Step 1: Connecting cables
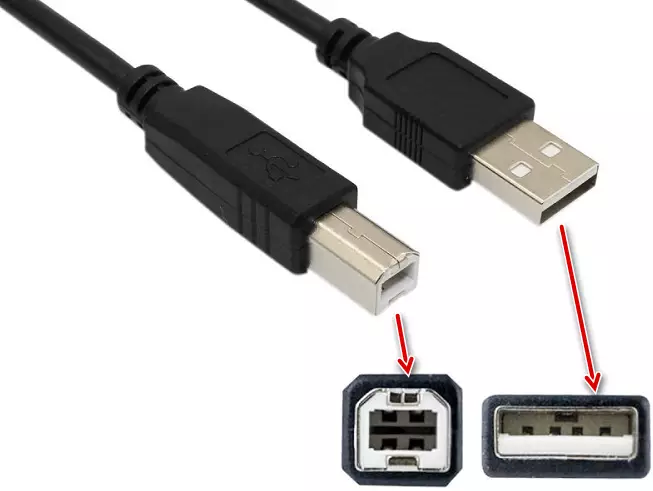
First of all, you need to connect the scanner to a computer or laptop by means of a special USB AM-BM cord. It is supplied by default complete with the device itself. The part on which the usb usb is familiar to the whole connector (BM), you should connect to the free socket of the computer. Connect the second end of the plug to the scanner.
After that, connect the scanner's network cable into the outlet, press the power button on it and go to the next step.
Step 2: Adding a device to the system
By connecting the device to a computer, you should add it to the system. In some cases, this happens automatically. If this did not happen, you will have to add a scanner to the list of connected devices manually.
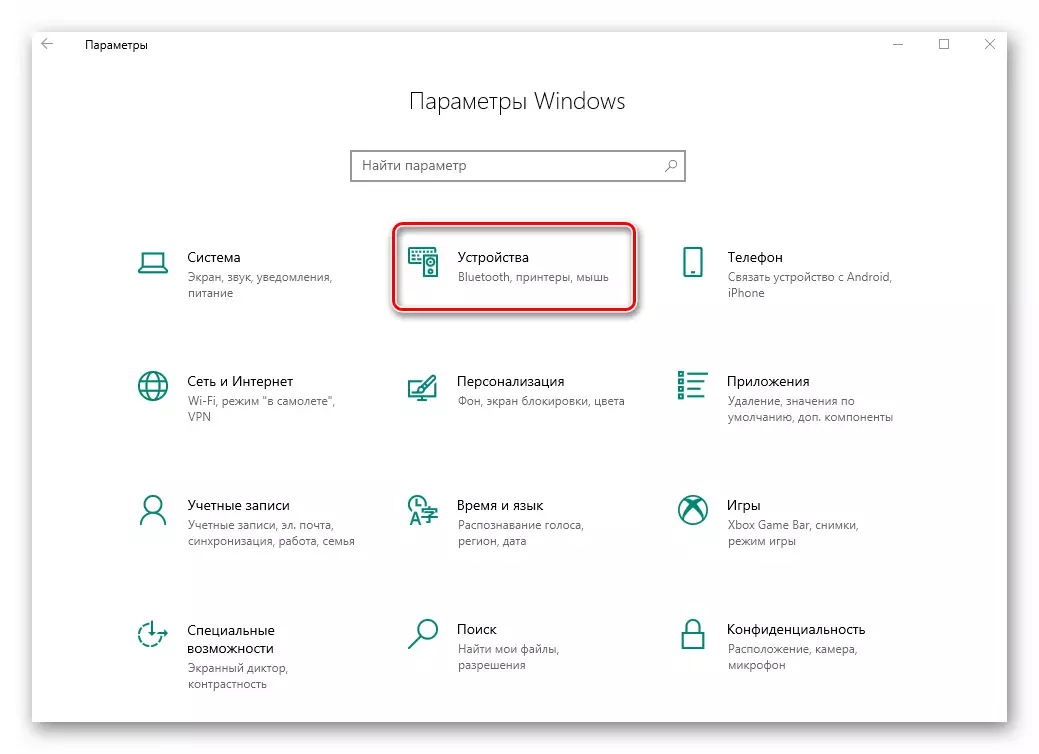
- Press the "Windows + I" keys combination, and then in the window that appears, click on the "Device"
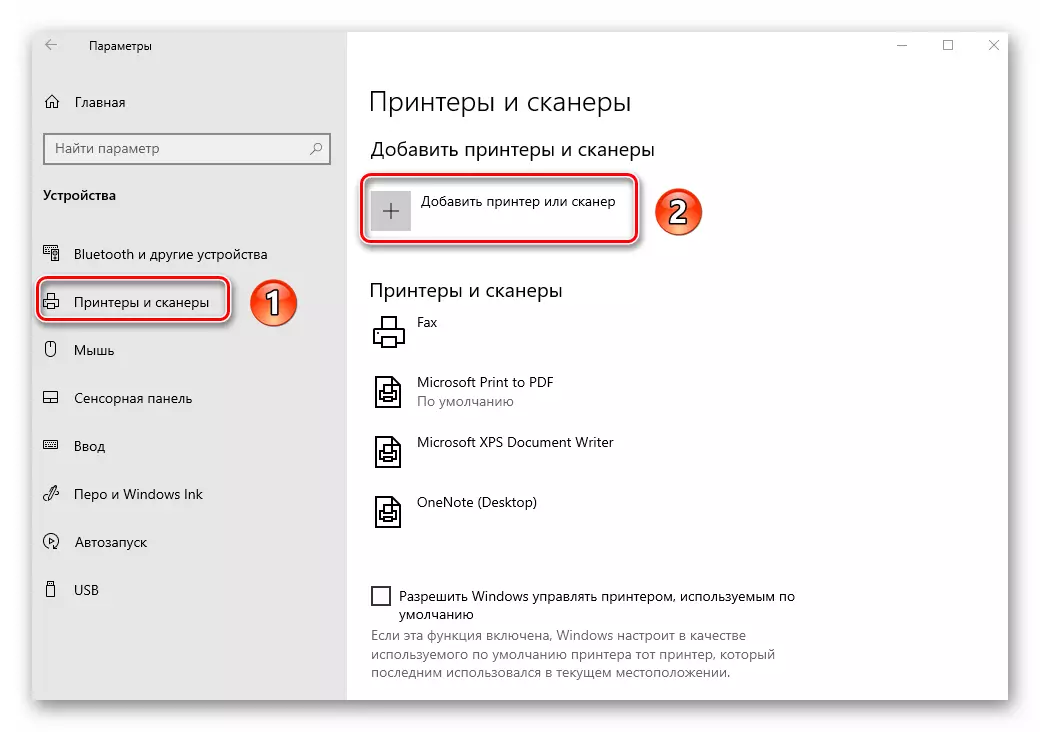
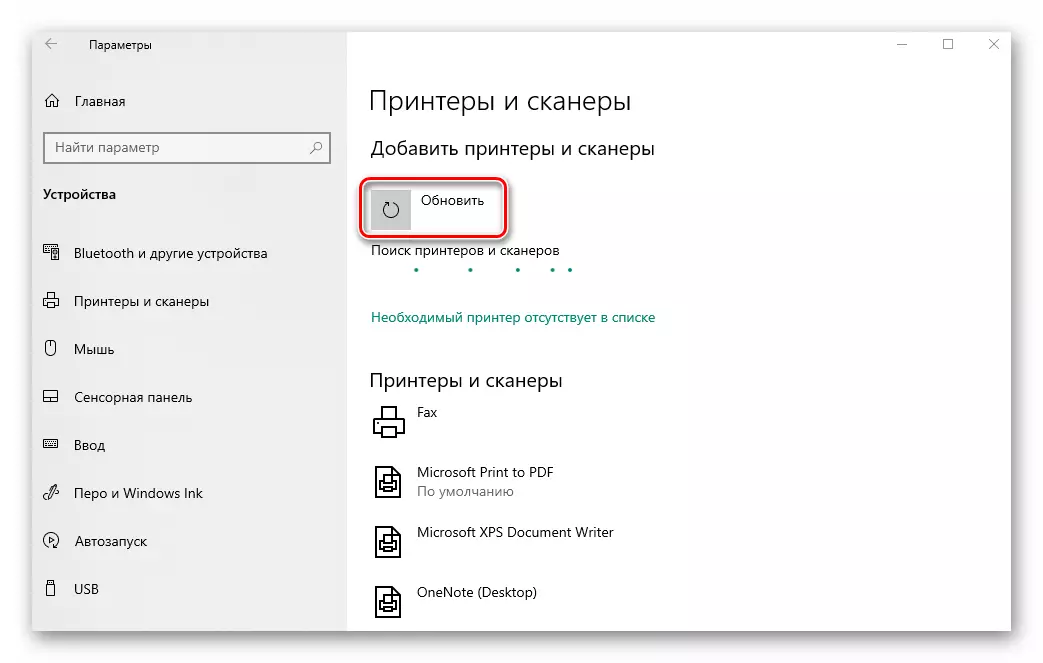
- In the left area of the next window, select the "Printers and Scanners" section, and then click the Add Printer or Scanner button.
- Wait for a while until Windows 10 scans all new devices. Sometimes the procedure ends fails, in this case, try clicking "Update" to re-search.
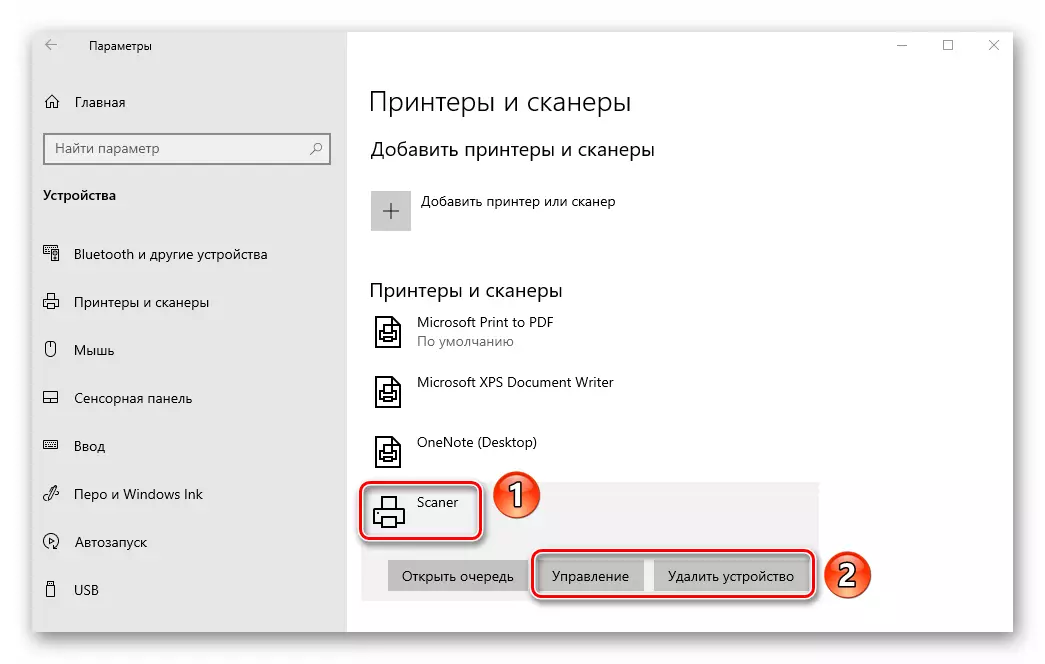
- Ultimately, you will see the name of your scanner in this window. Click on it once the left mouse button, after which it will be added to the overall list below. If you select the device, you can see its properties or remove from the system at all.
- After the scanner is successfully connected, proceed to the next step.
Step 3: Install Driver
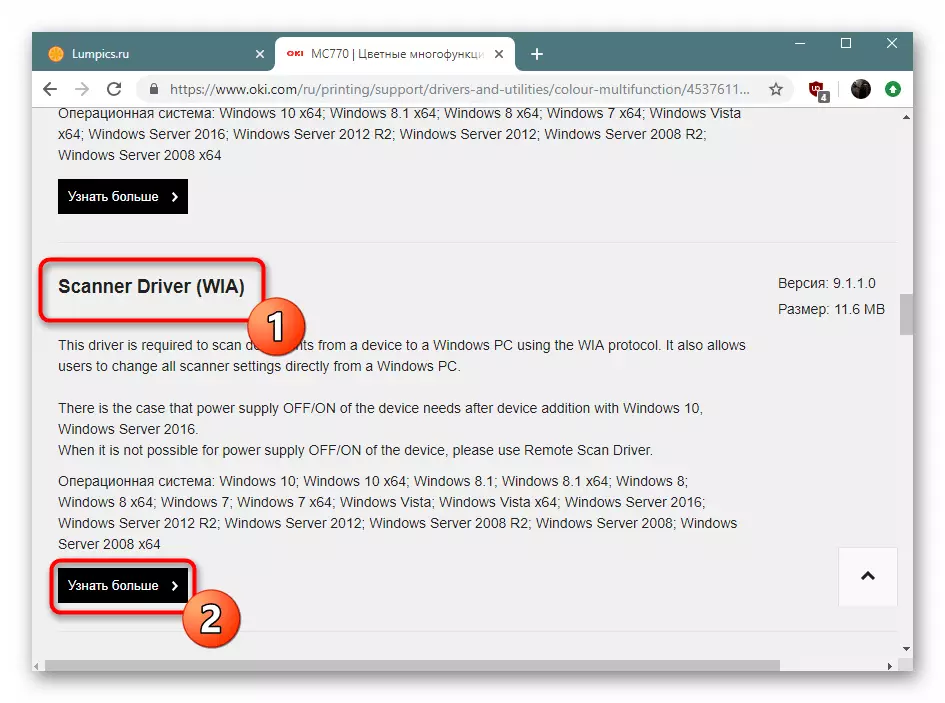
Almost all manufacturers of scanners are supplied with a disk device with the necessary software, which includes both drivers and scanning programs. If for some reasons you do not have, the driver and the accompanying software should be signed on the Internet. You can do this in several methods, with each of which you can find in a separate article.
Read more: download and install WIA driver for scanner
Step 4: Getting Started
By connecting the scanner and installing all the drivers, you can go to work with it. You can scan documents using a variety of different programs, we were told about them in a separate article.
Read more: Programs for scanning documents
If you do not want to resort to such software, you can use the program built in Windows 10. To do this, do the following:
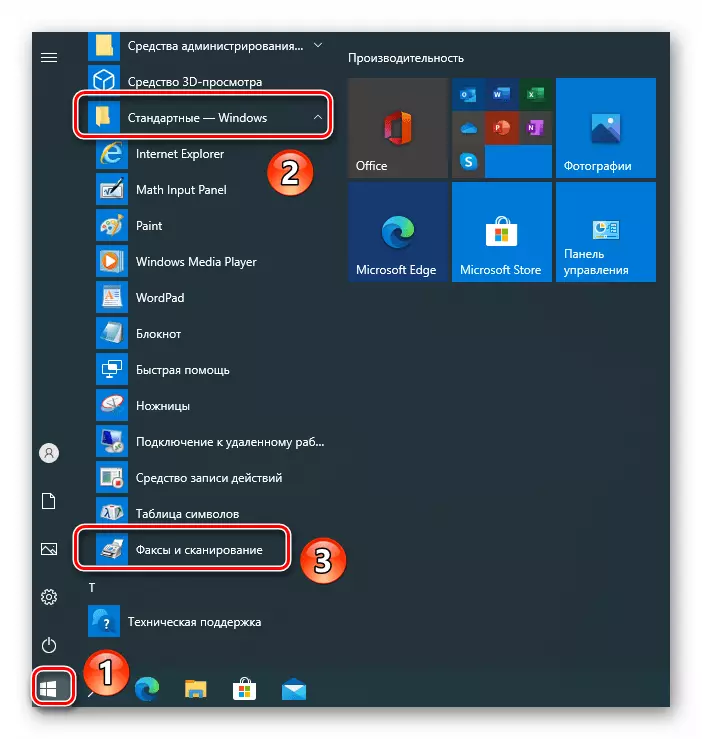
- Open the "Start" menu and scroll the left half to the bottom of it. Find and open the "Standard - Windows" folder. From the drop-down menu, select Faxes and Scanning.
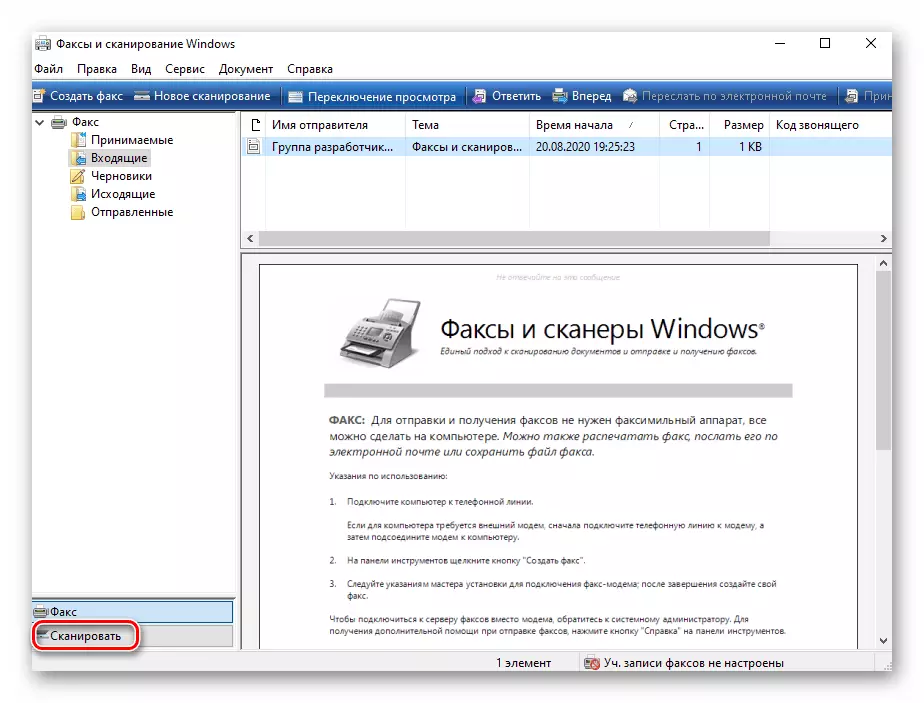
- In the window that opens, click on the "Scan" button located in the lower left corner. Thus, you switch the software to the corresponding mode.
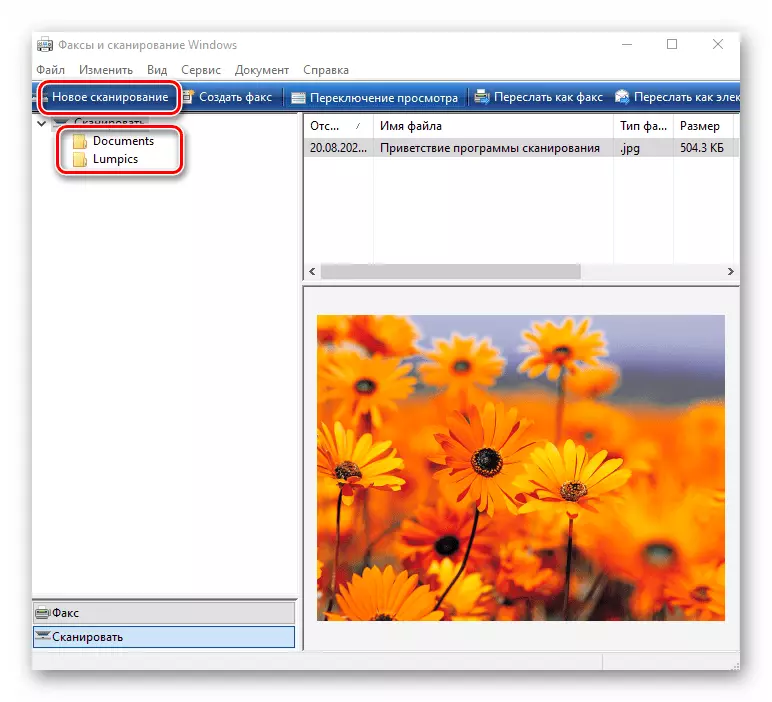
- As a result, you will see a list of directories where scanned documents will be saved. If necessary, you can create your folders. To start working with the scanner, click the New Scan button.
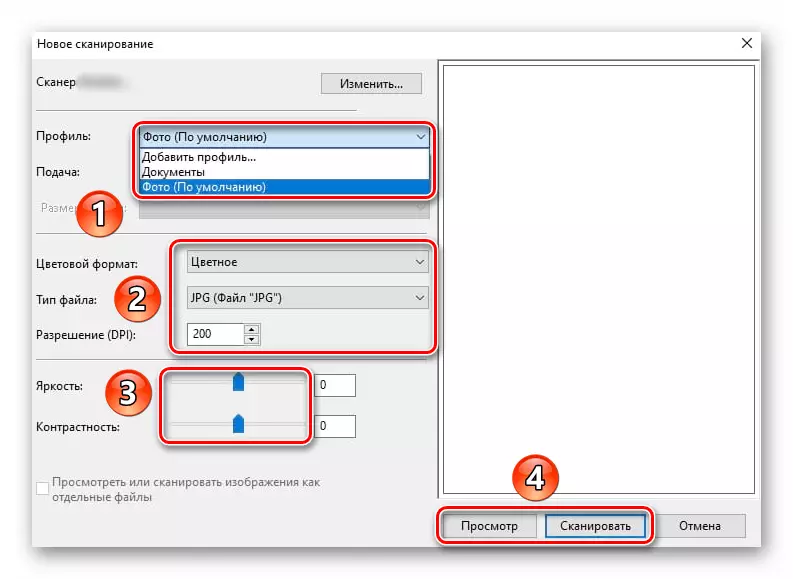
- As a result, a window will open in which you can select the device (if you have several connected scanners), scanning parameters and color format. Upon completion, click the "View" button (for pre-assessing the result) or "scan".
- After executing the operation, the scanned information will be placed in a shared folder, from where you can transfer it to any other. Please note that if necessary, you can scan the document and place its contents immediately to the PDF file. About how to implement it, we were told in a separate manual.
Read more: Scan to one PDF file