Preparatory actions
It is advisable to acquire the Apple's branded router to connect to the device from the same company to ensure maximum support for all functions and unlimited use of them, so in the following instructions it will be about configuring AirPort running Mac OS.
To begin with, connect the router to a computer or laptop. To do this, you can use universal instructions on our website by going to a separate reference manual below.
Read more: Connecting a router to a computer

Do not forget that an important part of the connection is the choice of space for the location of the router. Take into account the length of the cable that the provider spent in your home or apartment, or the location of the power outlet with a WAN port to connect to the router. When using a wireless network, it is important to provide a high-quality signal. To do this, the place is selected so that the Wi-Fi signal is enough for all rooms where mobile devices or computers will be involved. Note that thick walls interfere with the passage of the signal, the electrical appliances operating nearby are reduced.
Starting an application to configure
If you have previously encountered configuring routers of other models, such as TP-Link or ASUS, you know that you need to go to the browser address to open the configuration menu and execute authorization in the web interface. In the case of Apple's network equipment, things are a little different, because instead of the browser, you will need to run a proprietary application installed in the default Mac OS. To do this, open the "Office" menu and select the AIRPORT item on the top panel.
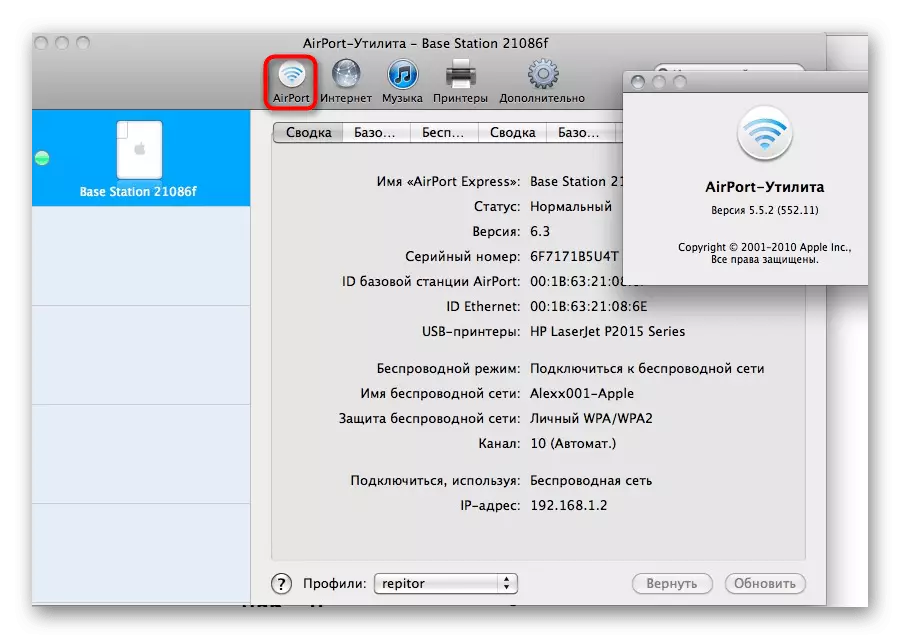
By selecting the required network equipment, enter standard login and password for the first authorization if they are installed by default. To find out the data for input, read the contents of the stickers on the rear of the device. As soon as the application is open, proceed to the configuration procedure.
Customize the apple router
After executing all previous actions, you can proceed to directly configuring the router through the branded application. This process is conveniently divided into several steps, each of which will be useful in certain situations, but is required to edit not all users. You can familiarize yourself with all the stages and decide for yourself which one should be implemented (only consider that there are also required WAN and Wireless Settings).Step 1: Airport Base Station
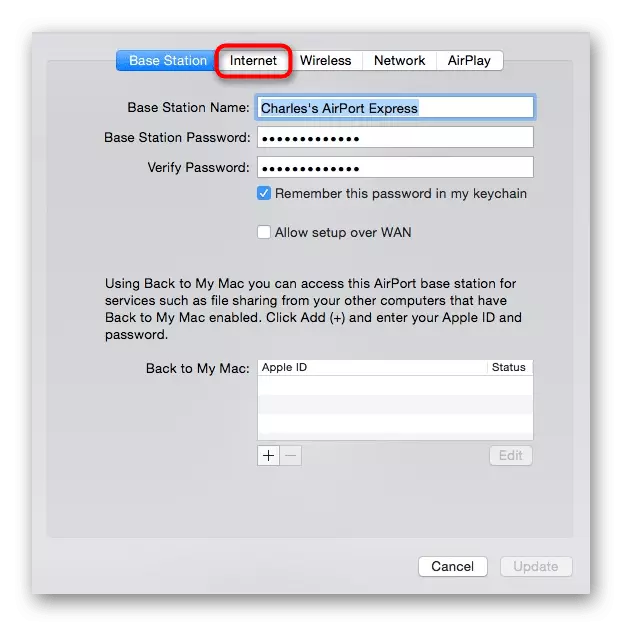
The first stage implies the choice of the main parameters of the AirPort Base Station, that is, the settings of the device itself used as a router.
- Click on the icon with the image of the router to open the window with its parameters.
- In the first tab, you can select the name for the station and set the password to be used for authorization.
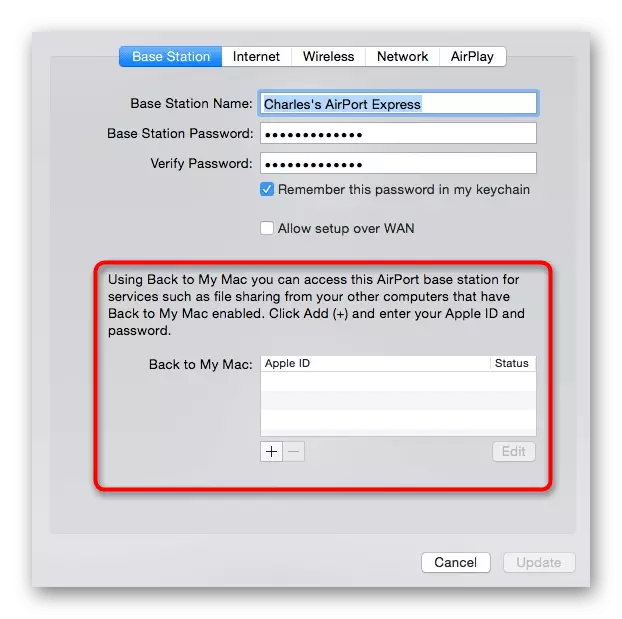
- Fill out the unit from the bottom if you want to access network equipment options in the future by authorization through your Apple ID.

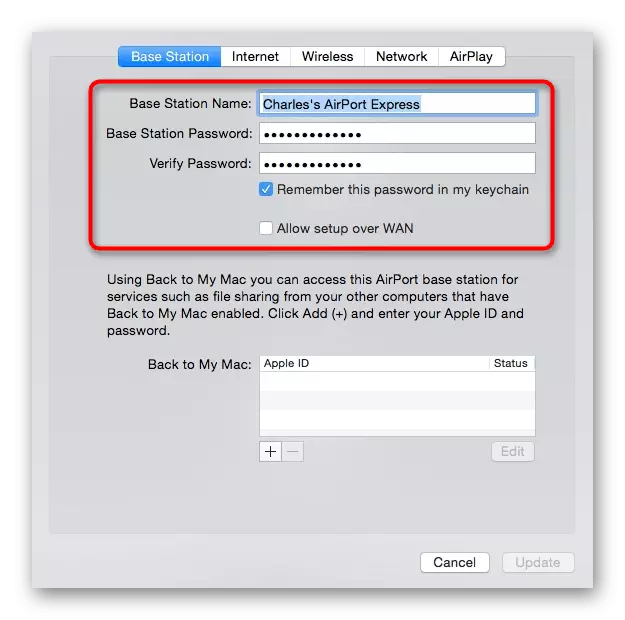
No more actions in this tab are needed, so click on "Update" to save all changes, and go to the next configuration step.
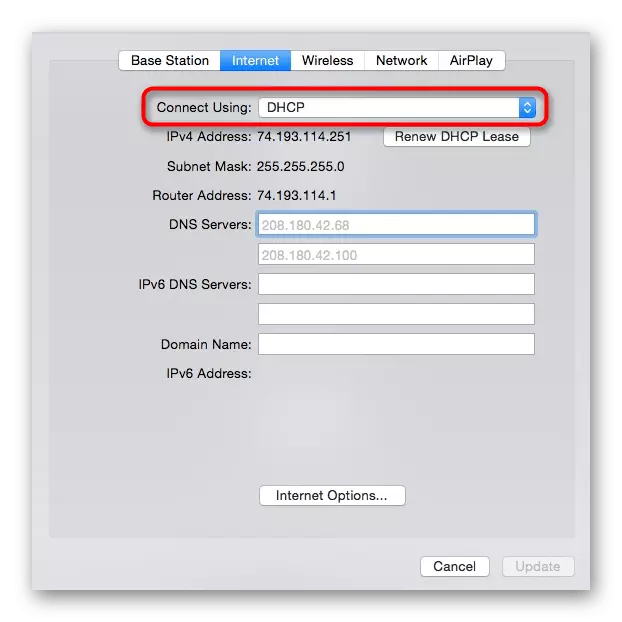
Step 2: Internet
This is the most important stage of interaction with the AIRPORT Base Station setup application, because it depends on the set parameters whether the device will access the network. During the changes, it should be considered what the connection mode provides the provider. Apple equipment supports configuration of three different protocols that we will look further.
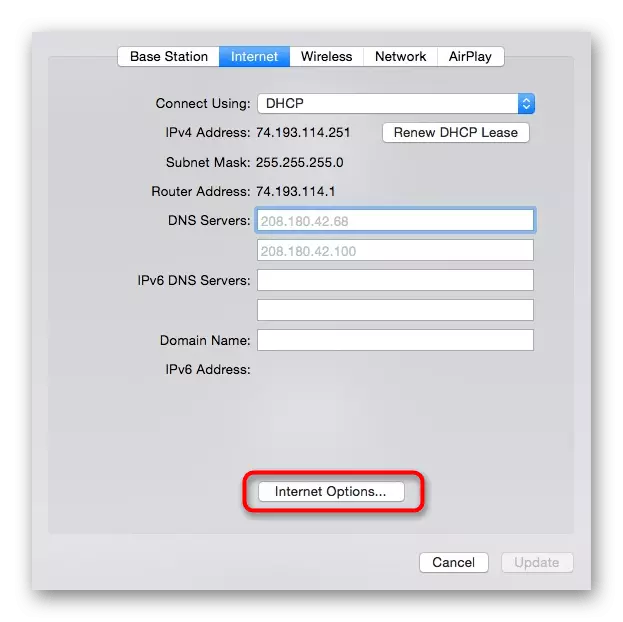
- In the application, switch to the "Internet" tab through the top panel.
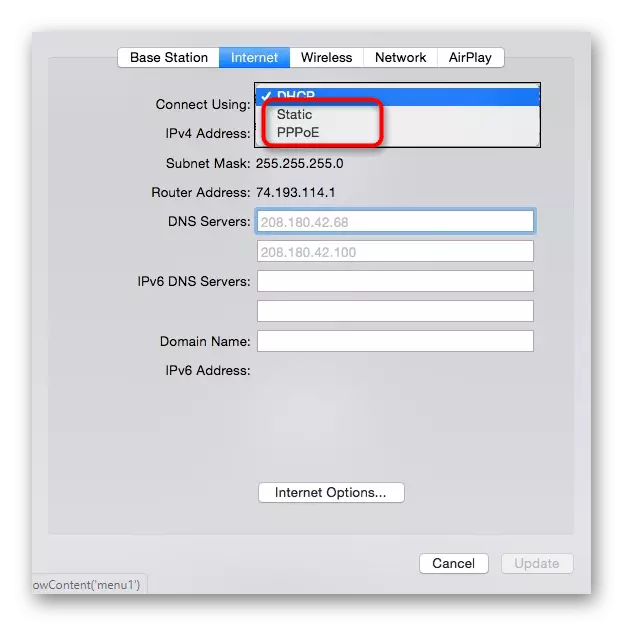
- Expand the Connect Using drop-down menu and select the appropriate connection mode. The provider can provide PPPoe, a dynamic or static IP address, so specify this information in advance with it or open the publicly available manual for connecting on the official website if the Internet service provider has laid out there.
- DHCP, that is, the dynamic IP address does not need to customize, since all parameters are provided automatically, but for Static and PPPOE you will have to fill in the appropriate fields, but first select the appropriate mode in the drop-down list.
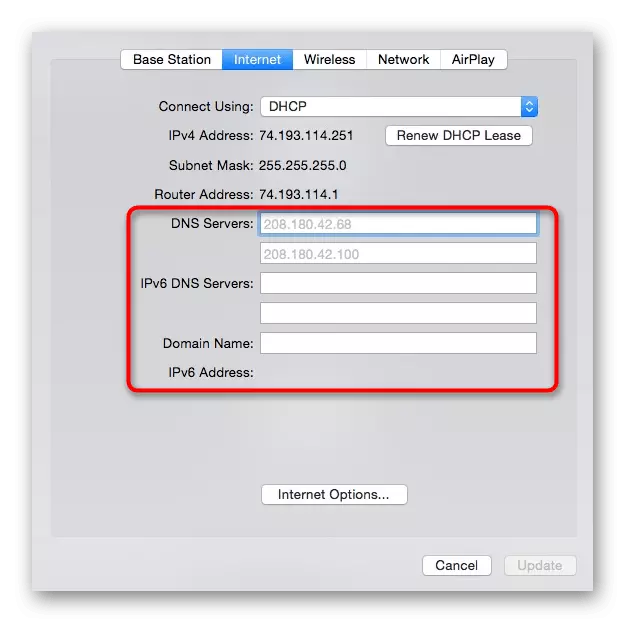
- For static IP, you will need to fill out information about the address received by DNS servers and the subnet mask in separately appearing lines. As for PPPoe, here the provider usually gives a card with a login and password or reports information to another method. You just enter them into the forms and apply changes.
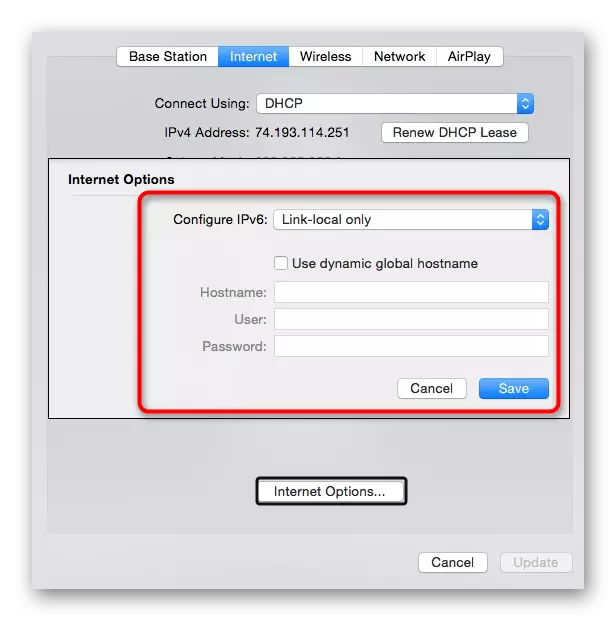
- Advanced users may need access to additional settings, for which, click on the "Internet Options" button.
- In the window that appears, switching to IPv6 packet transmission protocol, as well as the activation of DDNS in the presence of an account on a specialized site providing such services.
Mandatory apply all changes, and then restart the router and check the availability of Internet access when connecting via a network cable. If everything works fine and sites open, go to the next step.
Step 3: Wireless Network
Almost every user at home there is at least one device that will connect to the Apple router via the wireless network, so it is not necessary to bypass the configuration and this mode, and this procedure is performed as follows:
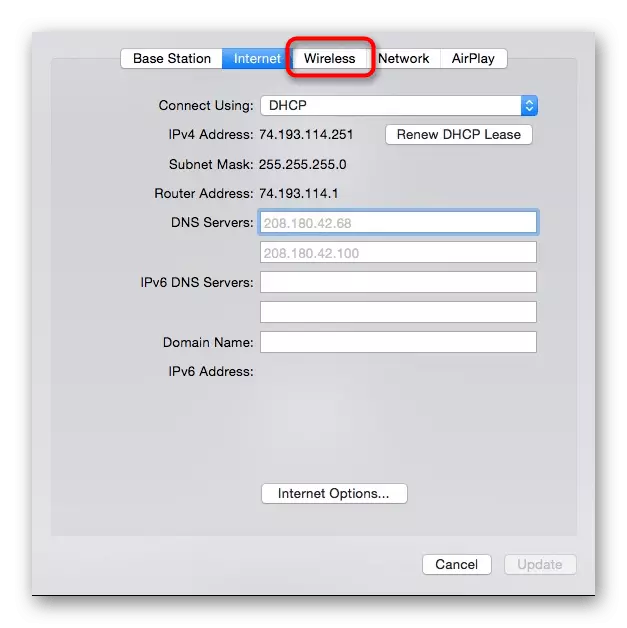
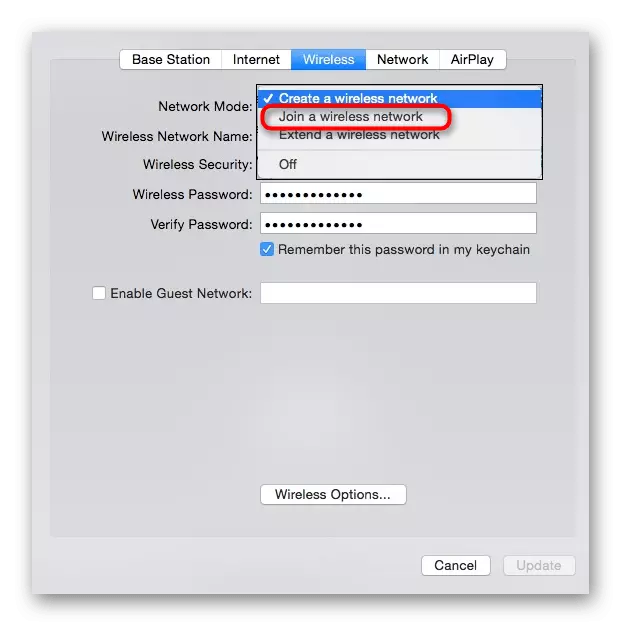
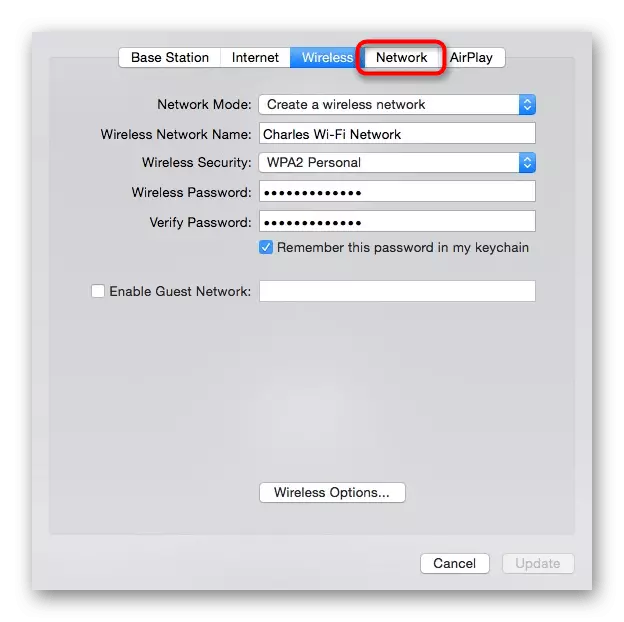
- In the application, open the "Wireless" tab.
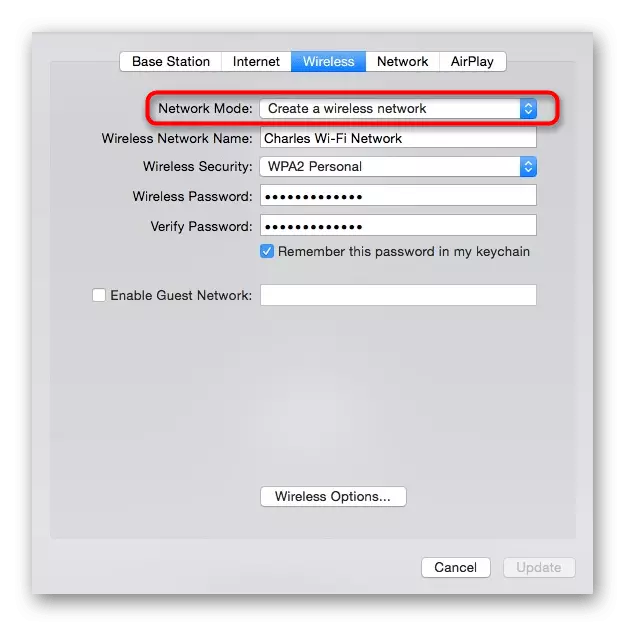
- As the Network Mode mode, set the "Create A Wireless Network".
- You can additionally select the Join A Wireless Network mode if you want to use a router as a repeater to expand the coverage area by connecting to the already existing Wi-Fi network. When this mode is selected, find the target network and connect to it by entering a password or via WPS.
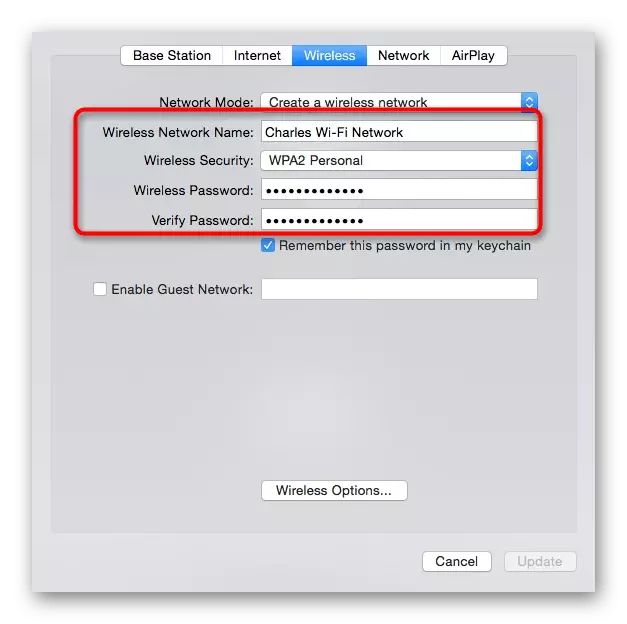
- If the standard mode of operation of the router is specified, the network will be created. To do this, enter its name, do not change the protection protocol, but set a more reliable password for it, without forgetting it to confirm in the second field.
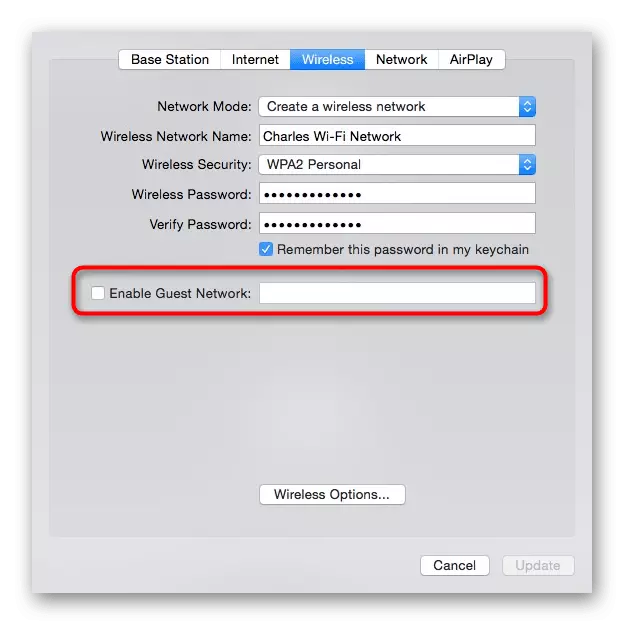
- If necessary, activate the guest network and adjust it in the same way as specifying the appropriate name and password.
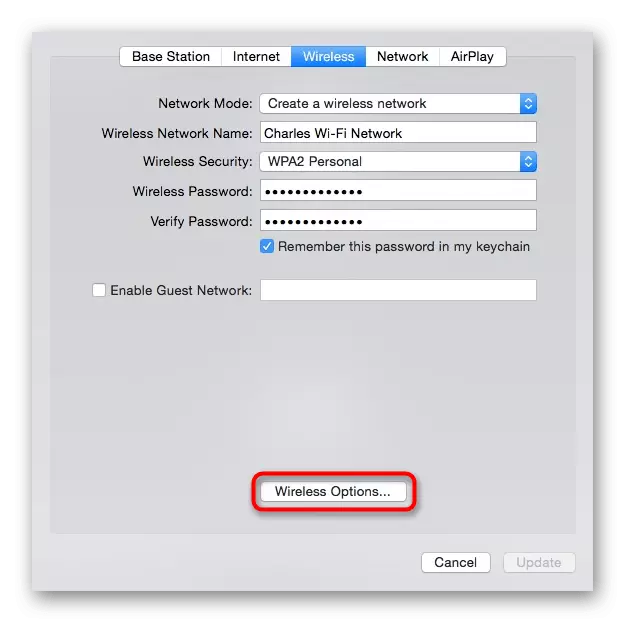
- Pay attention to the Advanced parameters present in the Wireless Options section.
- It is allowed to activate the second frequency to work the router, choose your country and change the broadcasting channel if required.

Once all changes come into force, and the router will be rebooted, connect to the wireless network, finding it by name in the list available and entering the new password. By the way, it can always be changed or find out through the same menu without need to discount all the parameters of the router.
Step 4: Local Area Network
The penultimate stage of configuration - the parameters of the local network. It is necessary to change them only in cases where the organization of this technology requires specific parameters related to access control or reservation of IP addresses, which in most cases is relevant only for experienced users.
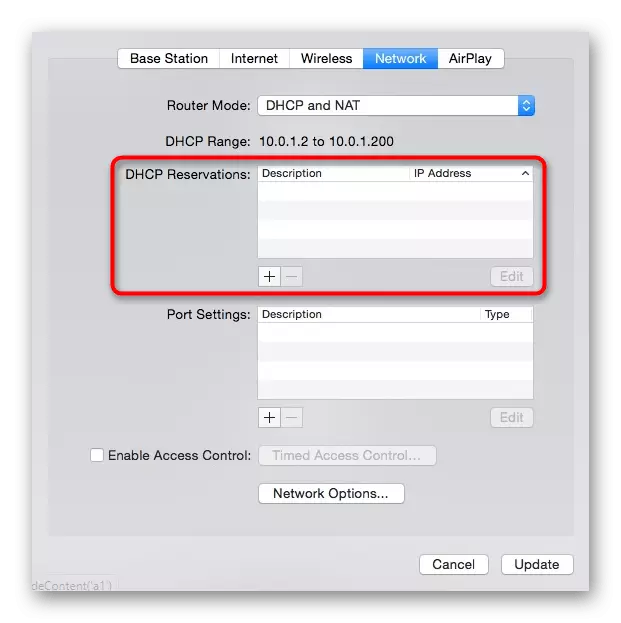
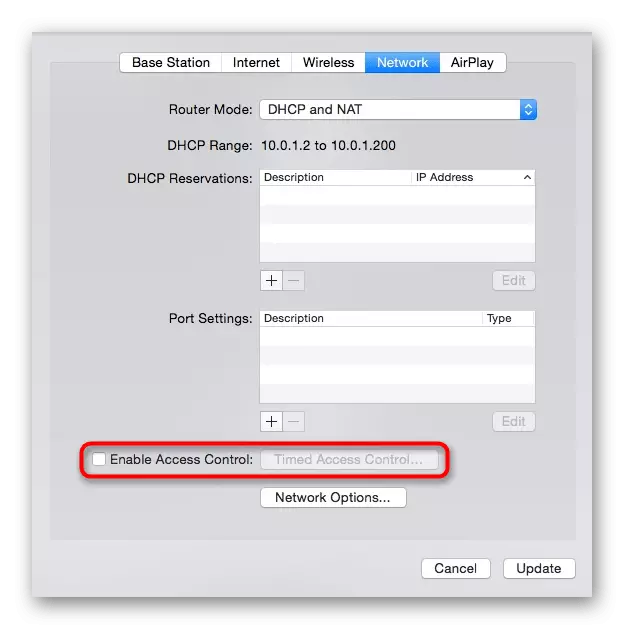
- All the necessary settings are on the Network tab, where you need to go to change them.
- By default, the router functions in DHCP and NAT mode, which means that each connected device receives a unique local address and uses the same network IP. If necessary, this mode can be changed.
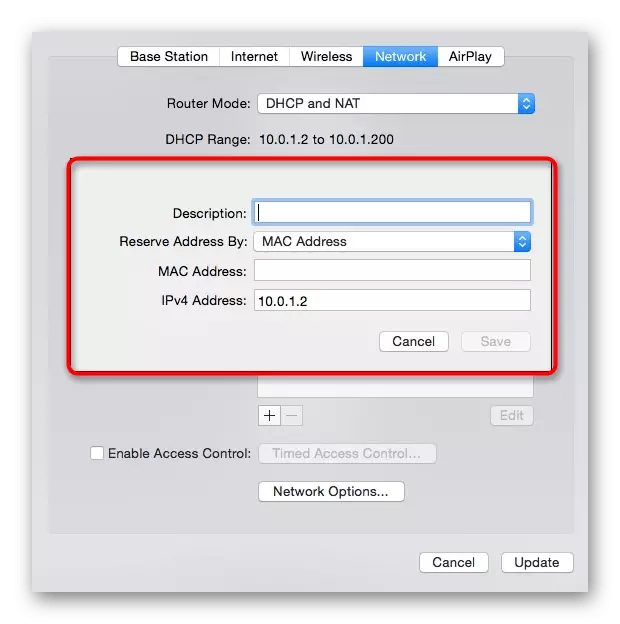
- Check out the DHCP backup table: when it is assisted and the IP address is assigned from the entire range for a specific device.
- After pressing the button in the form of a plus, a separate menu will open, where the redundancy rule is created. Do not forget that the address must necessarily enter the set range, which is displayed in the DHCP RANGE line.
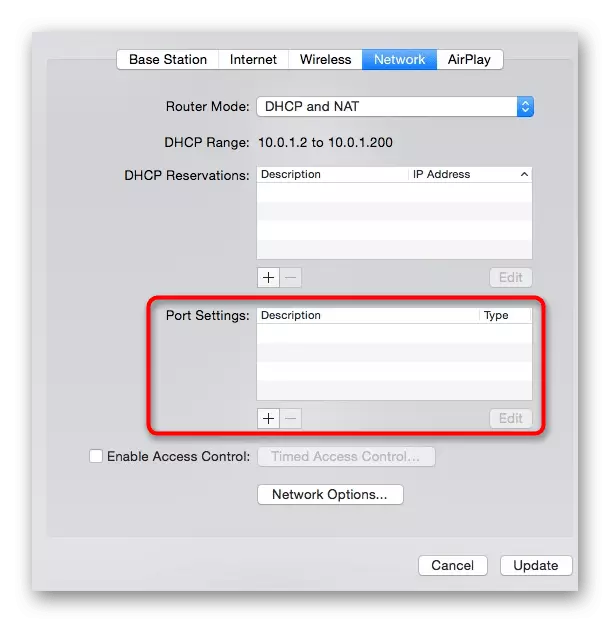
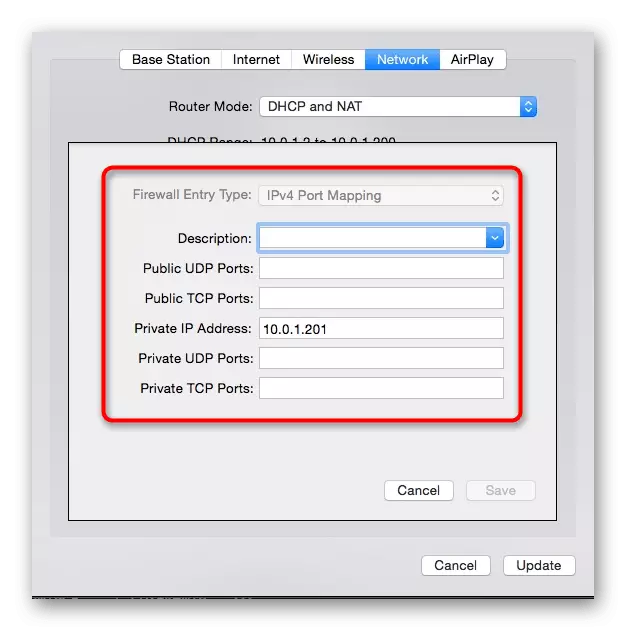
- The port forwarding for the router is carried out through a separate table, where to create the rule, too, you will also need to click on the button in the form of a plus.
- Enter the description, the port itself, its IP address and the protocols used, and then save the changes. Make the same absolutely for all ports you want to open.
- Network Equipment Developers allow you to establish access control to the router by setting the time to which you can enter the Internet - activate the technology and make the required changes.
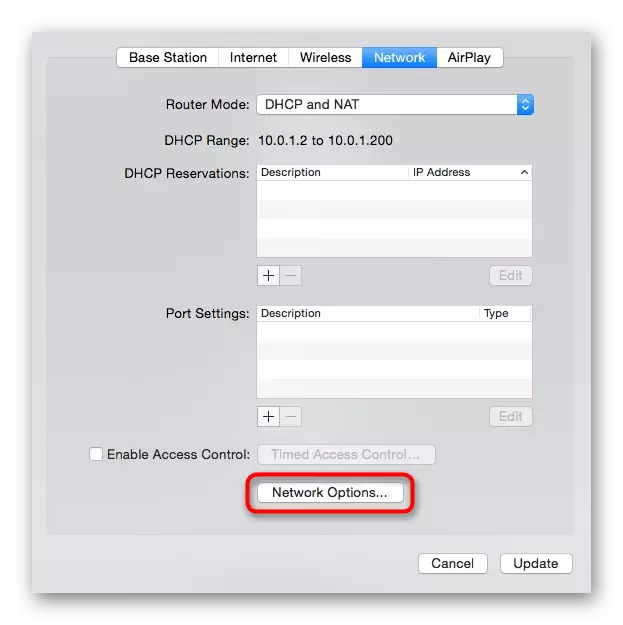
- To display additional parameters, click on Network Options.
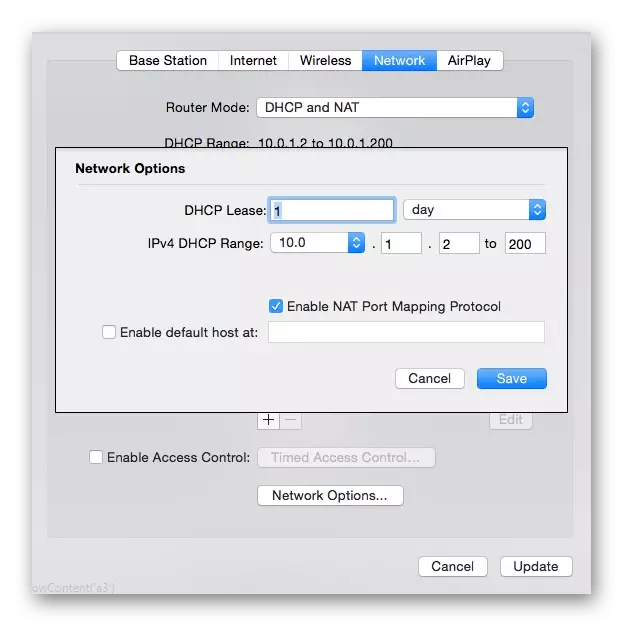
- There you can specify, for what period there will be a DHCP address, as well as change its range, if necessary.

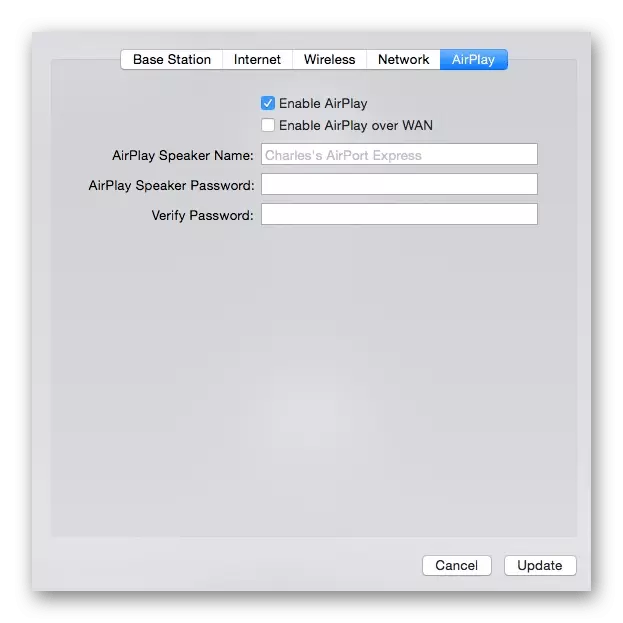
Step 5: Airplay
AIRPLE technology for Apple allows you to quickly connect to a TV or play music using a smartphone or laptop. In a separate router configuration section, you can configure this feature by entering the name for the network and installing the protective password so that other users cannot connect it. It is active by default and does not prevent anything completely disable it.