
Preparatory actions
For cleaning the Epson printer, the tools included in the driver are responsible through the computer, so it will be necessary to establish it. Most likely, you have already done this, but the lack of a menu that will be discussed further may indicate that the driver is outdated or installed incorrectly. In this case, repeat the installation procedure, and then connect the printer to the computer in the standard way. Read more about this in the materials on the following links.Read more:
Installing a printer on Windows Computers
Installing Printer Drivers
Epson Printer Software Cleaning
The program cleansing of the printers from Epson is the serial launch of the test tools and automated correction of possible problems. In most cases, the special application is missing, so further this process will be reviewed by the example of the "Print Settings" example.
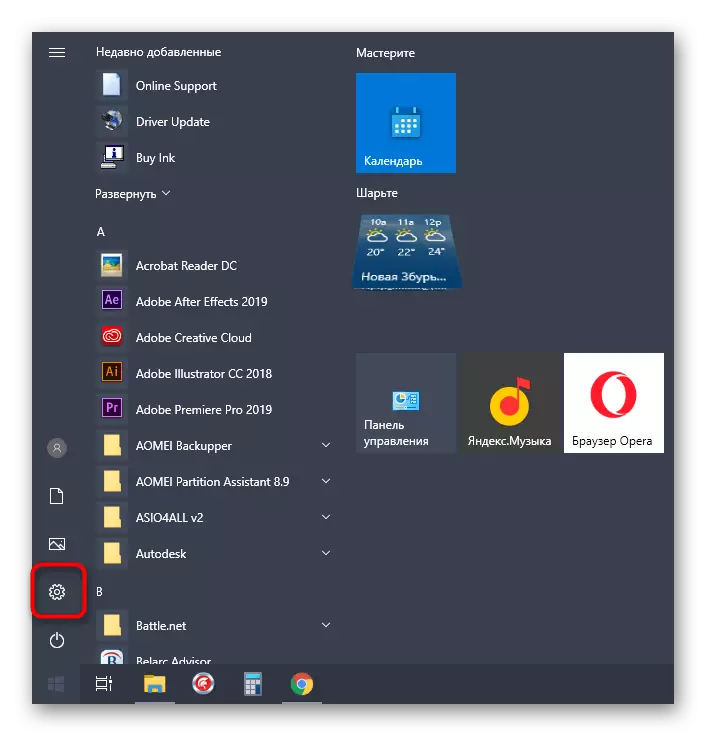
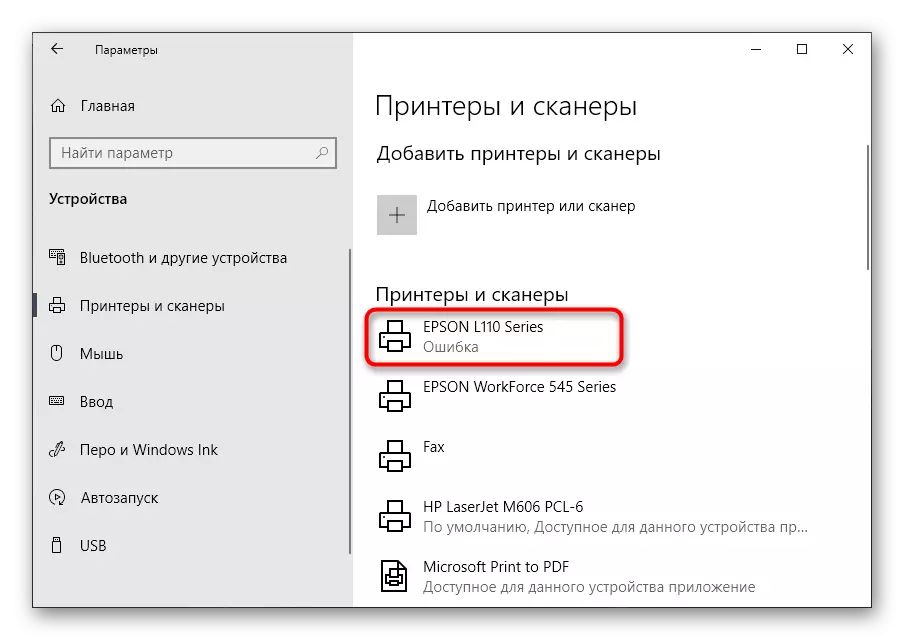
- Open the Start menu and call "Parameters" by clicking the gear button.
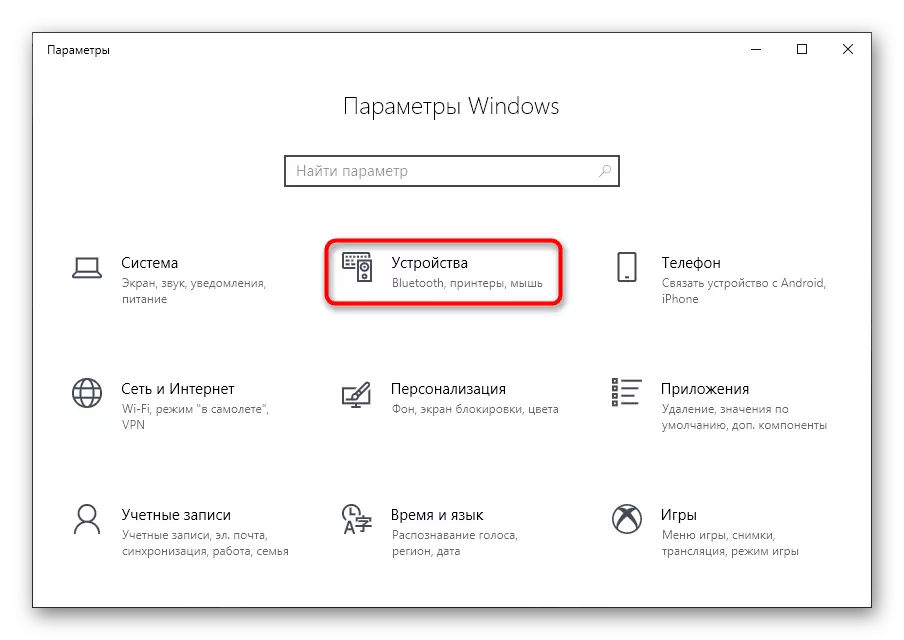
- Select the category "Devices".
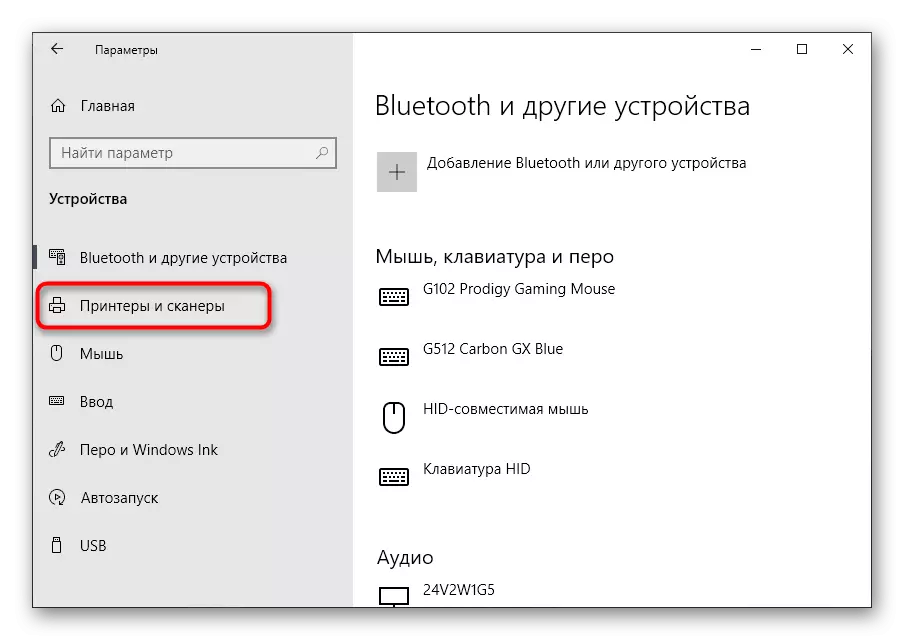
- Through the menu on the left, switch to "Printers and Scanners".
- Make a click on the name of your device in the list so that the interaction buttons appear with it.
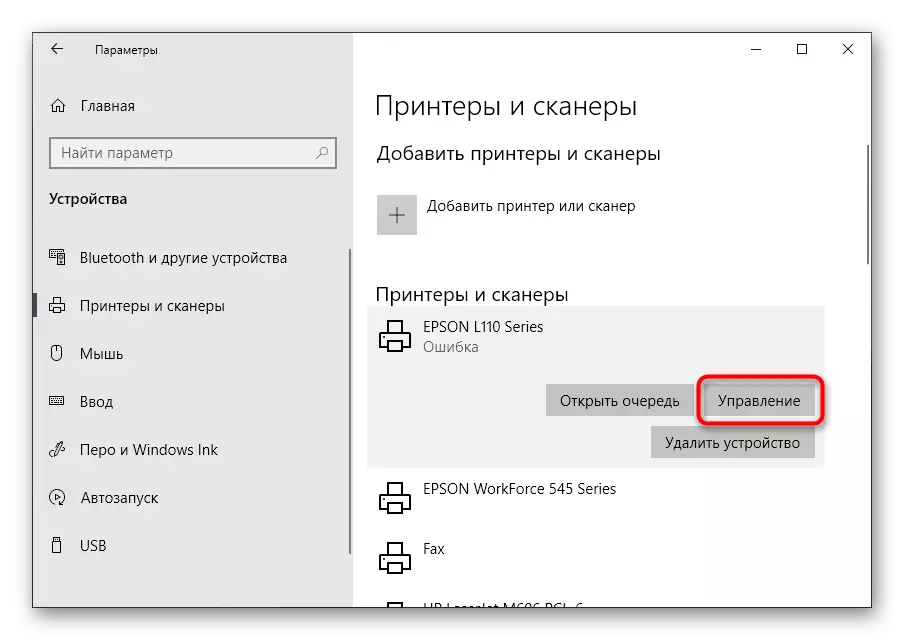
- Next, go to the "Management" section, where all software components are present.
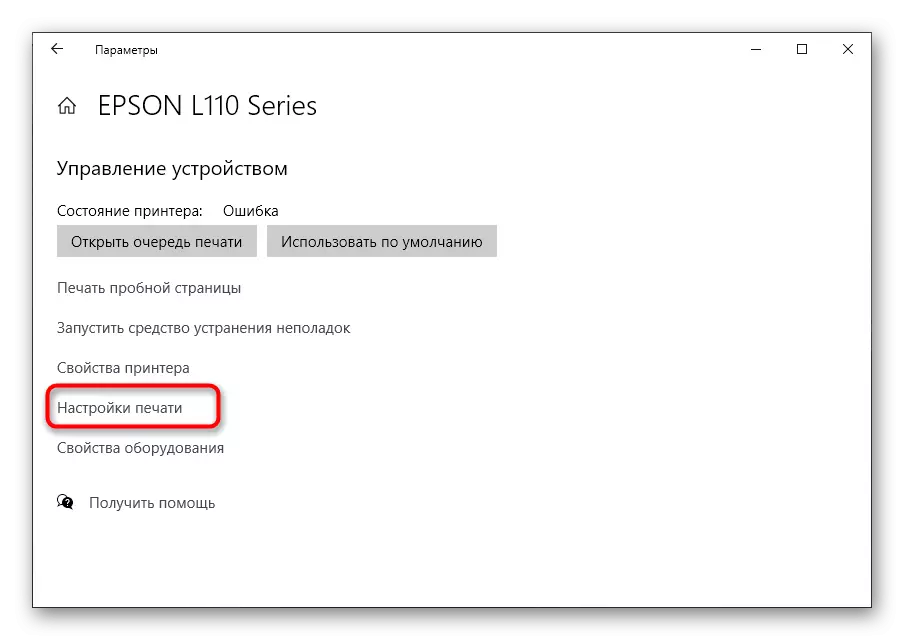
- Click Click on the print settings.
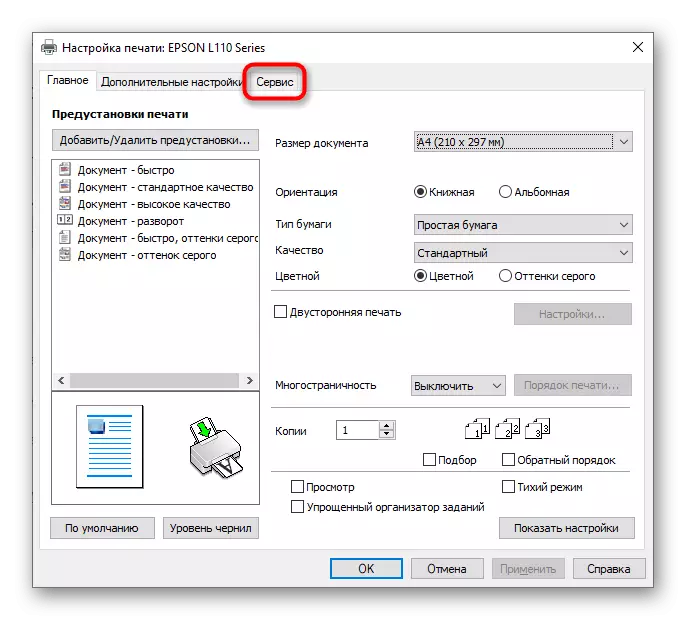
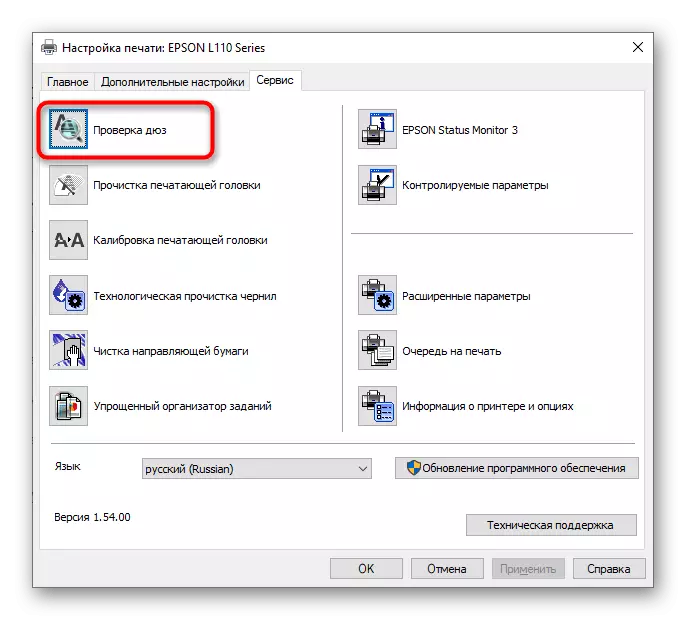
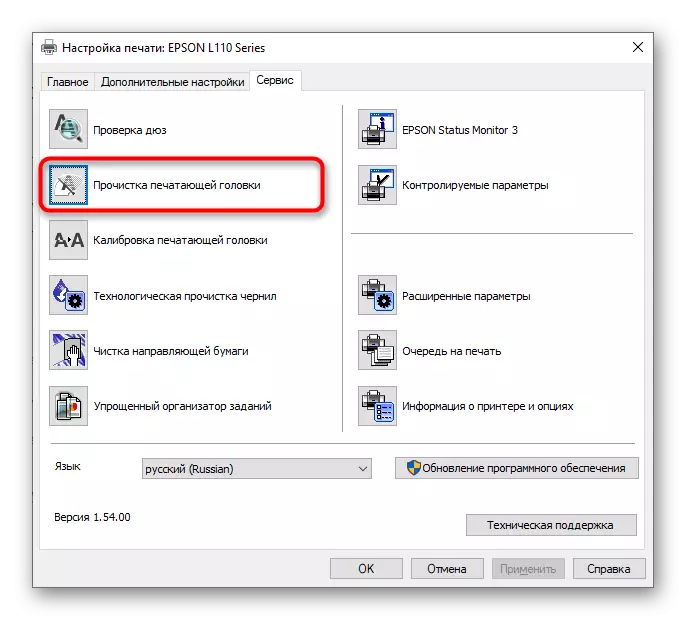
- Open the "Service" or "Service" tab, in which the necessary functions are located.
- Now you can start the process of checking and cleaning. You need to make sure that the printhead really needs clean, for what, click on the "Dutch check" button.
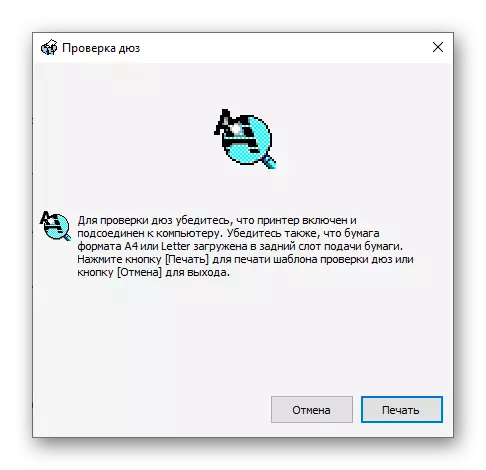
- Check out the instructions for performing this operation, prepare your printer, and then send a test document to print.
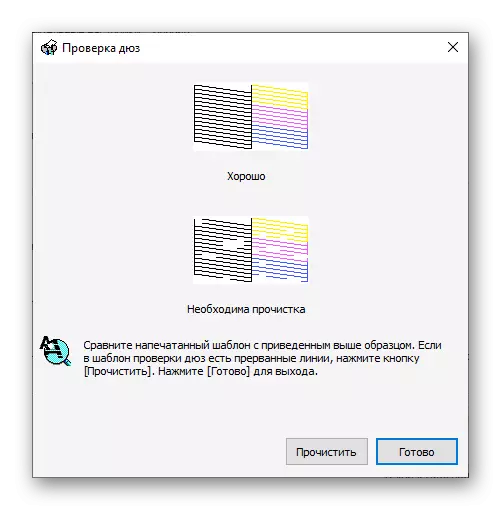
- Wait for the sheet with the result and compare it with the one that is displayed in the active window. If cleaning is needed, click "Clean".
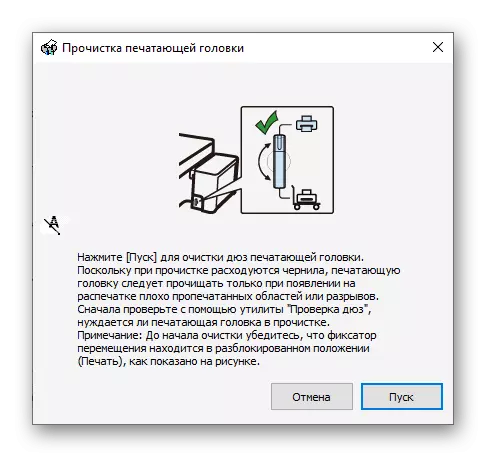
- Immediately there will be a transition to the "Cleaning Head Cleaning" tool, where you can familiarize yourself with the description of this operation and run it.
- Please note that this tool is started and through the Master section of the "Service" tab, where you simply click on the appropriate button. Repeat launch of the cleaning head cleaning will need if the result is not entirely ideal from the first time.
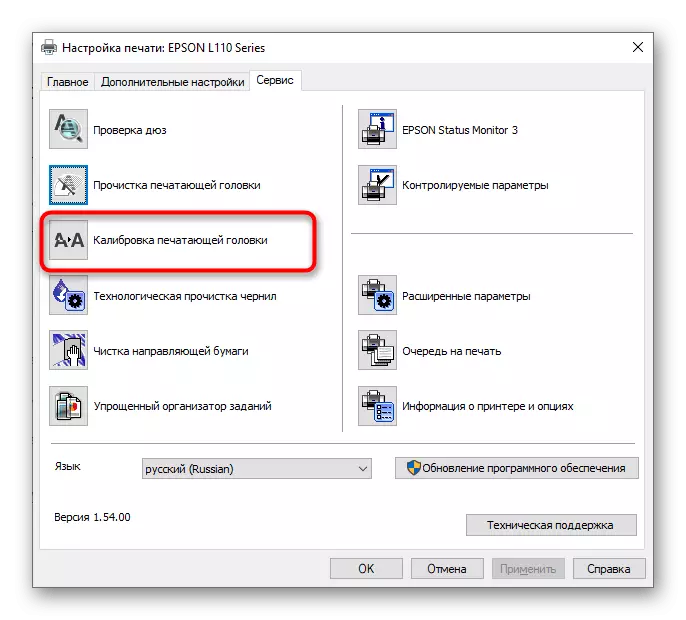
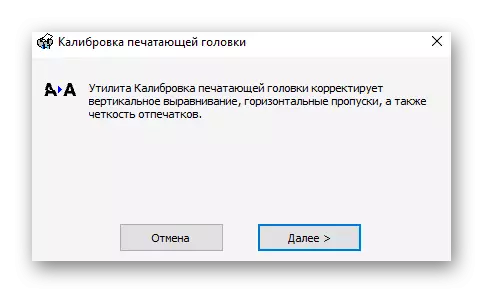
- The following function is "Calibrating the print head". It does not quite relate to cleaning, but it is useful if the letters or pictures on the sheet are located unevenly.
- When you start the utility, automatic vertical alignment will occur, adjusting horizontal pass and fingerprint clarity.
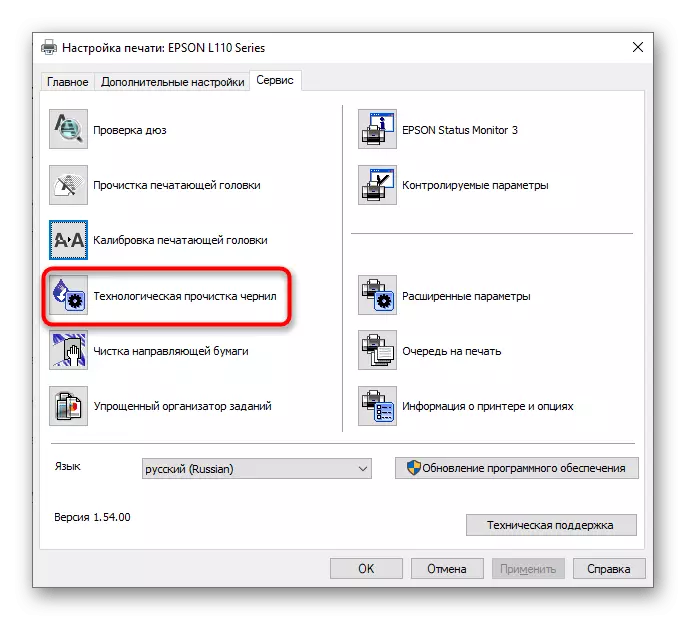
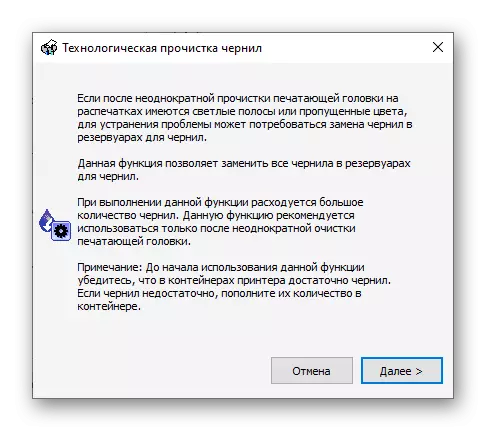
- Sometimes ink need in cleaning, since over time they dry out a little and begin to be served by jerks. This is performed through a separate tool "Ink Technology Clearance".
- Read the general information about the use of this utility. As you can see, it will become useful and in those situations where the print head cleaning did not bring the proper effect. Make sure that there is a sufficient amount of ink in containers, because they will be completely pushed and replaced.
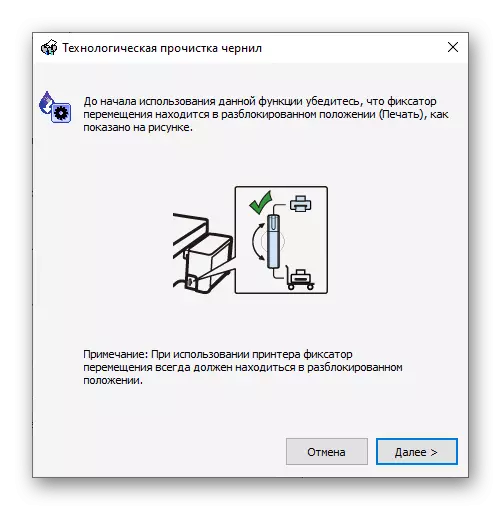
- The next step before starting the cleaning is the check of the retainer. Make sure it is in a unlocked position as shown in the image in the window.
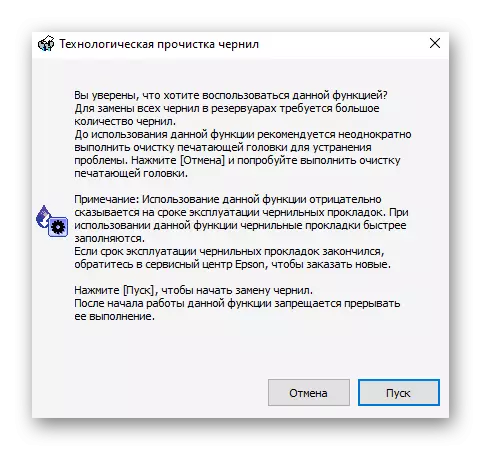
- Once again, read all the notifications, since this procedure is complex. Quickly press "Start".
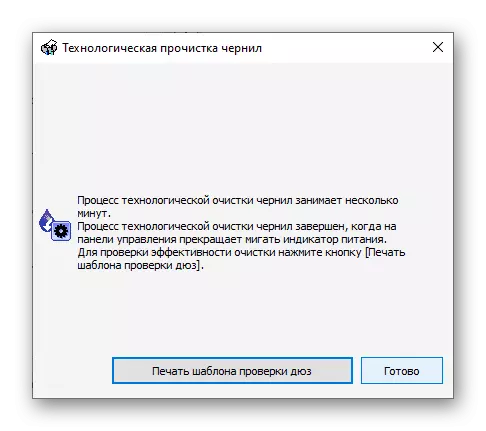
- Wait for the end of the ink cleaning - it will take a few minutes, and then the appropriate alert will appear on the screen. To demonstrate the result of the cleaning, click "Print the Test Check Template".
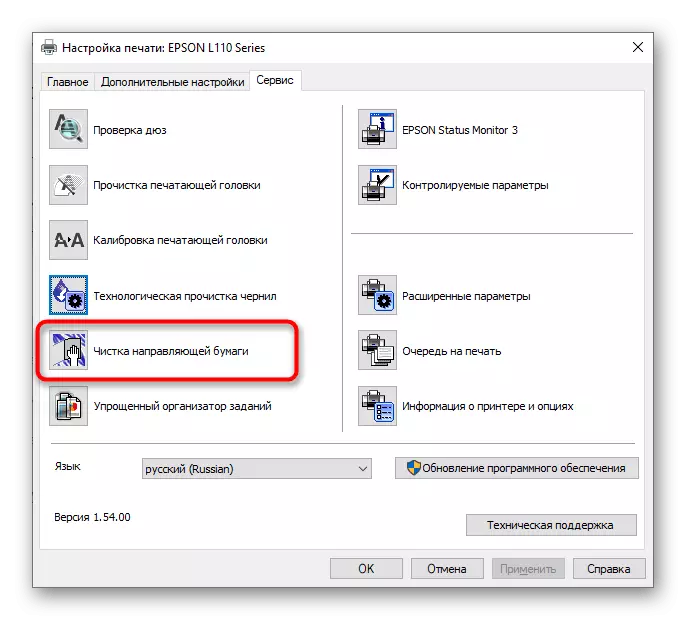
- Sometimes parts of the paint remain on the internal components of the printer and fall on paper, creating stripes and divorces. This problem is solved by running the paper guide tool.
- Use a simple A4 paper, and also repeat this procedure until you receive a noticeable result.
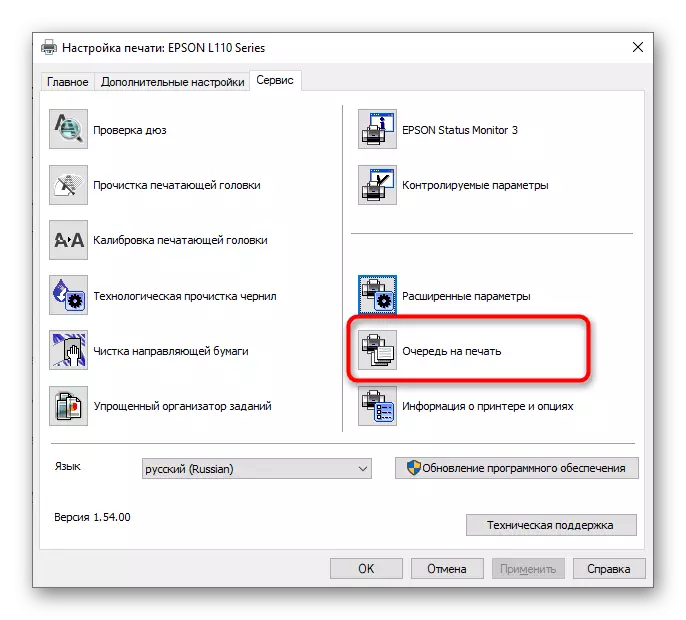
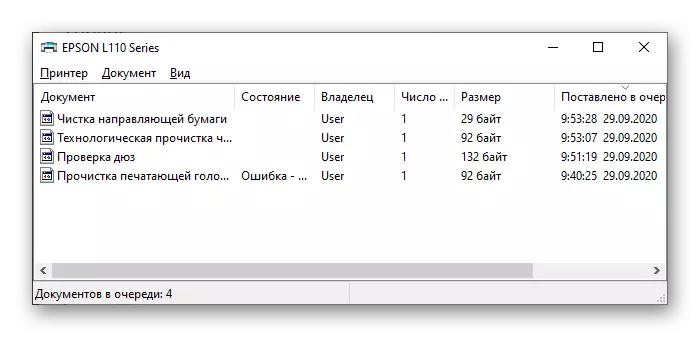
- Do not start at the same time multiple cleaning operations, as this may cause violations in the work of the printing equipment. You can cancel the action or see the status by clicking on the "Print Queue" button.
- A standard operating system window appears, which indicates which actions are in the queue for the printer. Click on it right-click to stop or receive additional information.

At the end of the entire cleaning procedure, it is recommended to check how well the printer prints. For this purpose, the templates received independently or standard trial pages available in the device driver are used. Read about choosing a suitable method and use it in a separate instruction on our website by clicking on the link below.
Read more: Check printer for print quality
Sometimes software cleaning does not have a proper effect, so you have to eliminate problems manually. About what to do in such situations is written in other articles on our site. Choose a suitable problem and proceed to reading solutions available to it.
See also:
Correction of problems with printer curve
Why doesn't the Epson printer prints
Solving problems with stamp bands on the Epson printer
Proper cleaning nozzle on Epson printers