

Method 1: Testograf
Testograf is an online service for creating surveys, questionnaires and forms. The solution to the problem voiced in the title of the article is using it according to the following algorithm:
Go to Testograf website
- Use the link presented to go to the service site and click on the "Try" button.
- Come up with a name for the future survey, and then click "Continue".
- In the next step, you will need to register or enter the account, if any already exist. This action is mandatory.
- Specify the email address, come up with a password, then enter the code from the picture and use the "Register" button.
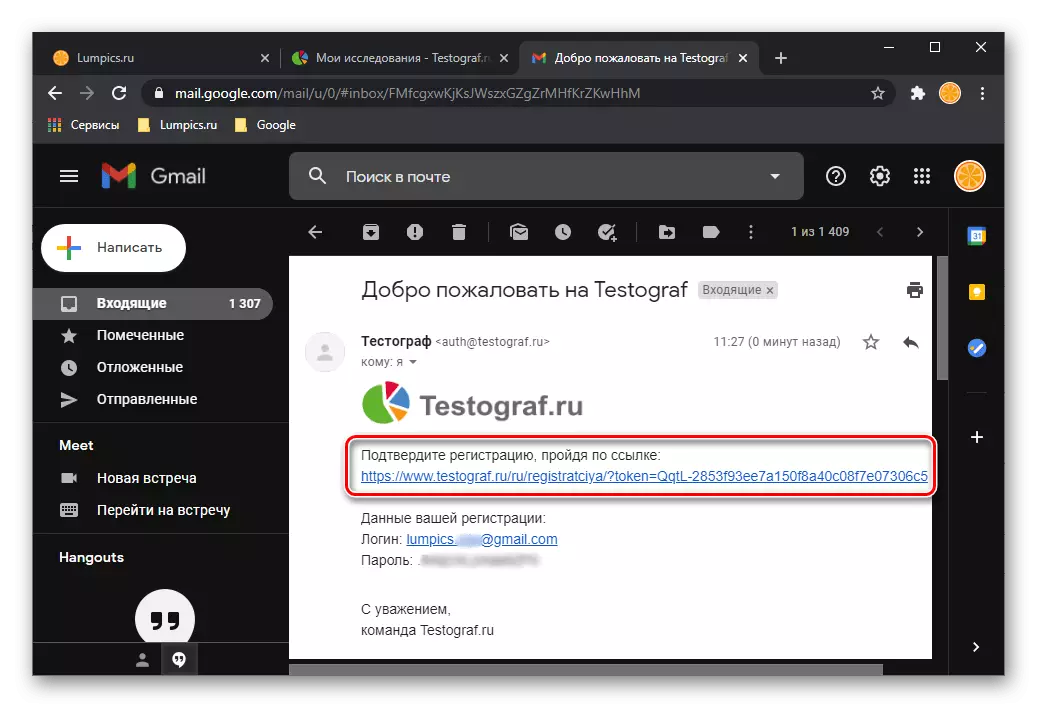
- The specified box will receive a letter with reference to confirm the creation of the account. Open it and go to the specified address.
- Mail, and therefore the registration procedure will be confirmed. On the My Studies page in the list of polls, click on the button indicated on the image to return to the creation of the survey.


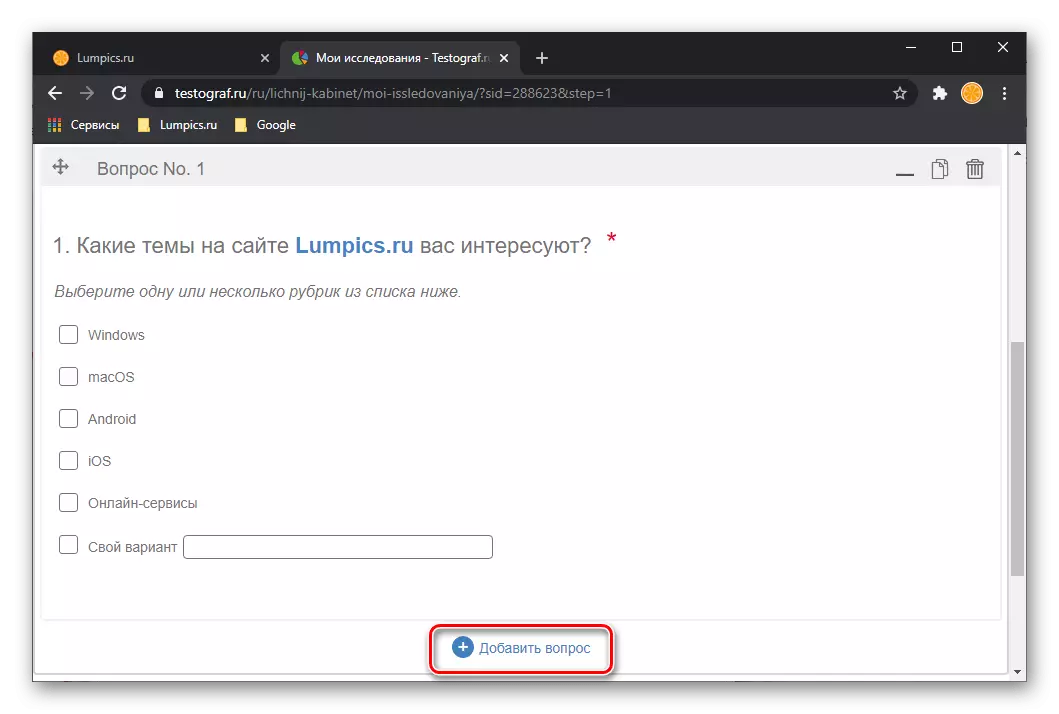
- Determine the basic page settings with questions - their display and order.
- Select an option to submit questions. We will use "a few of the list" as an example.
- Enter the first question, if necessary, change the font stack, its color and background color, add a link.

It is also possible to add a prompt, the appearance of which can also be changed using special tools. In addition to the editing parameters available for the question, there is an alignment and insertion of graphic elements.
- Specify the answer options to the question (1). With the help of the buttons presented under the field, you can "Add Answer", "Add List", Suggest "Your Option" of the answer, indicate "exceptions" (2), determine the minimum and maximum number of answers (3). It is also possible to install a timer and add comment (4). If necessary, the order of elements in the list can be changed (5), and unnecessary positions are removed (6).
- Having finished with the first question, use the button below the button to create the second.
Repeat the steps from the previous step with this and subsequent questions in your survey - add the required number of answer options and, optionally, set additional parameters.
- Please note that in addition to questions, you can also "add a page". This may be required for various reasons, for example, in order to share a survey on the heading or simply show one question on the page.

By sending all the specified data, go to the next step, using the corresponding button.
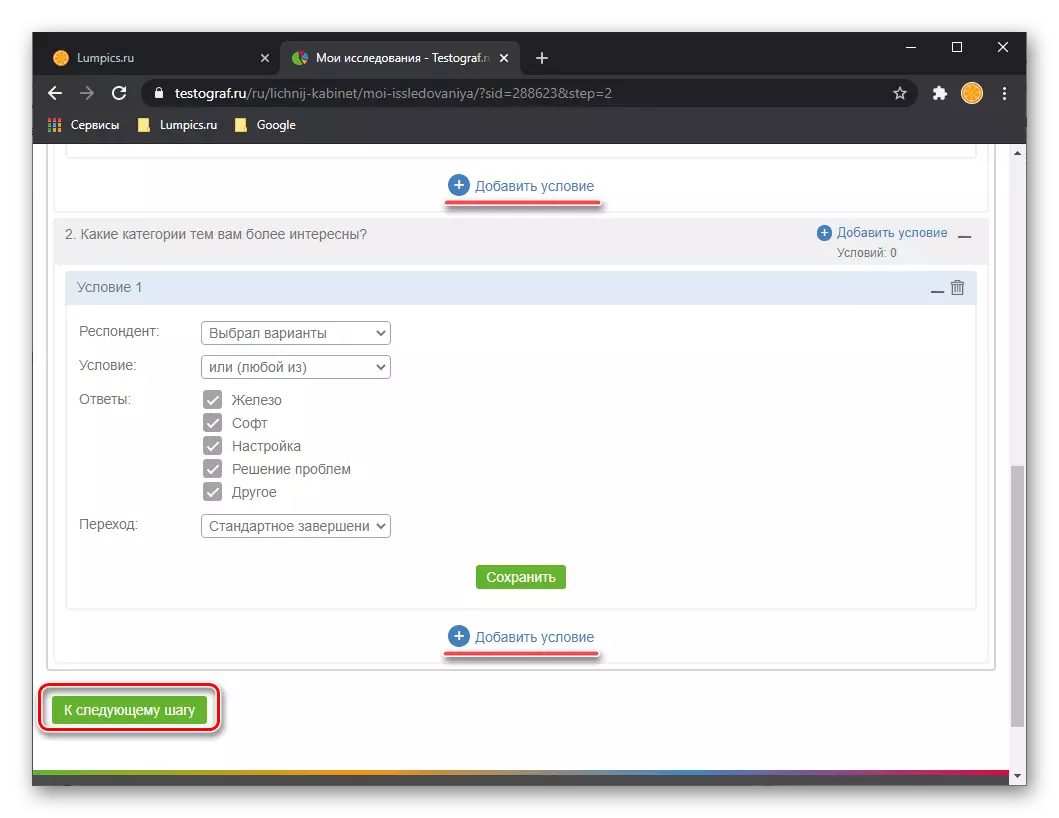
- The "Logic" page will be opened on which you can "add the conditions" by the user passing through the user. This is done for each question separately and is not a mandatory step. Available several parameters, determined with which you should click "Save".
- Similar to the actions described above, follow with the other questions in the survey, do not forget to "save".
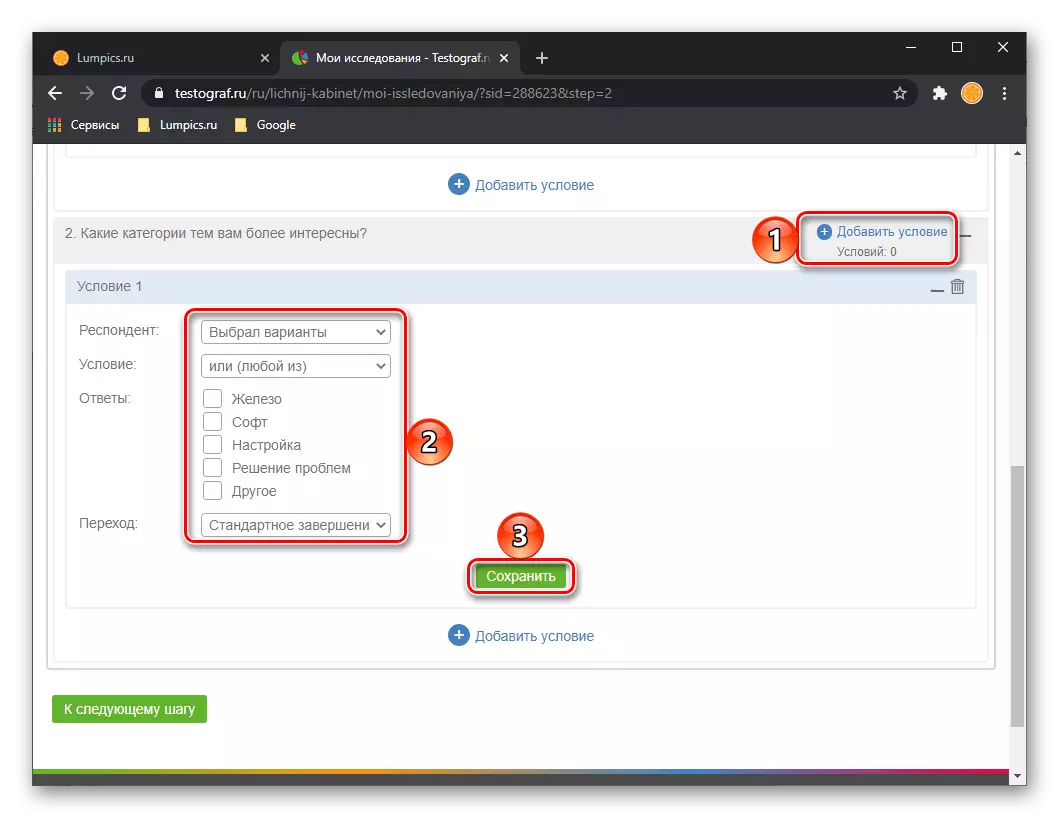
Note: For each individual question, you can add more than one condition. This feature is available even after saving.
- After you complete with the definition of the survey logic and press the "To the next step" button, it will be prompted to configure it. In the "Basic" tab, you can change the "name" and "title", "link", specify the date "beginning" and "completion".

There is also a possibility of adding the text "Greetings", which will appear on the first page with a survey, and the "letter of thanks" on the completion page. To change the appearance of these records, you should use the tools available in fields.

Additionally, you can "load promotion", add "Text of Disqualification" (a message that appears if the user for some reason is not suitable for passing a survey) and fill the "Survey is disabled" field (the message in case it is not available).

Optionally, activate a number of additional parameters presented at the bottom of this section, then return the page.
- Go to the "Parameters" tab and adjust them to your discretion, turning on or disabling the switches available opposite the options.
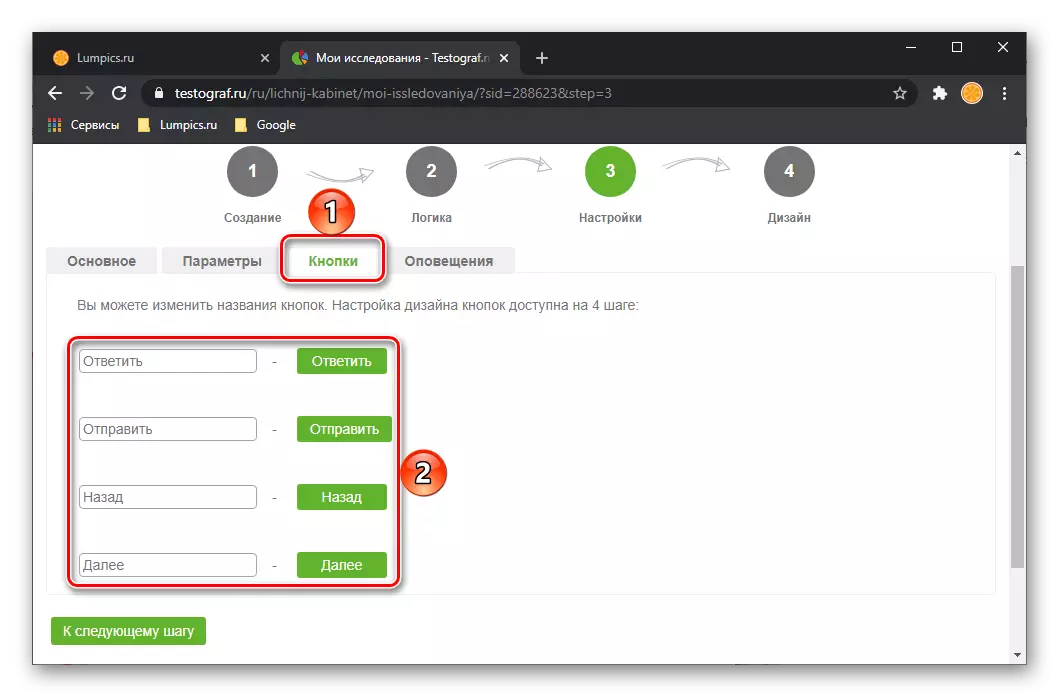
- In the "Buttons" tab, you can change the names of the corresponding elements "Reply", "Send", "Back", "Next".
- In the "Alert Settings" tab, the message text (warnings and comments) is specified, which will be shown at the completion of the survey - this is necessary to verify the correctness of the execution.

After completing the setting, go to the next step.
- At this stage you will be asked to change the design of the survey, first of all, the type of text. Parameters such as font, size and color are available for different elements. Also, do not forget about such an opportunity as "preview" available on each of the stages
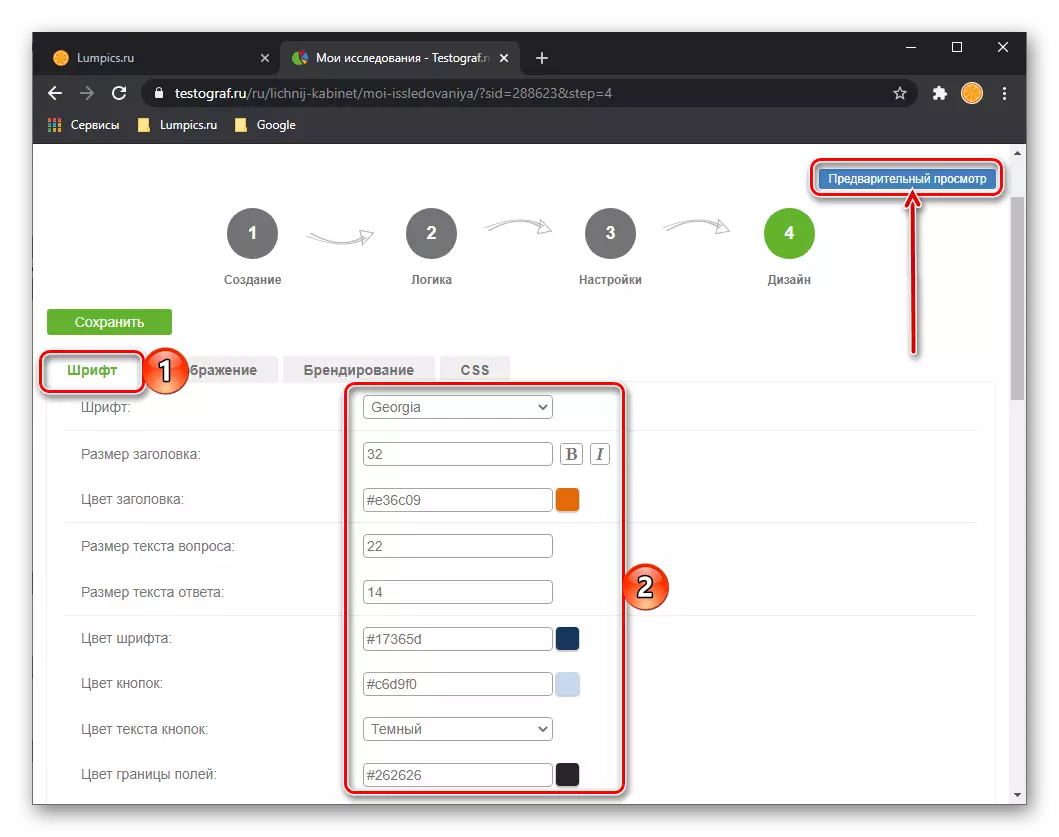
and at the bottom of the page.
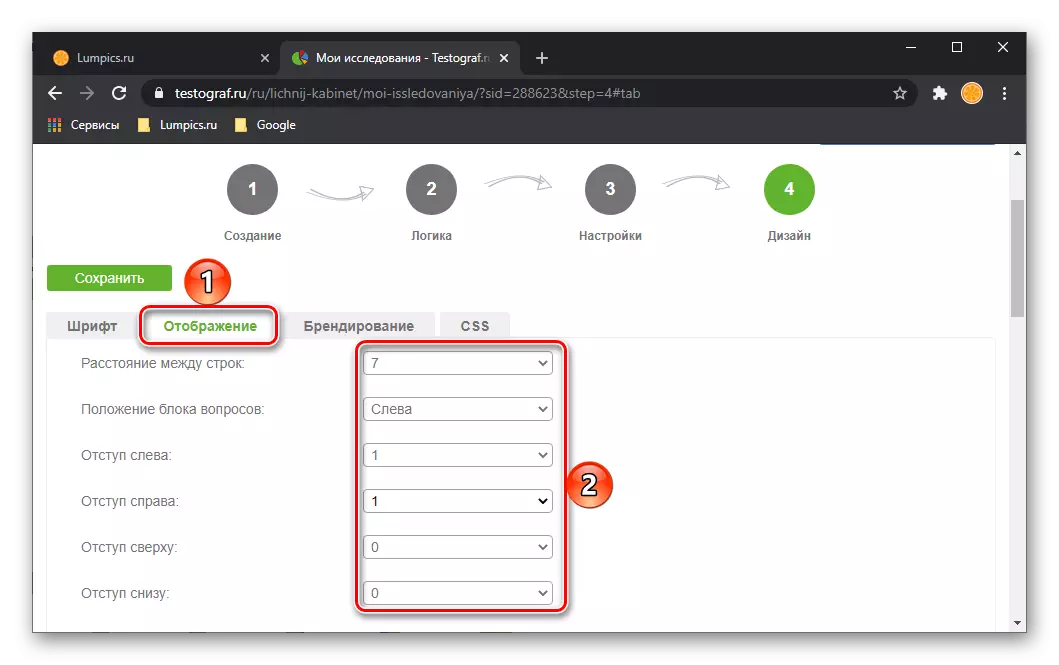
- The following design parameter is the question of a survey. It indicates the distance between the rows, the position of the block with questions and indents.
- The "Branding tab" provides the ability to change the overall style of survey presentation. Using various options available for background and caps, logo and title, it is possible to bring it out of corporate stylistics. For example, if you make a survey for your site or personal blog, enter the general interface will help choosing the main color and adding thematic images.
- In the last tab of the "Design" section, you add user CSS. If you own this language, you can add a description of the appearance of the created document with a survey.
- Deciding with all the parameters, once again inspect the survey to make sure its compliance with the requirements and correctness of the preparation,

After that, press the "Save" button located on the left.
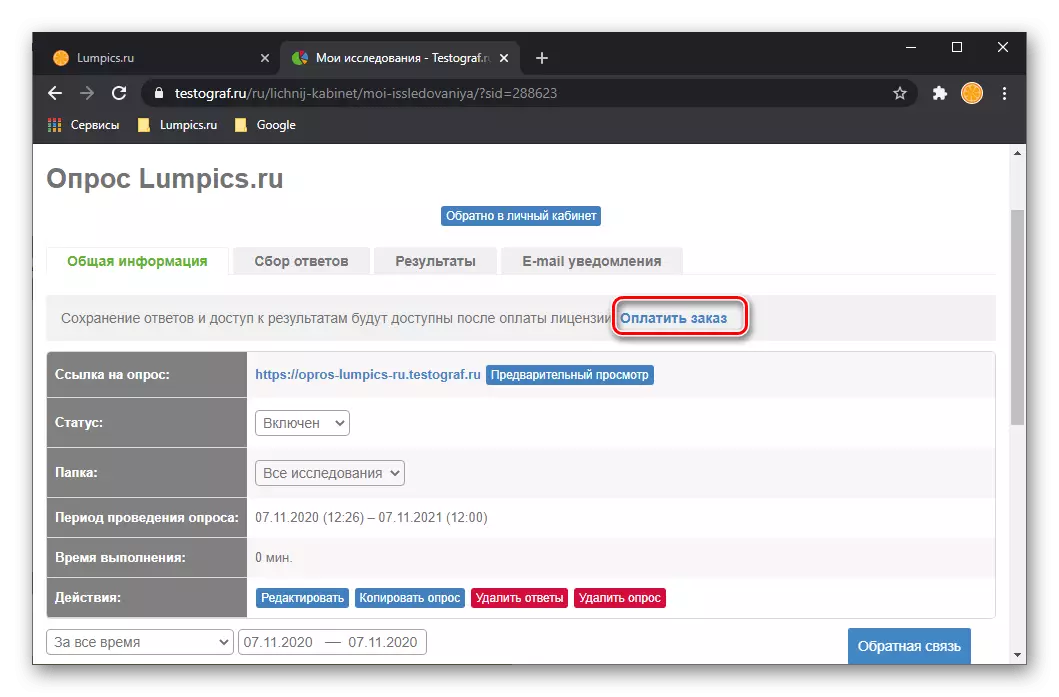
- In order for the survey to be published, you will need to "pay the order".
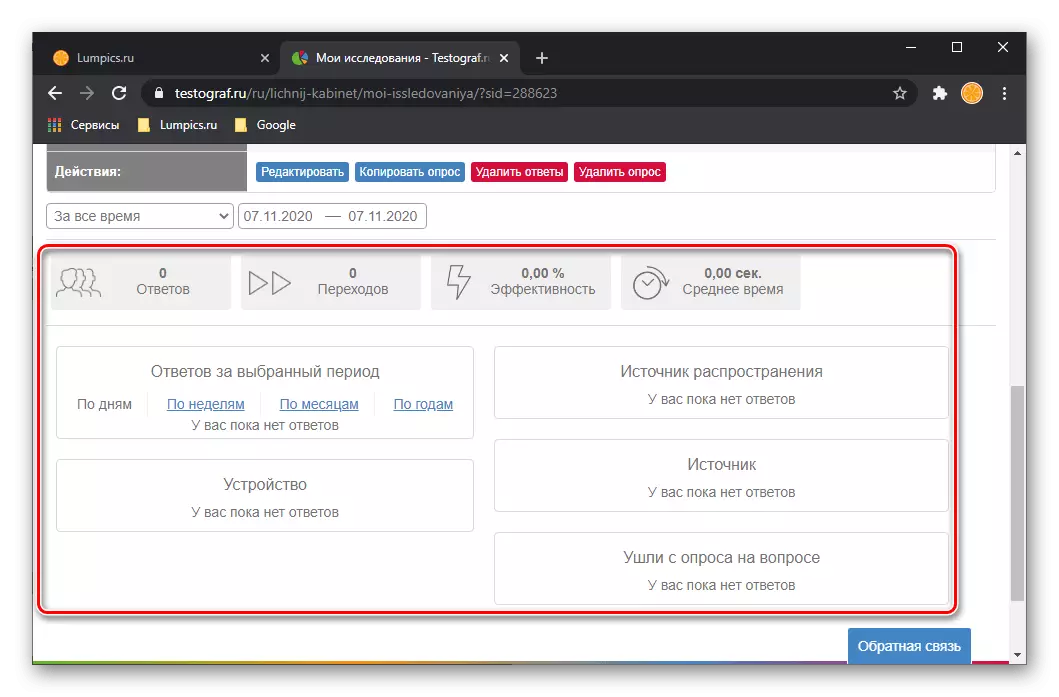
Below, under the description of its condition, you can familiarize yourself with the possibilities that provide an online service for working with polls and evaluating the results of their passage.


Testograf is an excellent solution for creating your own surveys, but this service is focused, first of all, on large companies and organizations, private and legal entities for which such tasks are an integral part of the work. You can learn about all its possibilities in our detailed review.
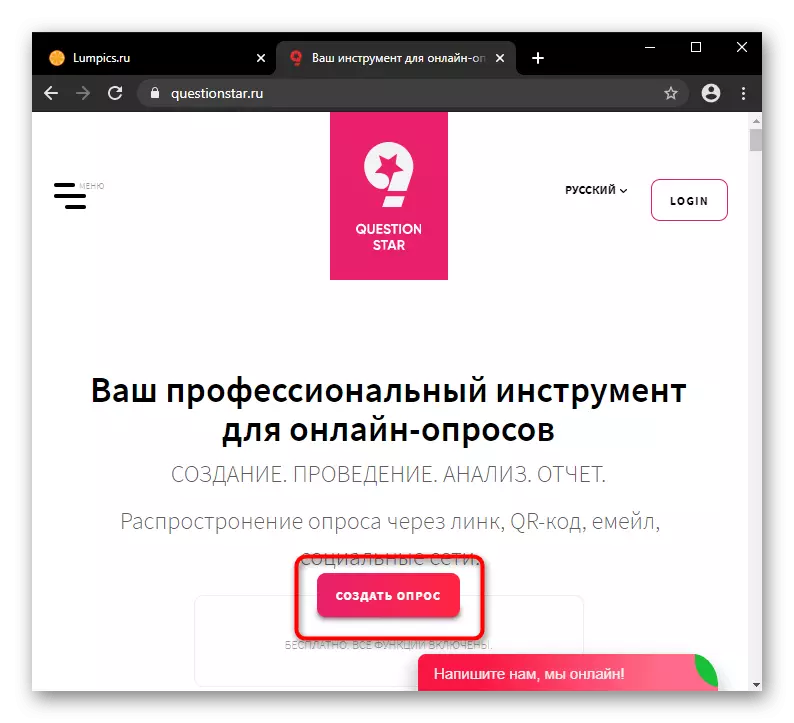
Method 2: Questionstar
The Questionstar online service offers users an advanced platform to create surveys of any level of complexity. In addition to the large number of tools, relevant and for short, and for detailed surveys, it is possible to take advantage of an advanced analytics, visually demonstrating respondents. All the collected data is stored in accordance with the law, due to which both parties can be confidentiality and security. A big advantage is a simple interface in which you practically do not need to be mastered, even if you want to create a complex and structured survey.
Go to Questionstar website
- After switching to the main page, you will need to register a personal account, where in the future all the created polls will be stored.
- The registration procedure is very simple and requires only an email entry to which confirmation will be sent, and the password. Authorization through social networks is supported.
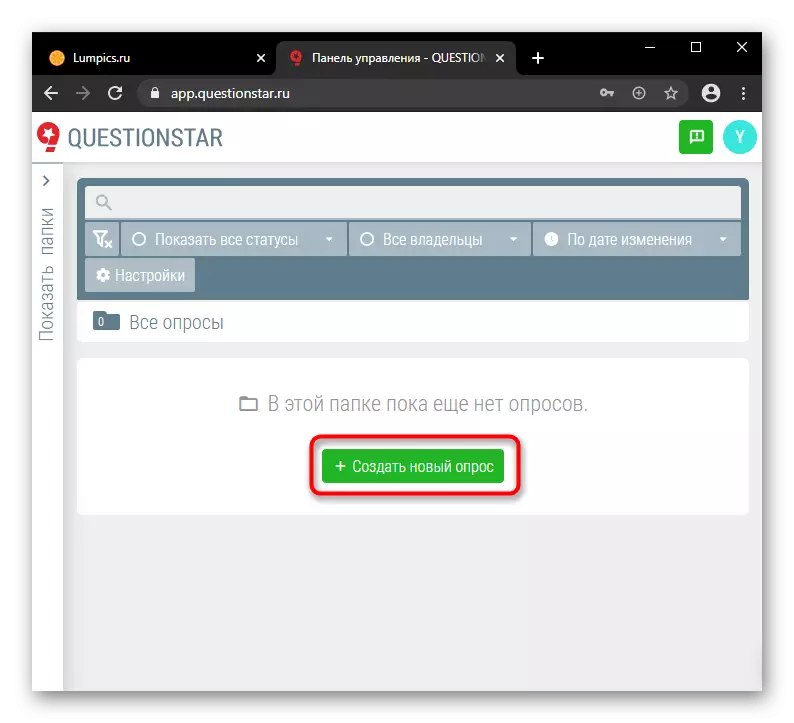
- After authorization in the profile, you will immediately be able to start creating a new survey.
- In the future, sort polls through the internal control panel to the folders and quickly find the desired search field and filters. Remote questionnaires fall into the basket, from where they can be restored or deleted finally.
- First of all, come up with a name that reflects the essence of future issues, and click the "Create" button.
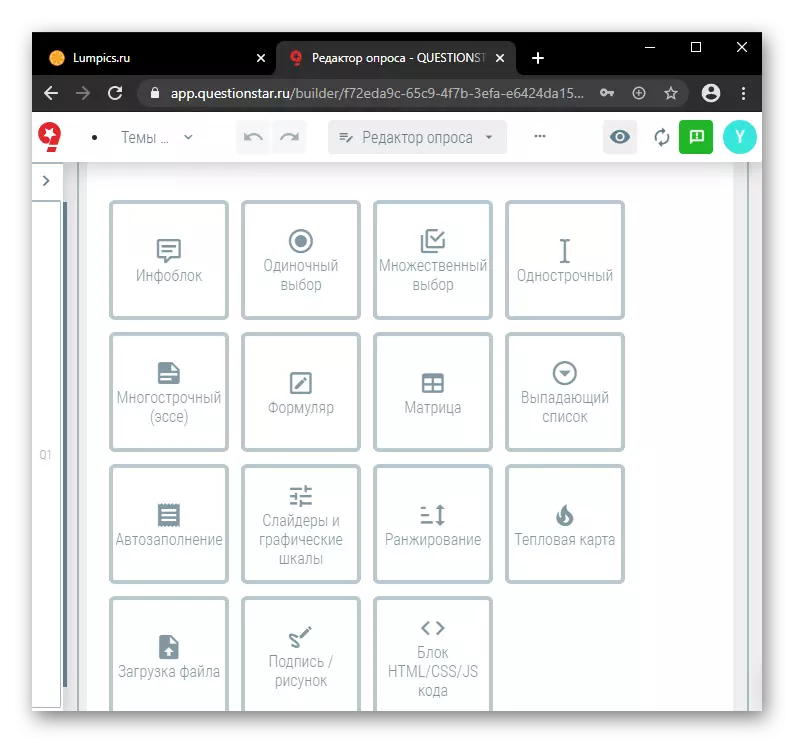
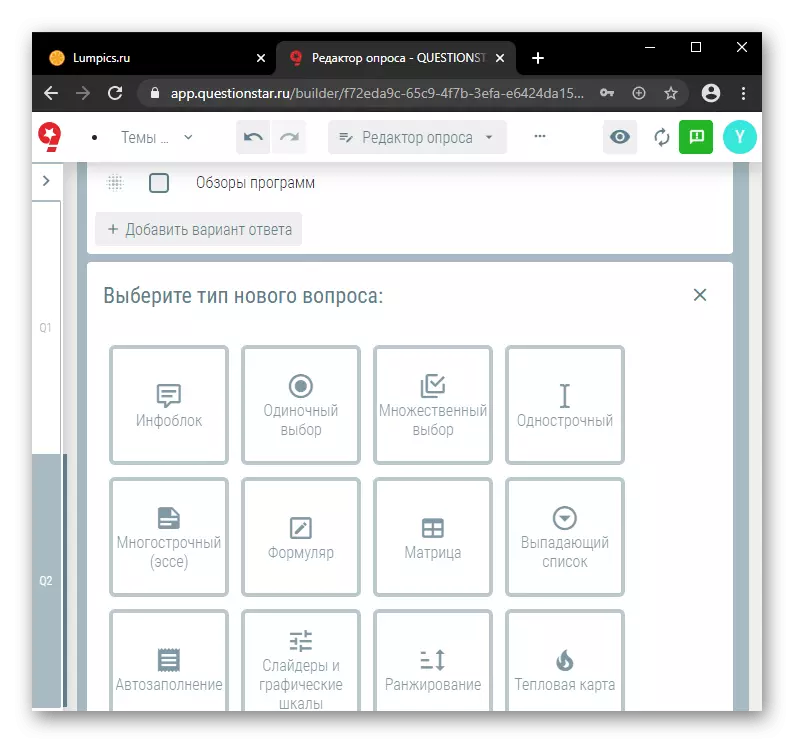
- Select the type of question, where of the 15 options, specify the one that corresponds to the desired form of response. There is both all known options and non-standard, so that the questionnaires can be compiled absolutely to any topics.
- In the screenshot below you see the type of question "Multiple Choice", according to which the respondent is allowed to choose several options for answers. The creator itself solves an affordable number of proposed response options and can at any time change their sequence by dragging the lines to the right place.
- When typing and answering options, the toolbar appears, which allows you how to format the text: change style, alignment, size, font color, highlight words, insert links and perform other actions. Entering answer options, you can quickly add another item under the current line, view the list of common scales (for example, you can not create yourself, and insert a harvested scale of consent with the answer options from "fully disagree" to "fully agree") . And when you click on the "magic wand", a menu will appear with pre-installed issues and scales
- For greater informative, insert links to any definitions or information that the respondent must know before answering the question.
- Each new question can be created using any other type of block - it provides the most flexible questionnaire.
- In some types of questions, the preview is available immediately, in the form of its creation.
- In addition, you can open a preview of both a specific question and the entire survey by clicking on one of the respective buttons.
- Preview of the entire survey allows the author to go through it to make sure that all the forms and the emergence of additional questions. Through the "Tablet" button, you can switch to the viewing mode from the smartphone - this is relevant when creating complex surveys with adding, for example, images.
- Long questions are better separated by pages. The transition to them will be made by the "Next" button, which the respondent will click on all the questions from the current page.
- In the process of editing, move to the desired question, clicking on the tile with its number. This is faster than scrolling the page.
- If you deploy the navigation menu, a more detailed form will appear with the preview of the questions, indicating their types and pages. There is also a search field.
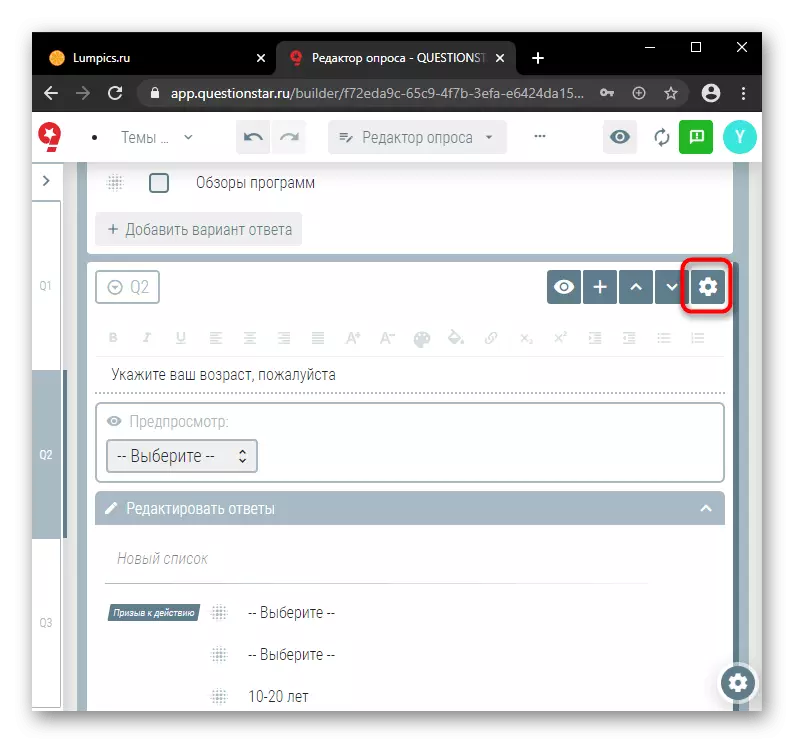
- To obtain extended functions regarding the configuration of the question, click on the button with the gear. Previously, the question itself must be allocated.
- There are two tabs: The first changes the type of question, the second demonstrates the available properties. Using the second tab, you can import and export the answer options, ask the status of the status of mandatory or desirable, and then the respondents will not be able to leave it unanswered or will be notified that the question is preferably not missing. Immediately, you can ask a question about collecting personal data, in which the information obtained falls into the protected storage and will become available only for a limited number of persons (according to the law on the protection of personal data). Press the button with the question mark to learn more about the features of some functions.
- The "Add Display Logic" item will display a question only if the respondent will meet the conditions you specify. By adding branching, you will create an additional question with an answer options that respondents will appear if they choose a specific answer from the main issue.


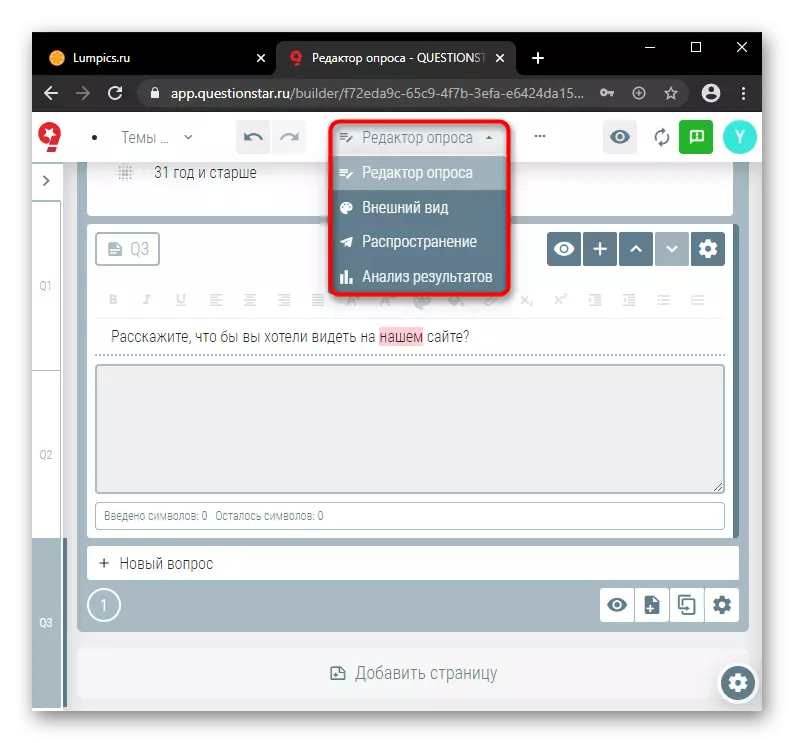
Now that the questionnaire is completed with the creation of the basement, perform its general settings. Click the button with three dots to the menu with additional features.

- "Survey Settings" - a separate page with 7 tabs, where you are invited to make basic settings, edit actions at the end of the survey, configure access to the questionnaire, change personal data protection settings, custom service messages, edit the features of a multilingual survey and the details of collecting contact data of respondents.
- Through "Translations", the entire survey is transferred to one of the selected languages. Using this feature, it is advisable to formulate questions in advance and the answers as easy as possible to avoid the inaccuracies of the translation.
- The remaining three points - "rename the survey", "copy the survey" and "shared access" in explanation do not need.


Here, from the poll editor, you can switch to another page.
- On the "Appearance" page for stylizing a survey, it is proposed to choose a template from blanks or download your own. The palette can be created automatically from the downloaded image with the required colors in the "Palette" menu.
- Ready templates are allowed to edit, but the settings are not very much. Advanced users who know HTML and CSS can write their own template and add it to the list. Supported by writing code using JavaScript - so the elements of the survey will be interactive and stylish.
- Through the "Distribution" you can copy the link, send emails with a proposal to pass the survey, create a post in social networks, generate QR code, and also embed a survey to your site.
- The "Results Analysis" page, in fact, helps to see and analyze the answers received. Pay attention to the presence of tariff plans. A free plan analyzes only the answers of the first 50 respondents.
- Depending on the type of question, methods of displaying information will be different, the most suitable in one way or another. So, for a form with a choice of several response options, you will see a horizontal chart, and for the question with a choice of response through the drop-down menu - a circular diagram.


The created survey will need to be launched by clicking the button with a black point, and then the "Run Survey" button, otherwise the respondents will not be able to respond to it.

Now and at any time you can see the number of answers and other statistics, stop the survey.

Method 3: Google Forms
The service allows you to create a survey with different types of responses. An understandable interface is available to the user with a convenient setting of all elements of the future questionnaire. You can place the finished result or on your own site, or by organizing the distribution of the target audience. Unlike other sites, in Google Forms you can create an unlimited number of polls for free.
The main advantage of the resource is that access to editing can be obtained absolutely from any device, it is enough to enter your account or follow the link, copied before.
Go to Google Forms
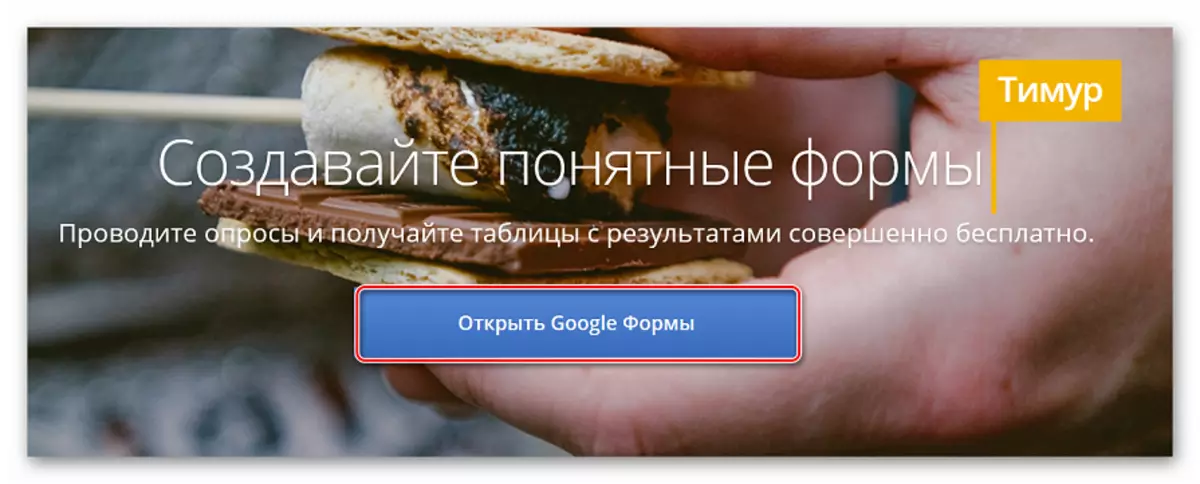
- Click on the "Open Google Forms" button on the main resource page.
- To add a new survey, click on "+" in the lower right corner.

In some cases, "+" will be located next to templates.

- A new form will open before the user. We enter the name of the questionnaire in the Form Name field, the name of the first question, add items and change their appearance.

- If necessary, add a suitable photo to each item.

- To add a new question, click on the plus icon on the left sidebar.

- If you click on the view button in the upper left corner, you can find out how your questionnaire will look after the publication.

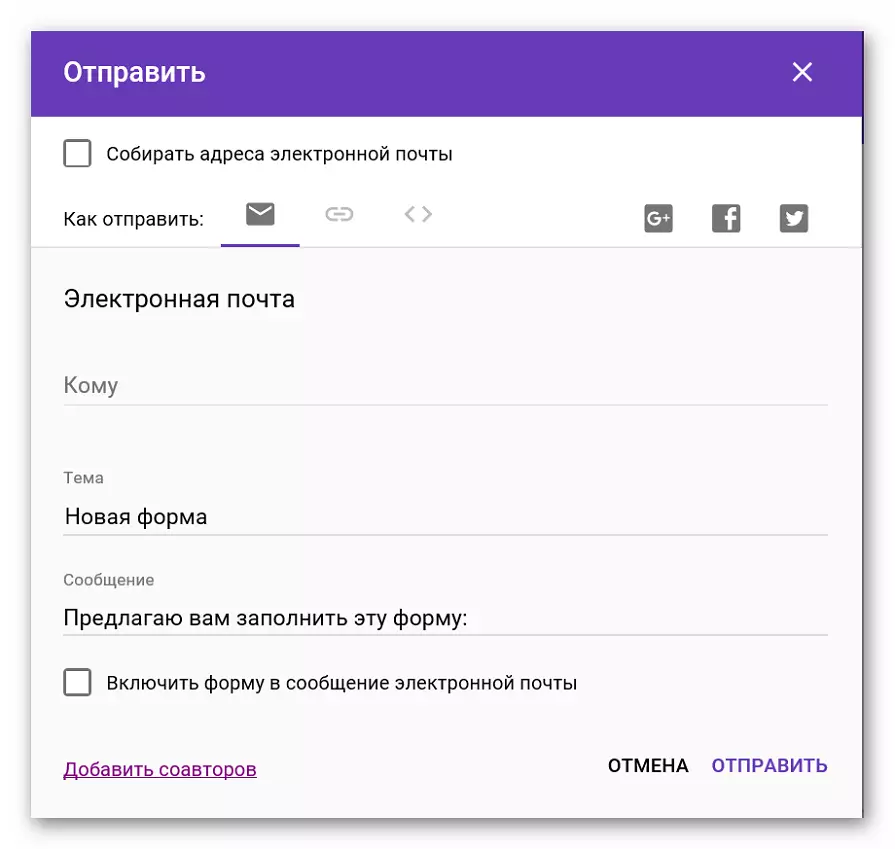
- As soon as editing is completed, click on the "Send" button.
- You can send a finished survey or email, or sharing a reference to the target audience.
Once the survey is held the first respondents, a consolidated table with results will be available to the user, which allows you to see how the opinion of the respondents is divided.
Method 4 Survio.
Survio users are available free and paid version. Freely, you can create five polls with an unlimited number of questions, while the number of respondents surveyed should not exceed 100 people per month. To work with the site you need to register.
Go to Survio website
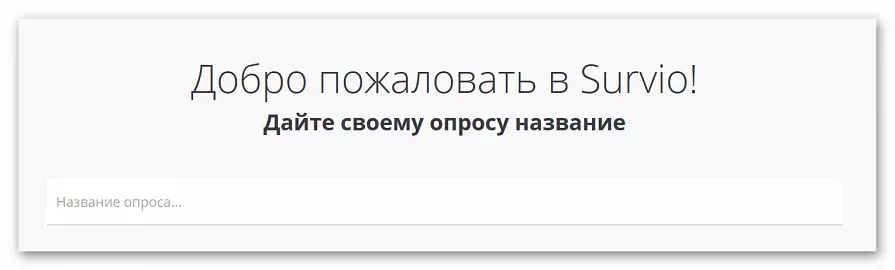
- We go to the site and pass the registration process - To do this, enter the email address, name and password. Click "Create Poll".

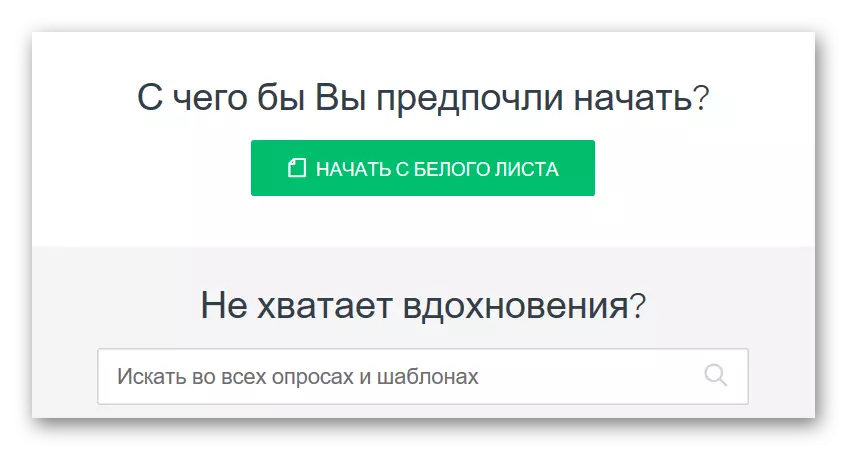
- The site will propose to choose a way to create a survey. You can use a profile from scratch, and you can already have a ready-made pattern.

- We will create a survey from scratch. After clicking on the corresponding icon, the site will suggest to enter the name of the future project.
- To create the first question in the questionnaire click on "+". Additionally, you can change the logo and enter your own text of the respondent's greeting.

- Selects a user will be offered several options for issuing a question, for each subsequent, you can choose another appearance. We enter the question itself and answer options, save the information.

- To add a new question, click on "+". You can add an unlimited number of questionnaire items.

- We send the finished questionnaire by clicking on the "Collection Collection" button.

- The service offers many ways to share with the target audience of the questionnaire. So, you can insert it to the site, send by email, print, etc.
The site is convenient to use, the interface is friendly, there is no annoying advertisement, SURVIO is suitable if you need to create 1-2 polls.
METHOD 5: SURVEYMONKEY
As in the past site, the user can work with the service for free or pay for an increase in the number of available polls. In the free version you can create 10 polls and get a total of up to 100 replies within one month. The site is optimized for mobile devices, working with it comfortable, annoying advertising is missing. Buying "Basic Tariff" Users can increase the number of answers received to 1000.
In order to create your first survey, you need to register on the website or input using the Google account or Facebook.
Go to SurveymonKey website
- We register on the site or enter through the social network.

- To create a new survey, click on "Create Poll". On the site there are recommendations for novice users who will help make a questionnaire as efficient as possible.

- The site offers to "start with a white sheet" or choose a ready-made template.
- If you start working from scratch, we enter the name of the project and click "create a survey". Be sure to put a tick in the corresponding field, if the questions of the future questionnaire were drawn up in advance.

- As in the past editors, the user will be offered the most accurate configuration of each question depending on wishes and needs. To add a new question, click on "+" and choose its appearance.
- We introduce the name of the question, answer options, set up additional parameters, then click the "next question".

- When all questions are entered, click on the "Save" button.
- On the new page, select the survey logo if it is needed, and configure the transition button to other answers.

- Click on the "Next" button and go to the selection of a method for collecting responses to a survey.

- The survey can be sent by email, publish on the site, share on social networks.

After receiving the first answers, you can analyze the data. Users are available: summary table, viewing the answer trends and the ability to trace the selection of the audience on individual issues.
See also: Create a survey in the VKontakte group