Method 1: Editor Stories
To create a collage in history with standard tools of the Instagram Official Application for Android or iOS, you can resort to two solutions depending on the results requirements. Note, the best quality guarantees only the second option, as the first settings are limited.Read more: How to add Storage in Instagram from the phone
Option 1: Image Assignment
To combine multiple photos, a single image will have to resort to the Collage tool. In this case, there are only a few standard templates that determine the number of pictures within the framework of the publication, but without individual settings, not counting the filter blending modes when creating photos on the device chamber.
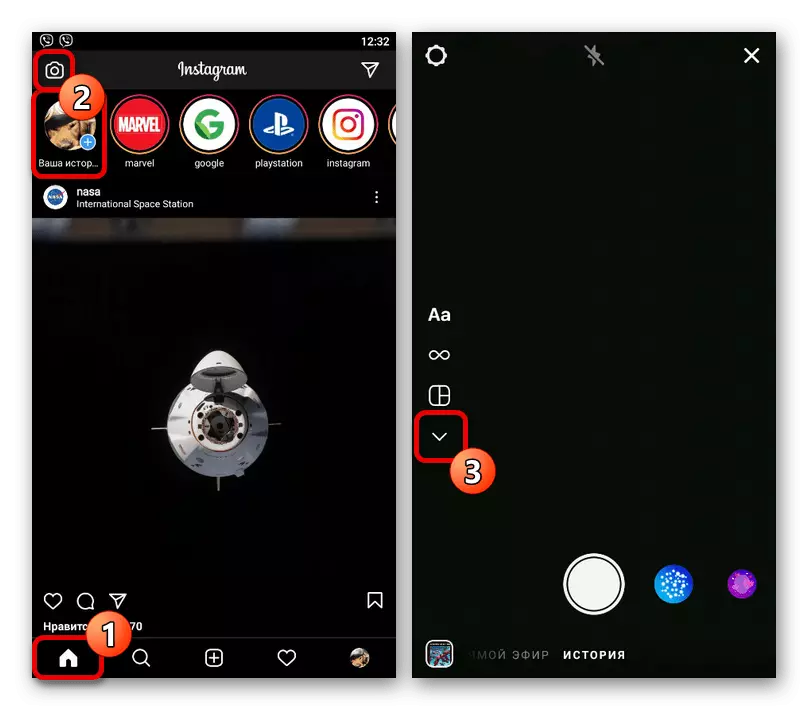
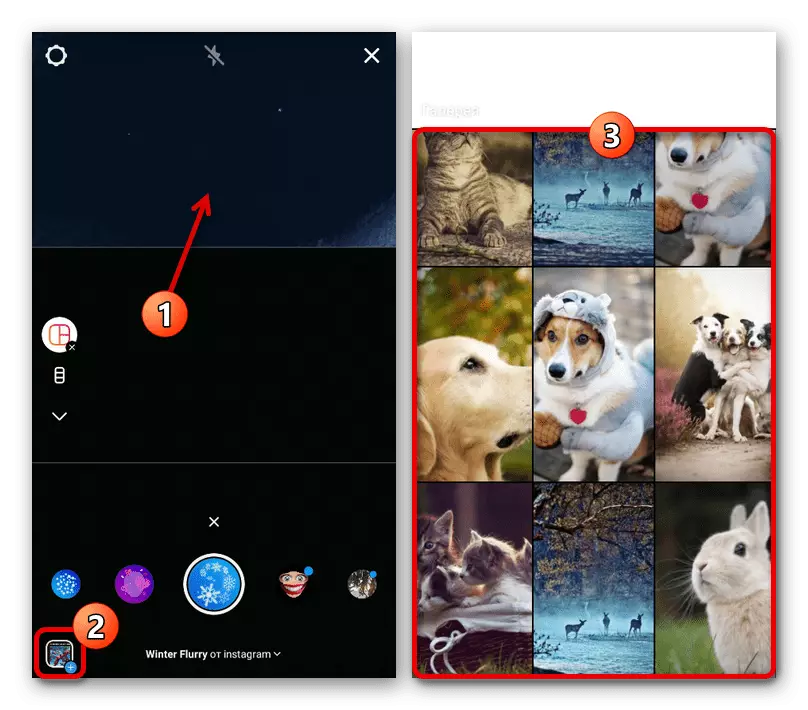
- Open the Instagram application and on the Home tab, use the "Your History" button. You can also go to the editor using the icon in the upper left corner of the screen.
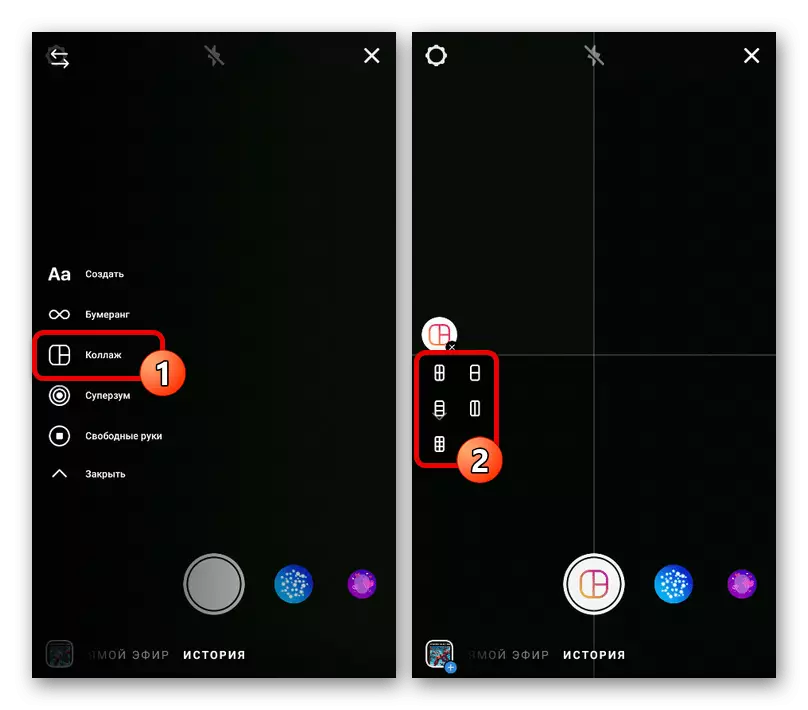
- On the left side panel, click on the down arrow icon and select "Collage" from the presented tool list. To change the number of simultaneously available frames, but strictly up to six pieces, you should use the button marked and touch the appropriate option.
- To start filling, tap one of the blocks on the screen, install the filter to work with the camera, and tap on the center button, as when creating a regular photo. Alternatively, you can download the finished image from the memory of the smartphone by pressing "+" in the lower left corner and pointing the desired shot on the "Gallery" page.
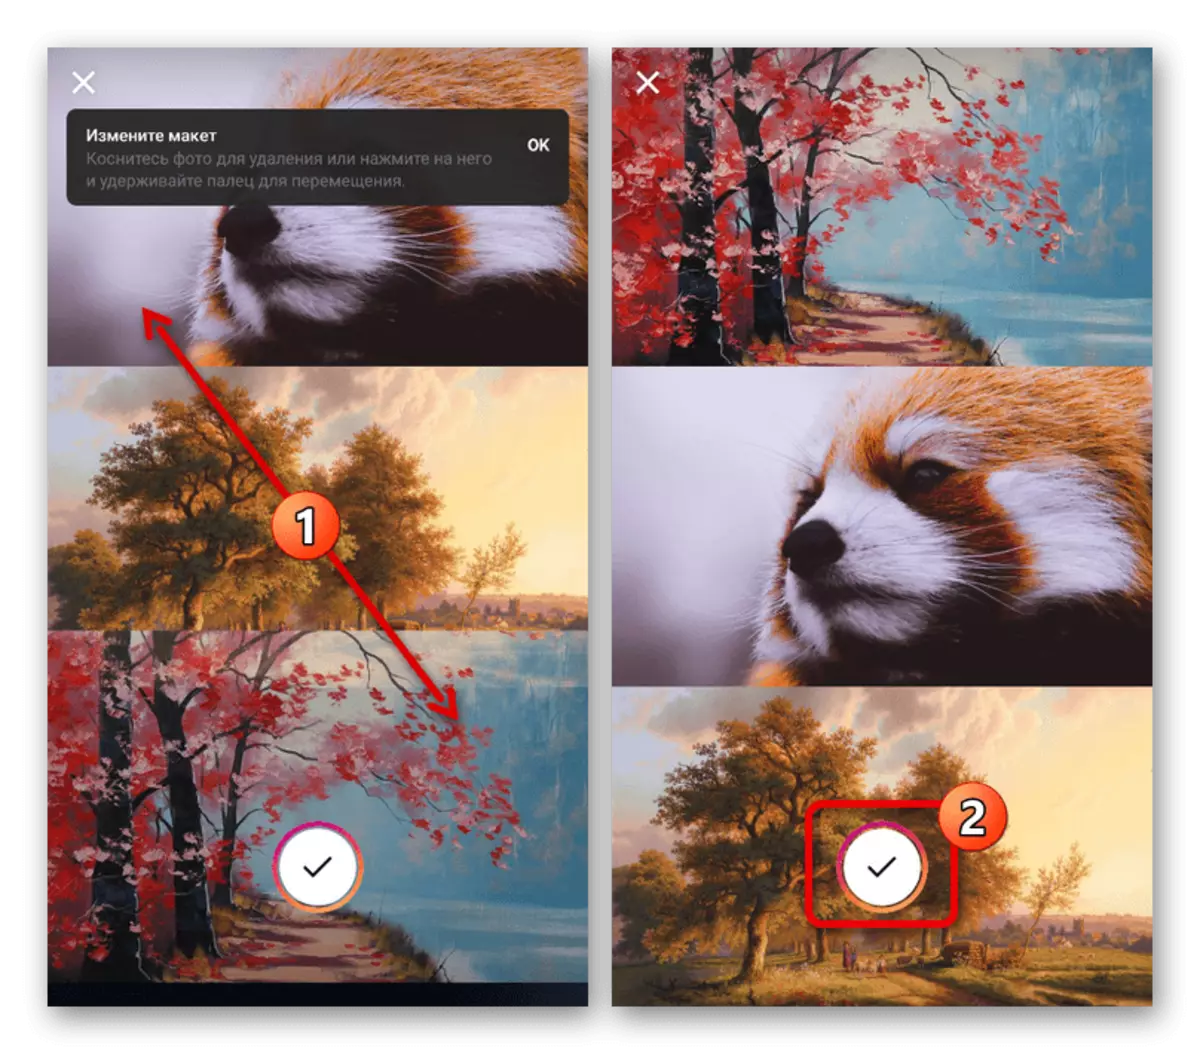
- The resulting collage is strongly limited in the editing plan, but at the same time you can still delete or change frames by places by clapping and dragging into the right place. To complete and save, use the Tick Image button.
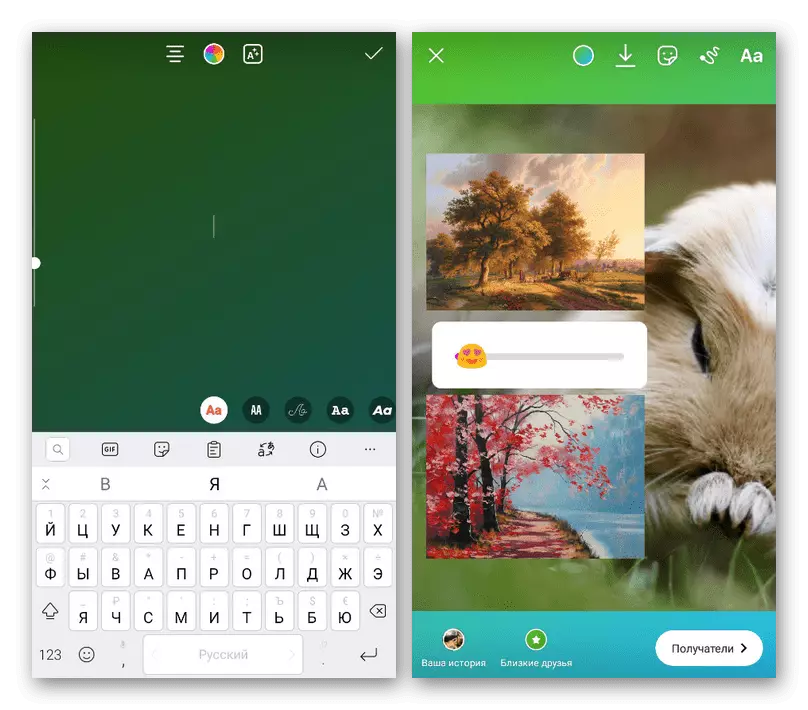
- Using the Storage standard editor, edit the image by preparing for publication. After that, click "Recipients" or on the arrow icon and opposite the "Your Story" item, use the Share button.

Option 2: Enclosing Images
In addition to the considered tool, you can create a collage using a special sticker that allows you to impose photos to the editable background, and a third-party keyboard. The first option is still available only on iOS, while the second is an excellent alternative for Android devices.
Read more: Overlay photo on each other in history in Instagram
Method 2: third-party applications
Many third-party applications allow you to create collages by applying one of the templates and subsequent loading of multiple files, including using the camera. As a rule, such possibilities are almost almost in each with a library templates.Option 1: StoryArt
One of the most popular programs for creating collages available both on Android and iOS is StoryArt, providing a lot of free tools and templates.
Download StoryArt from Google Play Market
Download StoryArt from App Store
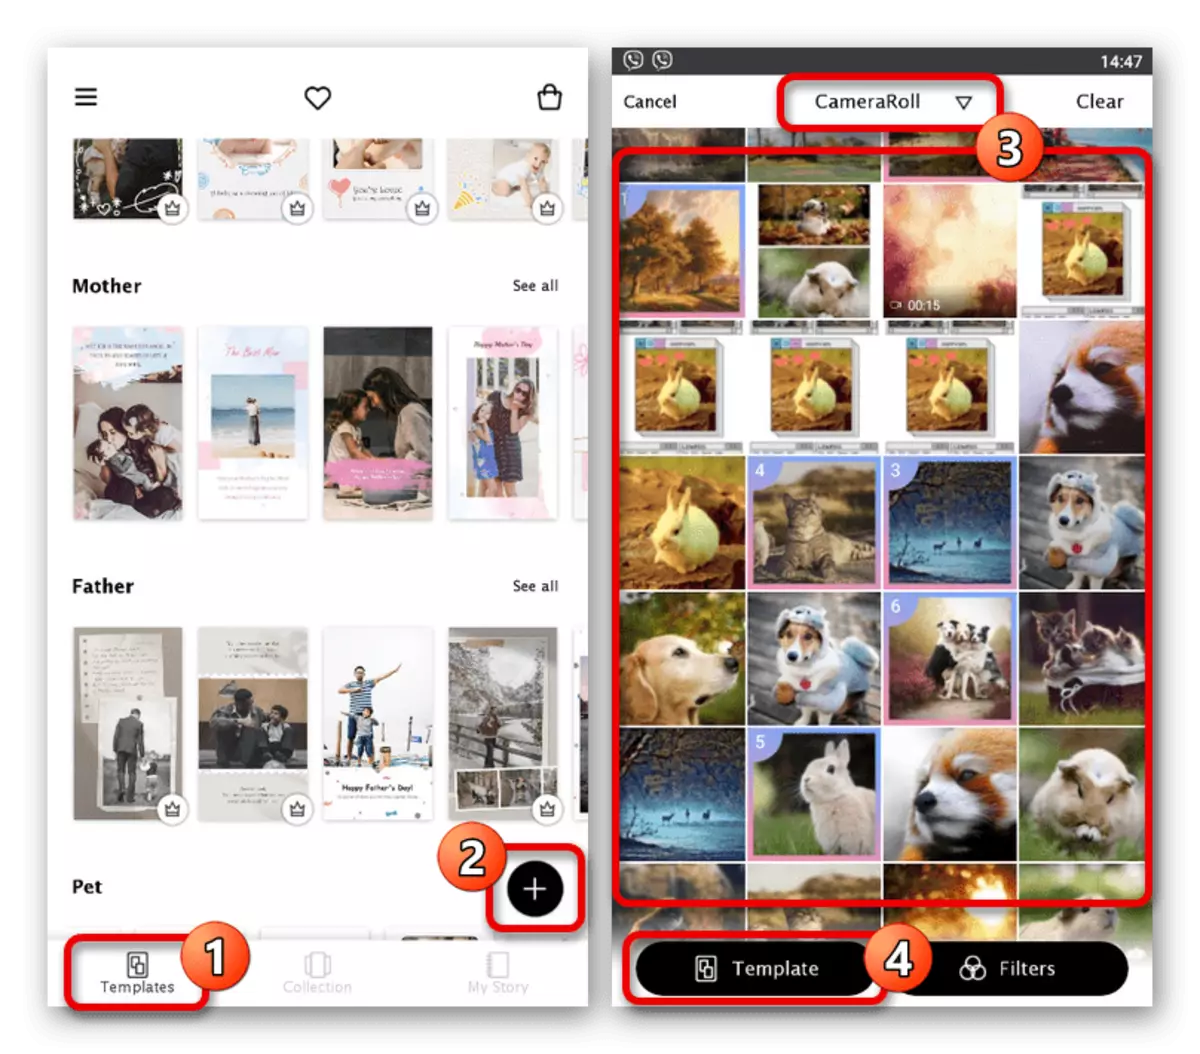
- On the main page "TEMPLATES" in the application, click on the "+" icon, select up to nine photos and use the TEMPLATE button. The folder can be changed using the drop-down list on the top panel.
Note: If the number of photographer does not initially play any role, you can first select a template, and then add addition.
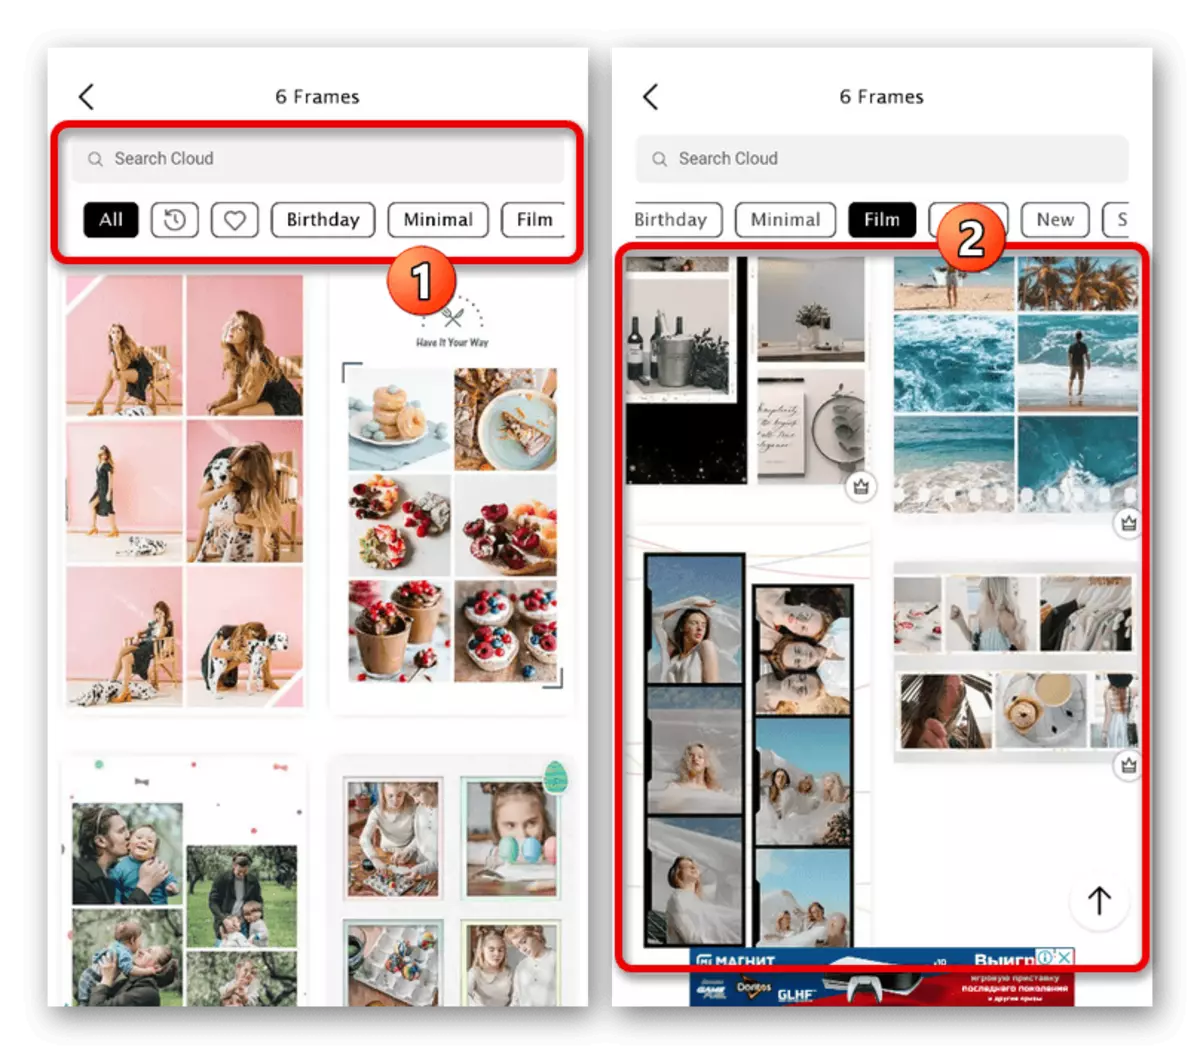
- As a result, a list of templates that support the selected number of images will appear on the screen. Find and tap one of the options, if necessary, using division by category, not forgetting that some are available only on a fee basis.
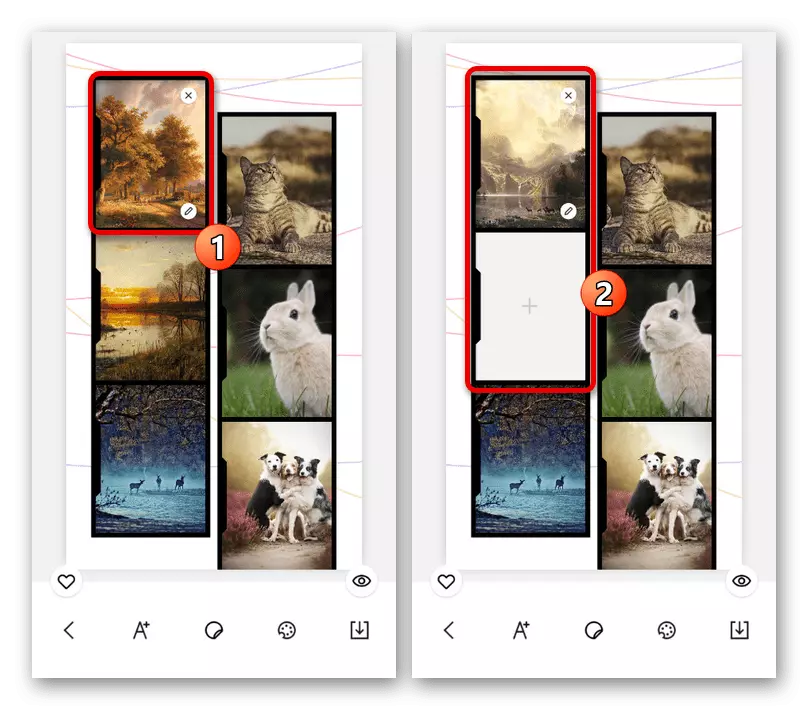
- After downloading the template assets, the history editor with already integrated photos appears on the screen, which, however, can be changed in places. Moreover, if necessary, you can even replace the snapshot, touching the cross in the corner of the file to delete and "+" to add a new one.
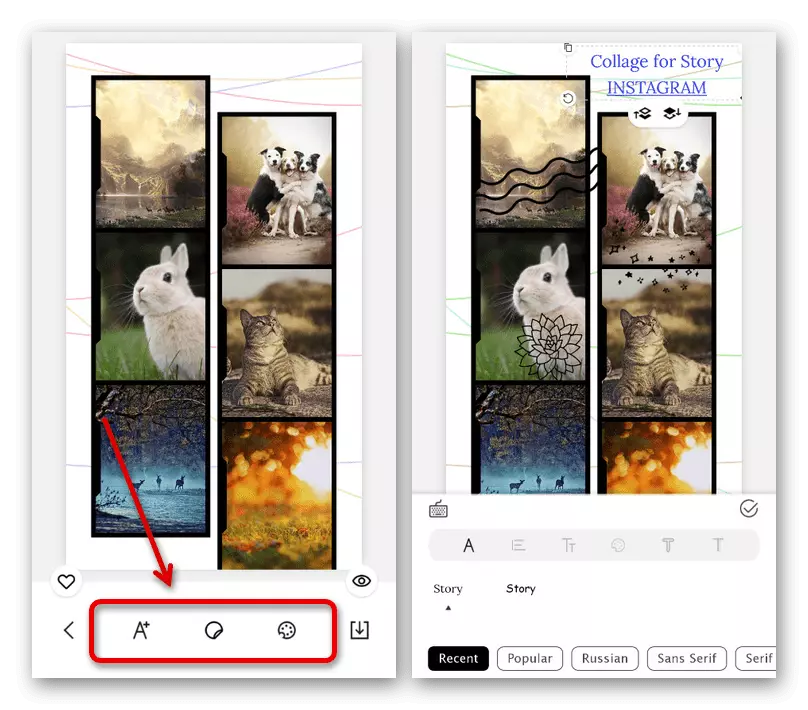
- Frames themselves can change places if clamping and dragging the contents in the right place. Also there are other tools, including filters.
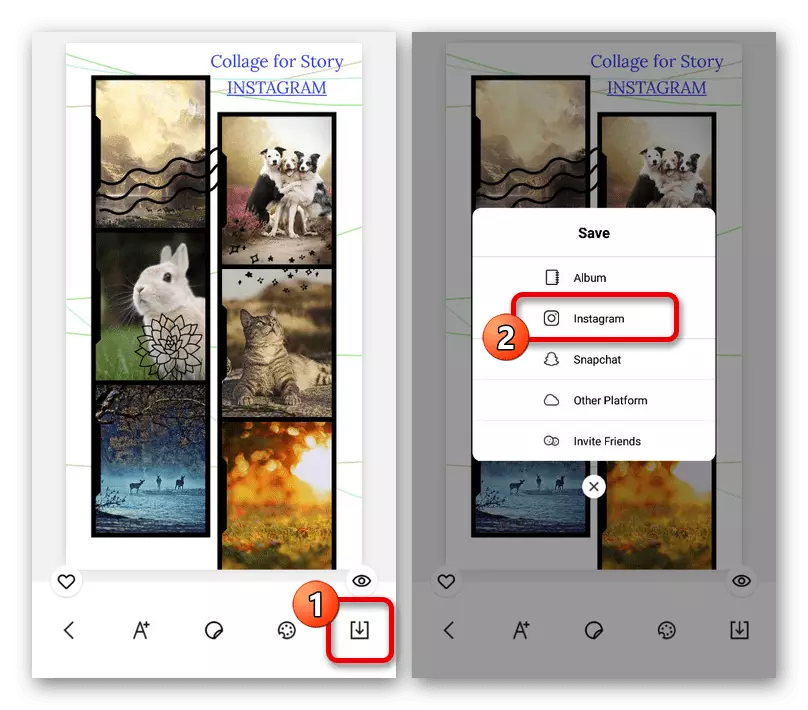
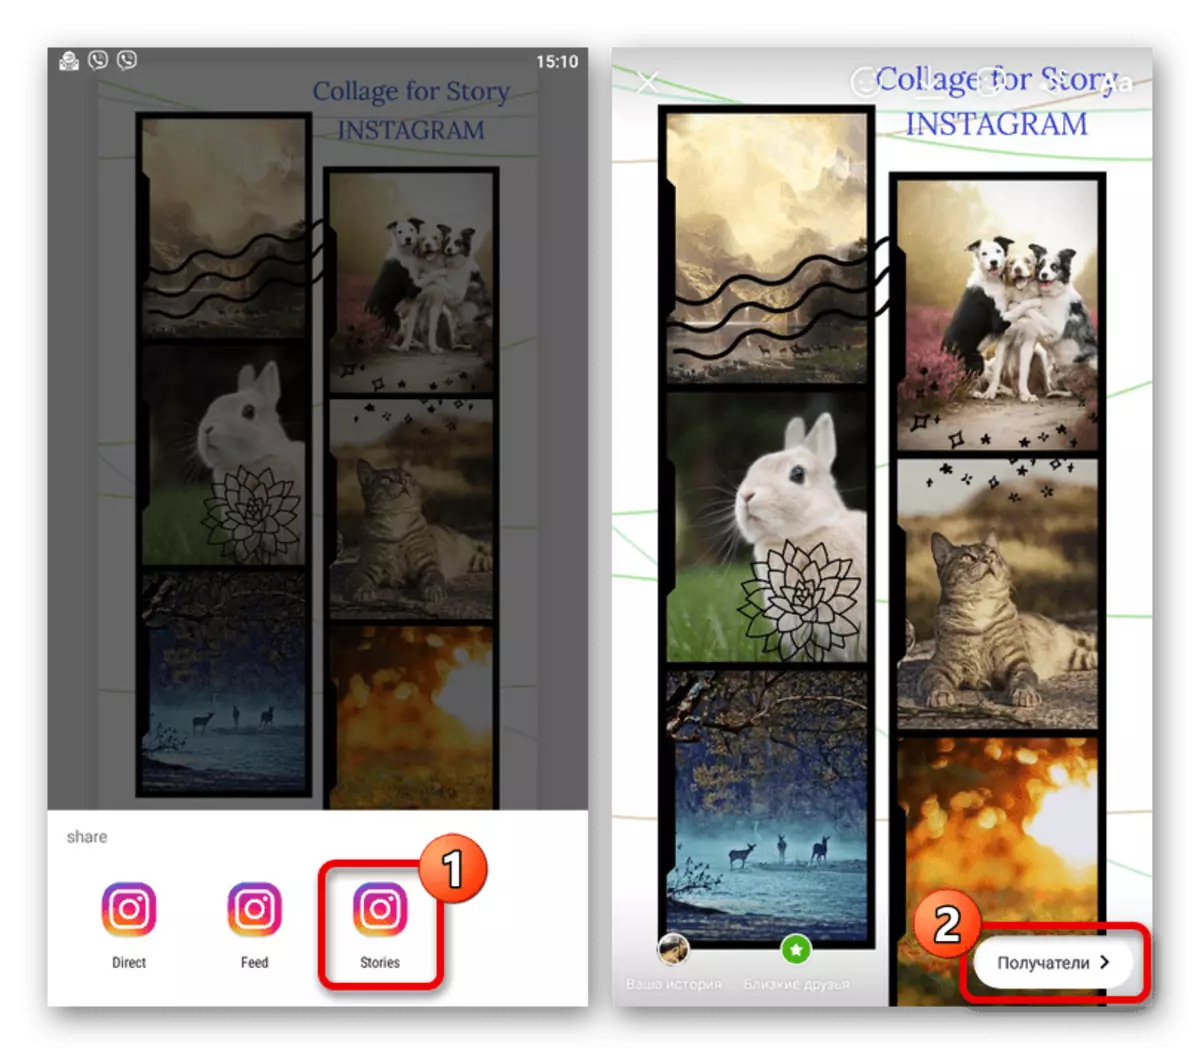
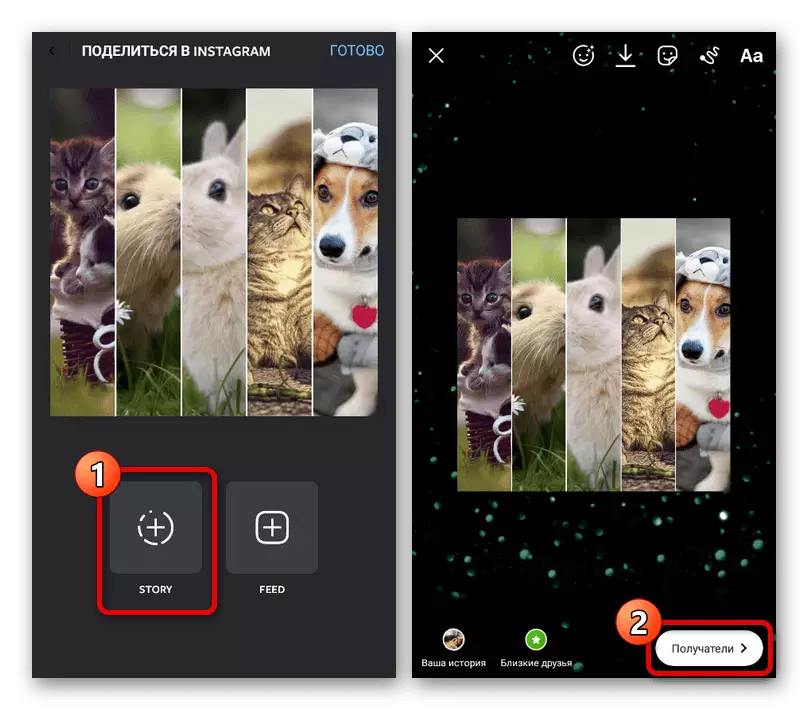
- After completing the preparation of the Storage, click the Download button on the bottom panel and select "Instagram" in the pop-up window.
To create a story, from the available options in the Share block you need to touch "Stories". As a result, you will be redirected to the standard editor in Instagram Appendix with the already downloaded file.
This application is standing out that it has a minimum of advertising and there are free tools. However, at the same time, most possibilities are provided on a fee.
Option 2: Layout
Another highly high rating application was released specifically to create stories in Instagram based on collage layouts.
Download Layout from Google Play Market
Download Layout from App Store
- Open the application and on the start page, click the Start button. After that, select by single touch the images you want to add to history using the lower panel to switch between different folders on the device.
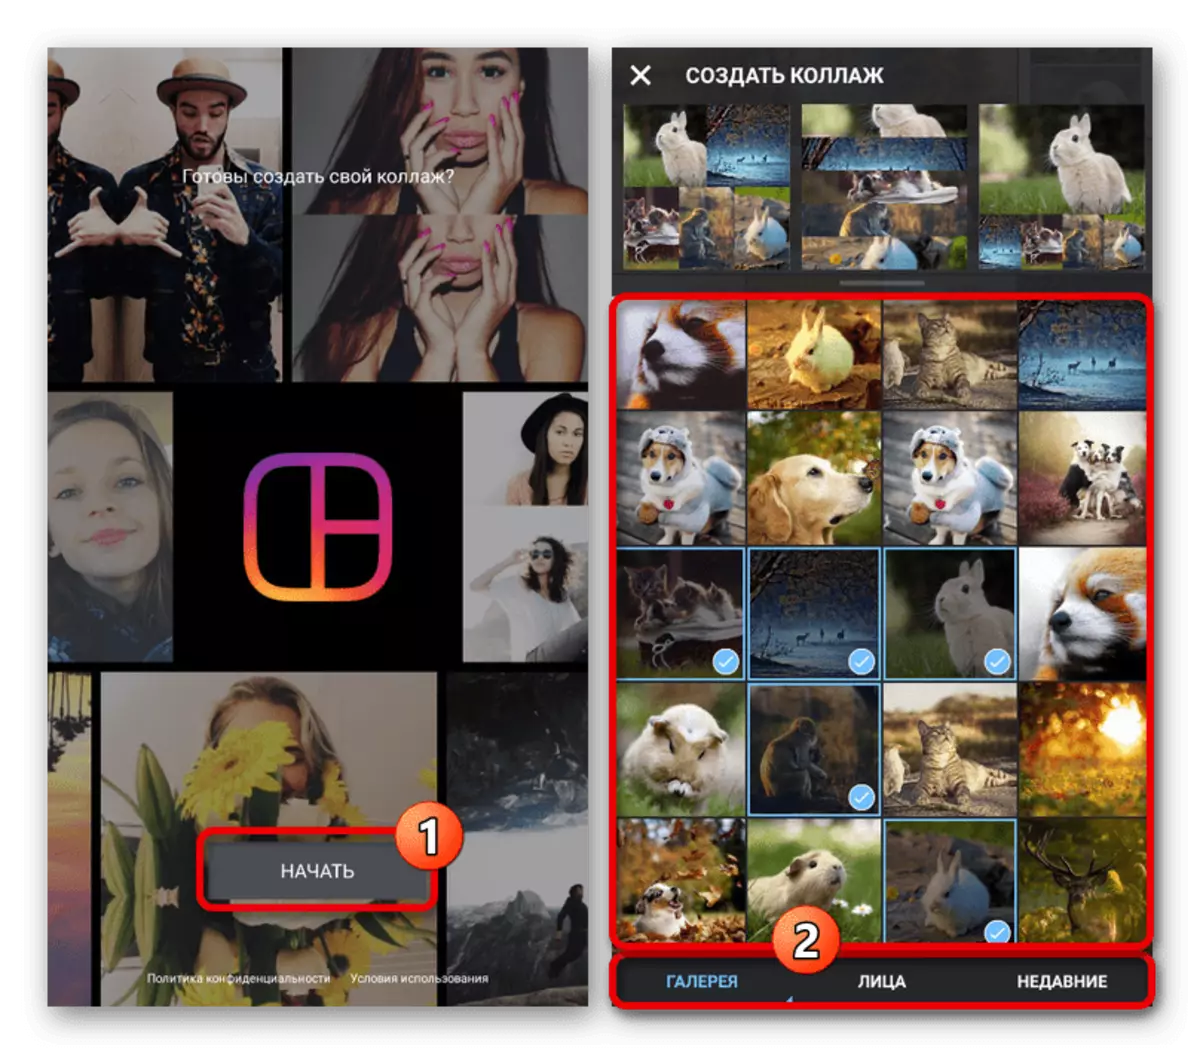
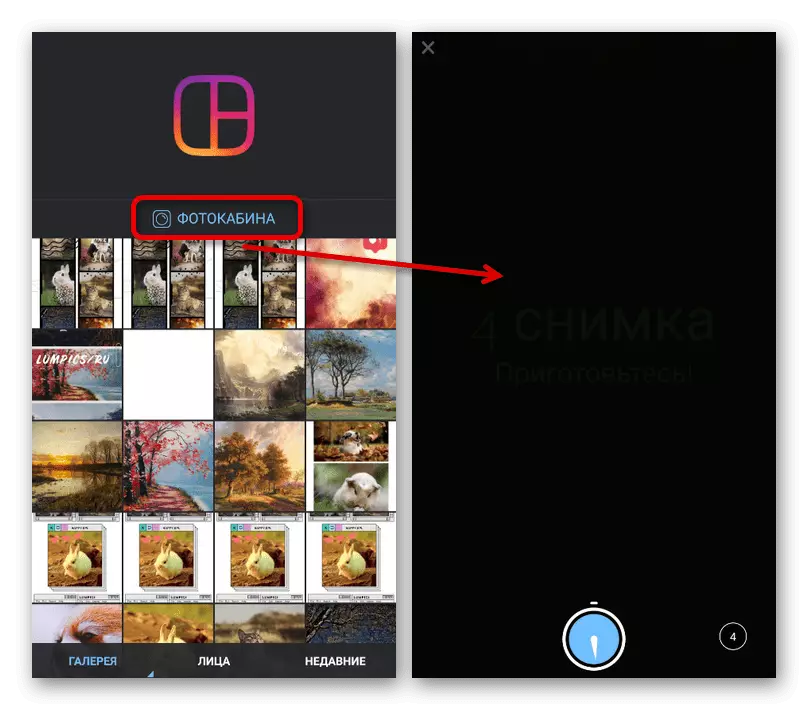
If necessary, you can use the smartphone camera to create multiple instant photos by clicking the "Photocabine" button. Unfortunately, there are almost no effects here and you cannot add videos.
- By preparing, in the "Create Collage" block, decide on the appearance of the template. Most of all this refers to the form and location of the photographer, rather than any additional effects.
- If you want to resize a separate image, tap the appropriate block. After that, clamp one of the edges of the blue frame and pull in the desired side.
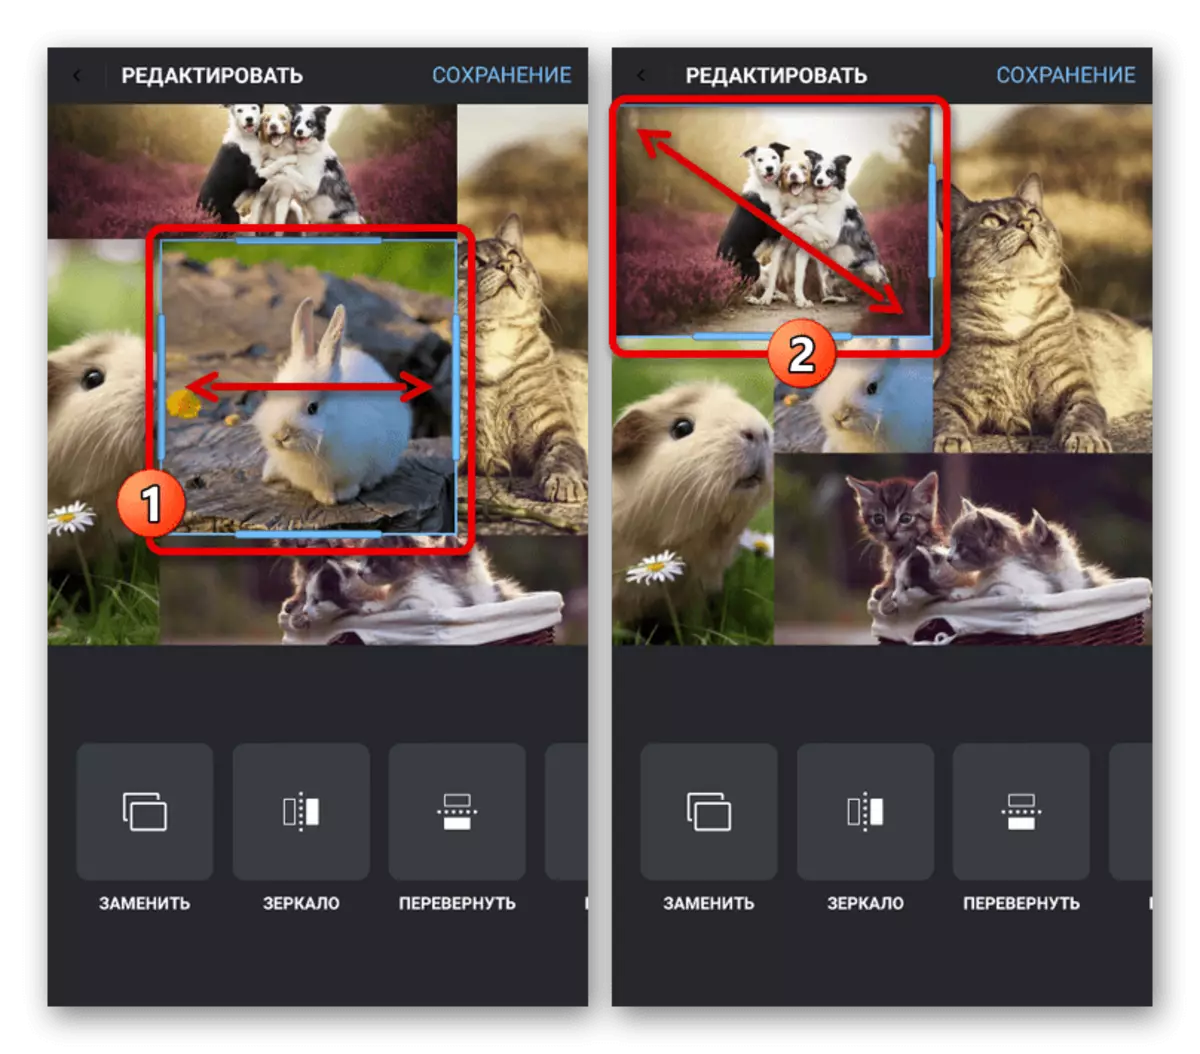
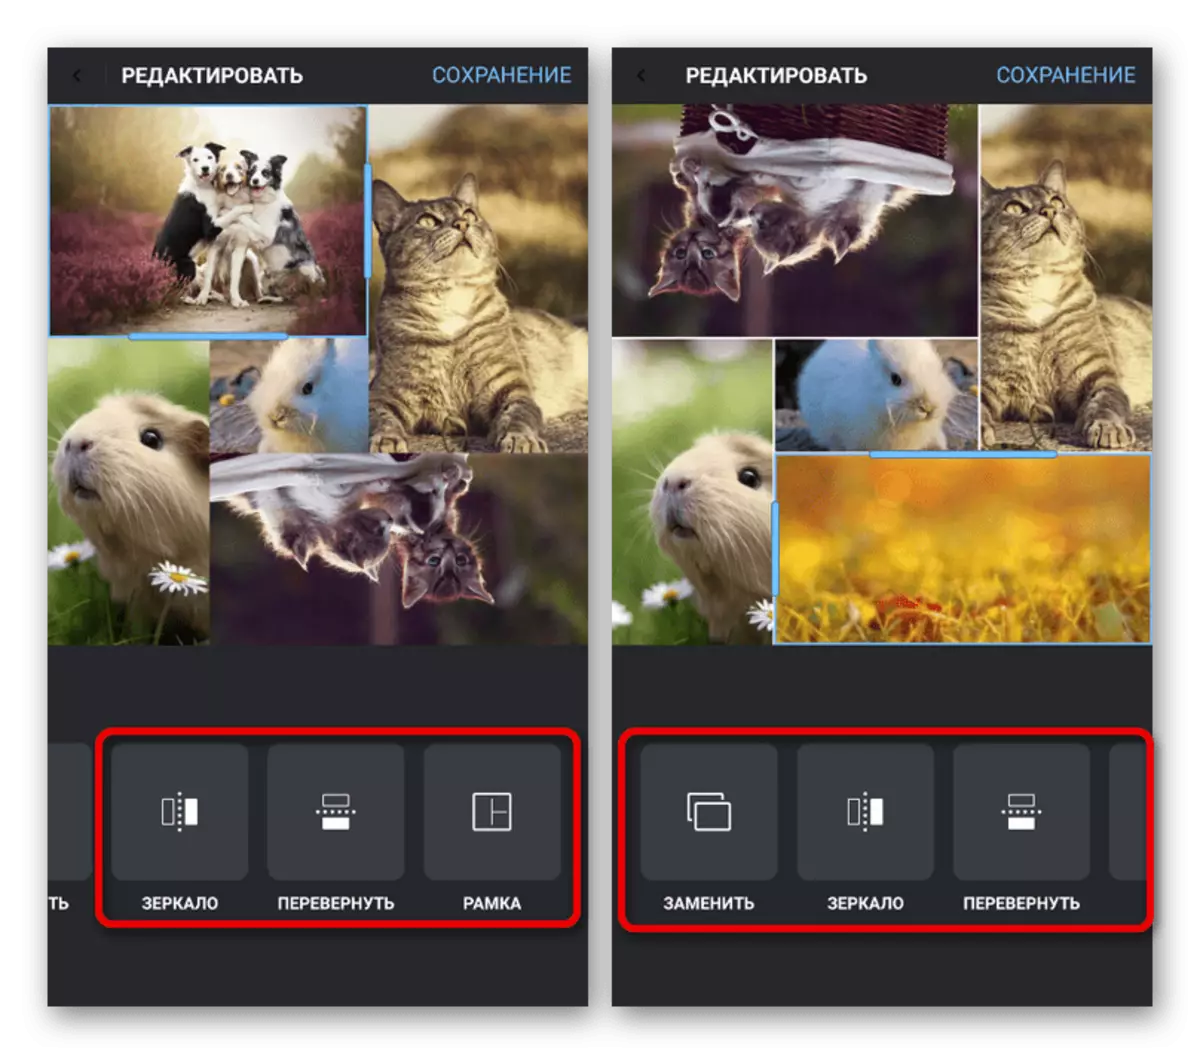
Each selected card can be changed using tools on the bottom panel, applying to replacement, culmination, turning, etc. The most interesting here is the "Frame", as it creates visible divisions between the photo.
- For a more beautiful composition, you can drag and scale the frames, again, with a long touch. When the work is completed, click the "Saving" button on the top panel and select "Instagram".
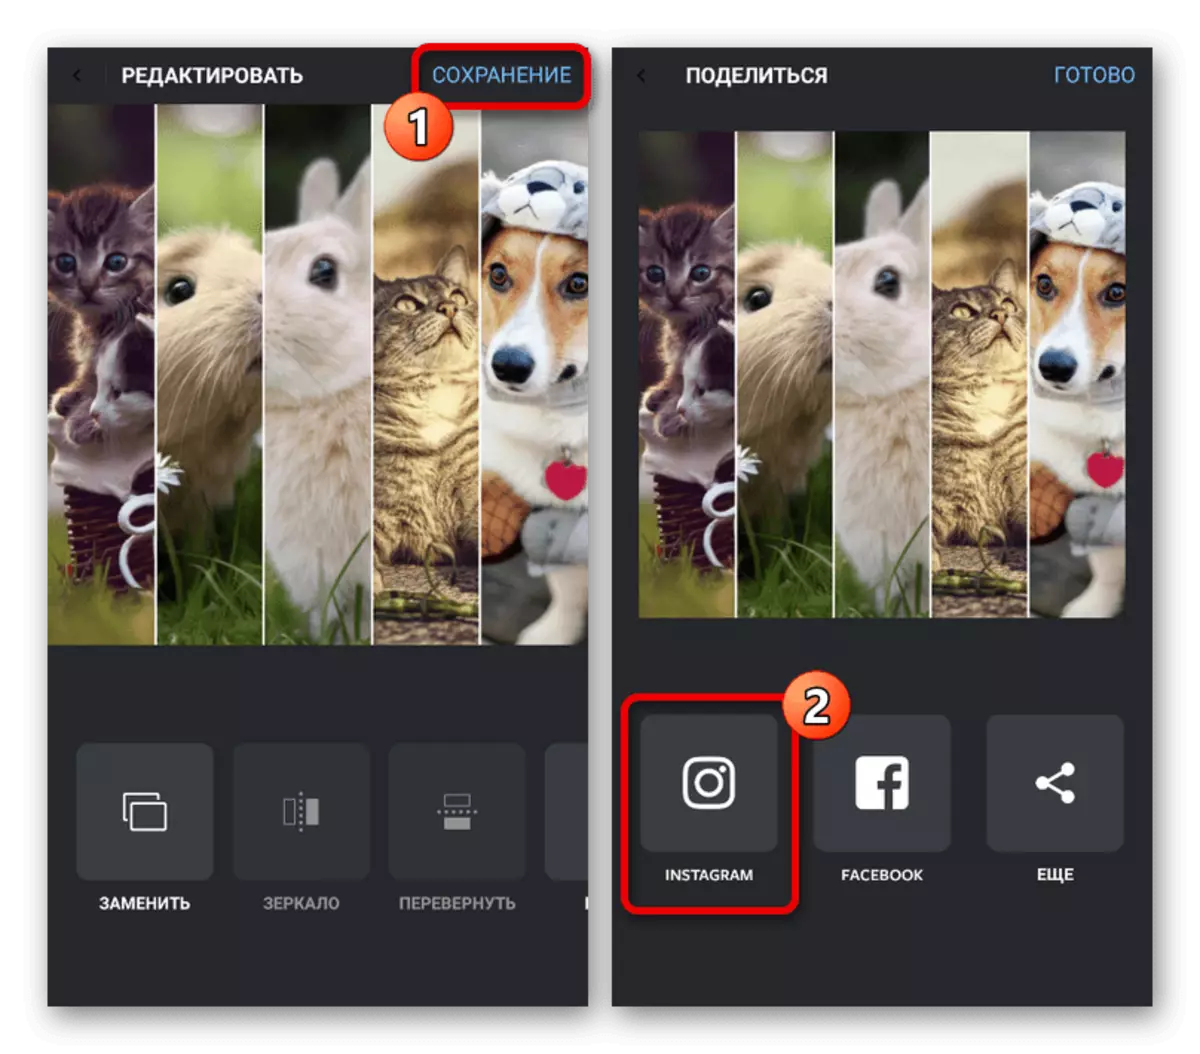
From the available publishing methods, you must specify "Story". As a result, there will be an automatic opening of the official client Instagram with the addition of just prepared content.
As you can see, the story itself is not stretched to the full screen, which can sometimes be a problem, but the scaling is still available. This aspect can hardly be considered a minus, since there are no paid features and advertisements.