Diagnose the reason why the keyboard does not work on a laptop is not only possible by analyzing the events preceding the problem, as well as compliance with all recommendations. As in other similar situations, the problem can wear a software and hardware, as well as to be unpropered, because of which it will not be possible to detect it without a personal inspection. We will analyze the main problems faced by the owners of laptops, and ways to solve them.
Starting a virtual keyboard to perform some methods
Since some methods that we will consider may require text input, you will need to use a virtual keyboard - an application pre-installed in Windows. In most ways it is not necessary to do this, because it is almost always necessary to make a mouse and copying text (for example, commands) through its right button. However, still, as a temporary replacement of the non-working physical keyboard, we suggest using its virtual option. About how it can be done, find out from the following article.Read more: Run a virtual keyboard on a laptop with Windows 10
Method 1: Windows 10 settings
In the "dozen", there are literally two settings that can affect the performance of a laptop physical keyboard.
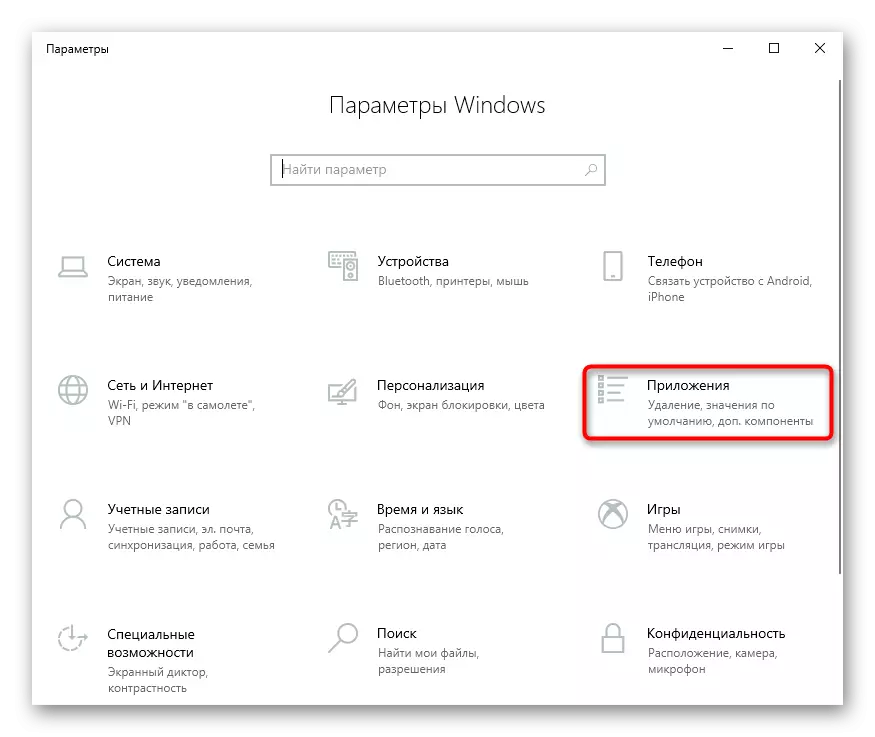
- They both are in the "Parameters" application, which must be called through the "Start".
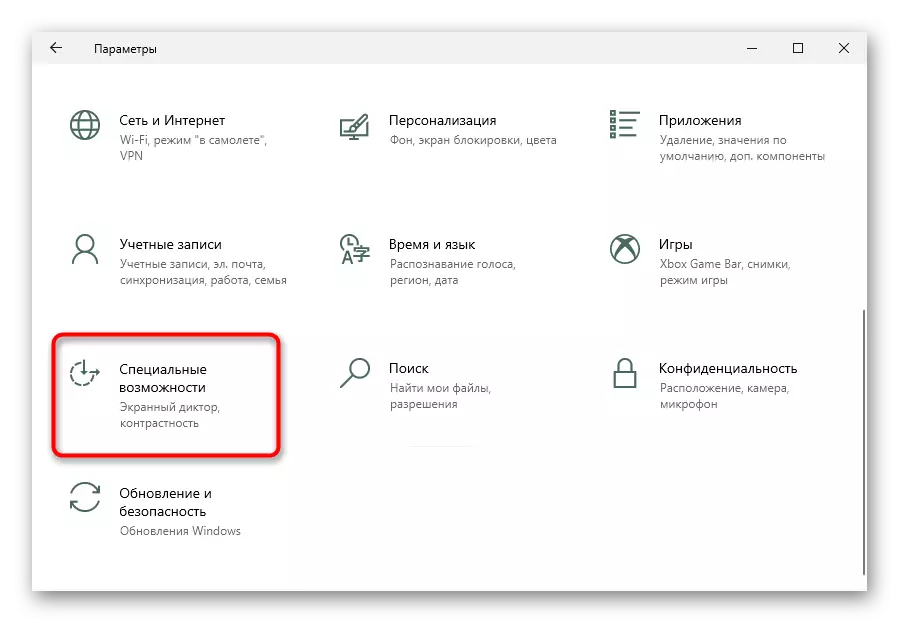
- First go to the section "Special Features".
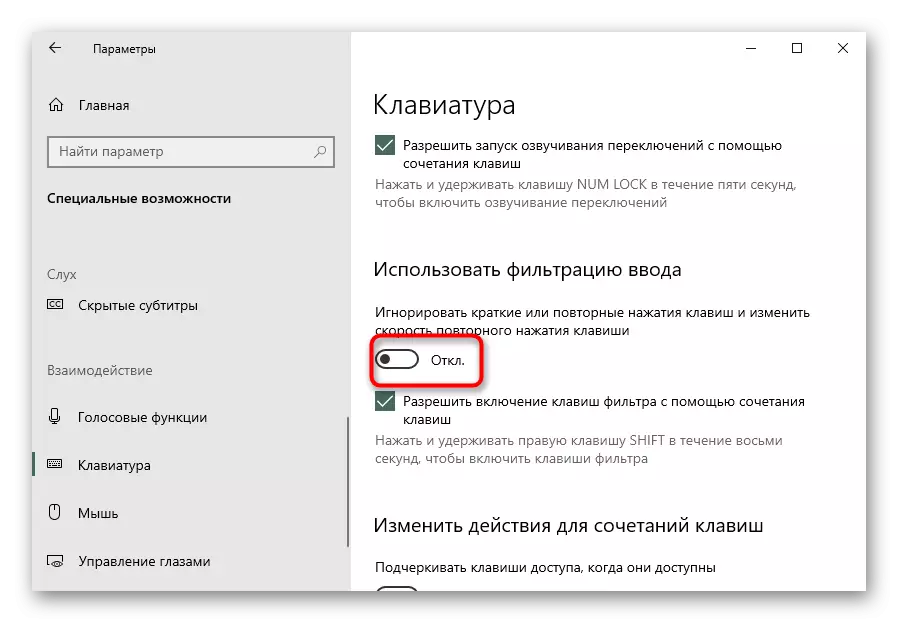
- Through the left panel, find the "Keyboard" item and in the central part of the window, see the status of the first parameter - "Use the device without a regular keyboard". If its value "On", change to "Off" And go to any application that supports a text set to check whether the problem has been fixed.
- The second parameter that needs to be checked is also here. Scroll down to the "Use Input Filter" block. Change the current value to the opposite and check again whether the keyboard has earned.


Method 2: Forced launch of the CTFMON process
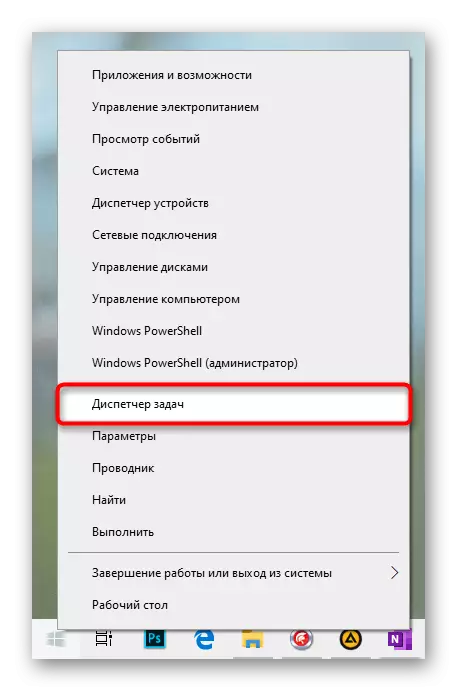
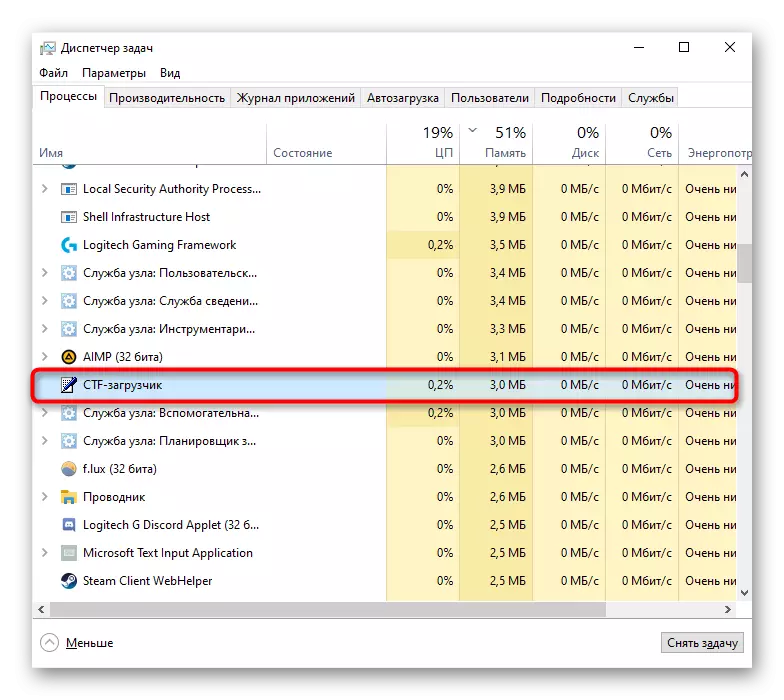
When the keyboard runs normally in Windows (in text editors, messengers) and in the BIOS, but does not respond to the password input attempts on the input screen, when typing in the search and applications from the Microsoft Store, with a greater share of the probability, you can sin the CTFMON.exe process which does not start with the operating system. This can be changed in a simple way - by adding the corresponding parameter to the registry. However, first you should make sure that you really have something to correct. To do this, launch the "Task Manager" by pressing the right mouse button on the Start button.
Look there the "CTF-boot" process there.
If it is really missing, do the following:
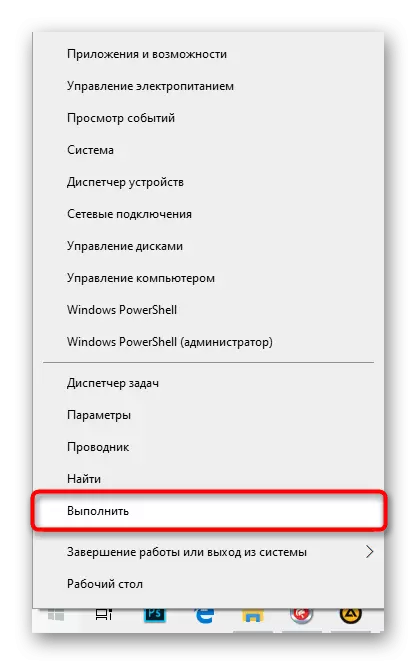
- Click PCM on "Start" and this time select "Run".
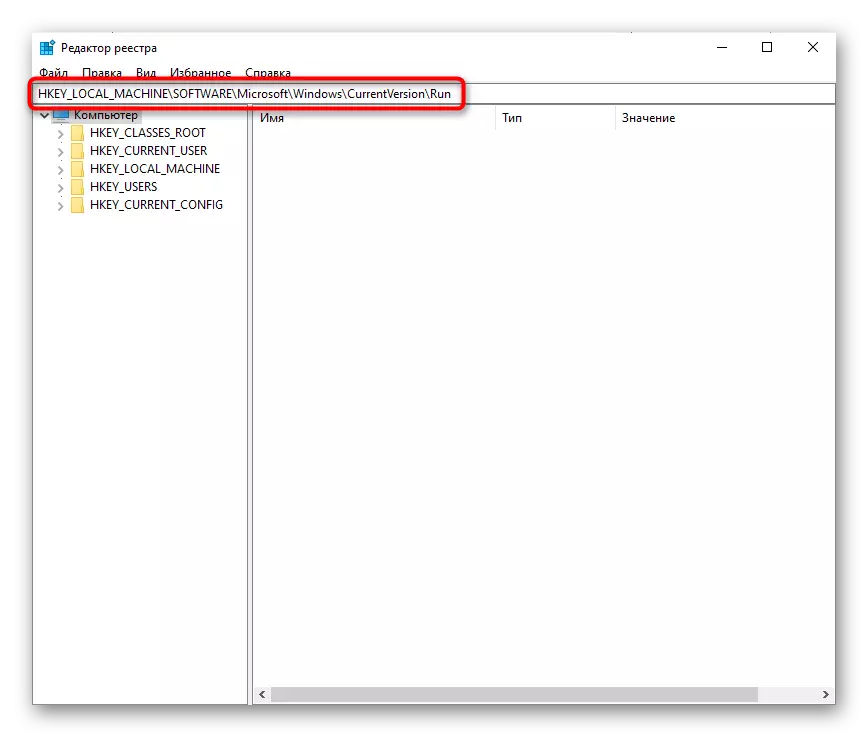
- Write a REGEDIT (or copy this command from here and paste it), then click "OK".
- Go along the path HKEY_LOCAL_MACHINE \ Software \ Microsoft \ Windows \ CurrentVersion \ Run or copy it and insert it into the address bar, first clearing it. To go to the address, use ENTER on the running virtual keyboard.
- Add a keyboard startup process to autoload, clicking on the PCM on an empty place in the central part of the window and selecting "Create"> "String Parameter".
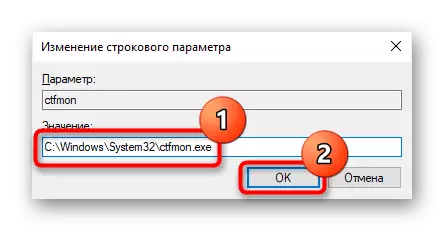
- Set the name "CTFMON", after copying this word or typing on the virtual keyboard. After that, click on the renamed left mouse button twice to open properties. In the "Value" field, add "C: \ Windows \ System32 \ Ctfmon.exe" and click "OK".


Additionally, we advise you to check for the task in the "job scheduler".
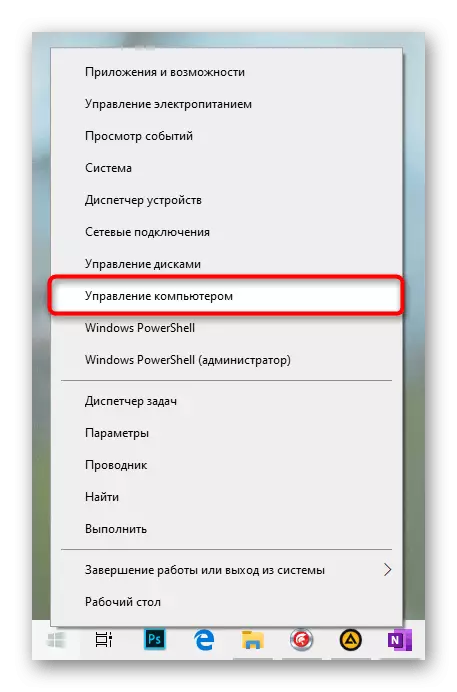
- Right-click on "Start" and go to "Computer Management".
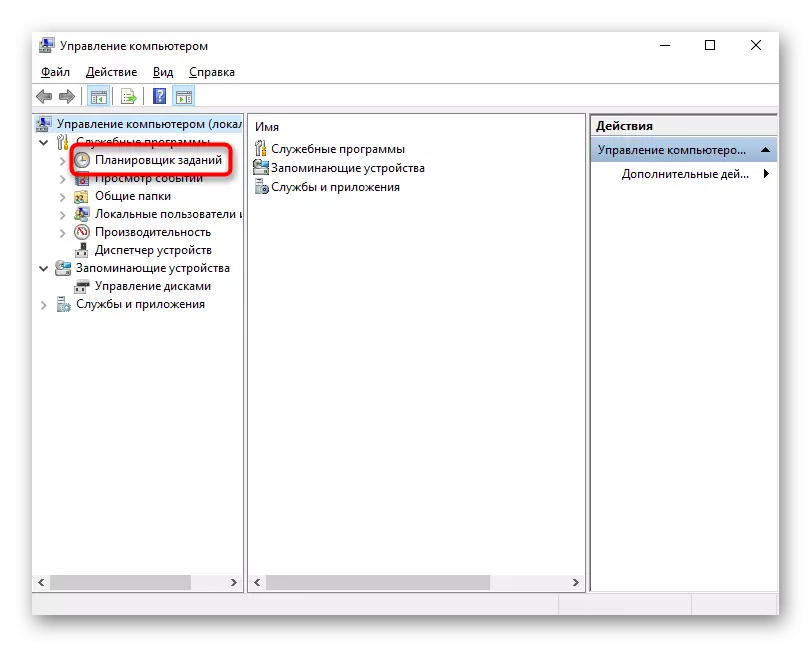
- From the list left you need to get to the "job scheduler".
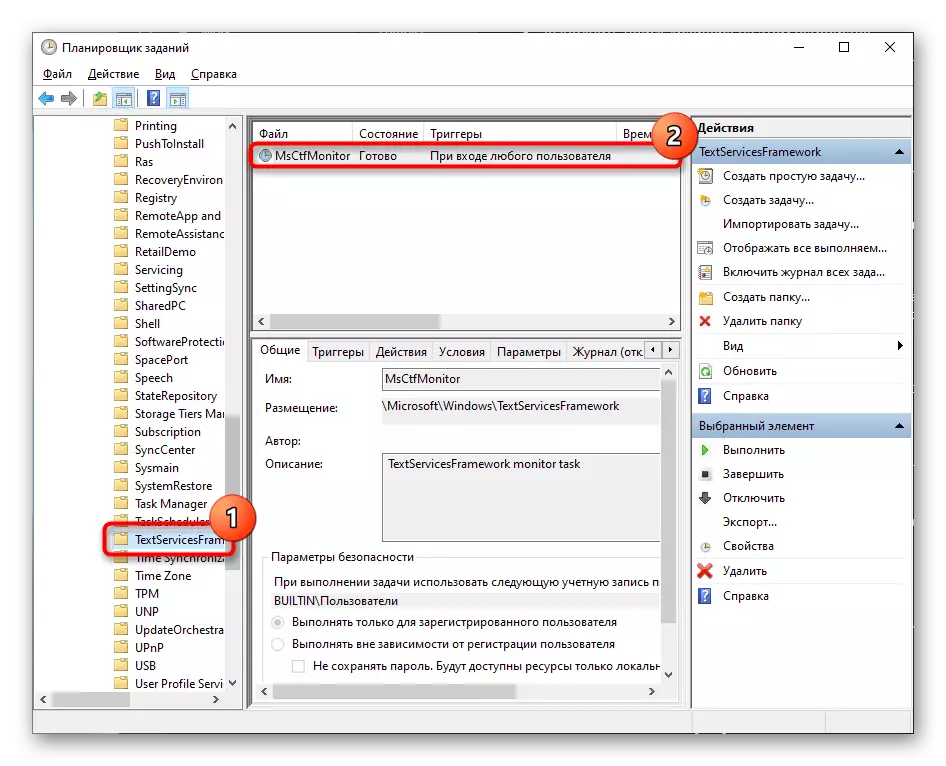
- Again, through the left side alternately, expand the Planner Library> "Microsoft"> Windows> "TextServicesFramework". In the central part of the window, see whether the MSCTFMONITOR task is running.
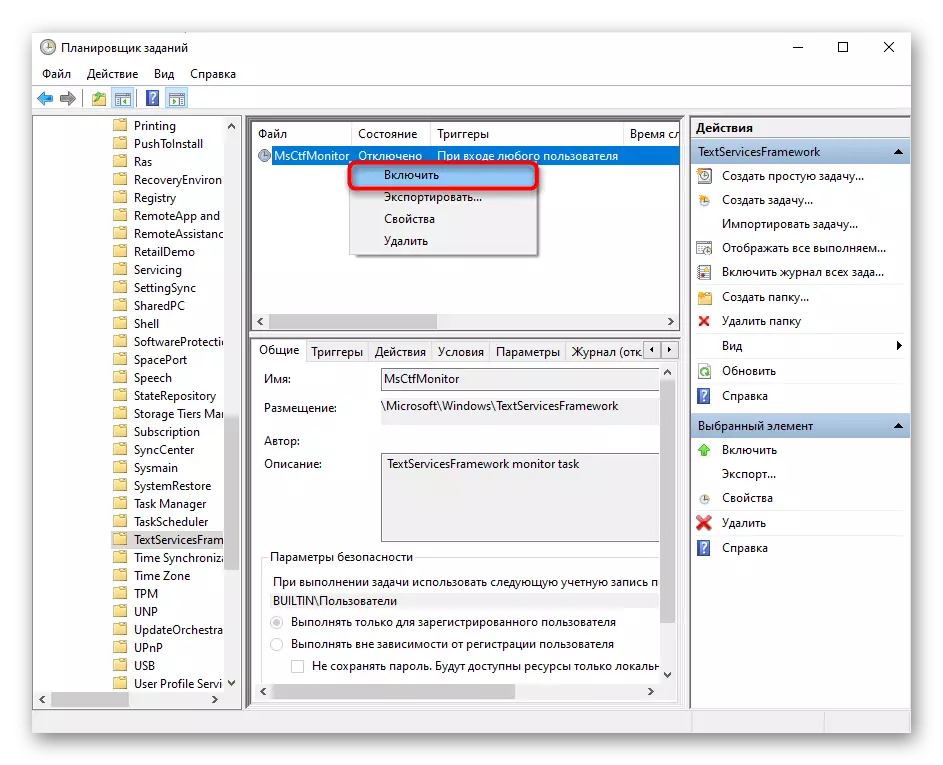
- If not, click the right mouse button, call the context menu and turn it on.
- Restart the computer and check the functionality of the keyboard.
Method 3: Disable fast launch
The fast launch function is definitely very convenient, however, the consequence of its inclusion may occur different kinds of errors. Most often, they meet just on laptops, mainly for the reason that the power acceleration technology saves the Windows kernel and drivers to the hibernation file, respectively, the next time you start the PC does not create a completely new session. Accordingly, it makes sense to disable the acceleration of the OS start and check whether it affected the keyboard failure.
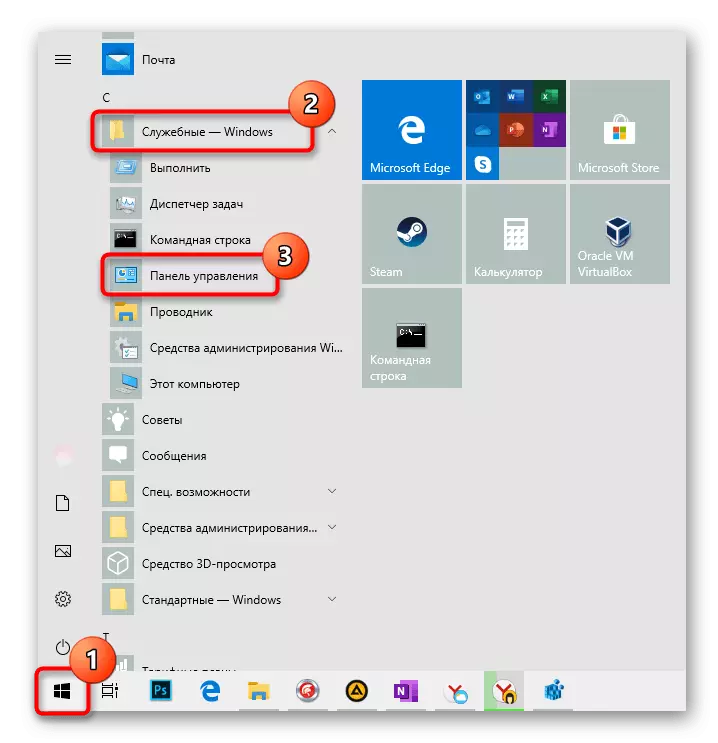
- Open the "Start", find the "Own-Windows" folder and expand it. From the results, select "Control Panel".
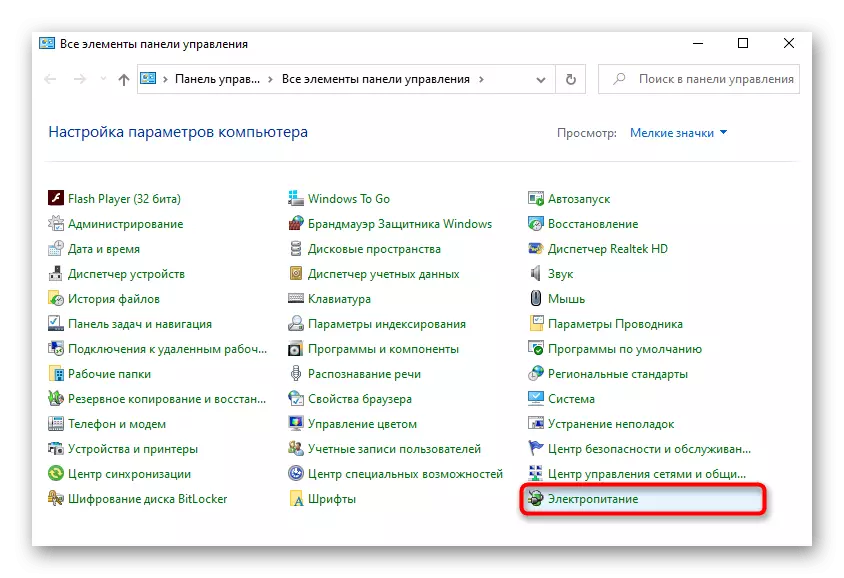
- Find the "Power" section and go to it.
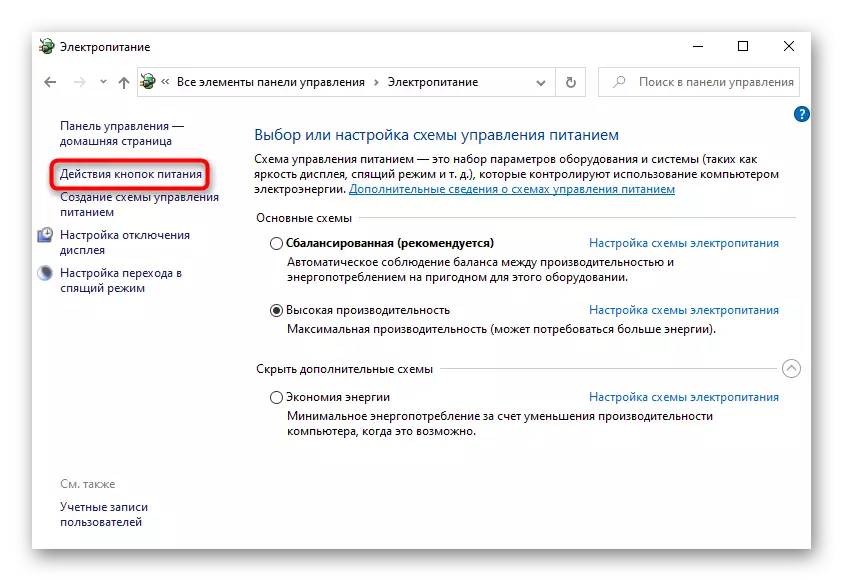
- On the left pane, click on the "Actions of the power buttons" item.
- So far, disabling the desired item is prohibited, so first click on the "Changing parameters that are not available now".
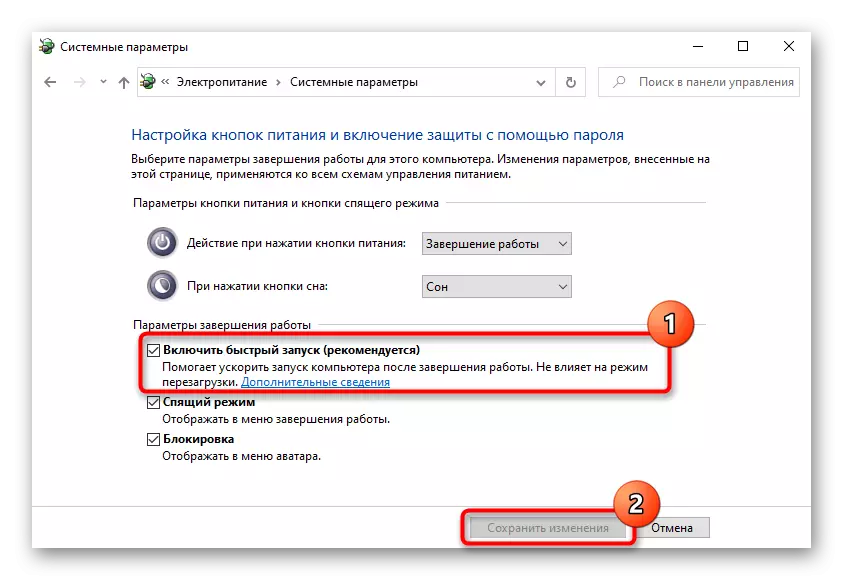
- Remove the checkbox with "Enable quick start (recommended)". Pay attention to the signature that reports that it does not affect the reboot mode, and only on the inclusion of a laptop from zero.
- Turn off and turn on, and do not restart the laptop. If it turns out not in this, you can activate a quick start.

Method 4: Troubleshooting Drivers
Quite often, the problem happens as a result of OS and Iron conflicts, an incorrectly carried out update or an incorrectly selected driver. Usually, the user does not install a similar driver independently - it makes either Windows automatically, loading the desired software from own repository, or the installer program-all drivers for PC (such as Driverpack Solution). If the first case practically excludes some failures, the second, on the contrary, increases their chance. You can check their presence through the Device Manager.Reinstalling the problematic keyboard driver
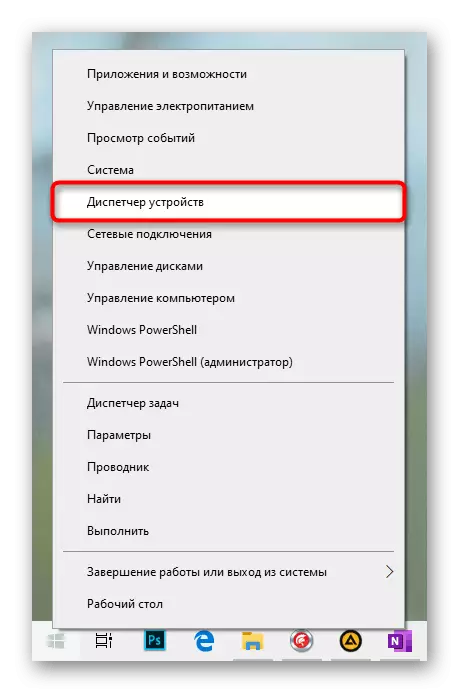
- PCM on "Start" will cause an alternative menu from which you should go to "Device Manager".
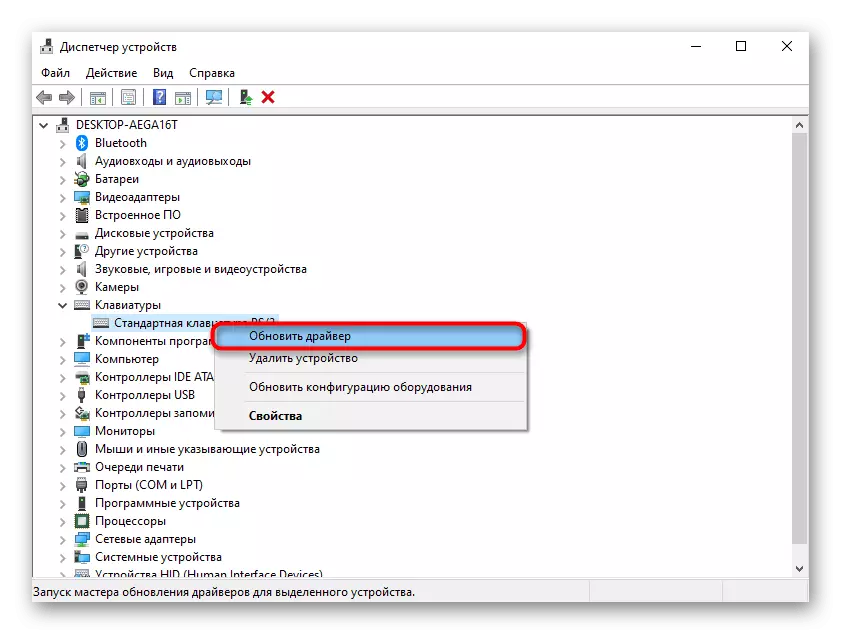
- Expand the category "Keyboards". Browse the lists for the presence of positions with warnings in the form of an icon with a yellow triangle and an exclamation mark in it (sometimes the icon can be red with a cross). If not, select the "Standard Keyboard PS / 2" item.
- If the device with the notification will be detected, try installing the driver for it manually - it is possible, it is absent at all. To do this, right-click and select Refresh Driver.
- From the proposed options, use "Automatic search for updated drivers".
- Wait for the procedure.
- According to its results, software can both be established and not. In the first case, it is enough to send a PC to a reboot, and in the second you will receive a message that the latest version has already been installed.
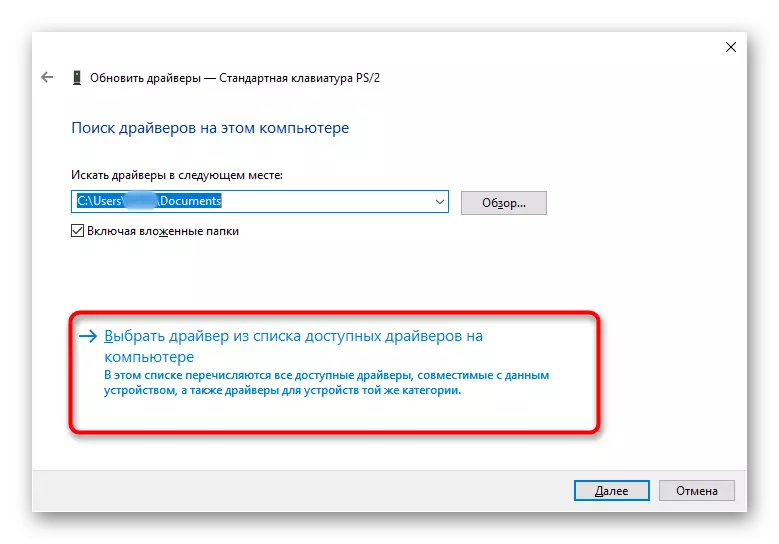
- In the absence of an automatic update, try installing a driver that is already on the laptop, re-release. To do this, in the same driver update window, instead of an automatic option, select "Find drivers on this computer".
- Now click on "Select a driver from the list of available drivers on the computer" without changing the path to search it.
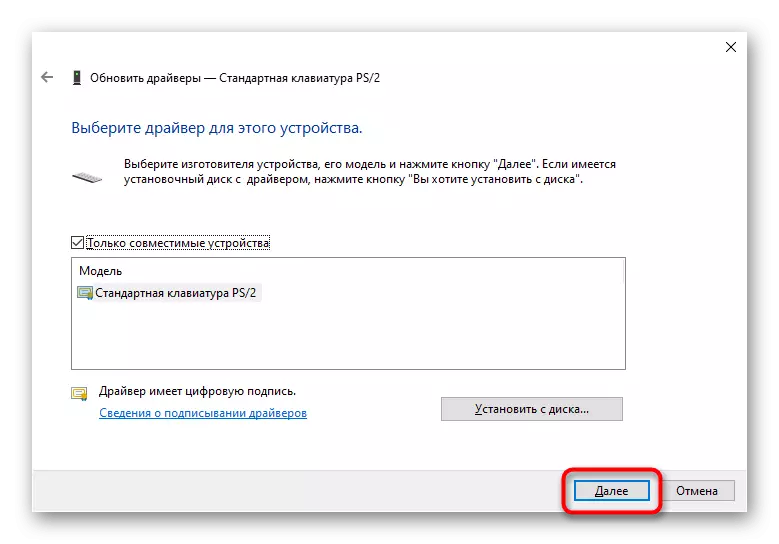
- Ideally, you will see only one line that will be called "Standard Keyboard PS / 2". If the lines are somewhat, highlight the mouse clicks mentioned and go "Next".
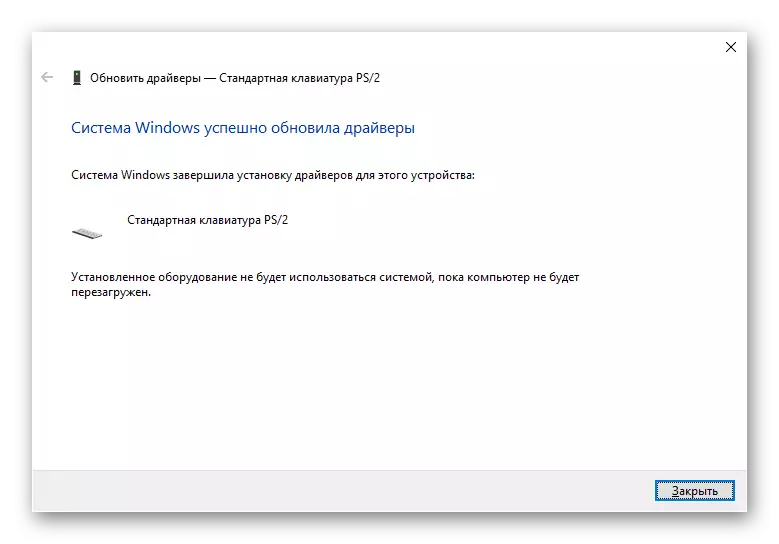
- After a short installation, you will receive a notification of the successful completion of the procedure. It will remain close all windows, restart the device to apply changes.


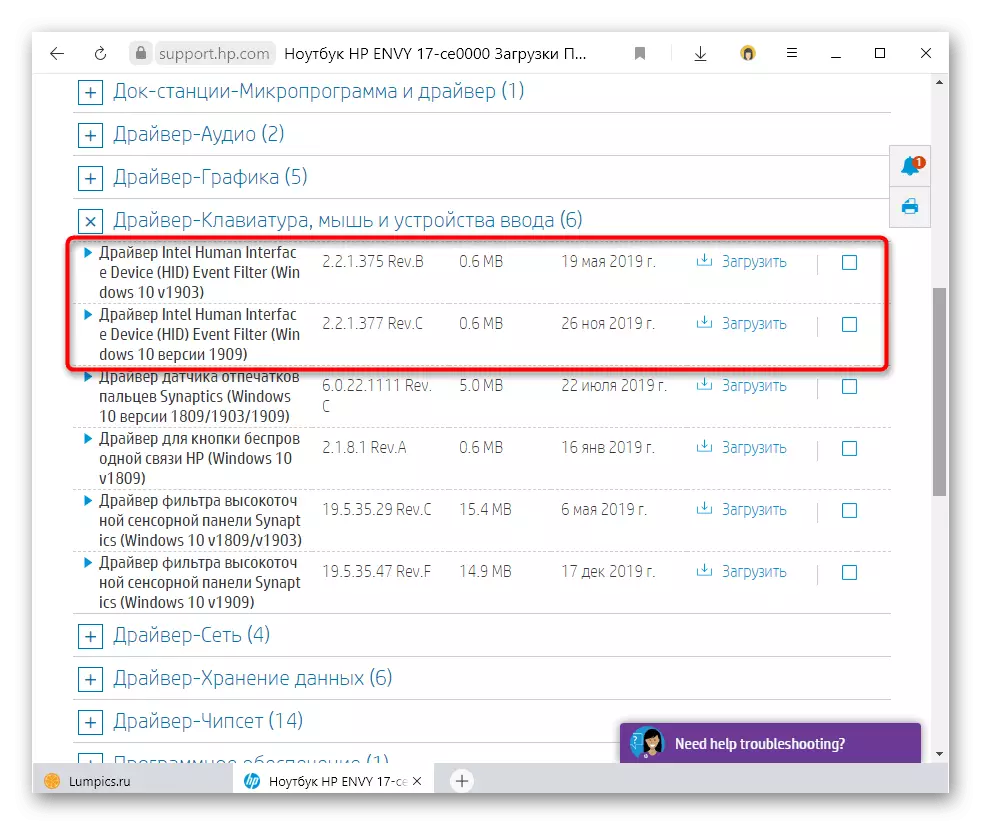
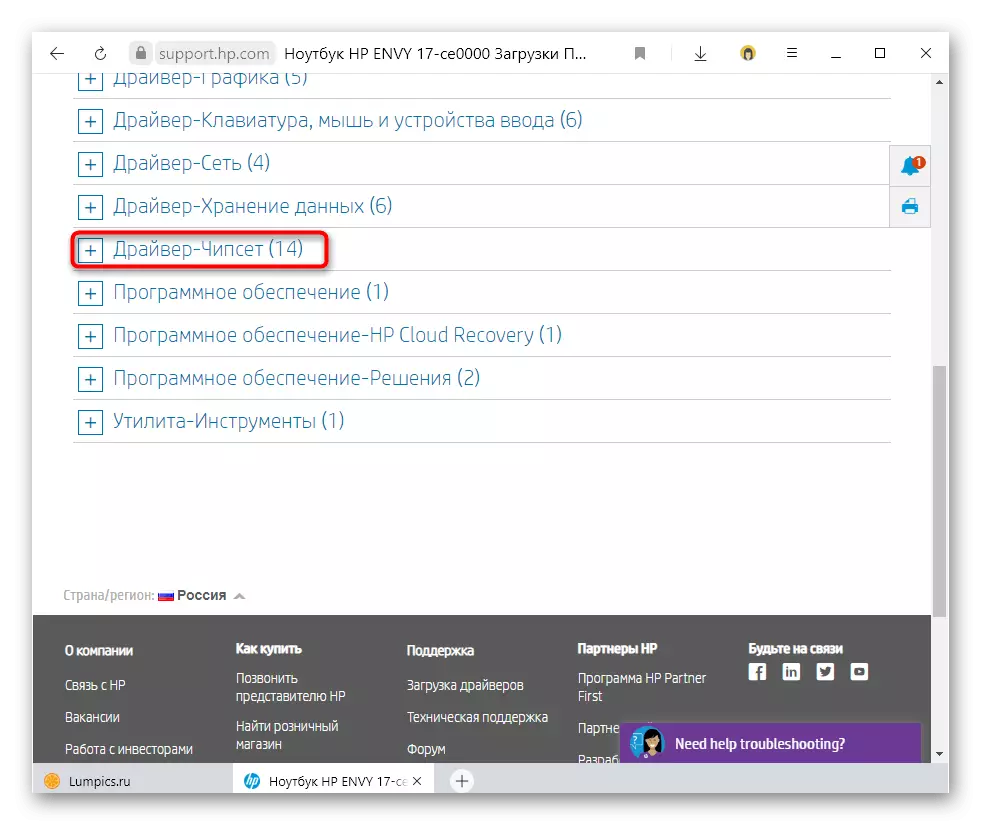
However, you can update the driver not only: for this there is also an update of the system (we will tell about it in one of the following ways), as well as access to the official site of the laptop manufacturer. There you need to go to the technical support section, which may be called a "support", "downloads" or something like that. For example, on the HP website there is a "Driver-keyboard, mouse and input device" tab, where the user is offered to download two drivers for HID devices. On the websites of other companies, this tab is another, for example, "Other".
Delete keypad driver
Some users helps a simple removal of the driver, without reinstalling (for someone, even deleting the touchpad driver, but this is a single recommendation, be careful).
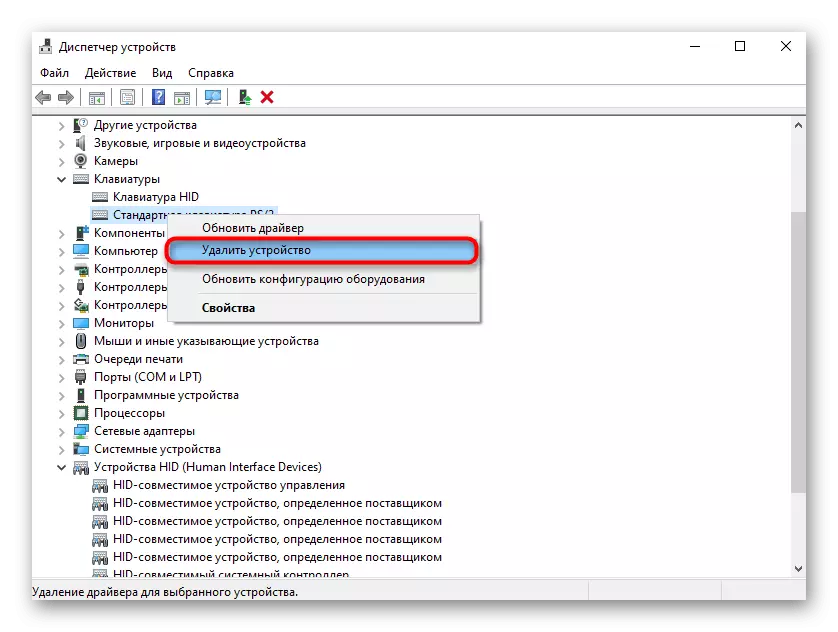
- This procedure can also be performed through the Device Manager, but this time choosing the Delete Device item.
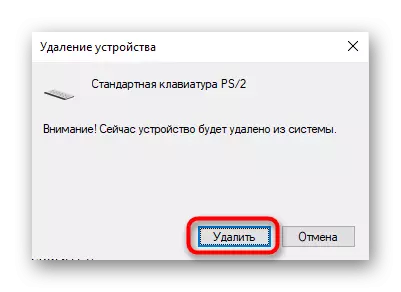
- Put a check mark in a warning window if it is, and click "Delete".
- Restart the laptop.
Delete driver ELAN.
Users whose laptops are installed by ELAN drivers, more than once experienced problems with the work of the keyboard. According to their observations, it helps the removal of this driver, after which the operation of the input device is restored. Uninstall this can be via "Parameters"> Applications. The same is allowed to perform through the already mentioned "Device Manager" in the "HID Devices" section.
Installing the chipset driver
Sometimes the violation of third-party drivers leads to problems with the functioning of the laptop as a whole. They can fail suddenly, but it happens more often after an incorrect installation, as mentioned above, through different drivers. Therefore, it is best to refer to the official site of the manufacturer (see the last item of our instruction above "reinstalling the problem keyboard driver") and find all system drivers there. For an example, at the same HP on the site there is a separate category, from other manufacturers this section should be referred to as well or "chipset".
Prohibition of the installation of Driver
When there is a suspicion that the keyboard stopped working after installing a Windows or system update, you can try to prohibit the automatic driver installation for a specific device. Thanks to this, the OS updates are common or local will bypass the keyboard side. However, it is recommended to perform this method as one of the latter, since such measures are rather radical.
- At first we will need to find out the identifier of the device by which the system determines it. Open the Device Manager, as shown earlier.
- If there is a problem device in the "keyboard" and "HID" sections, most likely it will be the keyboard. Even if it does not have it, the device does not have to look for a long time: it is usually in the first part section and called the "Standard PS / 2 keyboard".
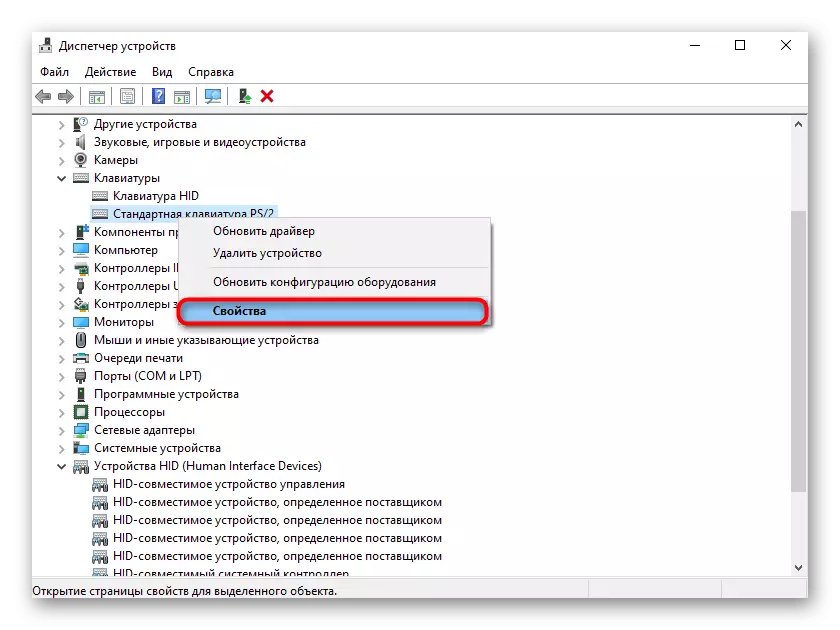
- Go to its "properties" by double click LKM or selecting the corresponding item in the context menu caused by PCM.
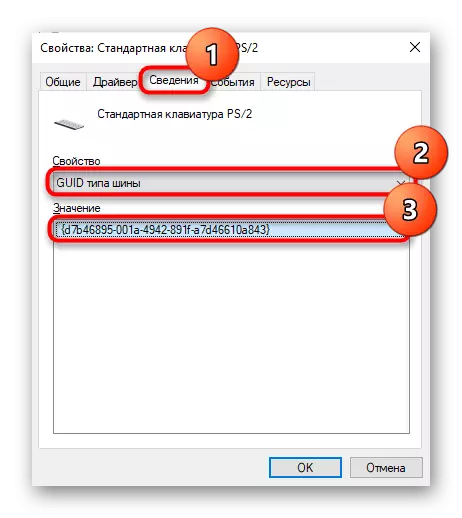
- Switch to the "Details" tab, where from the List "Property" select "GUID Class" or "Tire GUID". In the future, you will need to copy the line from the "Value" field - it can be done by clicking the right mouse button> "Copy". But while this is the window open open and go to the next step.
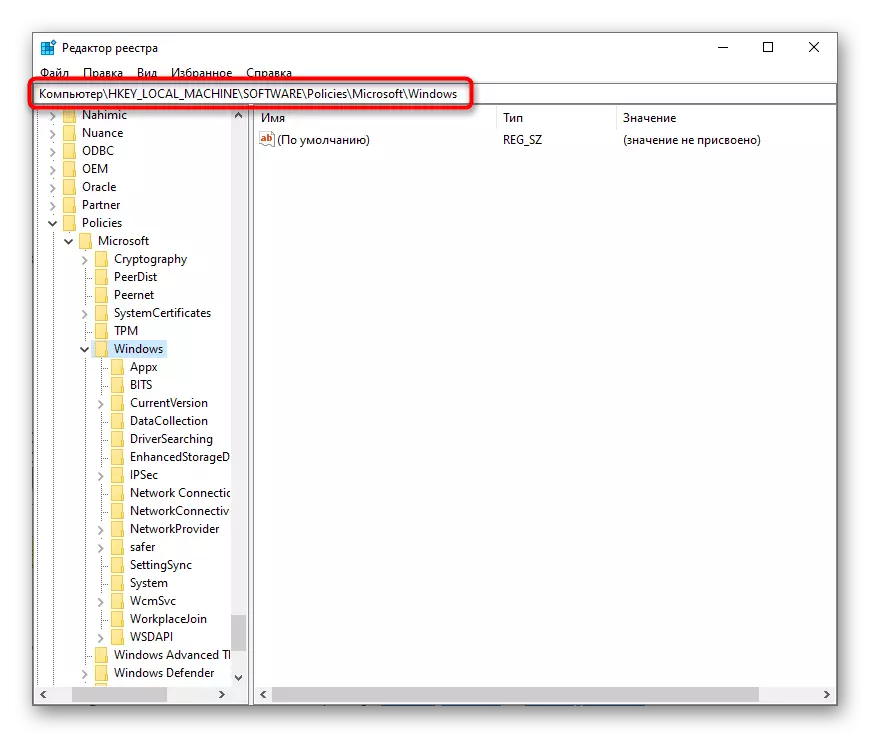
- Run the registry editor. Above, we have already shown how to do it. Go along the path HKEY_LOCAL_MACHINE \ Software \ Policies \ Microsoft \ Windows.
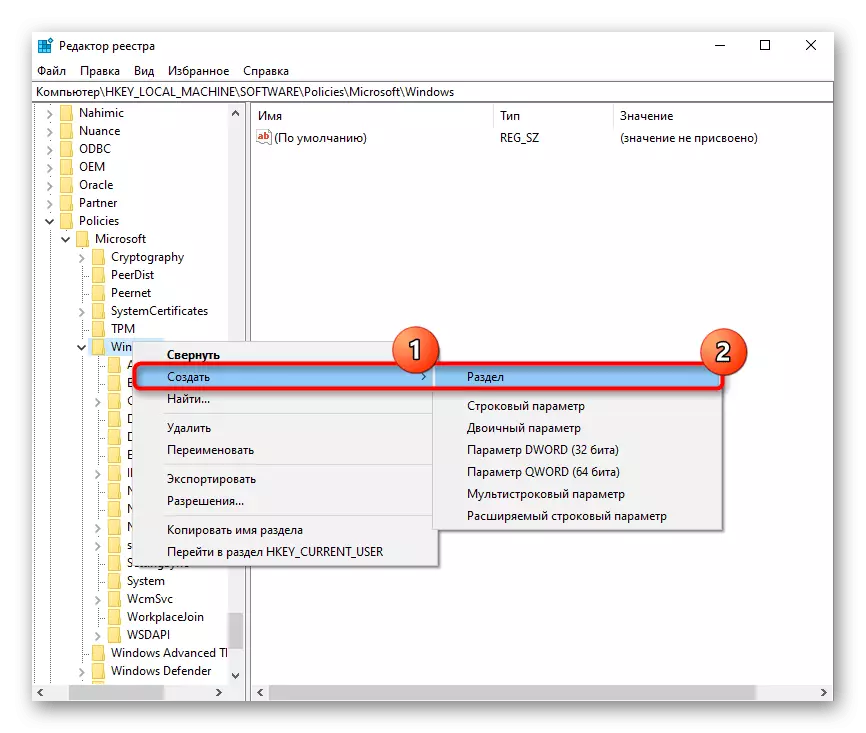
- Press PCM on the Windows folder on the left side of the window and select "Create"> "Section".
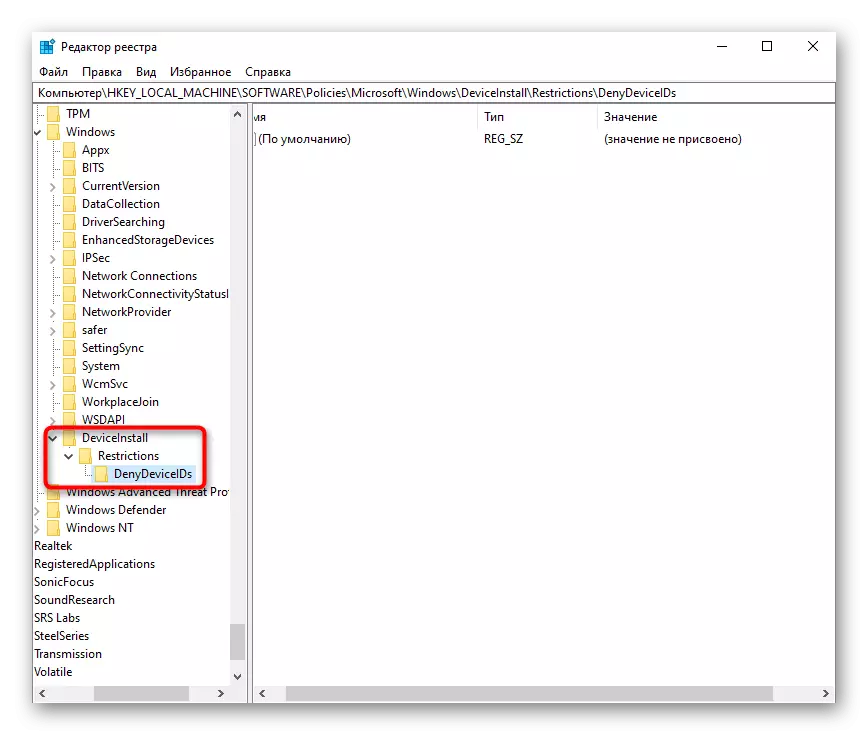
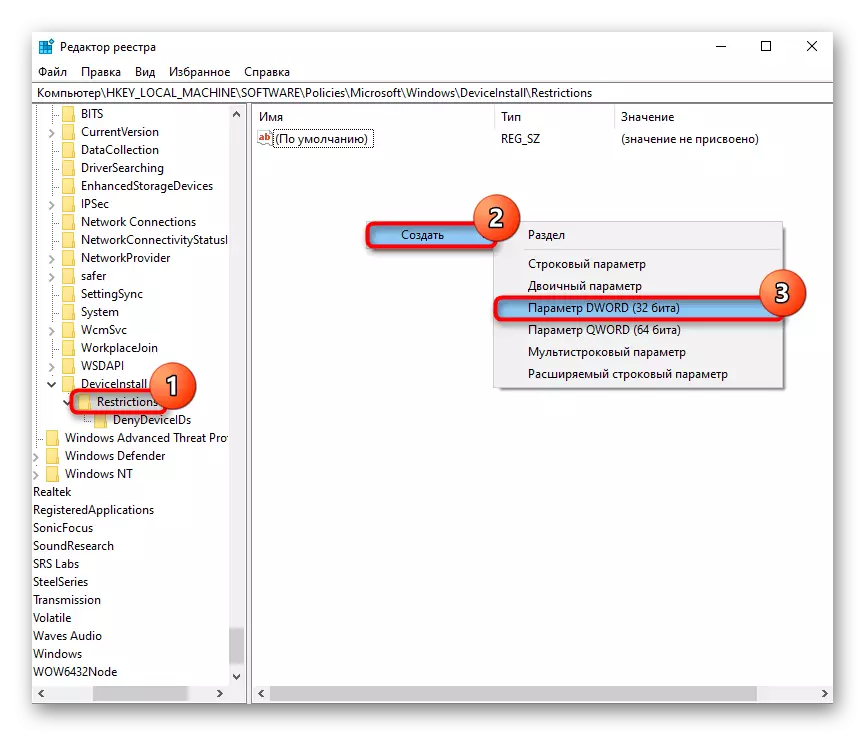
- Specify it with the name "DeviceInstall". Now press the PCM already on it and again create a section called "Restrictions", and within this section - "DenyDeviceIDs". The result should be like the screenshot below.
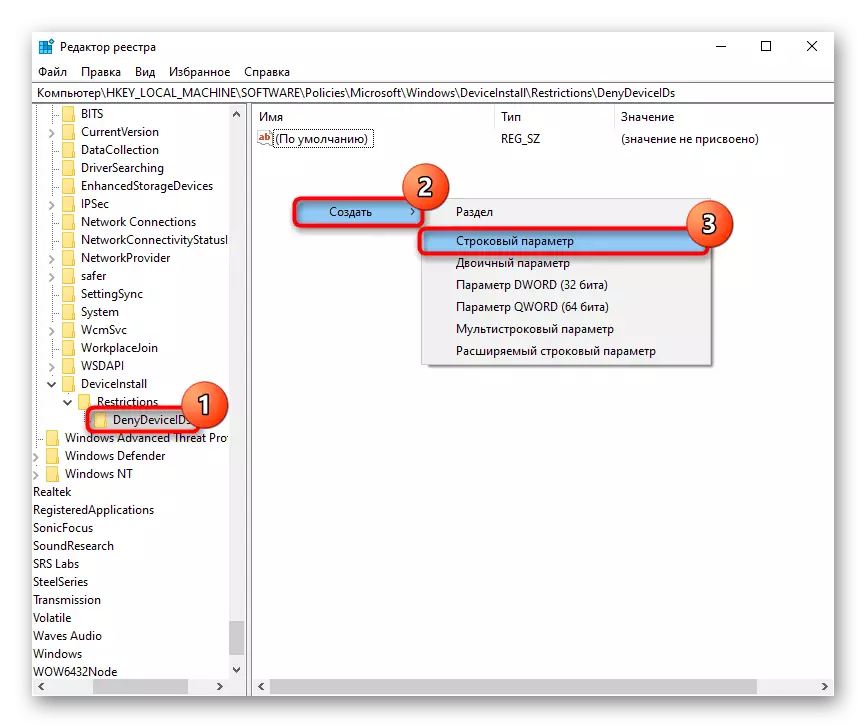
- While in the last created folder, click the right mouse button, call the context menu where you create a "string parameter".
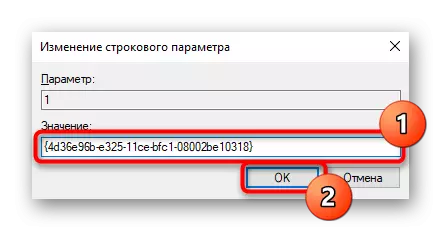
- Ask him the name "1". Open its properties, by pressing the left mouse button twice and insert the "GUID class" / "GUID type" type, which is found in step 3 through the Device Manager.
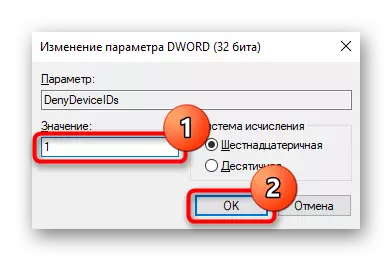
- Switch to "Restrictions", right-click on an empty place in the central part of the window and create "DWORD parameter (32 bits)", which name "DENYDEVICEIDS".
- Click on it with the left mouse button 2 times and in the "Value" field "1".
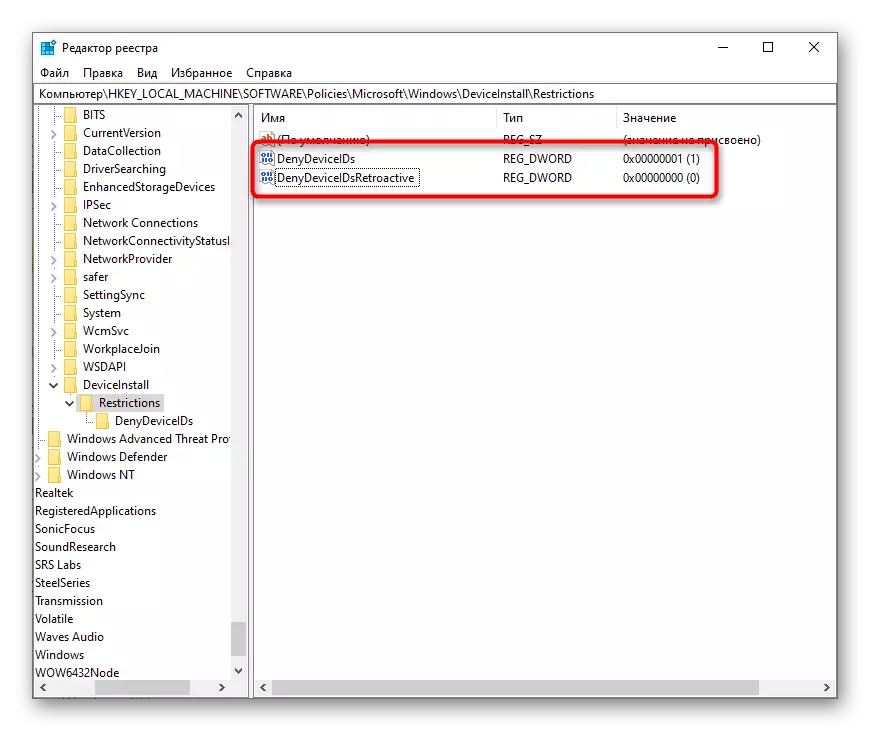
- In the same way, create the "DenyDeviceIsretroactive" parameter. Leave the value for it "0".
- Remove the keyboard driver as it was shown in one of the previous recommendations. Restart the laptop and check whether the keyboard works. If not, go back to the registry editor, in the same place, and delete the "DeviceInstall" folder through the right mouse button. The remaining values are also deleted, and in the future the driver will be able to download again.
Method 5: Check OS for viruses
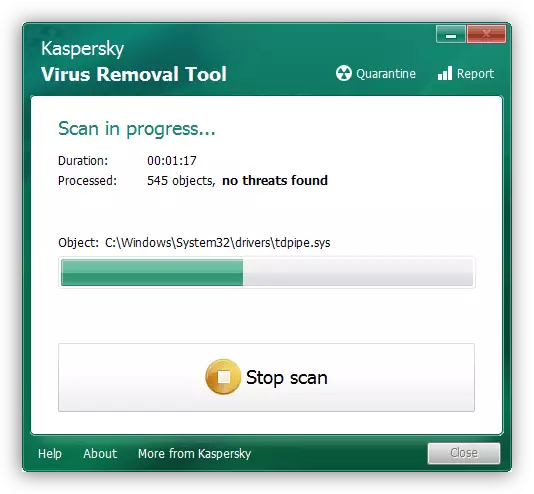
Many users seem to be a banal and generalized recommendation attached to each instruction to solve the problem. However, in this situation, it is really appropriate, as it is known about the presence of malicious software that blocks the keyboard operation, and then the operating system will be scanned for viruses. If you have already installed special software for these purposes, use it. In the absence of this, familiarize yourself with the other of our article, which will help you choose the appropriate protective software option.
Read more: Fighting computer viruses
Method 6: Check the values of the UpperFilters parameter
In the "Registry Editor", about which we have already told earlier, you can see something else, namely the state of the "UpperFilters" parameter. In the course of certain events, it can be lifted, so you should make sure or refute this assumption.
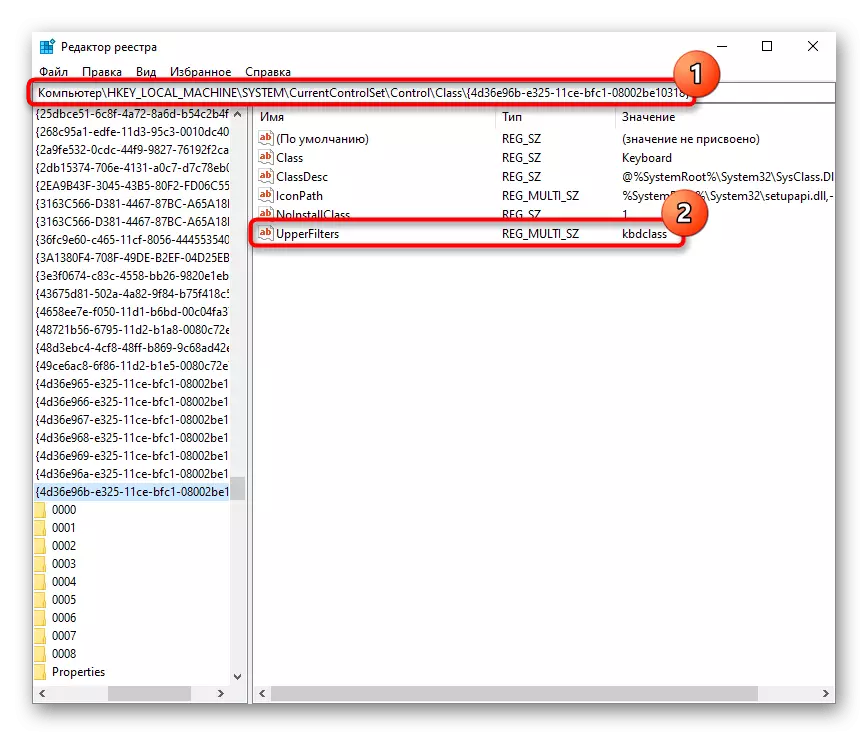
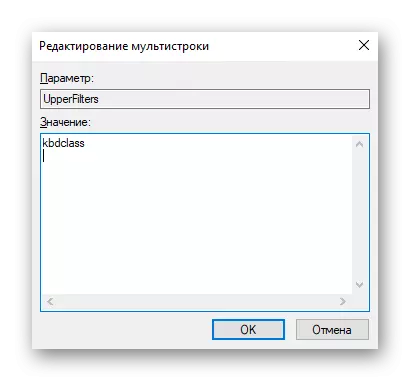
- Open the registry editor, as shown earlier, go along the path HKEY_LOCAL_MACHINE \ SYSTEM \ CURRENTCONTROLSET \ CONTROL \ CRASS \ {4D36E96B-E325-11ce-BFC1-08002BE10318}. Find there the UpperFilters parameter there. It must have the meaning of "KBDCLASS".
- If this is not the case, you manually change it by opening the "properties" of the string and entering there this word through a virtual keyboard or copying and inserting.
There is information that the parameter value knocks down one of the updates of Kaspersky Anti-Virus. If you are installed, and even after the correction, the problem is repeated, set the freshest update or turn it off to the update output. Sometimes there is a problem with different antivirus feature, and is responsible for a safe input from the keyboard. In this case, it is necessary to disable it, without stopping the work of the most protective software.
Method 7: Windows update management
Sometimes users stop working as the keyboard immediately after the installed system update. If you fix this problem, all of the recommendations are not possible, you can roll back the system to the previous state of the computer, restore the system or return the same to the original state.Return to the previous version
Within 10 days after installing the global Windows update, allows its users to return to the previous OS assembly if the current running is unstable. It is no secret that almost all updates of this OS have recently have many bugs and flaws, causing a variety of difficulties from users. Provided that you have just installed a major update changing the version of the system (for example, from 1903 to 1909), and it "broke" the keyboard, roll back. Perhaps very soon the developer will correct some errors, and again it will be possible to upgrade.
You can execute this procedure only if you did not delete the Windows.old folder!
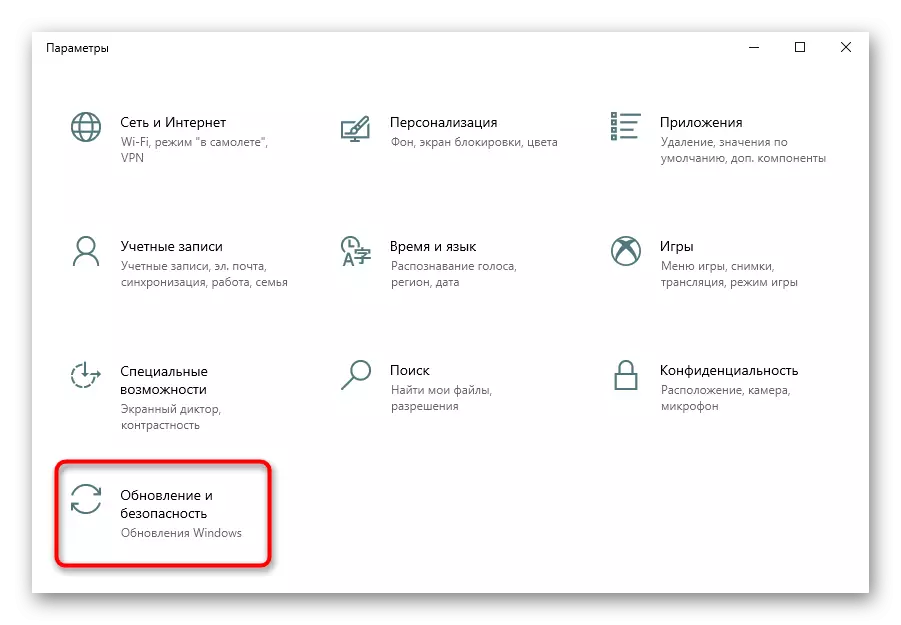
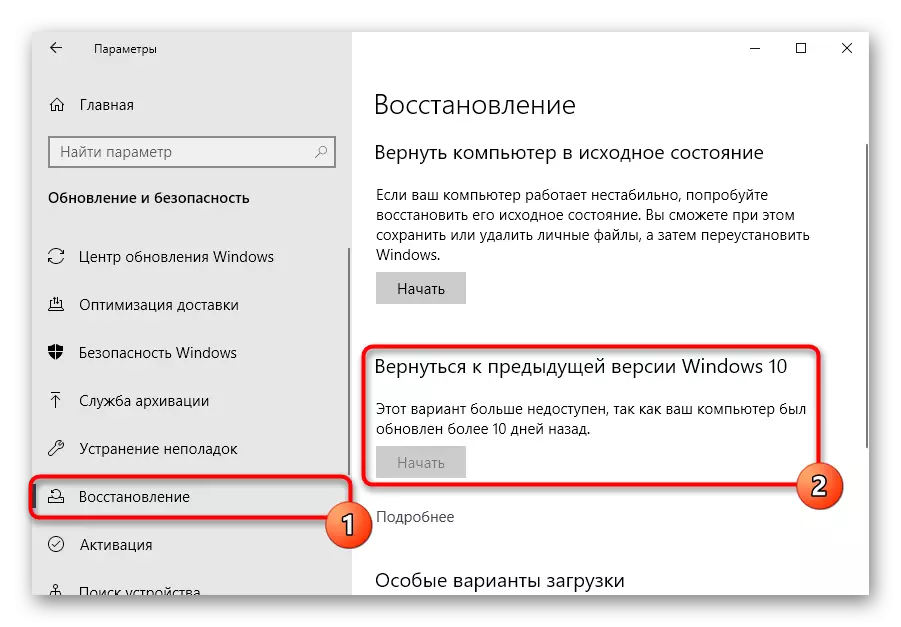
- Go to "Parameters", from there - to "Update and Security".
- Switch to "Restore" and click "Start" in the "Back to the previous version of Windows 10" block.
- Wait for the preparation for further procedure.
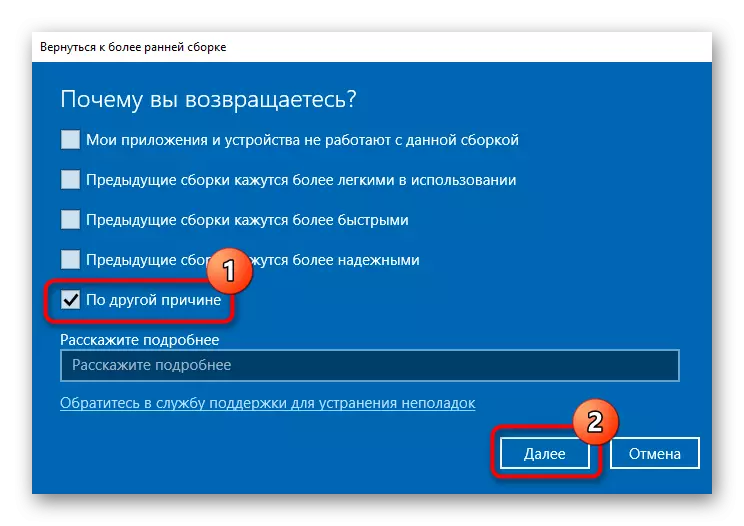
- Choose any reason, preferably specifying real, and go "Next".
- If you decide that the updates are enough with you, refuse to check the updates with the button "No, thank you."
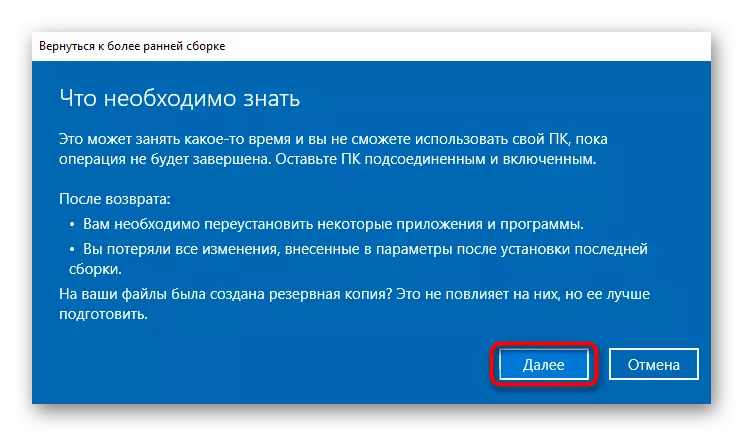
- Check out the information and click "Next".
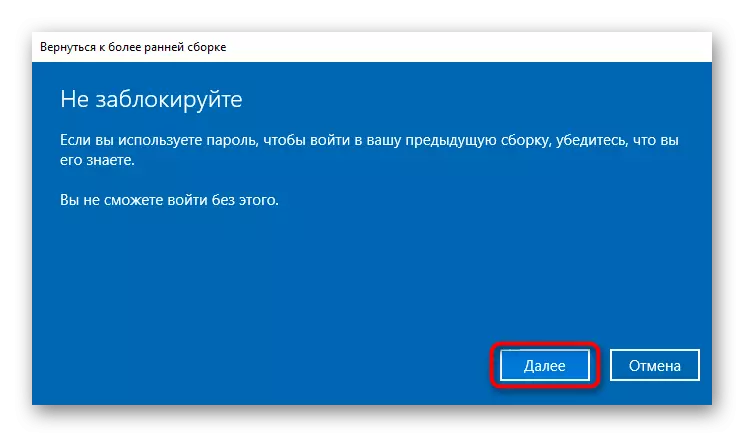
- Make sure the password used (if it is), you remember.
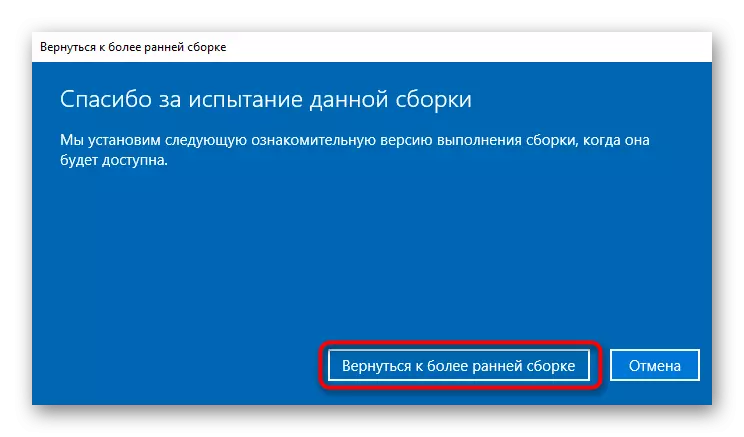
- Navigate to the direct return of the assembly by clicking on "Back to Early Early Assembly".
- Restore will begin, you need to wait for its completion.


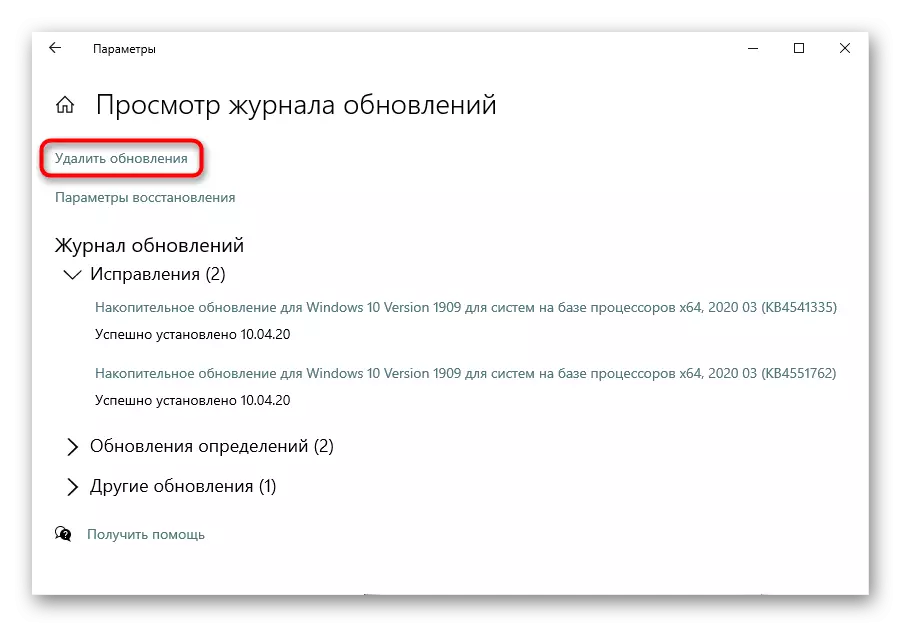
If the update is usual, not very large, delete it manually from the list of updates, using the article according to the following link, namely, 1.
Read more: Delete updates in Windows 10
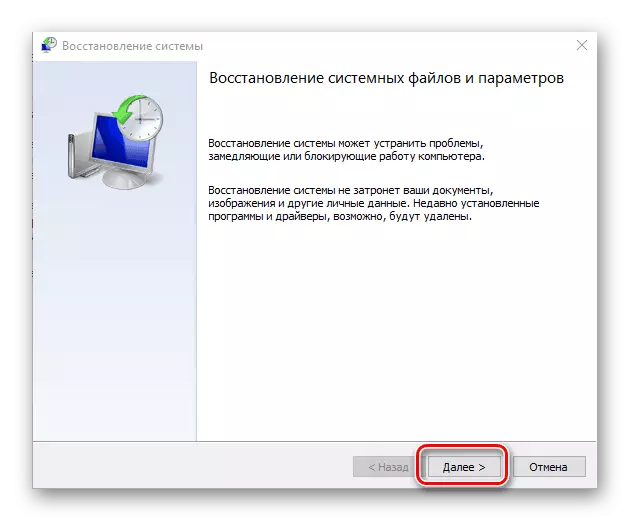
System Restore
The easiest and most often efficient method is the restoration of the system. Many people know how to independently return to the recovery point created earlier, but if you have not yet been able to use such a function, find out how to do it, you can by the following link.
Read more: Rollback to the recovery point in Windows 10
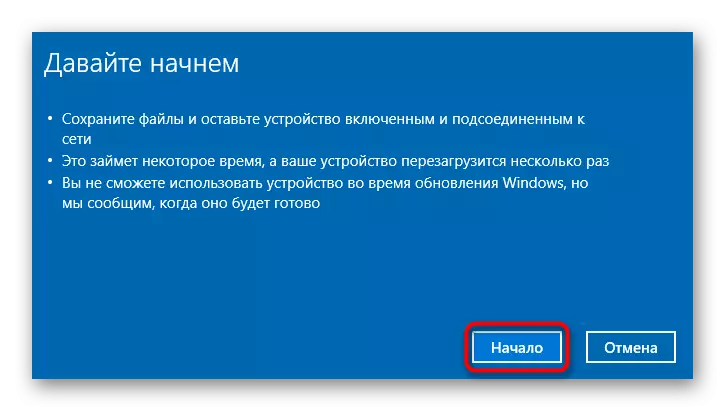
Windows 10 update
Quite often, failures correct not only recovery, but also updates. Before switching to radical measures, erasing Windows files (and not only), set all updates: there is a chance that such a light manipulation will correct all the problems with the performance of the device.
Read more: Installing Windows 10 updates

The initial state
When nothing helps, you can try to return the system to its original state. Not the most pleasant operation, because after that you will have to reinstall some applications and restore different system settings.
Read more: We restore Windows 10 to the original state

Analogue of this opportunity was the return to the factory state, in which the net installation of the system will be carried out, but with the preservation of some user data. The fact that it will be removed and how in principle to fulfill such a reset, we have already talked in the article below. This option with a greater probability can correct software failure, if that is.
Read more: Return Windows 10 to the factory state
Method 8: Physical Repair
Unfortunately, the device is not always possible to repair the software methods: if a physical problem is to blame, it is fixed only by the corresponding measures. When the own knowledge of the equipment is not enough, it will be necessary to contact the service center, where they will help you find a source of problem and eliminate it. For example, if a liquid was spilled on the keyboard, it is quite realistic to damage the chip or a connecting loop, and in more simple cases, it is possible to stick some keys, for example, due to the properties of the liquid (sweet drinks will force the keys to adhere and hard to press, etc.) . Of course, you can always disassemble the laptop to clean it from spilled tea, sodes that fell dust, but there are no guarantees that it will help, but disassembling and assembling a laptop will be valid. Upon reference below, you will find a general leadership regarding the independent parsing of the laptop, but we still advise not to do this without the necessary level of knowledge and confidence in our own actions.
See also: Disassemble the laptop at home
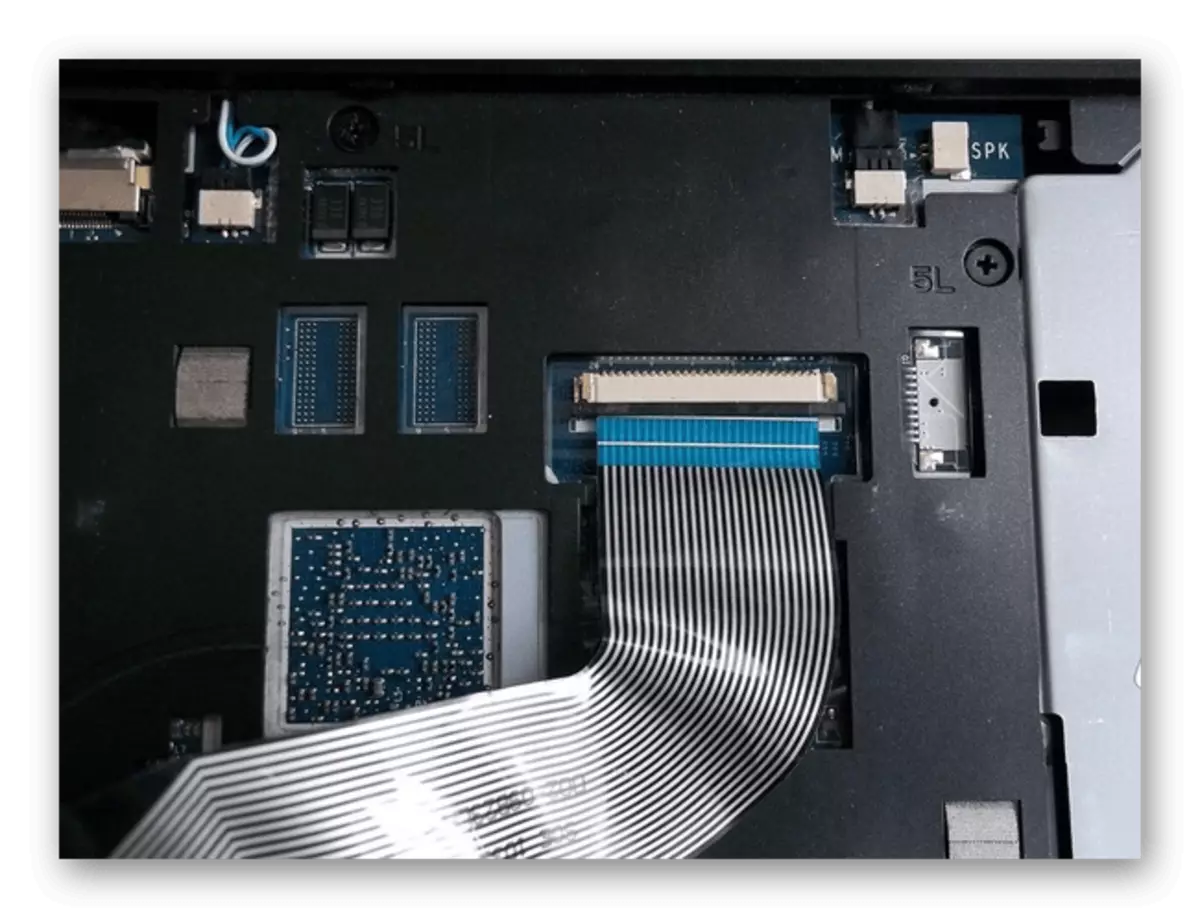
In more sad situations, the train turns out to be not working due to the fact that he was frowning (this happens during the disclosure and closure of the laptop), and the chip, like any electronics, can simply turn an inget. In addition, the loop can simply move away, and then it will be enough to connect it back into the connector so that the keyboard earned again. As you can see, we do not provide any recommendations and correction instructions, since this process depends strictly from the brand and the device model. If you want to try to solve everything yourself, use special videos on YouTube, which will help to disassemble the laptop.
What else can help
Tips that are less likely to be effective, but it is still worth performing them, especially before you see for help from experts:
- If you have a USB keyboard, connect it and try to peak the text. In a situation where the input from the external device is normal, and the built-in laptop does not work, a high probability in the hardware fault of the second one. When the input does not occur with any keyboard, the problem first should be signed in the operating system, since it signals some software failures.
- De-in the laptop, get the battery and wait 15 minutes. After that, insert it back and turn on the laptop. Alternatively, after turning off the device and remove the battery, disconnect the entire connected periphery and clamp the power button for 30 seconds (this will remove the balance of the capacitors), then set the battery back and turn on the device.
- Go to the secure mode and check if the keyboard works there. If so, it means, problems in the operating system, but which one - to be found exclusively to you, based on the recent actions, established by the software and everything that could provoke problems in the work of Laptop.
READ ALSO: Safe Mode in Windows 10
- Unlikely, but can help BIOS reset to default settings.
See also: Resetting BIOS settings
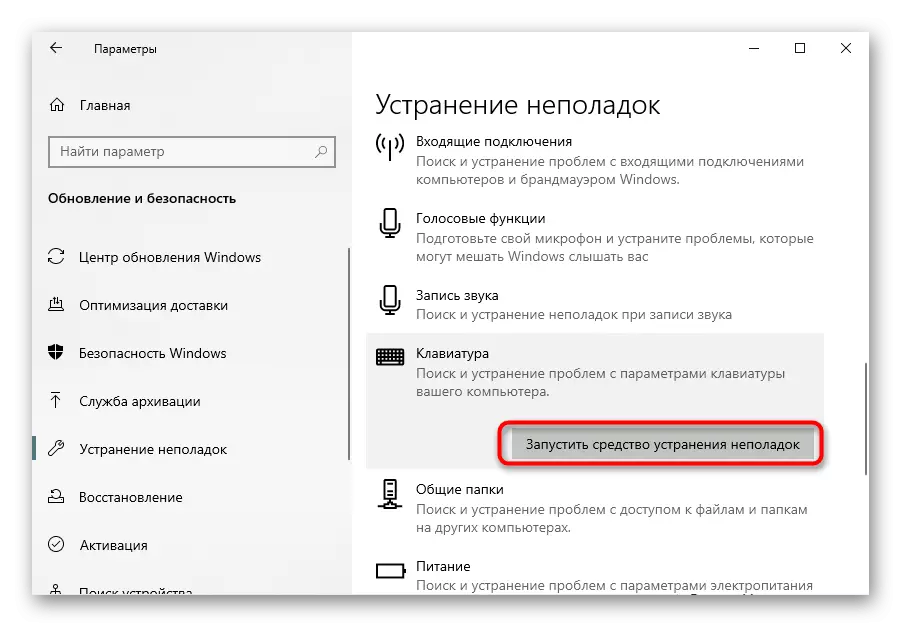
- Run the keyboard system troubleshooting. To do this, go to "Parameters"> "Update and Security".
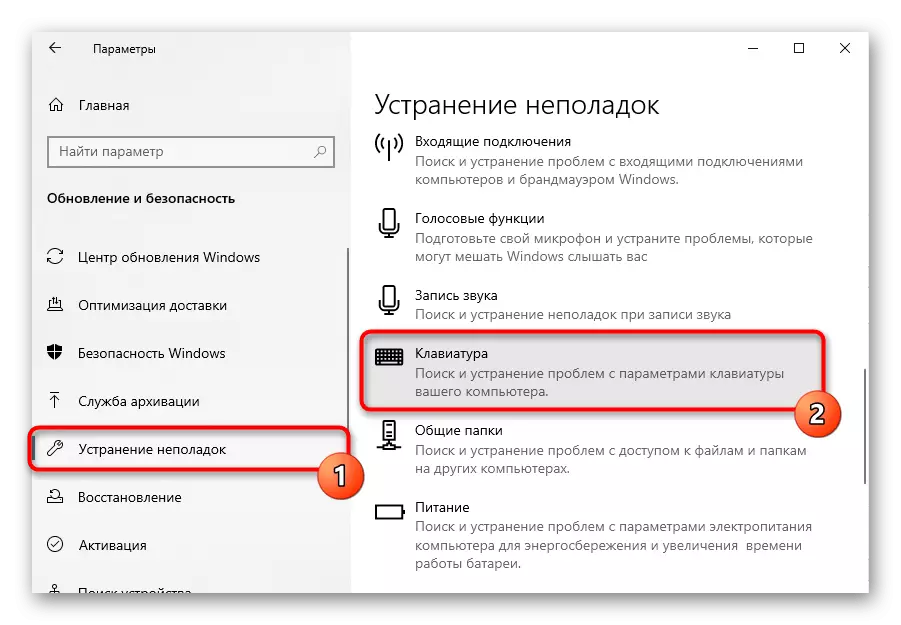
In the Troubleshooting section, select "Keyboard". Click "Run a troubleshooting tool" and follow the OS recommendations.