Turning off the addition of inscriptions in the photo when shooting
To prevent Xiaomi photos on smartphones with inscriptions in the form of a device model and shooting dates, you need to deactivate the options generating these options in the settings of the System MiuI application "Camera". It is possible to carry out such configuration by passing one of two ways.Method 1: Application "Camera"
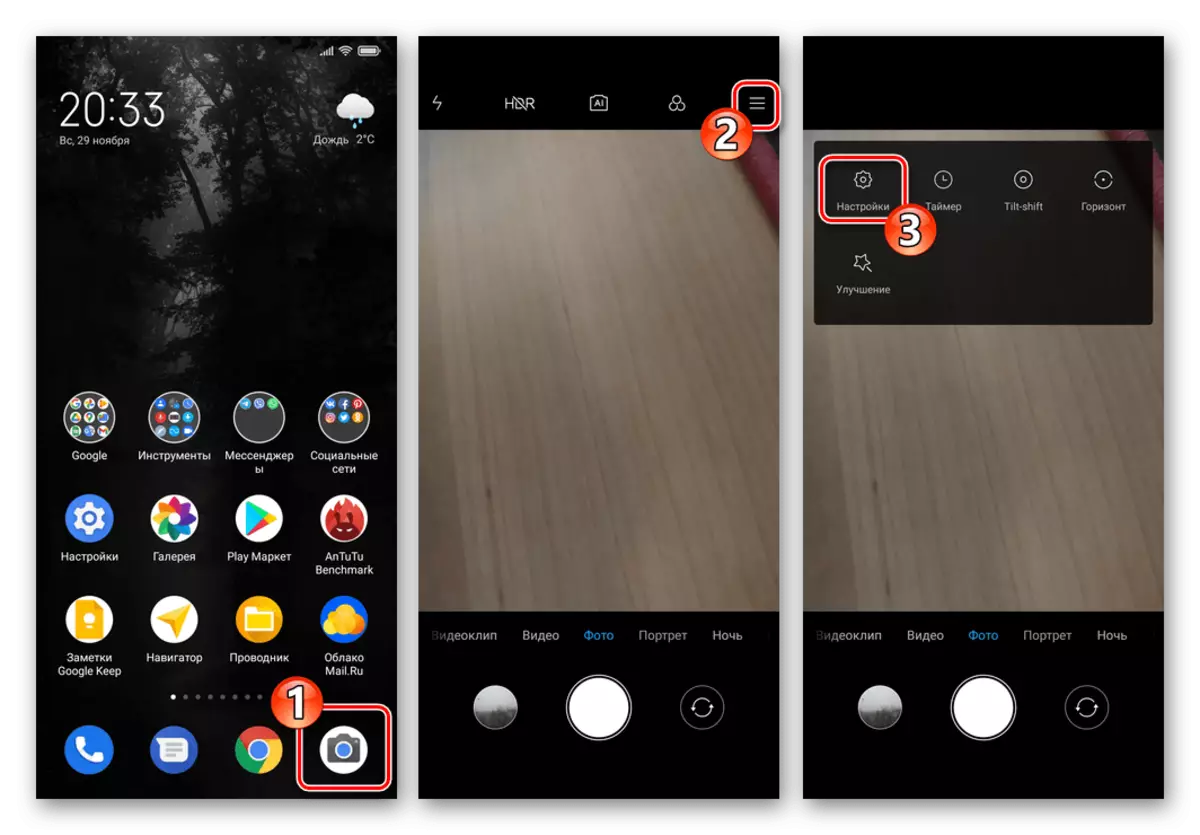
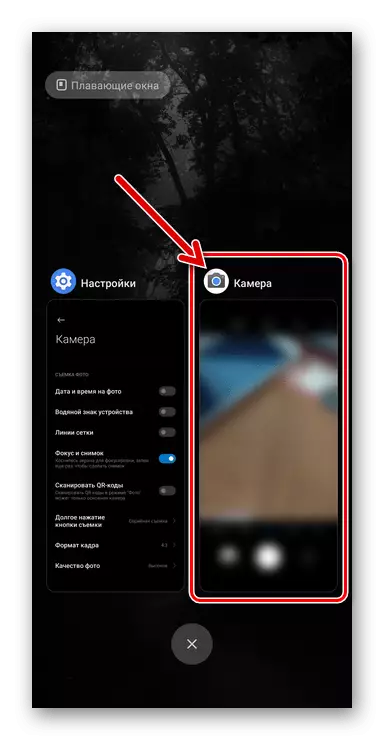
- Run the "Camera", press the button in the form of three screenshots in the upper right corner of the screen. From the displayed panel, go to "Settings" applications.
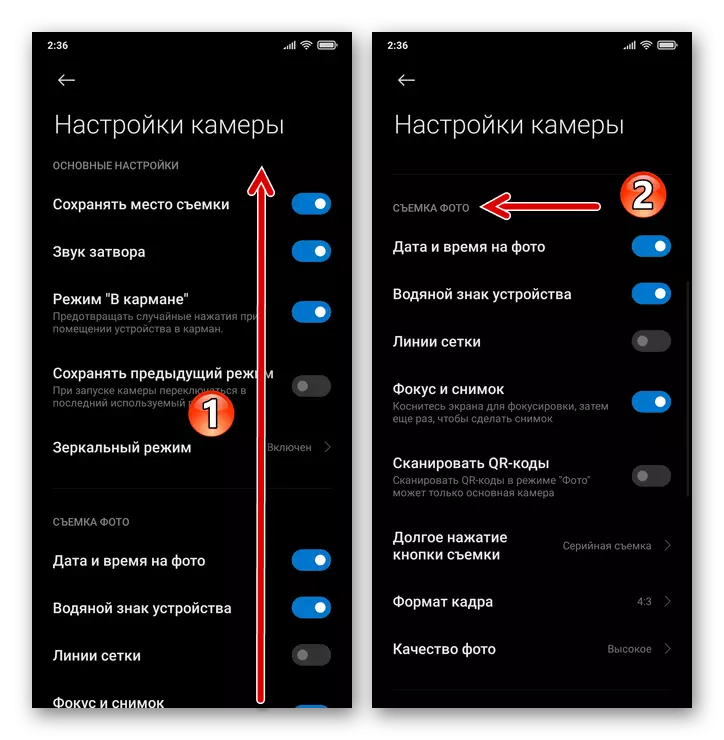
- Scroll through the information on the camera settings screen that opens, move to the photo shooting parameters.
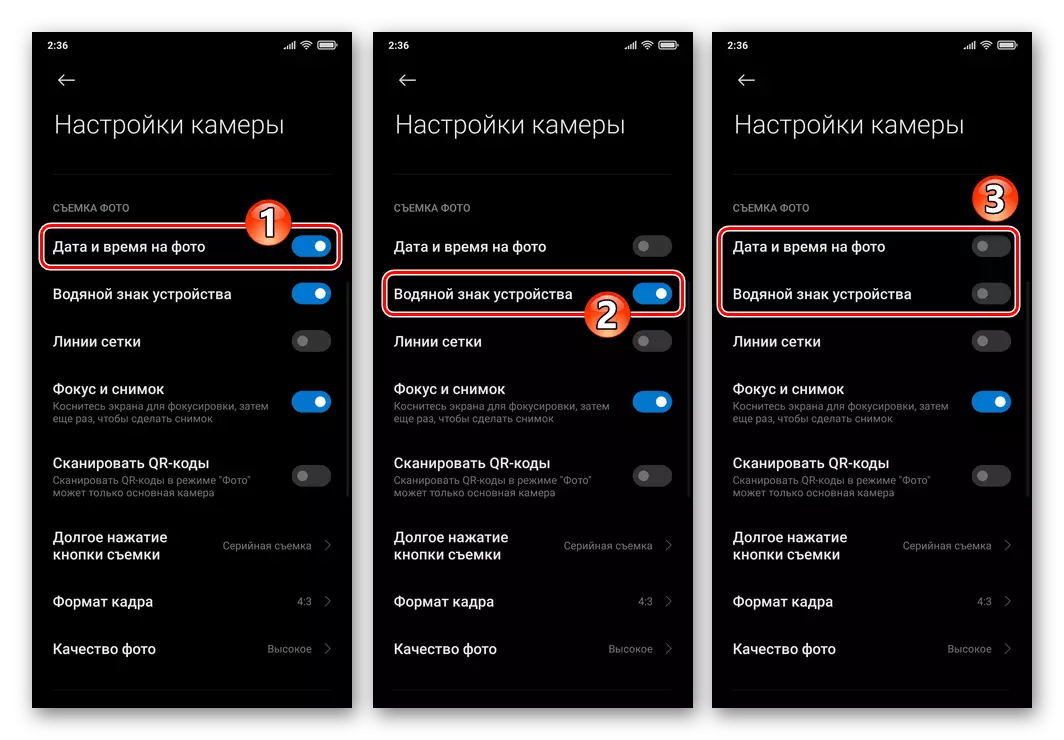
- Deactivate (may be selectively) Switches that are located to the right of the names "Date and time in the photo" and "Watermark of the device".
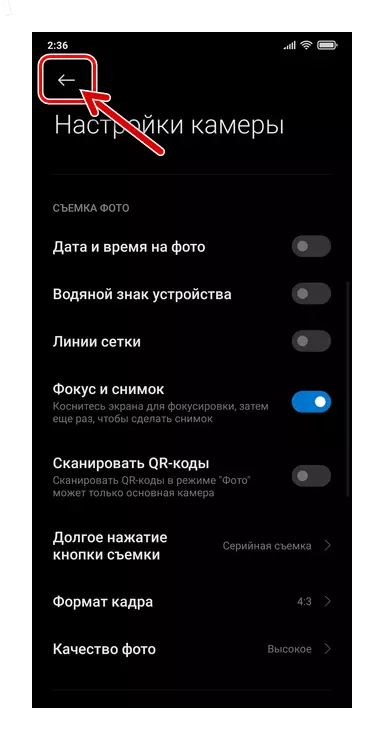
- Exit the camera settings and make a photo - on the pictures you received and all in the future created by the smartphone, there will be no inscriptions.
Method 2: Miui Settings
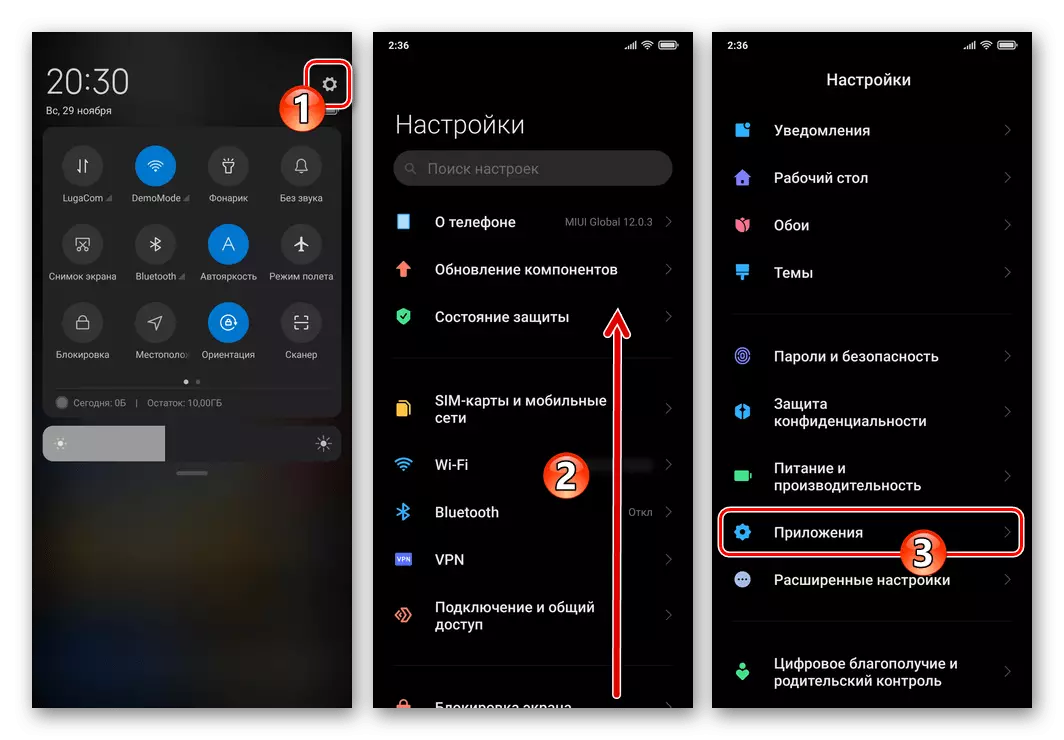
- From the desktop or the quick access panel of the MIUI OS, go to the "Settings" of the smartphone. Open the Application Settings section.
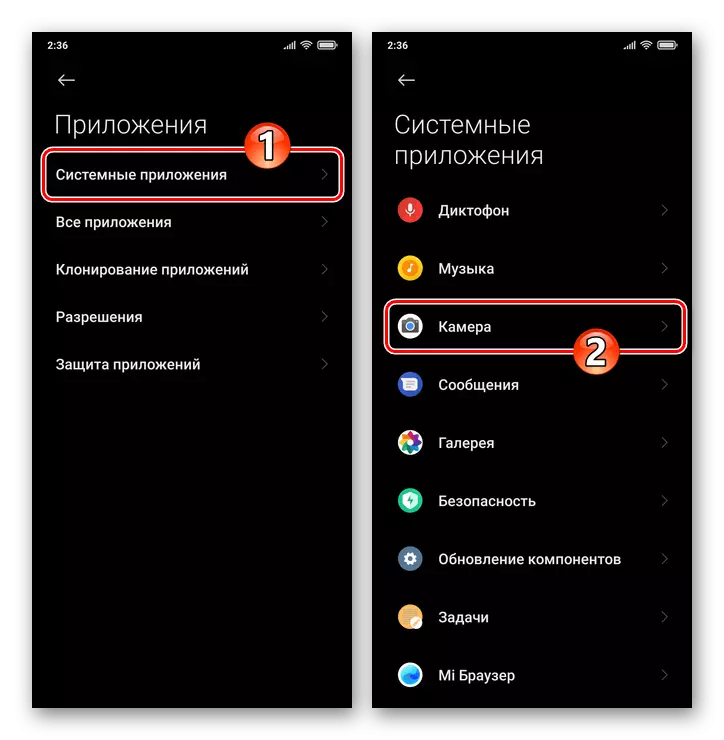
- Call the "System Applications" list, find the Camera point in it and click on this name.
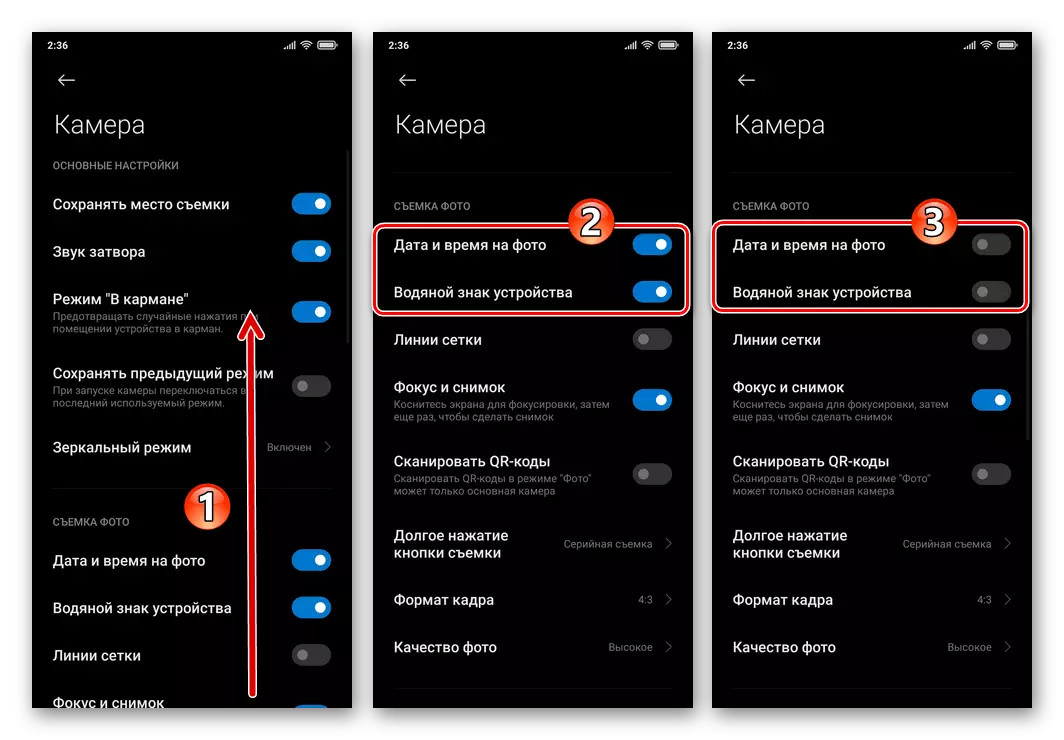
- On the screen that opens with the settings of the application in the "Photo Removal" list, disable one or both options: "Date and time in the photo" and "Watermark of the device".
- On this, all - exit "Settings" Miyui and use the smartphone camera - from now on the inscriptions on the photograph created with its help will be added to stop.
Removing inscriptions from photos
In order to effectively and carefully remove the inscriptions with already ready-made photos of the Xiaomi camera, in most cases it will not have to attract third-party funds - the MIUI delivery package is required to solve this problem. We are talking about an integrated image editor of the image integrated into the "gallery" - to use it in order to remove it in the photo of the "watermark of the device" and / or "date and time" of the shooting is possible twisher.Method 1: Erase objects
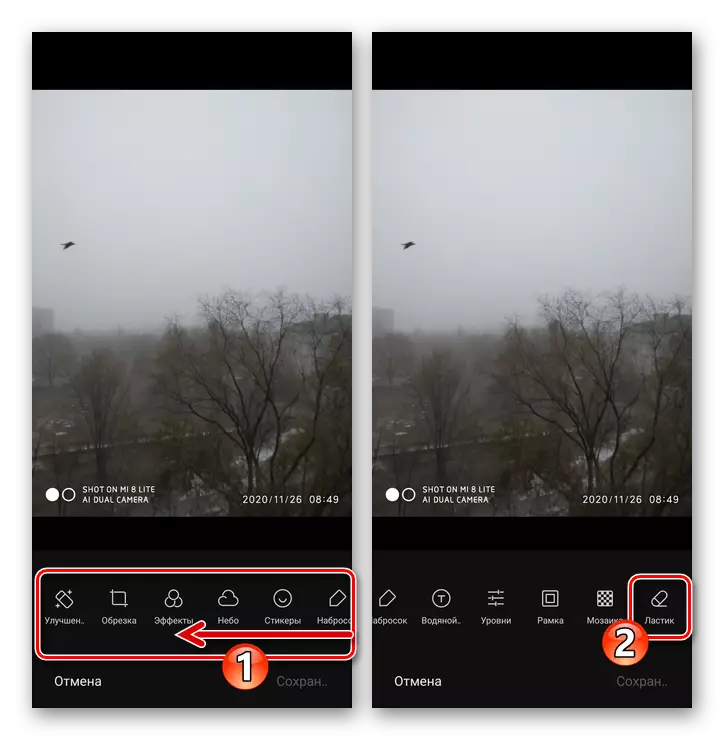
- Log in to the "Gallery" MIUUAY, find the photo to be edited and tap on the preview. Touch the second button in the toolbar at the bottom of the screen - "Edit".
- Scroll down the list of tools to work left to the left, click "Eraser".
- Further steps imply direct erasing of the inscriptions and are carried out in about the following way:
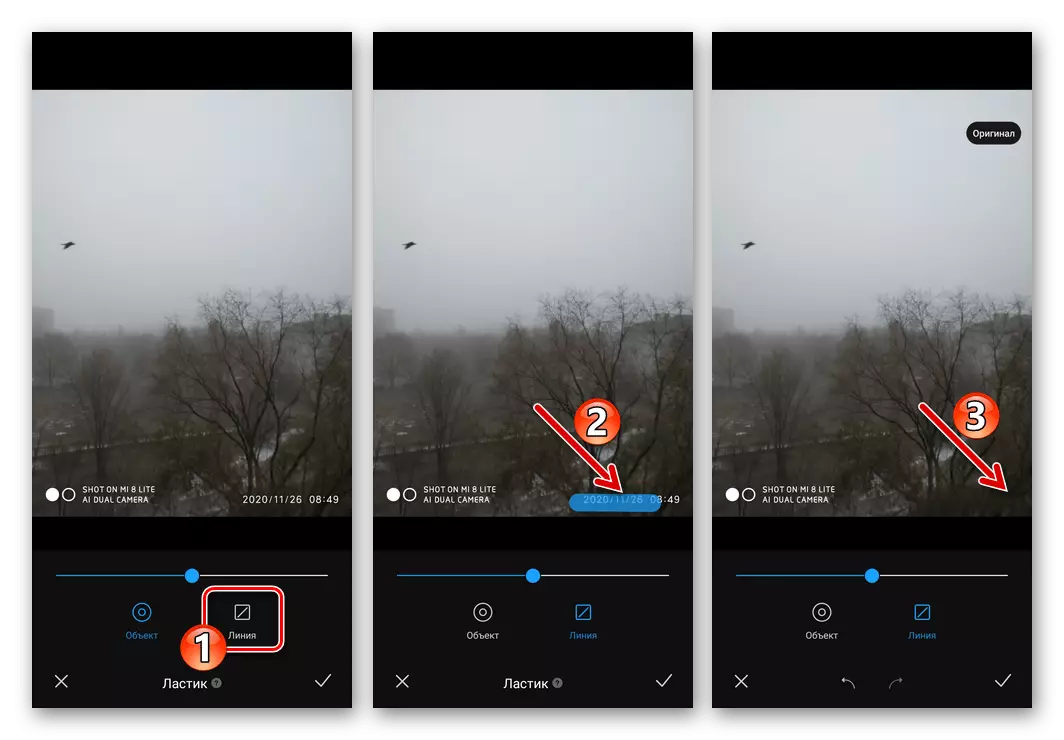
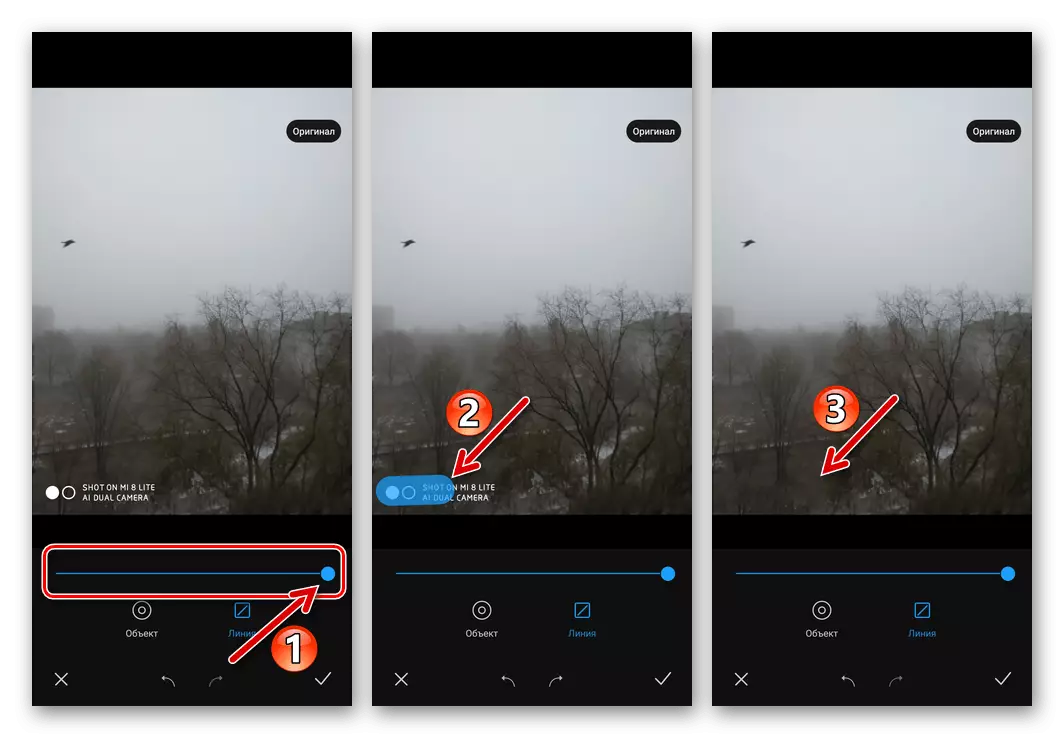
- First, delete the date and time from the photo. Move the Eraser tool into the "Line" mode and then gently swipe from the start of the inscription in the image until its end.
- To effectively remove from a photo of a two-lines of a watermark of the device, you can change the thickness of the area with a captured area of the region - move the runner under the area area to the extreme right position. Next, spend on the inscriptions of the area.
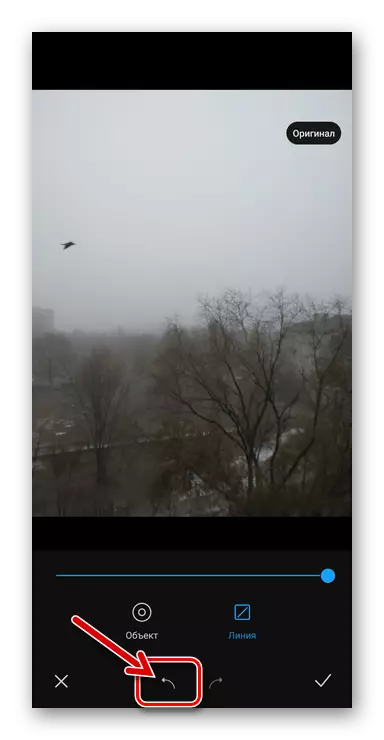
- If you do an acceptable effect when executing the foregoing, it will not work the first time, use the "Cancel" button and try to delete unnecessary objects by changing the thickness of the area with the "eraser" of the area and (possibly) by moving the tool to the object mode.
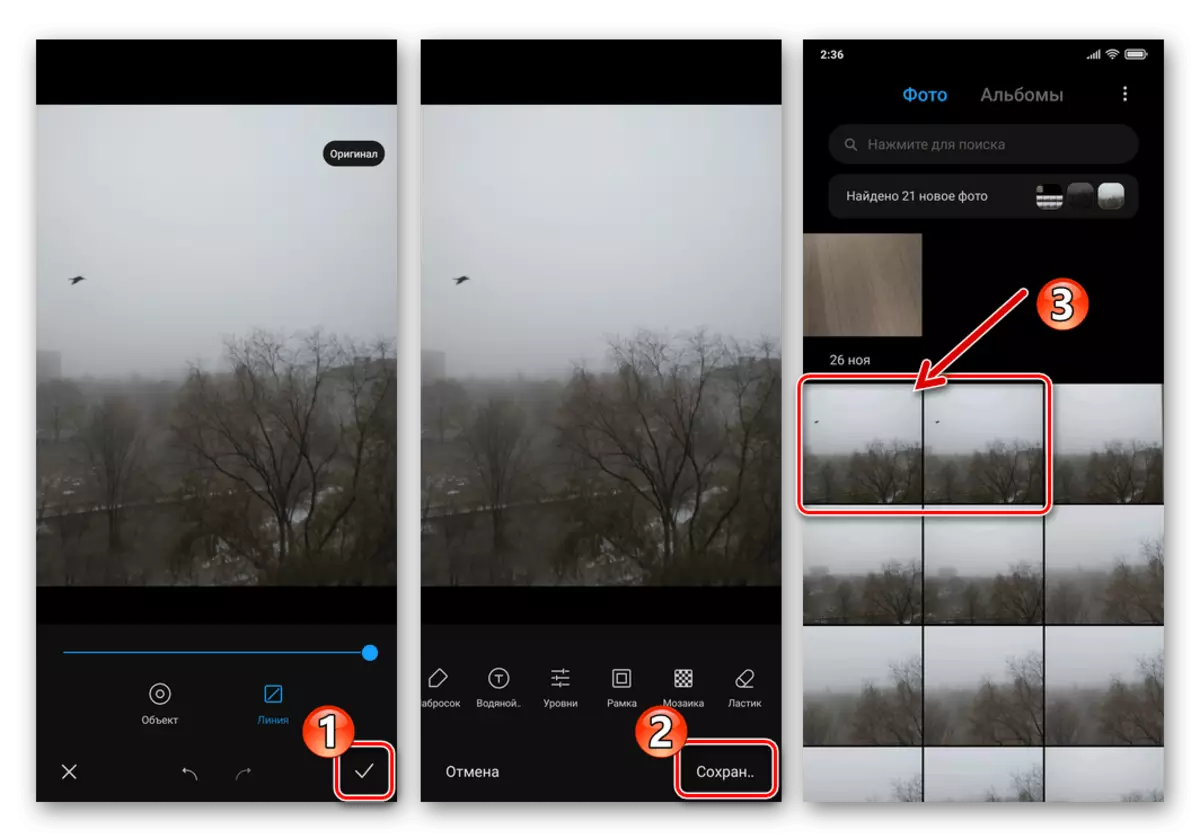
- After completing the editing, tap the tick in the lower right corner of the screen, then tap "Save". Note that the image editor in MIUI does not replace the original photo, and the new file creates a new file in the memory of the smartphone - a modified copy of the image, so it makes no sense to worry about the probability of its irrevocable damage in the process of performing the above manipulations.

Method 2: Trim photos
If the above option to remove inscriptions with the photo does not lead to a decent result, you may find an acceptable "sacrifice" part of the image with a watermark and / or date of shooting. Cut off the specified area of the picture is easy tools editor using the MIUI set.
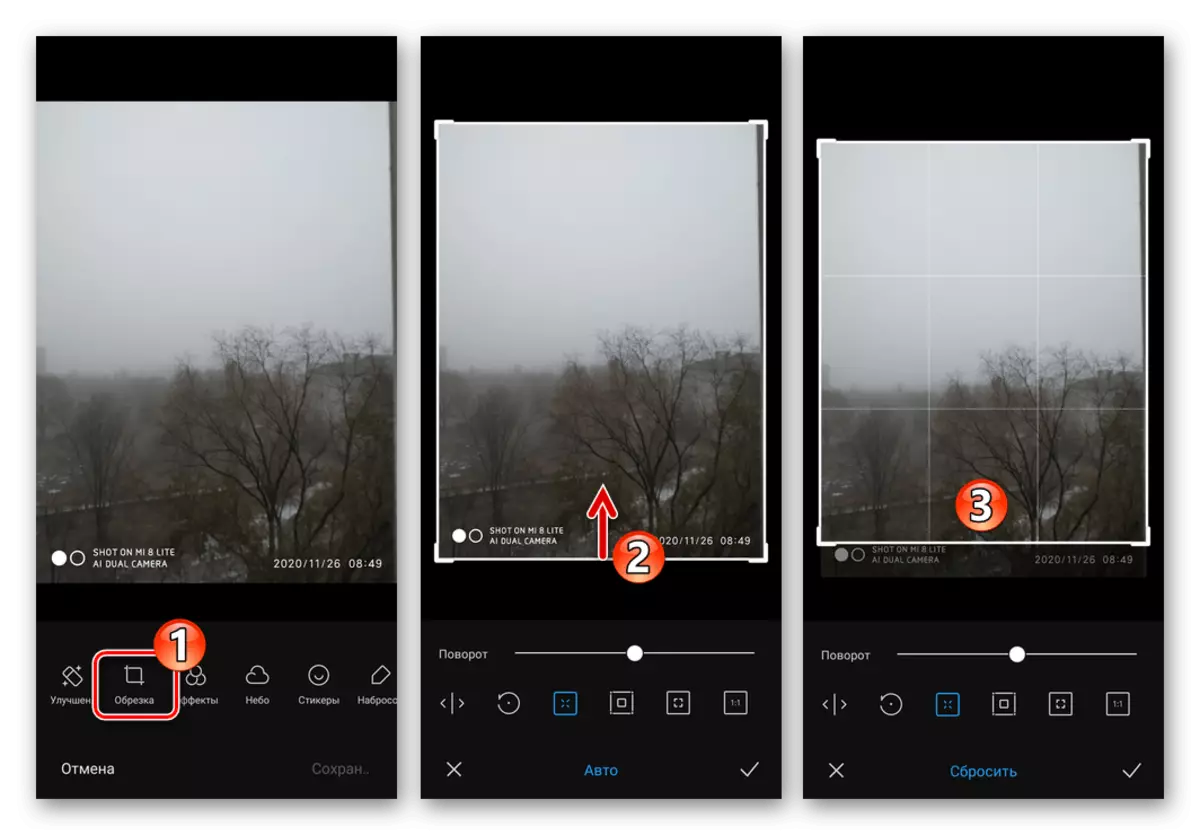
- Find an image with an "external" fragment in the "Gallery" of the smartphone, tap it preview to go to full screen viewing. Switch to photo editing mode.
- Select the "Pruning" tool at the bottom of the screen. Slide the bottom limit to the photo frame to the top edge of the inscriptions on it.
- If during the editing process you accidentally touches any of the means in the "Trimming" mode panels or make a random incorrect movement, which will break the desired editing stroke, click "Reset" at the bottom of the screen and repeat the selection of the image area left.
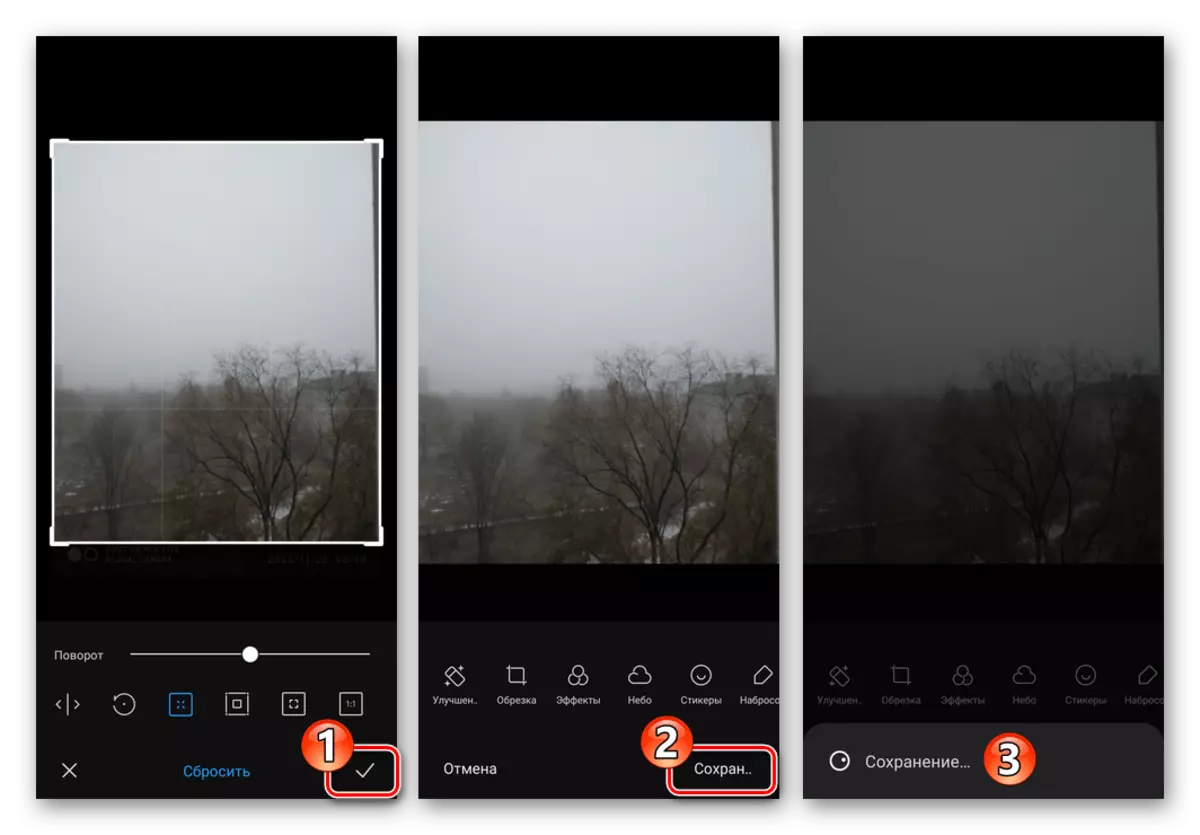
- Click on the box located in the lower right corner of the screen to complete the operation with the "Pruning" tool, then evaluate the result and tap "Save".
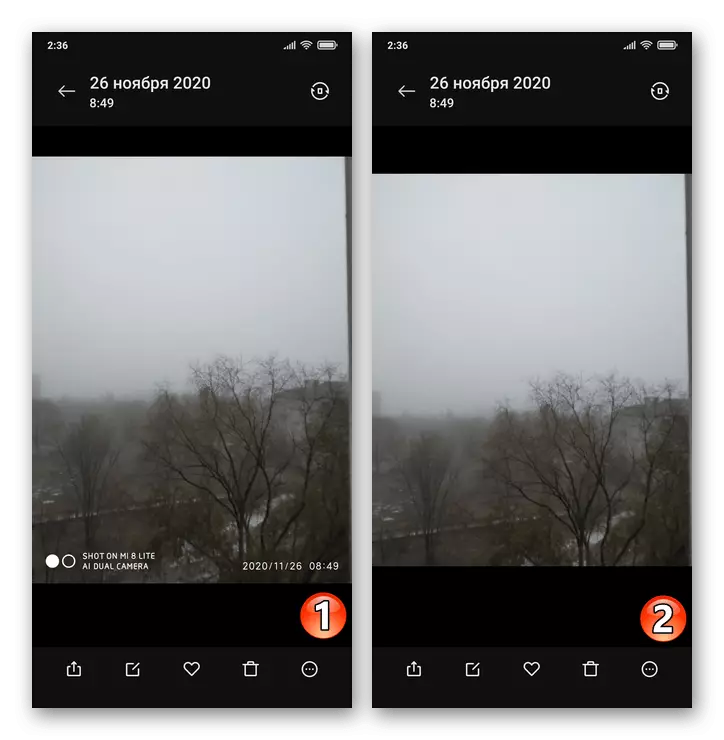
- Now at your disposal there are two photos of the photo - the original and its copy without inscriptions.