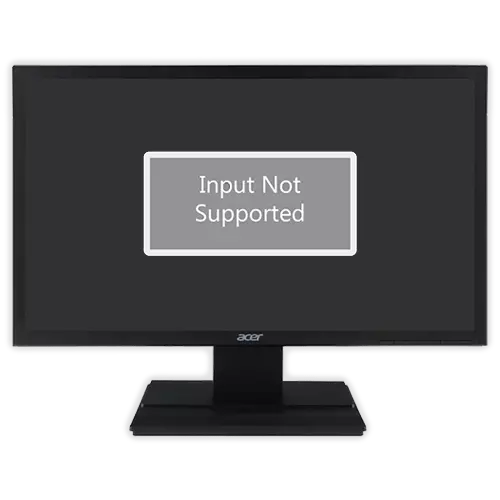
Input Not Supported Error Indicates the inability of the monitor to work on a user-selected or game resolution. On Acer monitors, like others, it occurs either when you turn on the computer, or when you start the game.
Option 1: Error booting the operating system
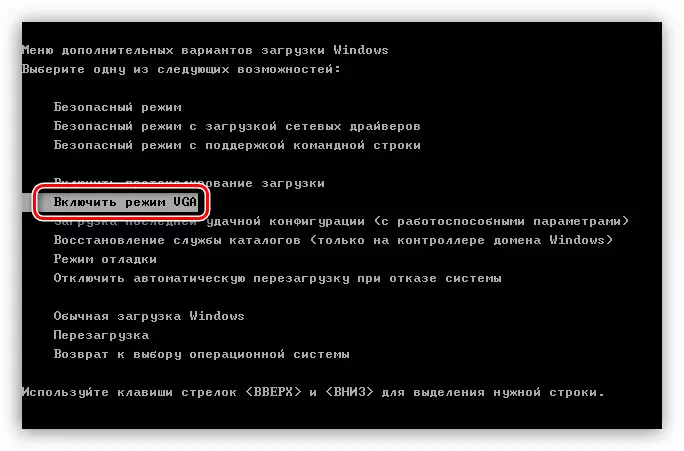
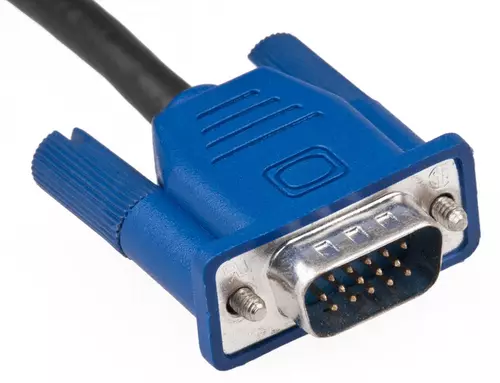
If the Input Not Supported is displayed when booting Windows, the user will most likely have to spend some effort to restore the computer's performance, since the usual operating system mode becomes unavailable to make the necessary changes. However, if your monitor is connected via VGA, all corrections are reduced to minimal labor costs.
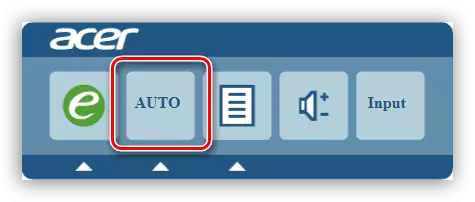
On the monitor, it is enough to find either a separate "auto" button and press it, or first open the "Menu" and already inside the settings to find the "AUTO" function. Thus, you reset all settings to the factory, and the problem will be eliminated.
When connected via HDMI / DisplayPort / DVI will have to do differently.
Windows 10 and 8
In more modern versions of this operating system, the error correction instruction is reduced to the following actions:
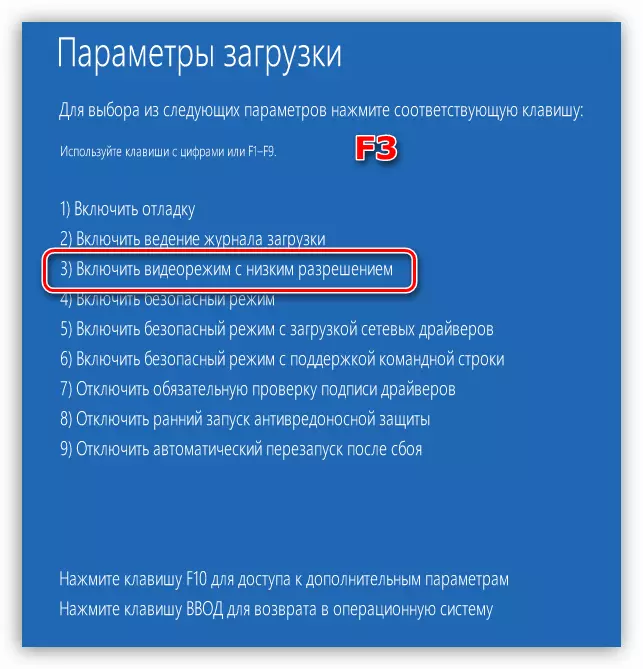
- When you start the computer, try calling the Download Settings menu by clicking either F8 or SHIFT + F8. If it does not work out this from several attempts, use the boot flash drive or feature of the operating system that causes the recovery mode. We will tell about these versions just below, so that those who managed to call "boot parameters" without additional manipulations, immediately could go to the correction.
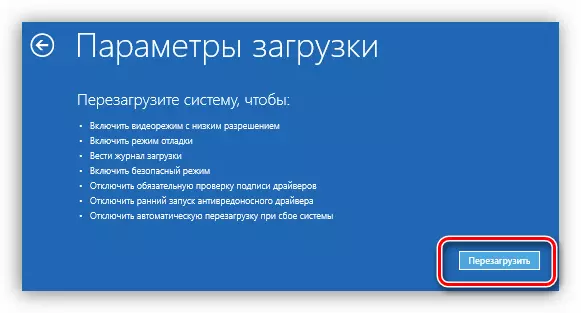
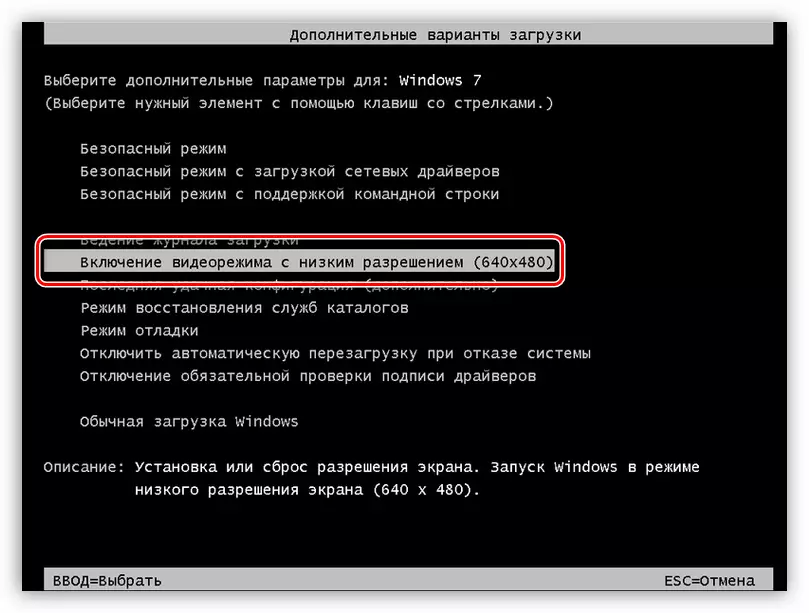
- In this menu, you will need to select the option "Enable low-resolution video" by pressing the F3 key. If suddenly it did not help, you can then go to "Safe Mode" (F4).
- Since often an Input Not Supported error appears on an unknown reason for the user, first of all it is recommended to remove the video card driver and install its last version.
Read more: Re-install video card drivers
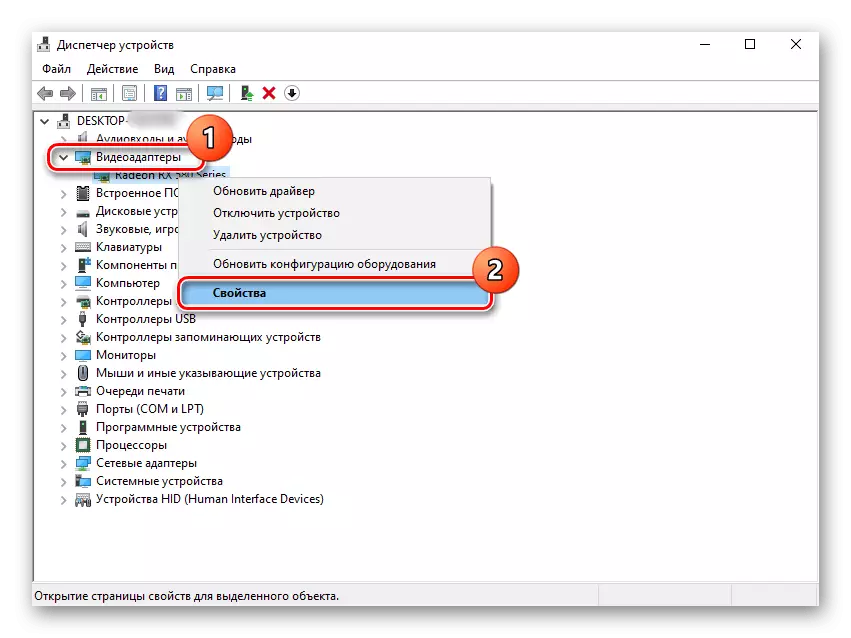
- The article on the link above describes the removal of the driver through special software, but if you do not have such an opportunity, you can always use standard operating system tools. Right-click on "Starting" Call "Device Manager".
- Find there your video card, turning the "video adapter" block, and click the PCM to call the context menu through which you go to "Properties".
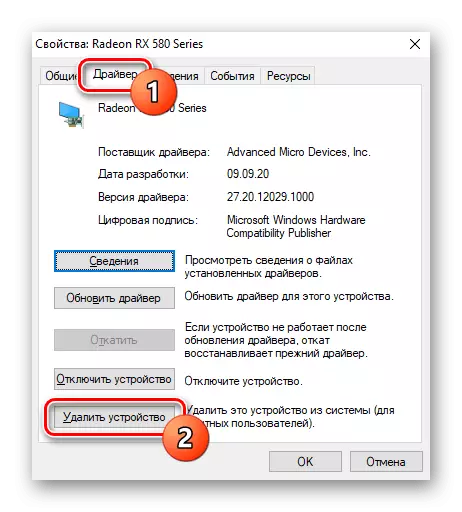
- On the Driver tab, click the Delete Device or Delete button.
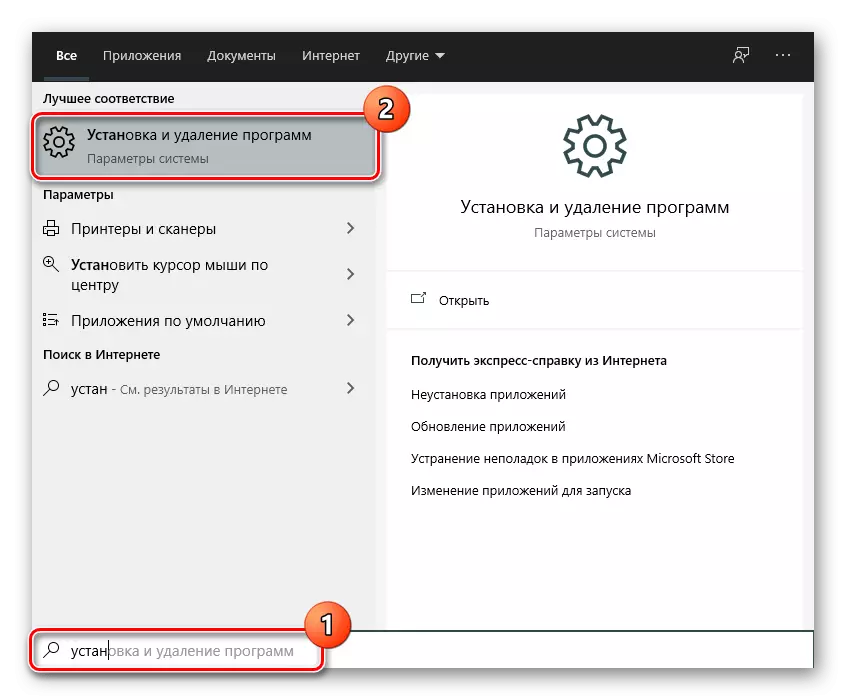
- Now delete the additional software by opening the "Installation and Delete Programs" through the search in the "start".
- Here are Find Software, belonging to AMD or NVIDIA, and uninstall it.
- It will remain to restart the computer and install the latest version of the driver. If you do not know how to search for it, use the appropriate part of the reference manual from step 2.

More error does not have to appear.
Calling the Download Settings menu through the loading USB flash drive
Now consider what you need to do those who cannot cause the desired menu with a combination of keys. Wrouders of the boot flash drive remains to connect it to the computer and boot from it via Boot Menu or changing the BIOS settings.
Read more: Configure BIOS to download from a flash drive
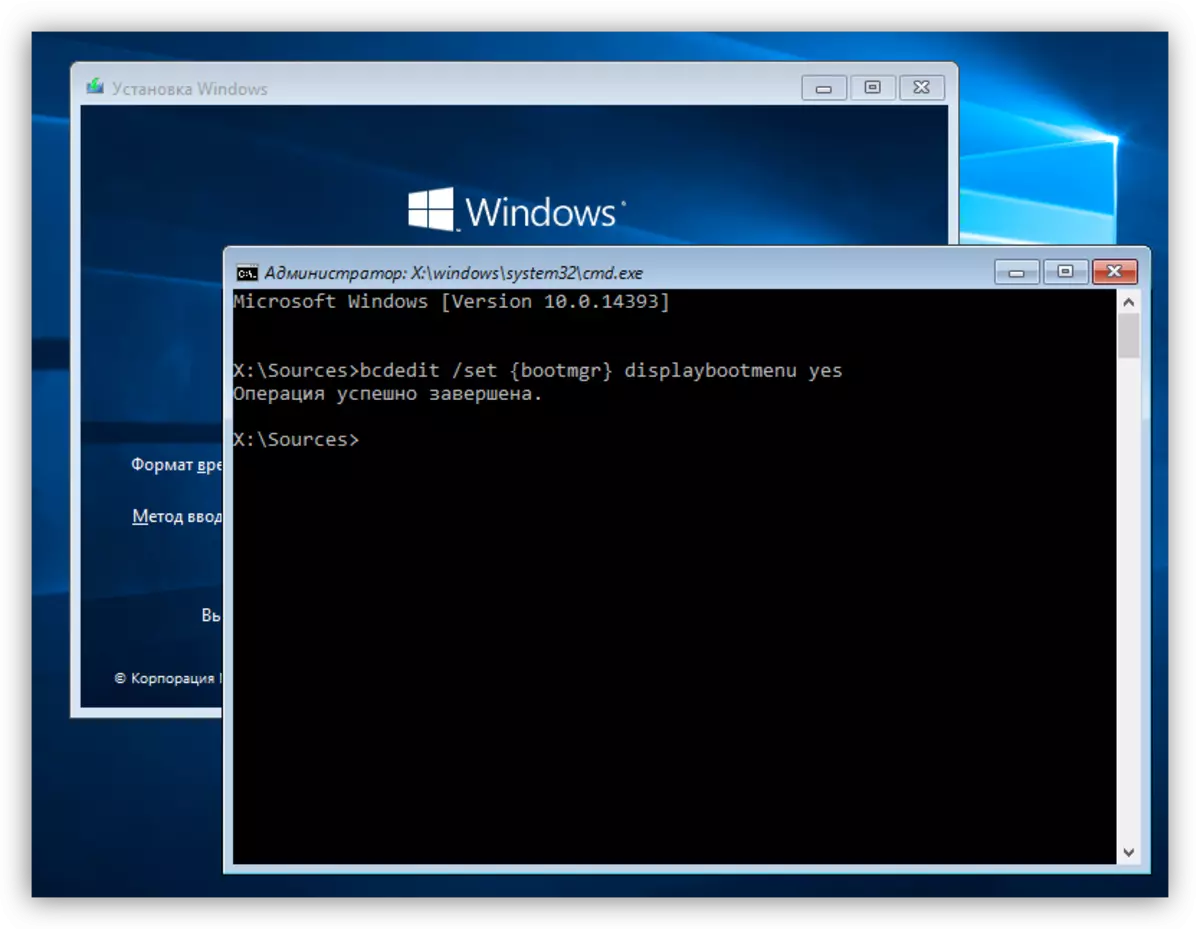
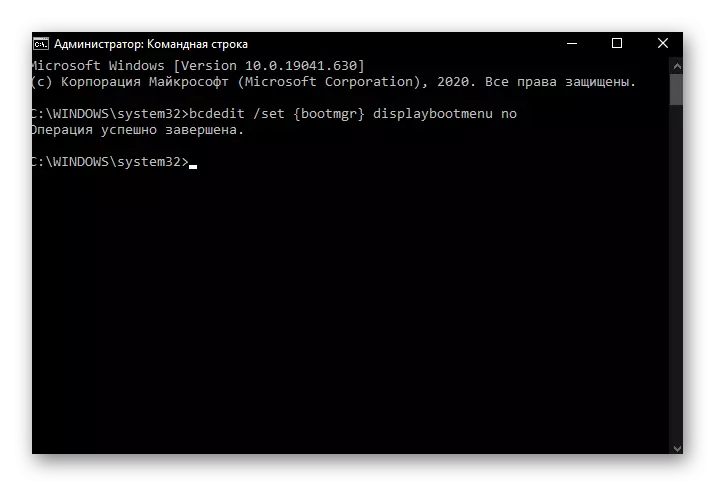
- In the first stage, press the SHIFT + F10 key combination to start the "command line". Write in it the bcdedit / set {bootmgr} command, DisplayBootMenu YES and press ENTER.
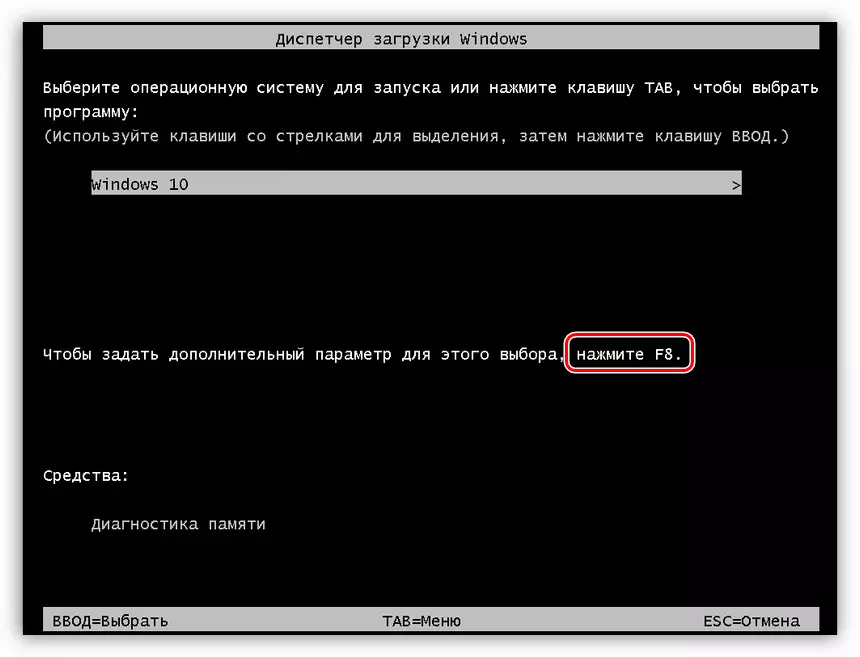
- Close the Console and Installer window, confirming the cancellation of the OS installation. The computer will start restarting and displaying the operating system selection window. Instead of confirmation, press the F8 key to appear the same menu "Download Settings".
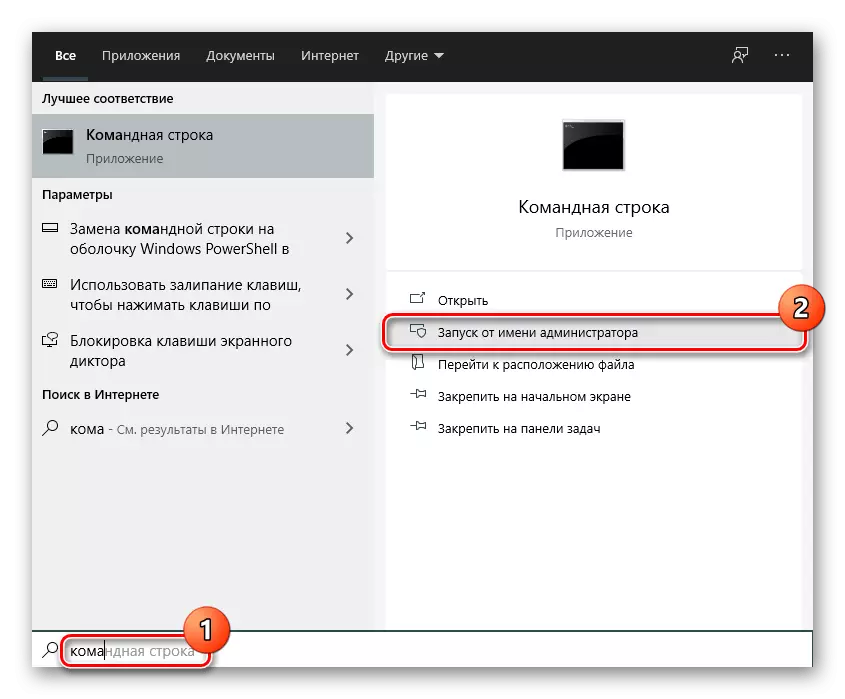
- Now you will need to perform the entire algorithm that was painted above, starting with step 2. However, before rebooting the computer, which will surely need after deleting the driver, additionally do the following: Open the "command line" with the administrator rights through the "Start".
- In it, write the bcdedit / set {bootmgr} command. DisplayBootMenu NO and press ENTER - it will turn off the boot menu that you included through the USB flash drive and the console.
Calling Windows Recovery Mode To open the Download Settings menu
If you do not have a boot flash drive, you can still get into the "boot parameters", but it will take several non-standard actions for this.
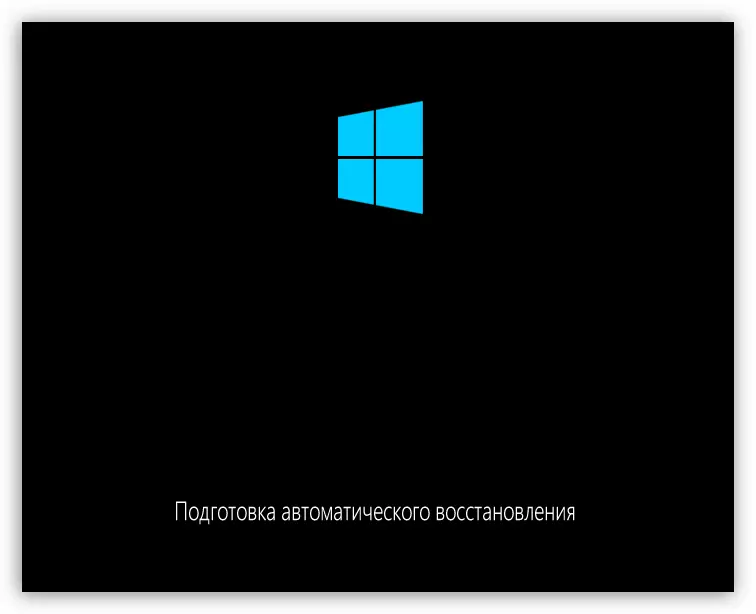
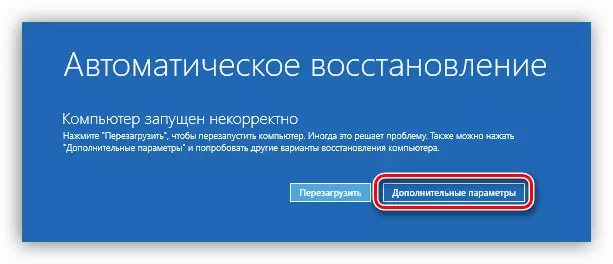
- In the "dozen" and "eight" there is a function of automatic recovery that runs after three unsuccessful computer boots. Accordingly, to simulate the unsuccessful PC launch, you will have to interrupt this process in the middle. After the boot screen appears with the OS logo, press the "RESET" button on the system unit, and if it is not suddenly not, hold the "Power" for a few seconds to turn off the computer. Do it 3 times in a row, after which the system itself will launch "Automatic Recovery".
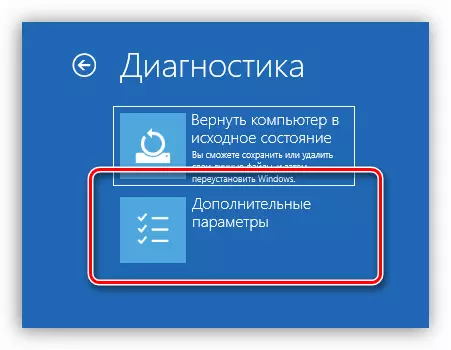
- In this window, select the option "Advanced Parameters".
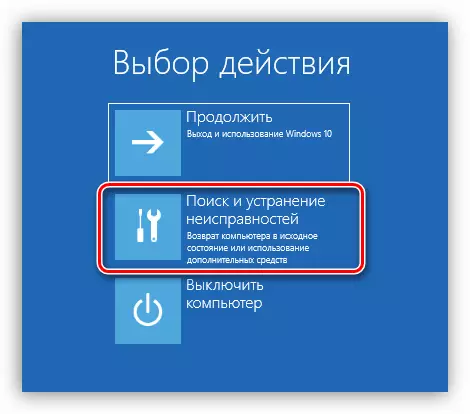
- From the list of tiles you need "Troubleshooting" (or "Diagnostics", if it is Win 8).
- Go back to "Advanced Parameters".
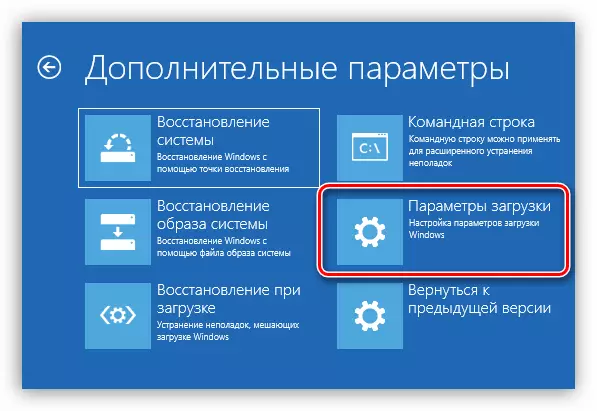
- Now click on "Download Settings".
- A list of available parameters that are necessary are displayed. Agree with the offer button to "Reboot".
- Return to the beginning of the header about Windows 10 and 8 and perform all the instructions starting from step 2.
Windows 7 and XP
If you have an old operating system, call the menu with additional download options is much simpler than the owners of modern Windows.
- To do this, when you start a computer, press the F8 key several times to definitely not skip the ability to start the desired menu. In the window that opens, select "Enable a low-resolution video mode (640 × 480)" and press ENTER.
- Now reinstall the operating system drivers (step 2 from the instructions about Windows 10 and 8).
Option 2: Error starting in Windows
The appearance of the INPUT NOT Supported problem after starting the game indicates that the game is trying to use video settings that are incompatible with your monitor, or there are other errors.- These errors are usually eliminated by installing or updating the DirectX component to the last version supported on your PC. After installing / updating, do not forget to restart Windows.
Read more: How to update the DirectX libraries
- In addition, you can edit the configuration file of the game by changing some video packagers for its normal startup. Go to the game folder, where something like "options.txt", "variables.txt", "screen.txt", "video.txt", "screen.txt", "video.txt", should be found among the system files. Depending on the game, its location will be either in the root folder or in a separate folder of the "Config" / "CFG" type. If nothing of this was found was found, do not forget to look into the system folder "Documents", where the user files sometimes fall like saving - among them the desired document can also hide.
- Among the parameters, search for "Height" and "Width" - they need to be changed both. The first indicates the height (for example, 1920 pixels), the second - width (1080 pixels). Naturally, it is necessary to establish the correct version of the permission, so that both parameters correspond to each other. Instead of Height and Width, there may be one parameter called, for example, "Screen". In general, you need to search, then the screen resolution is written in someone.
- Check also the parameter responsible for frame frequency. It should be called "Frame Rate" or approximately to this and have a value that is maximum supported by your monitor.
Option 3: Specific cases
Sometimes an Input Not Supported error appears not with those scenarios, which is described above, but suddenly or, for example, when connecting a monitor to a laptop via HDMI or other digital ports. This situation will help changing the frame rate on the device to which the monitor is connected.
Windows 10.
In the "dozen" principle of change of frame frequency Next:
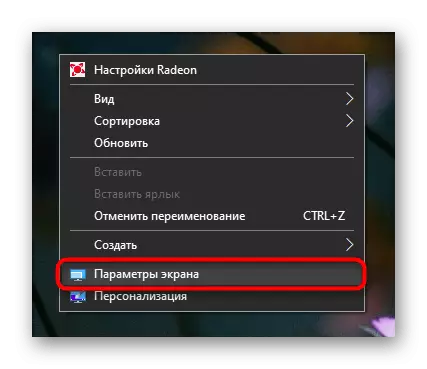
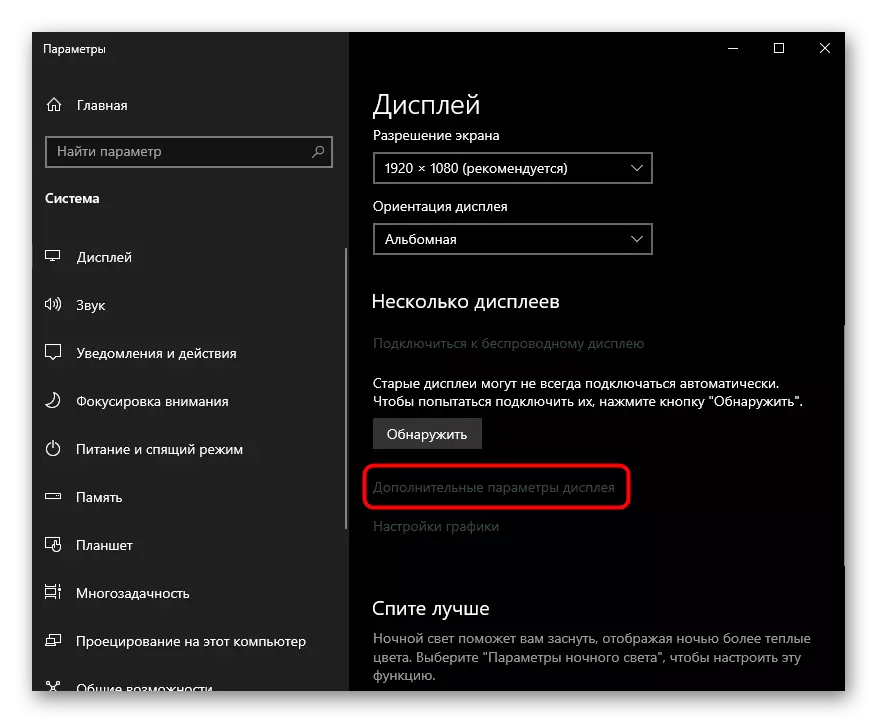
- Right-click on an empty place on the desktop and go to "Screen Settings".
- Find the "Advanced Display Parameters" link and click on it.
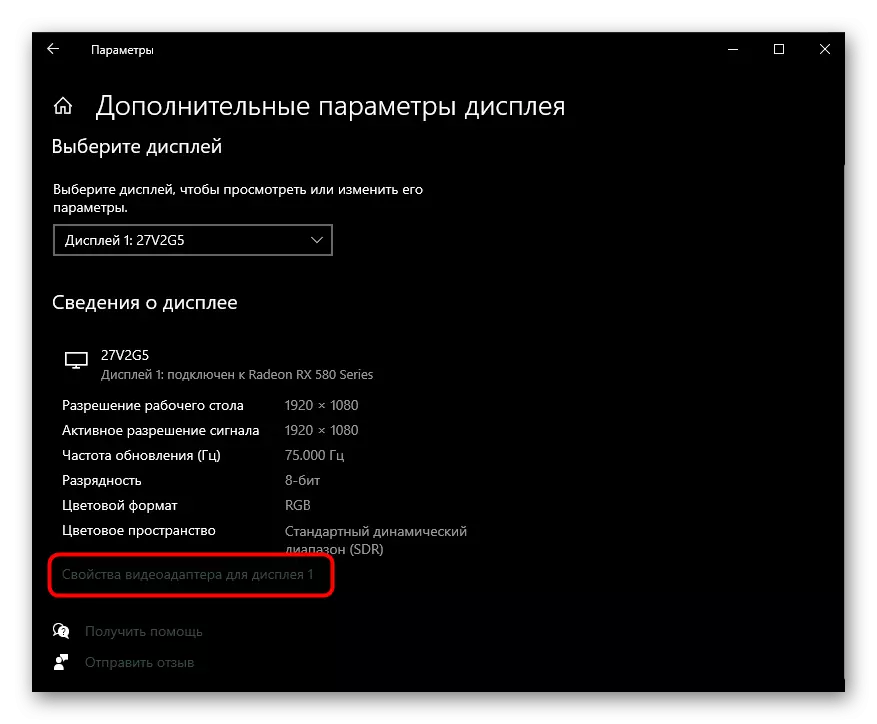
- Here you need a link called "Video Audapter Properties for Display 1".
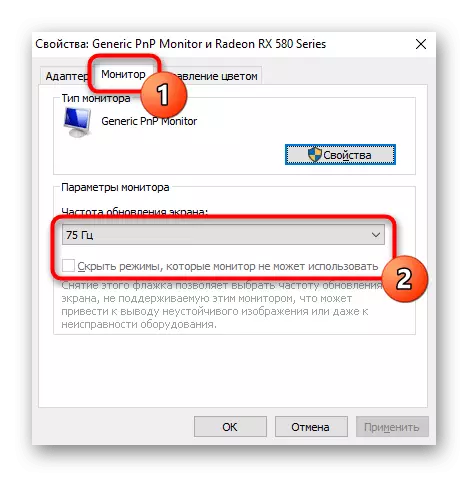
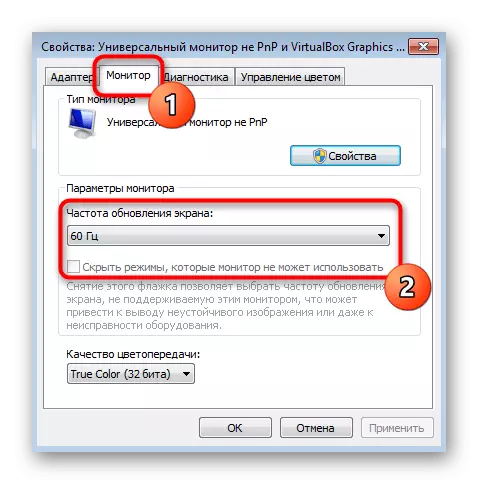
- Switch to the "Monitor" tab and select your video card supported by your video card. If possible, put a tick next to the point of hiding unsupported modes can add it to see the modes that are available.
Windows 8, 7, XP
In other versions of Windows, the principle of change is almost the same as in its latest version, in minor exceptions.
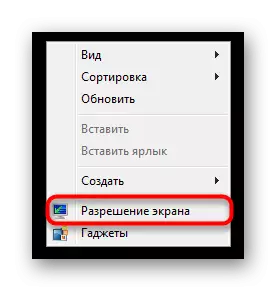
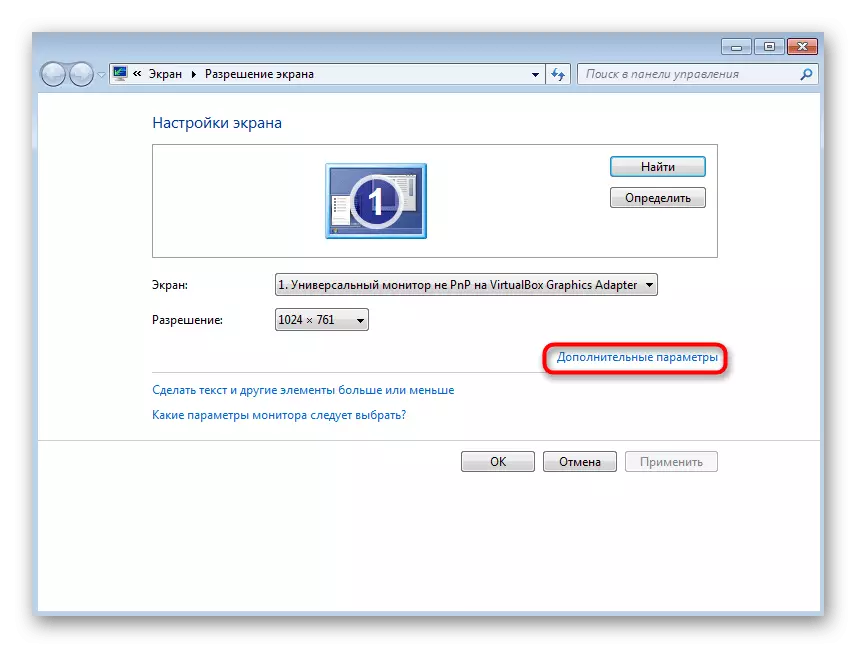
- Right-click on the context menu from which to select "Screen Resolution".
- In the menu that opens, click on the "Advanced Settings" link.
- Change the screen update frequency of the same principle that has been described in the instructions for Windows 10.
- These errors are usually eliminated by installing or updating the DirectX component to the last version supported on your PC. After installing / updating, do not forget to restart Windows.
In XP, the item of interest is called "Enable VGA mode".