
Connecting the device to the network
If you have not yet unpacked the TP-Link Extender device, now it's time to do it and connect it to the outlet. If you need to distribute the Internet via Ethernet, connect the corresponding cable to the connector below. In the case when the amplifier will be logged in in the already existing Wi-Fi network, simply insert it into the socket and turn it on.

As for the choice of location for the amplifier, it is necessary to take into account the size of your own home or apartment and the mode of operation, which will be installed in the future for TP-Link Extender. First, it is better to familiarize yourself with the instructions and tips from the developers, and after, if the location of the equipment does not suit you, it is already in the configured form it will be possible to transfer to any other place.
Login to the amplifier web interface
Another important information before setting up this network equipment. All actions are performed through a web interface, which is extremely similar to the router menu, and the entrance to it is performed in the same way. In most cases, you need to write a 192.168.0.254 address in the browser, go to it and enter standard login and password Admin. If you have any difficulties with authorization, read the reference guide below, where the search for the necessary data is stated on the example of routers, but also to the amplifier, these rules also relate.Read more: Definition of login and password to enter the web interface of the router
Fast setting TP-Link Extender
All modern TP-Link Extender models have a partition for quick setup, where actions are made automatically, and the user remains only to connect to the detected network. Most such a configuration option seems perfect, since there is simply no need for the choice of additional parameters, so we will consider it first.
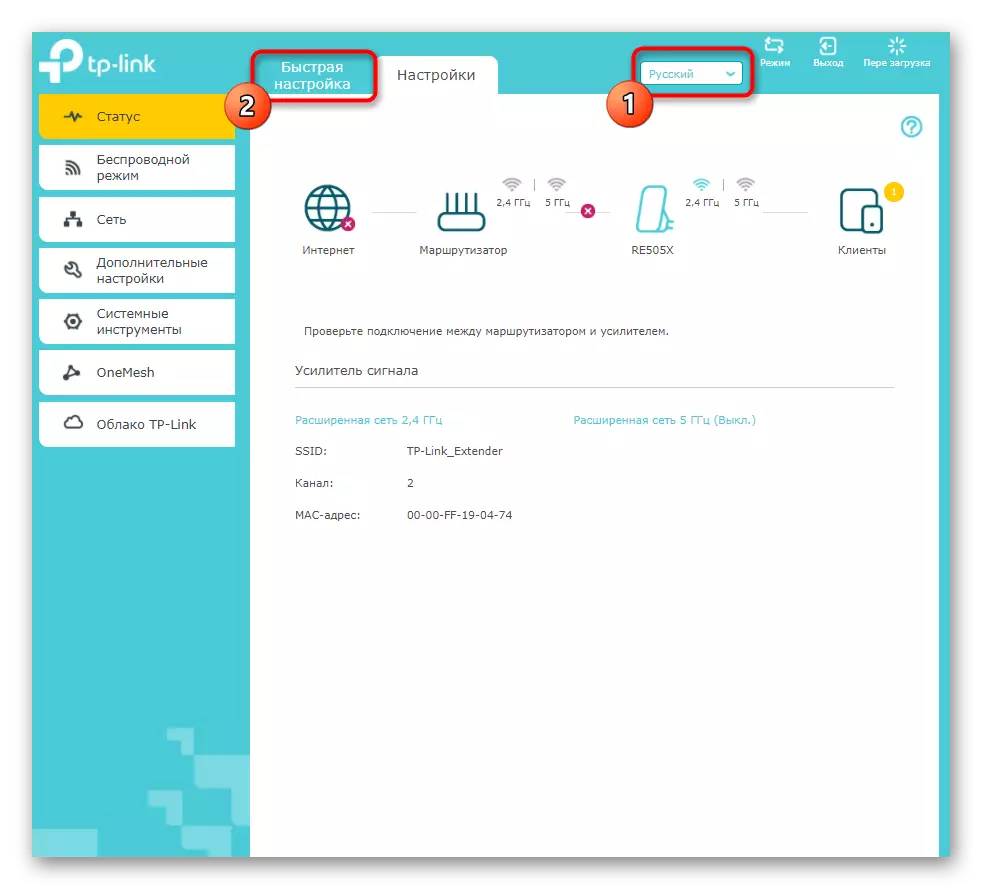
- After authorization in the web interface in the drop-down list on the right, select the Russian language, if this happens automatically, and then switch to the "Fast Settings" tab.
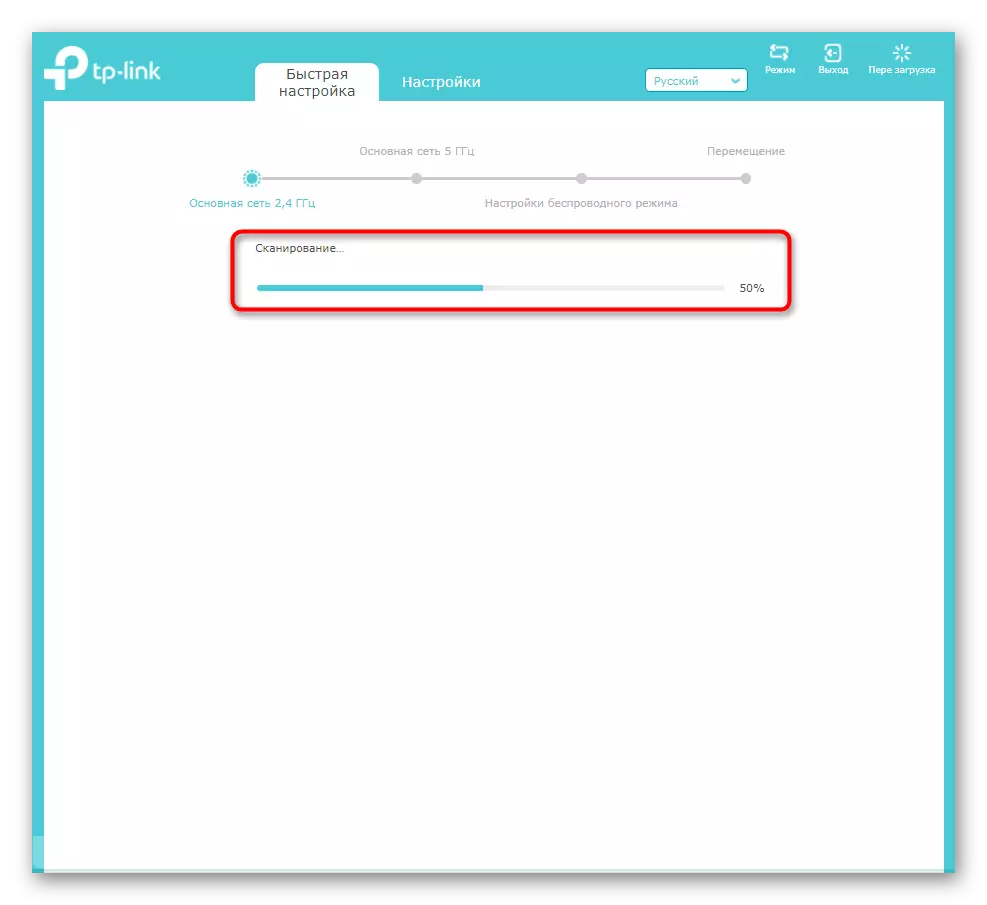
- Network scans will begin, which will take some time.
- A list with the found names of the wireless access points will appear. Repeat the scan, if there is no needed name, or select it by clicking on the left mouse button on the line.
- If the network is protected by a password, a form for its input will appear, after which you can continue the connection.
- The amplifier can work on two different frequency ranges, so allows you to connect directly to two wireless access points. After their configuration, a new window will appear, where you make sure the data entry is correct and confirm the settings.
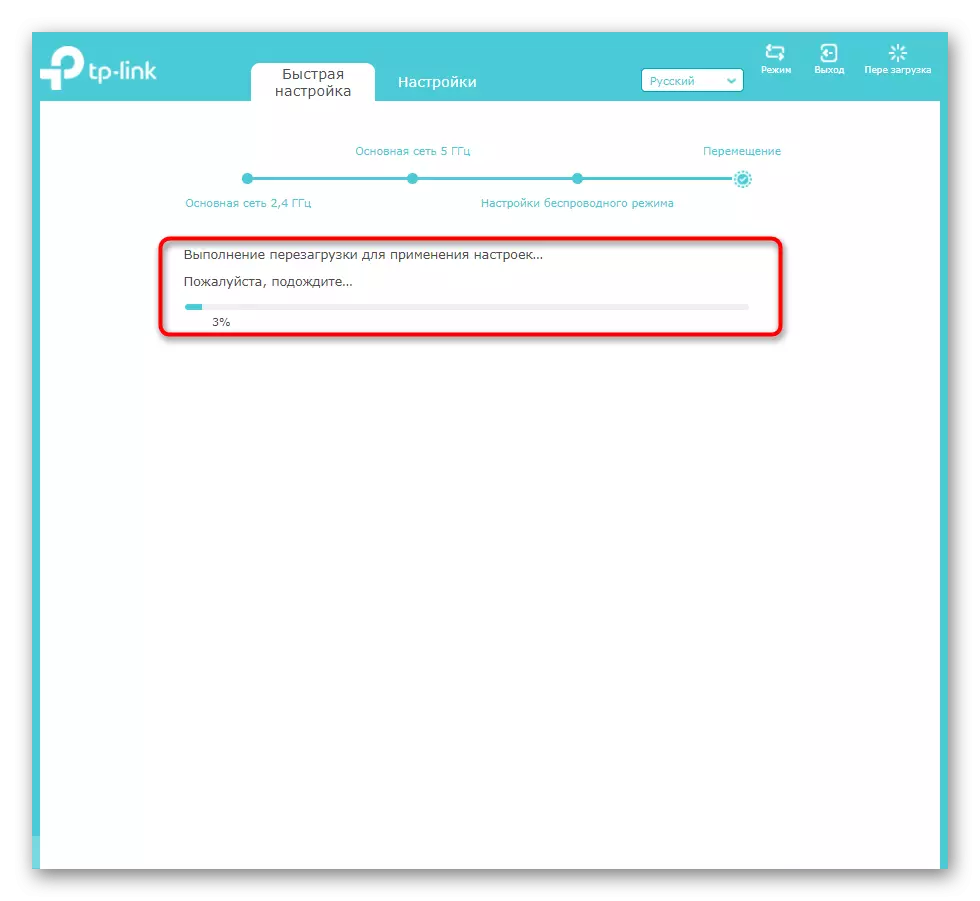
- The device will go on a reboot to apply settings, and with the next inclusion, they will come into force.
- Sometimes after updating the configuration, information appears on the screen that the amplifier can be moved to increase the coating zone. Read these recommendations and follow them if you think that the signal is really not good enough.


As you can see, the considered module for quick customization supports only the most basic parameters and simply connects the amplifier to the existing Wi-Fi network. If you are interested in installing system and advanced settings or quick settings did not bring due results, go to the next section of our article.
Manual TP-LINK Extender
The TP-Link Extender web interface has several interesting features that you should pay attention to the active user of these devices. They allow you to flexibly control access to the network and adjust the coverage area. We will understand with all those present sections step by step so that it does not arise confusion.Step 1: Wireless Mode
Let's start with the most important thing - connecting to an existing wireless network. This is necessary for those users who do not connect an Ethernet cable amplifier, but uses Wi-Fi-speaking router. The configuration process is almost no different from the above mentioned above, but has its own characteristics.
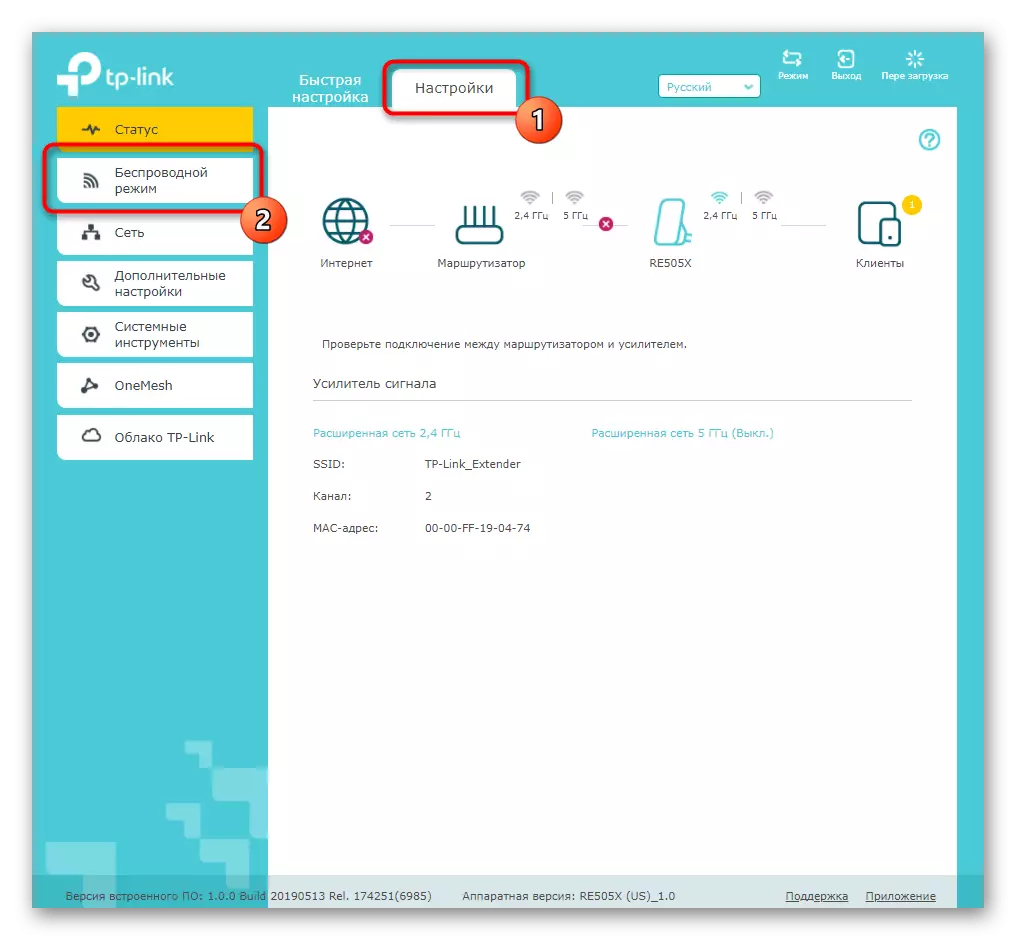
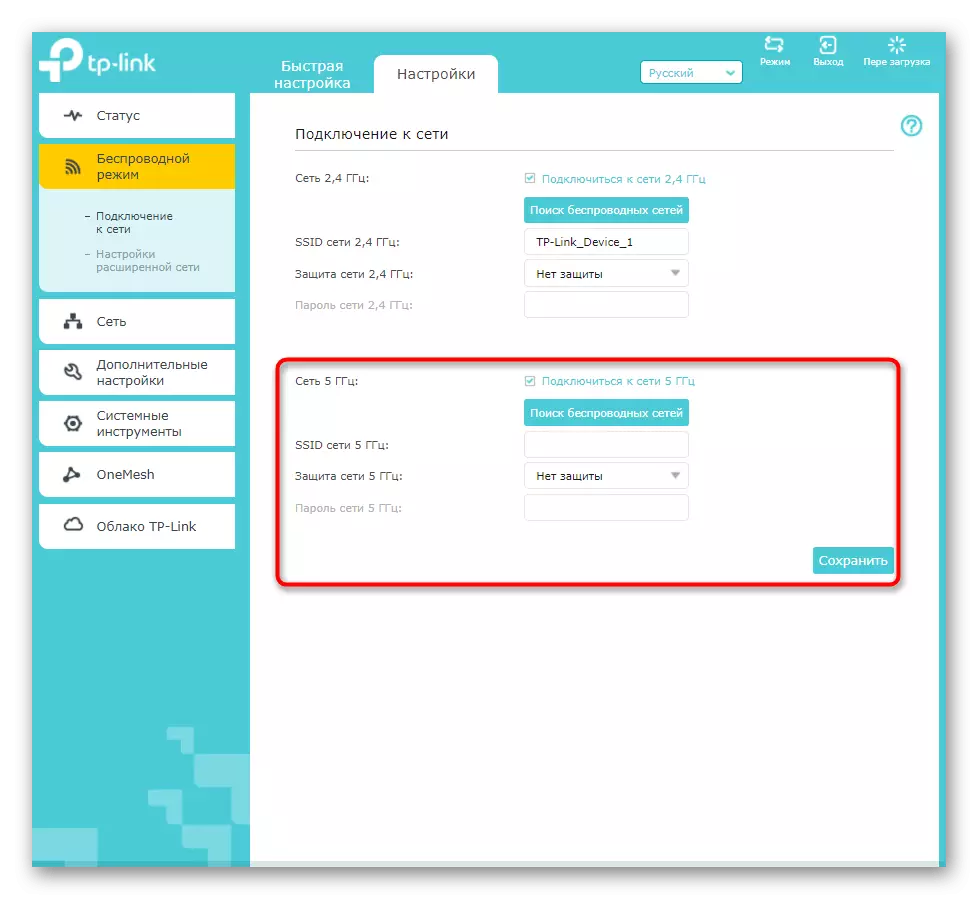
- Click on the "Settings" tab and immediately go to the "Wireless Mode" category.
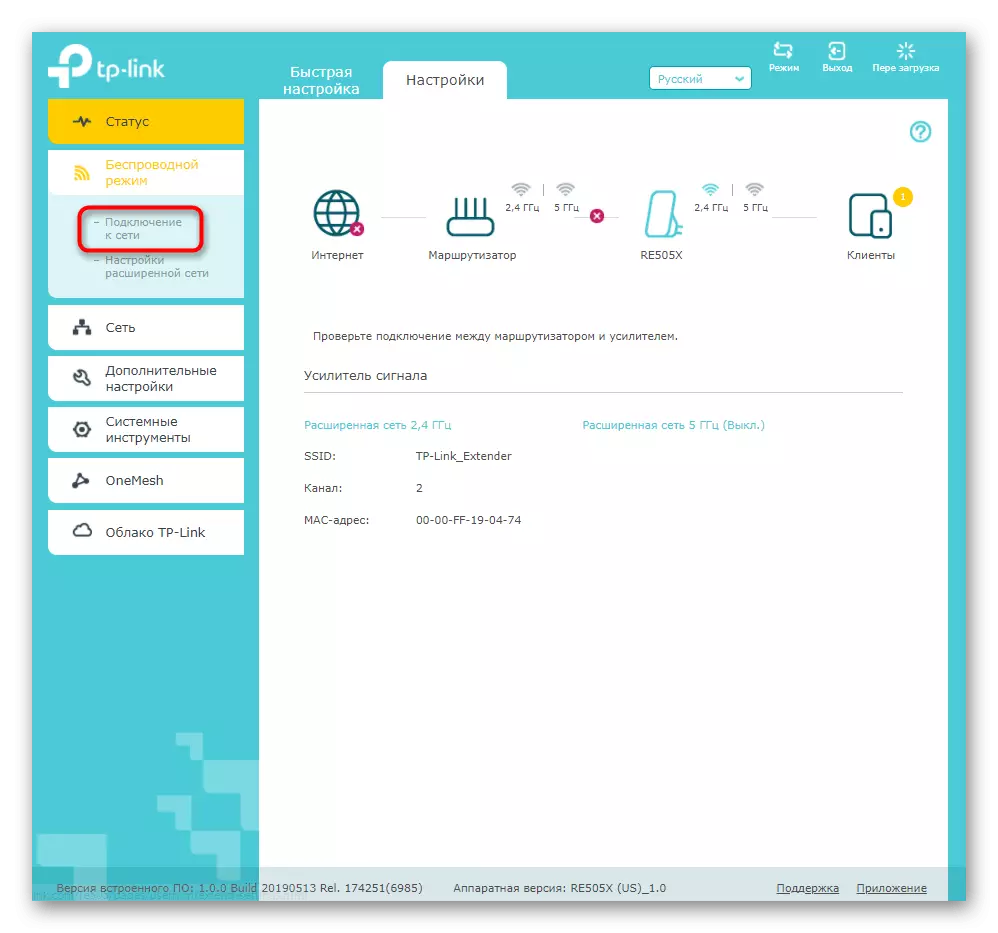
- There you are interested in the "Connection to the Network" menu.
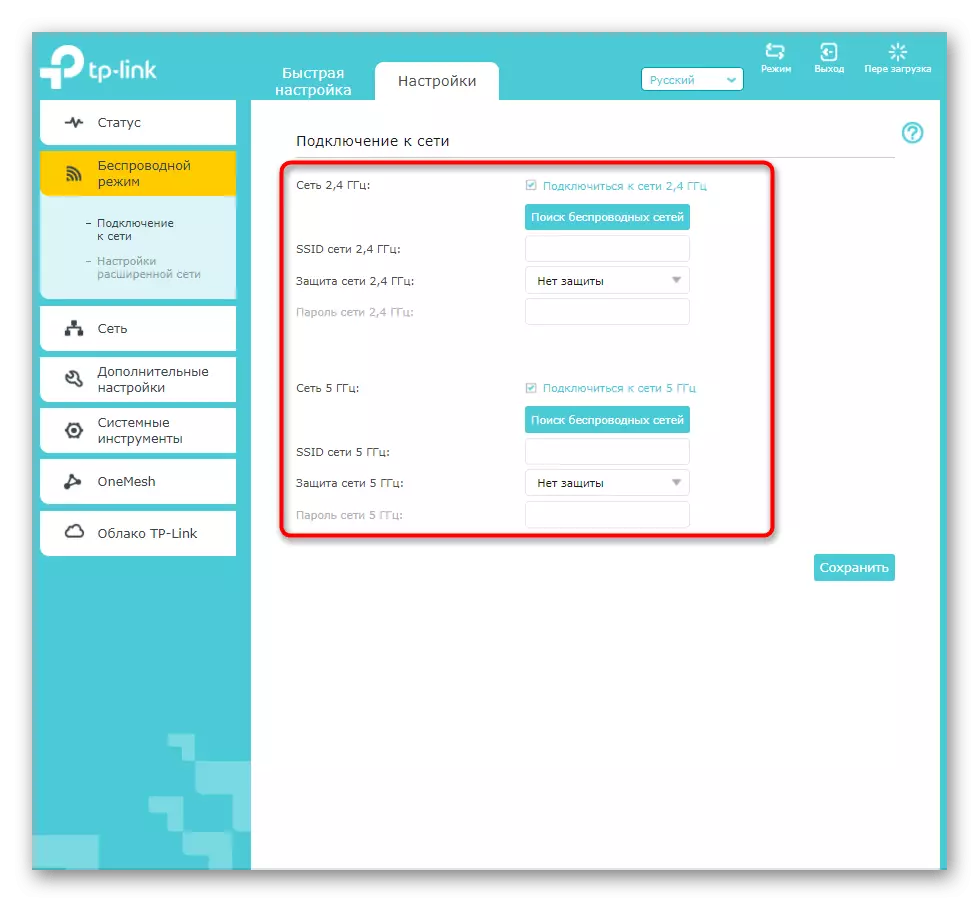
- In it, select the gerents to the network to which you want to connect, and then go to its search by clicking the "Wireless Networks" button or by entering the name manually, if you know exactly how it is written.
- After scanning, the SSID list is displayed in the coverage area, among which you will need to choose the desired one. Pay attention to the "Protection" column: if an open lock is drawn there, it means that the password for the network is not installed.
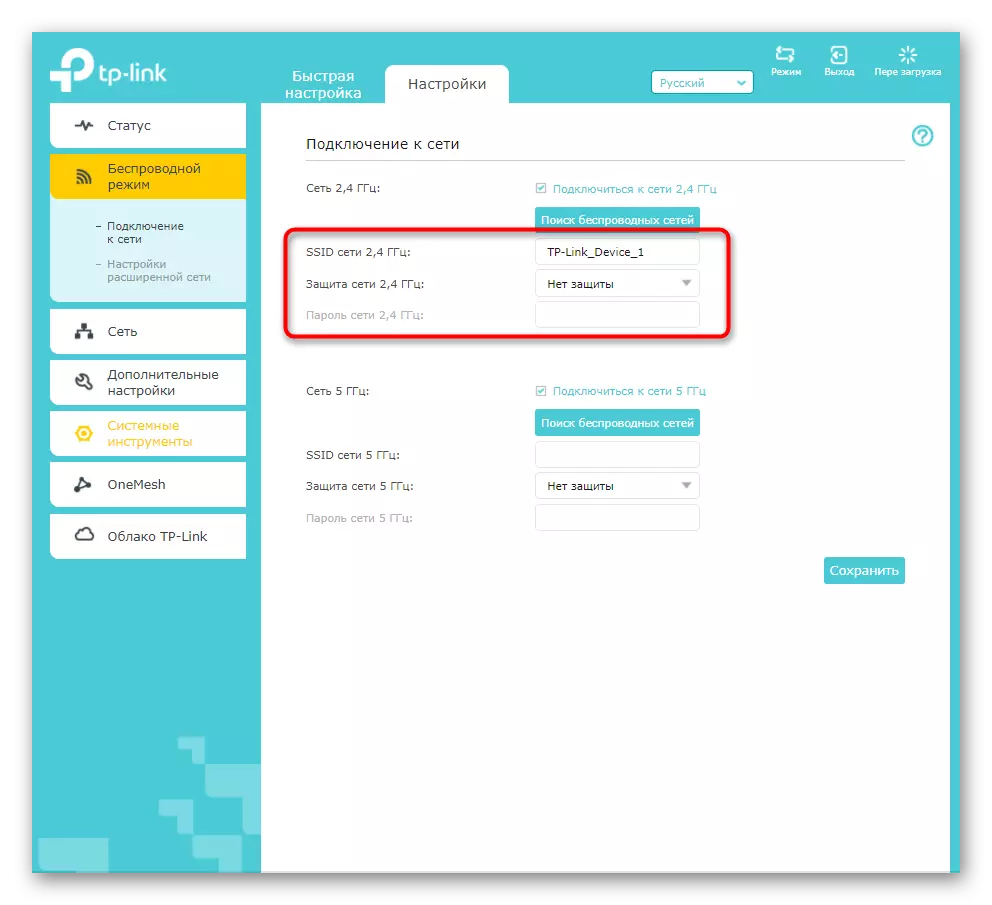
- After selecting a network with protection in the drop-down list, specify its type and password itself.
- Do the same with the second network if you want to use two frequency bands at once. Click the Save button to complete the settings and send the amplifier to reboot.

As soon as it turns on after applying the changes, try to connect any device to the wireless network and check how well the signal gain works. Go from the TP-Link Extender itself to another room to make sure the coverage area.
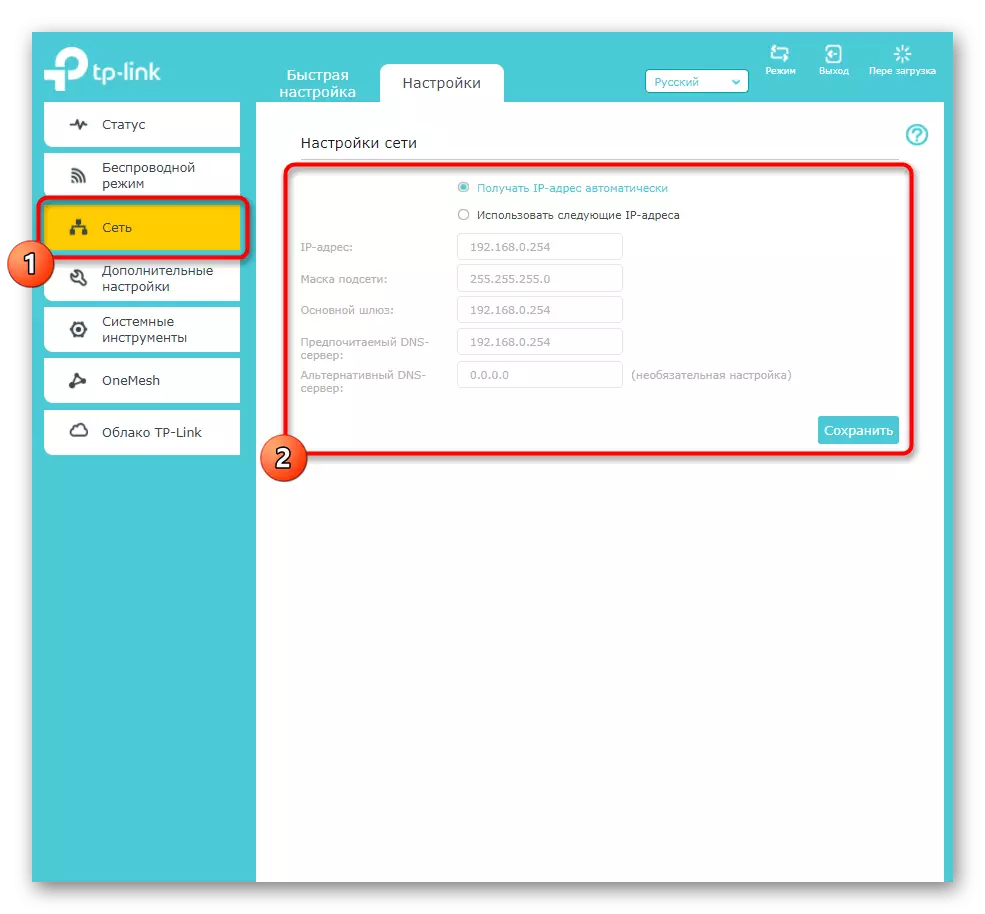
Step 2: Network
The TP-Link Extender web interface has only one block for network settings. They need to edit users that connect the amplifier to the router directly through the network cable. If the automatic receipt of the configuration has not happened, in this menu, check the "Use the following IP addresses" paragraph and repeat the parameters set in the router itself. Saving them, send a reboot amplifier.
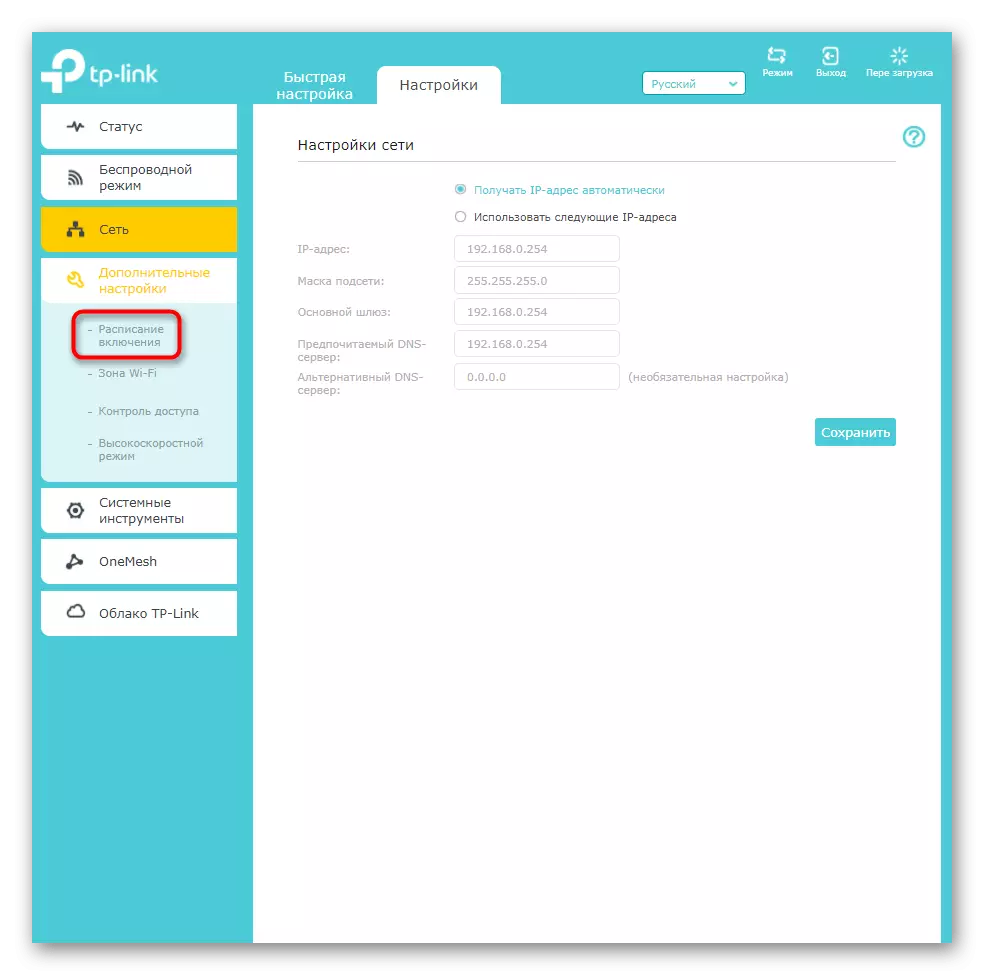
Step 3: Advanced Settings
Among the additional TP-Link Extender settings there are several interesting items that may be useful. This includes the activation of the schedule, the selection of coverage area and control the access of connected devices.
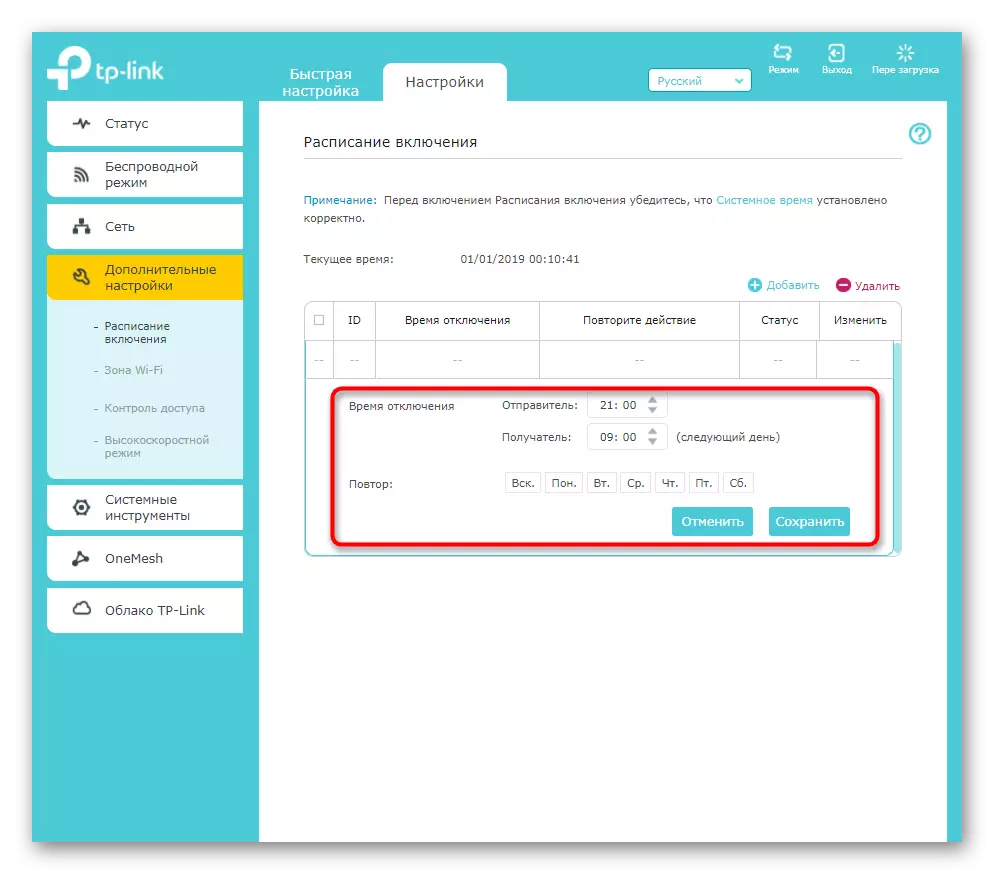
- To begin with, consider the Schedule Schedule in which you want to go through the "Advanced Settings" category.
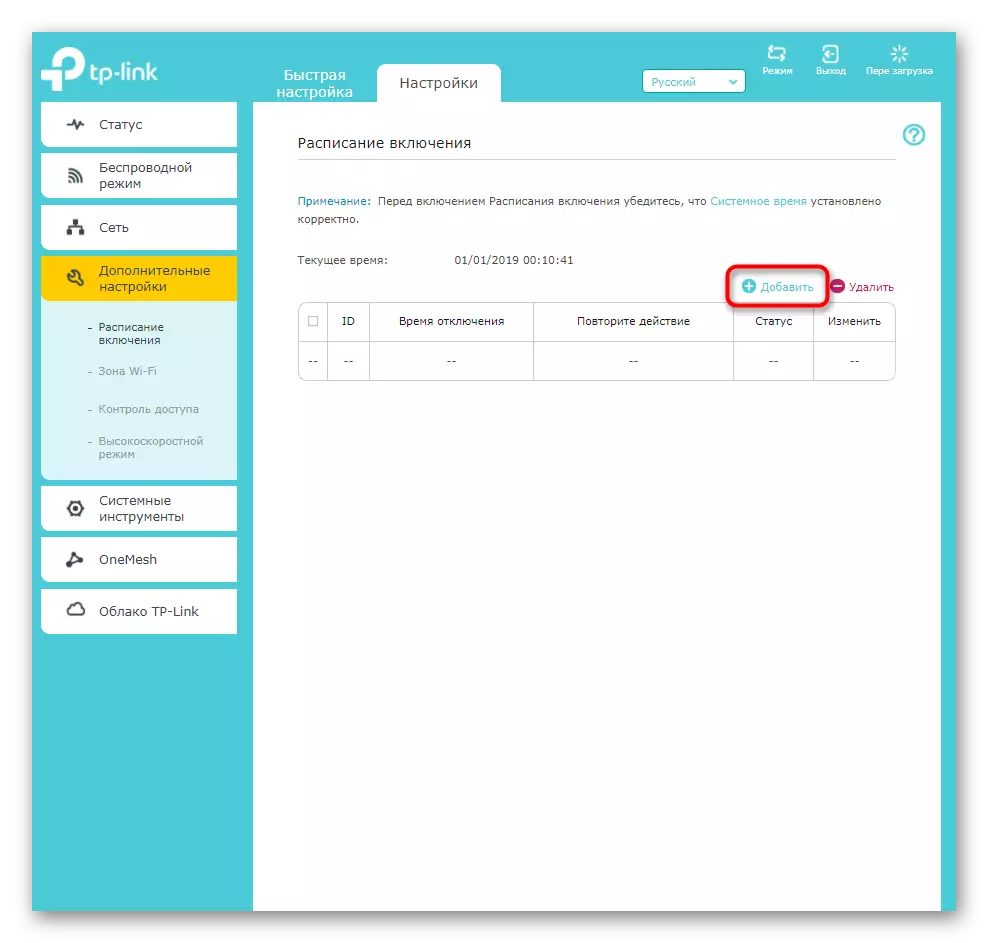
- Click the Add button to create a new enforcement schedule.
- In it, specify the start and end time and the days for which these restrictions relate. Add a few more schedule items if necessary, if you cannot comply with all the requirements in one.
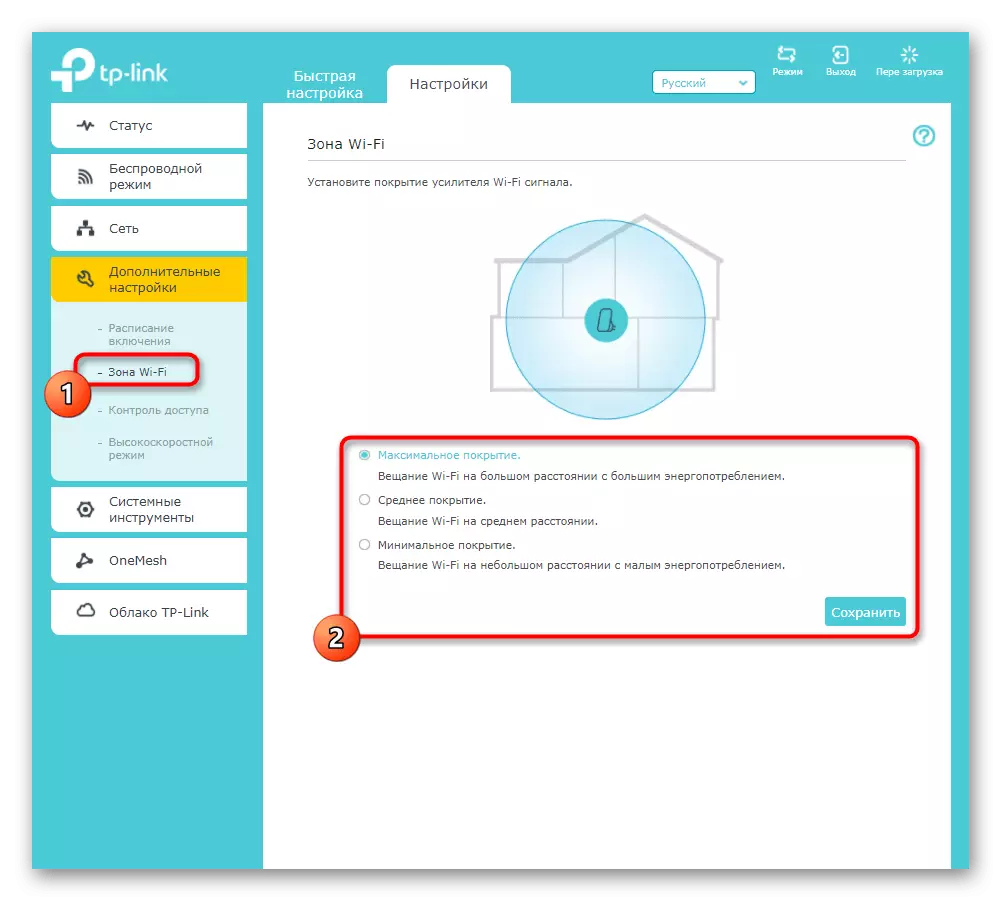
- The next menu is "Wi-Fi Zone". It contains settings that set the coating zone of the amplifier. By default, the "maximum coating" is set, and the editing is required in cases where the devices and so are in close proximity and do not want to spend more electricity than it could be. Mark the appropriate item marker and save the changes.
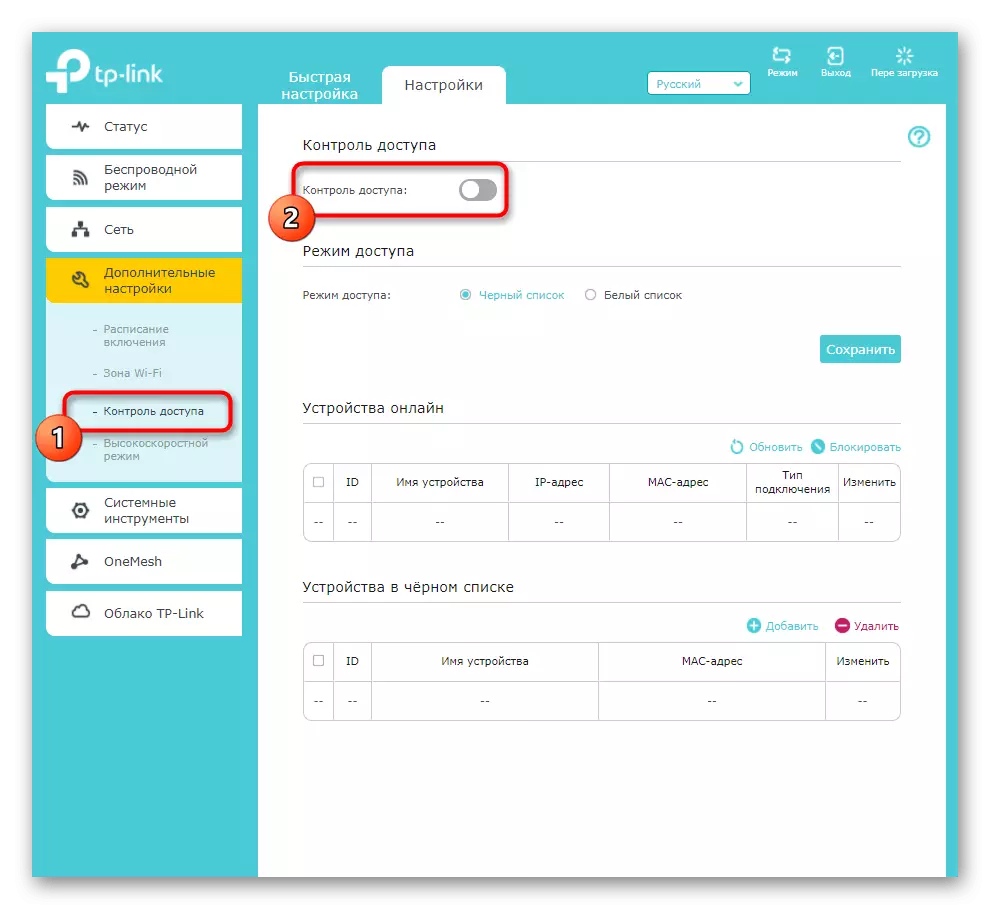
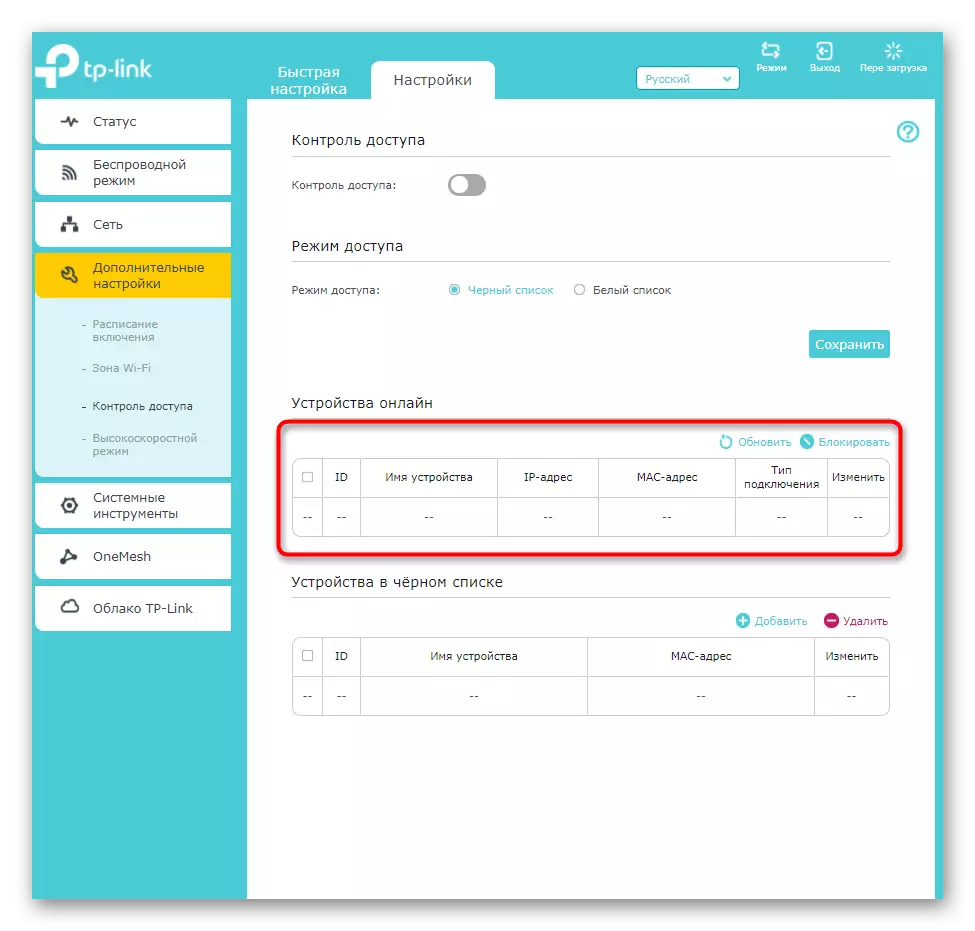
- As in the router settings, the TP-Link Extender has a small menu dedicated to configuring access control. If you want to set restrictions for certain users or create a white list, to start in the appropriate menu, activate the "Access Control" item, moving the slider.
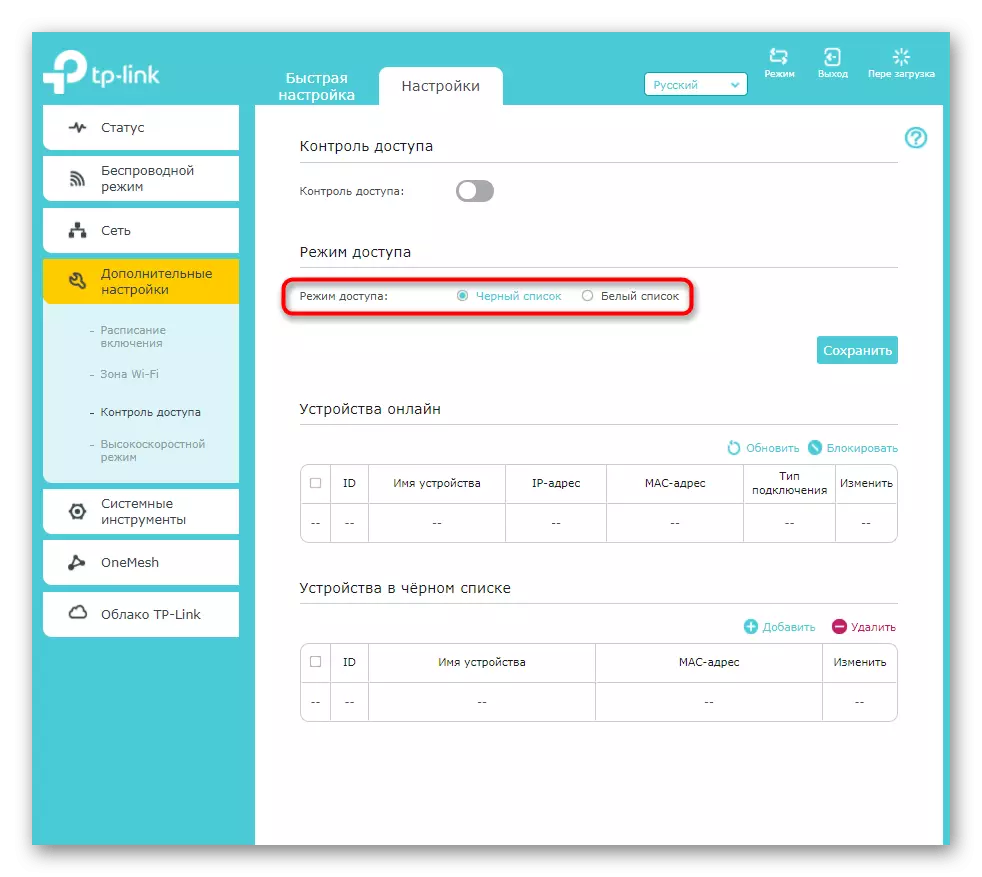
- Next, select your preferred mode. The black list implies blocking the table added to the table below, and the white is the resolution for them and the blocking of those that do not fall into this table.
- Browse the "Devices online" table to decide which of them you want to block or allow.
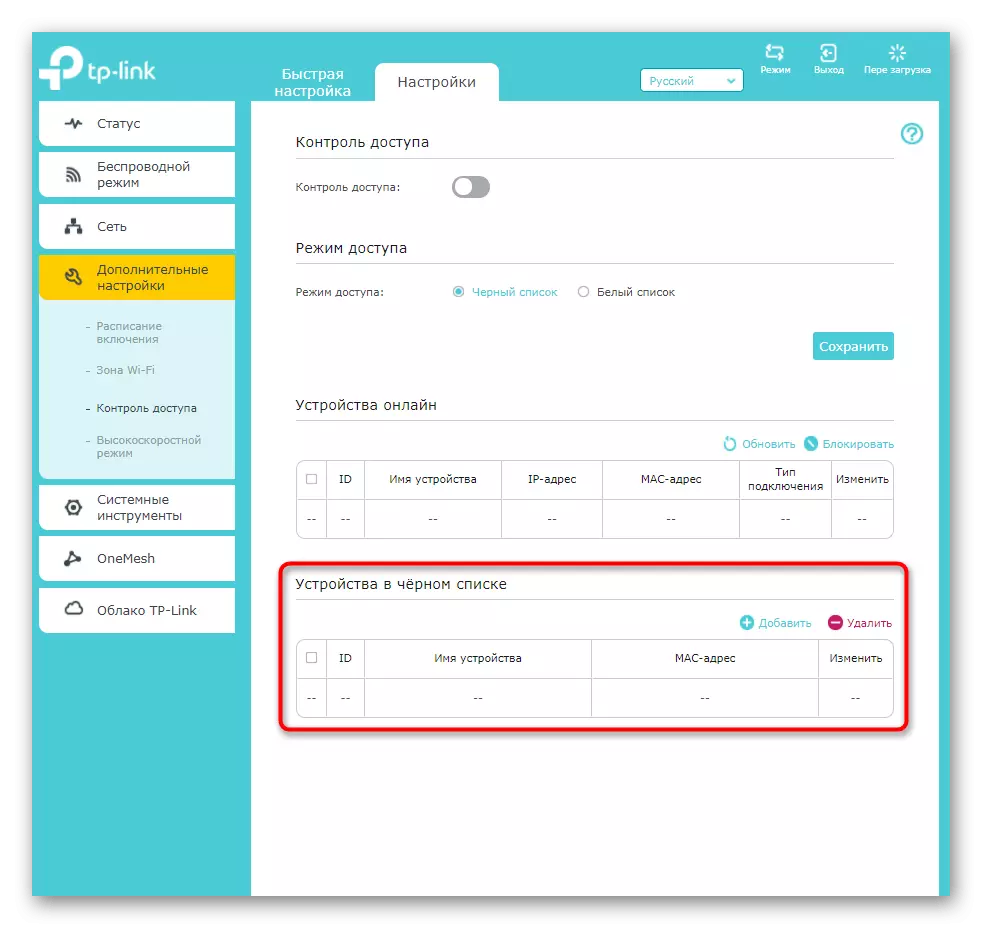
- Added to Lists Clients are displayed in the last table, which can also be controlled. In addition, there is a "Add" button, allowing manually to add the MAC address to the list, if the equipment itself was not found in the previous table.
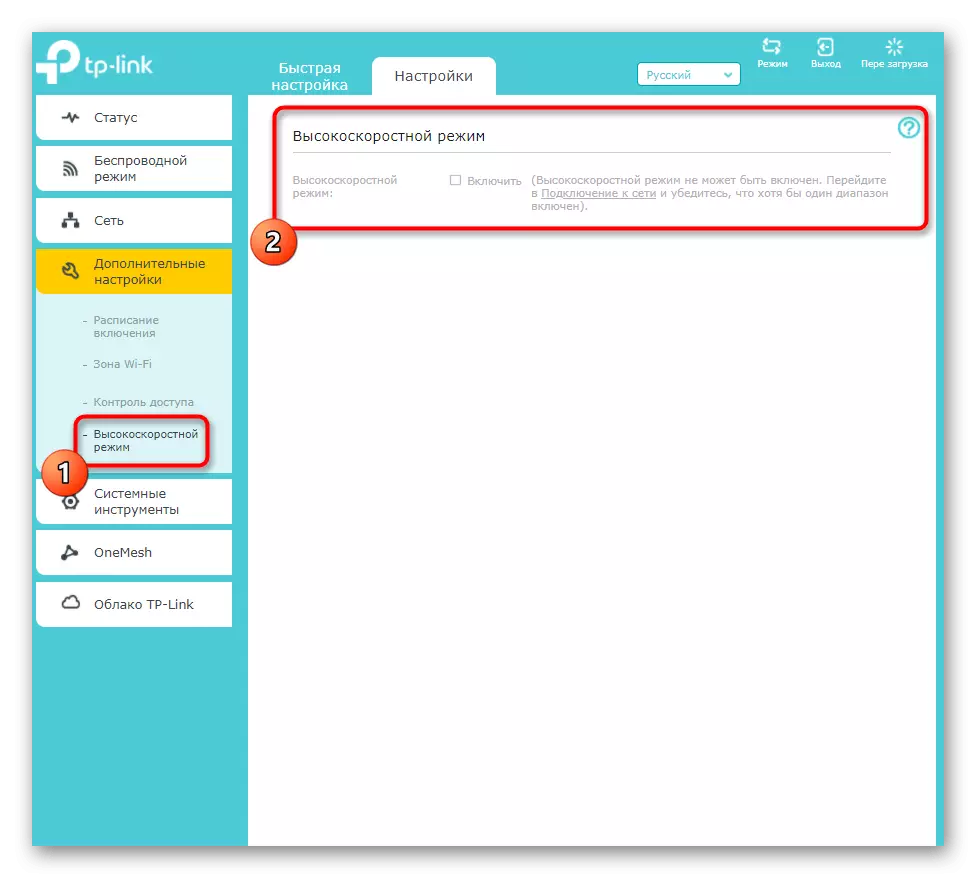
- Ends the section with additional "high-speed mode" settings. It is relevant only when the amplifier connects immediately to two Wi-Fi networks. When this mode is activated, one is always disabled and only the best works in order to ensure the best connection to the network.
All the settings discussed above are not necessarily edited, but they can be useful to perform additional configuration of the amplifier used. Do not forget after making any changes to press the "Save" button, otherwise, when you go to the next menu, they will be reset.
Step 4: System Tools
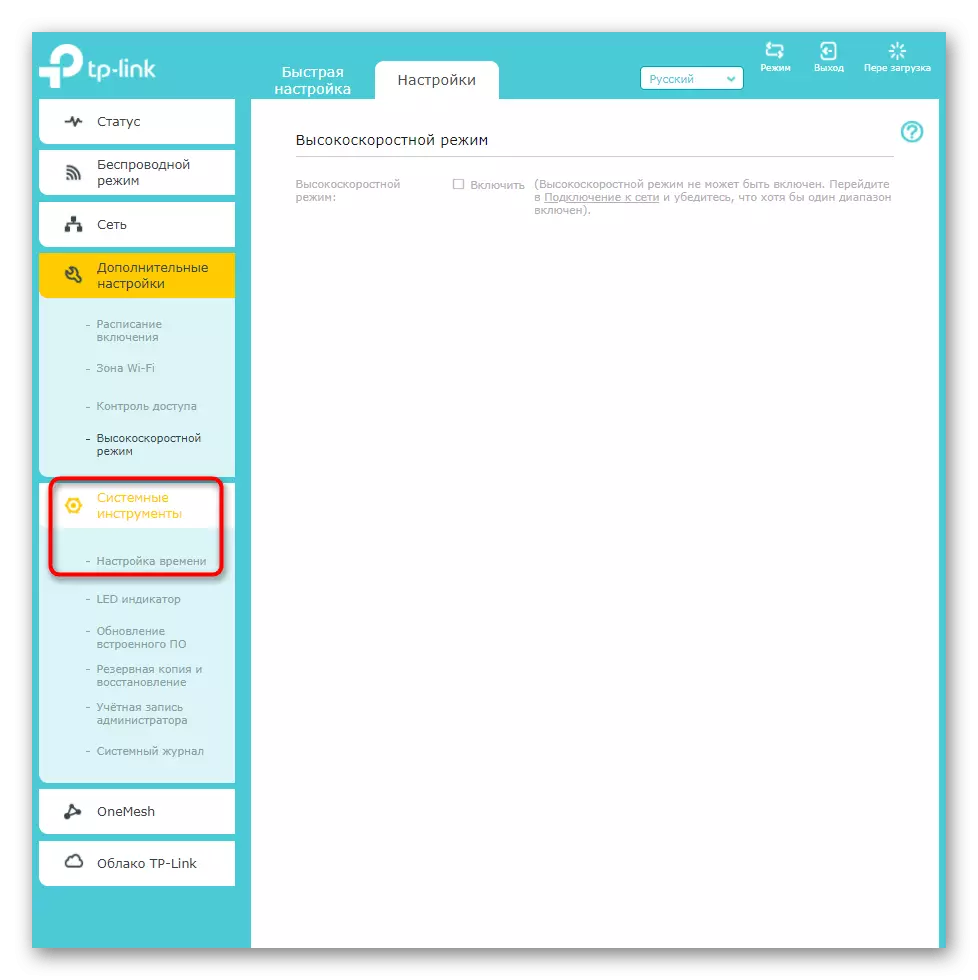
Briefly go through the system tools present in the TP-Link Extender web interface. They are responsible for the direct behavior of the amplifier, its internal software and the indicator located on the housing.
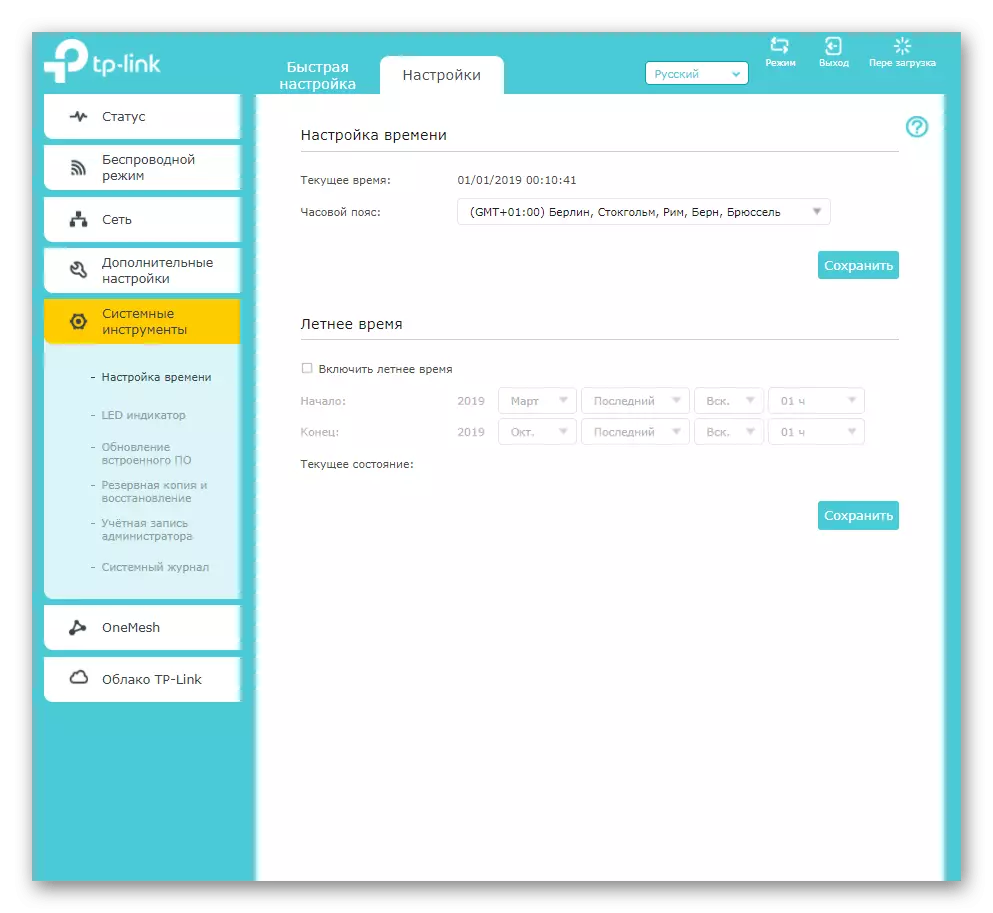
- First, open the "Time Setup" menu by selecting the appropriate section with system tools.
- Make sure that time is installed in accordance with the local one. Special attention to this item is required to pay users who have configured the schedule. If the time does not coincide with the local, most likely, the clock will be shifted and the schedule will be invalid.
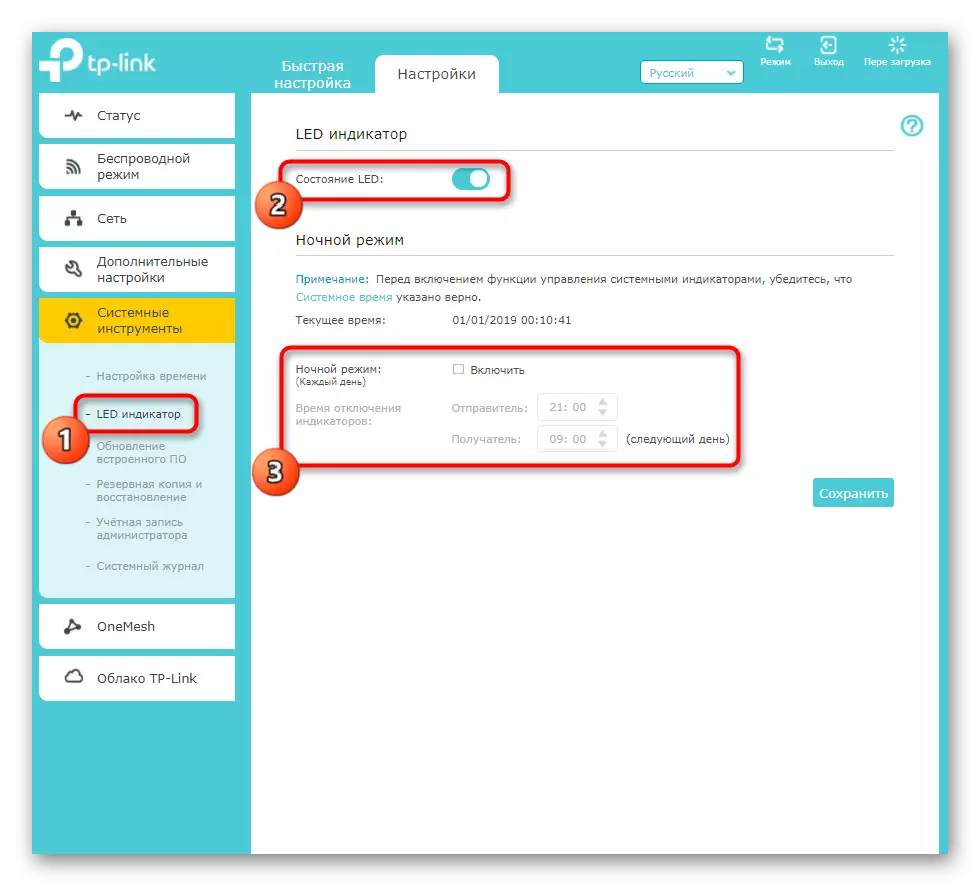
- The led indicator settings are followed. You can completely disable it or translate it to the night, setting a time lapse when it must be disconnected.
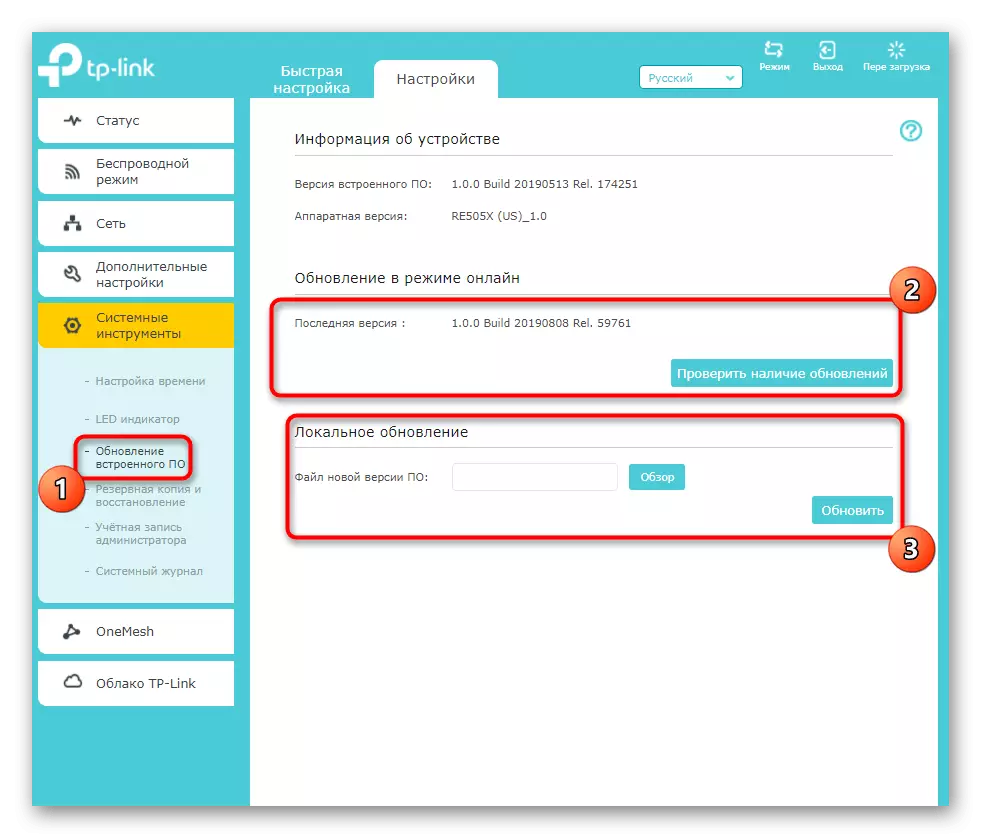
- The firmware for TP-Link Extender is not frequent, but if you want to check the availability of updates for the built-in software, you can do this using an online mode or on the official website. In the second case, the found file with the firmware will be downloaded through the "Local Update" block.
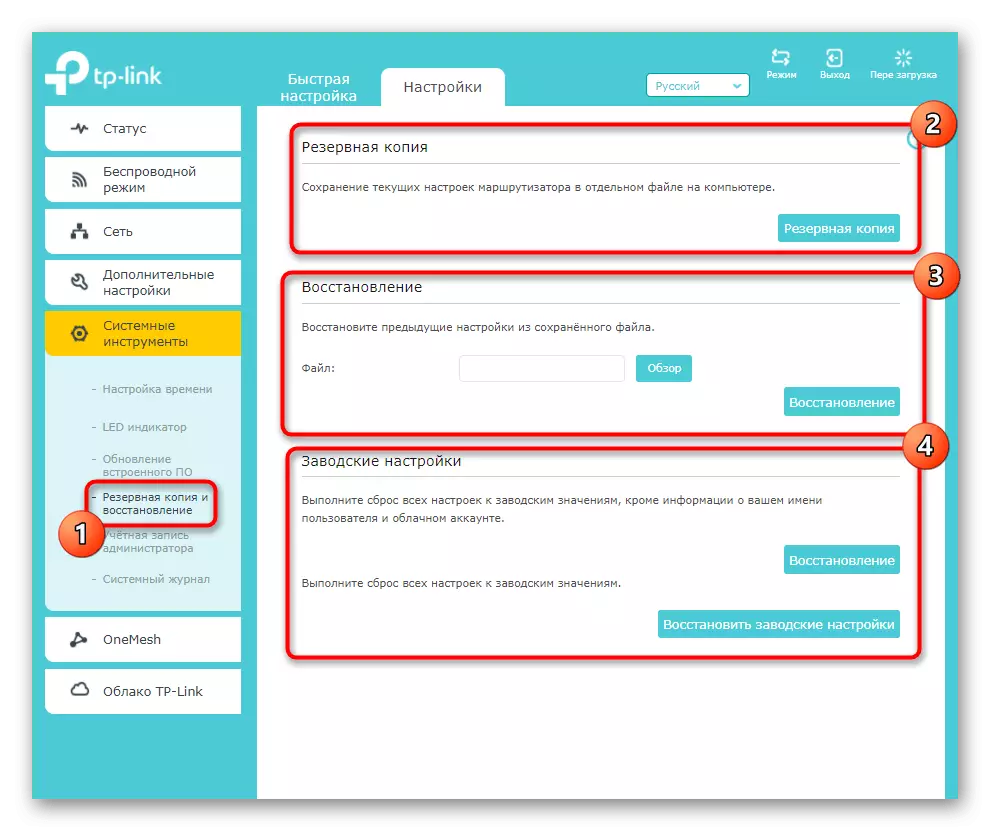
- Note the presence of the "Backup and Recovery" subsection. It is designed to create a file with the current amplifier settings, which can be restored at any time by downloading the file itself in the same menu. Below are the buttons responsible for resetting the device to factory settings. You need to click on them only if you want to completely reset the current TP-Link Extender configuration.
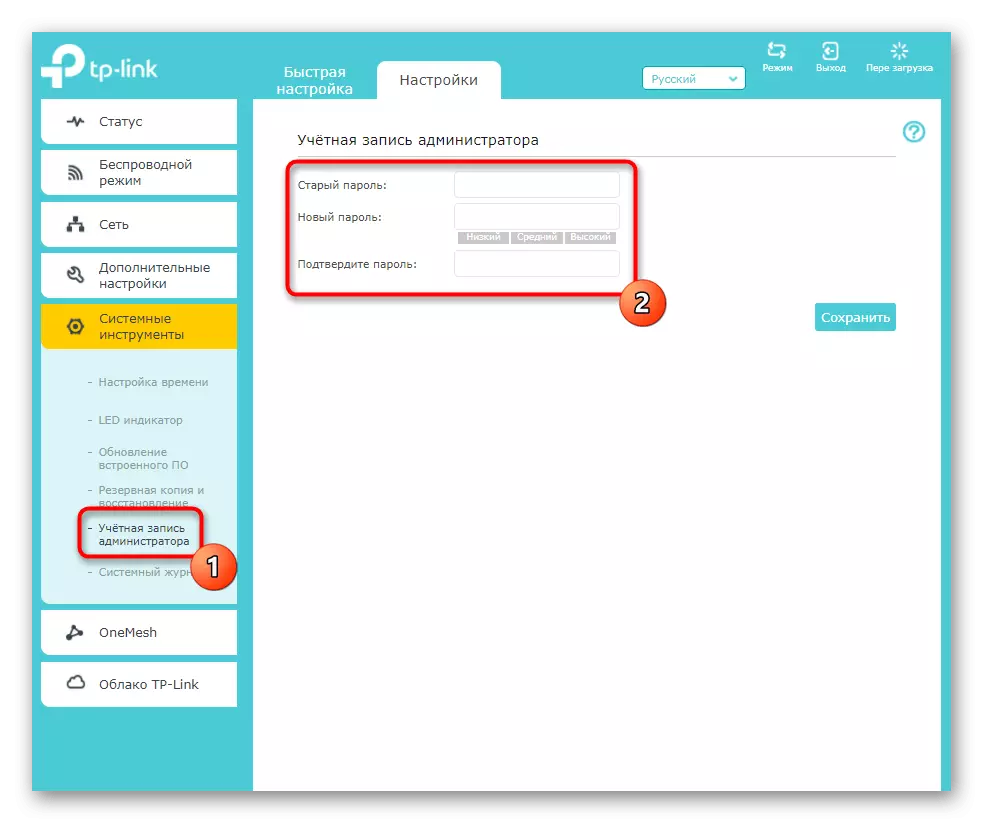
- You logged in before setting up this network equipment in the web interface by entering the administrator account data. They can be changed through special parameters of system tools, if you worry that someone will be able to connect to the amplifier and change its settings.
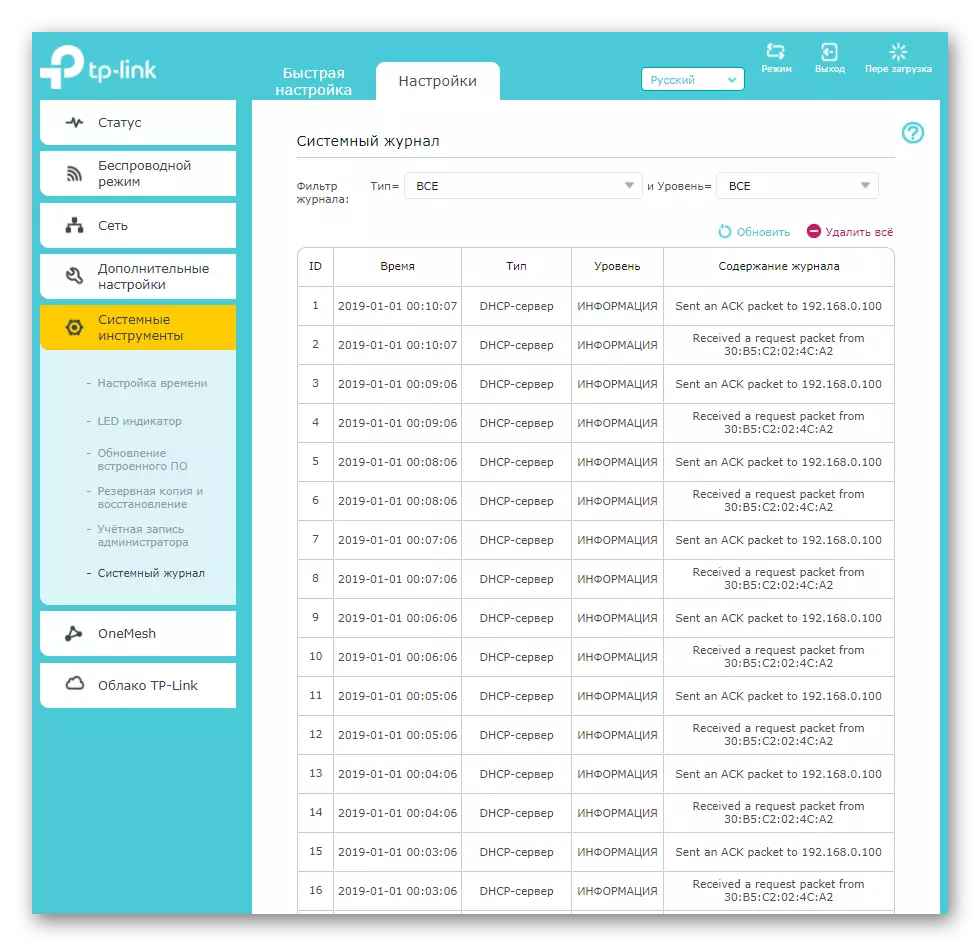
- The last item is "System Journal". It is necessary only to the users who understand the behavior of network equipment and wishing from time to time to view the magazine for suspicious actions and errors.
Step 5: TP-LINK applications
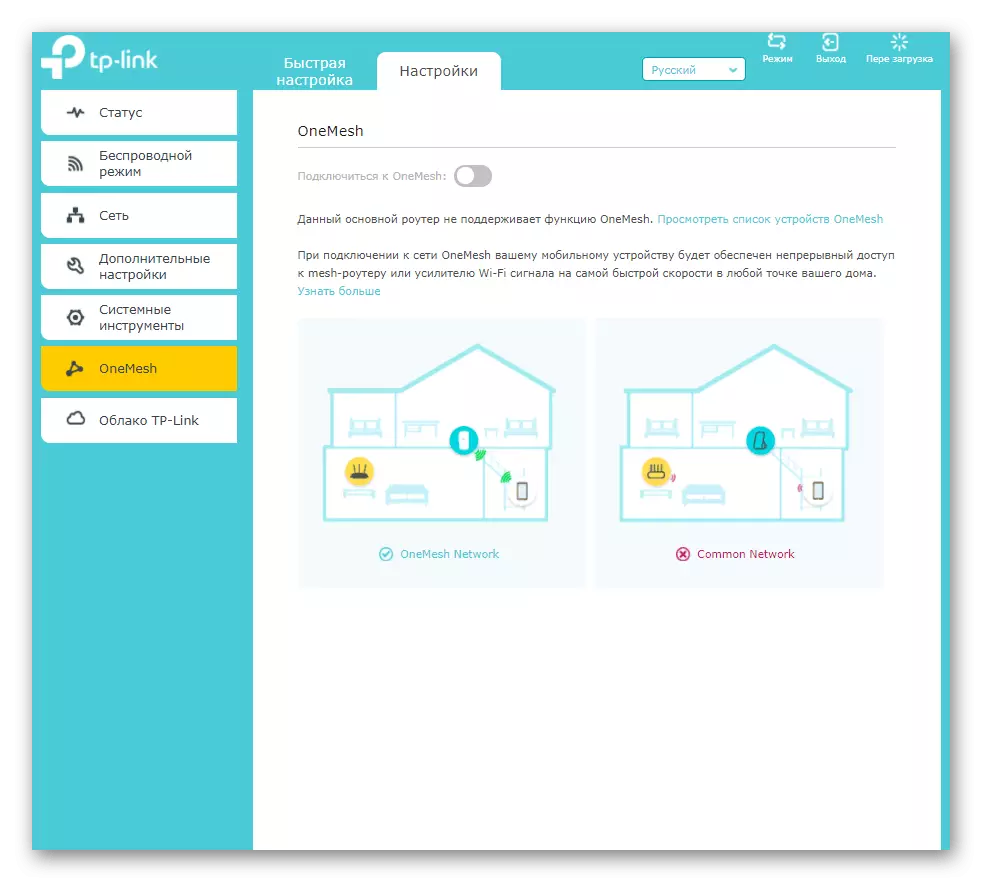
Finishing our article by referenceing two applications supported by some TP-Link Extender models. The first of them is called "OneEMASH" and is intended to ensure continuous access to mobile devices when connected to Wi-Fi. That is, it improves the stability of the connection at any point at home. More detailed with this application, see its web interface section and make sure that your main router supports it.
The TP-LINK cloud is another feature for mobile devices that are connected to the main network. When you go to this menu, read the instructions from the developers and execute them if the application loads did not occur in automatic mode. It allows you to control the network from a smartphone or tablet, running clients and some settings that you will see immediately after the connection.
