
Many of the drivers who have ever been released have a digital signature. This serves as a certain confirmation that the software does not contain malicious files and is absolutely safe for your use. Despite all the good intentions of this procedure, sometimes checking the signature can deliver some inconveniences. The fact is that not all drivers have an appropriate signature. And without the appropriate signature, the operating system will simply refuse to install. In such cases, you have to disable the mentioned check. It is on how to disable the mandatory driver signature check, we will tell in our lesson today.
Signs of problems with digital signature
By installing the driver for the device you need, you can see on your screen Windows Security Service.
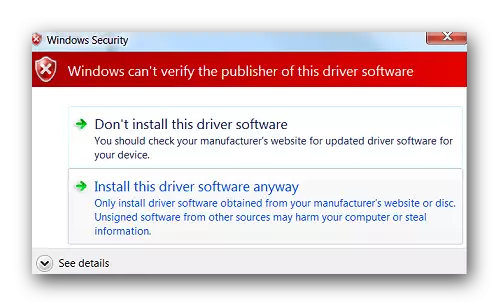
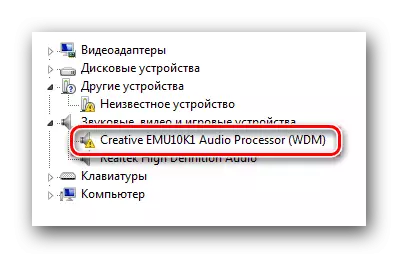
Despite the fact that you can select the "Install this Driver" item in the window that appears, the software will be installed incorrectly. Therefore, to solve the problem simply by the choice of this item in the message will not work. Such a device will be marked with an exclamation mark in the Device Manager, which indicates problems in the work of the equipment.
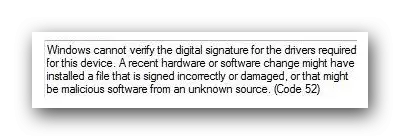
As a rule, in the description of such a device will appear the error 52.
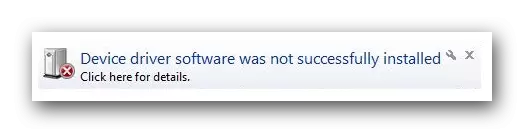
In addition, during the installation of software without the corresponding signature, a notification in the tray may appear. If you see something similar shown in the screenshot below, it means that you may have collided with the driver signature verification problem.
How to disable the inspection of signature from
You can select two main types of checks off - permanent (permanent) and temporary. We bring to your attention several different ways that will allow you to disable the scan and install any drivers on your computer or laptop.Method 1: DSEO
In order not to dig in the system settings, there is a special program that assigns the identifier for the driver. Driver Signature Enforcement Overrider Allows you to change digital signatures in any software and drivers.
- Download and run the utility.
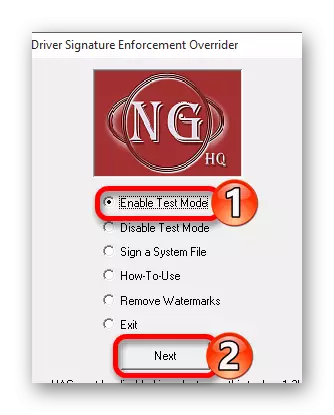
- Agree with the User Agreement and select "Enable Test Mode". So you turn on the test mode of the OS.
- Restart the device.
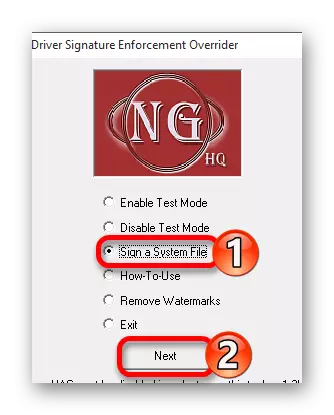
- Now start the utility and select "Sign A System Mode".
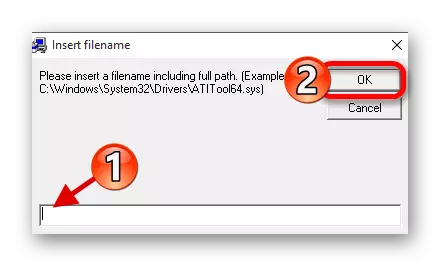
- Enter the address that runs directly to your drive.
- Click "OK" and wait for completion.
- Install the desired driver.
Download DRIVER Signature Enforcement Overrider utility
Method 2: OS load in special mode
This method is a temporary solution to the problem. It will disable the scan only until the next reboot of the computer or laptop. Nevertheless, it can be quite useful in some situations. We divide this method into two parts, as depending on the installed version of the OS, your actions will be somewhat different.
For owners of Windows 7 and below
- Restart the system in any available way. If the computer or laptop is initially disabled, then press the power button and immediately go to the next step.
- Click on the keyboard the F8 button until the window appears with the choice of Windows loading parameter. In this list, you must select a string with the title "Disable Driver Signature Enforcement" or "Disable the mandatory driver signature check". Typically, this string is the penultimate. After selecting the required item, press the "ENTER" button on the keyboard.
- Now you can only wait for the full system download. After that, the verification will be disabled, and you can install the necessary drivers without signature.

WINDOWERS Windows 8 and above
Despite the fact that the problem of testing a digital signature is basically the owners of Windows 7, such difficulties are found and when using subsequent versions of the OS. These actions must be performed by barely logging into the system.
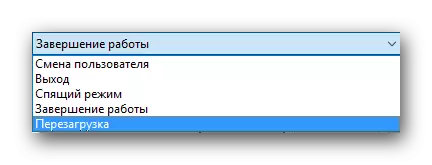
- Click the "SHIFT" button on the keyboard and not let go before rebooting the OS. Now press the "ALT" and "F4" keys simultaneously on the keyboard. In the window that appears, select the "Restart System" item, after which we click the "ENTER" button.
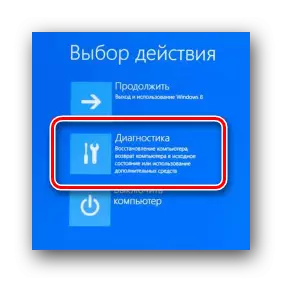
- We are waiting for a while until the "Select Action" menu appears on the screen. Among these actions, you need to find the line "Diagnostics" and click on the name.
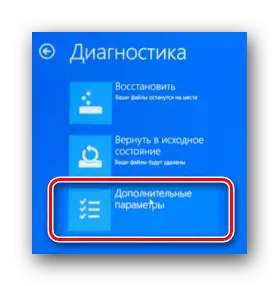
- The next step will be the choice of the "Additional Parameters" line from the general list of diagnostic tools.
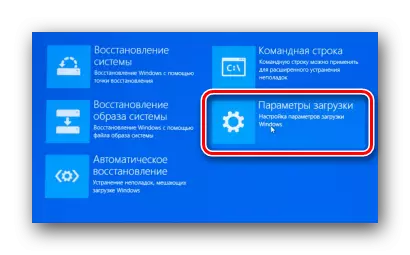
- From all the proposed subparagraphs you need to find the section "Download options" and click on its name.
- In the window that appears, you just need to click on the Restart button in the right screen area.
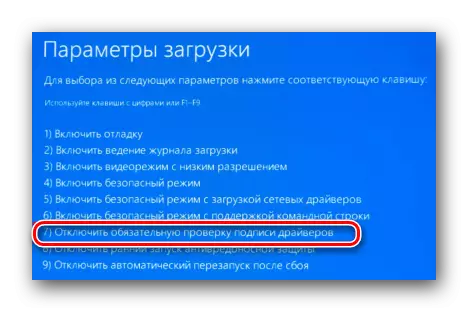
- During the restart system, you will see a window with a choice of boot options. We are interested in the item at number 7 - "Disable mandatory verification of driver signature". Select it by clicking the "F7" button on the keyboard.
- Now you need to wait until Windows boots. Mandatory verification of the driver signature will be disabled until the next system reboot.
This method has one drawback, which manifests itself in some cases. It lies in the fact that after the next inclusion of the test, the previously installed drivers without proper signature can stop their work, which will lead to certain difficulties. If such a situation, you have arose, you should use the following method, allowing you to disable the check of the commercial.
Method 3: Group Policy Setup
With this method, you can disable the mandatory check completely or until you turn it back independently. One of the advantages of this method is that it is applicable to an absolutely any operating system. That's what you need to do this:
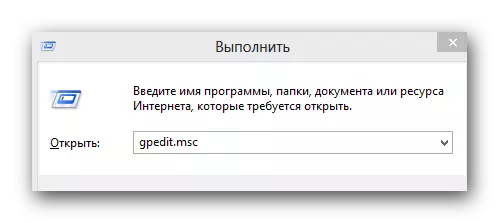
- On the keyboard, press the "Win + R" buttons at the same time. As a result, you will be launched. In the only field of the opened window, enter the gpedit.msc command. After entering the command, click "Enter" or the "OK" button in the window that appears.
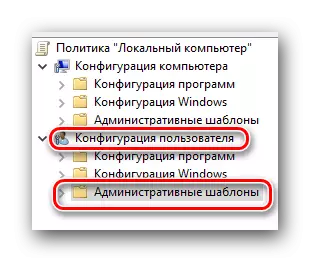
- You will have a window with group policy settings. In the left area, you must first go to the "User Configuration" section. Now from the list of subsections, choose the "Administrative Templates" item.
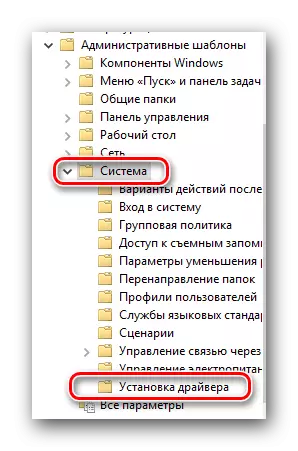
- The root of this section is looking for the "System" folder. Opening it, go to the next folder - "Install Driver".
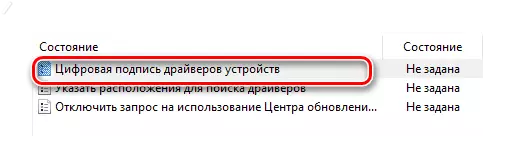
- By clicking on the name of the last folder, in the left area of the window you will see its contents. Here will be three files. We need a file called "Digital Signature of Device Drivers". Open it double pressing the left mouse button.
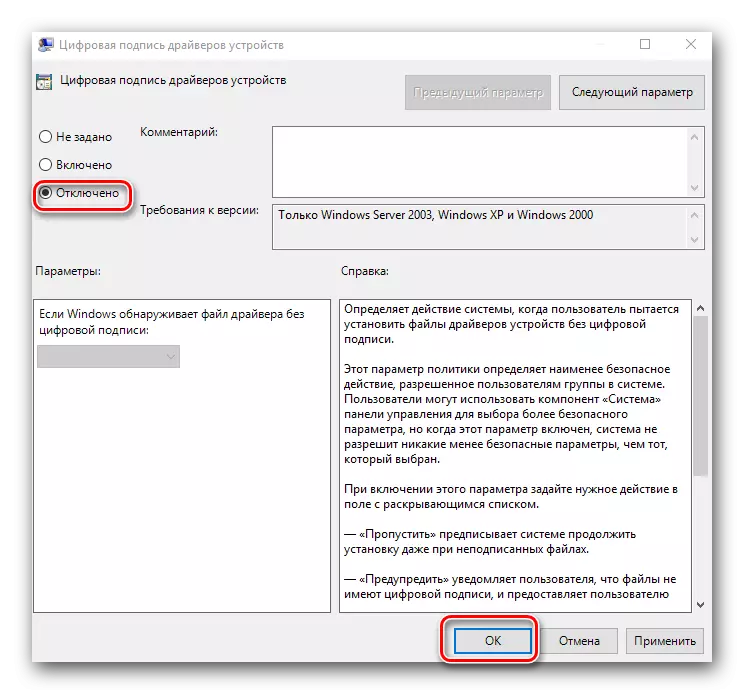
- Opening this file, you will see the area with switching the verification status. It is necessary to put the mark in front of the string "disabled", as shown in the image below. In order for changes to the settings entered into force, you need to click the "OK" button at the bottom of the window.
- After executing the described actions, you can easily install any driver without digital signature. If you need to re-enable the check function, simply repeat the steps and set the mark on the line "Enabled" and click "OK".
Method 4: "Command Line" Windows
- Open the "command line" by any priority for you. You can learn about all from our special lesson.
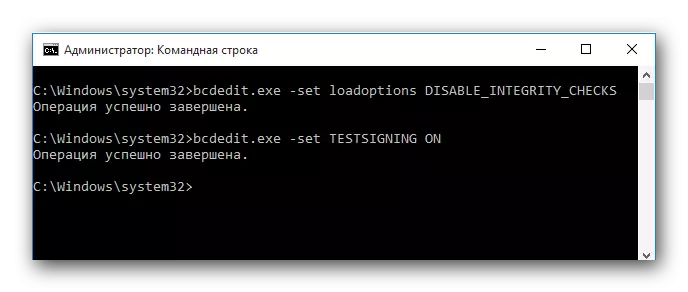
- In the window that opens, we enter the following commands in turn. After entering each of them, click "ENTER".
- In this case, the "command line" window should look like this.
- The next step will be rebooting the operating system. To do this, use any way known to you.
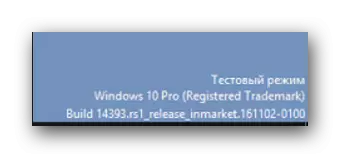
- After rebooting, the system will boot in the so-called test mode. It is not much different from the usual. One of the noticeable differences that can some interfere is the presence of appropriate information in the lower left corner of the desktop.
- If you need to enable the check function back, simply repeat all actions, replacing only the "ON" parameter in the second command to the "OFF" value.
- In some cases, this method can only work on the condition that you used it in the safe mode of Windows. About how to run Windows in safe mode, you can learn in detail from our special article.
Read more: Opening the command line in Windows
BCDEDIT.EXE -Set LoadOptions Disable_integrity_Checks
BCDEDITIT.EXE -SET Testsigning ON
Lesson: how to enter the secure mode in Windows
Using one of the above methods, you can easily get rid of problems associated with installing software without digital signature. Do not think that disabling the check function will entail the appearance of any system vulnerabilities. These actions are completely safe and in themselves will not affect your computer with malicious programs. However, we recommend that you always use the antivirus, in order to protect yourself completely from any problems with surfing on the Internet. For example, you can use the free Avast Free AntiVirus solution.