

Checking the display drive in Windows
If the laptop does not have any software or hardware problems, open the disc tray is extremely easy - just press a button that is responsible for this function. Depending on the model, Lenovo may need long hold (about 3 seconds).
On the side of the body can occur, and the usual plug that some users take for the drive. This can be understood not only by the absence of buttons, but also inscriptions, markings that it is in this place there is a drive.

However, the button may not always work if the drive is not visible to the operating system, it can not be opened. Usually, this indicates a mechanical failure. Find out if the computer sees the drive, as follows. The easiest way to look at the "Explorer" (the window "This computer" / "My Computer") and find among the local disk drive. If present go to be an option, telling about the open method, and if the drive there is not visible, follow these instructions:
- Start the "Device Manager" by calling the menu "Run" keys Win + R. In the field, type the command devmgmt.msc and click "OK".
- In Windows 8, and 10, it can also be done, right clicking on the "Start" and go to the "Device Manager".
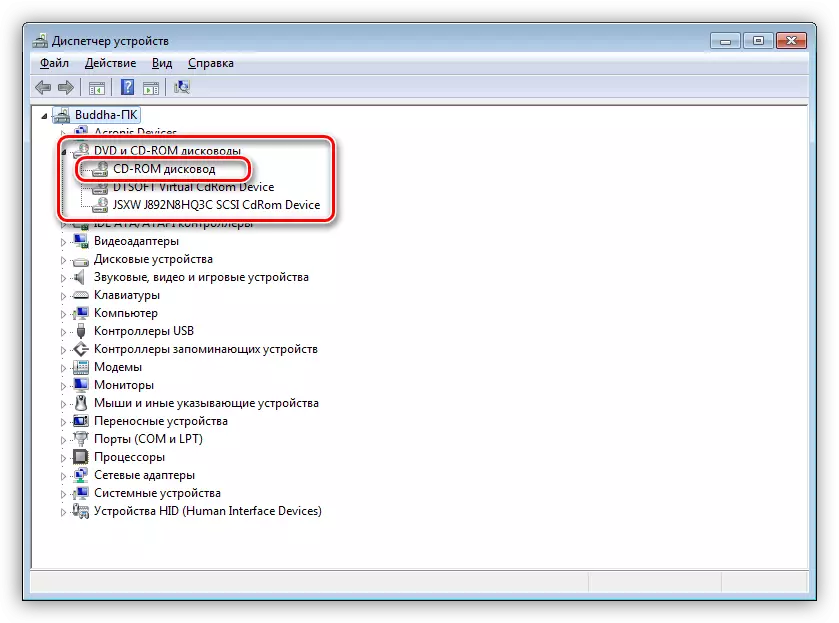
- In the list of devices to be displayed category «DVD and CD-ROM drives." Expand it and see if there is the name of «CD-ROM Drive", or as close to it. Options with a long set of characters and / or contain the word «virtual» is not suitable, as they represent a virtual emulator that you can create through special programs like Daemon Tools and UltraISO. In the screenshot below marked with the desired option of the three.
- Next to the drive must not be yellow or red icons indicating the existence of problems. If you see them, look for options 2, 4 and 5 of this article. Everyone else try to offer further order instructions.


Option 1: The key on the keyboard
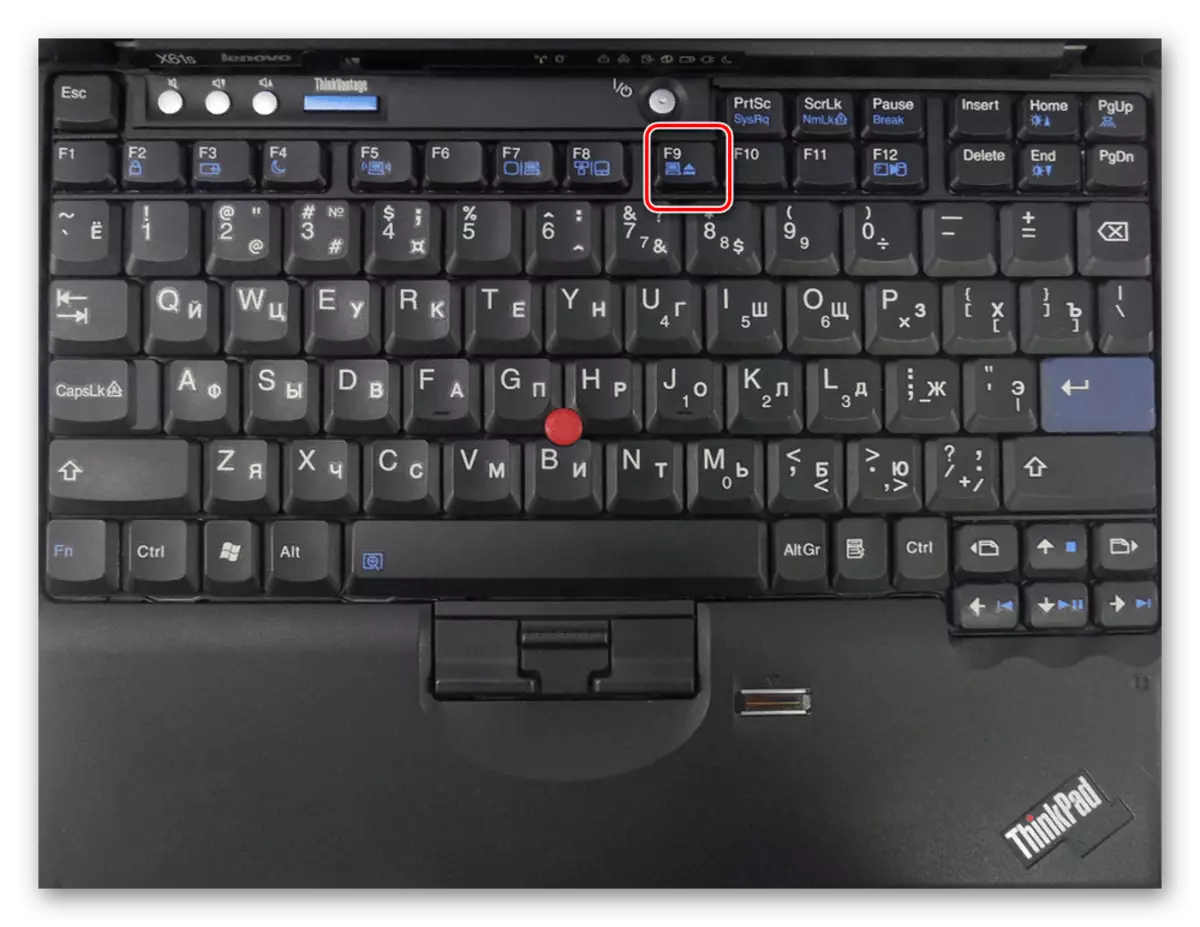
In some, mostly very old notebooks, the Lenovo, have a key on the keyboard, which opens the drive by clicking on it. It is always in the F-number and pressed in combination with the Fn key. In the photo below you can see that it is responsible for the F9 key. Look on the keyboard of your laptop a similar key, perhaps with a different number, but like the icon-arrow up.
Option 2: Restarting a laptop and search for conflicting programs
Sometimes a problem with a drive arises due to an unsuccessful laptop or a program that prevents the disk drive to open. You can see which software is running in Windows, close all the software that may interact with the drive anyway, and then try to open the last again. Or simply restart the laptop and without launching any unnecessary programs, try to open the CD-ROM tray.On the occurrence of problems can affect applications running with virtual disks. If this is your case, delete the program, additionally, trying to install the old or, on the contrary, a newer version in which there is no physical drive conflict. If necessary, you will need to restore the system to get rid of the traces of incompatible software, for example, from the system registry.
Read more: Restore System in Windows 7 / Windows 10
Option 3: System "Explorer"
Through the "Explorer" in Windows, you can initiate a tray emission. To do this, go to "This computer" / "My computer" or using the left pane of the "Explorer", right-click on the drive and select "Extract".

In a situation where you are trying to remove an empty drive, it may not be displayed in the "Explorer". For its visibility, one of the parameters are responsible to check and change if necessary:
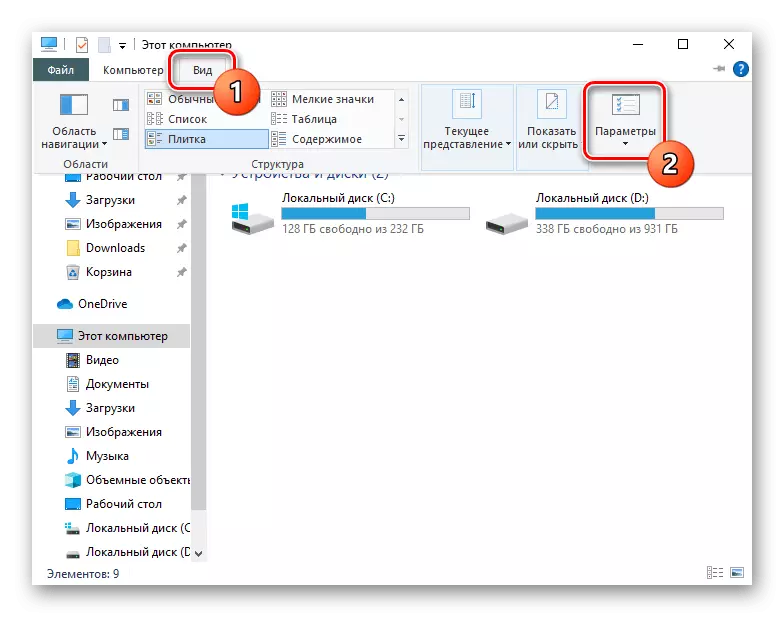
- Being in the "Explorer", in Windows 10, click on the "View" tab, and then by the "Parameters" button.
- In Windows 7, instead, use the "Sort" button, after which you select "Folder and Search Settings".
- In a new window, switch to the "View" tab, find the item "Hide empty discs" (in Windows 10) or "Hide empty disks in the Computer folder" (in Windows 7) and remove the checkbox from it. Close the window by clicking on "OK".
- Repeat the extraction step through the "Explorer".


Option 4: Windows Settings
In some cases, Windows does not see the drive or it cannot be removed because there have been relatively serious changes in the work of the laptop. These include both incorrectly configured BIOS, and problems with the driver, registry or even viral activity. The user needs to consistently try to find out what the settings affect the fact that the drive cannot be opened. In this you can help our separate article on the link below.Read more: We solve the problem with the lack of a drive in Windows
Option 5: Emergency Extraction
If no standard methods help solve the task, there is a chance that there are hardware problems. First of all, you should use emergency removal - on the Lenovo package next to the opening button there should be a small hole. It has a recessed button, it is necessary to click on something not very sharp and thin: a broken clip, a wire, an "ear" needle, etc. Do not use items that may break! These include: matches, toothpicks and thin plastic. Their wreckage may worsen the situation or to deprive you of the last hopes for extracting the tray from the drive.

Press the gadget to the button so that its pressing has felt. Perhaps you will need to wait a few seconds. In most cases, after this, the drive will open.
It should also be noted that some models on the other side of the emergency button can be the same small LED that inexperienced users or those who have not very good vision can be confused. Inspect this area more carefully to accidentally damage the light bulb.
There is always a chance that no of the proposed recommendations helps. This usually means the following:
- Some of the drive parts jammed;
- Drive as the device failed;
- Departed or damaged the loop connecting the drive with the motherboard.
Experienced users can replace the drive for a new one or try to repair the current, but for this, of course, you will need to fully disassemble the Lenovo laptop. It is done in different ways, because each model has its own design features. We recommend searching on the Internet video regarding the disassembly of your model or at least the same lineup of Lenovo laptops. Jossers who do not have adequate knowledge, practice and confidence in their abilities better contact the specialists who will fulfill this task without any difficulties.
See also: Disassemble the laptop at home