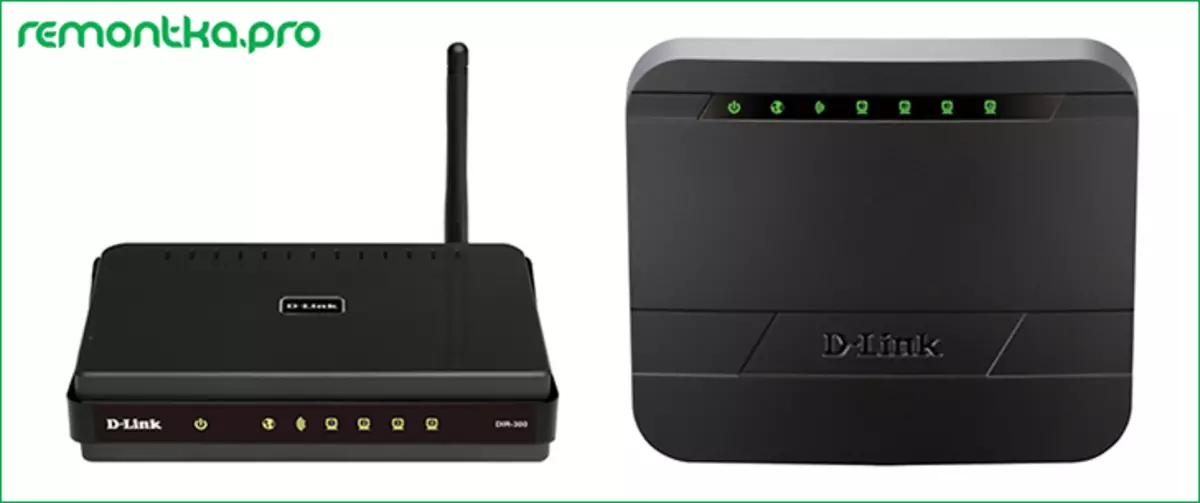
In this detailed instruction, it will be about setting up a Wi-Fi router D-Link DIR-300 (NRU) to work with the Internet Provider House. Creating a PPPoe connection will be considered, setting the Wi-Fi access point on this router and security of a wireless network.
The manual is suitable for the following router models:- D-Link DIR-300NRU B5 / B6, B7
- D-Link DIR-300 A / C1
Connecting router
The rear panel of the DIR-300 router has five ports. One of them is designed to connect a cable of the provider, four others - for wired computers, Smart TV, game consoles and other equipment that can work with the network.
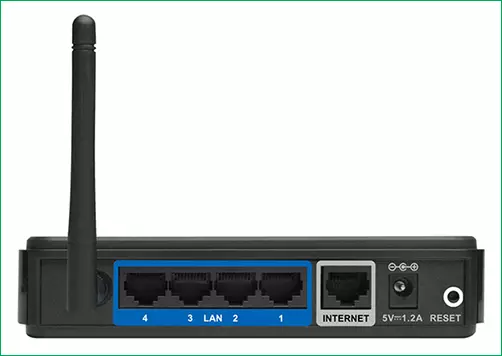
Rear side of the router
In order to start configuring the router, connect the Cable House.ru to the Internet port of your device, and one of the LAN ports connect to the computer network card connector.
Turn on the router power.
Also before starting the setup, I recommend to make sure that in the connection parameters on the local network on your computer installed automatic parameters to get the IP address and DNS addresses. To do this, do the following:
- In Windows 8, open the Charms side panel to the right, select "Parameters", then the control panel, network management center and shared access. Select "Changing the Adapter Settings" in the Left menu. Right-click on the Local Main Connection Icon, click Properties. In the window that appears, select "Internet Protocol version 4 IPv4" and click "Properties". Make sure that the automatic parameters are in the picture. If this is not the case, then change the settings accordingly.
- In Windows 7 - all similar to the previous item, only access to the control panel is obtained through the Start menu.
- Windows XP - the same settings are in the Network Connections folder in the control panel. We go into network connections, clicking the right mouse button on the local network connection, make sure that all settings are written correctly.
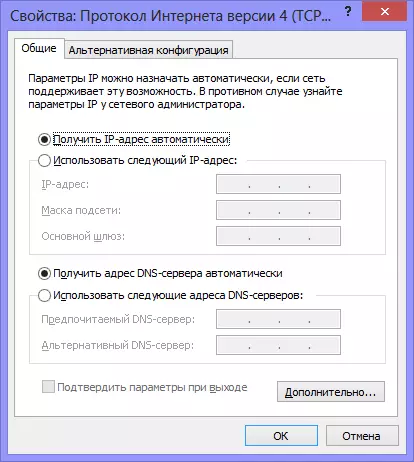
Correct LAN settings for DIR-300
Video instruction: Setting up DIR-300 with the latest firmware for Dom.ru
Recorded a video lesson for setting up this router, but only with the last firmware. Perhaps someone will be easier to perceive information. If that, all the details you can read in this article below, where everything is described in very detailed.Connection Connection for Dom.ru
Run any online browser (program used to access the Internet - Mozilla Firefox, Google Chrome, Yandex Browser or any other, on your choice) and enter the address 192.168.0.1 in the address bar, in response to the password request, enter the standard for D- Link DIR-300 Login and password - Admin / Admin. After entering this data, you will be the administration panel to configure the D-LINK DIR-300 router, which may look different:

Different firmware DIR-300
For the firmware version 1.3.x, you will see the first version of the screen in blue colors, for the latest official firmware 1.4.x, accessible to download from the D-Link site, it will be the second option. As far as I know, the principal difference in the work of the router on both firmware with Dom.ru is not. However, I recommend to produce its update to avoid possible problems in the future. Anyway, in this instruction I will consider setting the connection and for the other case.
Watch: detailed instructions for simple installation of a new firmware on D-Link DIR-300
Configuring the connection to the DIR-300 NRU with firmware 1.3.1, 1.3.3 or another 1.3.x
- On the router settings page, select "Configure manually", select the "Network" tab. There will be one connection there. Click on it and click Delete, after which you will return to the empty list of connections. Now click Add.
- On the Connection Settings page in the "Connection Type" field, select PPPoE, in PPP parameters, specify the username and password provided to you by the provider, put the Keep Alive tick. That's all, you can save the settings.
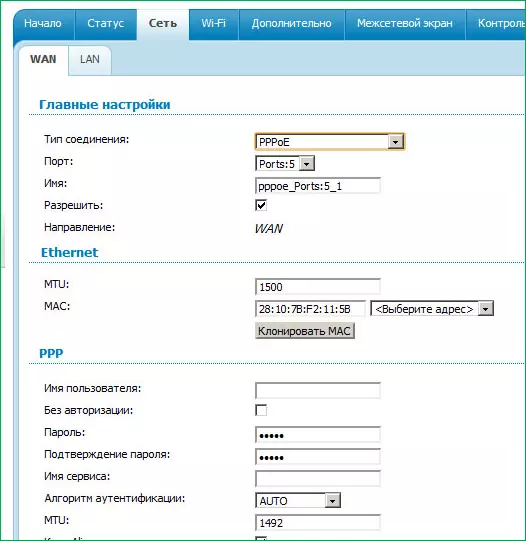
Setting up PPPoE on DIR-300 with firmware 1.3.1
Configuring the connection to the DIR-300 NRU with firmware 1.4.1 (1.4.x)
- In the administration panel below, select "Extended Settings", then select WAN in the "Network" tab. A list with one connection will open. Click on it, then click Delete. You will return to an empty list of connections. Click "Add".
- In the Connection Type field, specify PPPoE, specify the username and password for accessing the Internet Dom.ru in the appropriate fields. The remaining parameters can be left unchanged.
- Save the connection settings.
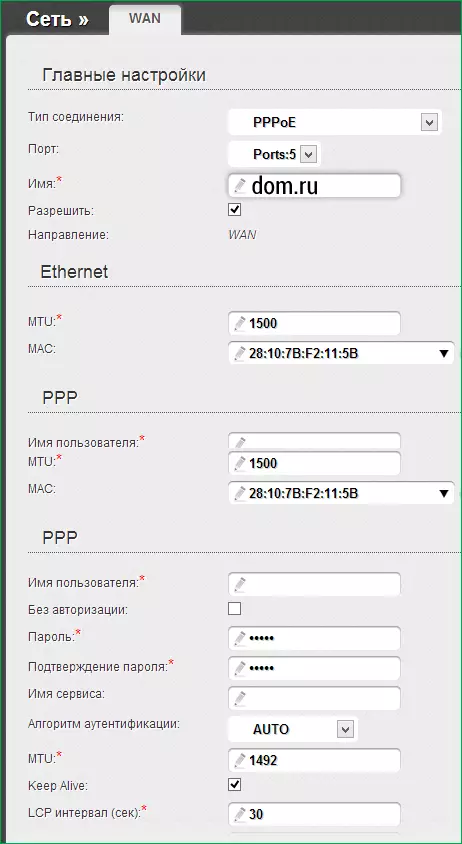
WAN Settings for Dom.ru
Setting the D-Link DIR-300 A / C1 routers with firmware 1.0.0 and above occurs similarly to 1.4.1.
After you saved the connection settings, after a short time, the router itself will establish an Internet connection, and you can open web pages in the browser. Please note: so that the router connects to the Internet, the usual connection of the house.ru, on the computer itself, should not be connected - after the router setting is complete, it does not need to be used at all.
Wi-Fi and Wireless Security Setup
The last step is to configure Wi-Fi wireless network. In general, it can be used immediately after completing the previous setting step, but it usually has a need to configure a Wi-Fi password so that the careless neighbors do not use the "free" Internet at your account while simultaneously reducing the speed of accessing the network you.
So how to configure the password on Wi-Fi. For firmware 1.3.x:
- If you are still in the "Manual Setup" section, then go to the Wi-Fi tab, subparagraph "Basic Settings". Here in the SSID field you can set the name of the wireless access point, for which you will identify it among the others in the house. I recommend using only Latin characters and Arabic figures, when using Cyrillic on some devices, there may be problems with connecting.
- The next item go to the "Security Settings". Select the type of authentication - WPA2-PSK and specify a password for connecting - its length should be at least 8 characters (latice and numbers). For example, I use my son's date as a password 07032010.
- Save the settings made by pressing the appropriate button. That's all, the configuration is complete, you can connect from any devices that allows you to enter the Internet using Wi-Fi
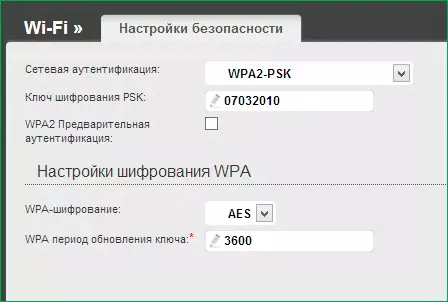
Installing a password on Wi-Fi
For D-Link DIR-300NRU routers with firmware 1.4.x and DIR-300 A / C1, everything looks like similarly:- We go into the advanced settings and select "Basic Settings" on the Wi-Fi tab, where you specify the name of the access point in the SSID field, click "Change"
- Select the "Security Settings" item, where in the Authentication Type field, specify WPA2 / PERSONAL, and in the PSK Encryption key field - the desired password to access the wireless network, which will need to be in the future when connecting from a laptop, tablet or other device. Click "Edit", after which at the top, near the light bulb, click "Save Settings"
On this, all basic settings can be considered complete. If something does not work for you, try to refer to the article to configure the Wi-Fi router.
