Note that the position of Discord about the installation of extensions and additional plug-ins is not yet completely clear. Some users get under the automatic bank from the AI, if you choose the wrong extensions settings that are perceived as an attempt to disrupt the performance of software, so use the instructions below only at your own risk.
All further action involve interacting with the Discord computer program, since it will be necessary to install a plugin for it and configure that it is possible to implement only on the PC (the browser version is not suitable for this). At the same time, the changing status will be visible everywhere. If you have not yet installed a digit on your computer, make it using the instruction on the link below.
Read more: How to install Discord
Step 1: Download and install BetterDiscord
For the possibility of installing a changing status in the discor, the BetterDiscord program is responsible. It expands the overall functionality of the messenger, adding new features, some of which we will use in the future.
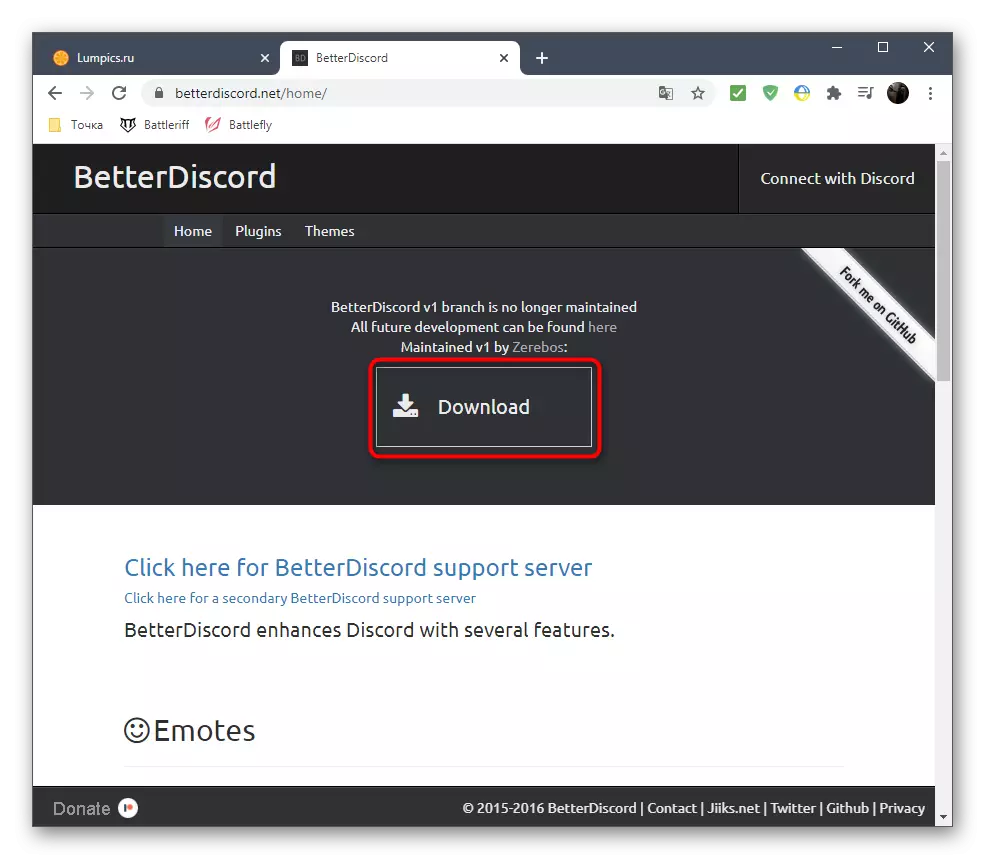
Go to download Betterdiscord from the official site
- Use the reference above to go to the official website and start downloading the program.
- A page is opening on GitHub, where we recommend immediately select the EXE format file to load the installer.
- When you finish download, open it from the download folder or directly through the browser.
- Confirm the rules of the license agreement to continue the installation.
- In the next window, select the first option - "Install BandagedBD".
- Tick the "Install to Stable" checkmark if an ordinary stable version of the discard is installed. The path to files is determined automatically, but if this does not happen, you have to manually specify the location where the executable file is located to start the software.
- Expect the end of the installation, then close this window and reboot the discord.


On this, adding advanced functionality in the program is completed. In this article we will talk only about available plugins, and if you wish to learn what is still provided by BetterDiscord, read the description on the official website or independently check each item in the discord itself.
Step 2: Creating a plugin for changing status
Create a plugin that will be further downloaded in BetterDiscord and allows you to set up a changing status. It has already been written using the JavaScript language - the code is in open access. It will only be formed to create a file from it and download to use in the program.
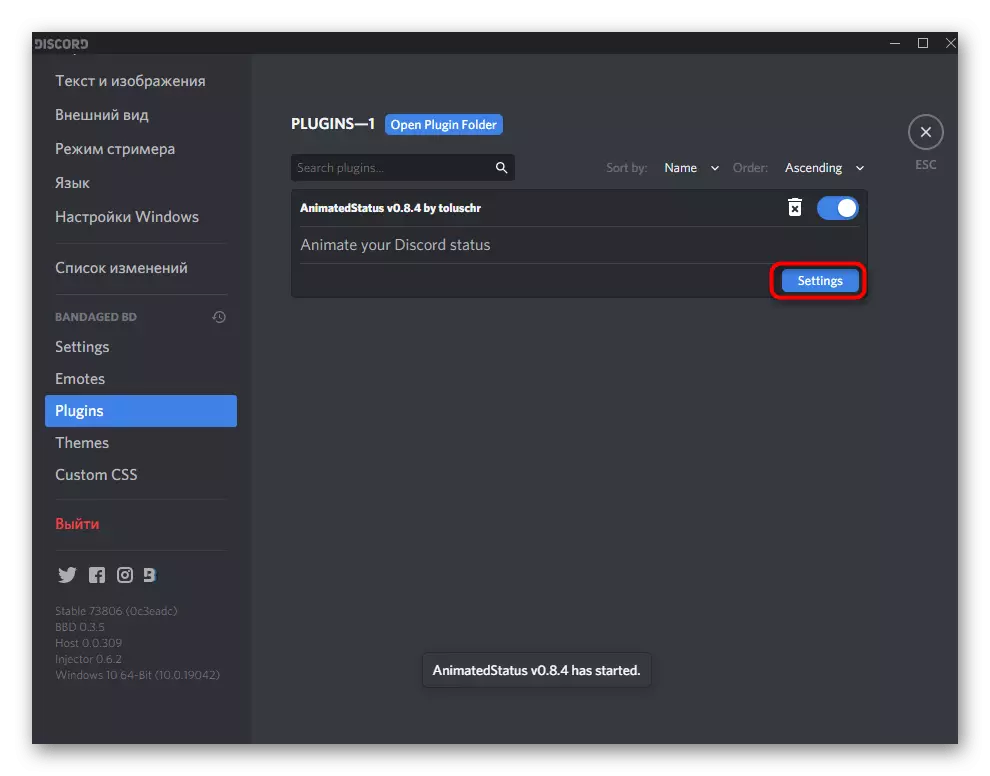
- To do this, open the discord and click on the gear icon, thus moving into common settings.
- You will see the availability of a new section - "BandAnded BD", where you click on the "plugins" row.
- Click the Open Plugin Folder button to go to that folder where all related plugins are stored.
- So far, it is empty, because no expansion has yet been established that we now will correct.
- Click on an empty place in the directory right-click, move the cursor to "Create" and select the "Text Document" option.
- You can not change the name and double click to edit through the Notepad.
- Insert the following code there:
// Meta {"Name": "AnimatedStatus"} * //
Class AnimatedStatus {
/ * BD Functions * /
getname () {
Return "AnimatedStatus";
}
getversion () {
Return "0.8.4";
}
GetAuthor () {
Return "Toluschr";
}
getDesRIFTION () {
Return "Animate Your Discord Status";
}
SETDATA (Key, Value) {
Bdapi.setdata (this.getname (), key, value);
}
GetData (Key) {
Return BDAPI.GetData (this.getname (), key);
}
/ * Code Related to Animations * /
Load () {
this.animation = this.getdata ("Animation");
this.Timeout = this.getData ("Timeout");
Status.AuthToken = this.getData ("Token");
}
START () {
if (this.animation == undefined || this.timeout == undefined || Status.AuthToken == undefined) Return;
this.status_animate ();
}
STOP () {
Cleartimeout (this.loop);
Status.unset ();
}
STATUS_ANIMATE (index = 0) {
if (index> = this.animation.length) index = 0;
Status.Set (this.animation [index]);
this.loop = setTimeout (() => {this.status_animate (index + 1);}, this.timeout);
}
/ * SETTINGS RELATED FUNCTIONS * /
STRTOANIMATION (STR) {
Let Lines = Str.Split ("\ n");
Let Out = [];
for (Let i = 0; i
if (Lines [i] .Length == 0) Continue;
Out.Push (json.parse ("[" + Lines [i] + "]"));
}
RETURN OUT;
}
AnimationTostr (Animation) {
If (Animation == undefined) Return ""
Let Out = "";
for (Let i = 0; i
OUT + = JSON.Stringify (Animation [i]). substr (1) .Slice (0, -1) + "\ n";
}
RETURN OUT;
}
GetSettingspanel () {
Let Settings = document.createElement ("DIV");
settings.style.padding = "10px";
// AUTH TOKEN.
settings.appendchild (gui.newlabel ("authtoken (https://discordhelp.net/discord-token)"));
Let Token = GUI.NewInput ();
token.value = this.getdata ("Token");
settings.appendchild (Token);
settings.appendchild (gui.newdivider ());
// Timeout.
settings.appendchild (GUI.NewLabel ("Time Per KeyFrame"));
Let Timeout = gui.newinput ();
timeout.value = this.getdata ("Timeout");
Settings.appendchild (Timeout);
settings.appendchild (gui.newdivider ());
// Animation
settings.appendchild (Gui.NewLabel ('Animation ("for no emoji)'));
Let Animation = Gui.NewTextArea ();
Animation.Style.FontFamily = "SourcecodePro, Consolas, Liberation Mono, Menlo, Courier, MonoSpace";
Animation.PlaceHolder = '"Message 1", "Emoji 1" \ N "Message 2", "" \ N ...';
Animation.Value = this.GetData ("Animation"));
settings.appendchild (Animation);
// Save Button.
settings.appendchild (gui.newdivider ());
Let SAVE = GUI.NewButton ("Save");
Save.ONClick = () => {
// Set Auth Token
this.setdata ("token", token.value);
// Set Timeout.
this.setdata ("Timeout", timeout.value);
// Set Animation
this.setdata ("Animation", this.strtoanimation (Animation.Value));
this.stop ();
this.Load ();
this.start ();
};
Settings.appendchild (Save);
// End.
RETURN SETTINGS;
}
}
/ * Status API * /
Const Status = {
authtoken: ""
Request: () => {
Let REQ = new xmlhttprequest ();
REQ.OPEN ("Patch", "/ API / V6 / Users / @ Me / Settings", True);
REQ.SetRequestheader ("Authorization", Status.AuthToken);
REQ.SetRequestheader ("Content-Type", "Application / JSON");
RETURN REQ;
},
SET: (Status) => {
Status.Request (). Send ('{"Custom_Status": {"Text": "' + Status [0] + '," emoji_name ":"' + Status [1] + '"}}');
},
Unset: () => {
Status.Request (). SEND ('{"Custom_Status": NULL}');
}
};
/ * GUI Wrapper * /
const gui = {
newInput: () => {
Let Input = Document.CreateElement ("Input");
input.classname = "inputdefault-_djjkz input-cij7to";
RETURN INPUT;
},
NEWLABEL: (text) => {
Let Label = Document.CreateElement ("H5");
label.classname = "h5-18_1nd";
label.innertext = Text;
Return Label;
},
NewDivider: () => {
Let Divider = Document.createElement ("DIV");
divider.style.paddingtop = "15px";
Return Divider;
},
newTextarea: () => {
Let Textarea = Document.CreateElement ("Textarea");
textarea.classname = "input-cij7to scrollbarghosthairline-1msom1";
textarea.style.resize = "vertical";
textarea.rows = 4;
Return Textarea;
},
NEWBUTTON: (text) => {
Let Button = Document.CreateElement ("Button");
button.classname = "Button-38ascr LookFilled-1GX00P COLORBRAND-3PXR91 Sizesmall-2CSMQN";
Button.innertext = Text;
Return Button;
}
};
- After that, click on the "File" menu and from the list that appears, select "Save As".
- In the "Saving" window, the correct location will open, so it is not necessary to change it. In the File Type field, specify "All Files *. *".
- As a file name, enter "Animated-Status.plugin.js" and confirm the saving.
- Return to the previous directory, make sure there is a JavaScript file there, and the text document can be deleted because it remained empty.
- Open the "Plugins" menu and check the presence of a plug-in created just. Slide the slider to activate it.
- All other actions are performed through "SETTINGS", what will be discussed in the next step.


Step 3: Setting up changing status
The last step is to set up a changing status using the added plugin. Now you need to configure the plugin itself by specifying only one parameter. Its receipt is made in several actions, so we will analyze it separately.Obtaining authorization token
Authorization token requires a plugin to perform automatic status shift actions. To obtain it, you will need a developer console and an already specified normal status.
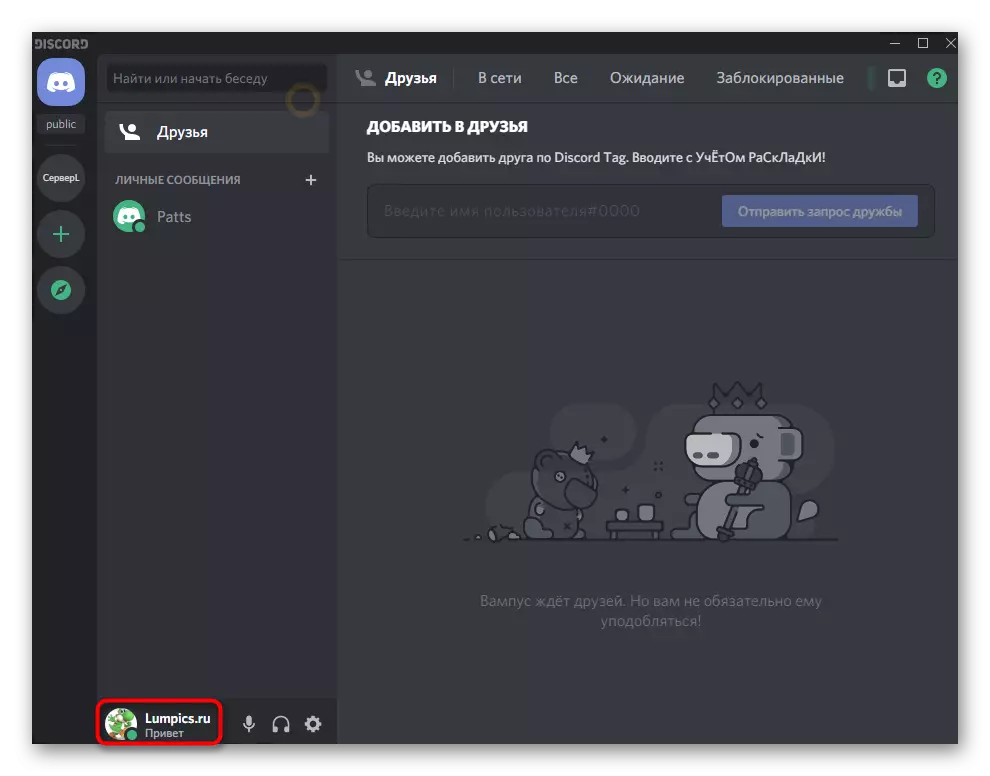
- Click on your avatar to open the status action menu.
- Select the last option - "Set user status".
- Enter any inscription and save the changes.
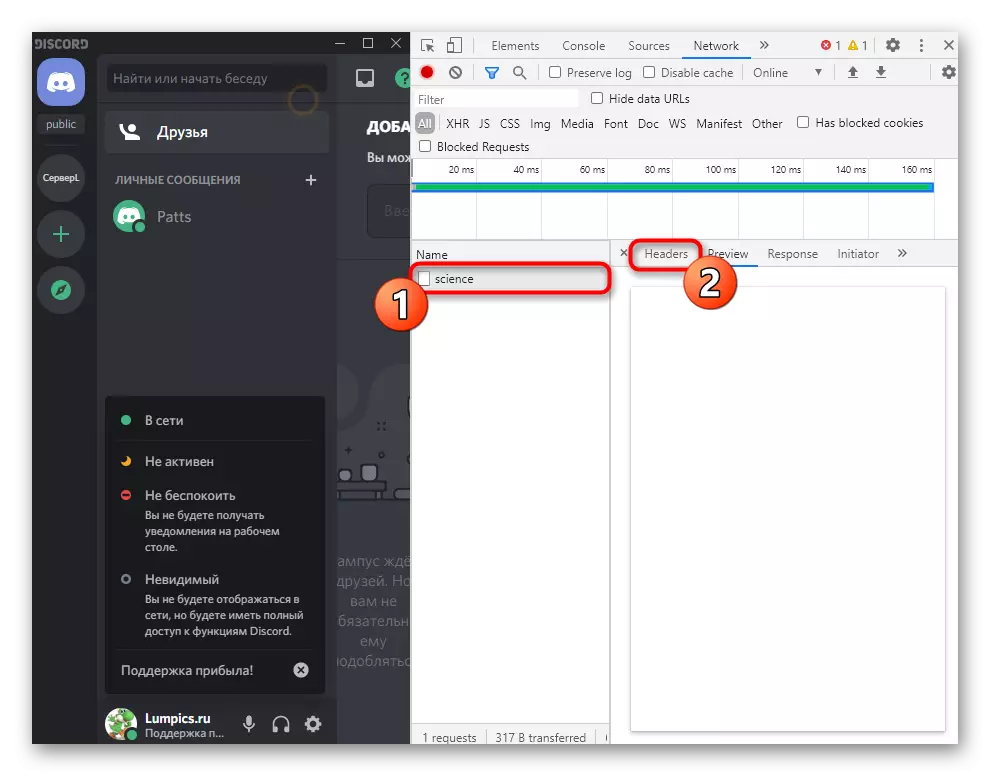
- Call the menu with statuses again and press Ctrl + Shift + I to display the developer console.
- Go to the Network tab.
- From the name list, select "Science" and open the Headers tab.
- Lower almost by the end of the parameter list, where you find the "Authorization" string and copy its value.
- Go to "Plugins", open the settings of the required plugin and paste the token in the field allotted for this.


Adding statuses to change
It remains only to choose the time through which the statuses will change, and enter their required quantity, which is as follows:
- In the Play Settings menu, set the delay in milliseconds. Enter the delay of at least 3000 to avoid the possible receipt of the account lock.
- If you want to add emoticons to the status, first find any site where their images are shown, and copy.
- Use double quotes - "", inside which and insert statuses in separate lines. Supported as Cyrillic and Latin, about Emodi you already know. Click on "Save" to save the changing status.
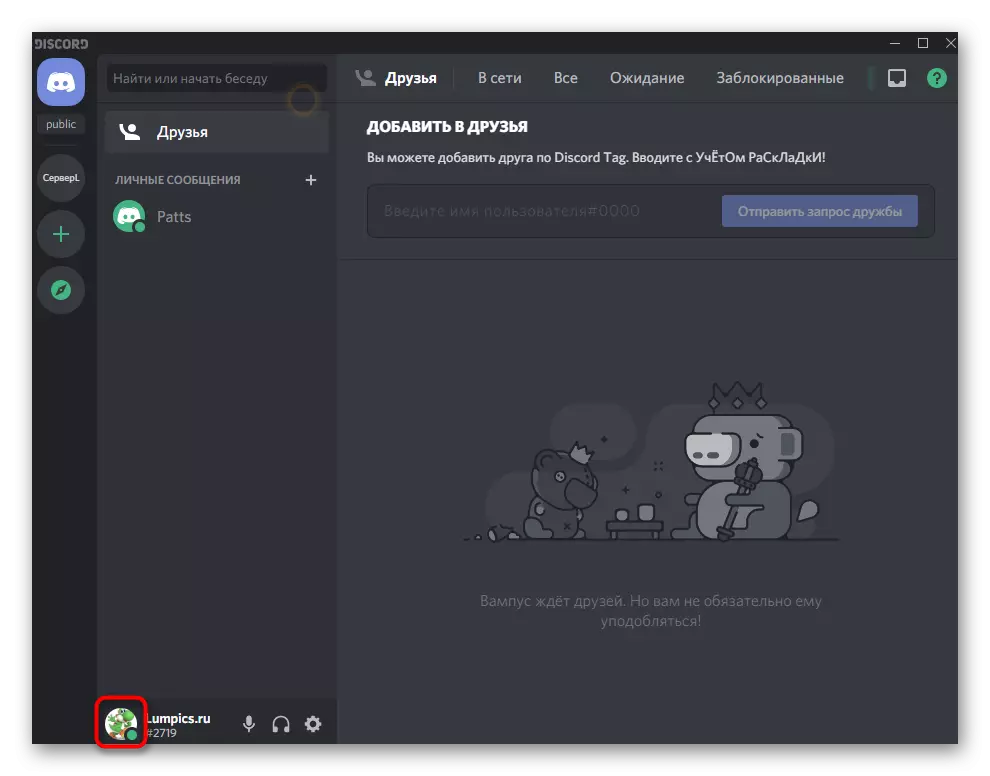
- Return to your page and check the changes.
- It is necessary to wait the specified number of seconds so that the status is automatically changed to another.