

Option 1: PC program
Discord Desktop supports a huge number of functions affecting the properties of the microphone. Accordingly, each user may select the parameters for itself, pushing out the conditions and quality of the microphone that is in stock. We suggest to deal with all points in turn, breaking them into categories.General Input Device Settings
Let's start with the general microphone settings that are edited most often and always turn out to be necessary. This includes the choice of equipment itself and adjusting its volume - the whole process does not take much time, and if necessary, you can return to the menu at any time and change the values.
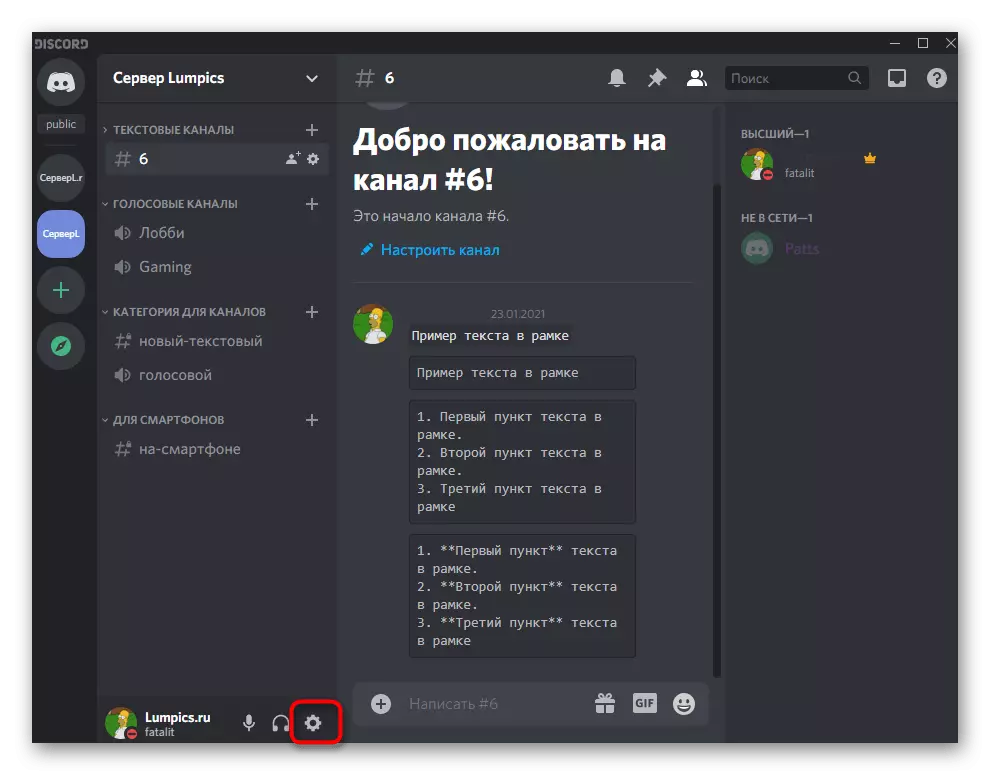
- After starting the program on the panel below, click the gear icon.
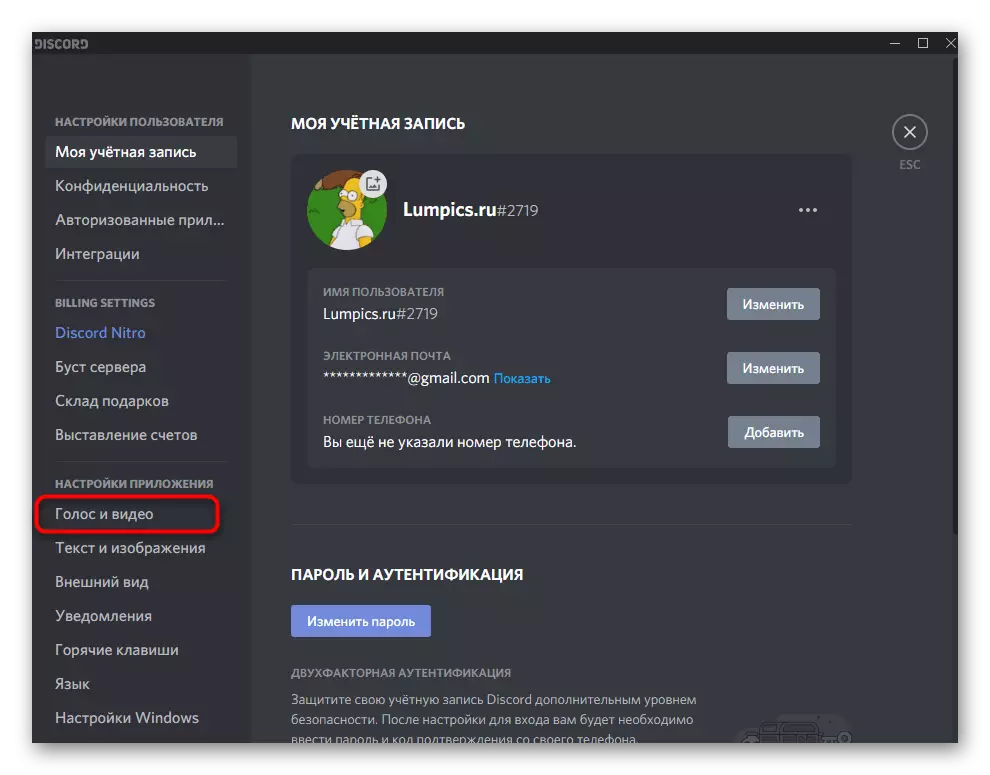
- The menu will open with the account settings where you go to the "Voice and Video" section.
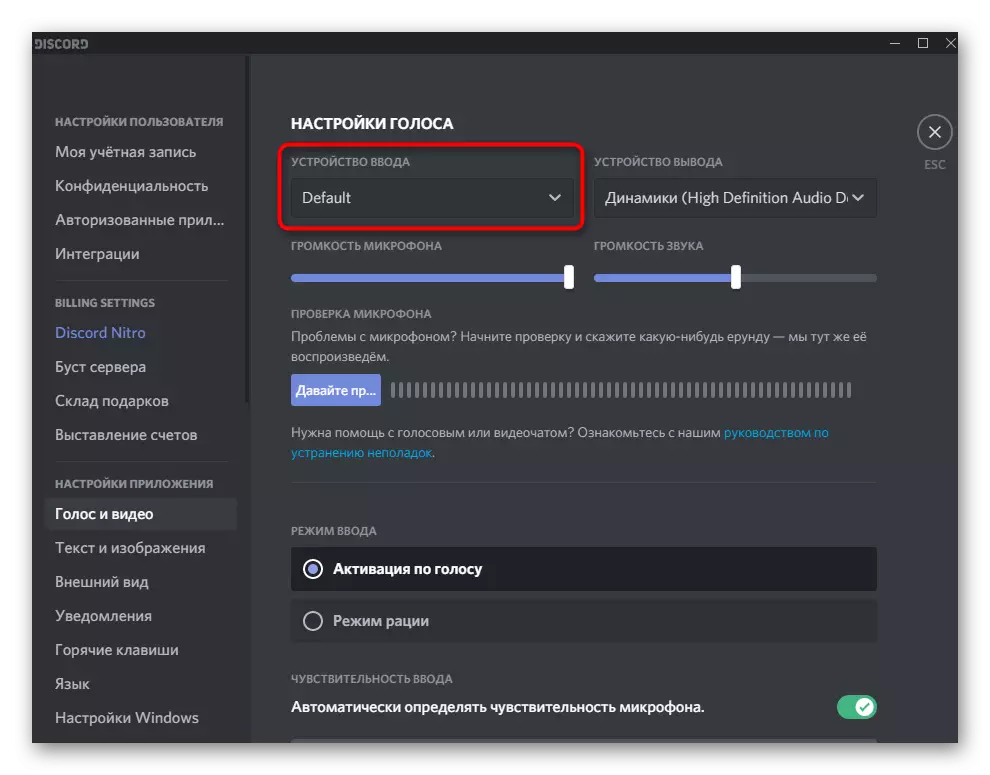
- Expand the "Input Device" list to select the Microphone used. It will be useful when several headsets are connected to the computer or a separate microphone on a laptop with built-in is connected.
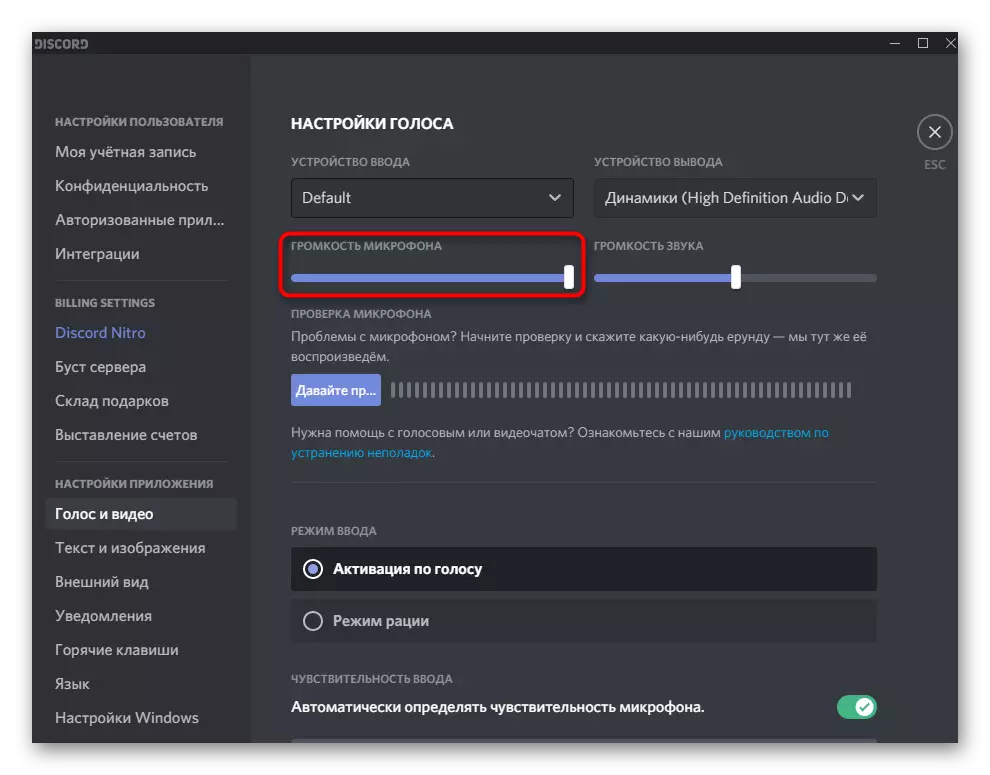
- Below is the slider "Microphone volume", from the name of which you can already understand its purpose. It is available for adjustment at the same time when checking the equipment, which we will talk a little later.
Input mode
Discord supports two input modes that allow differently called microphone activation. Accordingly, each of these options is suitable for specific users - those who wish to activate the microphone by pressing the button, or prefer the automatic switching on.
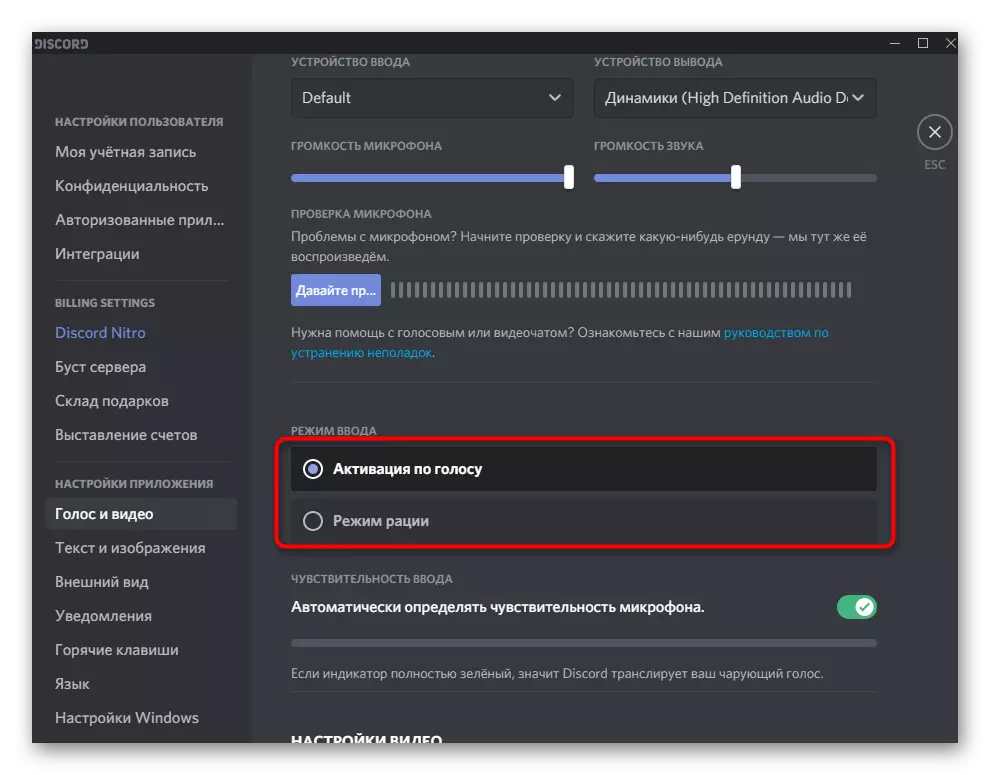
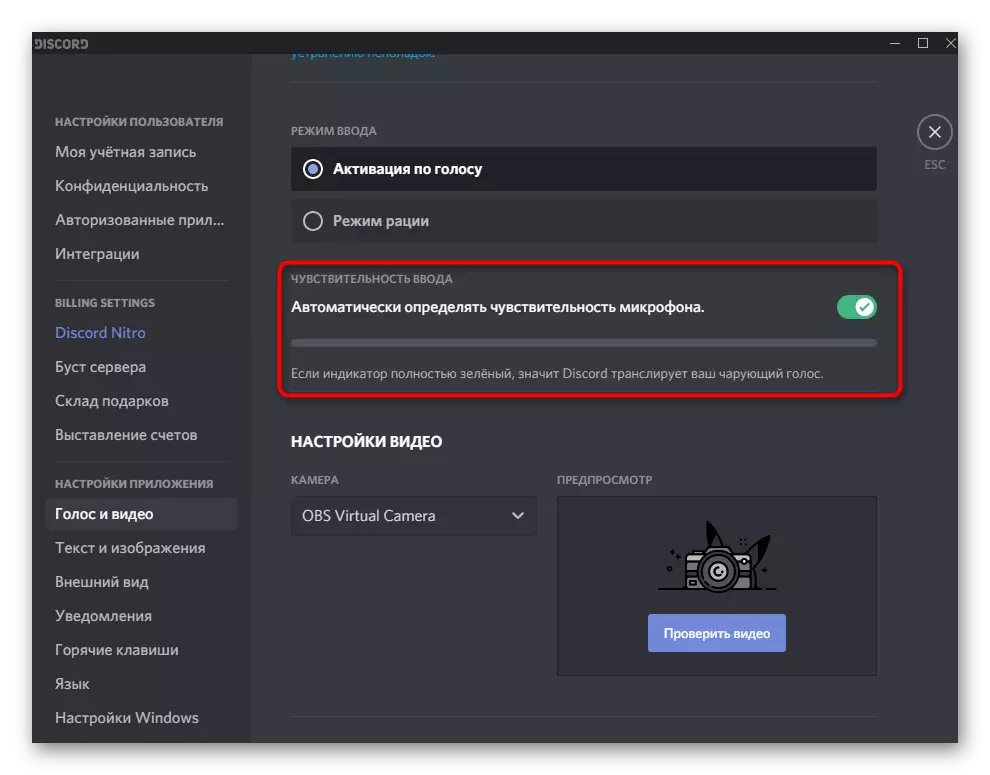
- In the same menu "Voice and Video", pay attention to two points in the "Input Mode" block. "Activating vote" allows you to automatically turn on the microphone when you start talking. Separately, the sensitivity is configured separately for this mode so that the algorithms capture exclusively your voice, and not outside noise. When using the "radio mode", the microphone will have to be included independently by pressing the hot key installed (on your choice).
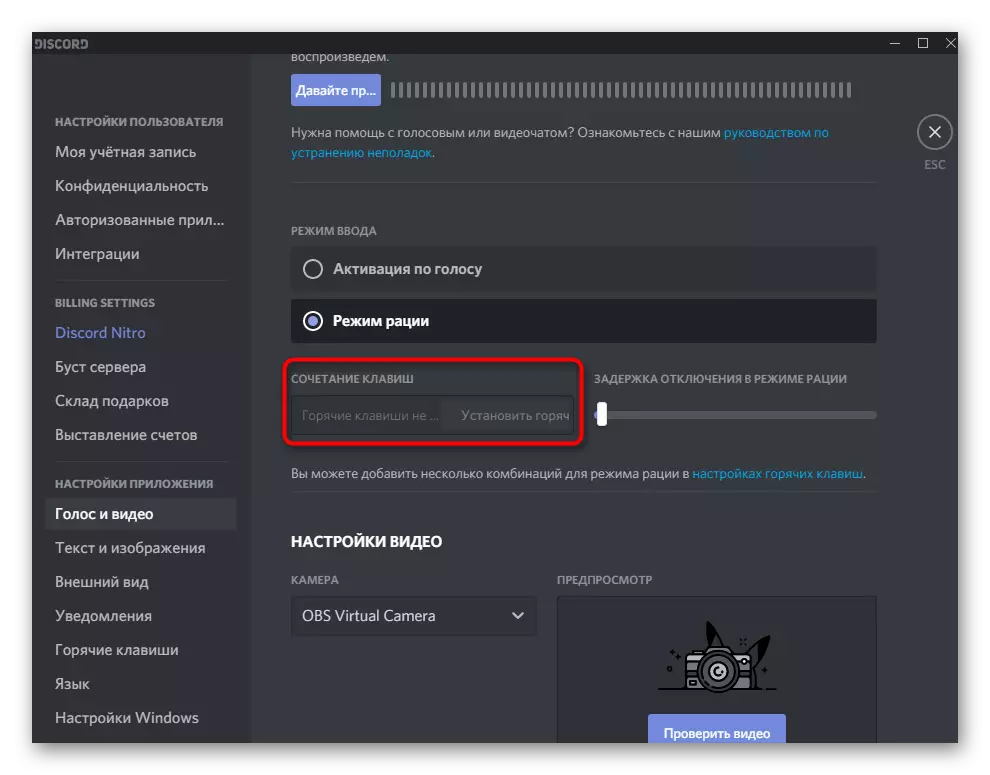
- In turn, we will analyze each of these options, starting with the "radio regime". Mark the marker this item so that the available settings appear below. First of all, developers offer to set the key combination to activate.
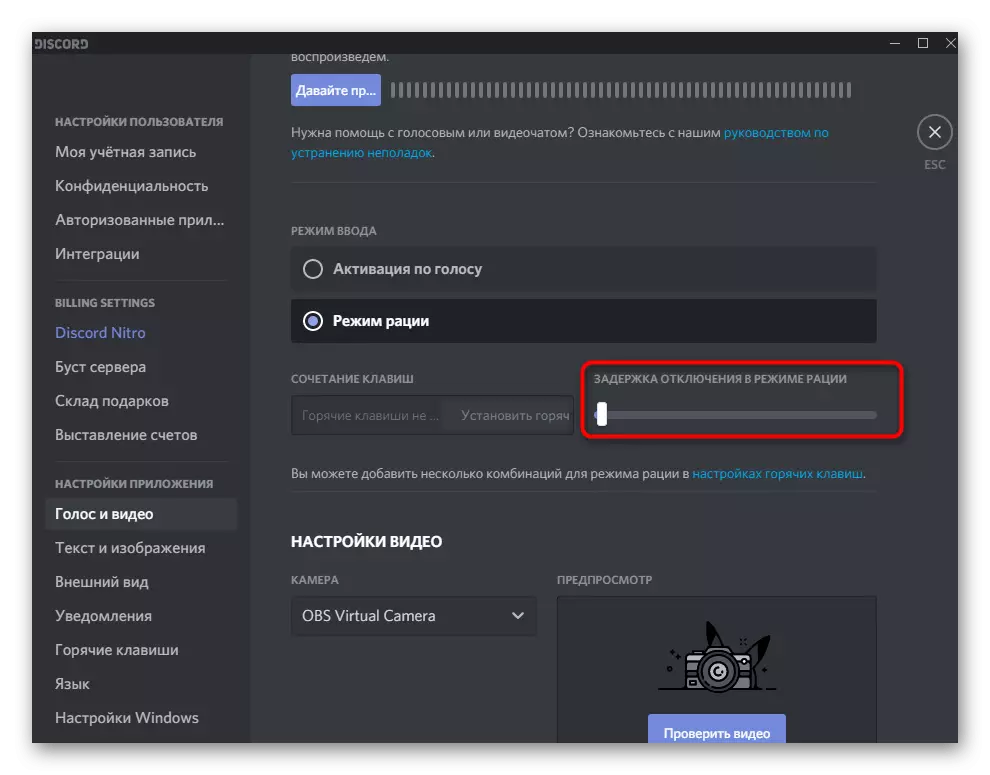
- On the right there is a slider that is responsible for delaying the trip, that is, it defines, after how many seconds the microphone turns off after you stopped harting the hot key.
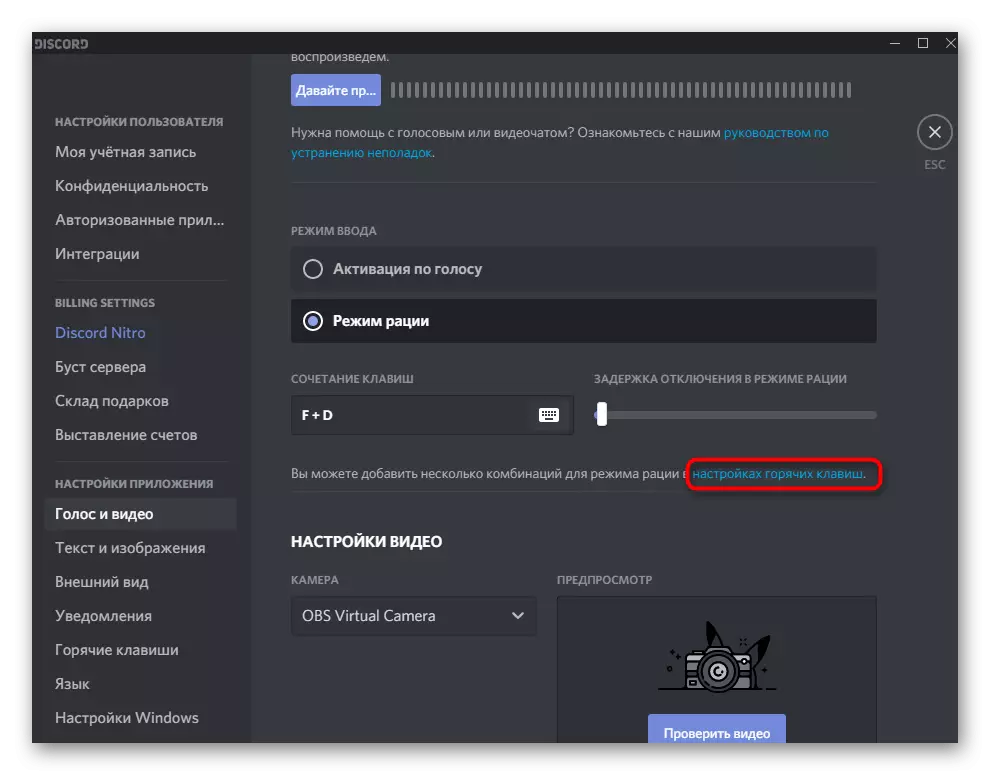
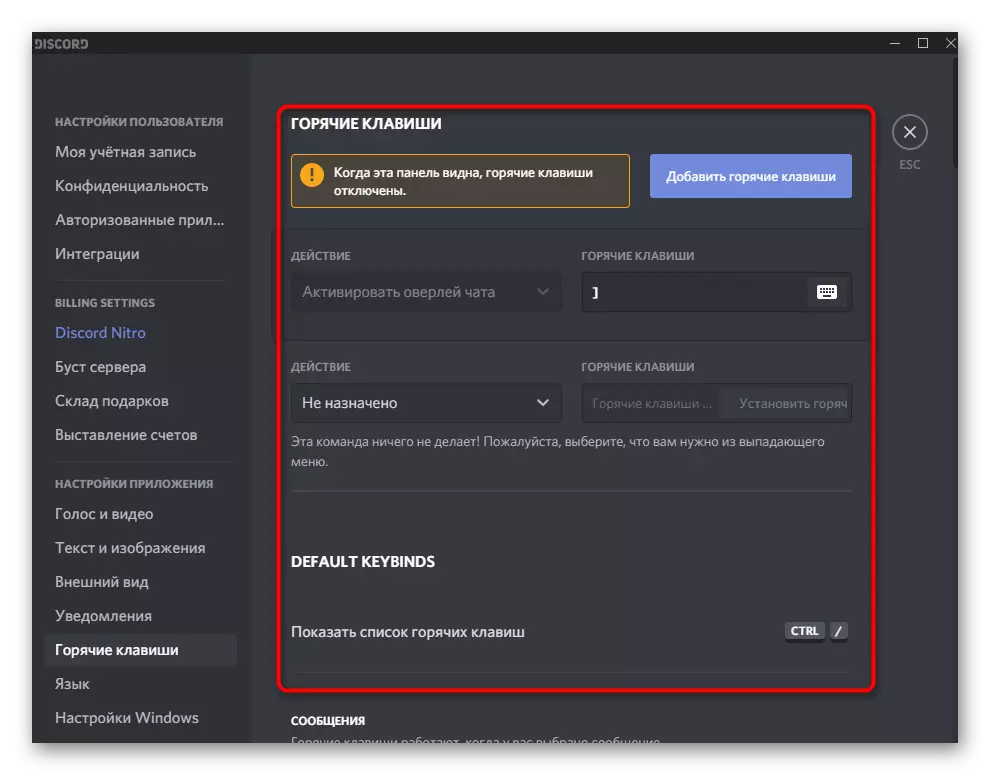
- There are support for several combinations at once, which can be assigned to activation of the radio. To edit the parameters, click on the selected lettering "Setting the hotkeys".
- Another menu will open - "Hot Keys", where you have to independently assign action and a combination for it. As you can already understand, the assignment of the same action is available immediately into several keys or even an additional mouse button.
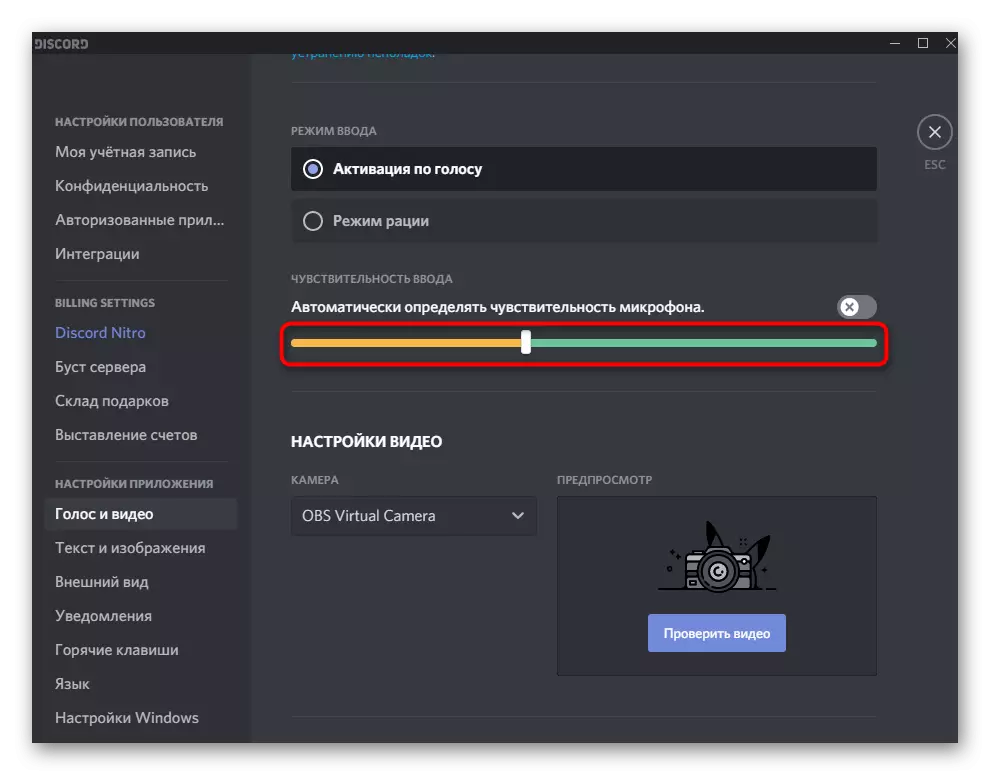
- Returning to the previous menu to disassemble the second mode - "activation by voice." For it, by default, the "Automatically identify microphone sensitivity" parameter is set, which can be disabled if the function of the function is not entirely correct.
- When manually regulated, you need to say something to the microphone so that a dynamic strip appears, indicating its sensitivity. The slider is set in the position, starting from which you want to activate the operation of the device.
Test each of these modes to understand what suitable for you, then proceed to the individual setting, following the instructions presented.
Extended parameters
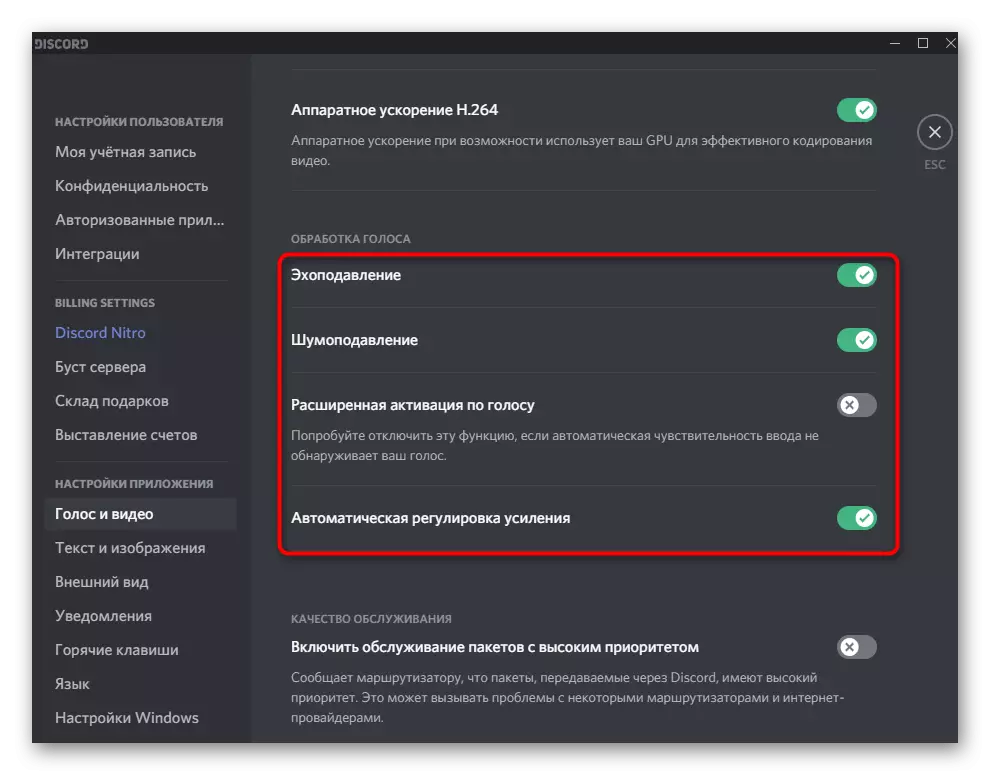
Let's talk about the extended parameters where the control of available effects includes the choice of standard algorithms and other functions that affect not only the quality of the call, but also on the sound of the microphone itself. All actions are performed in the already familiar menu "Voice and Video" menu.
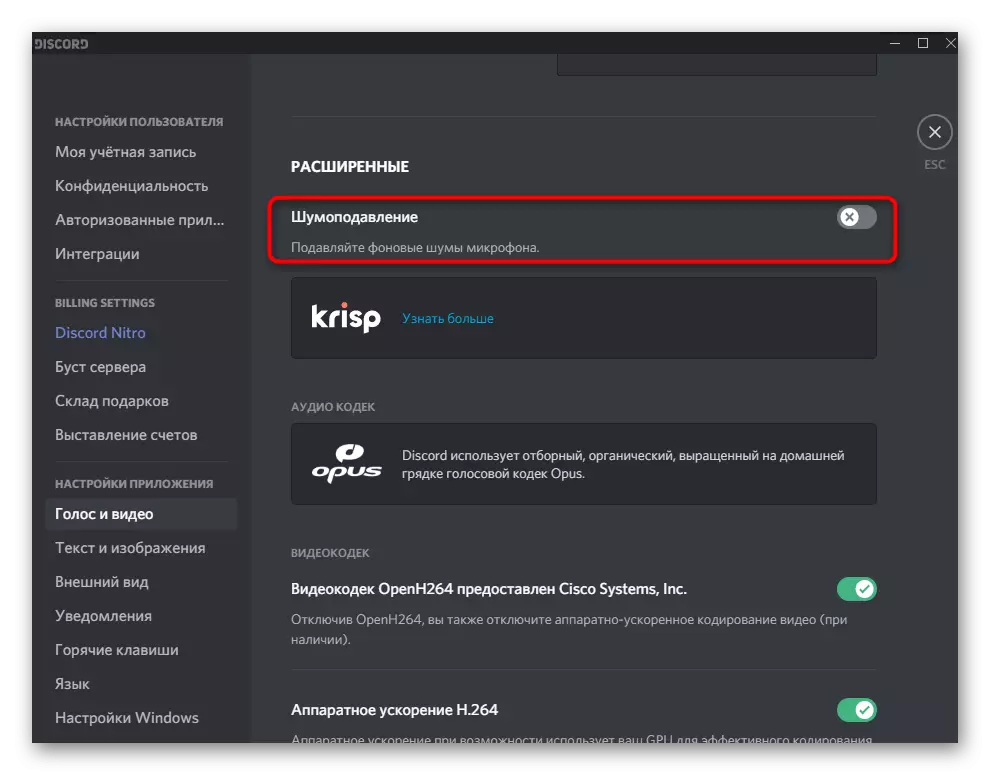
- The first available feature is "noise reduction" - based on Krisp, as the developers themselves report. This technology eliminates the noises falling into the microphone - it can be the sound of a computer, a street operating near the fan. There is no additional settings for noise reduction, so its work is automatically adjustable depending on external conditions.
- Below is the Voice Processing unit. There is also noise reduction, but already operating on the basis of the developed algorithm from Discord. For a larger effect, you can enable two functions at once, but most often it is not required. "Echopulation" allows you to get rid of echo if you are in the room where it is, or its appearance is associated with a poor-quality microphone. "Extended voice activation" is disabled by default, but it will be useful when the input mode does not work as needed. "Automatic gain adjustment" independently increases the voice volume or makes it quieter when the need appears. If the microphone is incorrectly functioning, this function should be disabled.
- The last block of this section is "mute applications." He is responsible for comfort while communicating when playing and reduces the volume of the application itself when you say or your interlocutors. Change the position of the switches and move the knob to configure the optimal ratio for you.

By the way, an echo is one of the main problems that appears when using the microphone in Discord, mostly characteristic of cheap models. The built-in tool is not always effective, so you have to look for alternative solutions to this unpleasant situation. You will find detailed information about them in another article on our website.
Read more: Eliminate the echo microphone in Discord
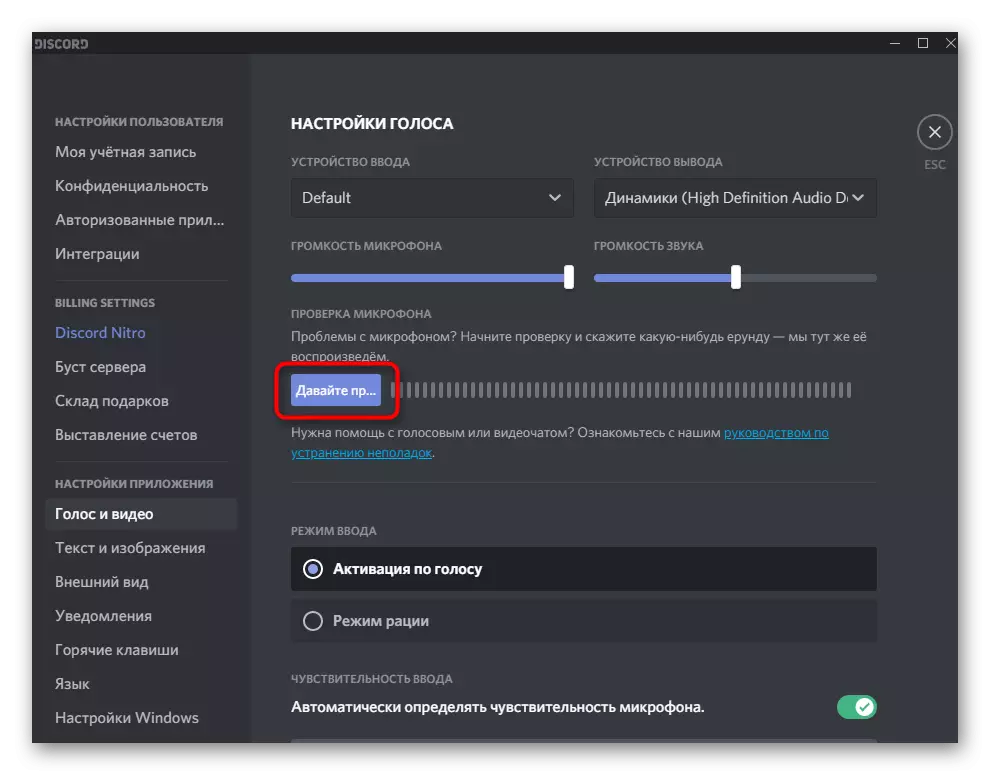
Checking the microphone
We will analyze the last step of configuring the input device, which consists in checking its operation. Of course, this can be done directly when a conversation with a friend, but sometimes it is useful to use the built-in function.
- For this, at the beginning of the same menu, which was discussed above, click the "Let's check" button.
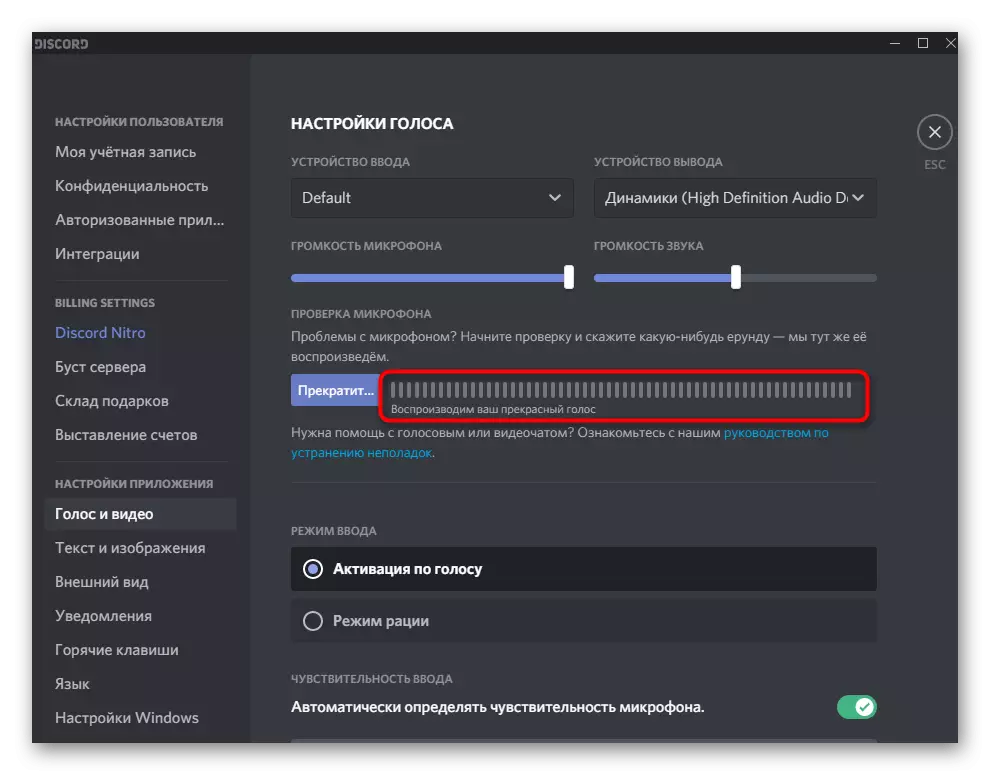
- Start talking in the microphone and follow the pulses on the strip on the right. It shows how long the spell sounds and whether your voice is captured by the microphone at all. As soon as you said everything you need, click "Stop" and decide whether to change any settings.
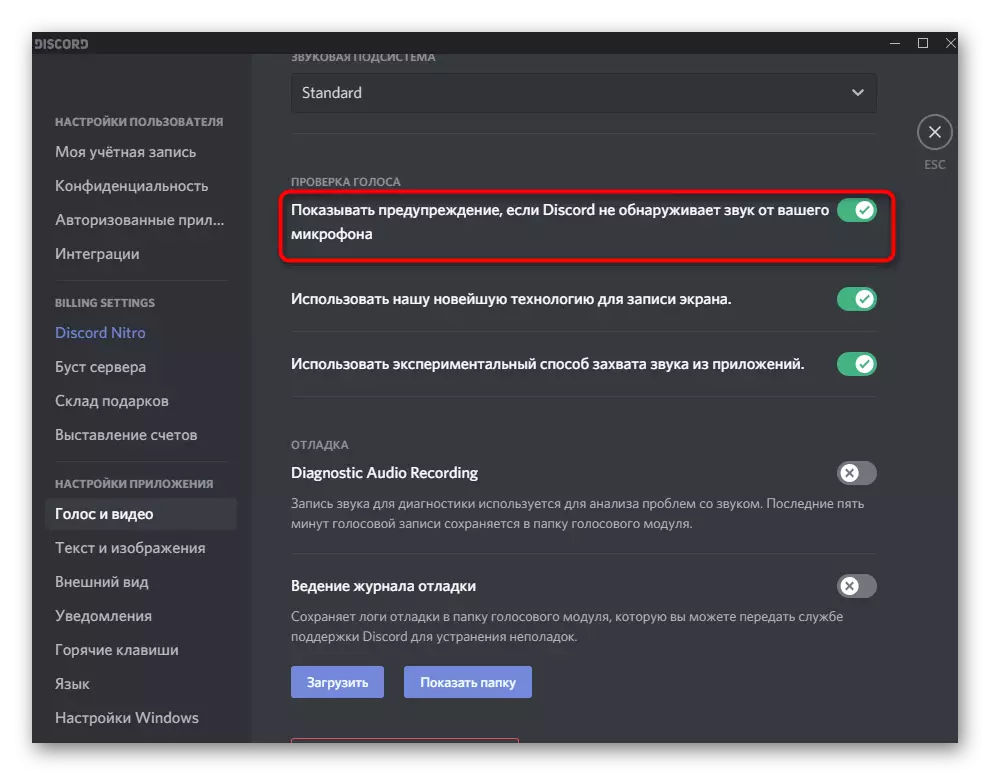
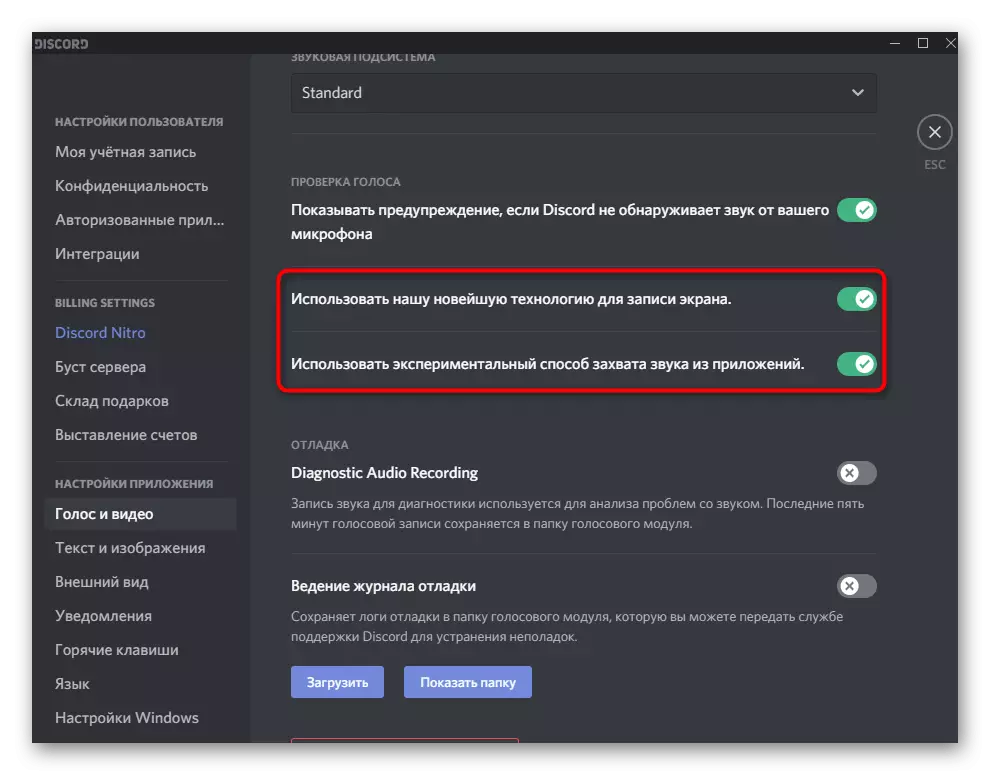
- The "Voice Voice" unit allows you to install additional parameters. One of the most useful - "Show a Warning If Discord does not detect sound from your microphone." This parameter will always help to be aware of whether the equipment works correctly.
- The following two parameters are activated by default and their deactivation is necessary only if there are any problems when screenshots or capture the sound of the applications.
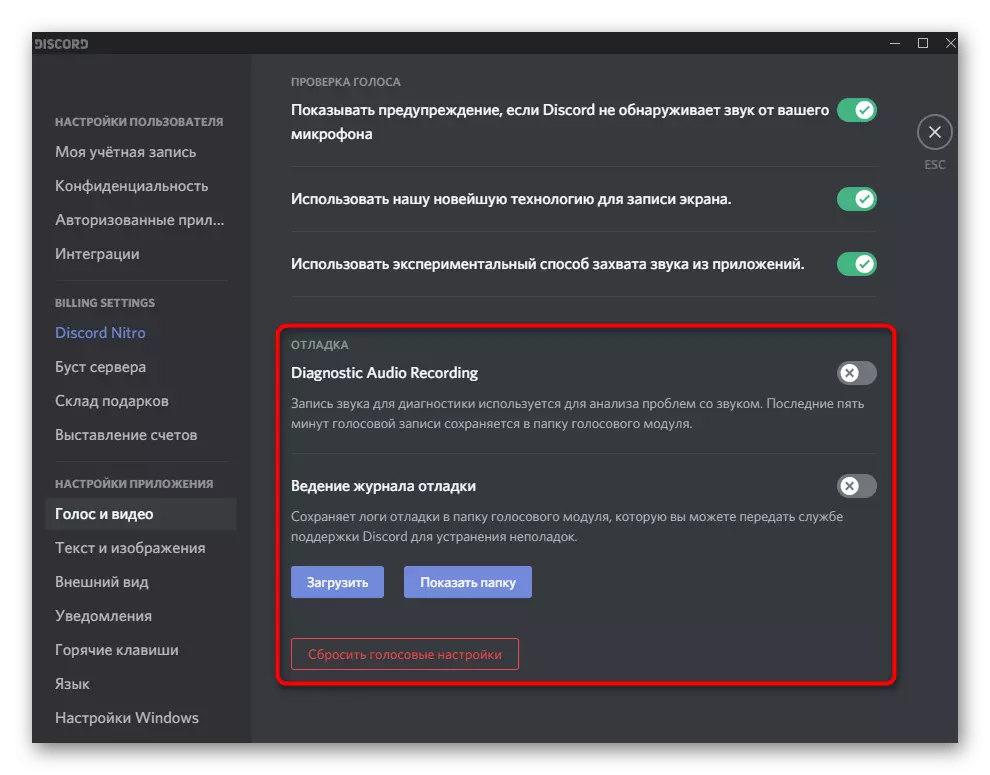
- Recent items are associated with debugging and maintaining its magazine. These parameters are managed only to those users who understand the operation of the software and experiencing problems with the microphone, therefore, the debugging log for manual troubleshooting or sending a message to the support service.
Microphone operation management
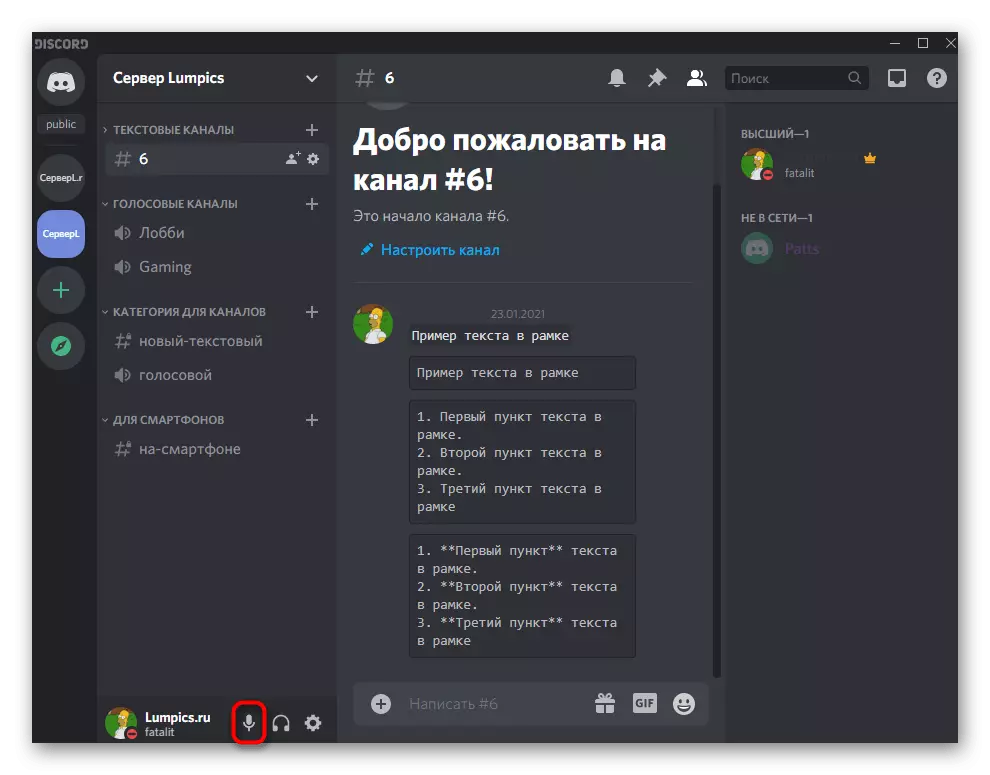
In short, we affect the topic of input equipment activity management, for which special buttons in the main Discord window correspond to and when communicating on voice channels or personal conversations with other users. In the main window to the right of the avatar, you see the microphone icon, clicking on which it turns off or activates. This is the fastest way to control activity.
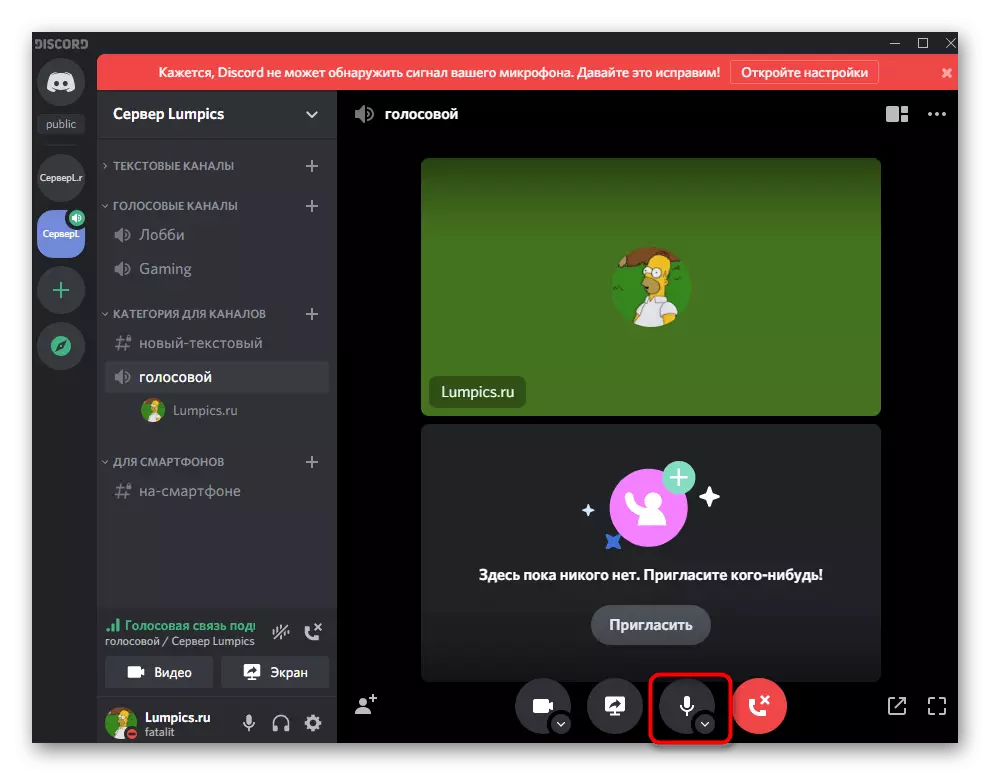
The same can be done during communication, but you have to open the conversation window, and not just connect to the voice channel. This button with the image of the microphone not only includes or disables it, but also changes the main parameters.
Deployed information about how the input device is activated in the Mobile Discord application or PC program, read in the material according to the following link.
Read more: Turning on the microphone in Discord
Setting up permissions for microphone use
This block with information on setting up the microphone will be useful only to the creators and server administrators in Discord, as we will talk about permissions for participants. Editing Roles Allows you to limit the use of the device, set priorities or prohibit the activation mode via voice. This is available both for the whole role and for any voice channel server. We will analyze the whole process on the example of the role settings:
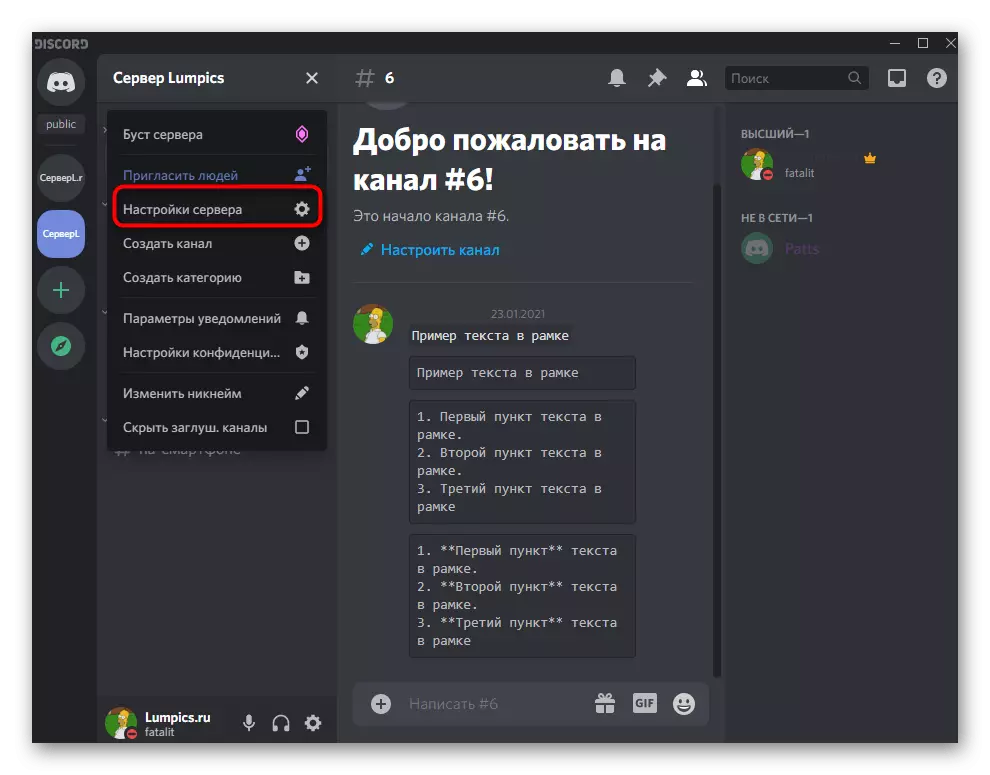
- Use the left pane to go to the server where you click on its name, displayed at the top, and from the drop-down list, select "Server Settings".
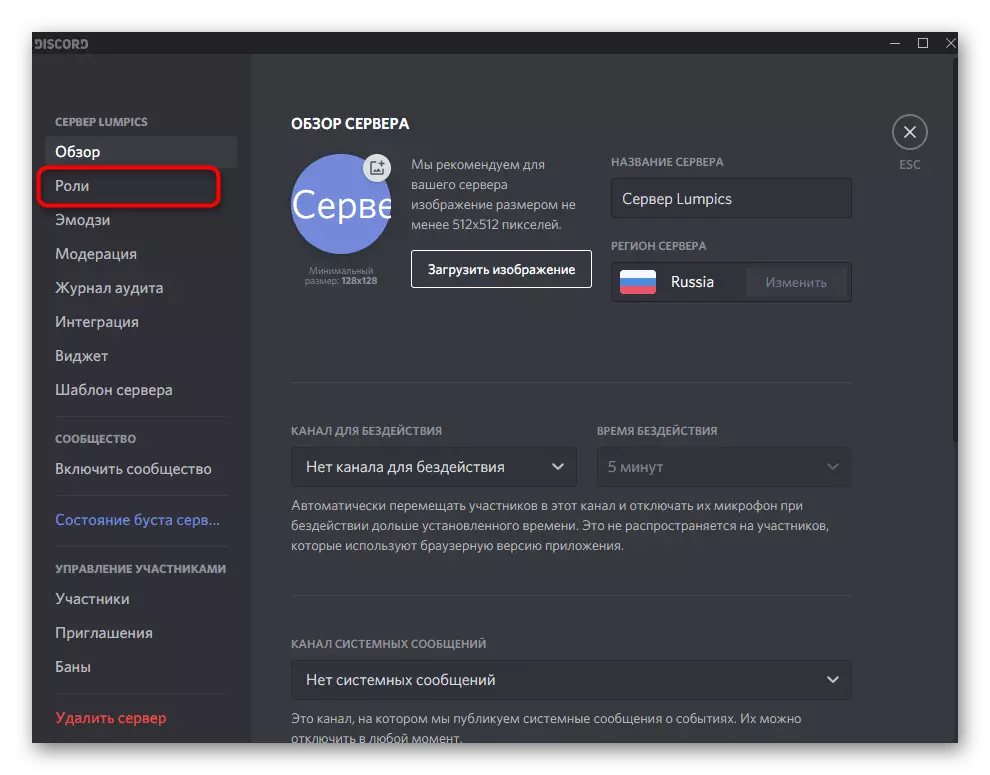
- Among all the parameters now you are interested in "roles".
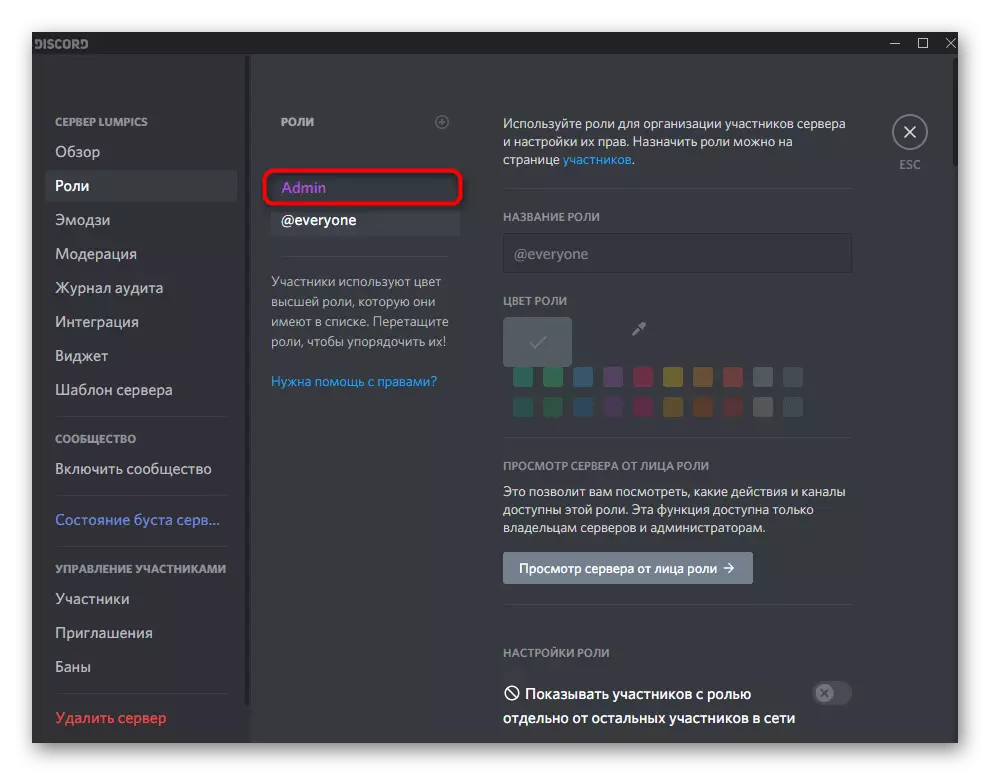
- Create a new role or go to editing already existing.
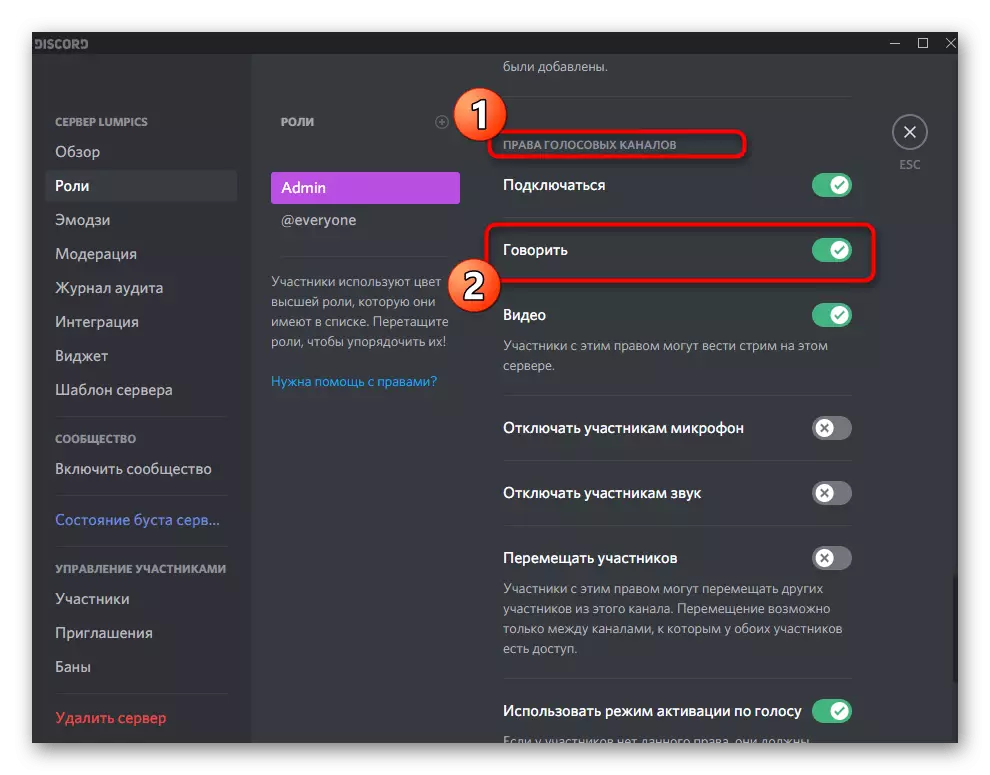
- Source to the "Rights of Voice Channels" block and decide whether you want to allow the owners of this role to use a microphone on voice channels.
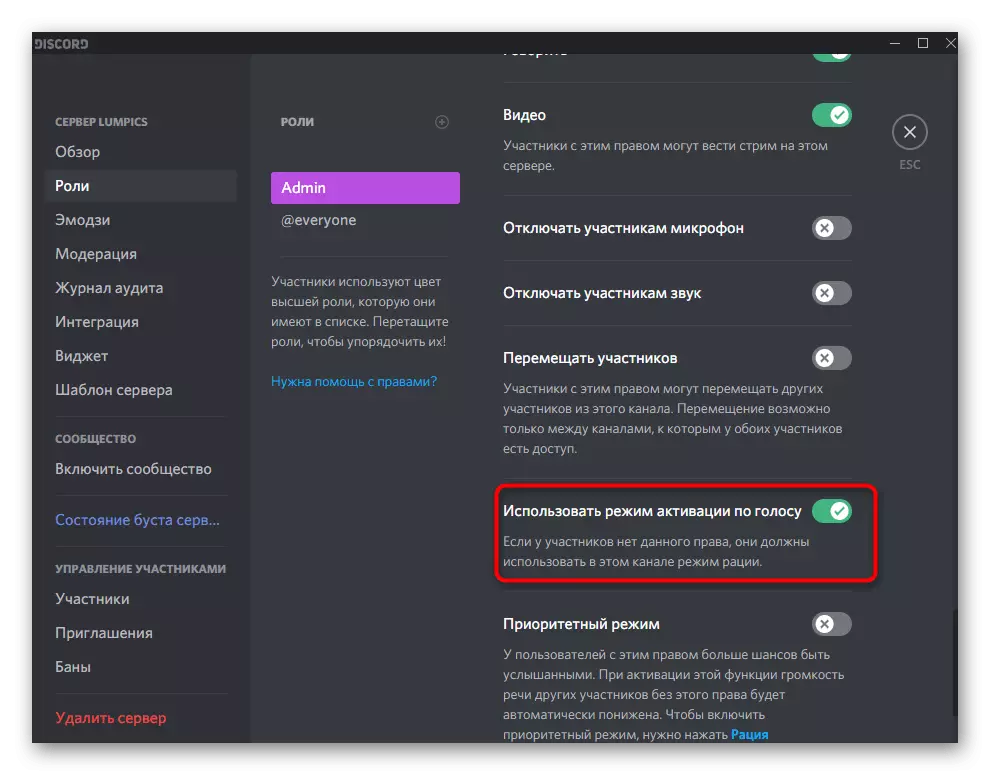
- As already mentioned, it is possible to prohibit the use of a voice activation mode - this allows you to slightly unload the voice channel if many participants are connected to it.
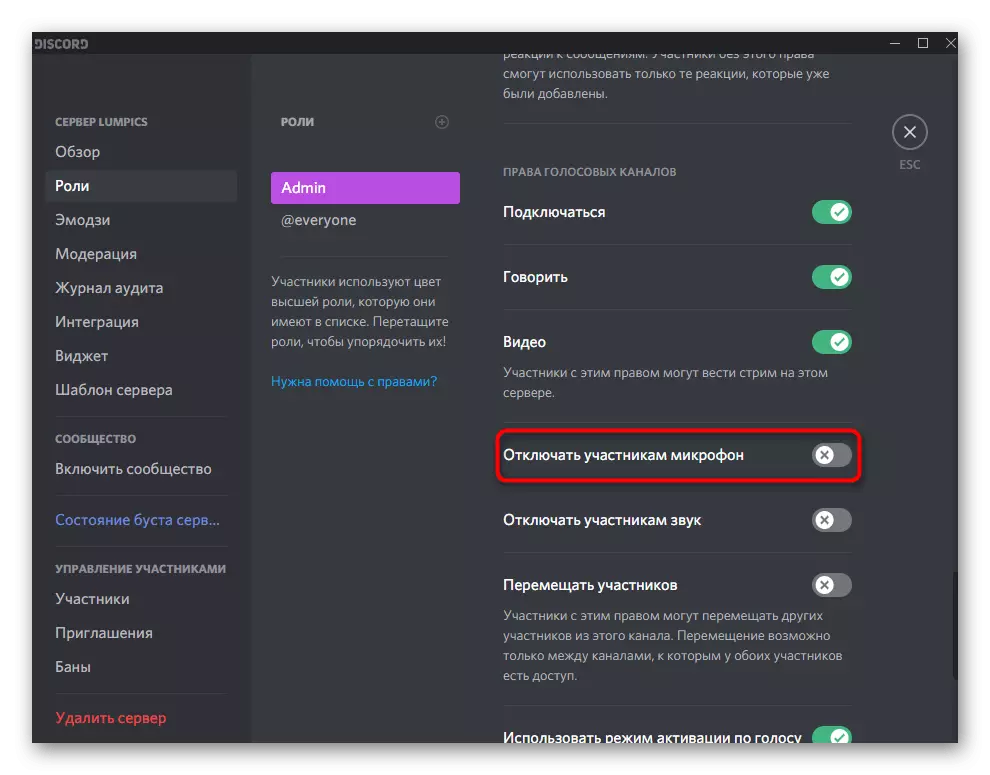
- For the administrator's role, you can assign the right to disabling the microphone to participants, which will be useful when conducting operational moderation when necessary.
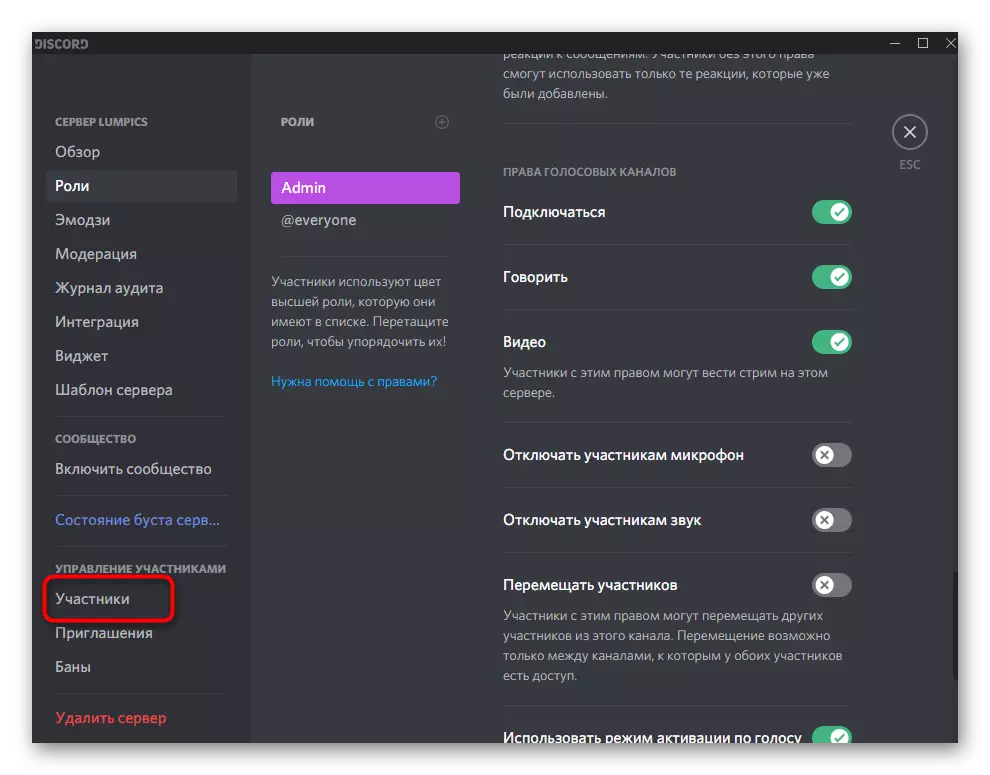
- After setting the role, do not forget to save the changes, then go to the "Participants" section.
- Assign just a changed role to all participants with which it should belong.

For more information on how to add and manage roles on the server, you will find in other articles on our website on the links below. They will help to deal with all the subtleties and nuances, if you first encounter the performance of such a task.
Read more:
Adding and distributing roles on the server in Discord
Creating an administrator role on the server in Discord
If, after setting up the microphone on the computer, you have difficulties or any of the above did not help to deal with its work, go to the material below, where it is described about solving frequent problems.
Read more: Troubleshooting microphone problems in Discord on Windows 10
Option 2: Mobile application
Let us turn to the mobile application of the discord where the microphone setting may also be required, since many users actively use it to communicate in voice channels or in a personal conversation with other participants of this messenger.basic settings
Quickly might on the main parameters of the microphone, which you need to know anyone who wants to actively use this application. It points in it are not much as in the PC program, which simplifies the configuration process, but limits users in terms of available opportunities.
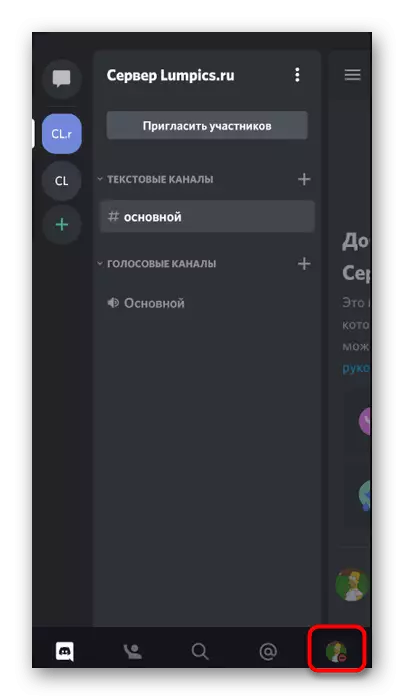
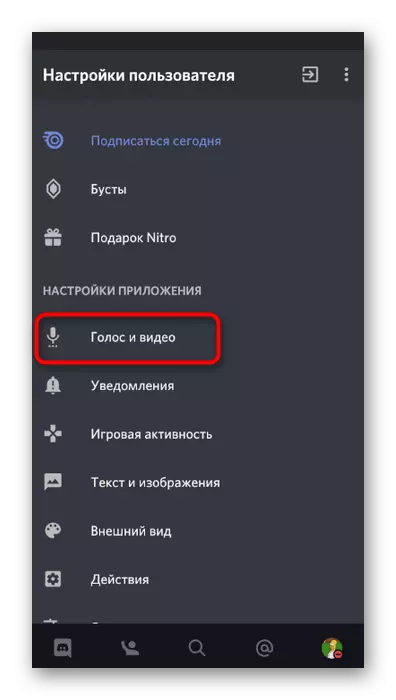
- After starting the application in the panel below, click on the image with your avatar, thereby opening the profile parameters.
- Run to the "Application Settings" block and select "Voice and Video".
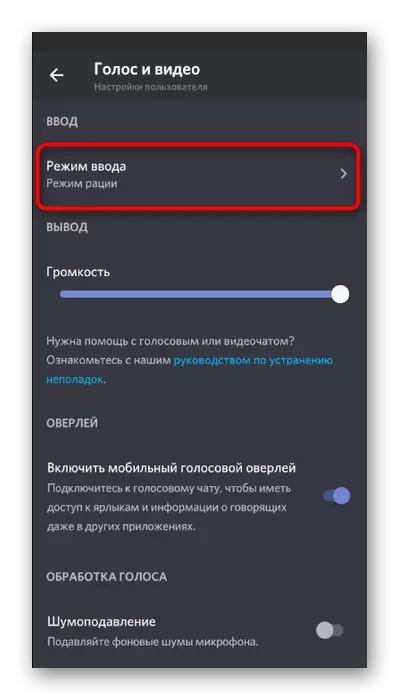
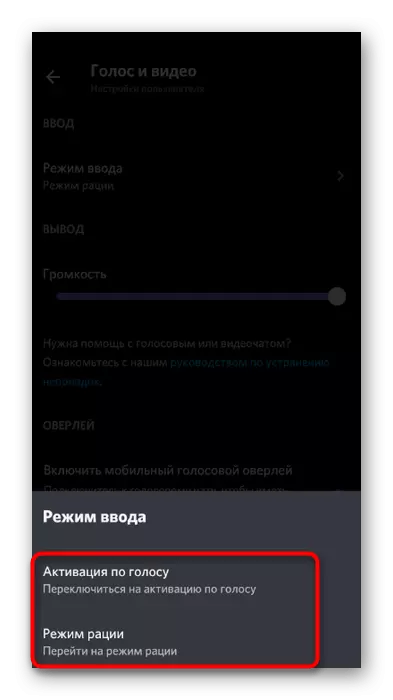
- The application supports two input modes, but they work not entirely correctly due to the features of the mobile version.
- You can activate the option with a walkie-talkie, for which it will take every time to bury the button with the image of the microphone to activate it, or leave a more convenient option - "activation via voice."
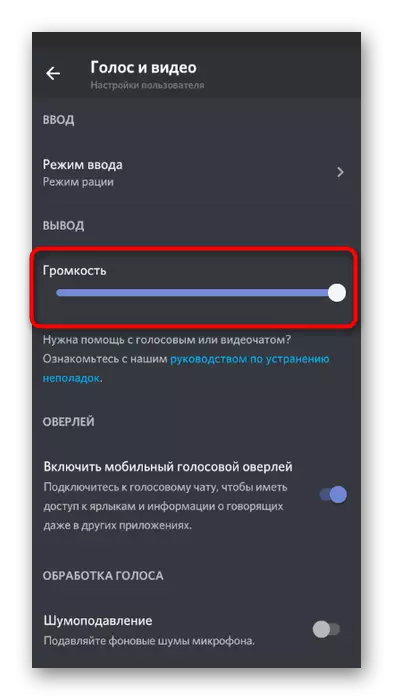
- Please note that the "Volume" slider adjusts the output sound, that is, the volume of the application, and not the microphone. Unfortunately, the input volume adjustment function is not yet available.
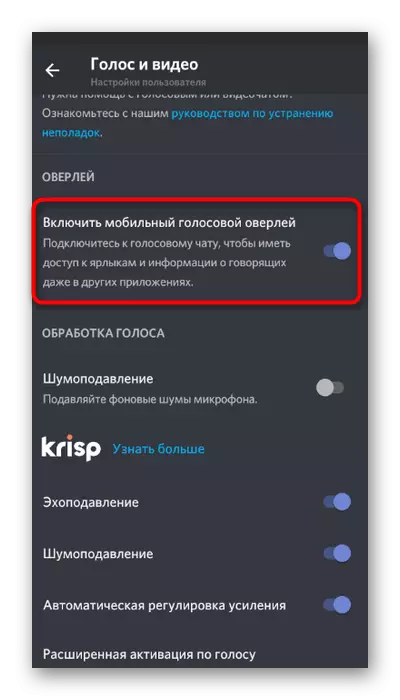
Mobile overlay
The function called "Mobile Overlay" displays the discord button on top of all windows with voice communication, allowing you to quickly control the sound, microphone and switch to conversation if it is necessary. You can enable this option in the same section with the settings, moving the appropriate slider.
There are no features in the work of the overlay, so we will not dwell on it in detail, but only consider the foundations in one of the following sections of our article.
Additional functions
Additional voice processing functions are also supported in a mobile application, so let's look at them more clearly so that each user decides whether to activate them.
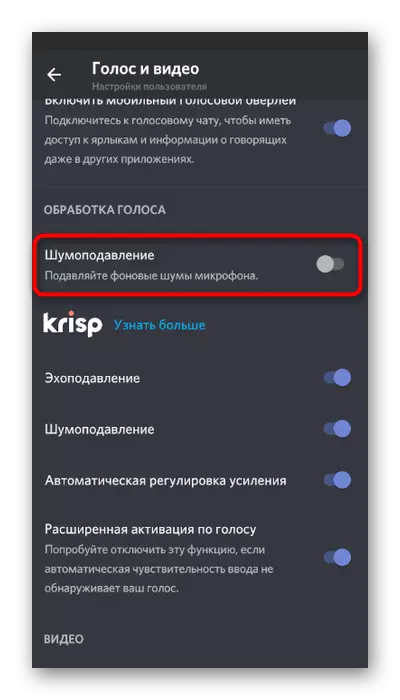
- The first is the "noise cancellation" parameter from Krisp, working in reinforced mode. Include it is worth it when the standard noise cancellation does not cope and the microphone still captures unnecessary sounds.
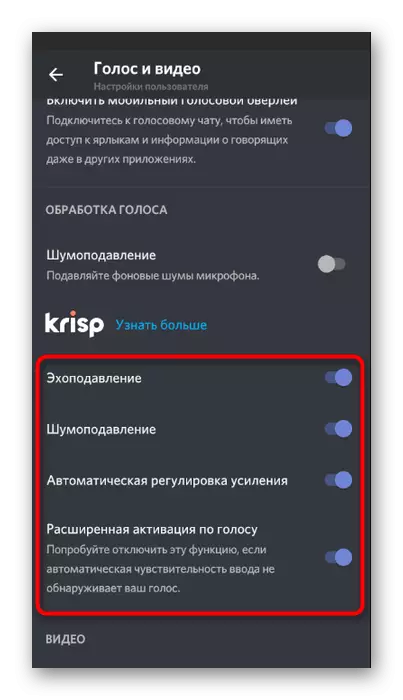
- Next, there is a block with standard functions, which include: "Echo-cancellation", "noise reduction", "Automatic adjustment of the gain" and "Extended voting activation". From the names of these parameters, their purpose is already clear, so we propose to turn off and activate them at your discretion.
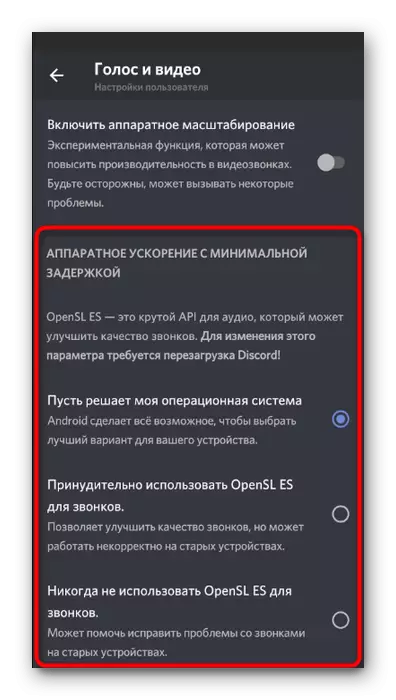
- At the end of the list with the parameters there is a "hardware acceleration with minimum delay" block. Change here anything only if the calls are observed with a voice delay, or the quality drops greatly.
Microphone operation management
For disconnection or activation of the microphone during communication in voice chats, the special button with its image is responding, which appears after the transition to the active channel. If the microphone on the icon turns around the red line, then it is now disabled.

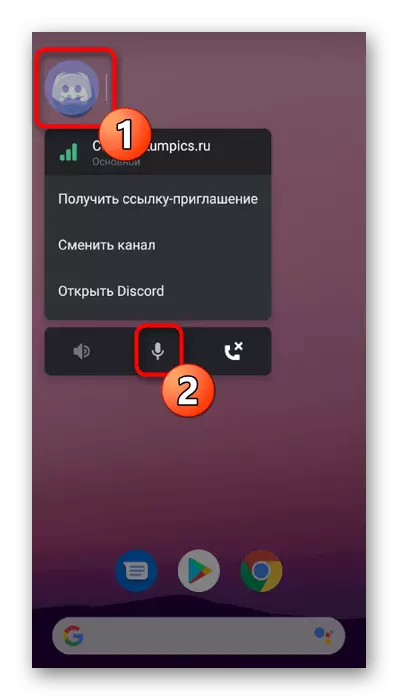
The same applies to management through Mobile Overlay, which we talked about above. When you click on its icon, a small menu appears with controls. Additionally overlay allows you to quickly get an invitation link to the channel or switch to another conversation.
Setting the microphone use permissions
Finishing our article by instructions for the administration and creators of servers, which in addition to the main microphone parameters want to establish permissions or restrictions for other users. The server has a special section that allows you to set the necessary rights for roles.
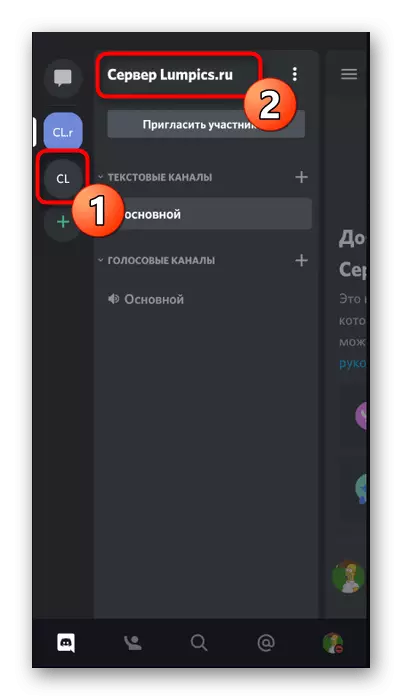
- Click on the server icon on the left pane, and then by its name above.
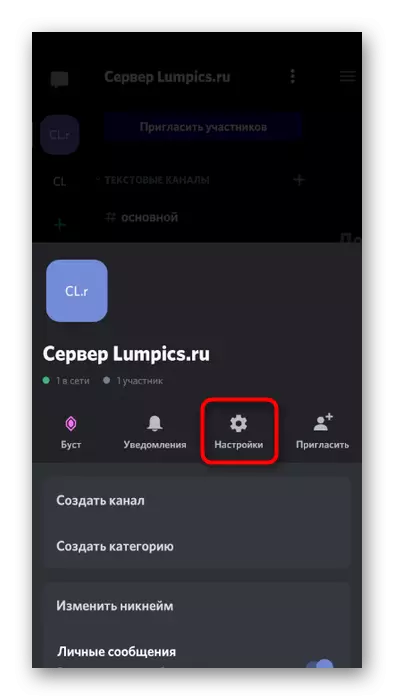
- A new window will pop up through which go to "Settings".
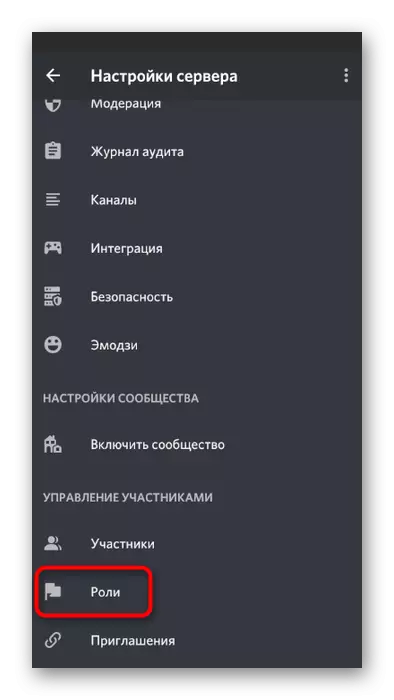
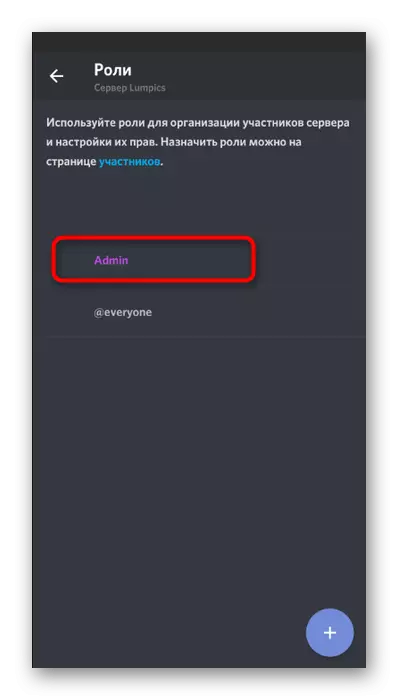
- Scroll to the "Managing Participants" block and select Roles.
- Take tap for the role for configuration or create a new one if so is still missing.
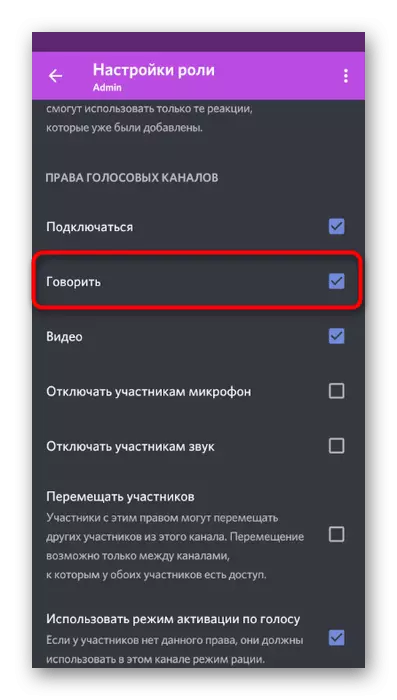
- Find "voice channel rights" and remove or check the box near the "Speak" parameter.
- The same can be done with "use activation mode vote."
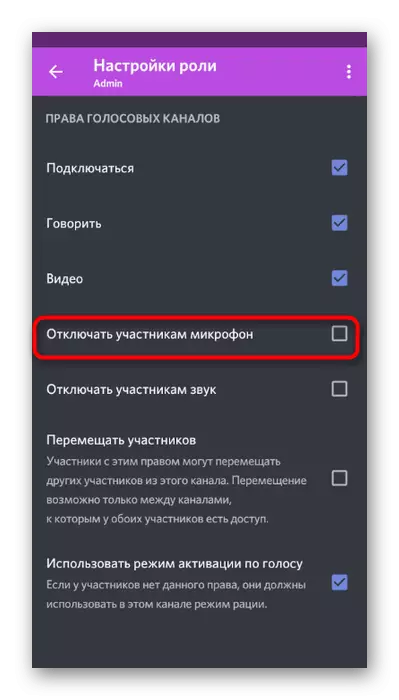
- For the administrator role, you can provide permission to disable microphone to other participants.
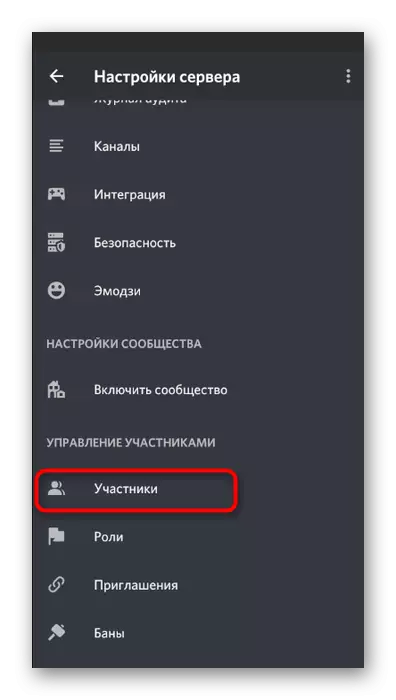
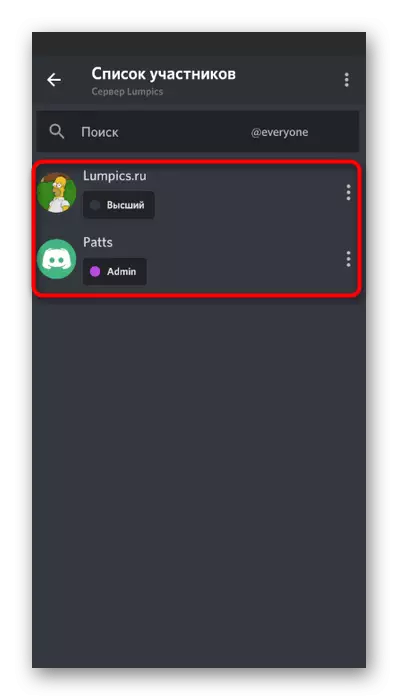
- After making all changes in the previous menu, select "Participants".
- Distribute the roles between all users to activate the permissions or limitations.

All information about how the roles are managed on the server, you will find in the appropriate section of the option 1 of this article, you can follow the links to thematic materials and get the information you are interested in.