

Method 1: Button on headphones
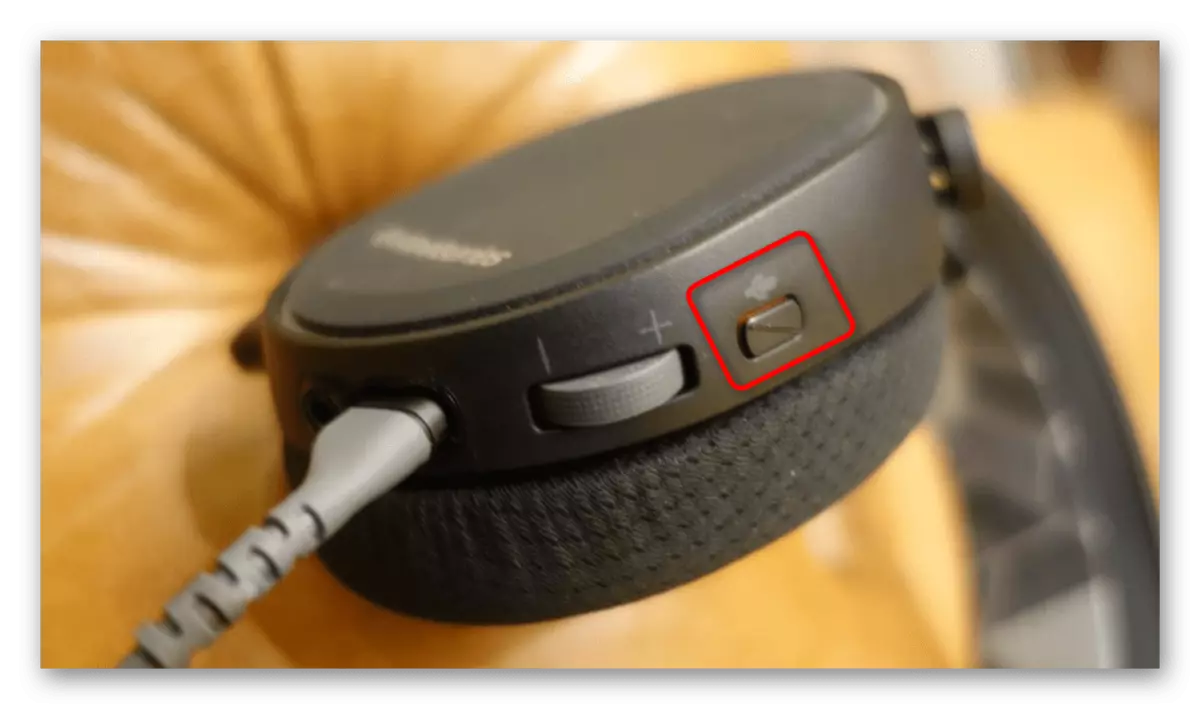
Modern headphones equipped with a microphone almost always have a selected button, which is responsible for the activation of the latter. Its location depends directly from the headset model, and in the following image you see an exceptional example of how the manufacturer decided to implement this function. Click this button to disable or activate the microphone, and in the headphones themselves, hear a successful action signal, unless, of course, it is provided by the built-in software.
The second type of headphones is a retractable or flexible microphone that works as shown in the picture below. There are models where the microphone is automatically activated as soon as you lower it or push out of the compartment, and the headphones receive a notification that the device is ready to work. You need to push or raise the microphone to turn it off. If the signal heard, it means that everything is done correctly, and, in the extreme case, you can run any test device test, say a few words and check whether the microphone is really in a disconnected state.

Method 2: Programs for voice communication
Almost every user uses a microphone in headphones to communicate through special programs. If in Discord or TeamSpeak, turning off the input equipment occurs in one click, since the corresponding buttons are displayed on a separate panel, in the same Skype will have to perform a whole algorithm of actions. With the active use of this software, the following instructions are accurately useful. Use the information received and when interacting with other voice communication programs, turning off the microphone there in about the same or using the specially designated buttons in the main menu or when conversing other users.
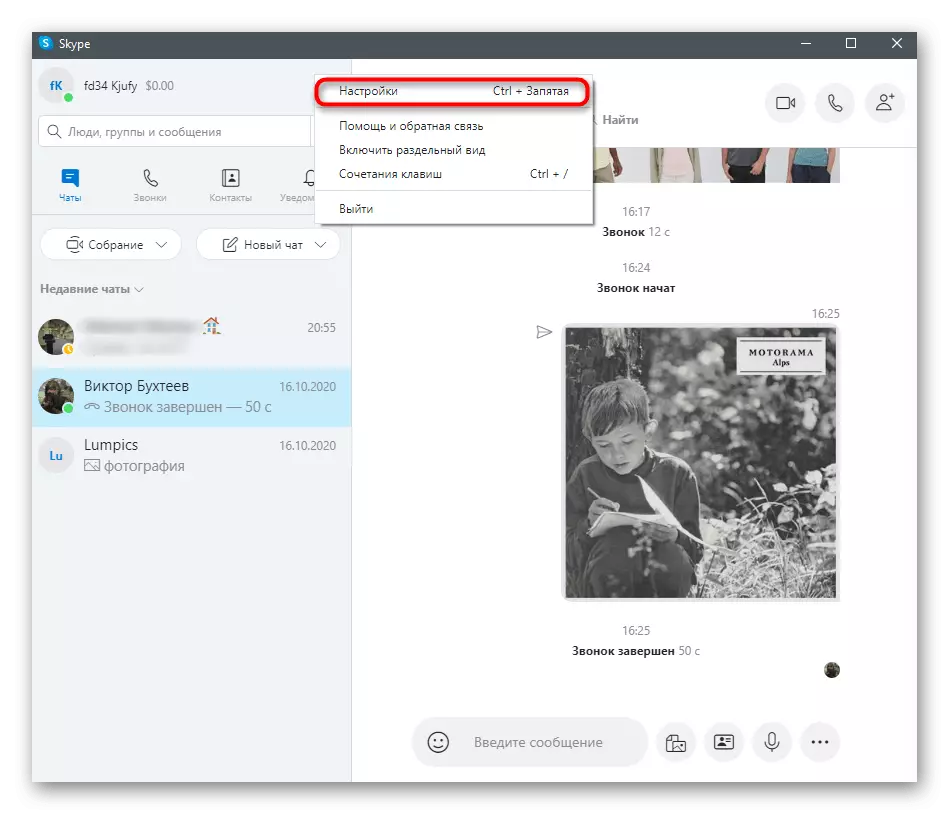
- Press the string with three horizontal dots to open the menu in Skype.
- From the drop-down list, select "Settings".
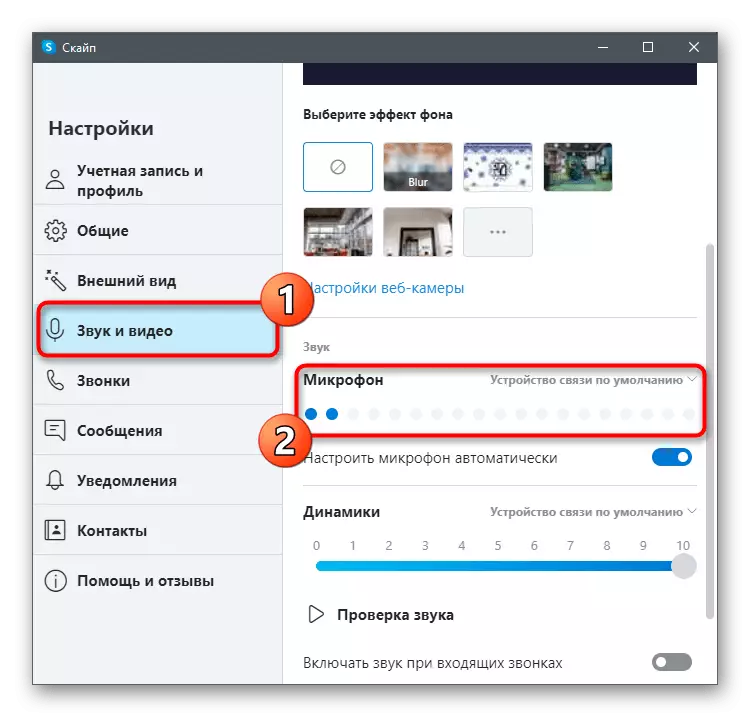
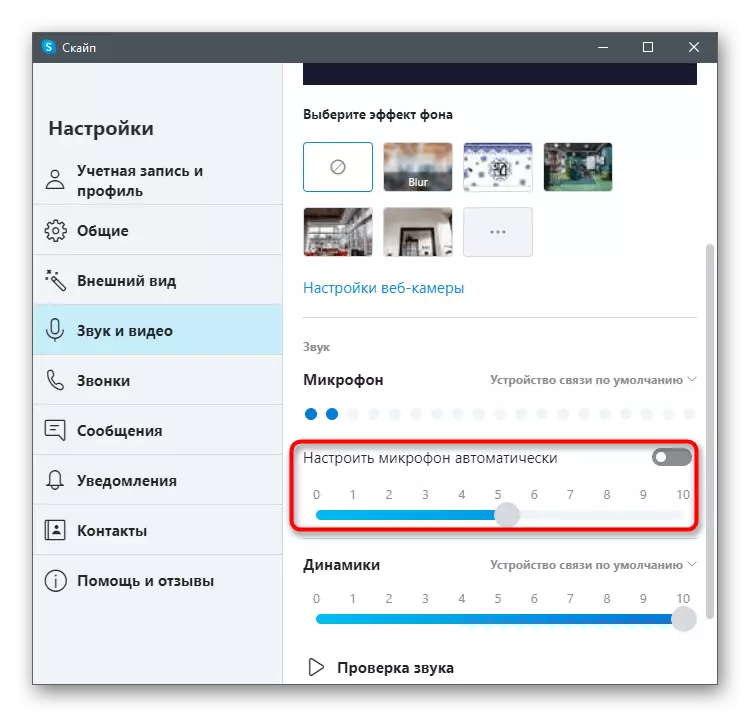
- Go to the "Sound and Video" section and pay attention to the dynamic strip showing the device used. By the way, it can be simply changed in the drop-down list to the one that is not connected now, but it will be only within the framework of the program.
- However, the priority option will turn off the automatic microphone setting and lowering the volume to a minimum.
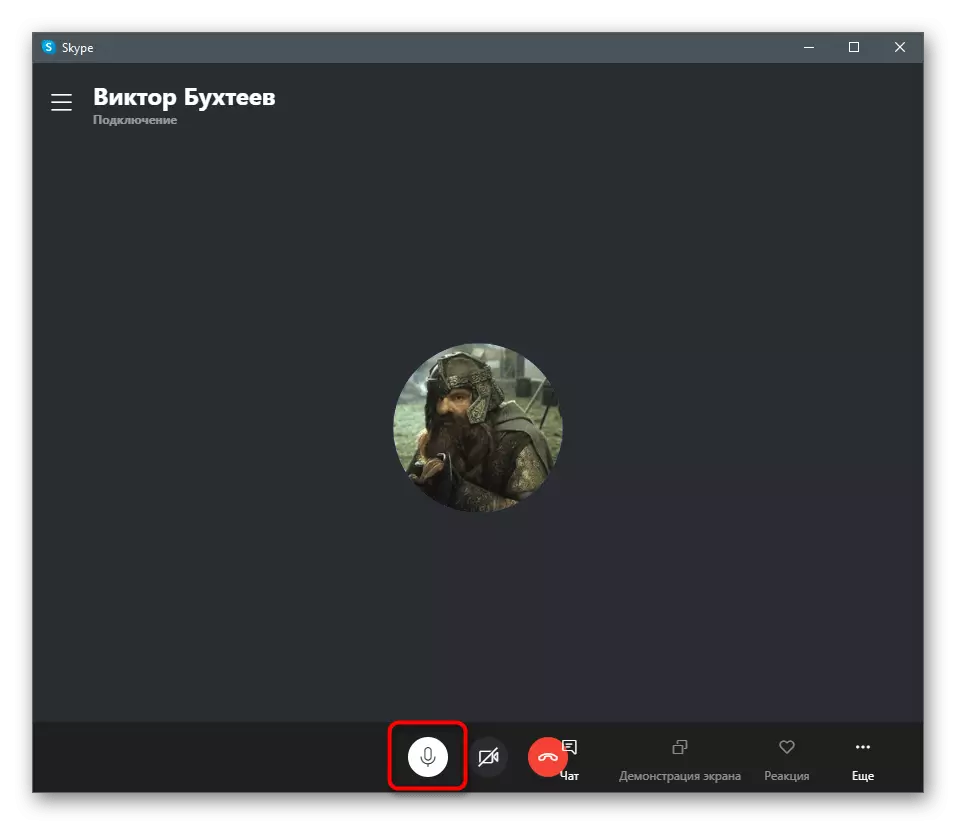
- If you do not want to use a microphone during a conversation with a specific person, when you conversate, click on the button with the image of this device to disable it and the interlocutor did not hear your voice until the next inclusion.

Method 3: Sound control panel in Windows
If the microphone has no shutdown button and when it is displaced, the sound is also not turned off, you can use the function built in Windows to disable the input device absolutely for all programs. The disadvantage of this method is that you will have to disconnect each time and include the microphone if it is necessary to activate in different software.
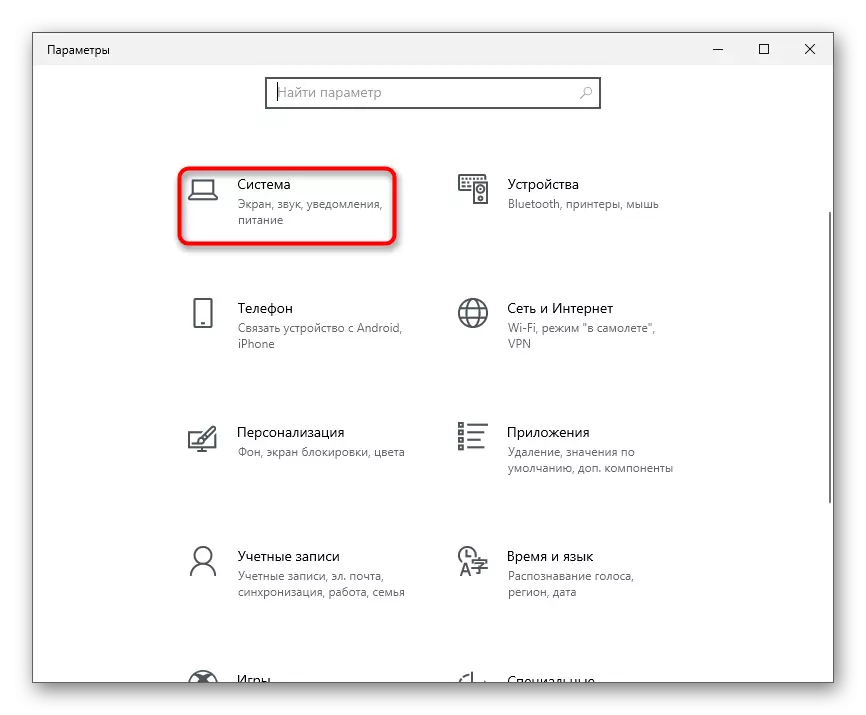
- Open the Start menu and go to the "Parameters" application.
- Among all tiles are you interested in the "system".
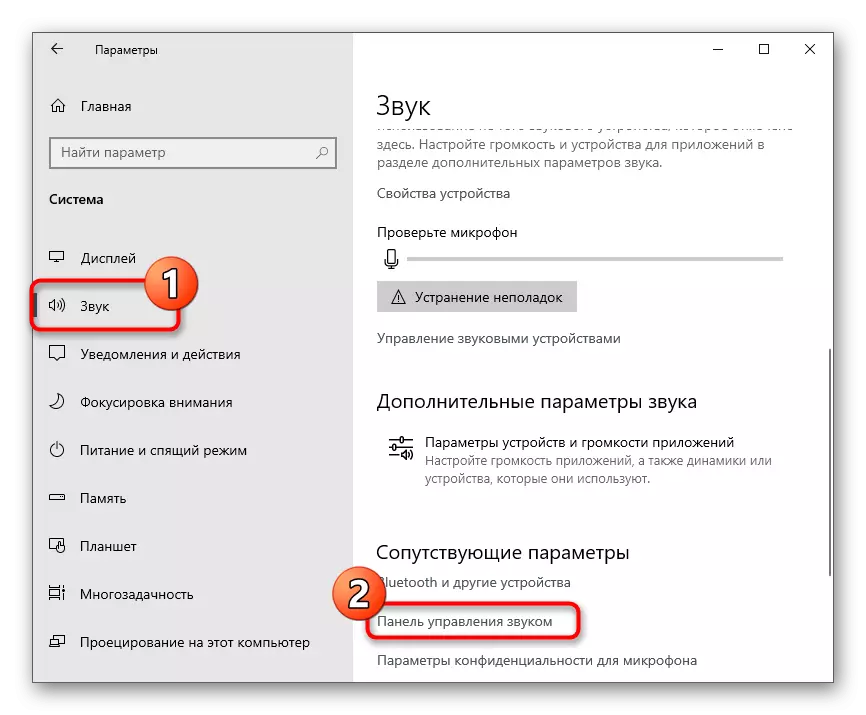
- In it, open the "Sound" category and in the "Related Parameters" block, click on the Sound Control Panel.
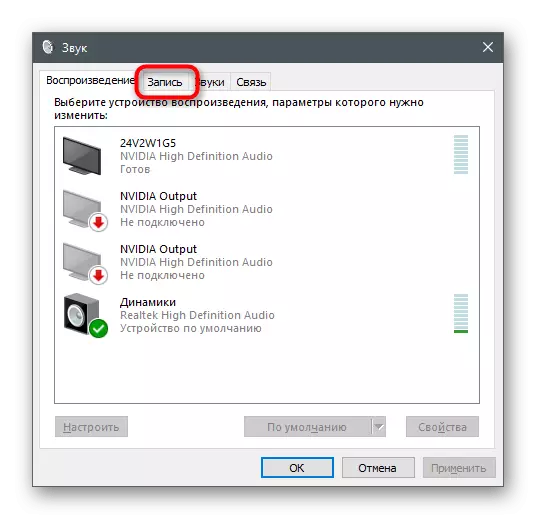
- After the "Sound" window appears, go to the "Record" tab.
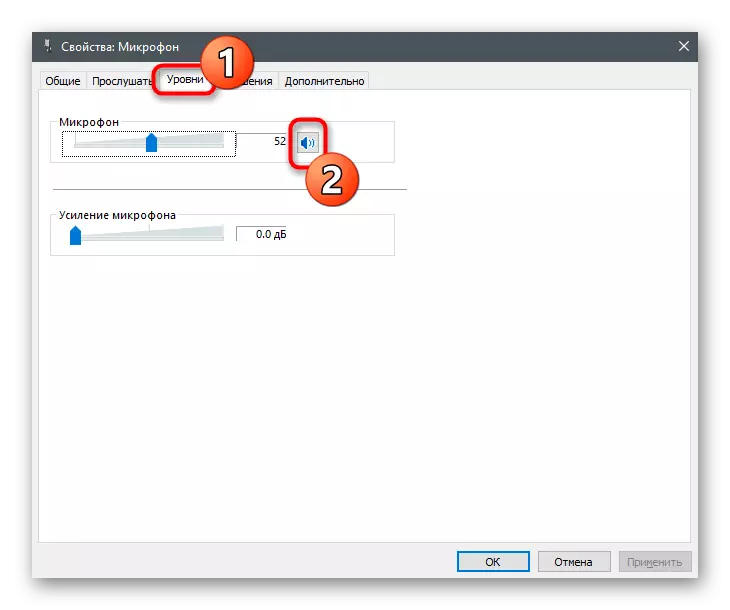
- Double-click the microphone icon to open its properties.
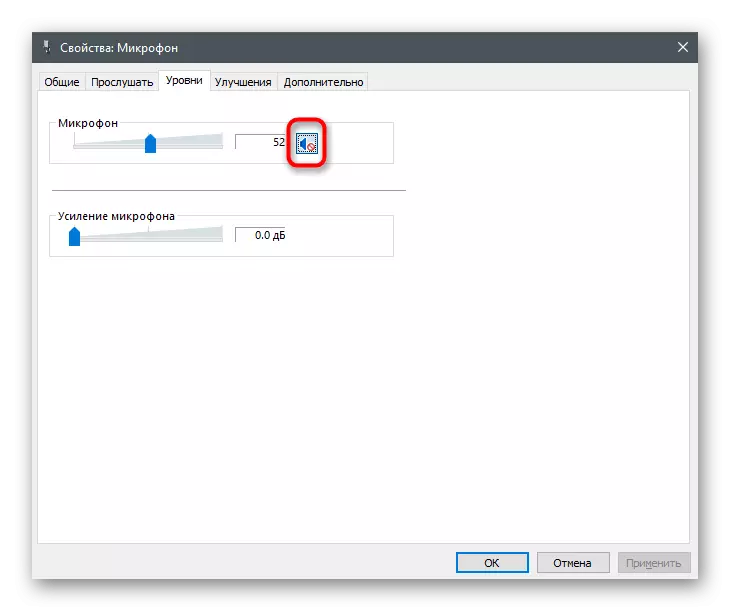
- Click the "Levels" tab and move the Microphone slider to the minimum value or use a special button to turn off the sound.
- If the right side of it is a small icon with a red crossed line, it means that now listening from the equipment does not occur and cannot be used in any software or game.


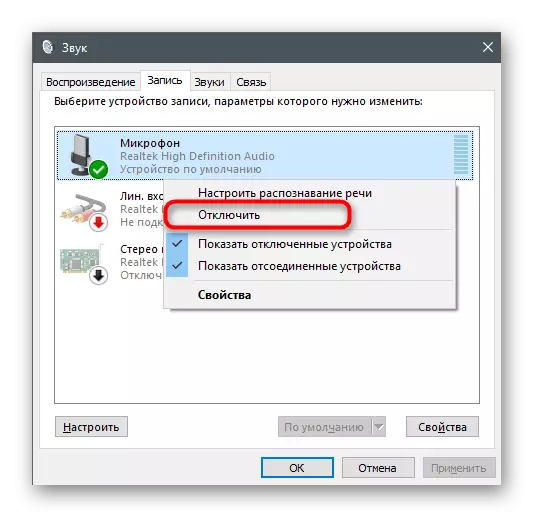
If the above option does not suit you, there is another way - a complete shutdown of the device through the same menu. Such an approach is optimal in those situations where you do not even want any program to show a microphone from headphones. To do this, go to the same "Sound" menu and follow these actions:
- Right-click on the microphone you used to call the context menu.
- From it, select "Disable".
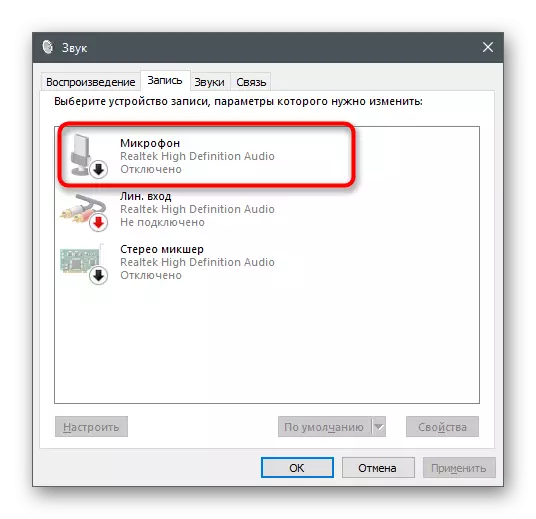
- The microphone is now in the "Disabled" state.

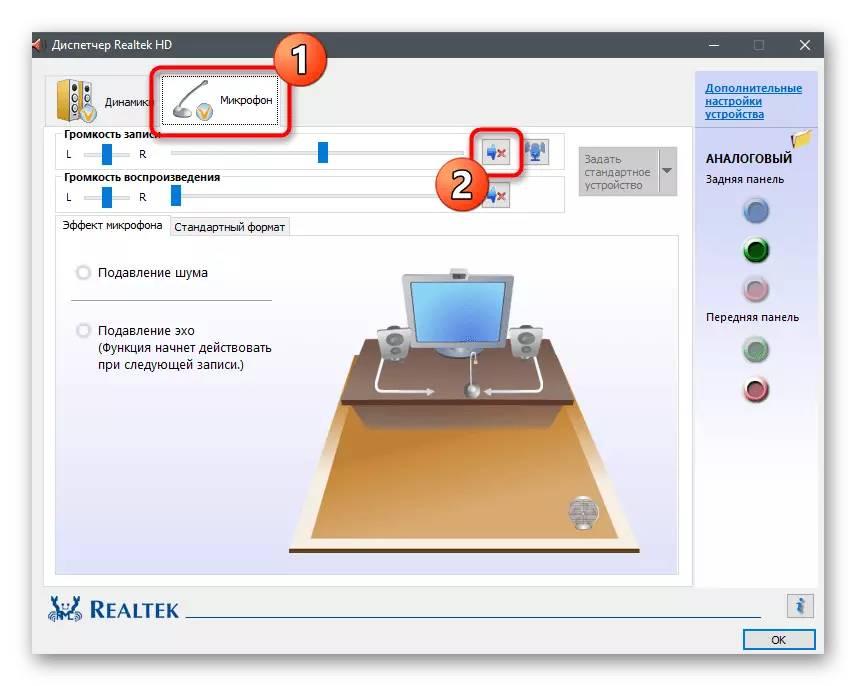
Method 4: Sound Management Manager
Often, when installing drivers for a sound card, a graphical interface program is added to the operating system, designed to control the input and output devices. It can be used to turn off the microphone in headphones. If we are talking about the sound manager from Realtek, find the executable file on the computer and run it as shown in the article below.
Read more: Realtek HD Dispatcher Opening Methods in Windows 10

Next, it remains only to find a tab with the microphone and use the present buttons to disable the capture of sounds from this equipment. Example You see in the following screenshot.
Method 5: "Device Manager"
This method will be implemented only if you installed an additional headphone driver during their first connection (relevant for gaming and semi-professional devices), and the built-in microphone is displayed as a separate device in the Device Manager menu. It is always easy to check and disable the equipment if it is present there.
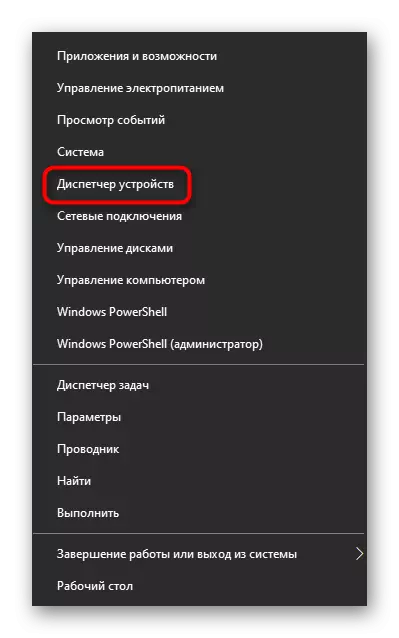
- Right-click on the Start button and from the menu that appears, select "Device Manager".
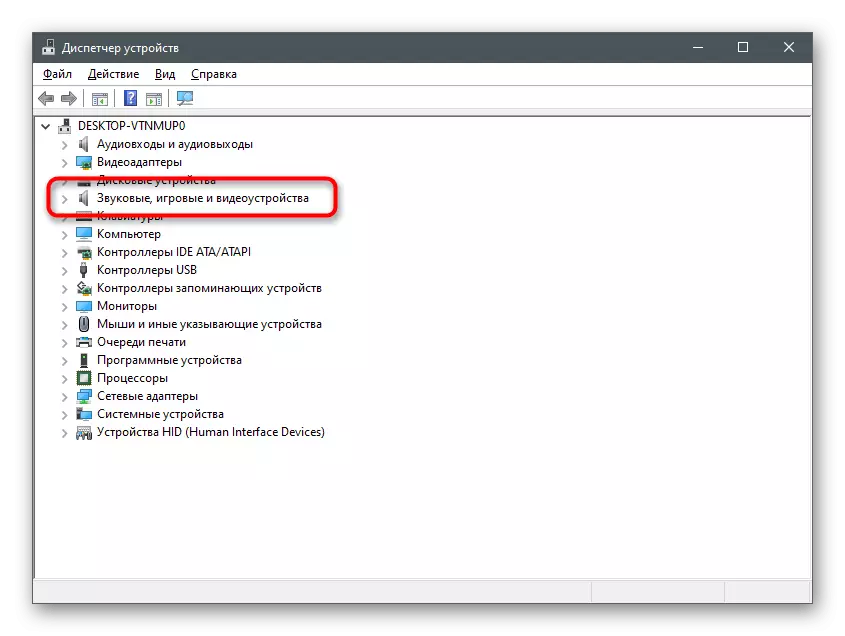
- Expand the list "Sound, game and video devices".
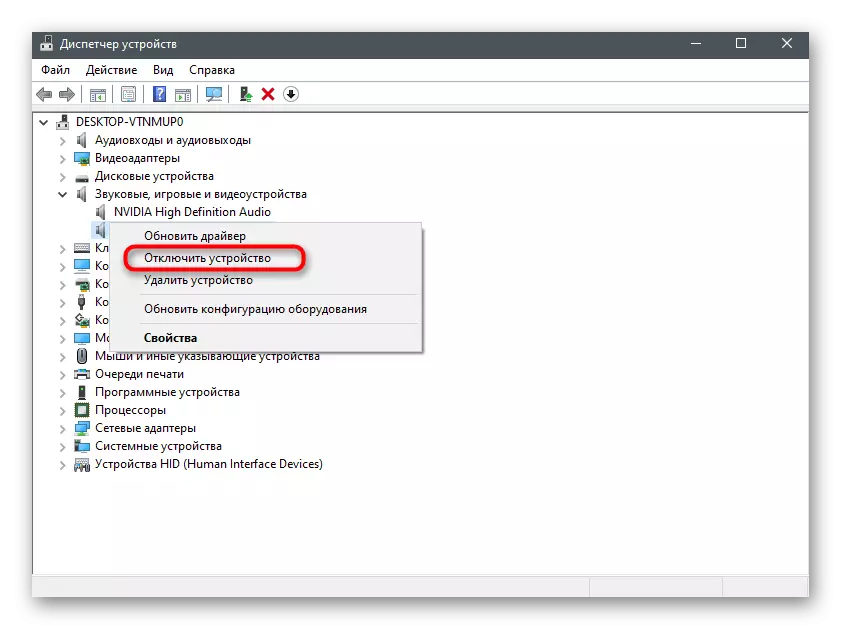
- Find the microphone among them, press the PCM on it and specify the "Disable Device" item.
When performing any of the listed methods, you can use convenient tools for checking the microphone to make sure that it is really disconnected and none of the interlocutors will hear you. It will help to deal with this question another article on our website by reference below.
Read more: Microphone check in Windows 10