

Creating your own business cards for frequent requires specialized software that allows you to create business cards of any complexity. But what to do, if there is no such program, but there is a need for such a card? In this case, you can use the tool as standard for these purposes - the MS Word text editor.
First of all, MS Word is a text processor, that is, a program that provides a convenient way to work with the text.
However, manifested by some smell and knowledge of the capabilities of this very processor, it is possible to create business cards no worse than in special programs.
If you have not yet installed MS Office, then it is time to install it.
Depending on how you will use the office, the installation process may differ.
Installing MS Office 365
If you subscribe to the cloud office, the installation will require you three simple actions:
- Download Office Installer
- Run installer
- Wait for the installation
Note. Installation time in this case will depend on the speed of your internet connection.
Installation of MS Offica's offline versions on the example of MS Office 2010
To install MS Offica 2010 you will need to insert the disk into the drive and start the installer.Next, you must enter the activation key, which is usually pasted on the disk box.
Next, choose the necessary components that are part of the office and wait for the installation.
Creating a business card in MS Word
Next, we will look at how to make business cards yourself in Word on the example of the MS Office 365 Home office package. However, since the 2007, 2010 and 365 package interface is similar, then this instruction can also be used for other versions of the office.
Despite the fact that there are no special tools in MS Word, it's easy to create a business card in the Word.
Preparation of empty layout
First of all, we need to decide on the sizes of our card.
Any standard business card has dimensions of 50x90 mm (5x9 cm), we will take them for the database for ours.
Now choose a tool to create a layout. Here you can use both the table and the object "Rectangle".
The option with the table is convenient because we can immediately create several cells, which will be business cards. However, there may be a problem with the placement of design elements.
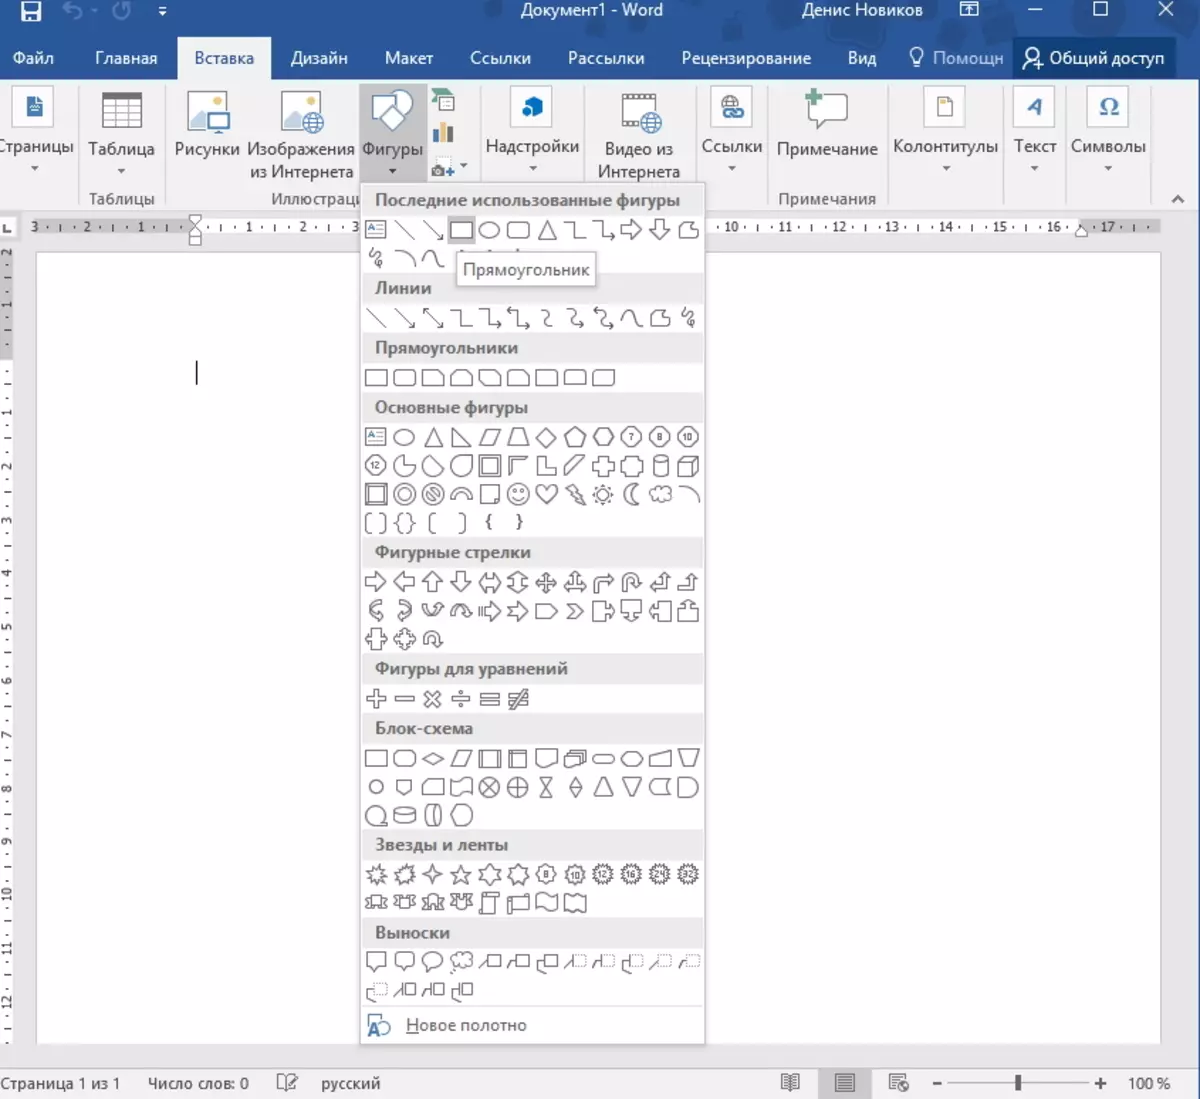
Therefore, we use the object "Rectangle". To do this, proceed to the "Insert" tab and select figures from the list.
Now draw an arbitrary rectangle on a sheet. After that, the "Format" tab will be available to us, where we indicate the size of our future business card.
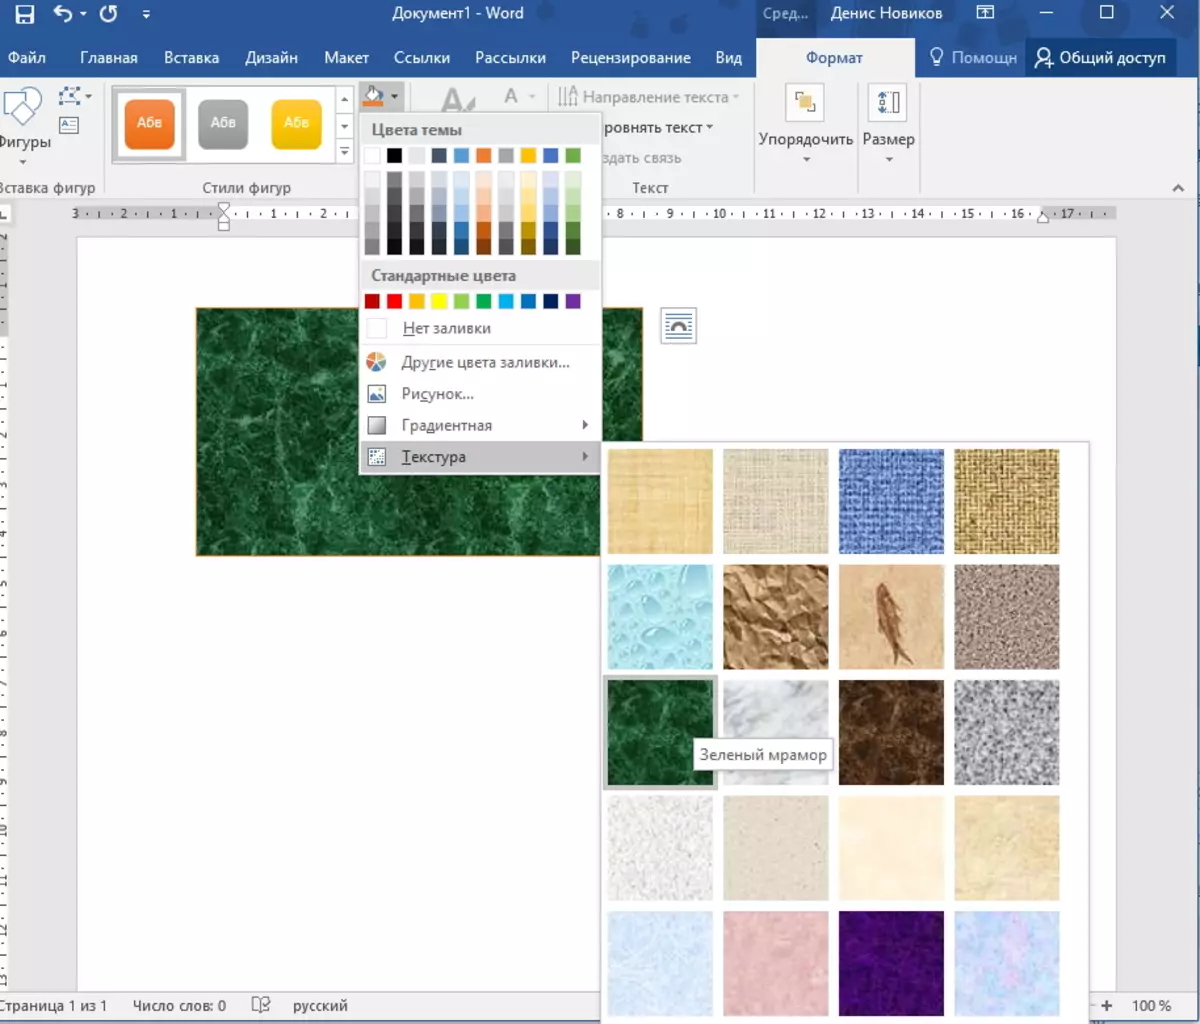
Here we configure the background. To do this, you can use standard tools that are available in the "Styles" group. Here you can choose as a ready-made version of the fill or texture, as well as set your own.
So, the sizes of the business card are set, the background is selected, which means our layout is ready.
Adding design elements and contact information
Now it is necessary to decide what will be placed on our card.
Since the business cards are needed so that we can provide contact information in a convenient form in a convenient form, then the first thing you need to decide which information we want to place and where to position it.
For a more visible idea of their activities or your company, on business cards, there is any thematic picture or logo of the firm.
For our business card, we choose the following data placement scheme - in the top will place the surname, name and patronymic. On the left there will be a picture, and on the right contact information - phone, mail and address.
In order for the business card to look beautiful, to display the surname, name and middle name, we use the WordArt object.
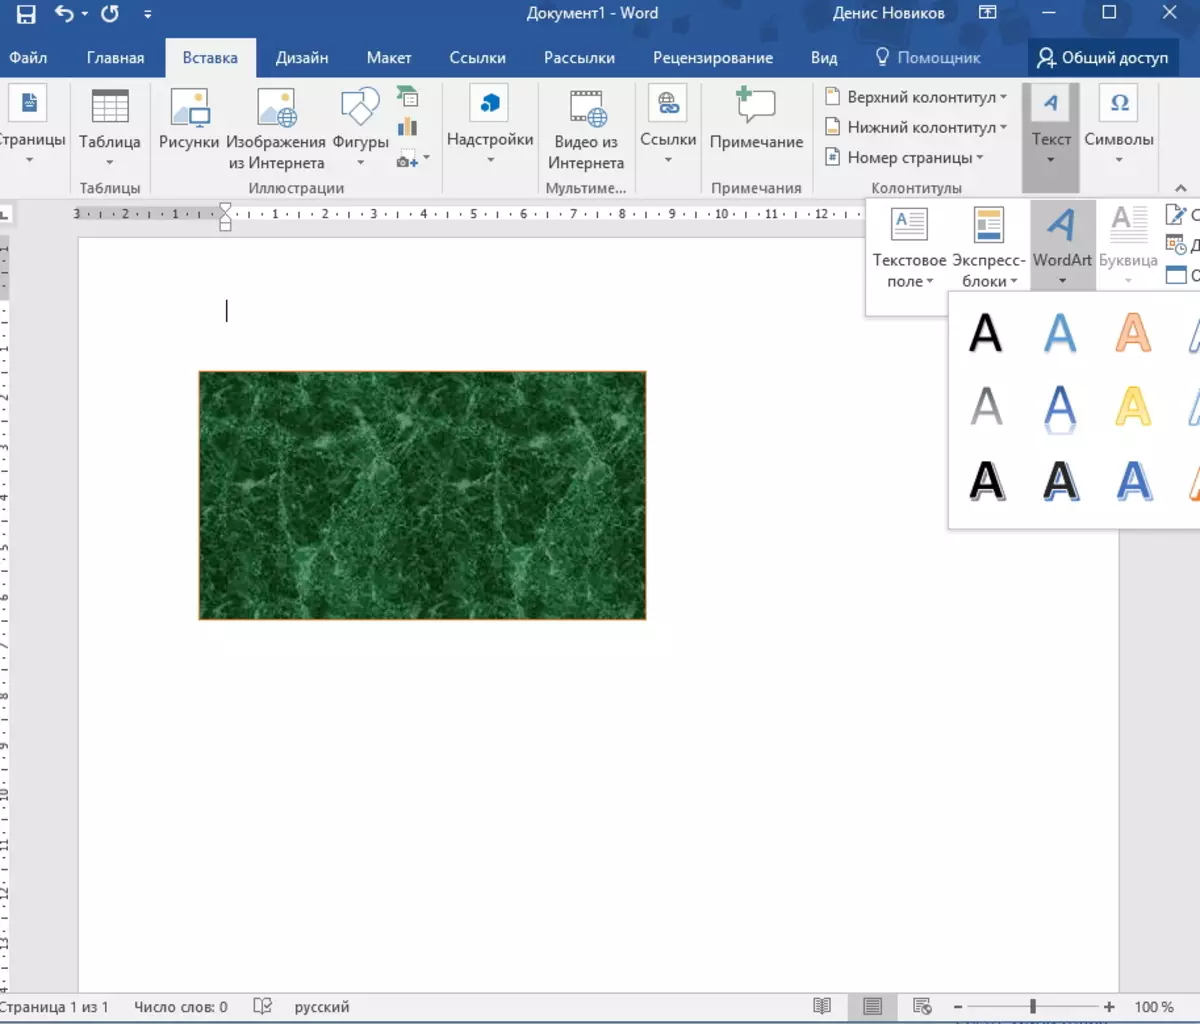
Return to the "Insert" tab and click on the WordArt button. Here you choose the appropriate style of design and introduce your last name, name and patronymic.
Next, on the Home tab, we reduce the font size, and also change the size of the inscription itself. To do this, use the "Format" tab, where we specify the desired size. It logically will indicate the length of the inscription equal to the length of the business card.
Also on the "Home" and "format" tabs, you can make additional font settings and inscription display.
Adding a logo
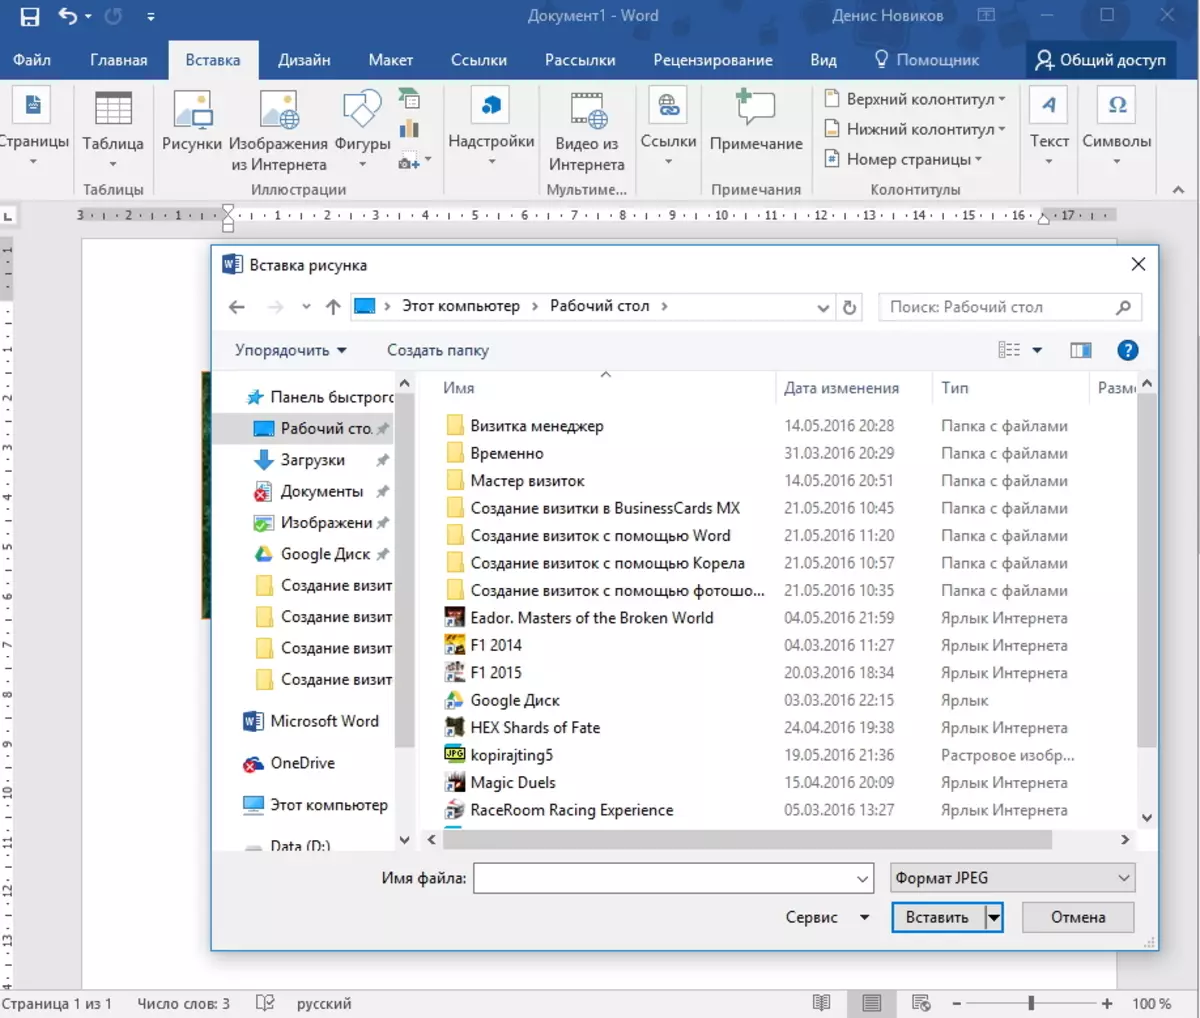
To add an image to a business card, we return to the "Insert" tab and press the "Picture" button there. Next, select the desired image and add it to the form.
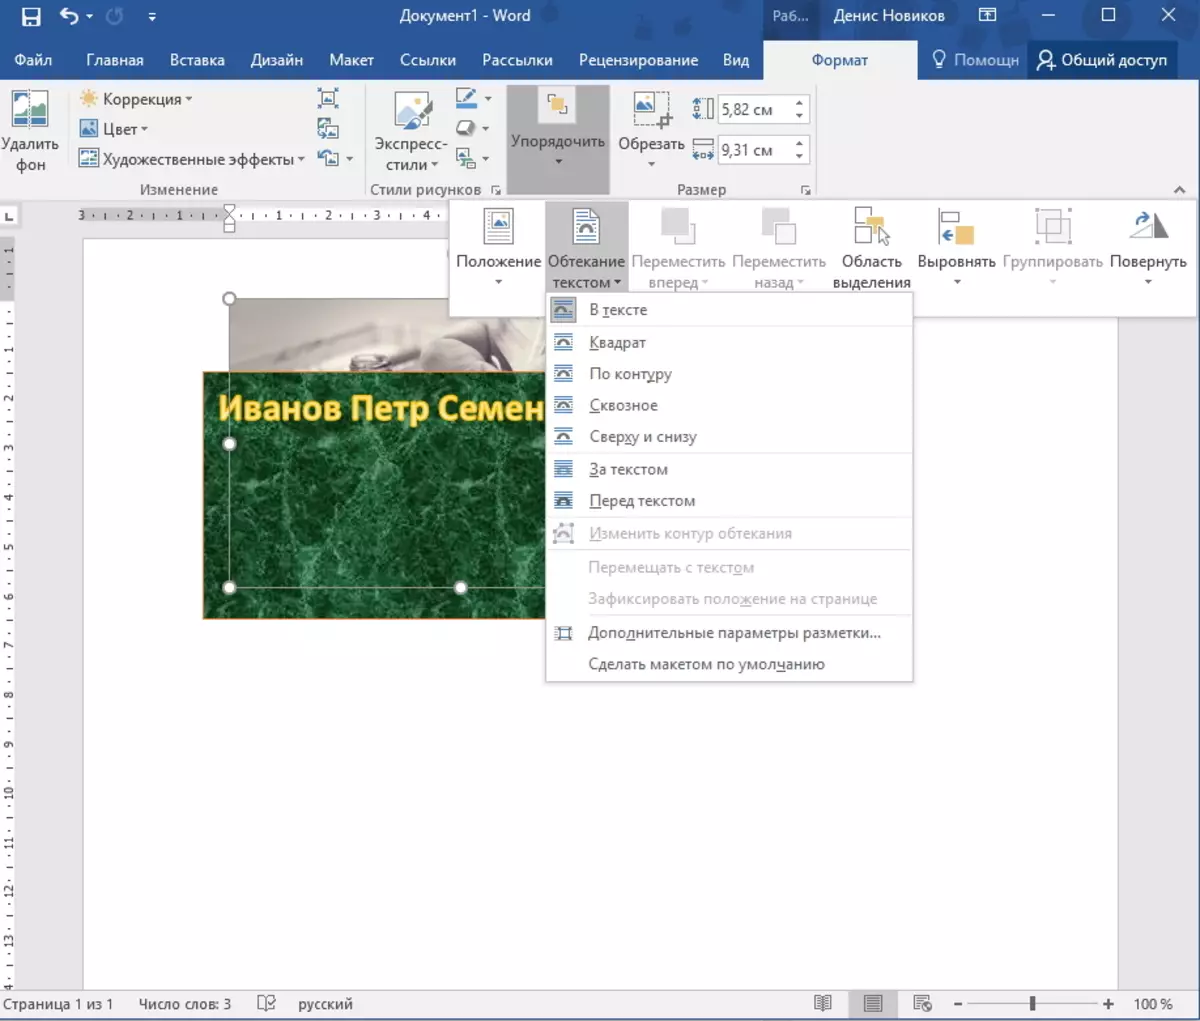
By default, the picture has flow around texts in the value "in the text" because of which our card will overlap the picture. Therefore, we change strengthening to any other, for example, "top and bottom."
Now you can drag the picture to the desired place on the form of the business card, as well as resize the picture.
Finally, we still have contact information.
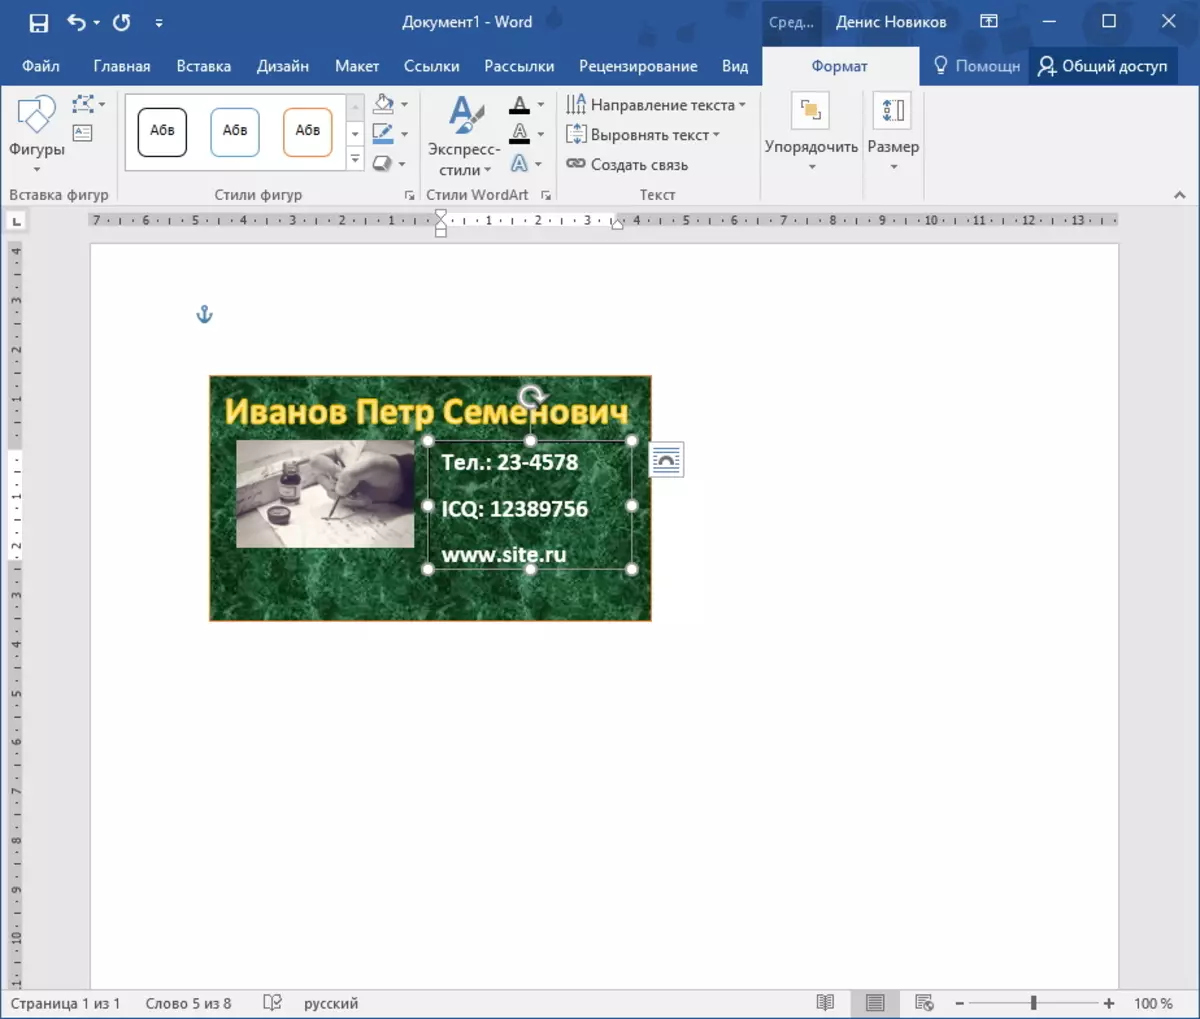
To do this, it is easier to use the "Inscription" object, which is on the "Paste" tab, in the "Figures" list. Having placed the inscription in the right place, fill in the data about yourself.
In order to remove the boundaries and background, go to the "Format" tab and remove the figure of the shape and fill.
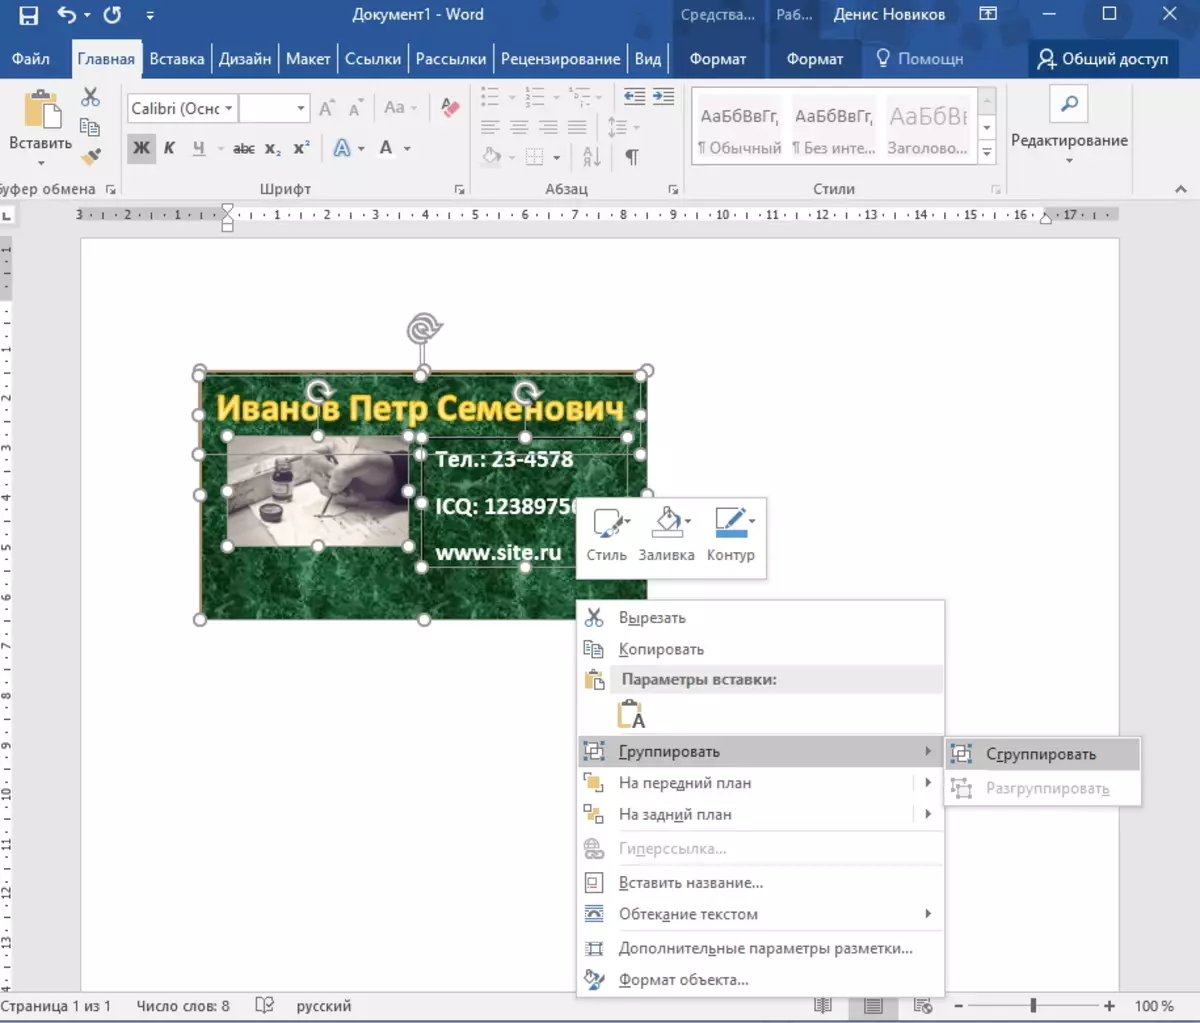
When all design elements and all information is ready, we allocate all the objects from which the business card consists. To do this, press the SHIFT key and click the left mouse button on all objects. Next, press the right mouse button by grinding selected objects.
Such an operation is necessary so that our business card "does not crumble" when we open it on another computer. Also the grouped object is more convenient to copy
Now it remains only to print business cards in Word.
READ ALSO: Creation programs
So, such a non-curtail way you can create a simple business card by means of Word.
If you know this program quite well, you can completely create more complex business cards.