
The acceleration of the processor is an easy thing, but requires certain knowledge and caution. A competent approach to this occupation allows you to get a good productivity growth, which is sometimes very lacking. In some cases, you can dispersed the processor through the BIOS, but if this possibility is missing or you want to carry out manipulation directly from under Windows, it is better to use special software.
One of the simple and universal programs is SetFSB. It is good because with its help you can overclock the Intel Core 2 Duo processor and the old models similar to it, as well as various modern processors. The principle of operation of this program is simple - it increases the frequency of the system tire, affecting the PLL chip installed in the motherboard. Accordingly, everything that is required of you is to know the brand of your board and check whether it enters the list of supported.
Check the support of the motherboard
First you need to find out the name of the motherboard. If you do not own such data, then use special software, for example, the CPU-Z program.After you have determined the boards, go to the official website of the SETFSB program. Registration there, to put it mildly, not from the best, but all the necessary information is here. If the board is in the list of supported, then you can gladly continue further.
Body features
The latest versions of this program, unfortunately, paid for the Russian-speaking population. It is necessary to make approximately $ 6 to get the code for activation.
There is an alternative - to download the old version of the program, recommend version 2.2.129.95. This can be done, for example, here.
Installing the program and preparation for overclocking
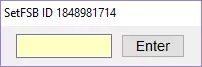
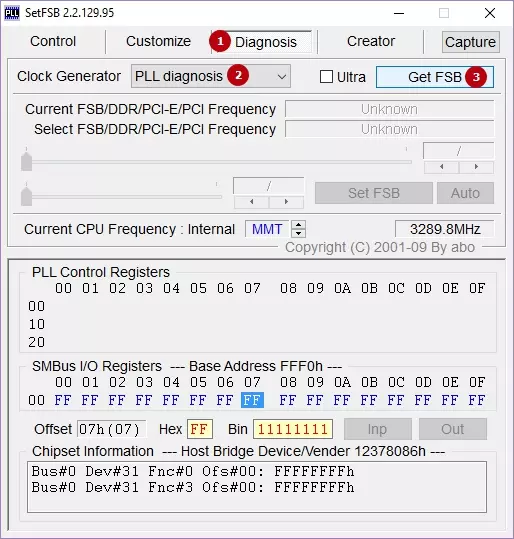
The program works without installation. After starting, this window will appear before you.
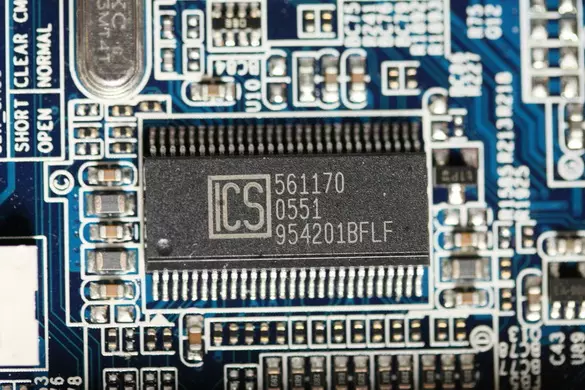
To start overclocking, you must first find out your clock generator (PLL). Unfortunately, it is not so easy to find out. Computer holders can disassemble the system unit and find the necessary information manually. This data looks like this:

Methods of software identification PLL chip
If you have a laptop or you do not want to disassemble the PC, that is, two more ways to find out your PLL.
1. Go here and look for your laptop in the table.
2. The SETFSB program will help identify the PLL chip firm itself.
Let us dwell on the consideration of the second method. Switch to the " Diagnosis ", In the drop-down list" Clock generator. »Select" Pll Diagnosis ", Then click on the" button " Get FSB.».
Surrence below, in the field " Pll Control Registers. "And we see a table there. We are looking for column 07 (this is Vendor ID) and look at the value of the first line:
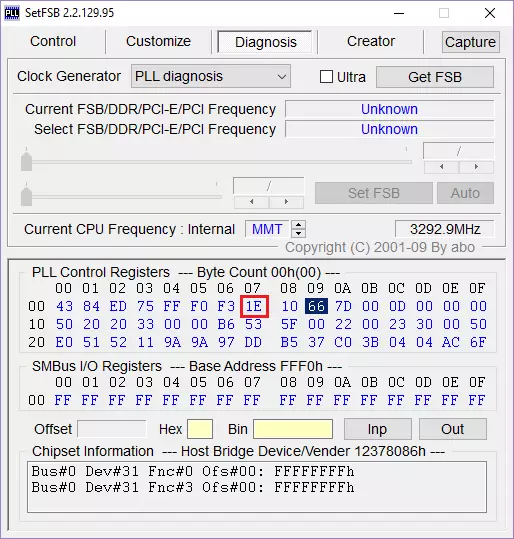
• If the value equals he - then the PLL from RealTek, for example, RTM520-39D;
• If the value is x1, the PLL from IDT, for example, ICS952703BF;
• If the value is x6, the PLL from Silego, for example, SLG505YC56DT;
• If the value equals X8, the PLL from Silicon Labs, for example, CY28341OC-3.
x - any number.
Sometimes exceptions are possible, for example, for chips from Silicon Labs - in this case, VENDOR ID will be located not in the seventh pate (07), but in the sixth (06).
Check protection against program acceleration
Find out whether there is a hardware protection against program acceleration, so possible:

• We look in the field " Pll Control Registers. »On column 09 and click on the value of the first line;
• We look in the field " Bin. "And we find the sixth bits in this regard. Please note that the count count must begin with the unit! Therefore, if the first bit is zero, then the sixth bit will be the seventh digit;
• if the sixth bit is 1 - then for overclocking via the SETFSB, you need a PLL hardware mode (TME-MOD);
• If the sixth bit equals 0 - then the hardware mod is not required.
Start overclocking
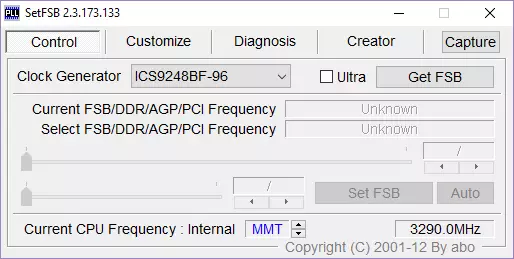
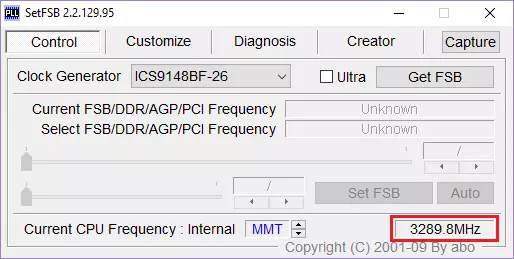
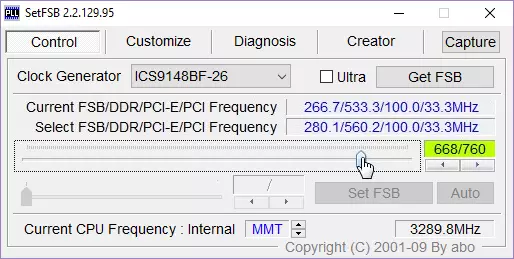
All work with the program will occur in the "tab" Control " In field " Clock generator. »Select your chip, and then click on" Get FSB.».
At the bottom of the window, on the right, you will see the current frequency of the processor.
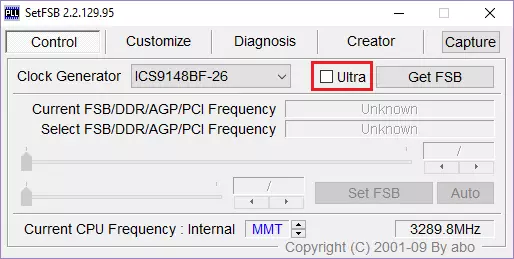
We remind you, acceleration is carried out by increasing the frequency of the system tire. This happens every time you move the central slider to the right. All other posts leave as it is.
If you need to increase the range for adjustment, then set the checkbox next to the parameter " Ultra».
Increase the frequency is best careful, 10-15 MHz at a time.
After adjustment, press the "SETFSB" key.
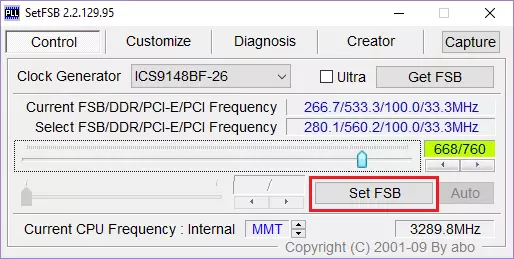
If after that your PC hung or turned off, then the reasons for that two: 1) you indicated the wrong PLL; 2) increased the frequency. Well, if everything was done correctly, the processor frequency will rise.
What to do after overclocking?
We need to know how stable the computer works at the new frequency. This can be done, for example, in games or specialized programs for tests (PRIME95 or other). Also follow the temperature, in order to avoid possible overheating when the processor is loaded. In parallel with the tests, run the temperature monitor program (CPU-Z, HWMONITOR or other). Tests are best to spend about 10-15 minutes. If everything works stably, then you can stay at a new frequency or continue to increase it by performing all the above actions on a new circle.How to make a PC run with a new frequency?
You should already be known, the program works with a new frequency only before rebooting. Therefore, that the computer always started with the new system tire frequency, you must install the program in the startup. This is a prerequisite if you want to enjoy an overclocked computer on an ongoing basis. However, in this case, it will not be about simple adding the program to the "Auto-loading" folder. There is a way for this - the creation of a BAT script.
Opens Notebook ", Where we will create a script. We write there a string, approximately such:
C: \ desktop \ setfsb 2.2.129.95 \ setfsb.exe -w15 -S668 -CG [ICS9LPR310BGLF]
ATTENTION! Do not copy this line! It should have another!
So, we disassemble it:
C: \ desktop \ setfsb 2.2.129.95 \ setfsb.exe is the path to the utility itself. You can distinguish the location and version of the program!
-W15 - delay before starting the program (measured in seconds).
-S668 - Admission setting. Your digit will be different! To find out her, look at the green field in the Control program tab. There will be two numbers through the slash. Take the first number.
-CG [ICS9LPR310BGLF] - model of your PLL. You may have this data! In square brackets, you need to enter the model of your pll as it is specified in the SetFSB.
By the way, along with the SETFSB itself you will find the setfsb.txt text file, where you can find other parameters and apply them if necessary.
After the string was created, save the file as .Bat.
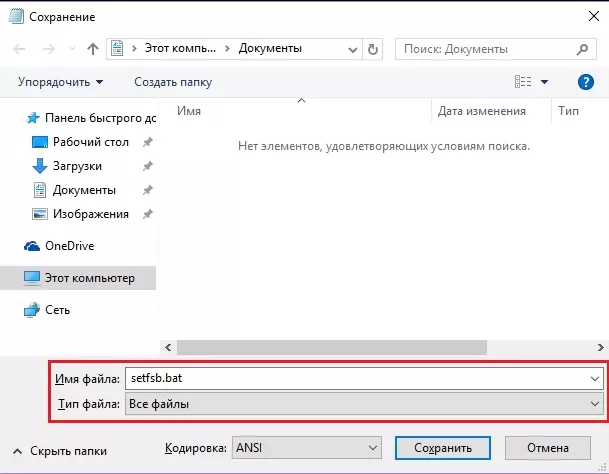
The last step is to add a bat in autoload by moving a shortcut to the folder " Bus load "Or through the registry editor (this way you find on the Internet).
See also: Other processor acceleration programs
In this article, we examined in detail how to properly dispersed the processor using the SETFSB program. This is a painstaking process, which will eventually give a tangible increase in processor performance. We hope you will definitely work out, and if you have any questions, ask them in the comments, we will answer them.