

You removed the video, cut out too much, added pictures, but the video is not very attractive.
In order for the video to look more alive, in Camtasia Studio 8. There is an opportunity to add various effects. It can be interesting transitions between scenes, imitation of "Camera" camera, image animation, effects for cursor.
Transitions
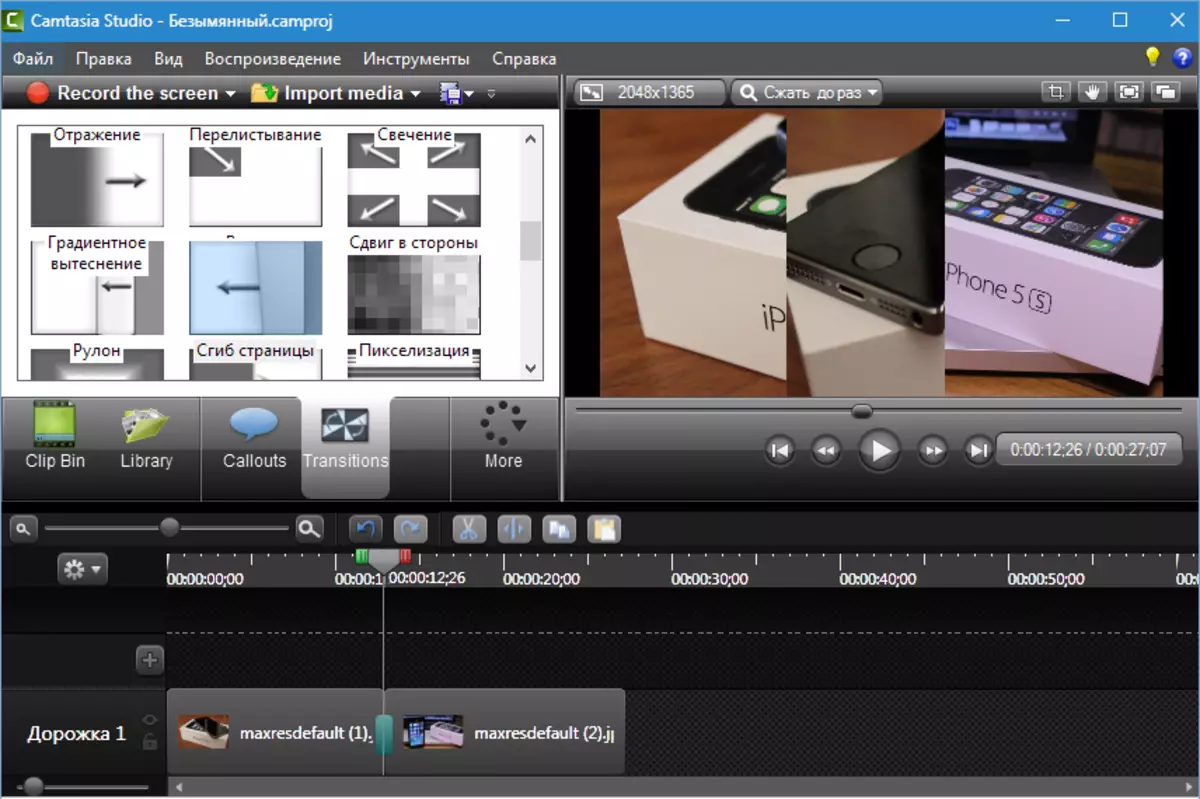
The effects of transitions between scenes are used to ensure a smooth shift of the picture on the screen. There are many options - from the simple disappearance-appearance to the effect of turning the page.
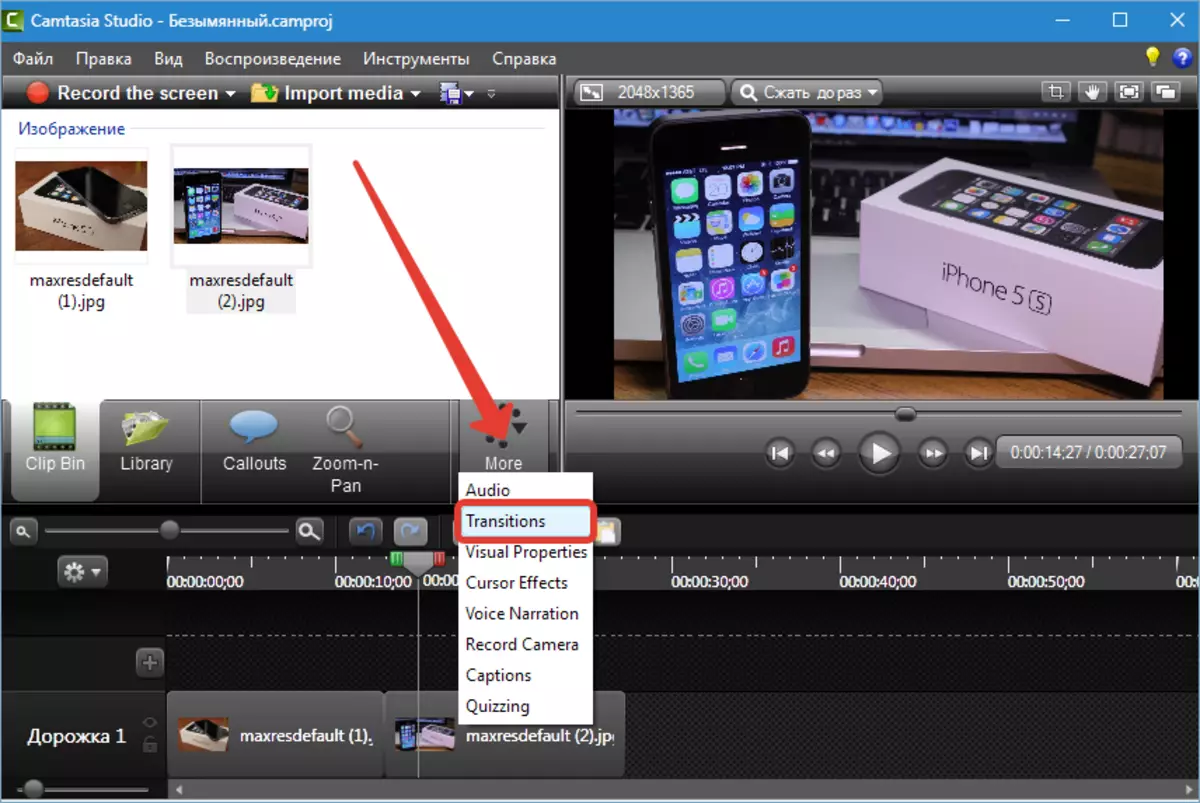
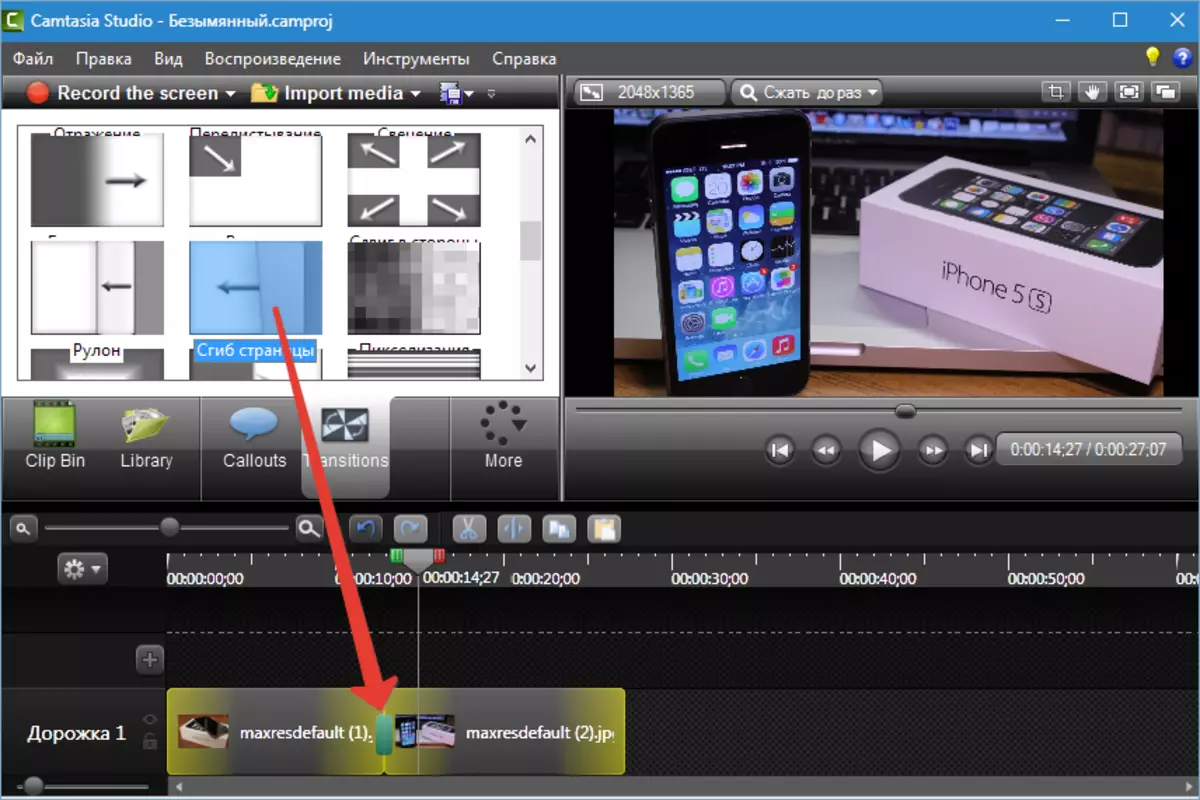
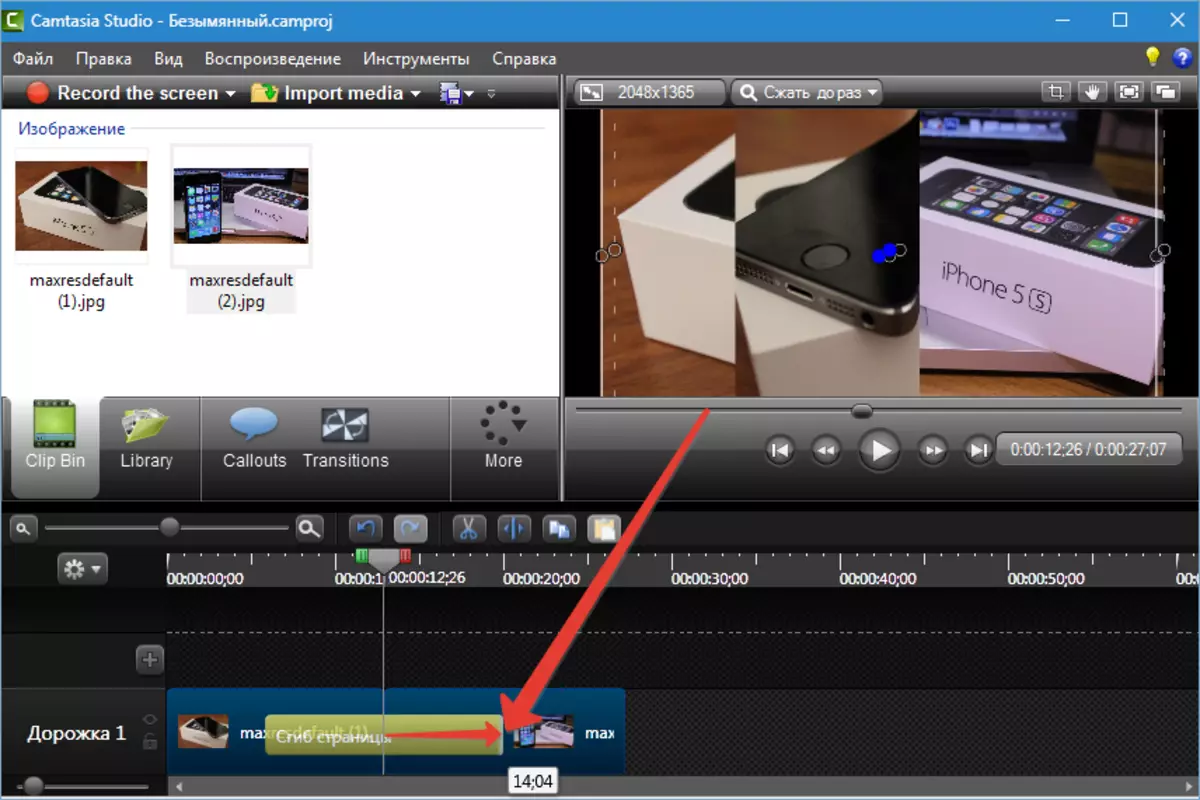
The effect is added to a simple dragging to the border between fragments.
That's what we did ...
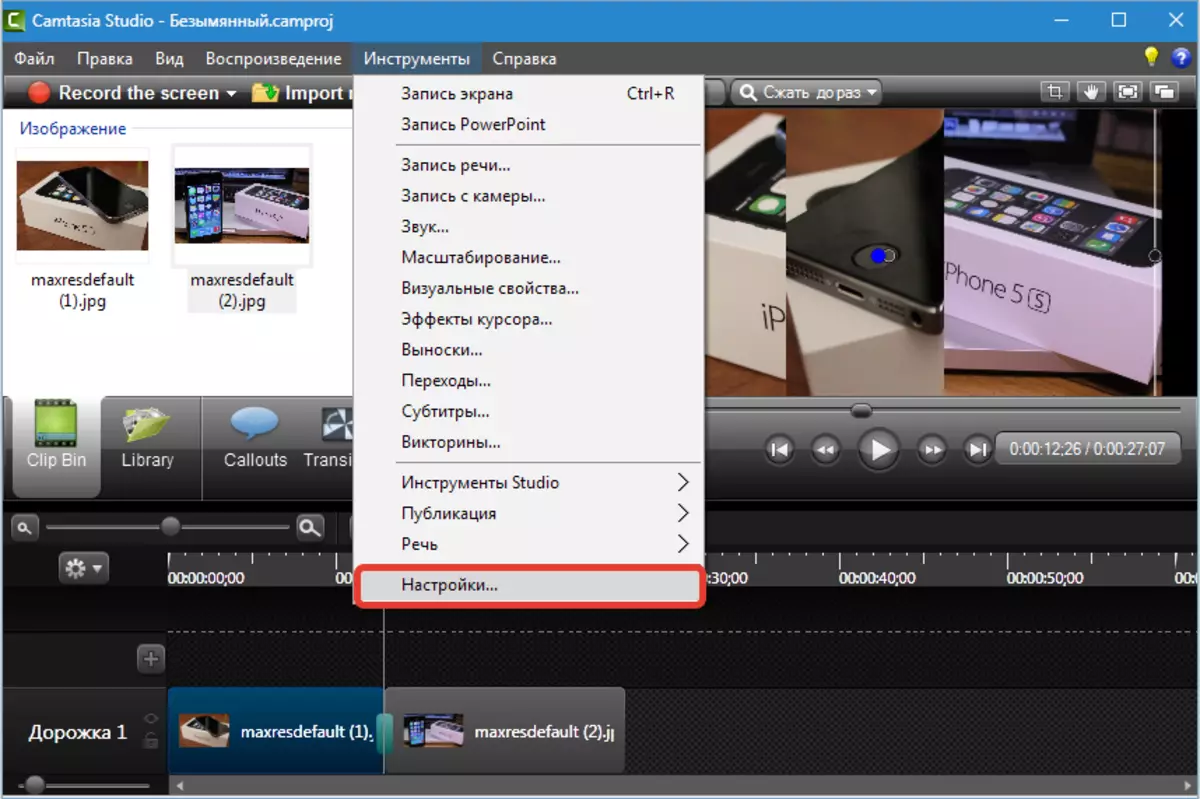
Set up the duration (or smoothness or speed, call as you want) the default transitions can be in the menu "Instruments" In the program settings section.

The duration is set immediately for all clips transitions. At first glance it seems that it is uncomfortable, but:
Tip: In one clip (roller), it is not recommended to use more than two types of transitions, it looks bad. It is better to choose one transition for all scenes in the video.
In this case, the flaw turns into dignity. Disappears the need to manually set up the smoothness of each effect.
If still a desire appeared to edit a separate transition, then make it easy: to bring the cursor to the edge of the effect and when it turns into a double arrow, pull in the desired side (decrease or increase).
Removing the transition is done like this: Select (click) The effect of the left mouse button and press the key "Delete" on keyboard. Another way is to click on the transition right mouse button and choose "Delete".
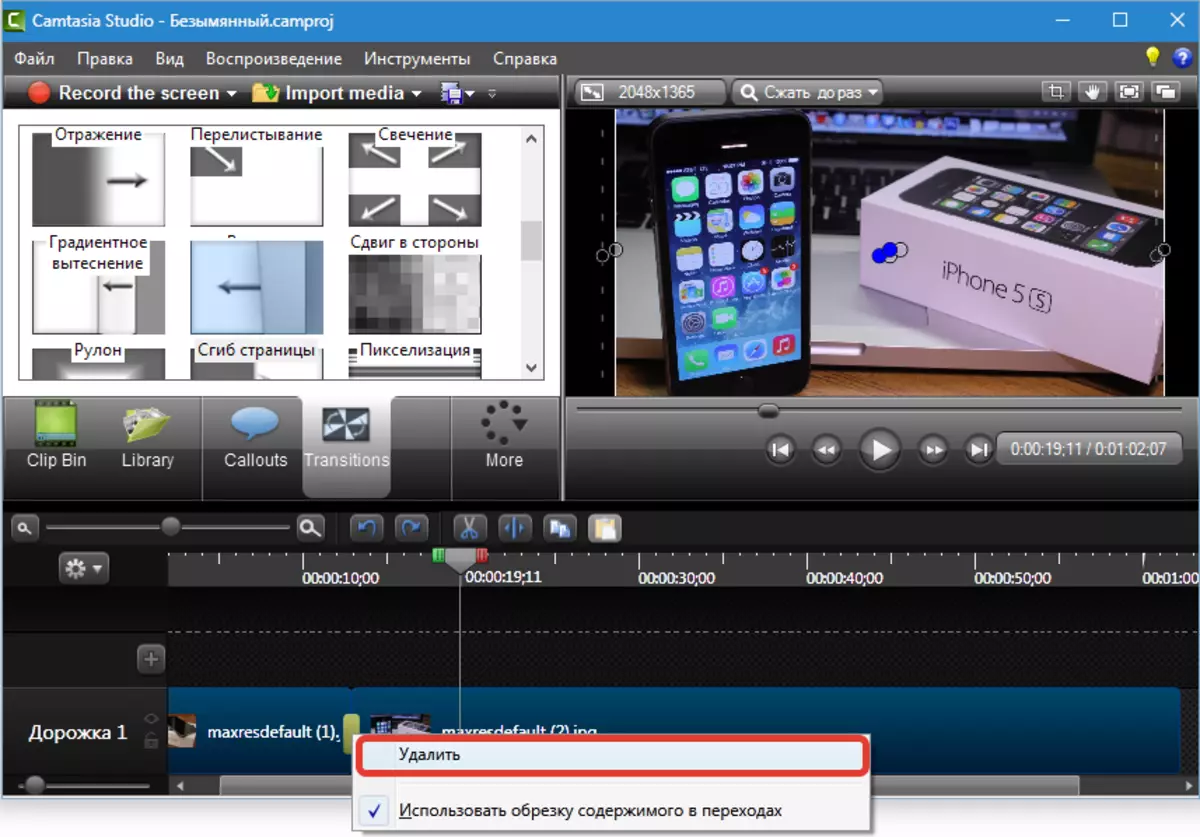
Pay attention to the appearance of the context menu. It must be the same kind as on the screenshot, otherwise you risk remove part of the roller.
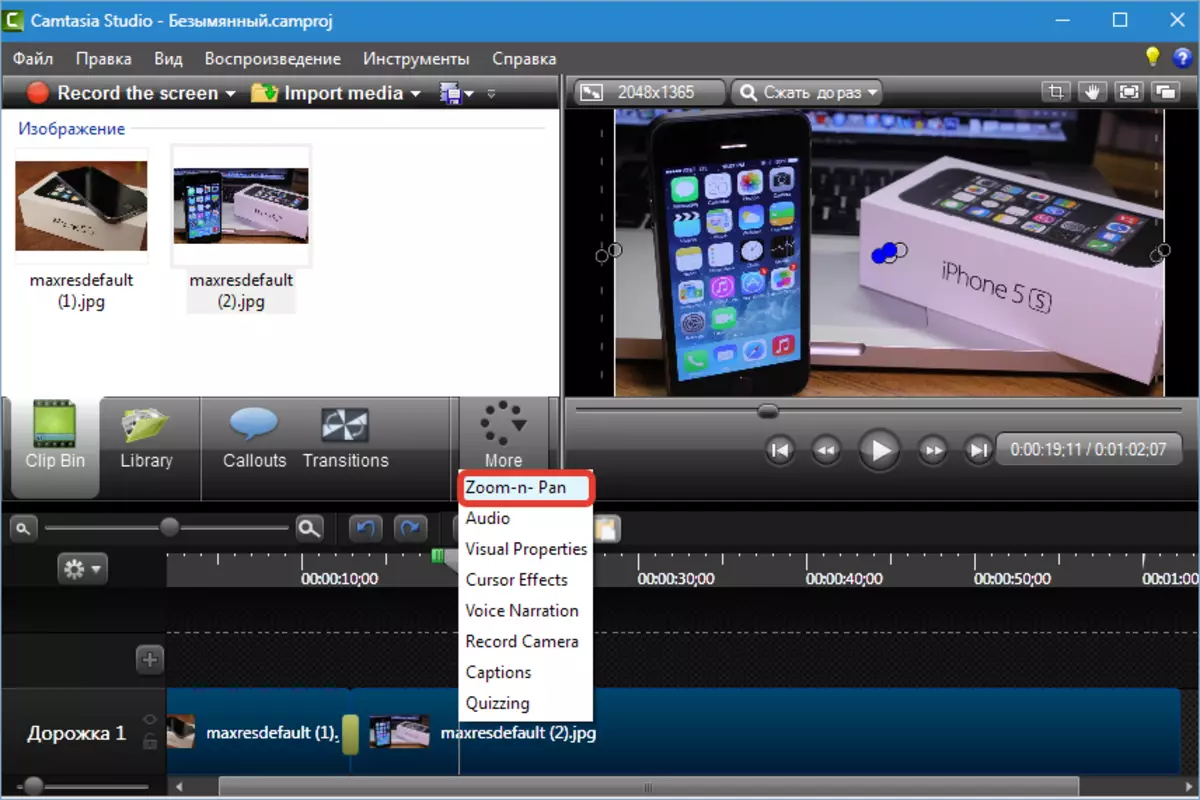
Imitation "Ditting" Cameras Zoom-N-Pan
During the mounting of the roller, from time to time, it becomes necessary to bring the image to the viewer. For example, large show some elements or actions. This will help us in this function. Zoom-N-Pan.
Zoom-N-Pan creates a smooth approximation and scene removal.
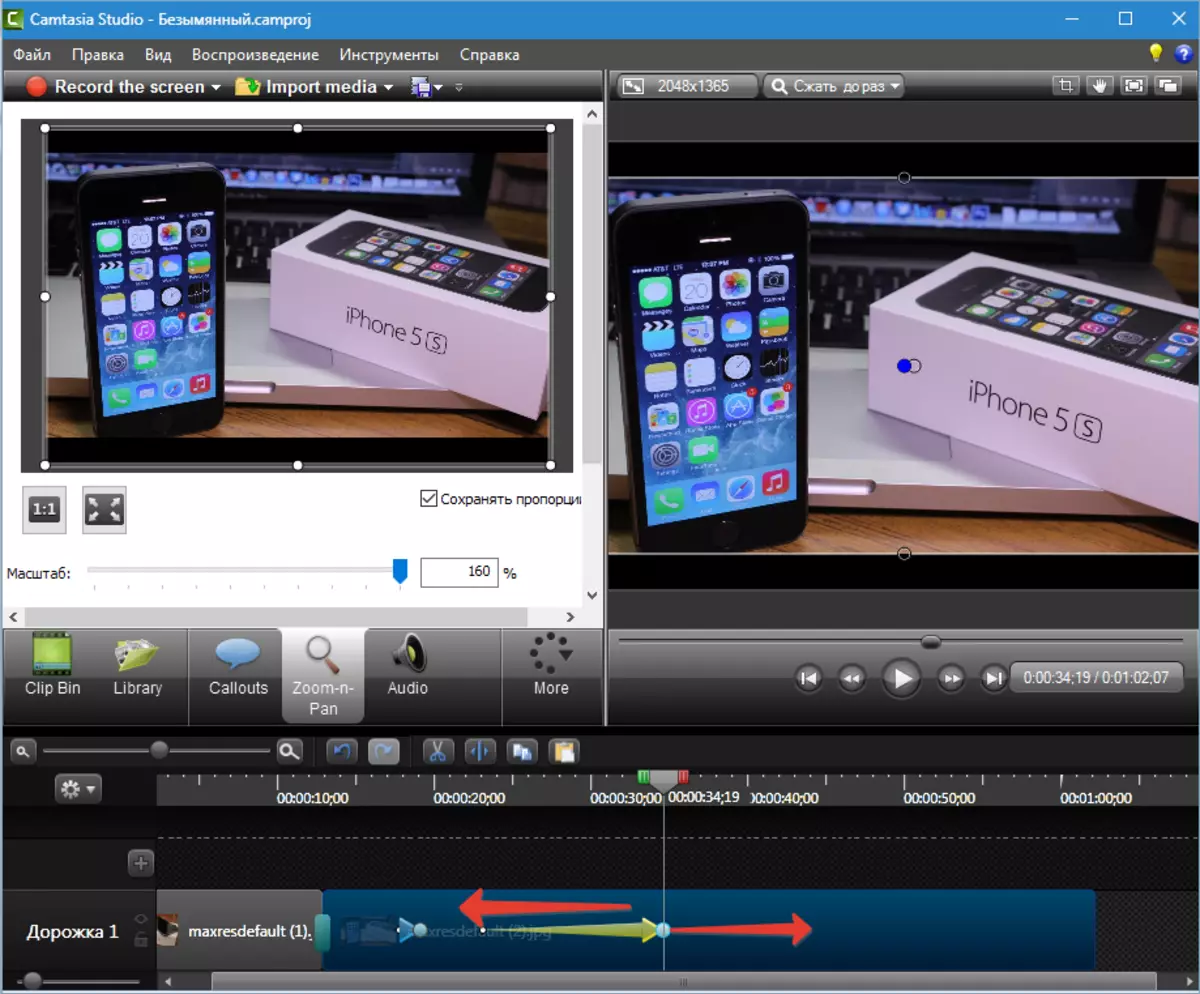
After calling the function to the left, the working window opens with the roller. In order to apply zoom to the desired area, you need to pull the marker on the frame in the working window. An animation mark appears on the clip.
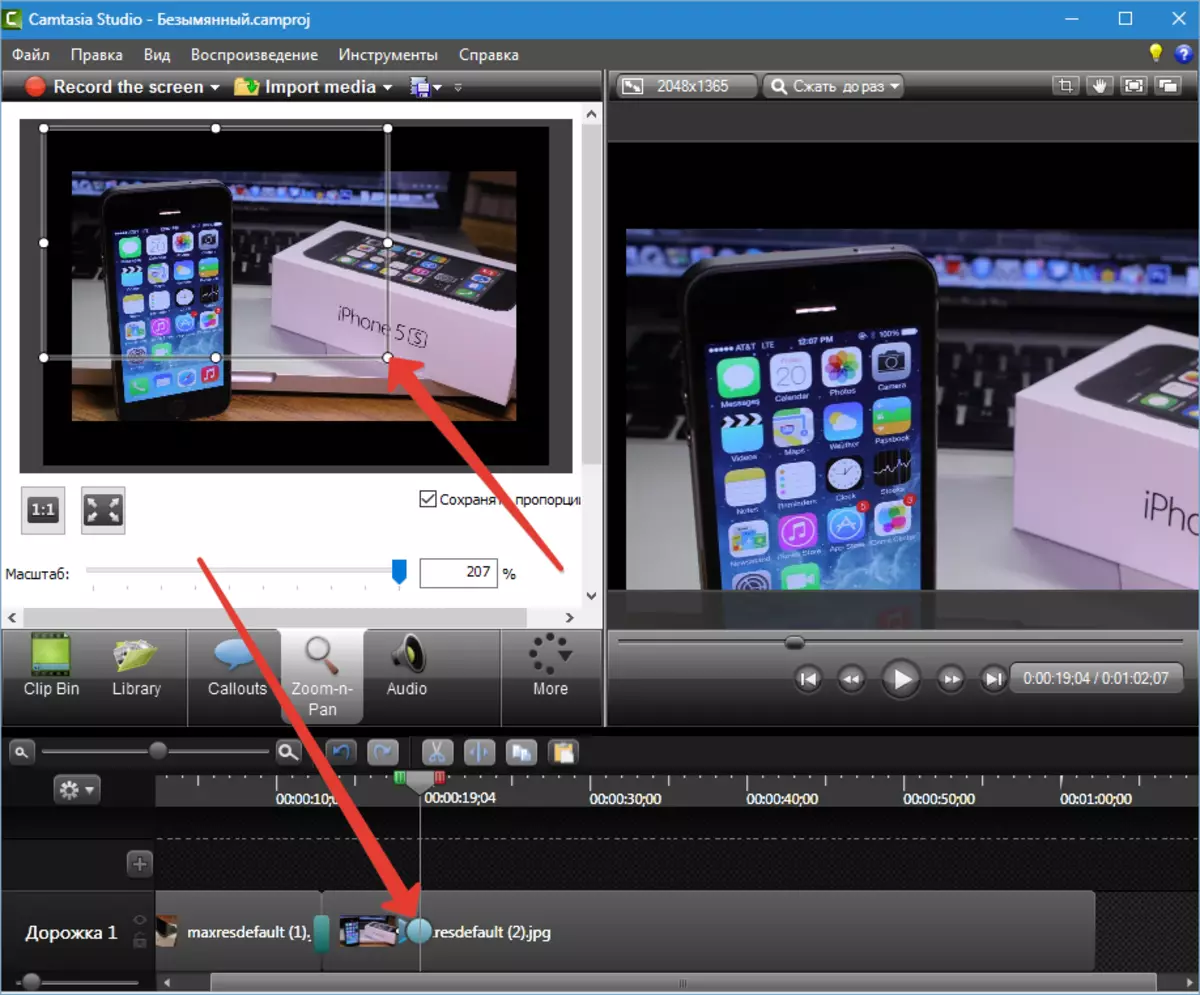
Now rewind the roller before the place where you want to return the original size, and click on the button similar to the full-screen mode switch in some players and see another mark.
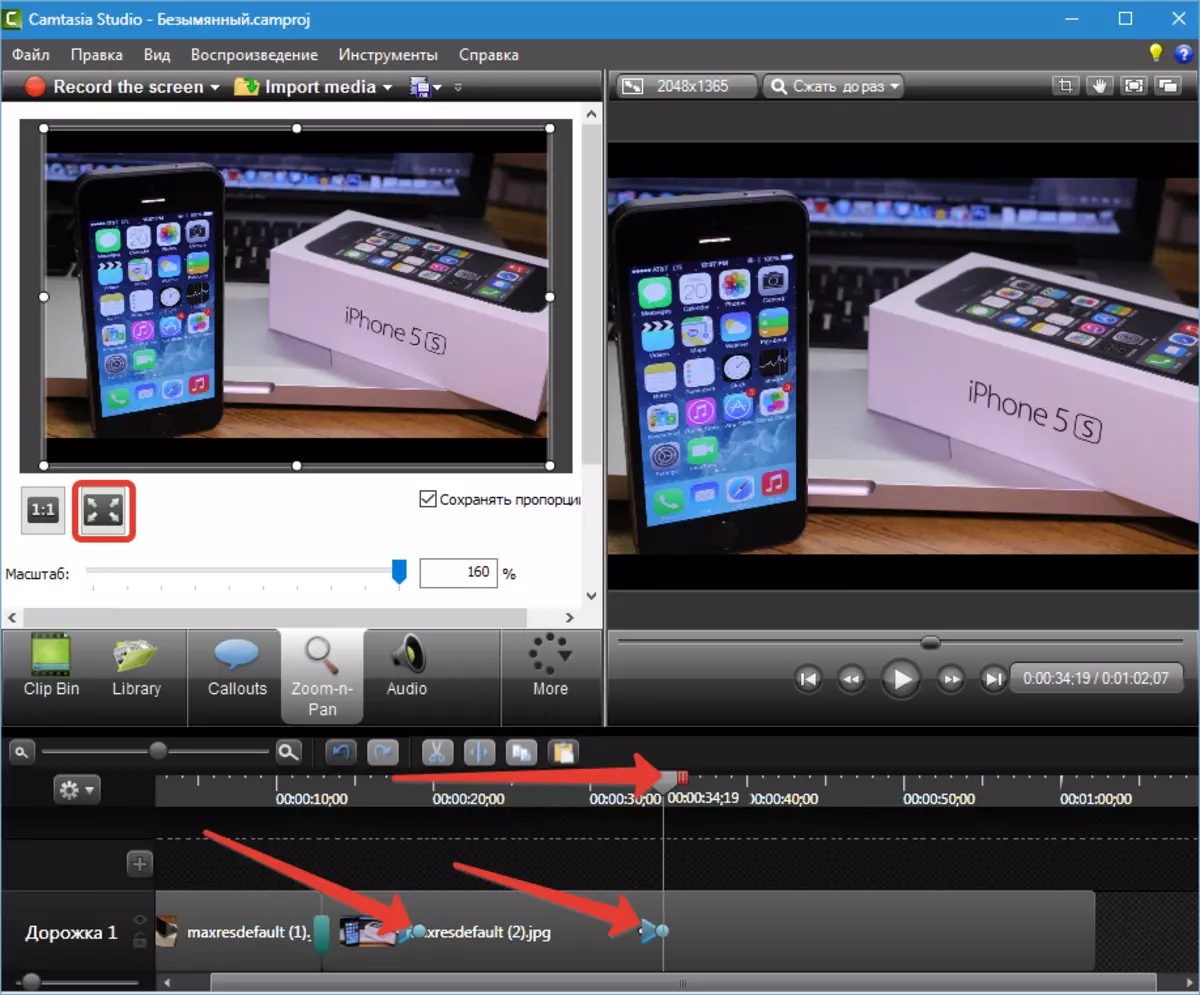
The smooth effect is adjustable as in the transitions. If you wish, you can stretch the zoom on the entire roller and get a smooth approximation all over (one can not be installed). Animation marks are movable.
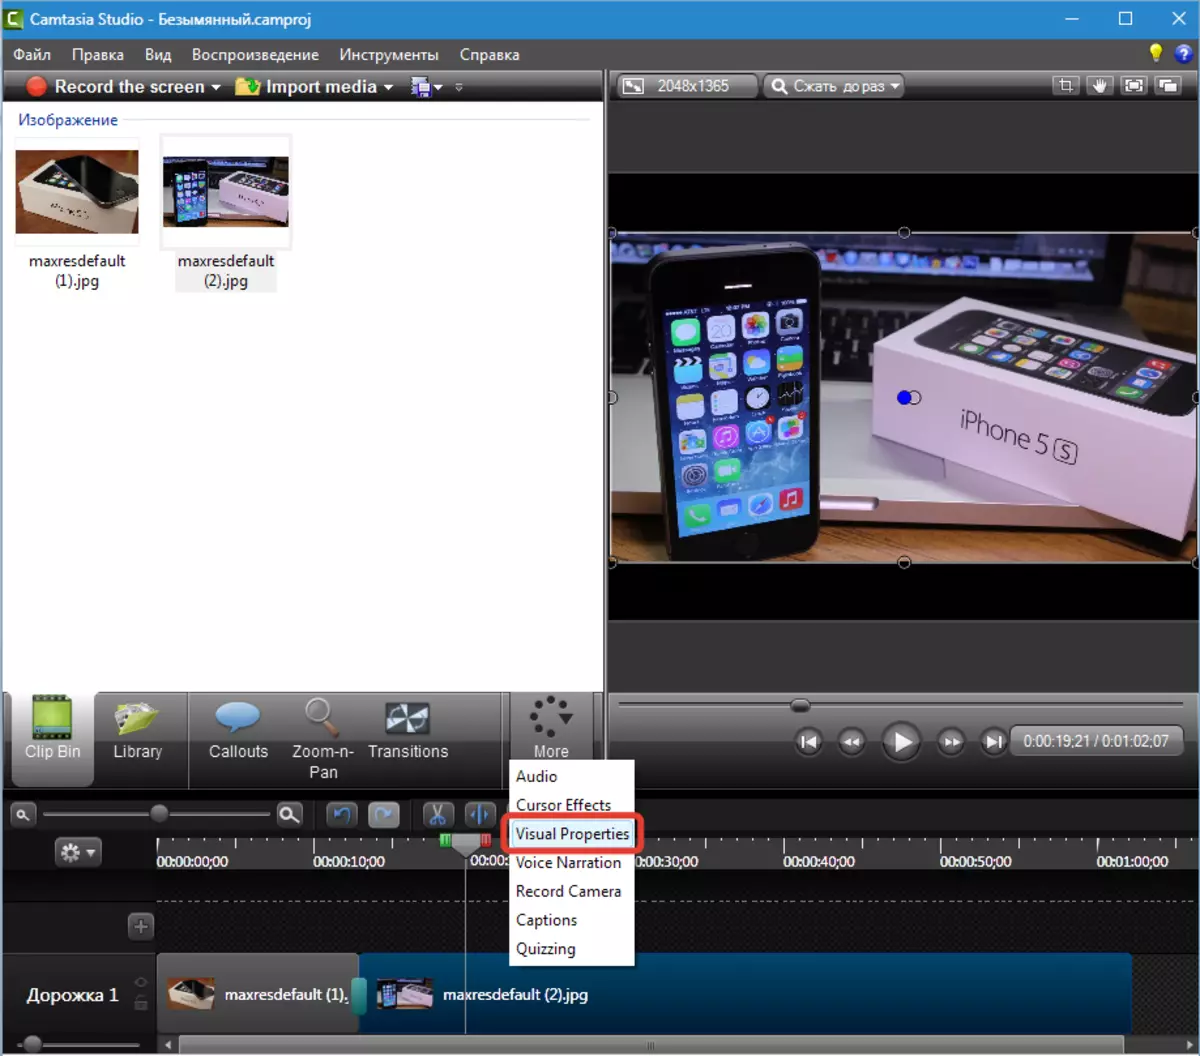
Visual properties
This type of effects allows you to resize, transparency, position on the screen for images and video. Also here you can rotate a picture in any planes, add shadows, frames, tint and even remove colors.
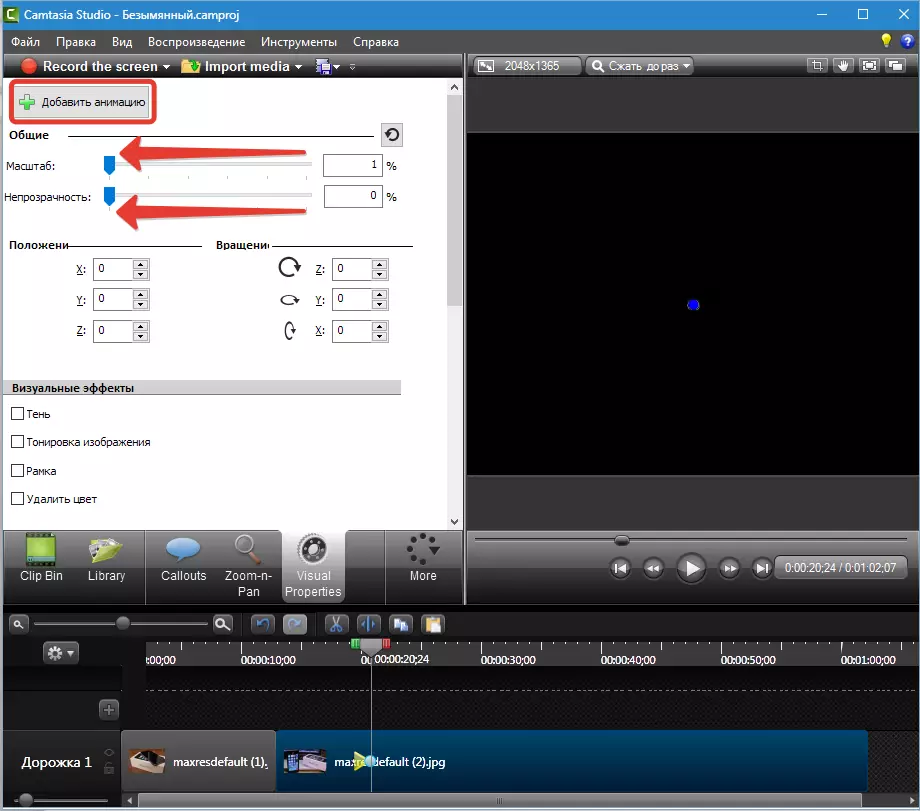
We will analyze a couple of examples of the application of the function. To begin with, make a picture from almost zero size to increase to the full screen with a change in transparency.
1. We translate the slider to the place where we plan to start the effect and click the left mouse button on the clip.
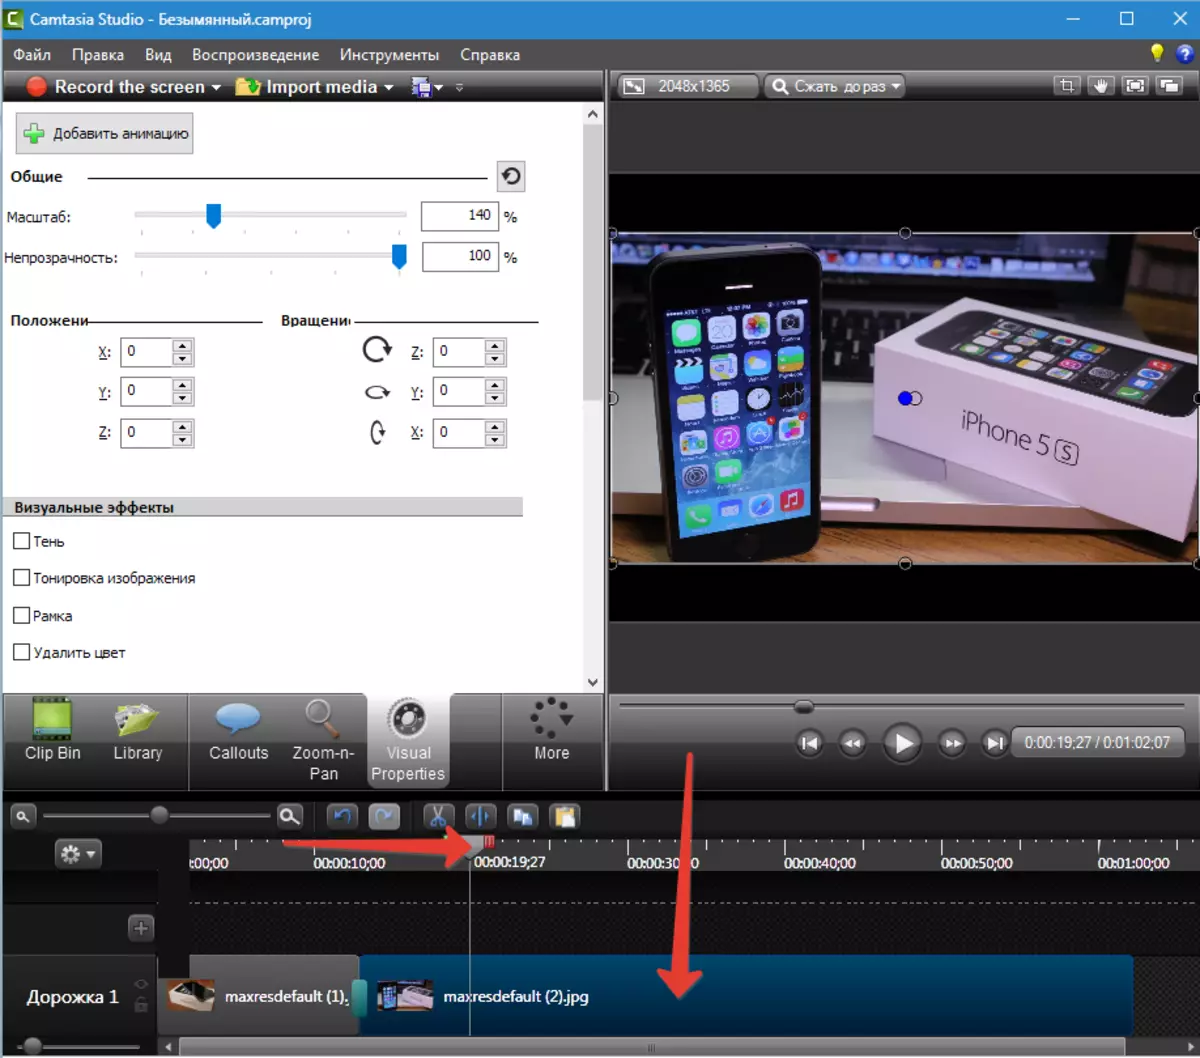
2. Press "Add Animation" And edit it. Thinking the slider scale and opacity to the leftmost position.
3. Now go to the place where we plan to get a picture of the full size and press again "Add Animation" . Return the slider to the original state. Animation is ready. On the screen we see the effect of the appearance of the picture with simultaneous approximation.
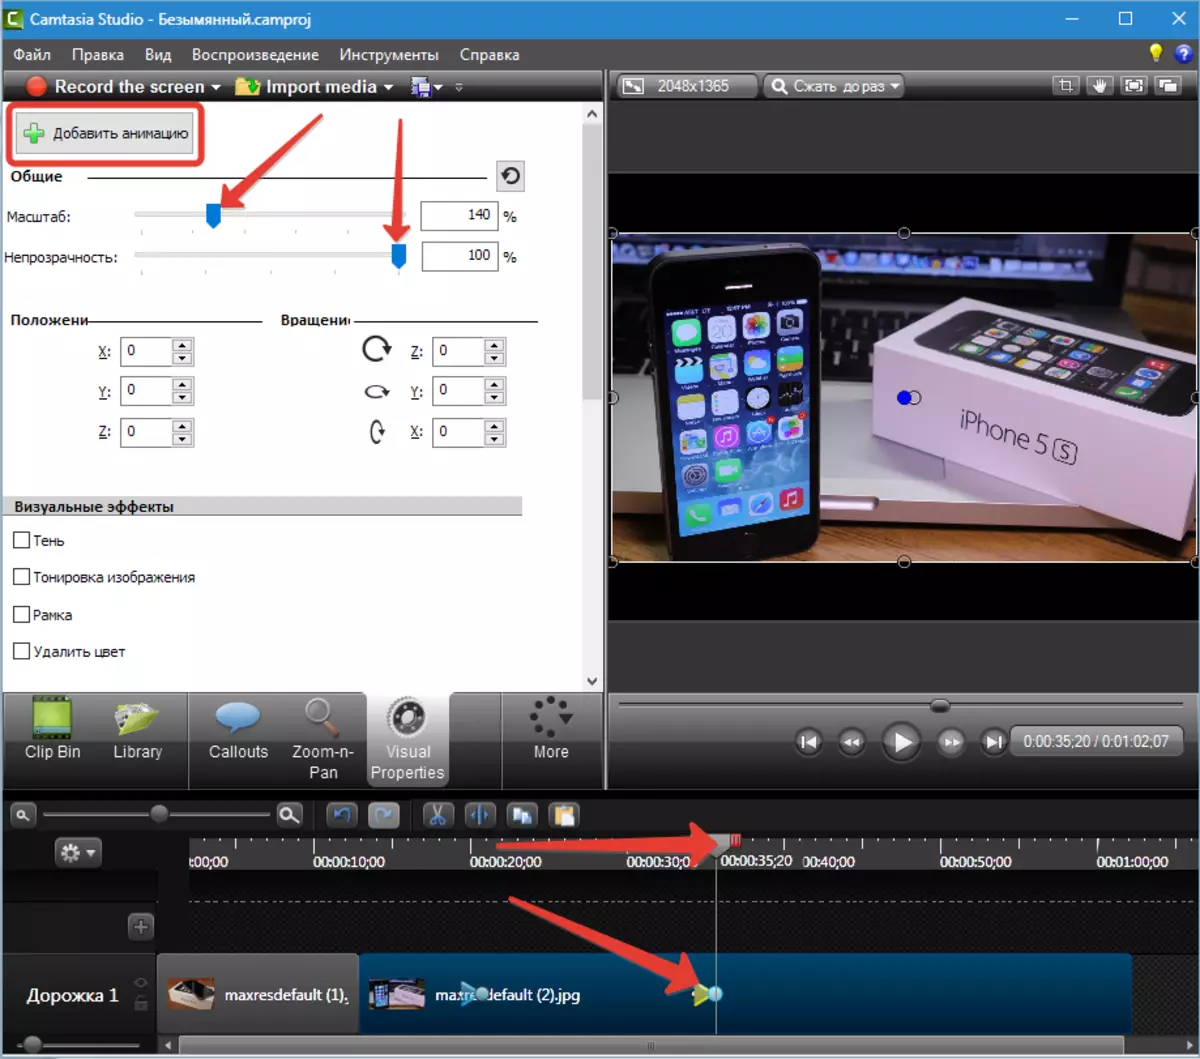
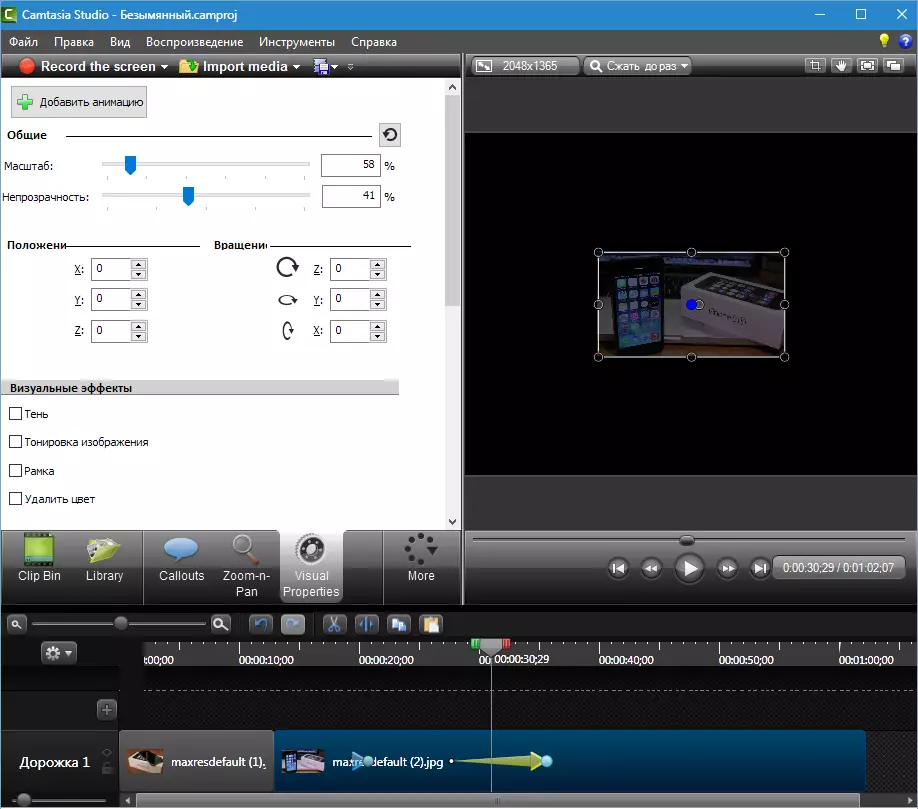
Smoothness is adjustable in the same way as in any other animation.
With this algorithm, you can create any effects. For example, the appearance with rotation, disappearance with deletion, etc. All available properties are also adjusted.
One more example. We offer another image on our clip and remove the black background.
1. Drag / pass the image (video) on the second track so that it is on top of our clip. The track is created automatically.
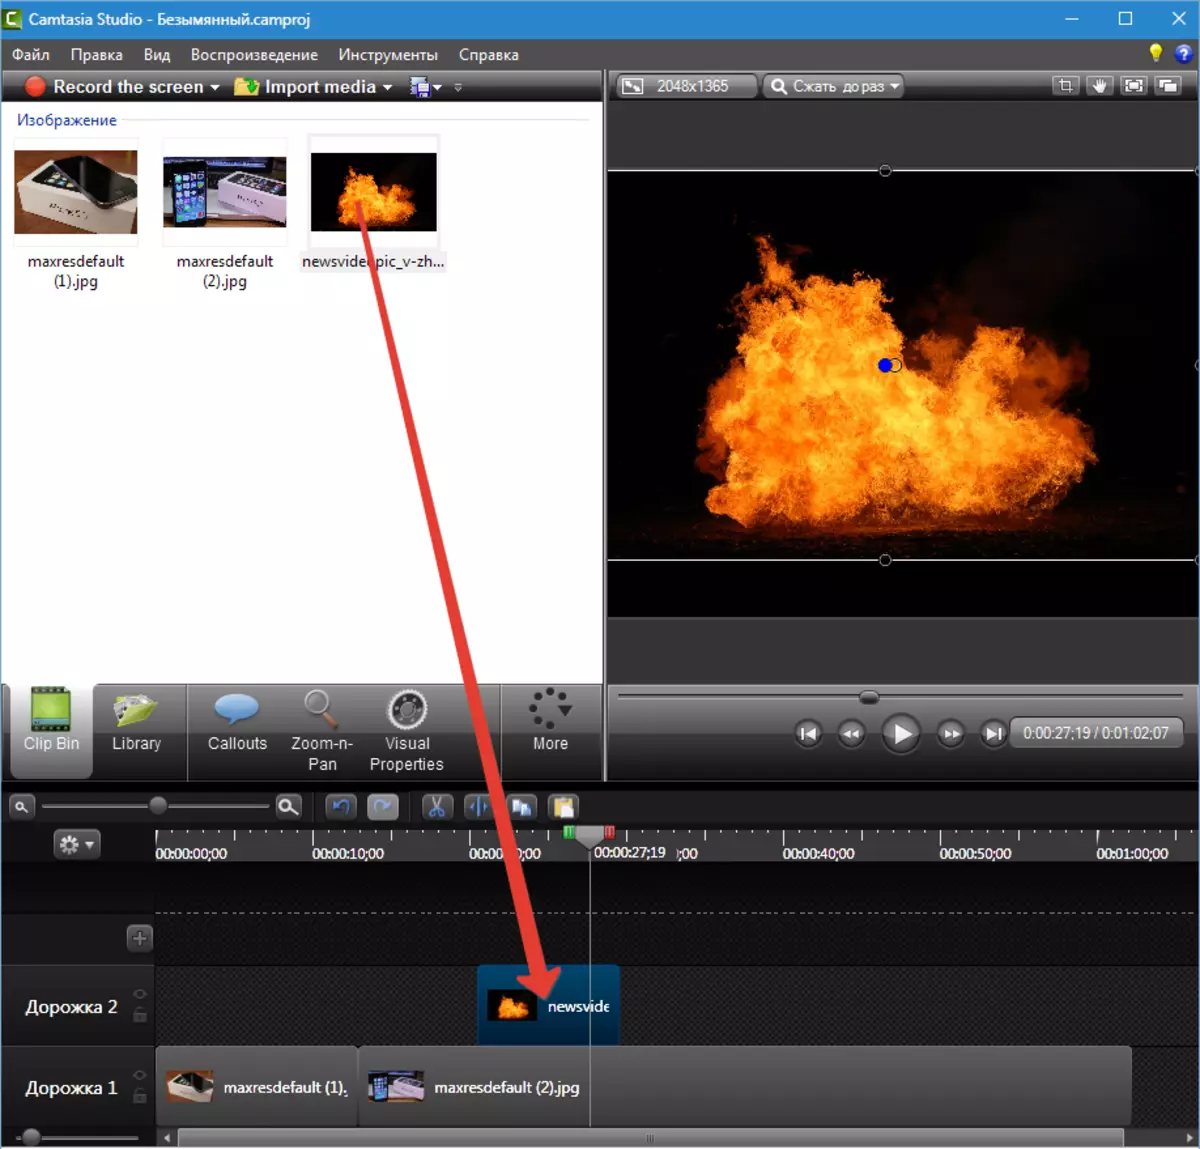
2. We go to visual properties and put a tank opposite "Delete color" . Choose a black color in the palette.
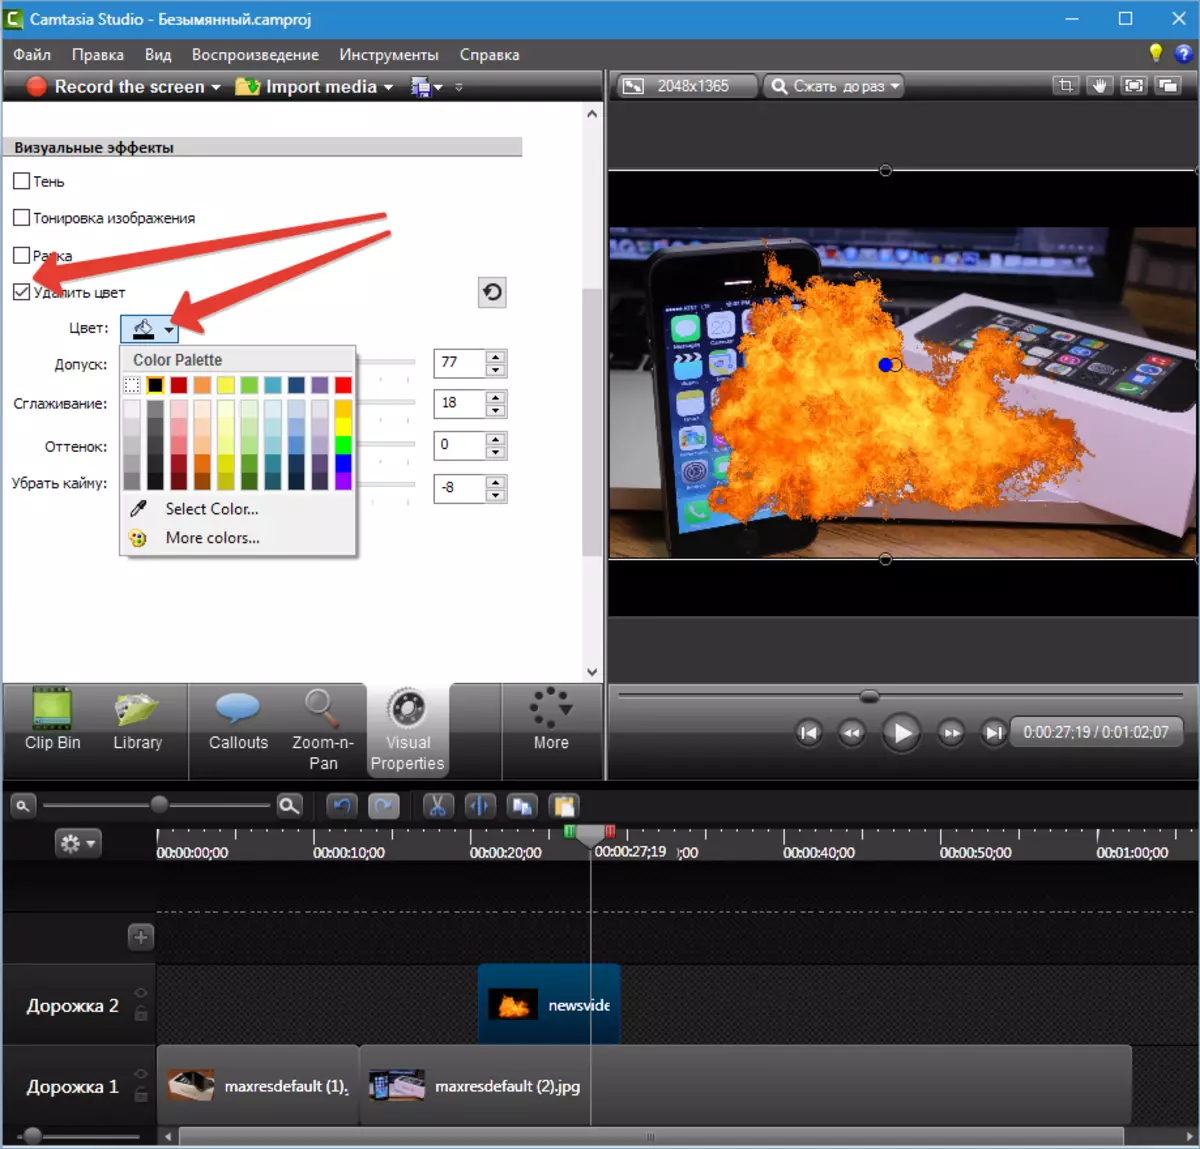
3. Sliders regulate effect effects and other visual properties.
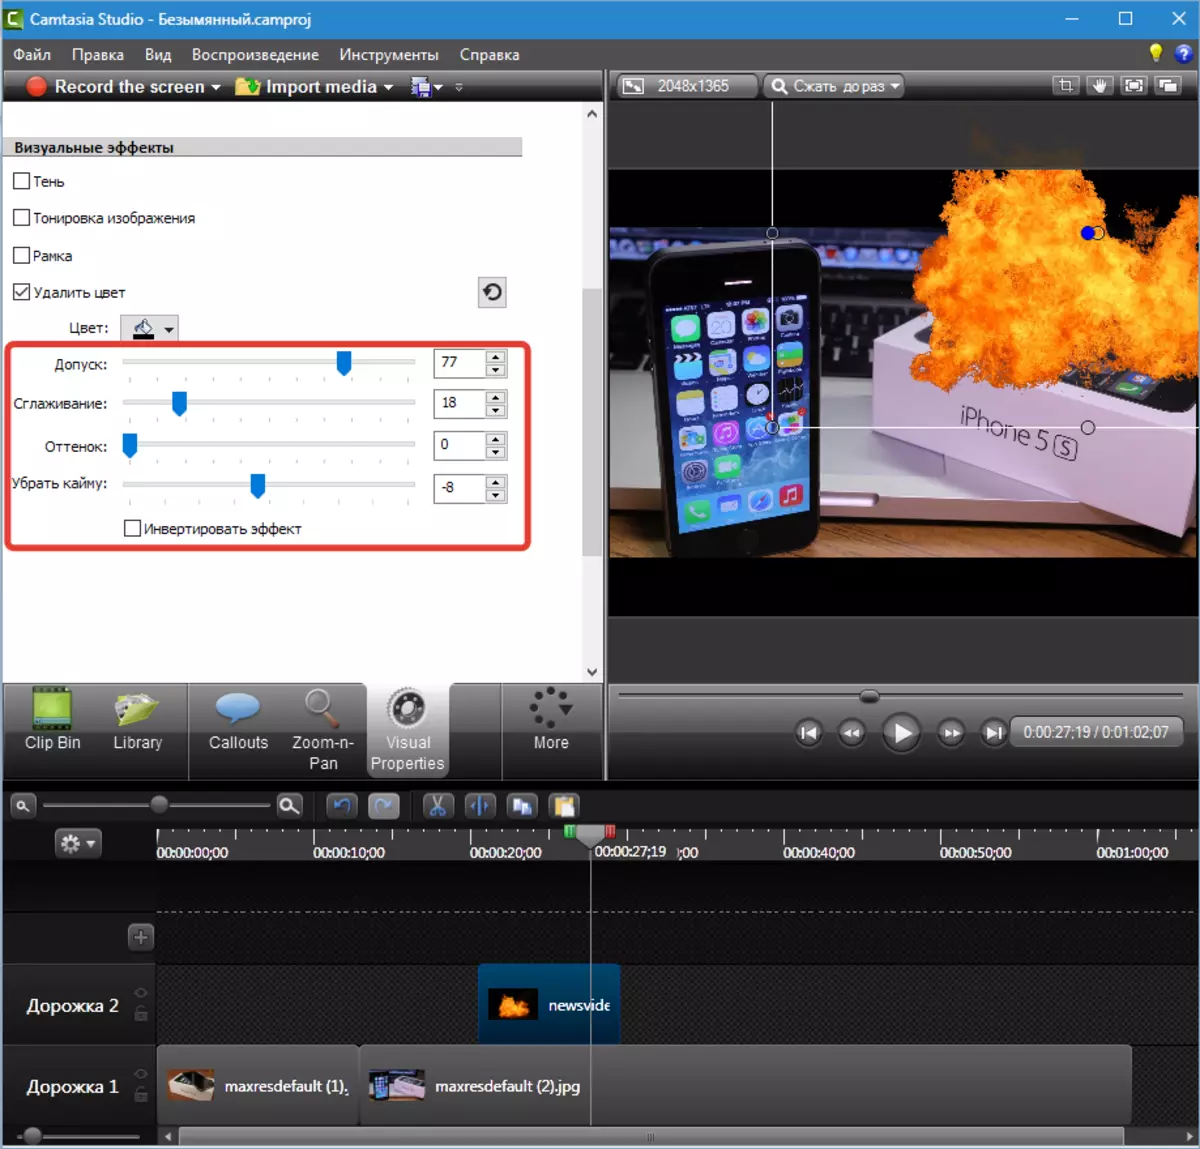
In this way, you can apply different footage on the clips on a black background, including videos that are widespread online.
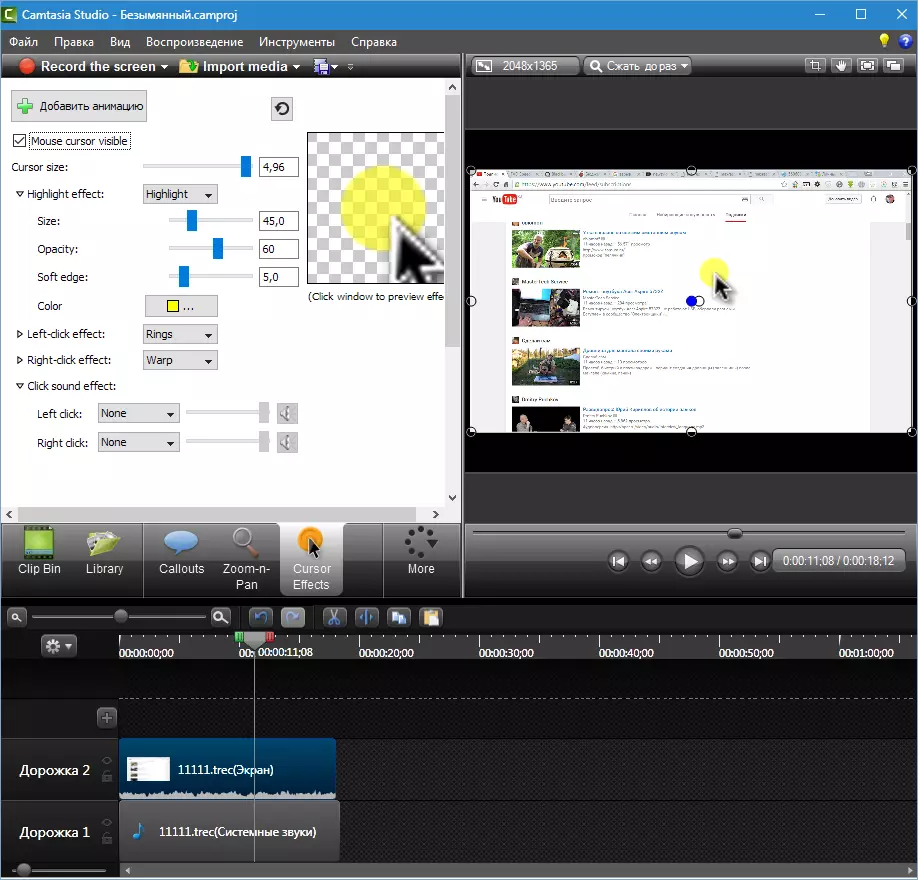
Cursor effects
These effects apply only to the clips that are written by the program itself from the screen. The cursor can be made invisible, change the size, turn on the backlight of different colors, add the effect of pressing the left and right button (waves or indulgence), turn on the sound.
Effects can be applied to everything clip, or only to its fragment. As you can see, the button "Add Animation" Present.
We looked at all possible effects that can be applied to the roller in Camtasia Studio 8. . Effects can be combined, combine, invent new use options. Good luck in creativity!