

In this article, we will talk about setting up the Yota router connected by this provider. If you have contracted and issued an order on a modem, you need to familiarize yourself with another instruction on our website, which is devoted to configuring equipment of this type.
Read more: Setting up the Yota modem
Connecting a computer to a router
The primary task is to connect the purchased router to the computer, since all further actions should be made through the web browser of the associated PC. To do this, unpack the device, connect it to the network and connect with the computer using the LAN cable or standard wireless network settings, after receiving the network created. Details about how all this is done, read in the material below.
Read more: Connecting a computer to a router
Authorization in a personal account
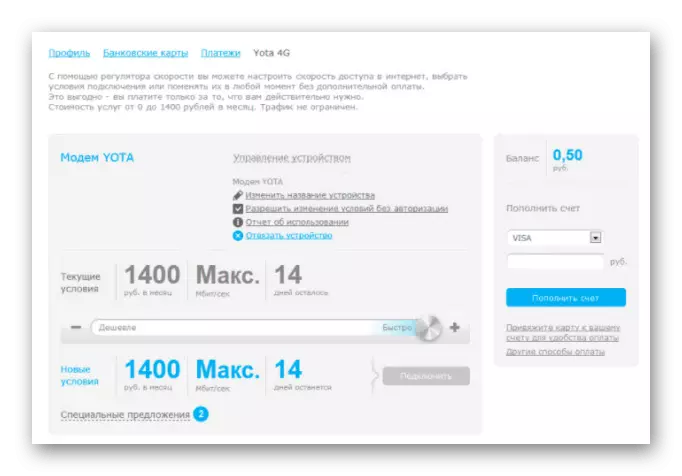
The next action that needs to be performed after connecting the router to the computer is authorization in the Personal Office of the User. The Yota website is available even in those moments when the funds are running out already - open it, go to the profile and connect the fare if this has not been done when concluding a contract with the provider or the payment time has already expired.
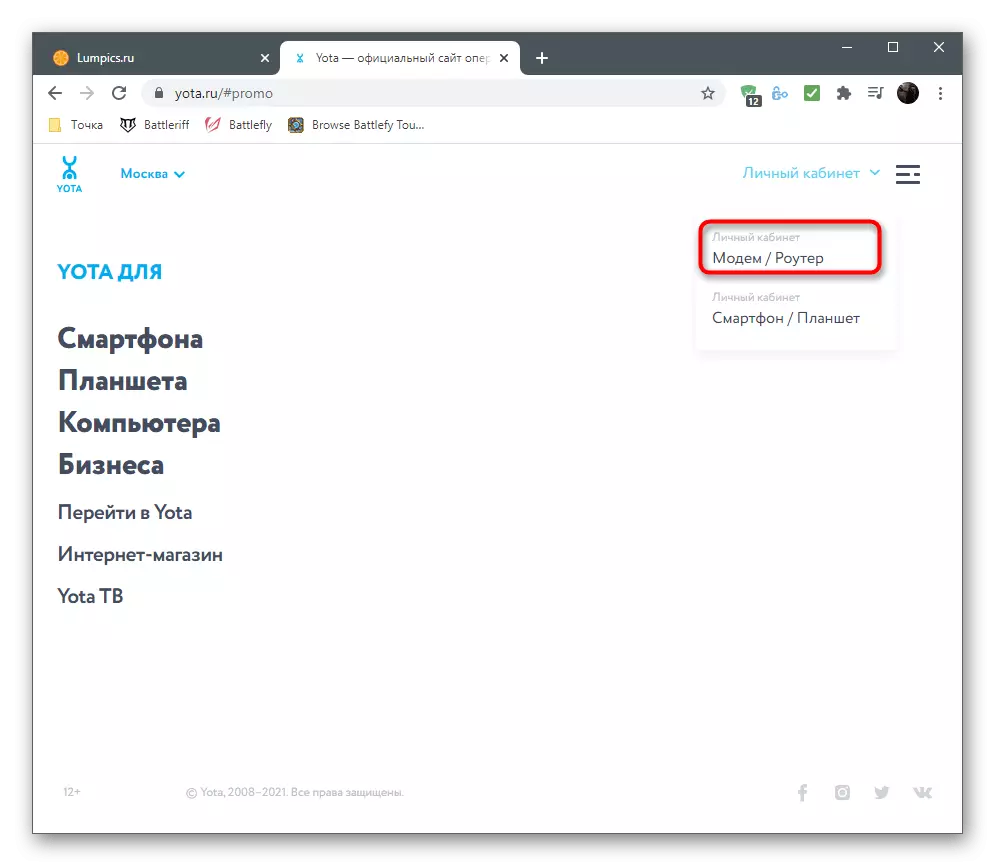
- Go to the official website of Yota.ru and expand the list "Personal Account".
- Select the authorization option "Modem / Router".
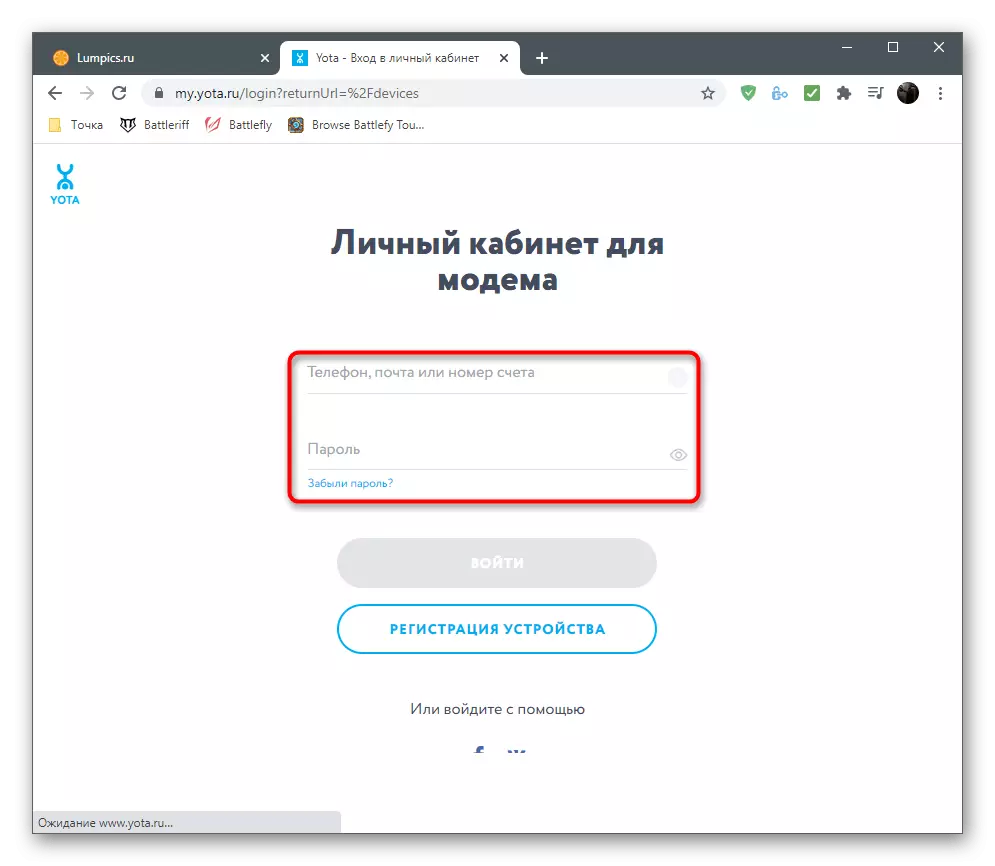
- Enter the phone, mail or account number indicated when signing the contract. The password is assigned to the provider, so it should also be registered in the documentation or can be clarified when applying to technical support.
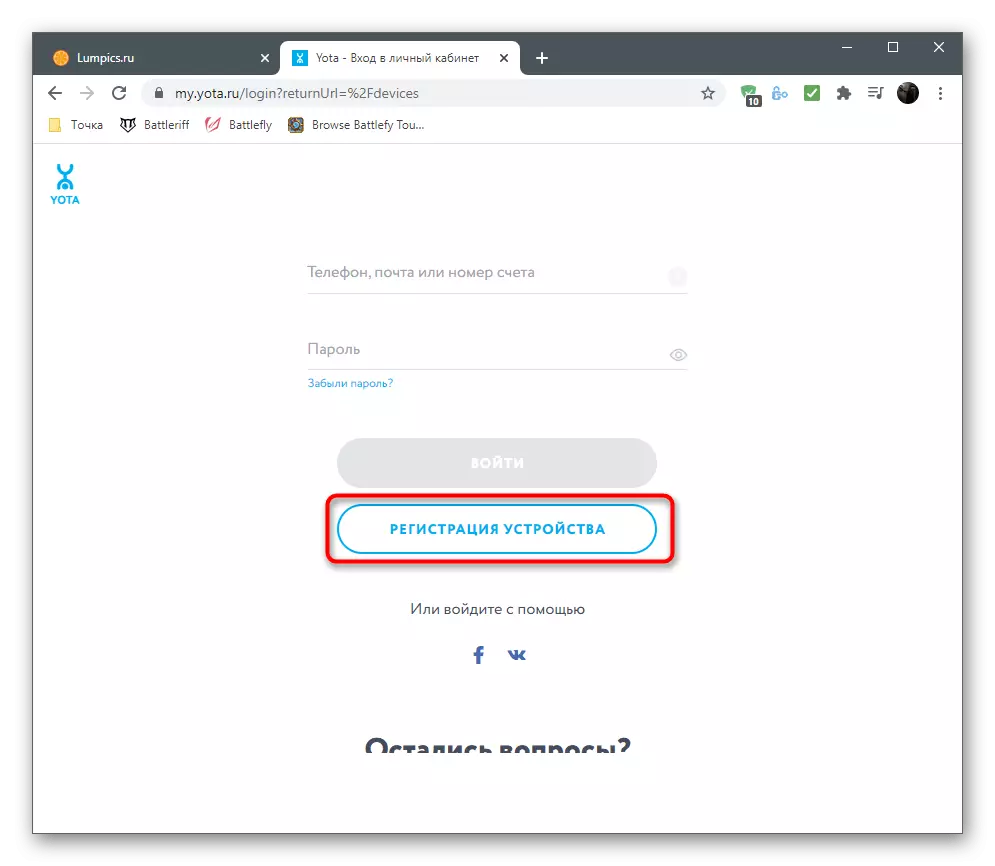
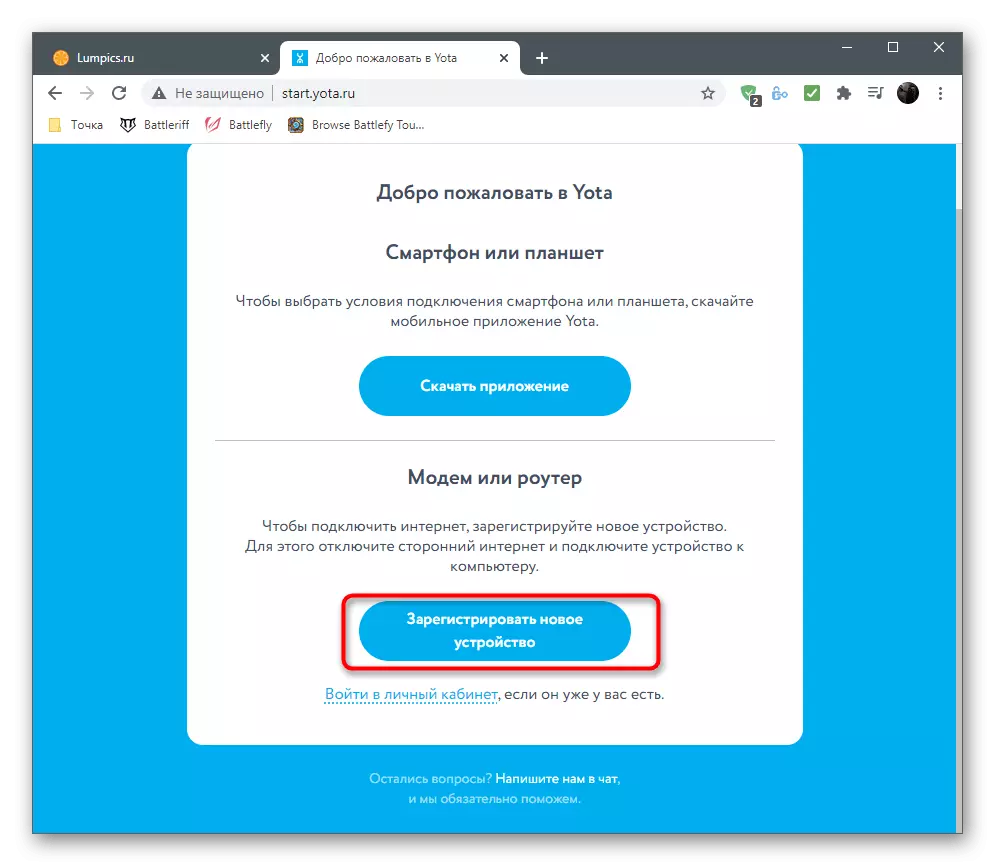
- If the registration of the device is not yet executed, press the corresponding button to go to the next step.
- Click "Register a new device" for a modem or router.
- Follow the instructions displayed on the screen by entering information about the acquired equipment model, and after authorization in the office, check the account and when necessary, replenish it to activate the tariff plan.

Login to the Yota web interface
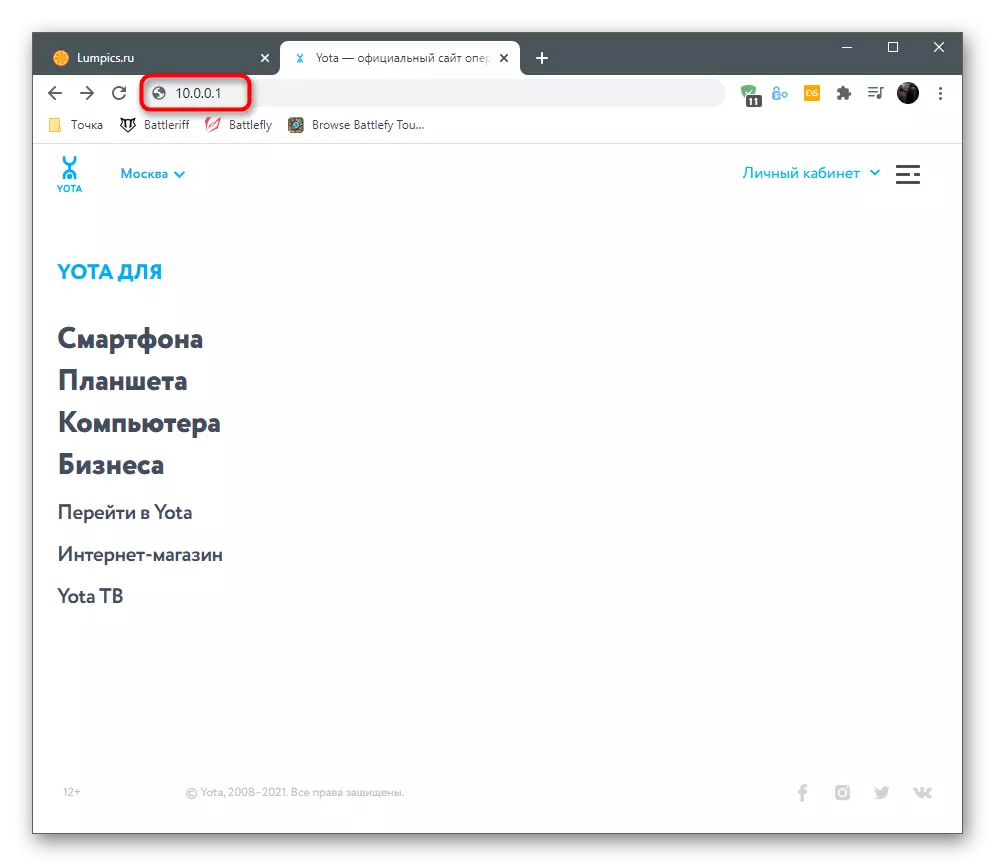
Now that all preparatory work is completed, proceed to setting up the equipment to ensure its normal functioning and access to the wireless network. The Yota web interface is made in such a way that the user does not have to dig in the settings and it was possible to quickly set the parameters by selecting the most necessary. You do not have to be authorized in the Internet center, since the parameters will open immediately after the transition to status.yota.ru in the browser.

If an error appeared on the screen and access to the site is not provided, use IP address 10.0.0.1 instead of the domain name to open the router settings.
The principle of action is slightly different if you purchased a router from another company, but use the Internet from Yota. Then, for authorization in the web interface, you will need login and password indicated on the rear device sticker. On how to identify data for input and access the settings, you can read in another instruction on the link below.
Read more: Definition of login and password to enter the web interface of the router
The following instructions for holders of routers from third-party manufacturers are not always relevant, since Yota collaborates only with certain companies that establish the branded firmware. If the web interface in the screenshots differs from the fact that you have, find out the model of the available router and enter its name in the search on our website to get the thematic setup guide.
Solving problems with the entrance to the web interface
At the end of this section, we will analyze a small instruction that will be useful to users with transition problems to the Internet center. Usually this difficulty is associated with incorrect adapter parameters, the editing of which is carried out like this:
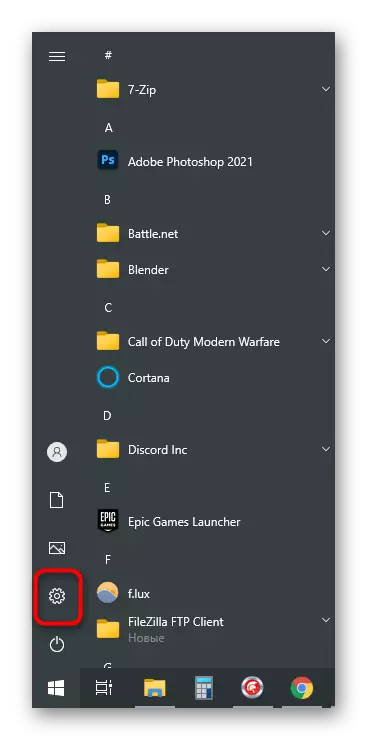
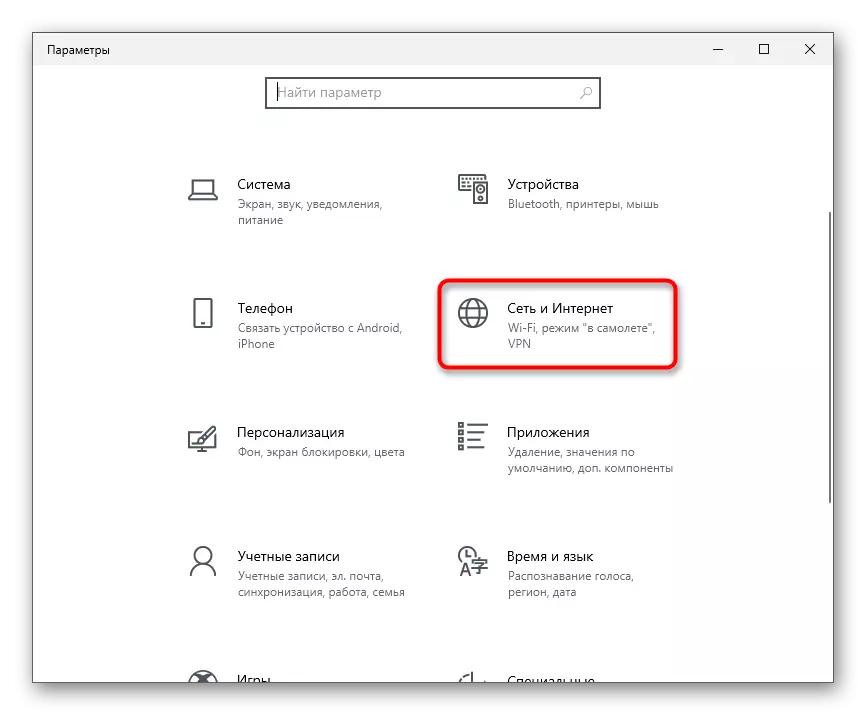
- Open the Start menu and go to the "Parameters" application.
- In it, you are interested in the tile "Network and the Internet".
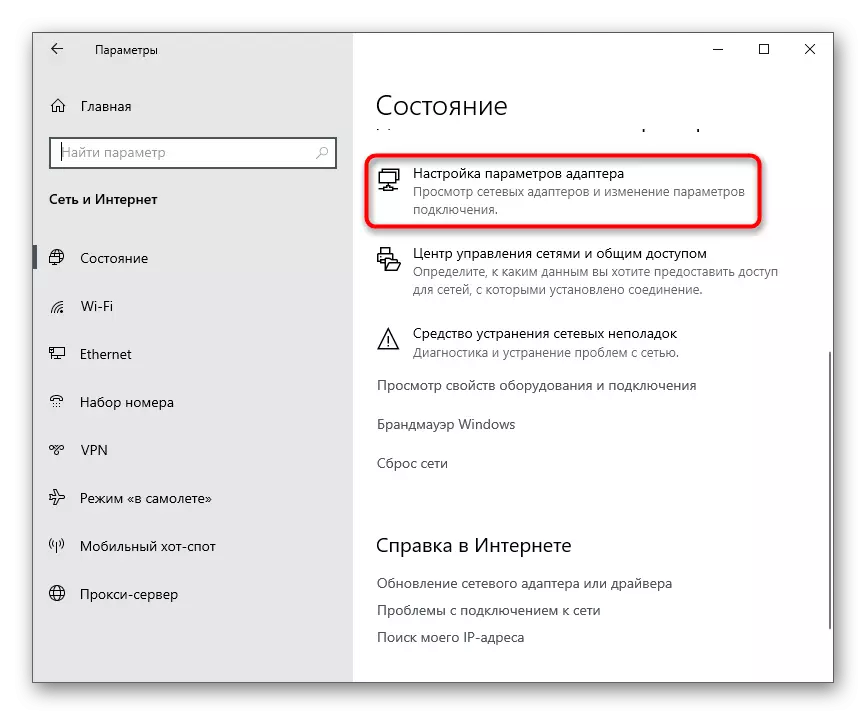
- The new window will open in the "Status" section, in which the string "Setting the adapter parameters" should be found.
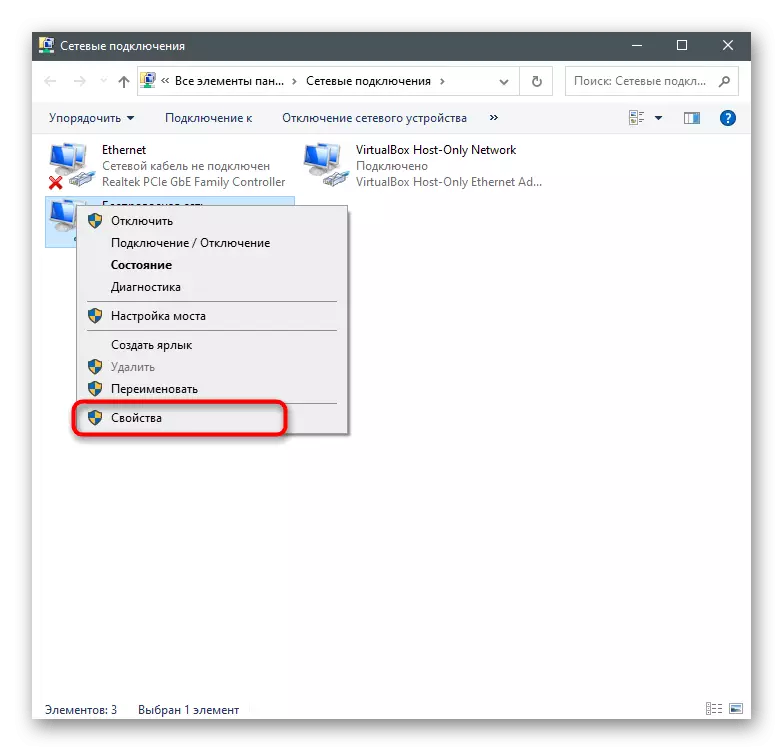
- After displaying the list of network connections, right-click on the context menu used and from the context menu that appears, select "Properties".
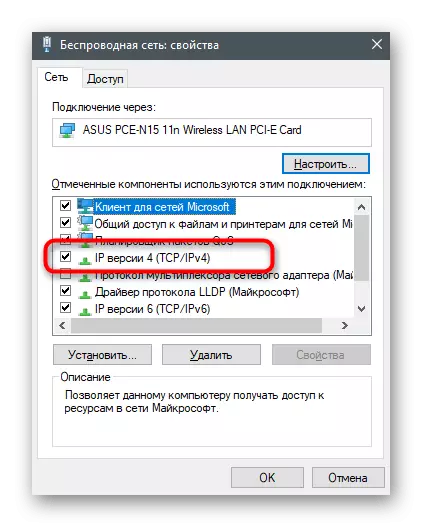
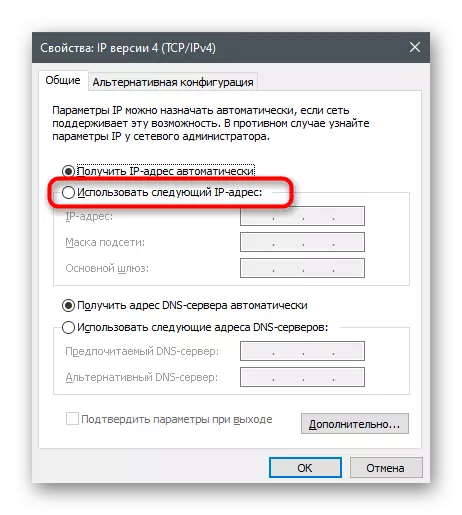
- Double-click on the "IP version 4 (TCP / IPv4) component".
- Mark the marker item "Use the following IP address".
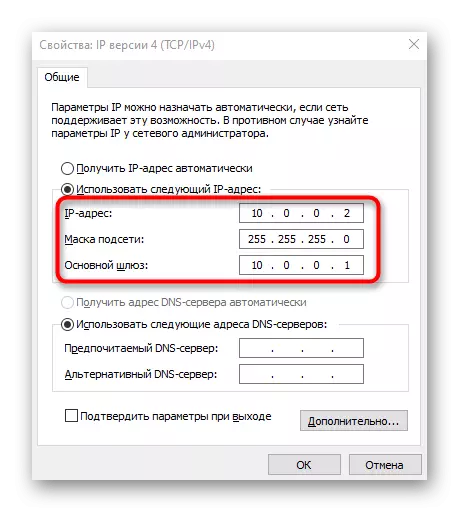
- The "IP address" string is set to 10.0.0.2, the "subnet mask" - 255.255.255.0 and the "main gateway" - 10.0.0.1.
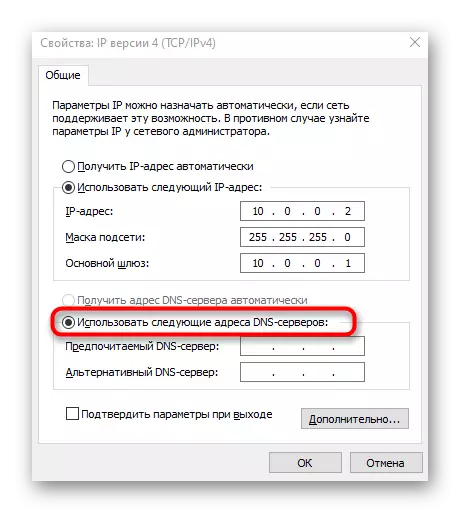
- Select the option to use the following addresses and for DNS servers.
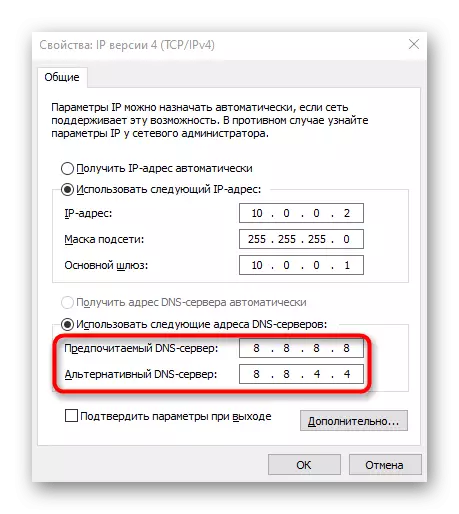
- Specify the preferred and alternative DNS servers from Google, introducing 8.8.8.8 and 8.8.4.4.
Apply the changes, after which re-connect to the network and follow the transition to the Internet center as it was shown earlier. Now everything should be opened normally, but if the problem appeared again, contact directly into technical support of the provider and explain your situation.
Setting up a Yota router
Consider the basic principles for configuring the Yota router on the example of a branded web interface. You must connect the SIM card, since the operator supplies an exceptionally wireless 4G Internet, then go to the Internet center and follow the actions described below.Switch to device settings
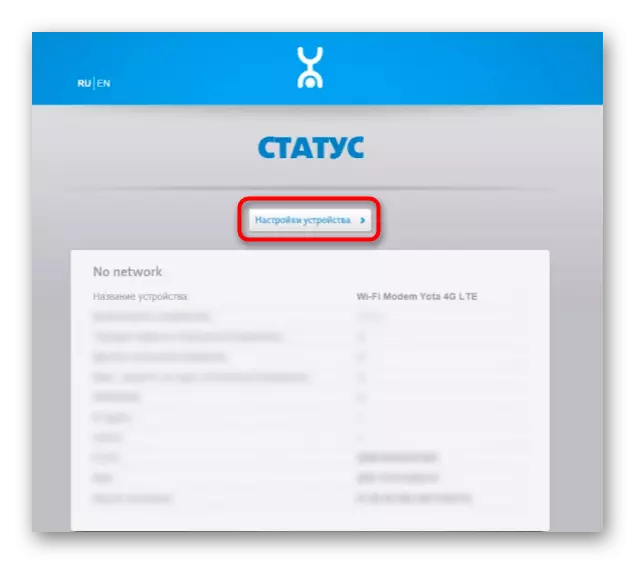
The first task that the ordinary user will encounter is the need to go to the list of all settings for further editing. When you open the web interface, the "Status" menu appears where the current state of the device is displayed. You need to click on the "Device Settings" to open the available options.
If it is not about branded firmware, the web interface will immediately start in the general menu with all the settings. Use the "Fast Setup" tool to promptly edit the required parameters.
Wi-Fi settings
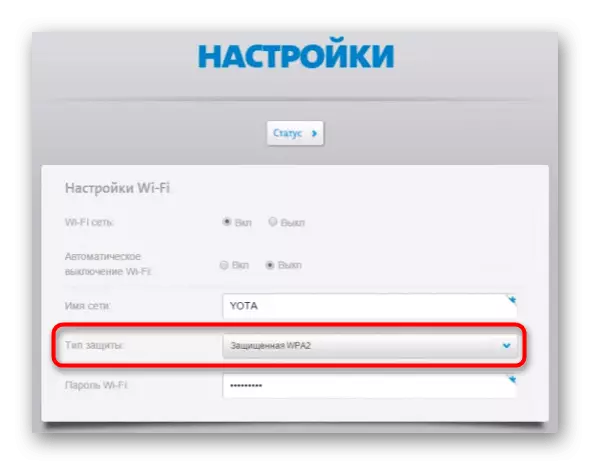
The Internet from Yota is not connected by the LAN cable, so there is an exceptional block among the settings list to change the wireless network parameters. Let us consider in detail each item - what to change from this, and what to leave in the same condition.
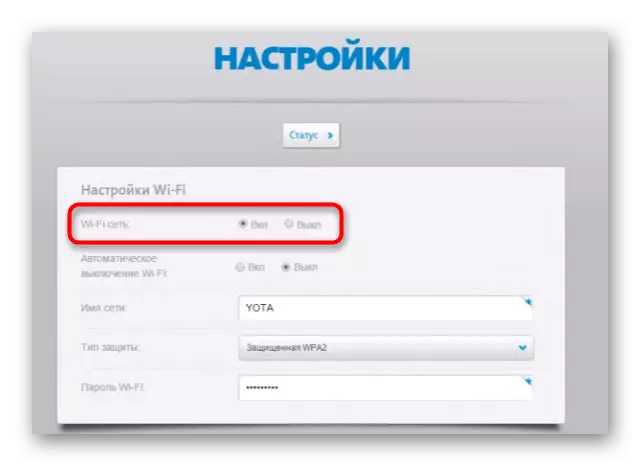
- The first parameter is called "Wi-Fi Network" and is responsible for turning on the broadcast of the wireless access point. If you put a marker near the item "Off", the network will not be available, but you can still go to the Internet center to change this setting.
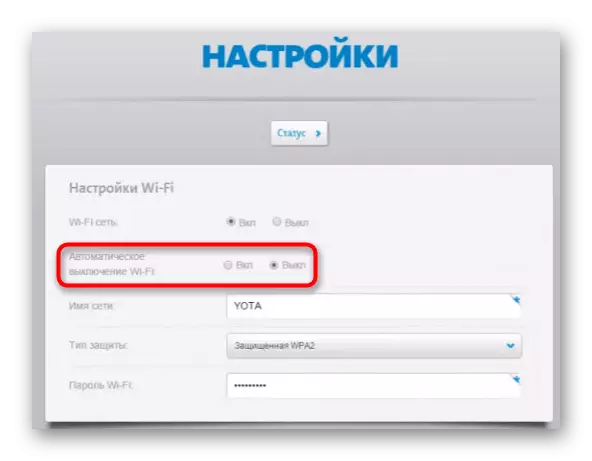
- The automatic Wi-Fi shutdown is necessary only in cases where you want to stop the broadcast in those moments when no device is connected to the router. This is useful to save traffic, but if the tariff is unlimited, the activation of this function has no meaning.
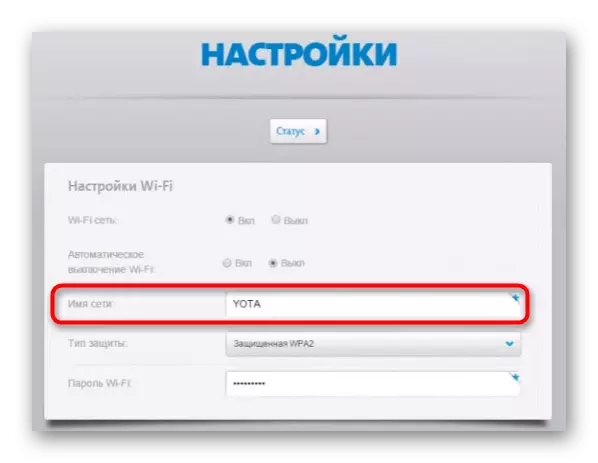
- "Network Name" - the name of the access point with which it is displayed in the list available when connected. You can choose a completely any name that will arrange you personally.
- "Protection Type" is recommended to be left by default so that the connection to the router is carried out exclusively by password. So you will prevent unauthorized connections and save traffic, if suddenly someone wants to use free Wi-Fi.
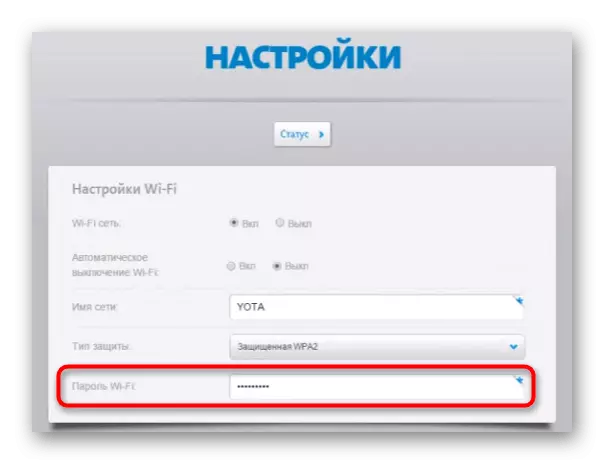
- Wi-Fi password must consist of a minimum of eight characters. It can always be changed in this menu.
Restoration of factory settings
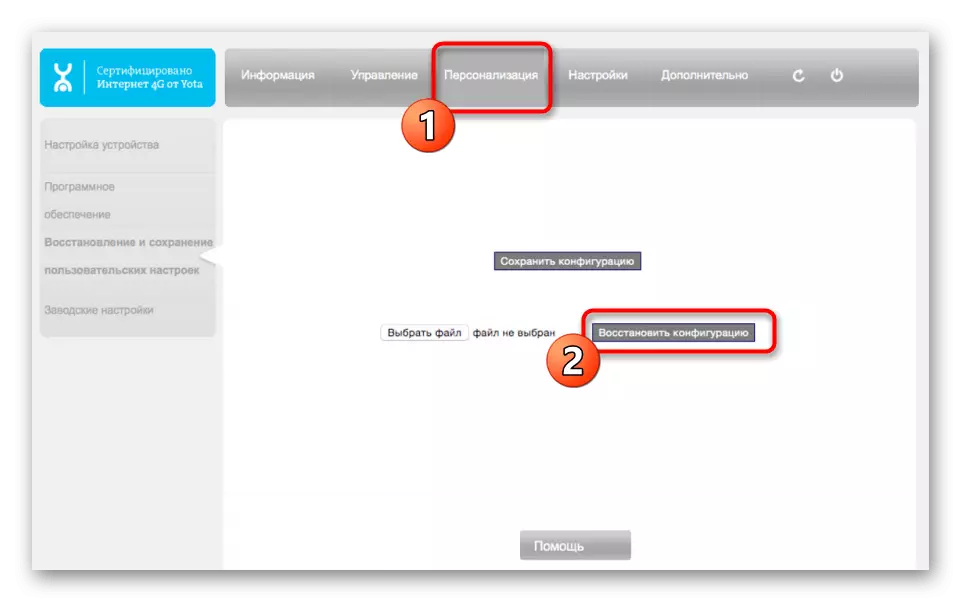
Usually, the reset of the router settings to the factory is not required, but if you have chosen the wrong parameters or experience difficulties with their editing and access to the network, it will help solve the problem. To reset, you will need to go to the "Personalization" tab and use the Restore Configuration button. When notifications appear, confirm your intention and wait a few seconds until the router boots with new parameters.
Now the menu is in a state in which it would be when the router is first turned on, which means that you can specify any custom settings for a wireless network as it was shown earlier, thereby making the connection.
Enable firewall
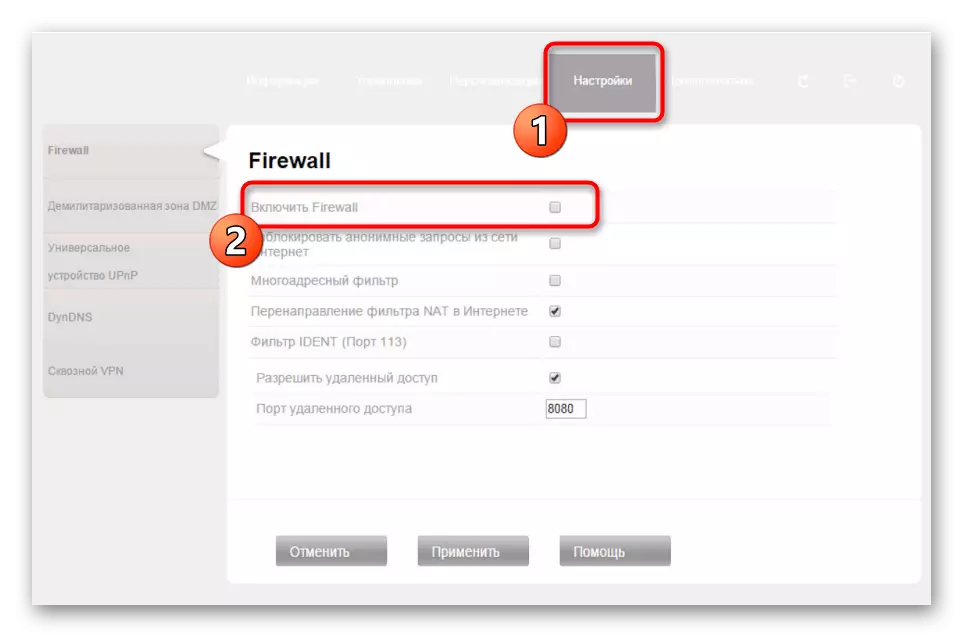
As an additional parameter, the developers are recommended to turn on the firewall, and especially the people setting the router in their office. Standard rules will allow to protect against hackers and prevent unauthorized connections to the router. Be sure to turn on the firewall, because in the absence of protection rules, you can not only lose part of the traffic, but also to disclose user information.
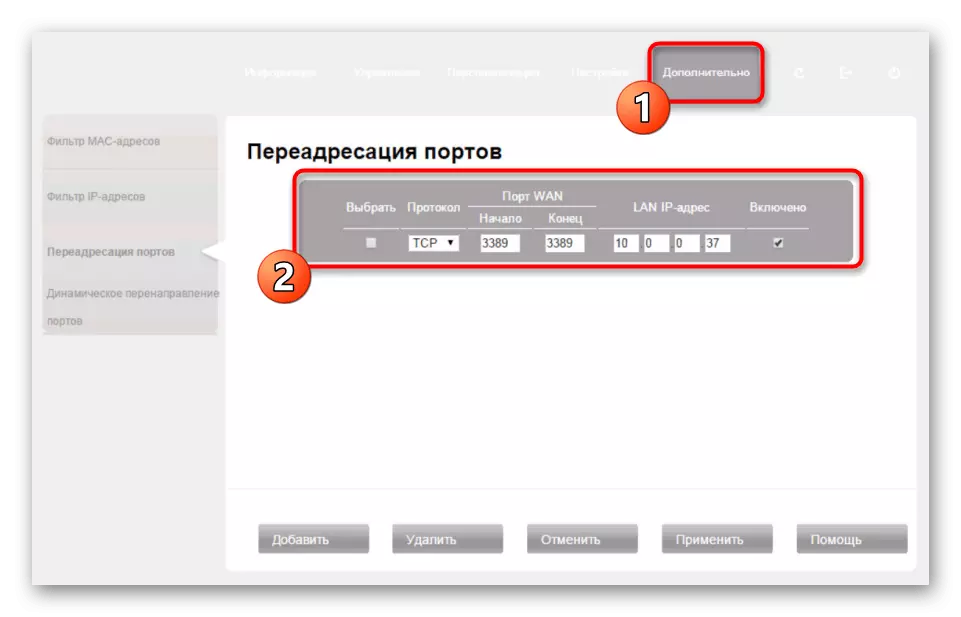
Sprinkle ports
Last setting within the framework of the article - opening ports. This is done on the Advanced tab in the "Port Forward" section and is required when using some programs or games connecting to the Internet. You will need to select the connection protocol and specify the port itself you want to open.
The owners of other models of routers and all those who want to get more information about the ports of ports, another article on our website will be useful.
Read more: Opening ports on the router