

When working with a virtual machine (hereinafter referred to as VM) VirtualBox is often required to exchange information between the main OS and the VM itself. This task can be implemented using shared folders. It is assumed that the PC is running Windows and installed guest OS supplements.
About shared folders
Folders of this type provide convenience with VirtualBox. Very convenient option - create a separate similar directory for each VM, which will serve to exchange data between the PC operating system and the guest OS.How they are created
At first, the general folder must be created in the main OS. The process itself is standard - the command is used for this. "Create" in the context menu Explorer.
In such a catalog, the user can post files from the main OS and perform other operations with them (moving or copying) in order to obtain access to them from VM. In addition, it will be possible to access the files created in the VM and posted in the general directory.
For example, create a folder in the main OS. Its name is better to do comfortable and understandable. No manipulation with access is required - it is standard, without open shared access. In addition, instead of creating a new one, you can use a directory created earlier - no difference here, the results will be completely the same.
After creating a shared folder on the main OS go to VM. Here will be more detailed setting. Runing the virtual machine, select the main menu "A car" , Further "Properties".
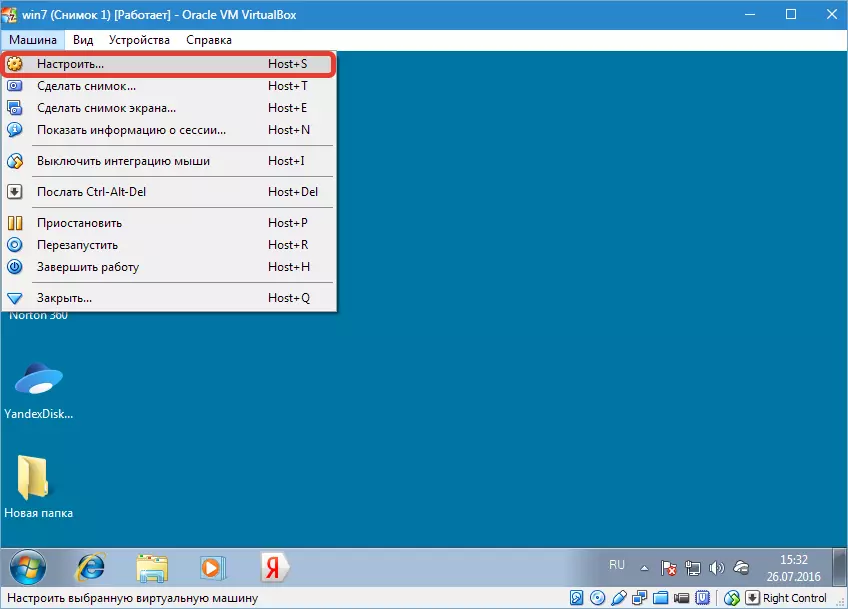
The VM Properties window will appear on the screen. Press "Shared folders" (This option is on the left side, at the bottom of the list). After pressing the button must change its color to blue, which means its activation.
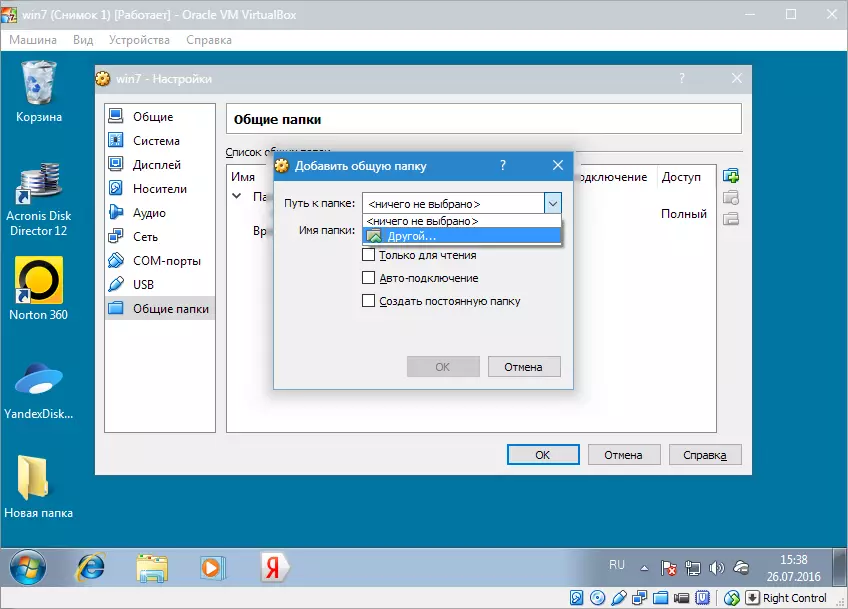
Click on the adding new folder icon.

A window for adding a shared folder will appear. Open the drop-down list and click "Another".
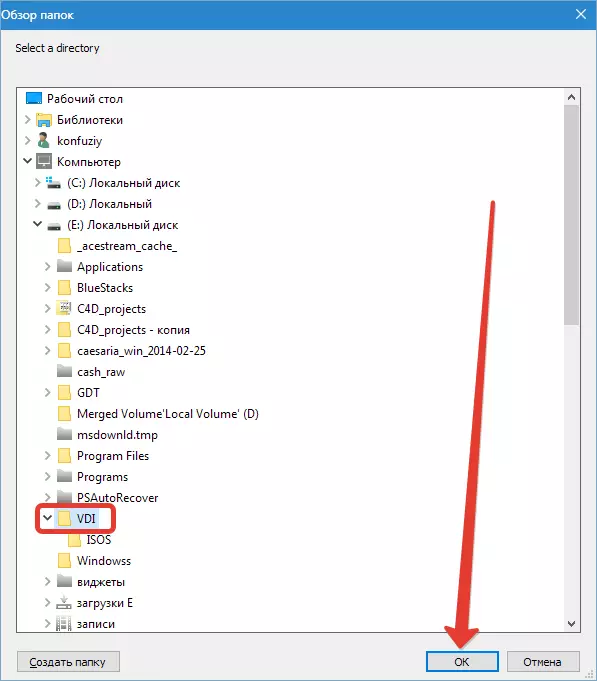
In the folder review window that appears after this, the folder is needed to find a common folder that, as you remember, was previously created on the main operating system. It needs to click and confirm your choice by clicking "OK".
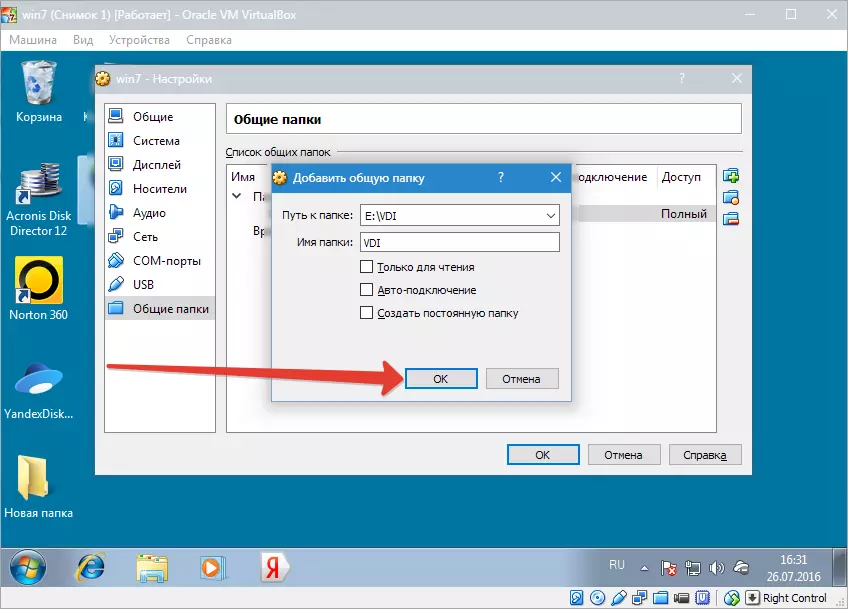
A window will appear that automatically displays the name and location of the selected directory. The latter parameters can be installed there.
The created common folder will immediately be visible in the section "Network Connections" Explorer . To do this, select this section. "Network" , Further Vboxsvr. . In the conductor, you can not only see the folder, but also make actions with it.

Temporary folder
In VM, there is a list of common folders by default. Recently refer to the latter "Machine folders" and "Temporary folders" . The period of the existence of the directory created in VirtualBox is closely interconnected with where it will be located.The created folder will exist only until the user closes the VM. When the latter is open again, the folders will no longer be - it will be removed. It will be necessary to re-create it and gain access to it.
Why it happens? The reason is that this folder was created as temporary. When VM stops working, it is erased from the temporary folder partition. Accordingly, it will not be visible in the conductor.
We add that the method described above can access not only to the overall, but also to any folder on the main operating system (provided that this is not prohibited for security purposes). However, this access is temporary, existing only at the time of the virtual machine.
How to connect and configure a constant shared folder
Creating a permanent shared folder implies its setting. When adding a folder, activate the option "Create a permanent folder" and confirm the choice by pressing "OK" . Following this, it will be visible in the list of permanent. You can find it in "Network connections" conductor , as well as proceeding on the way the main menu - "Network environment" . The folder will be saved and visible each time the VM start. Save all its contents.

How to set up a common VB folder
In VirtualBox, configure the shared folder and manage it - the task is not complicated. You can enter it or erase it by clicking on its name right-click and selecting the corresponding option in the menu that appears.
It is also possible to change the definition of the folder. That is, make it constant or temporary, configure the auto connection, add an attribute "Only for reading" , change the name and location.
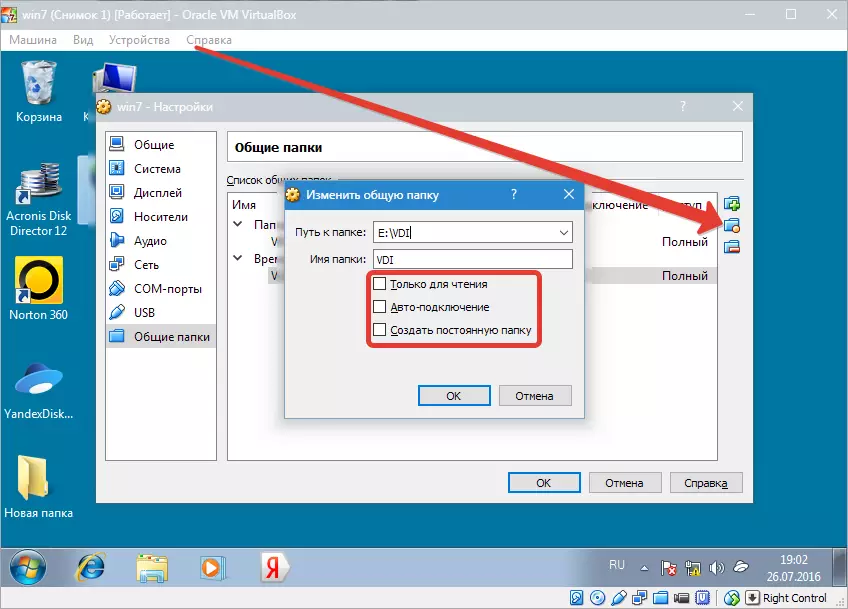
If you activate item "Only for reading" You can place files in it and make operations with the data contained in it can be solely from the main operating system. From VM to do this in this case it is impossible. The shared folder will be found in the section "Temporary folders".
When activated "Auto-connections" With each start, the virtual machine will attempt to connect to a shared folder. However, this does not mean that the connection can be installed.
Activating item "Create a permanent folder" , we create the appropriate folder for VM, which will be saved in the list of permanent folders. If you do not choose any item, it will be located in the temporary folder section of a specific VM.
On this, work on creating and configuring public folders is completed. The procedure is pretty simple and not requiring special skills and knowledge.