

Often you have to record movies and various videos on physical media for viewing on the road or on other devices. In this regard, the flash drives are especially popular, but sometimes there is a need to transfer files and to disk. To do this, it is desirable to use the time-tested and users of the program that quickly and securely copy selected files to the physical blank.
Nero. - Confident leader among these categories. Easy in management, but having a rich functionality - it will provide tools to implement the tasks as an ordinary user and confident experimenters.
The transferring of video files to the hard disk implies a few simple steps, the sequence of which will be described in detail in this article.
1. We will use a trial version of the Nero program downloaded from the developer's official website. To start loading the file you need to enter the address of your mailbox and click the button Download . You will start downloading the Internet bootloader.
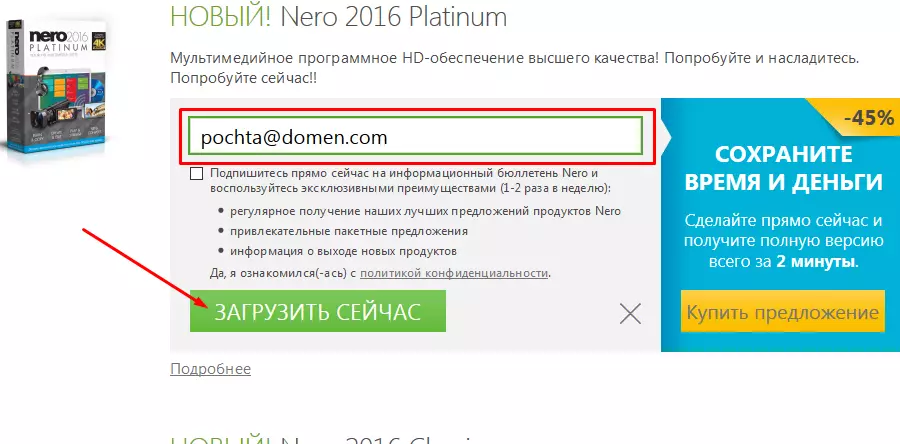
The developer provides for familiarization with a two-week trial version.
2. After the file is loaded, the program must be installed. Through it will be downloaded the necessary files and unpacking into the selected dripping. This will require the speed of the Internet and specific computer resources, so it is desirable to postpone it for the most fast installation.
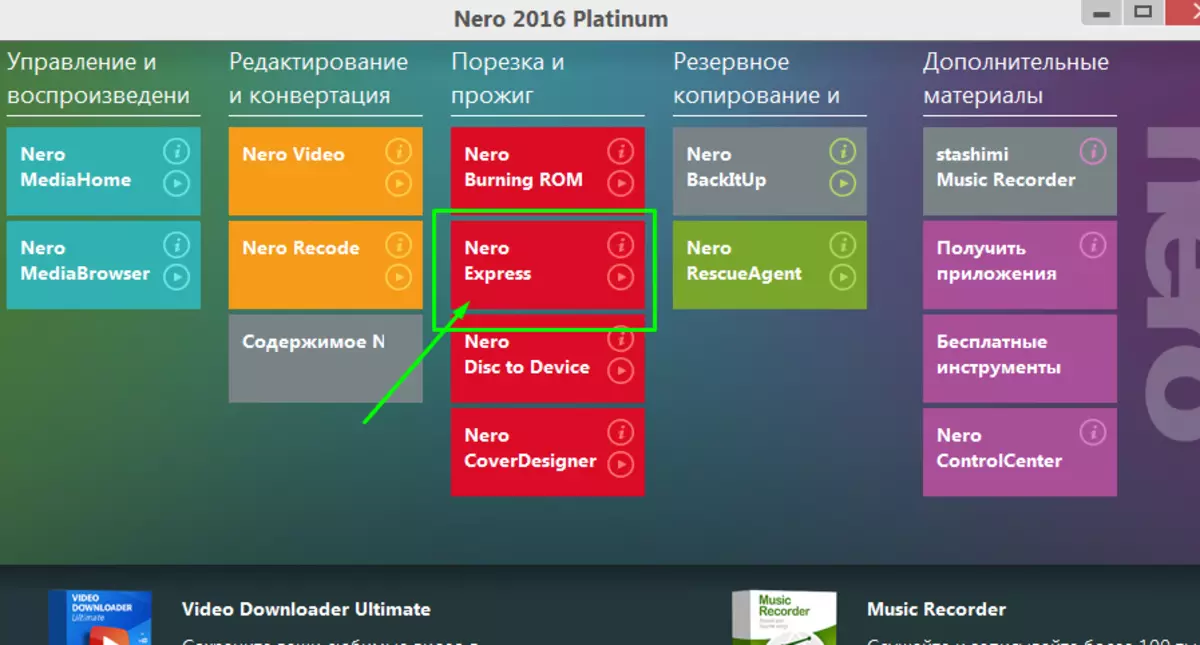
3. After installing Nero, launch the program itself. Before us on the desktop, the main menu appears in which we need to choose a special module for recording discs - Nero Express..
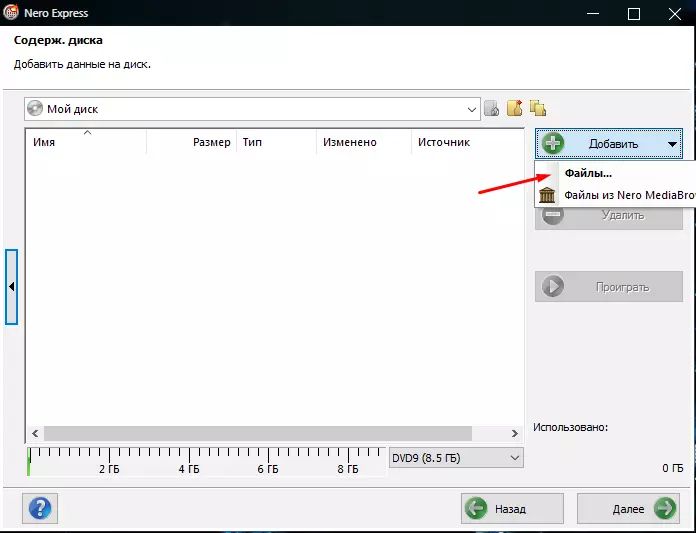
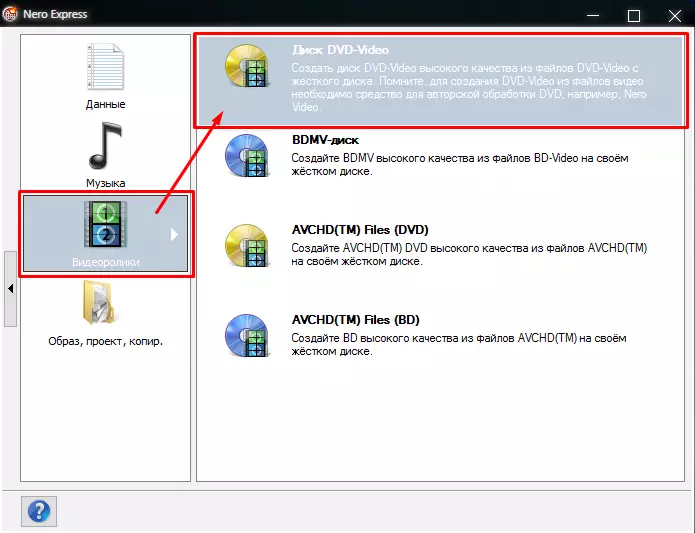
4. Depending on which files you need to write, there are two subsequent action options. The most versatile way will be the choice of item Data In the left menu. This way can be transferred to disk any movies and video with the ability to view almost on any device.

Pressing the button Add A standard conductor will open. The user must find and select those files that need to be recorded on the disk.
After the file or files are selected, at the bottom of the window can be viewed on the recovery of the disk depending on the size of the recorded data and the free space.
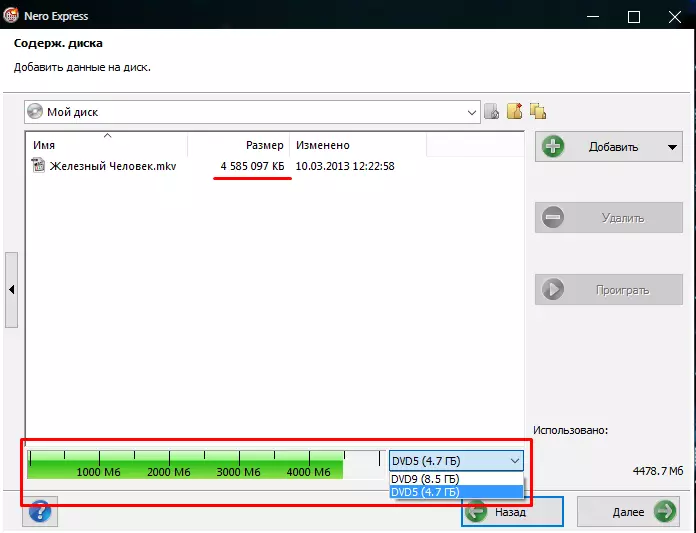
After the files are selected and coordinated with space, press the button Further . The following window will allow you to spend the last recording settings, set the name of the disk, enable or remove the recorded media check and create a multisession disk (suitable only for duals with RW marks).
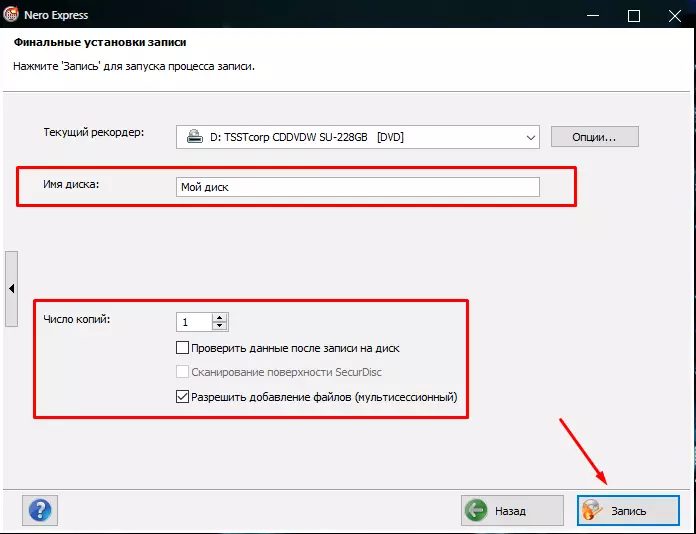
After selecting all the necessary parameters, insert a clean drive into the drive and press the button. Record . The write speed will depend on the amount of information, the speed of the drive and the quality of the disk.
5. The second method of recording has a narrower assignment - it is useful for recording files only with .bup, .vob and .ifo permissions. It is necessary to create a full-fledged DVD to handle compliant players. The difference between ways is only that you need to select the appropriate item in the left subroutine menu.
Further steps to select files and record disk are no different from the above.
Nero provides a truly full-fledged tool for recording discs with any types of video files, which can be initially created to work with any devices that can "read" discs. Immediately after recording, we get a ready-made disk with unmistakably recorded data.