

Macro is a set of specific actions, commands and / or instructions that are grouped into one holistic command that provides automatic execution of a task. If you are an active user MS Word, you can also automate frequently performed tasks by creating appropriate macros for them.
It is on how to include macros to a Word, how to create and use them to simplify, accelerate the workflow and will be discussed in this article. And yet, for a start, it will not be superfluous to figure out in more detail why they are needed at all.
Areas of using macros:
- 1. Acceleration of frequently performed operations. This includes formatting and editing.2. Assign multiple teams into a holistic action "from and to". For example, using a macro, you can insert a table of specified size with the required number of rows and columns.
3. Simplify access to some parameters and tools located in different program dialog boxes.
4. Automation of complex sequences of actions.
The macros sequence can be recorded or created from scratch by entering the code into the Visual Basic editor in the programming language of the same name.
Turning on macros
By default, macros are not available in all versions of MS Word, more precisely, they are simply not included. To activate them, you need to enable developer tools. After that, the Tab will appear on the program control panel "Developer" . About how to do it, read below.
Note: In versions of the program in which macros are available initially (for example, WORD 2016), the means to work with them are in the tab "View" in a group "Macros".

1. Open the menu "File" (Microsoft Office button earlier).
2. Select "Options" (Previously "Word Settings").
3. Open in the window "Options" Category "Basic" and go to the group "The main parameters of work".
4. Install the checkbox opposite the item "Show the" Developer "tab on the tape".
5. A tab will appear on the control panel "Developer" in which there will be an item "Macros".
Macros recording
1. In the tab "Developer" or, depending on the Word version used, in the tab "View" Click the button "Macros" and select "Macro Record".

2. Set the name for the macro created.

Note: If you, creating a new macro, give him exactly the same name as the built-in program, the actions written by you in a new macro will be carried out in exchange standard. To view macros available in MS Word by default, in the button menu "Macros" Choose "Word Teams".
3. in paragraph "Macro is available for" Select what it will be available: a template or document in which it should be saved.
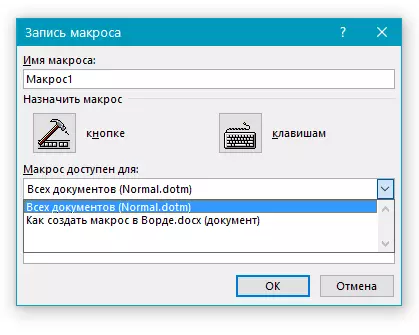
- Advice: If you want the macro to be created in all documents that you work in the future, select the parameter "Normal.dotm".
4. In the field "Description" Enter the description for the macro created.
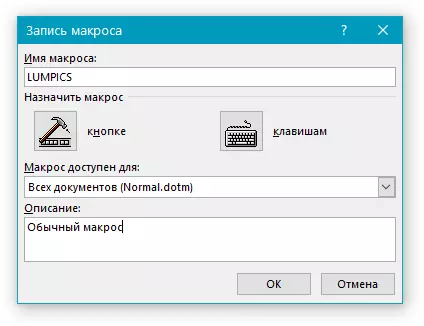
5. Perform one of the actions below:
- Click "Button";
- Select the document or documents in which you want to add the created macro to the shortcut panel (section "Setting the Quick Access Panel");

- Advice: To create a macro to be created for all documents, select a parameter. "Normal.dotm".

In the window "Macro of" (previously "Select commands from" ) Select the macro to write, click "Add".

- If you want to configure this button, click "Change";
- Select the appropriate symbol for the button being created in the field. "Symbol";
- Enter the name of the macro to be displayed later in the field. "Display Name";
- To start recording macro double click on the button "OK".

The character you selected will be displayed on the shortcut panel. When you hover the cursor pointer to this character, your name will be displayed.
- Click on the button "Keys" (previously "Keyboard");

- In chapter "Teams" Select the macro to write;

- In chapter "New key combination" Enter any combination convenient for you, and then click "Assign";

- To start recording macro click "Close".
6. Perform all the steps to be included in the macro.
Note: During the macro recording, you cannot use the mouse to highlight the text, but it is necessary to use it to select commands and parameters. If necessary, select the text using the keyboard.
Lesson: Hot keys in Word
7. To stop the macro recording, press "Stop recording" This command is located in the button menu. "Macros" On the control panel.

Changing key combinations for macro
1. Open the window "Options" (menu "File" or button "MS Office").
2. Select "Setup".
3. Click on the button "Setup" located near the field "Keyboard shortcut".
4. In the section "Categories" Choose "Macros".
5. In the list that opens, select the macro to be changed.
6. Click on the field "New key combination" And press the keys or key combination you want to assign for a specific macro.
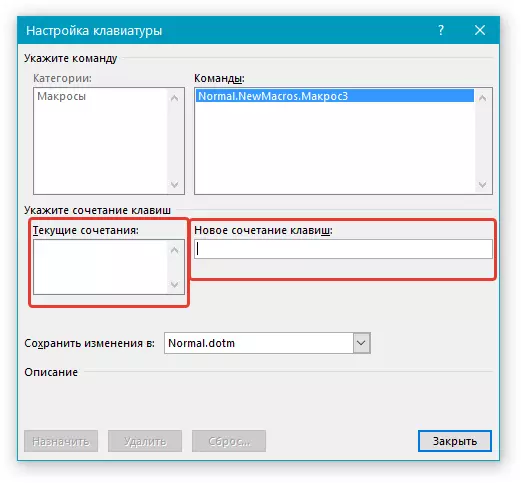
7. Make sure the key combination assigned is not used to perform another task (field "Current Combination").
8. In the section "Save Changes" Select the appropriate option (place) to save the place where the macro will start.

- Advice: If you want the macro to be used in all documents, select the option "Normal.dotm".
9. Click "Close".
Launch macro
1. Click on the button "Macros" (tab "View" or "Developer" , depending on the program version used).

2. Select the macro you want to run (list "Macro name").
3. Tap "Run".

Creating a new macro
1. Press the button "Macros".

2. Set the name for the new macro in the appropriate field.

3. In the section "Macros from" Select a template or document for which the macro will be saved.

- Advice: If you want the macro to become available in all documents, select the parameter "Normal.dotm".
4. Click "Create" . The editor will be opened Visual Basic. in which it will be possible to create a new macro in Visual Basic.

That's all, now you know what macros in MS Word are, why are they needed, how to create them and how to work with them. We hope, the information from this article will be useful for you and really help you simplify, speed up the work with such an advanced office program.