

Important information
Very often, if it really is in the keyboard, and not in the operating system, by connecting the external USB keyboard. If it works, most likely, the cause is hardware. If both are likely to be likely that the entire snag in the settings or OS failures. However, this is not an axiom and not an absolute judgment, since there are different situations.
Part of the instructions presented in this article requires text entry. You can either copy it from the site using the mouse and insert into the necessary fields in Windows, or use the on-screen keyboard pre-installed in the operating system. The call and use of this tool is told in our separate article.
Read more: Run a virtual keyboard on a laptop with Windows
Remember that even if the physical keyboard does not work at the entry stage in the account, there is always the ability to call on-screen - on the right below there are several buttons, including the one that is responsible for special features.

Method 1: Windows 10 settings
In Windows 10, there are a pair of settings that can block the operation of the physical keyboard on the device. One of them purposefully turns off the input, and the second has a different purpose, but the occasion is caused by the problem.
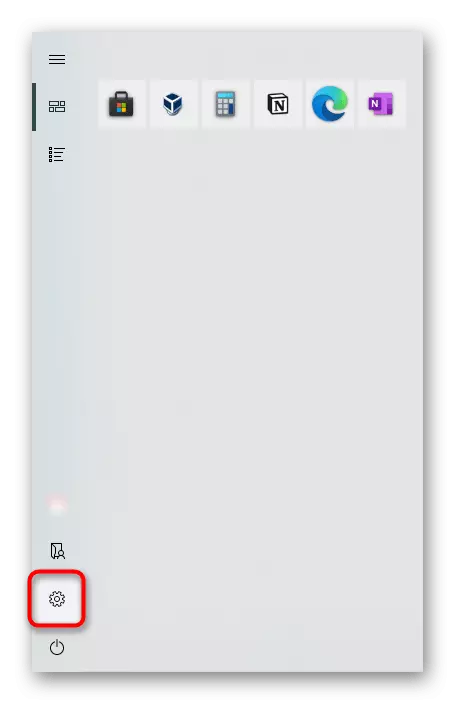
- Open "Start" and go to "Parameters".
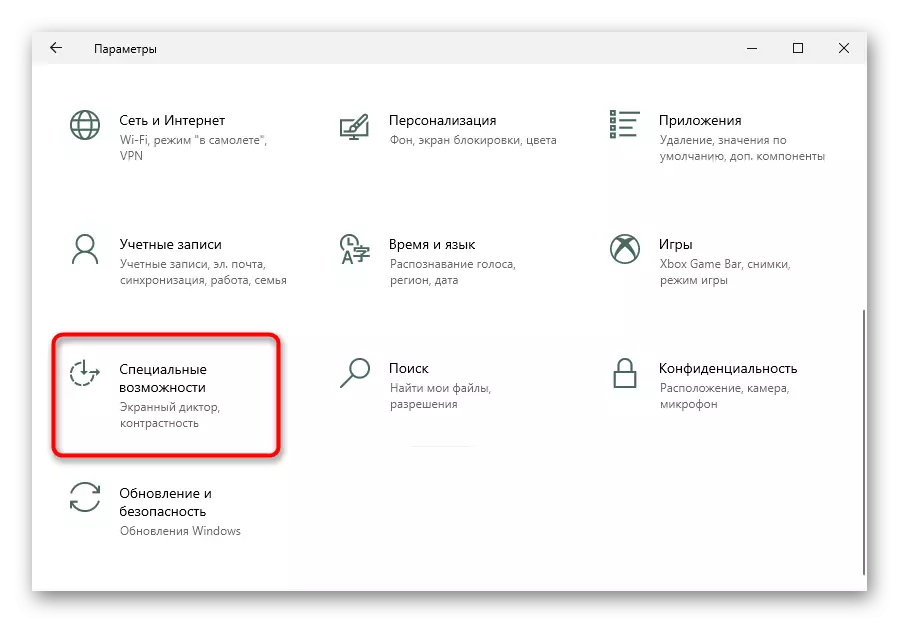
- Switch to "Special Features" section.
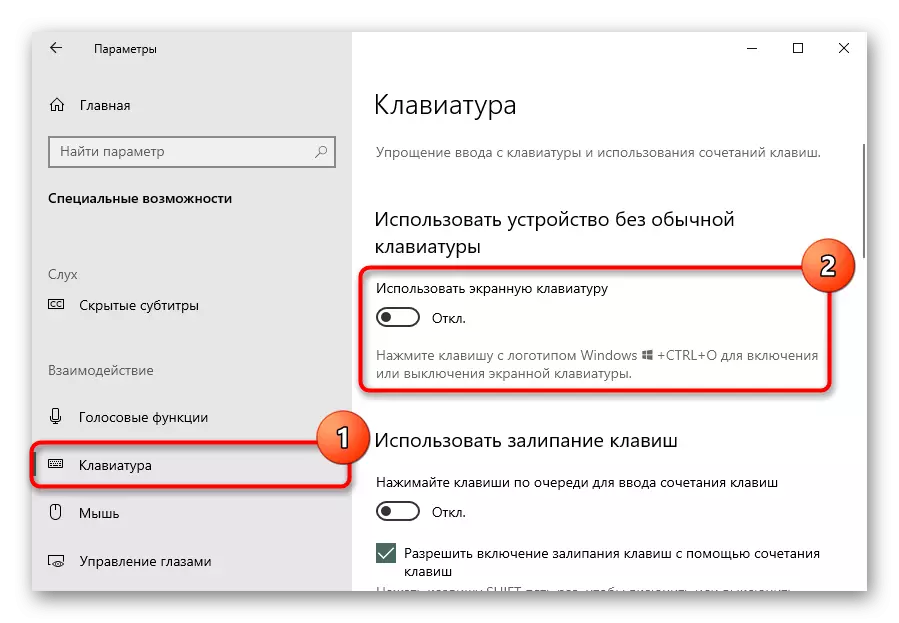
- On the left pane, find the keyboard item and click on it. In the central part of the first setting will be "using the device without a regular keyboard". Make sure that its condition is in "Off", and if so, turn on the function and turn off again.
- Without closing this window, open any other where you can print, and try typing text.
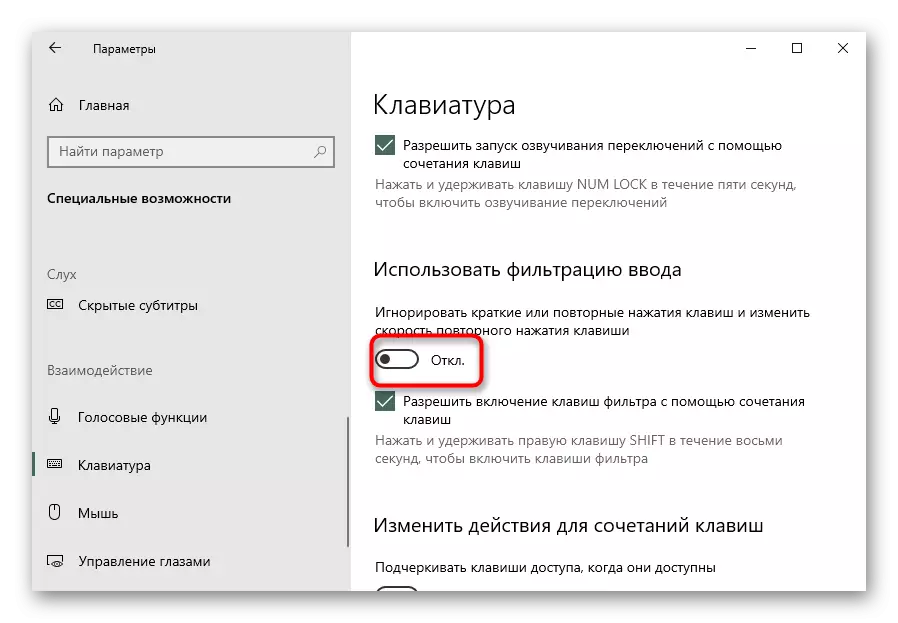
- If the performance is recovered, close "Parameters", if not, hereby change the status of the "Use Input Filter" function to the opposite of the current. Sometimes it conflicts with the keyboard, so it should be checked if the function can turn out to be a source of a problem in your case.
Method 2: Running troubleshooting tools
The easiest, but not particularly effective way is to use the device built-in tools for diagnosing and troubleshooting. Among other things, it checks and performance of the keyboard, which helps in minor and common failures. Due to the simplicity (checking in automatic mode) it is better to start with this method.
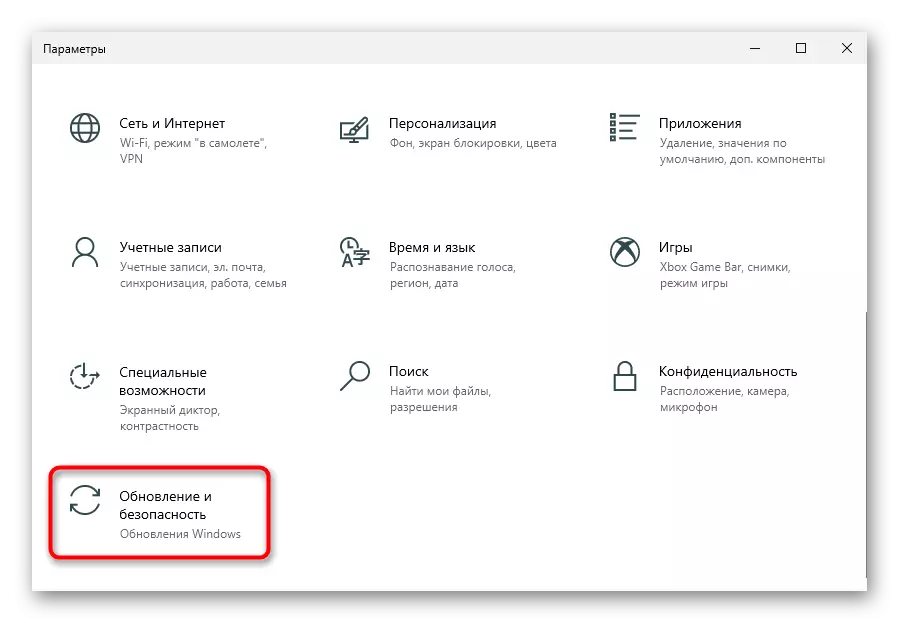
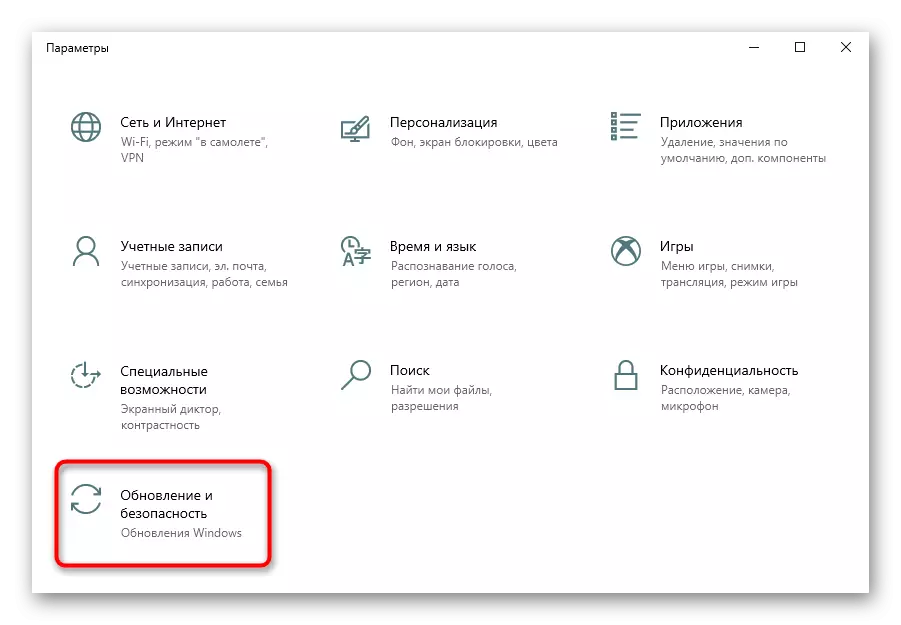
- Being in "Parameters", select "Update and Security" Tile.
- Switch to "Troubleshooting" through the panel.
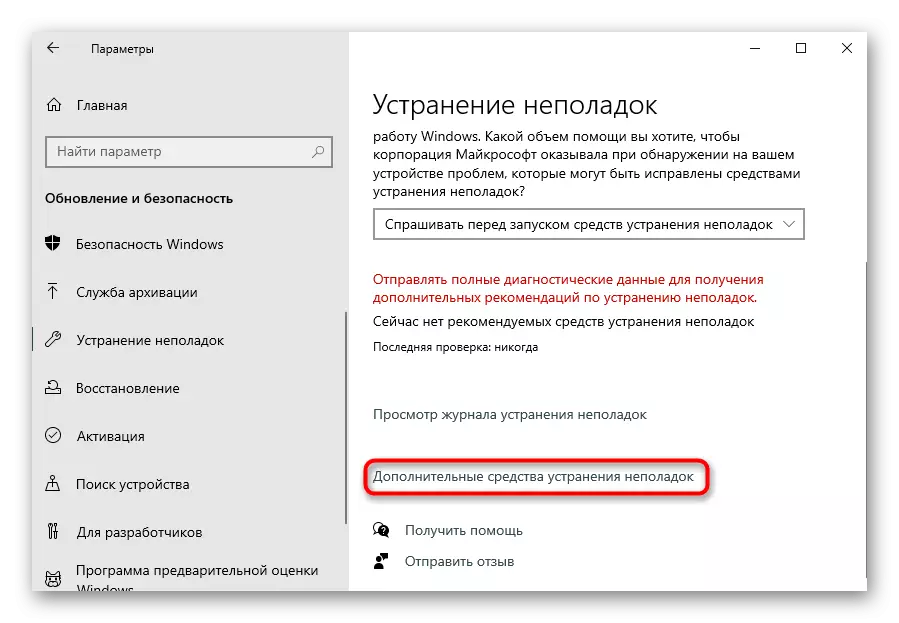
- In the central part of the window you either see the inscription "Now there are no recommended troubleshooting tools", or there will be a proposal to check the keyboard, which you want to run. In the absence of such a proposal, click on the link "Advanced troubleshooting tools."
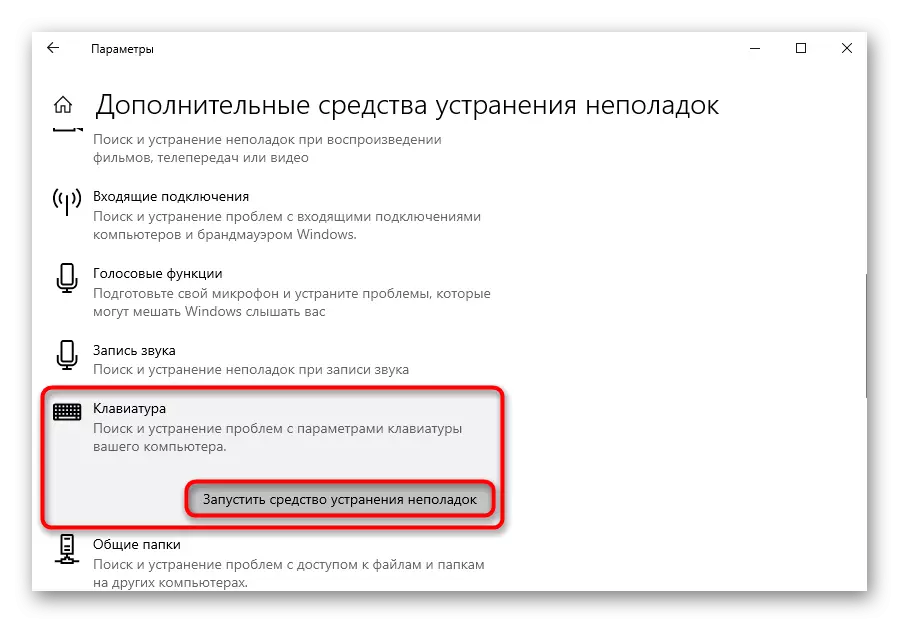
- Find the keyboard string, click on it, and then on the "Run troubleshooting" button that appears.
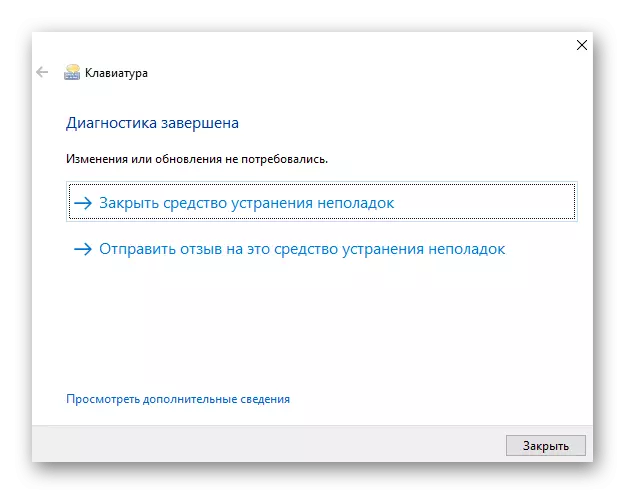
- If the application advises to perform any actions, do it. In the case when the problem is not detected, close the window and go to the following methods.

Method 3: Forced Starting CTFMON Process
In some situations, the user has a keyboard only selectively - in some applications, they can dial text and activate various commands, and in others - no. This is due, as a rule, with an invaded CTFMON process, which is responsible for the correct functioning of the keyboard.
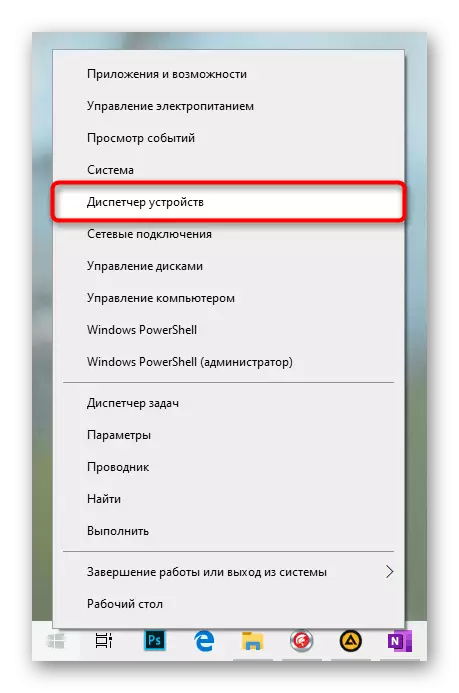
- Find out if the process is really not running, you can via the "Task Manager". Open it by pressing the right mouse button on the taskbar or by "start-up" and selecting the appropriate item.
- In the list of processes, look for a "CTF loader".

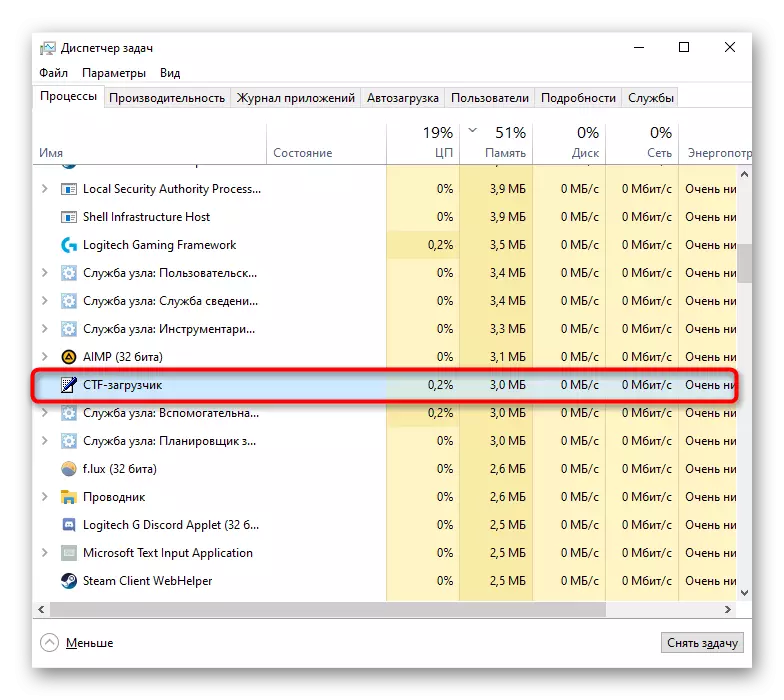
In the absence of this process there, it can be concluded that it does not really start with the operating system. It will be needed to add it to the autoload yourself, for this, follow these actions:
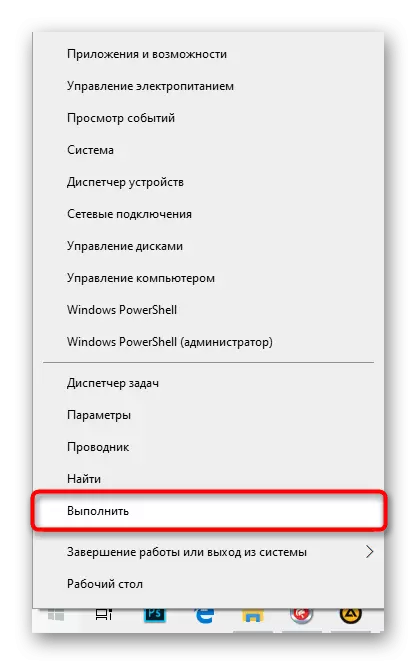
- Right-click on the "Start" and call the "Run" application.
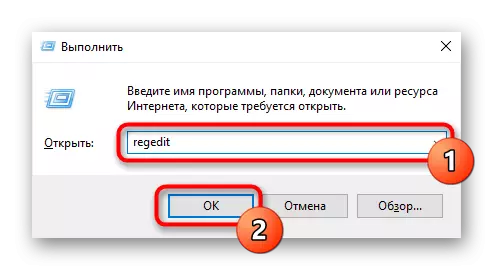
- Copy and paste (or use the on-screen keyboard for dialing) command Regedit, and then click OK.
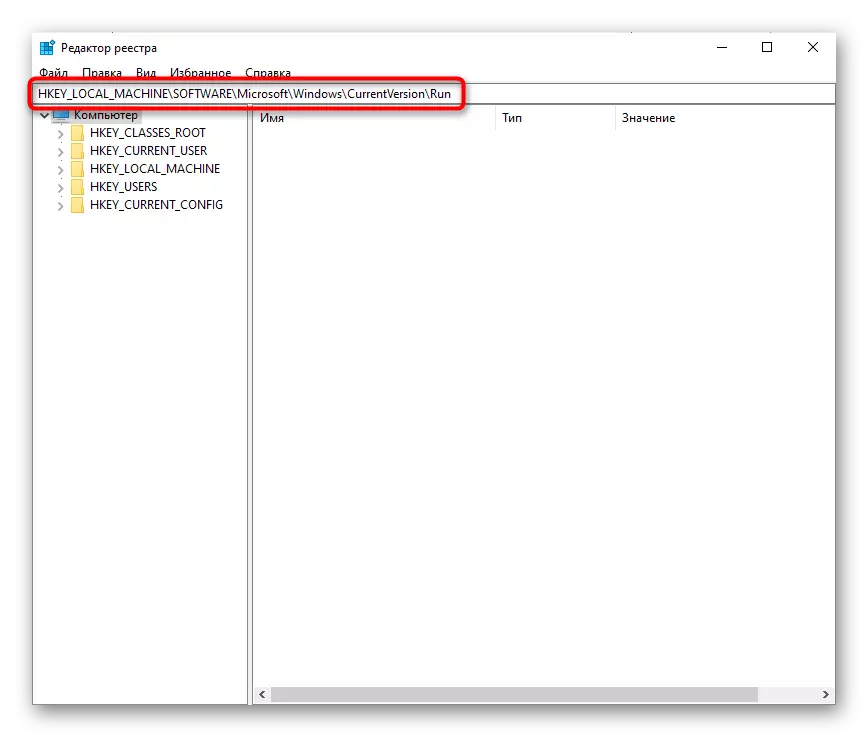
- Sequentially expand HKEY_LOCAL_MACHINE \ Software \ Microsoft \ Windows \ CurrentVersion \ Run branches. In Windows 10, this path can also be copied and pasted into the address string, and then click on the ENTER screen keyboard.
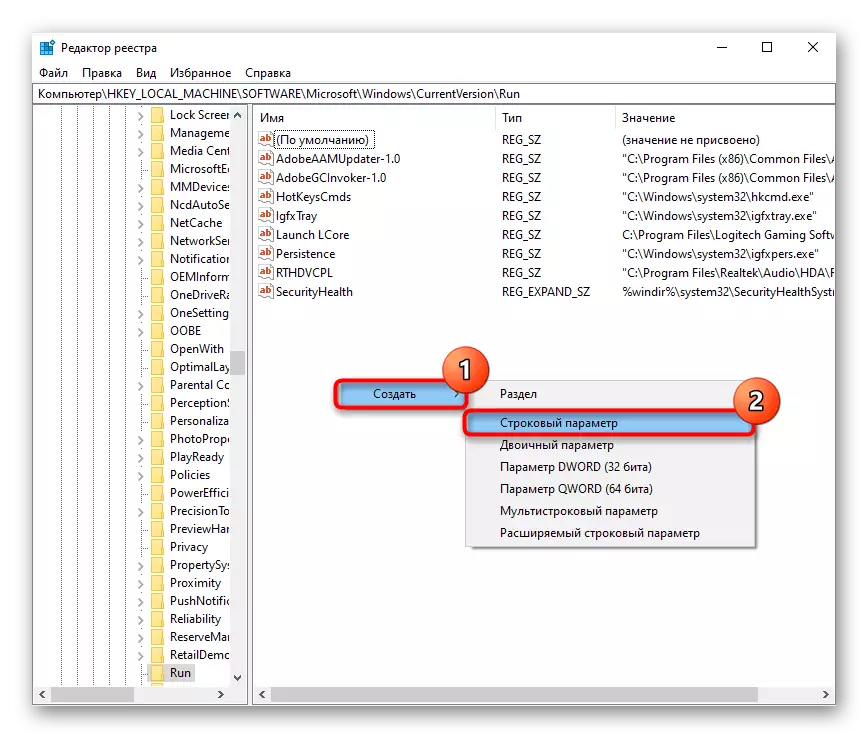
- In an empty place in the center, right-click and create a string parameter.
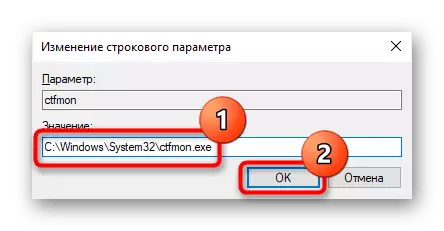
- Rename it to "CTFMON", then double-click on it with LKM. A window with editing a file will open, in the "Value" field insert C: \ Windows \ System32 \ Ctfmon.exe and save the changes made by the "OK" button.
It is best to enter the "job scheduler" and see whether the process under consideration is enabled.
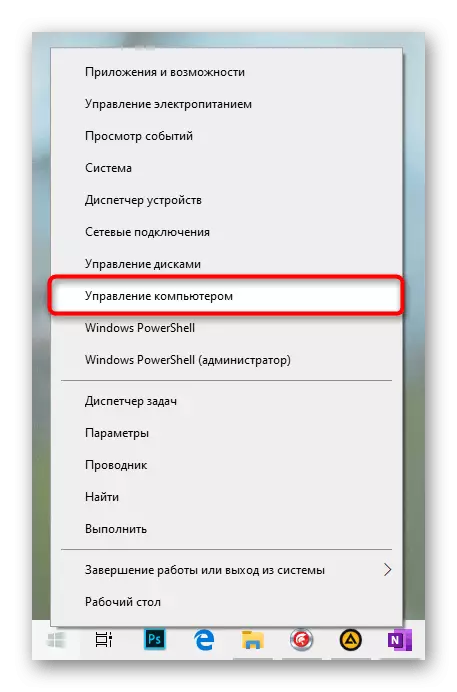
- Right-click on the "Start" button again, but this time open the "Computer Management".
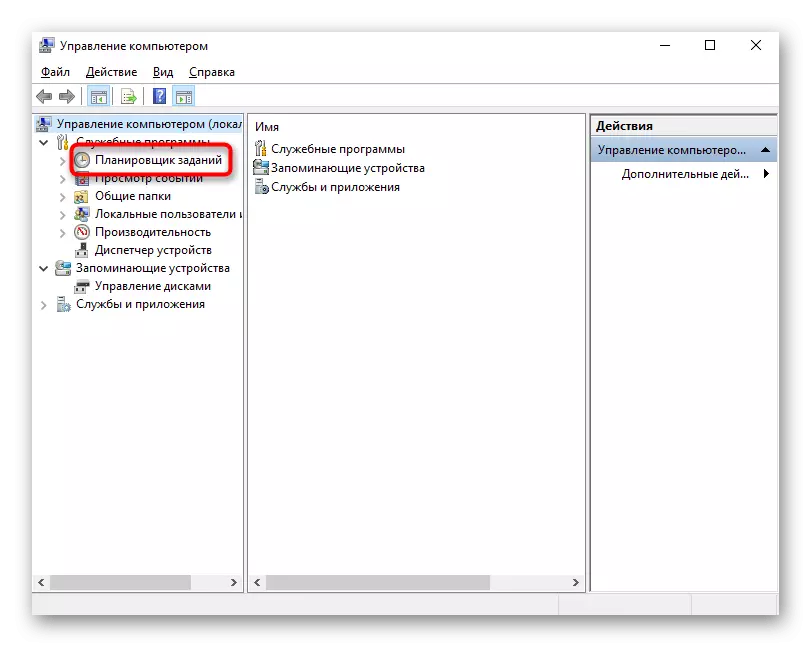
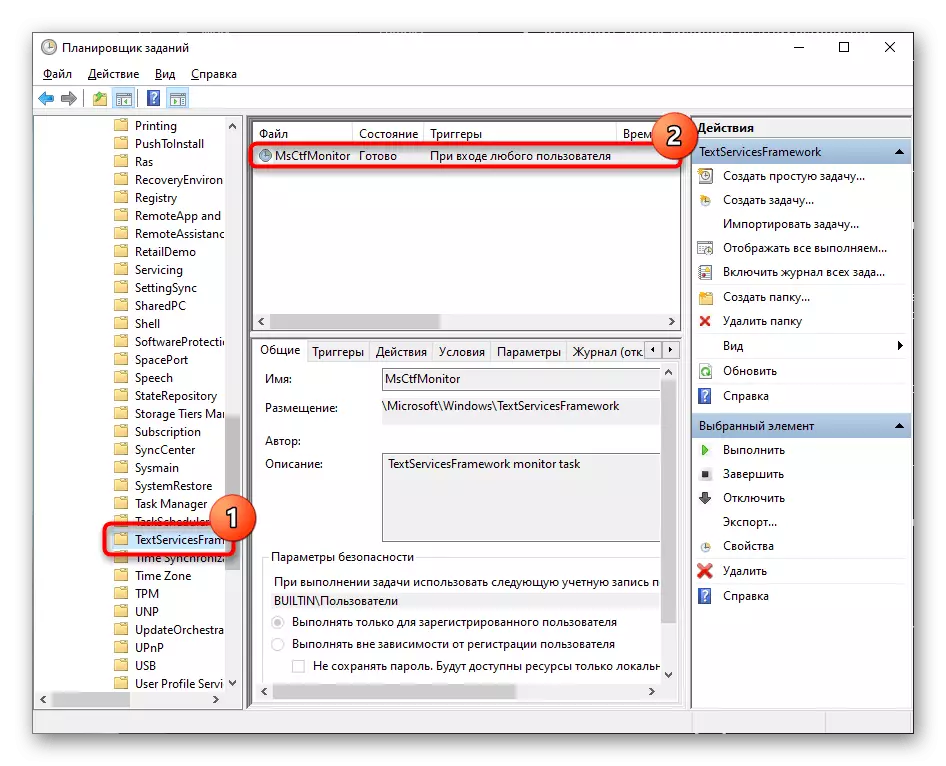
- Through the left panel switch to the job scheduler.
- Using the left panel, expand the Planner Library folders> Microsoft> Windows> TextServicesFramework. In the center there must be a task called "MSCTFMONITOR" with the "Finish" status. If so, just close the window.
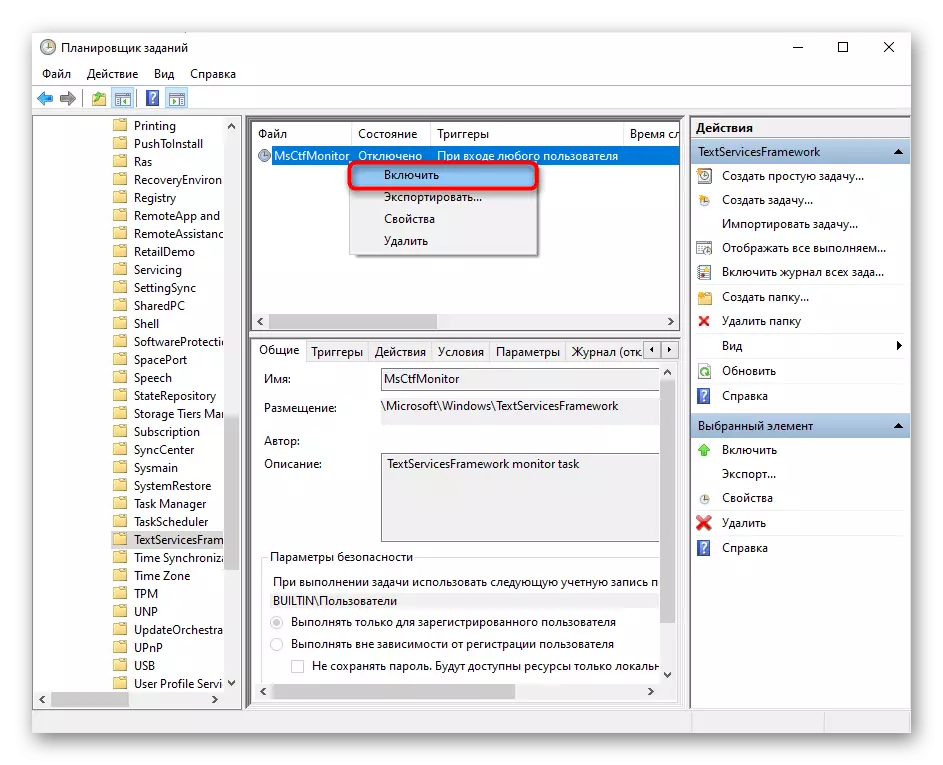
- With the status "Disabled" by the right click of the mouse on the line, call the context menu and turn on the task.
- It remains to restart the laptop and check whether the full-fledged keyboard operation resumed.
Method 4: Turning off the quick laptop launch (Windows 10)
In the "dozen" there is a quick launch function of the device, significantly saving time when the hard disk (HDD) laptops are turned on, but little effective with the installed solid-state accumulator (SSD). Despite the convenience in some cases, it can provoke incorrect launch of the operating system.
The fact is that to speed up Windows downloads, this manner saves some files (including drivers) to RAM, and this reduces the creation of a new session. A minus of this approach is that the user will periodically experience any program conflicts even after turning on and off the laptop, and after the reboot - no. Therefore, if the keyboard ceased to work normally with such symptomatics, it will be necessary to disable quick start.
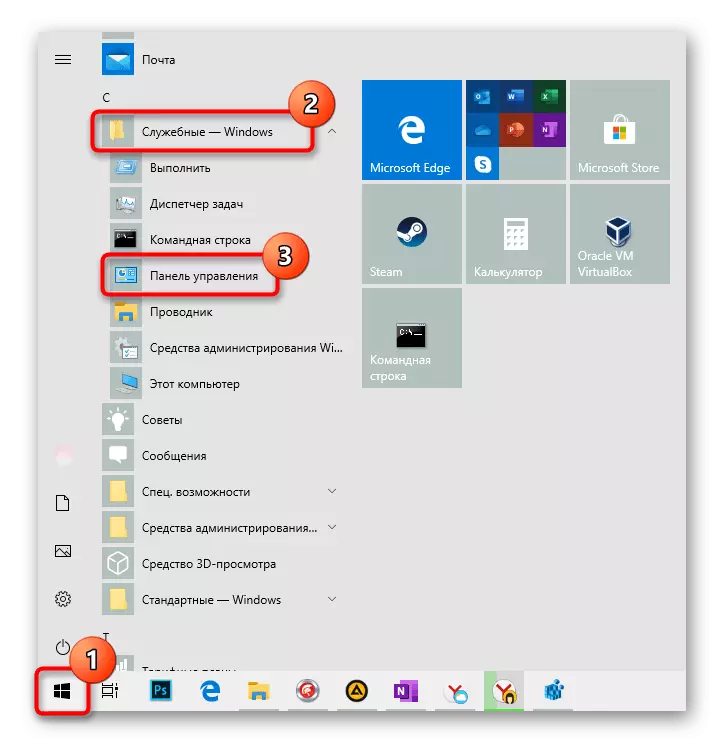
- In most cases, the function is activated by default, which you could and not know. Be sure to check its status by calling the "Control Panel". You can start the application by opening the "Start" and finding the "Own-Windows" folder.
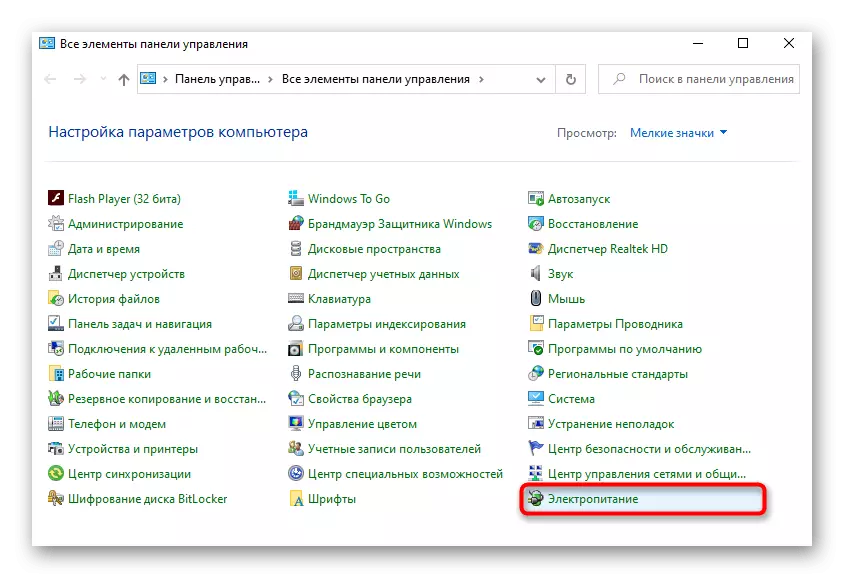
- For convenience, switch the viewing type to "minor icons" and call the "Power" section.
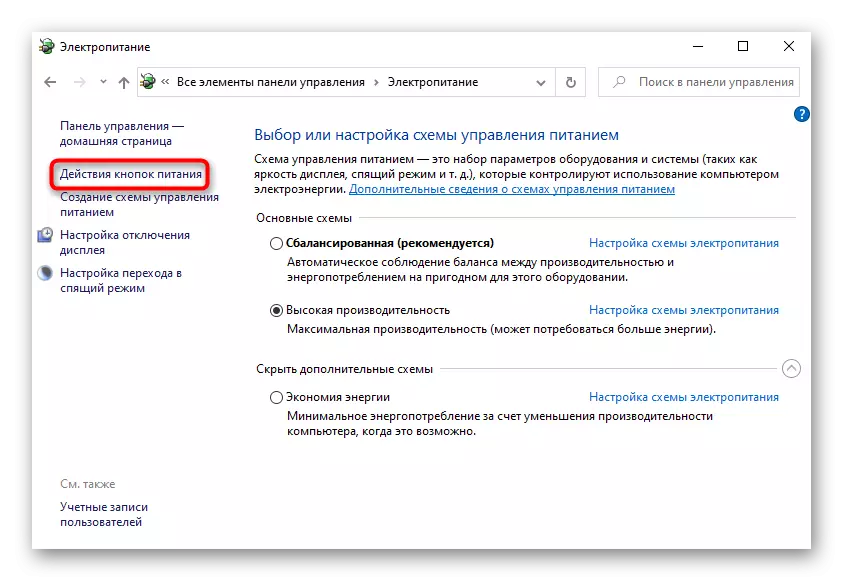
- On the left panel there is a "Actions of the power buttons" parameter, which and press.
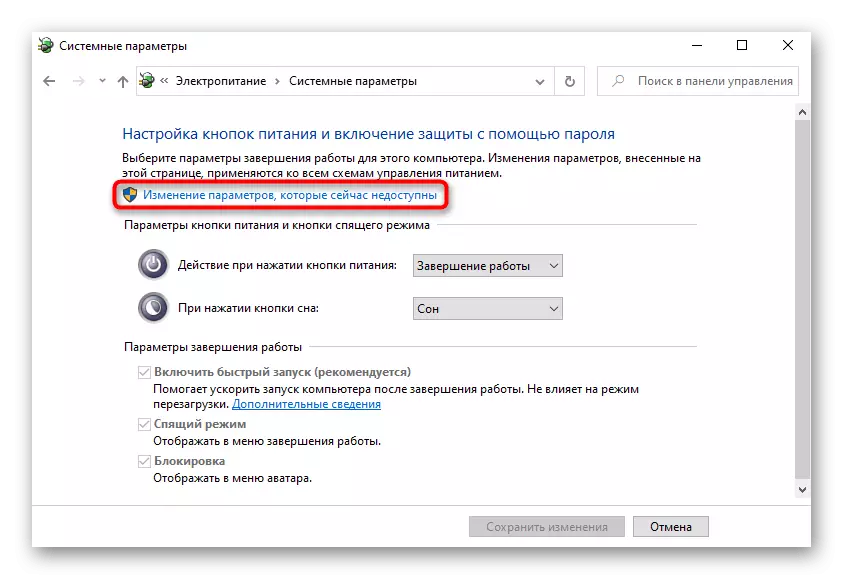
- So far, the desired setting is inactive. Click on the "Changing parameters that are not available now", after which it will be possible.
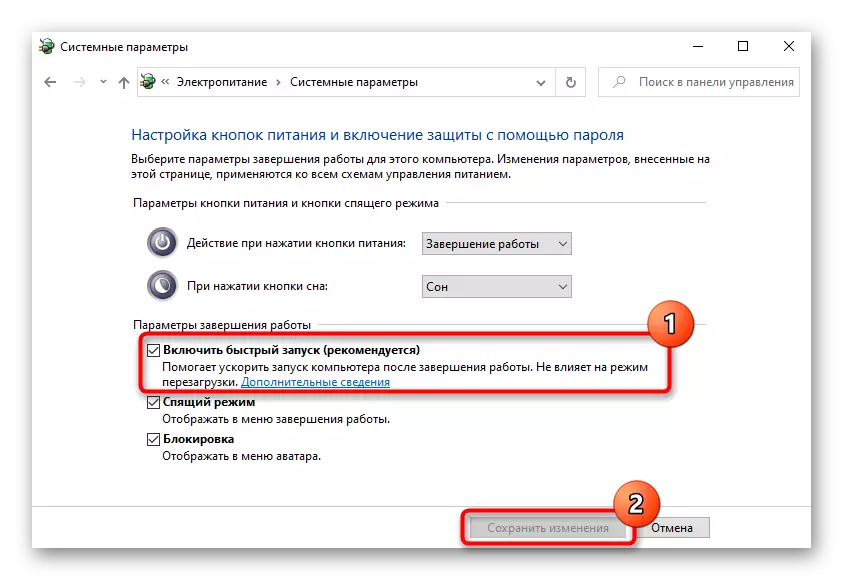
- Remove the checkbox from the "Enable Quick Start (recommended)" item. Immediately note the description of the function we have already mentioned. Consequently, to check whether a quick launch is really to blame for everything, and then turn on the laptop, and not just reboot it.
If this change has not corrected the situation, you can return the setting.
Method 5: Troubleshooting Trouble
The drivers are required to computers so that the operating system can normally interact with the hardware component, and the keyboard is no exception. However, sometimes no problems cause a driver, but its current state.Most often for laptops, the driver sets Microsoft from his own repository, and depending on what and how it was installed, the device itself will work normally or with failures. Of course, the chance of errors when installing software is low, but still exists, and it increases with a manual attempt to install an inappropriate driver or use the program to automatically update the drivers. Next, we will analyze several options for how to fix the software failure.
Reinstalling the keyboard driver
First try simply reinstalling the software is an easy and efficient option.
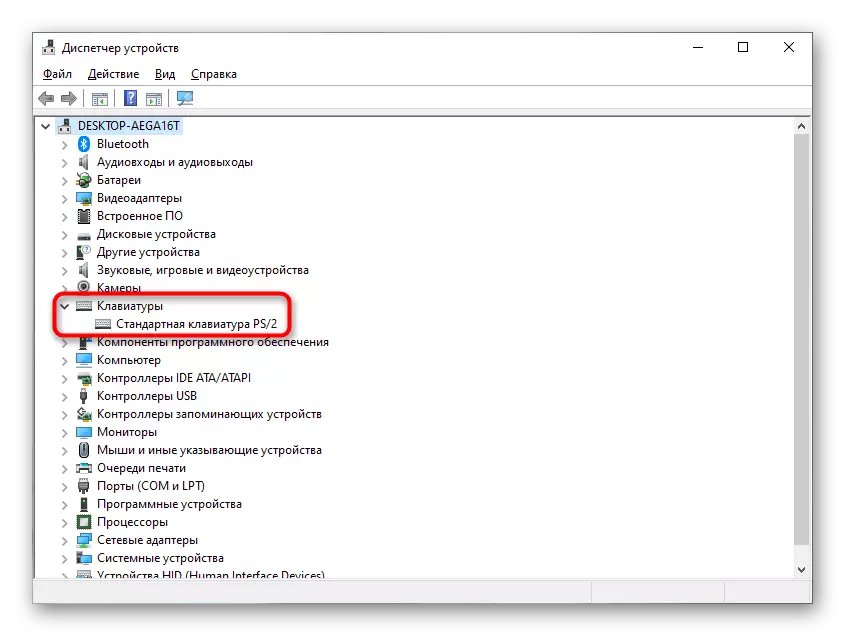
- Right-click on the Start Context menu and go to Device Manager.
- Expand the keyboard block - there must be no warning signs, since such problems reinstalling does not always correct, it is worth it to take into account. So, press PCM on the "Standard Keyboard PS / 2" line.
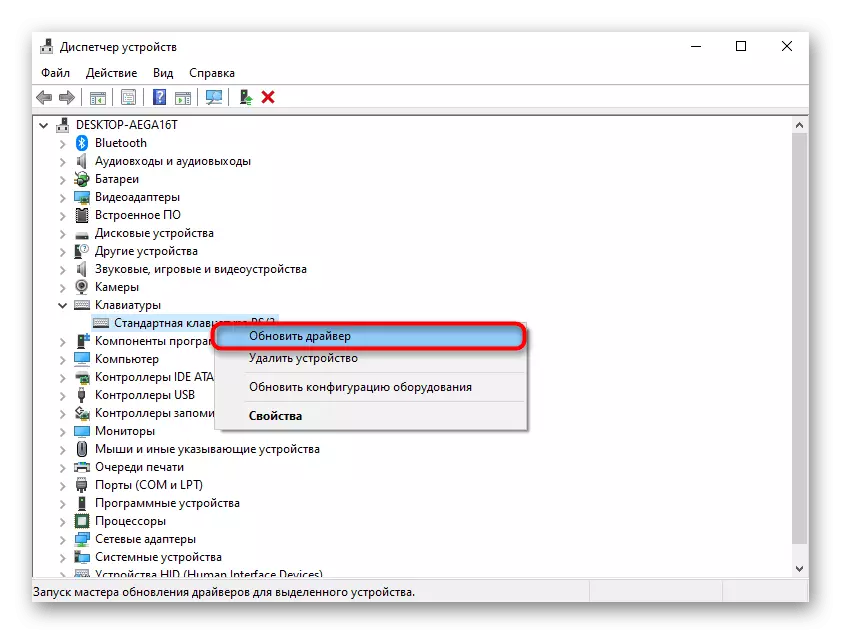
- In the context menu, you need an "Update Driver" item.
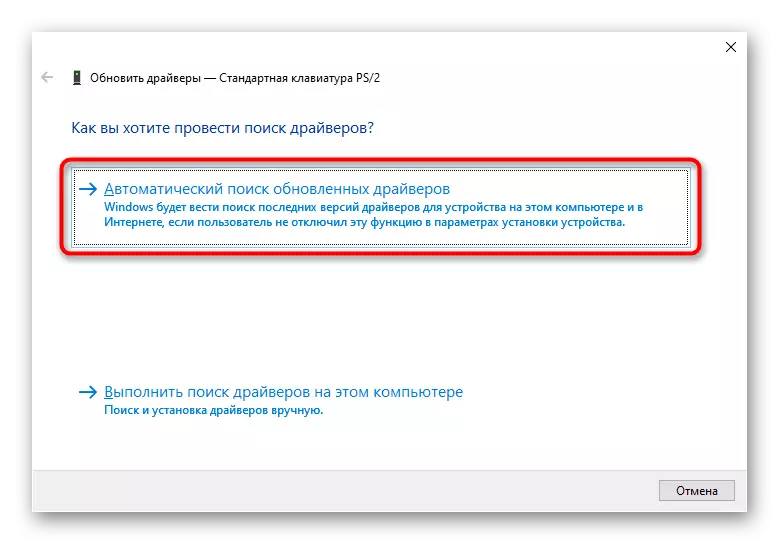
- A window will open in which use "Automatic search for updated drivers".
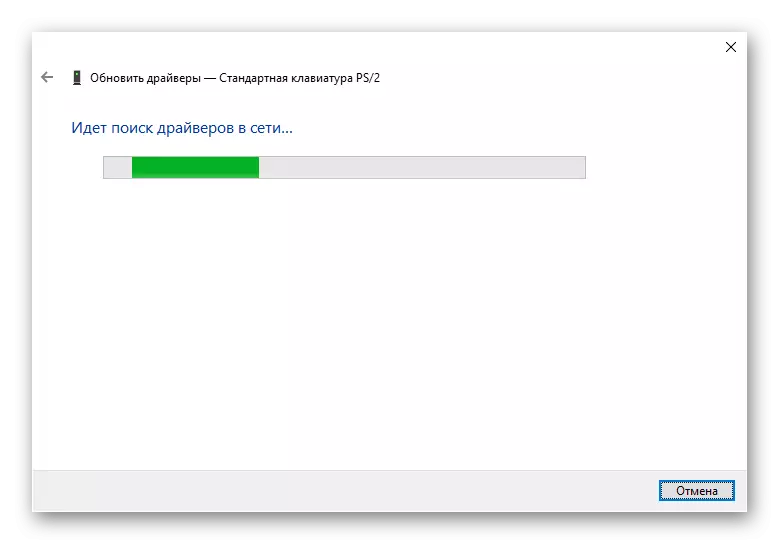
- After a short verification, information will be displayed or about the installation of a newer version of software will be installed, or the driver does not need update. Most likely, it will be a second version of the development of events, since in most cases the modern versions of Windows install updates automatically, and those, in turn, are extremely rare for the keyboard.
- If you have been commissioned in an automatic update, try making a manual update or reinstalling. To do this, call the driver update again, but this time you select the option "Find drivers on this computer".
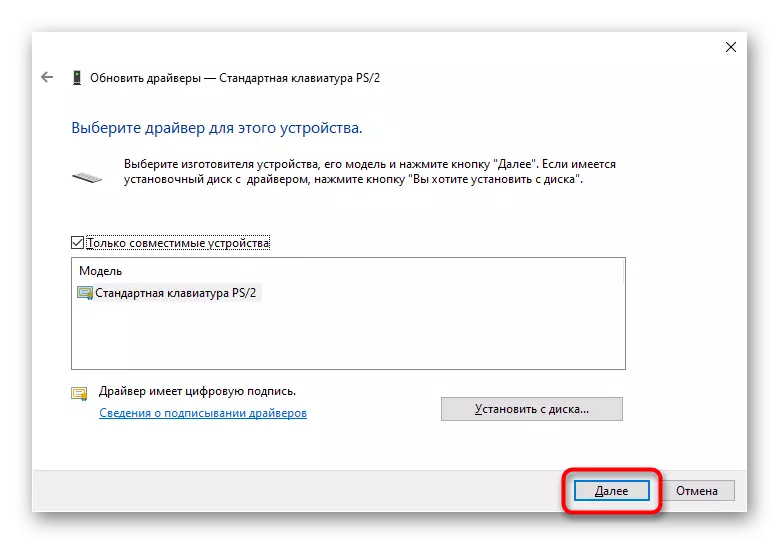
- Click on the "Find driver from the list of available drivers on the computer".
- Only one option should be displayed in the list, and it will be selected automatically. If there are several of them, select the option "Standard Keyboard PS / 2" and proceed "Next".
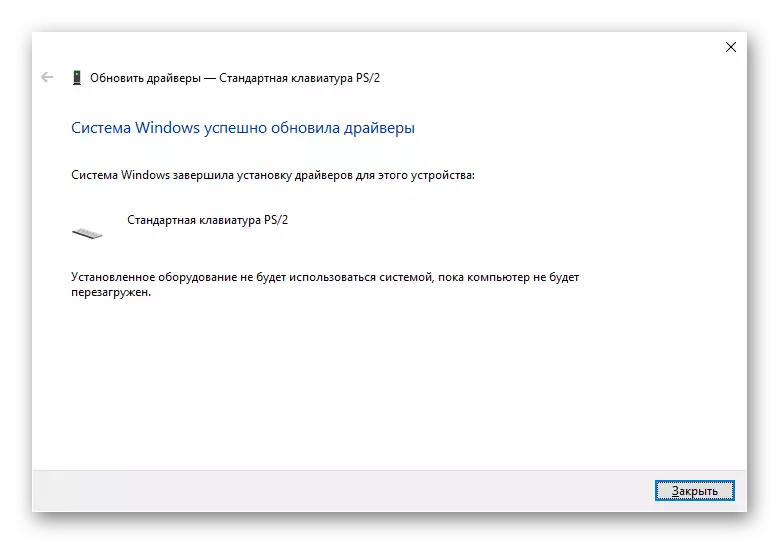
- A short installation will occur, based on which the driver must be installed / updated. All changes will be applied only after rebooting, as stated in the window itself.


Delete keypad driver
Some users helps to pre-delete the driver, after which it is already necessary to return to the previous section of the article and perform the automatic installation of the driver (but most likely it will make Windows when turned on).
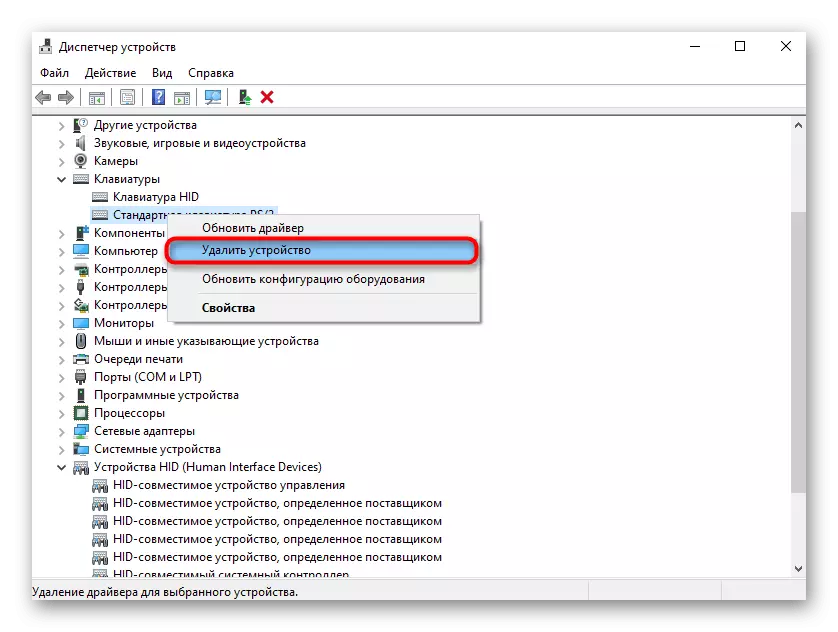
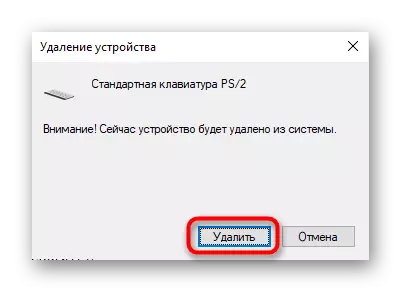
- To uninstall, you need in the same section of the task manager. Select the "Delete Driver" item.
- In a new window, confirm your action, then restart the device, open the Device Manager again and go to the keyboard driver update.
Installing the chipset driver
There is a low probability that the keyboard does not work because of the driver of another laptop component, usually chipset. In a situation where it fails to restore its performance, try refreshing the component in the mentioned. To do this, you will need to use the official site.
Go to the official site Acer
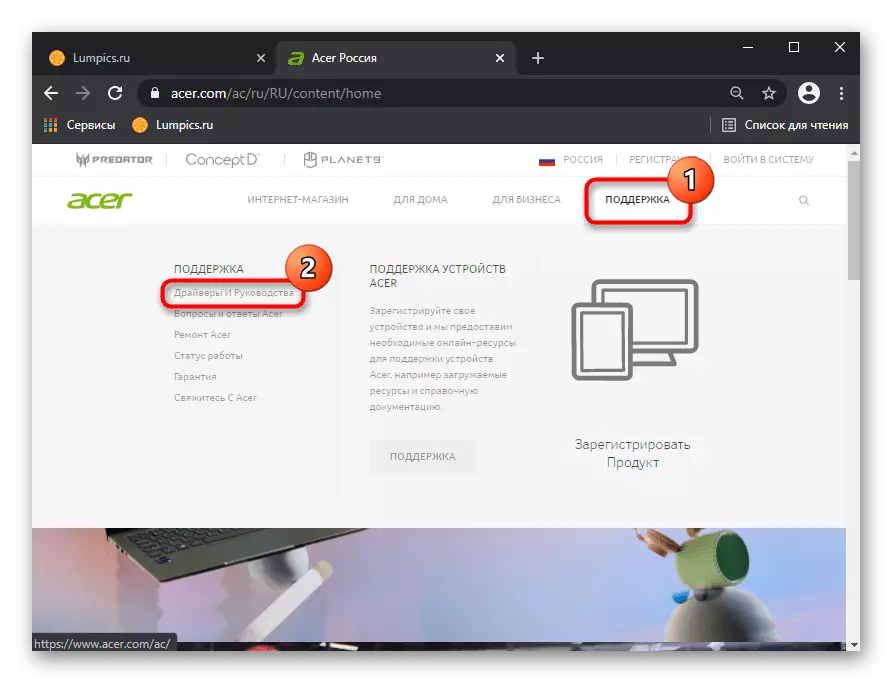
- Click on the link above, on the page click on "Support" and from the drop-down menu, go to "Drivers and Manuals".
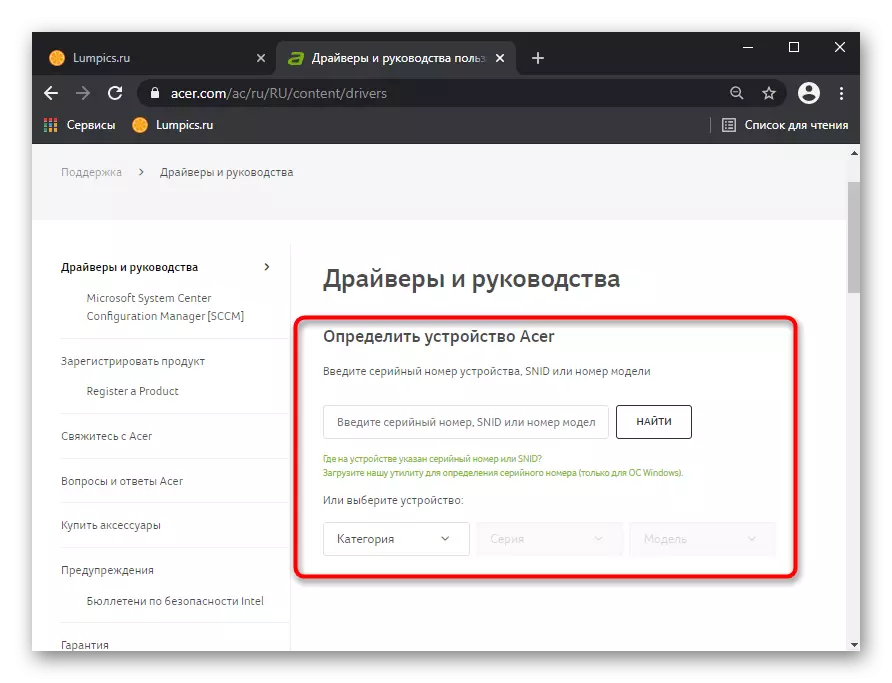
- Specify the laptop model by any of the proposed methods. If you do not know her, use our separate item to help determine this information.
Read more: How to find out the name of your laptop
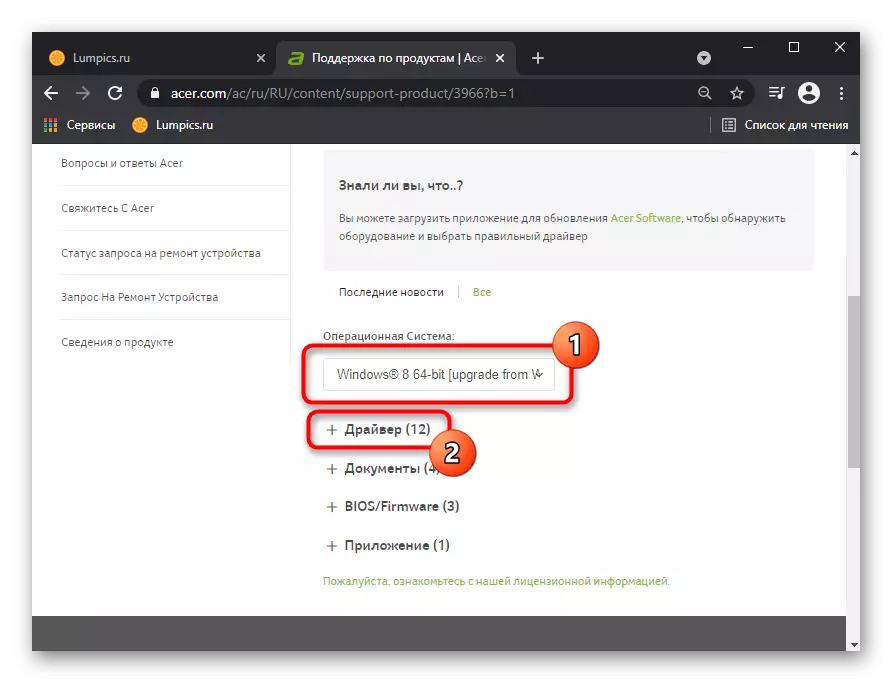
- Check if the operating system and discharge is chosen correctly, if necessary, replacing it to its. If your OS and / or its discharge is not in the list, it means that the support of the drivers is missing and this instruction will have to skip.
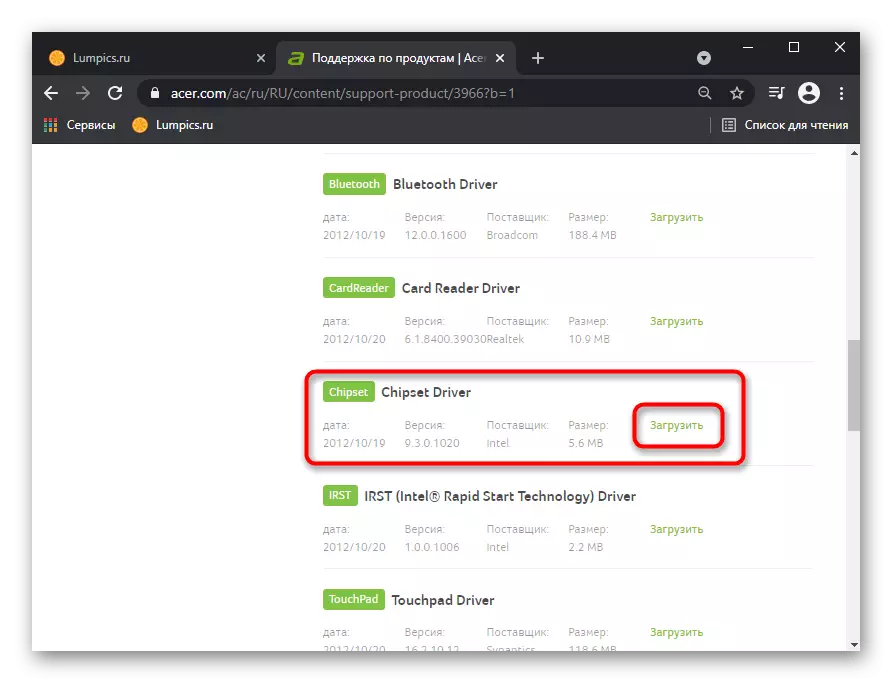
- Expand the "Drivers" list and find the category "Chipset". Click the Upload button to download the installation file.
- Install the driver as an ordinary program, restart the laptop and check if the problem has been fixed.
Method 6: Check the values of the UpperFilters parameter
The UpperFilters parameter, which is located in the register of the operating system, could be deleted or changed, usually (not always) due to the effects of viruses. The user needs to check the availability of this file and, if necessary, edit its value or re-posing entirely.
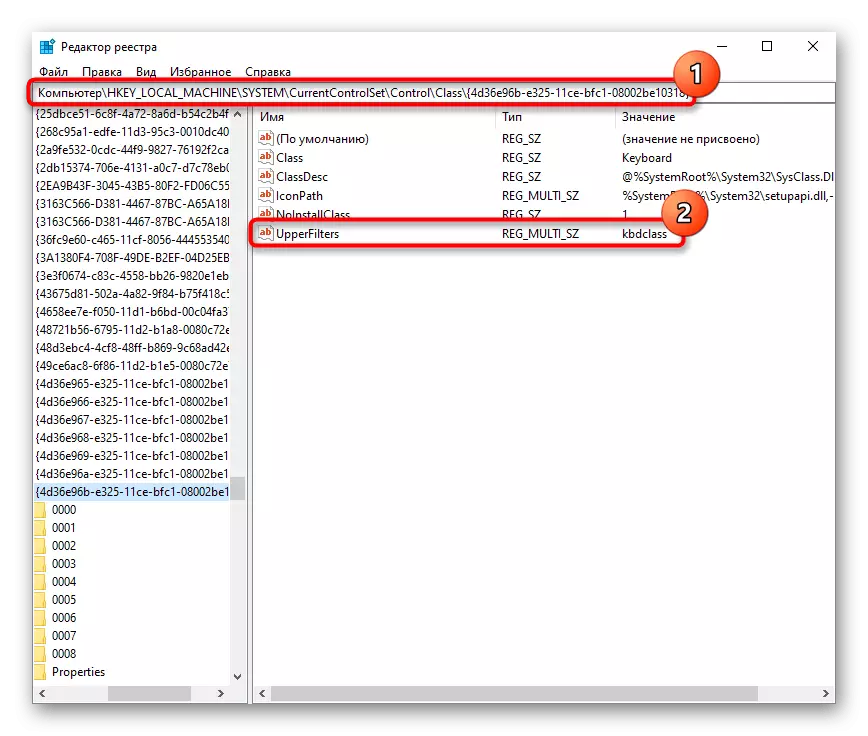
- Open the registry editor as it was shown in the method 3.
- Go along the path HKEY_LOCAL_MACHINE \ SYSTEM \ CURRENTCONROLSET \ CONTROL \ CURRENTCONTROLSET \ CONTROL \ CRASS \ {4D36E96B-E325-11CE-BFC1-08002BE10318} and see if the UpperFilters parameter is in the central part and the "KBDCLASS" value is assigned to it.
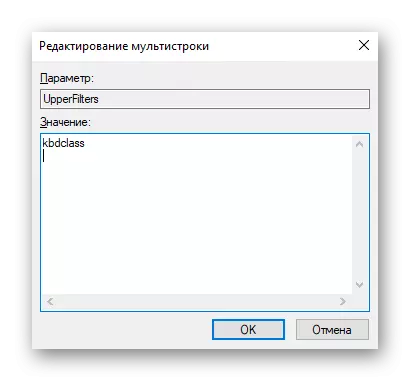
- If the value is different, double click on the LKM file and change it to the specified one.
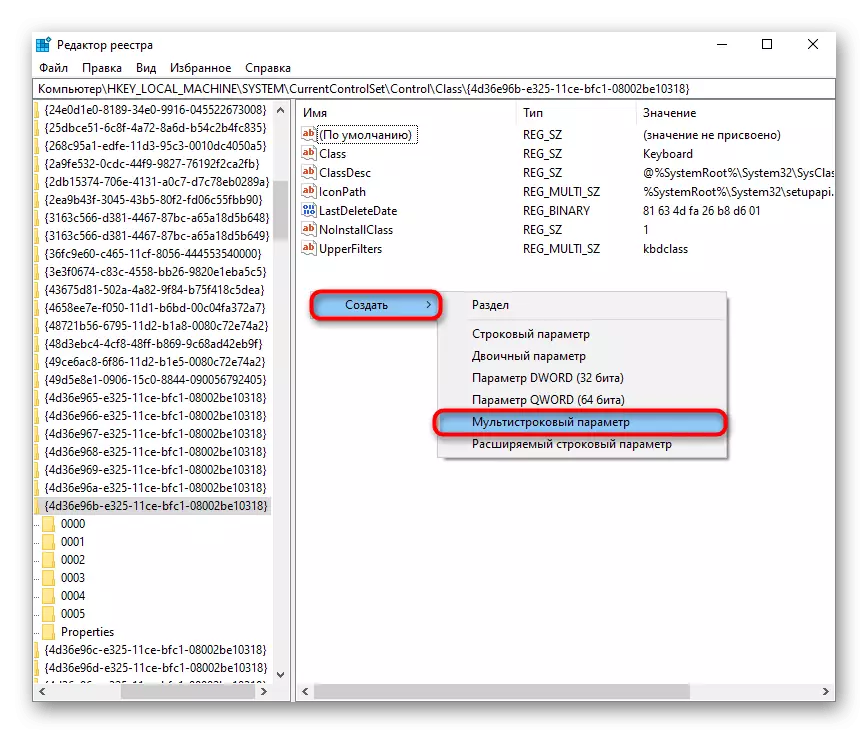
- And if there is no file itself, create it by clicking PCM> "Create"> "Multi-String Parameter". Rename it to the mentioned name, and then change the value as it was said above.
- Restart the device in order for the changes to take effect.
We will specify that the UpperFilters parameter may vary by itself from the owners of a certain (one of the old) versions of Kaspersky Anti-Virus. If you use this protector, after rebooting the laptop again go to the registry and check if the value of this parameter has not changed. When changing with "KBDCLASS" to another, update the antivirus to the latest version or for a while, turn it off by creating an appeal to the company's technical support that should give any personal recommendations.
Method 7: Windows update management
Remember whether the operating system has not been updated before the keyboard has ceased to operate. Sometimes the updates are "dozens" can also affect the normal functioning of the entire device - this is a well-known fact. You can spend a few days waiting for error corrections by developers, faster to cancel the installation of a problem update. Further instructions are applicable as you already understand, to Windows 10 (and to some extent to Windows 8.1), since Windows 7 and below are not updated for normal users for normal users.Rollback to the previous version
After installing a major update, Windows permits to roll back it for 10 days if it is established incorrectly or adversely affects the operation of the system. This feature is relevant only when switching from version to a version, for example from 2004 to 20H1.
It is recommended to install the latest version only after the release of a Patch from Microsoft, fixing all the "shoals" of the last update.
Important! You can roll back the update provided that you have not deleted the folder "Windows.old" manually.
- Call the option "Parameters" and click on the "Update and Security" tile.
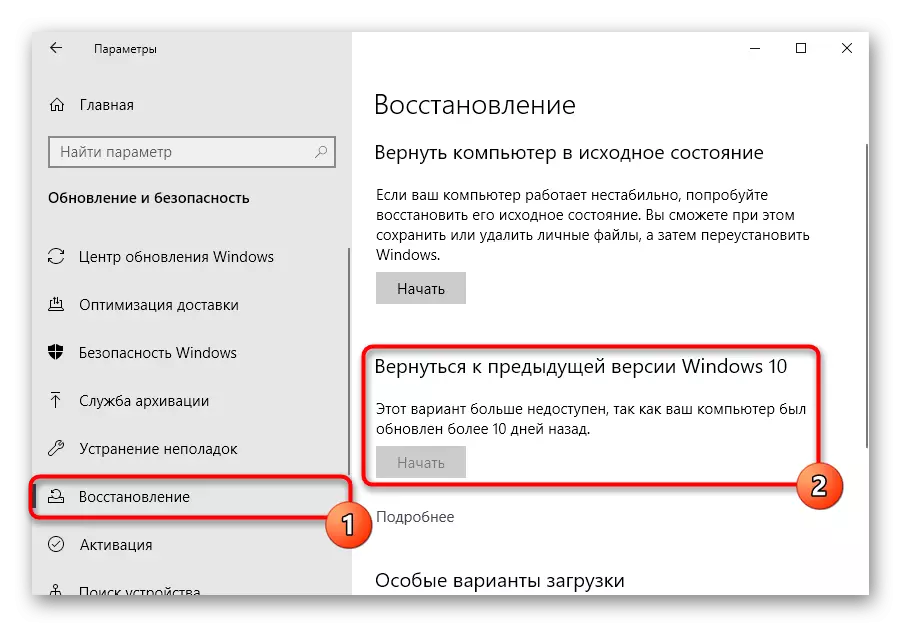
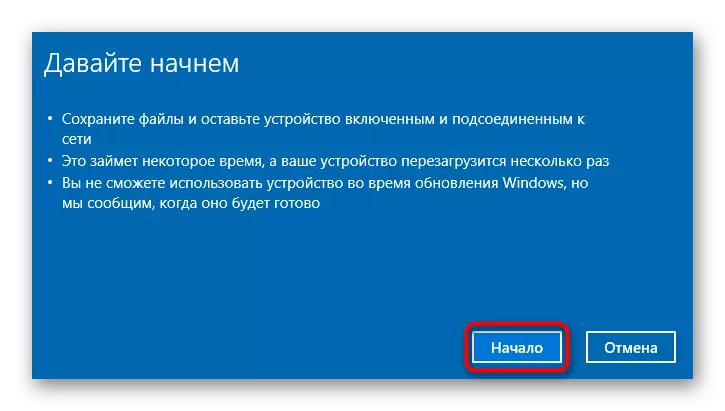
- On the left pane, find the "Restore" section, in which and go. On the right you will see the "Back to the previous version of Windows 10". The "Start" button will be active only if the two conditions listed are slightly higher.
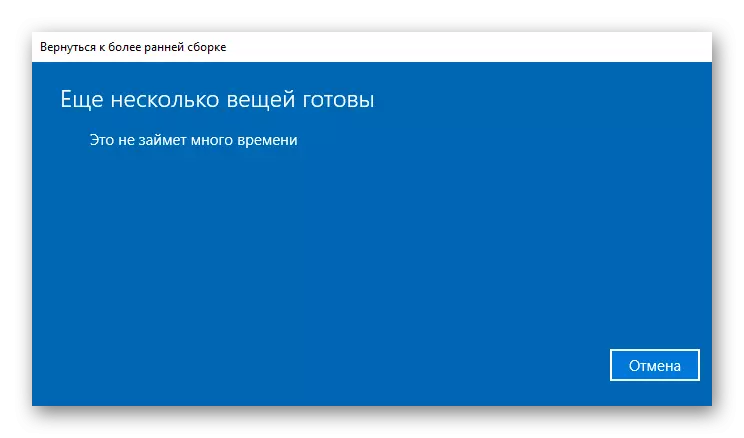
- After pressing, a non-losing preparation of the system for recovery will begin.
- Install a tick about a suitable reason - it will not be superfluous to give a brief description, because of which you want to return to the previous assembly. It can help developers faster to detect and correct the problem, especially if it is highly specialized (for example, relevant for some Acer devices).
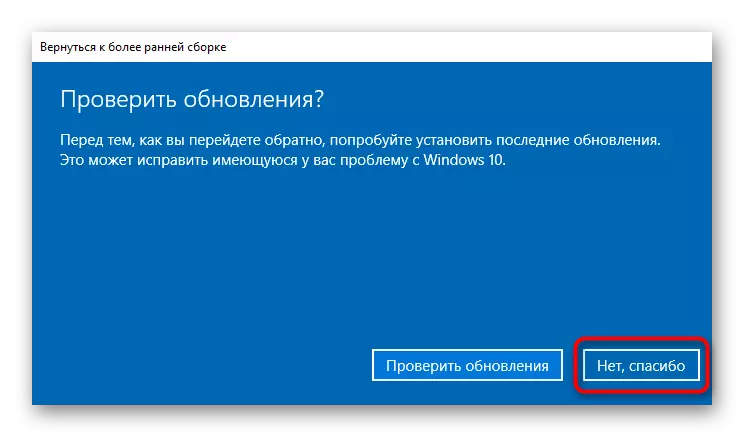
- The system will suggest checking the presence of the latest update, which in theory can help fix problems. Decide, you want to experience luck by setting a later update, or prefer to return to the workshop before the release of the next major update.
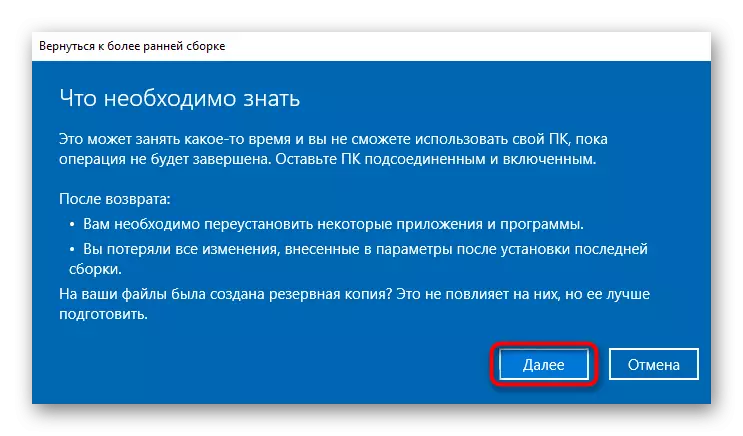
- Those who are going to return the "dozen" to last version, you first need to read what it will be changed in Windows files.
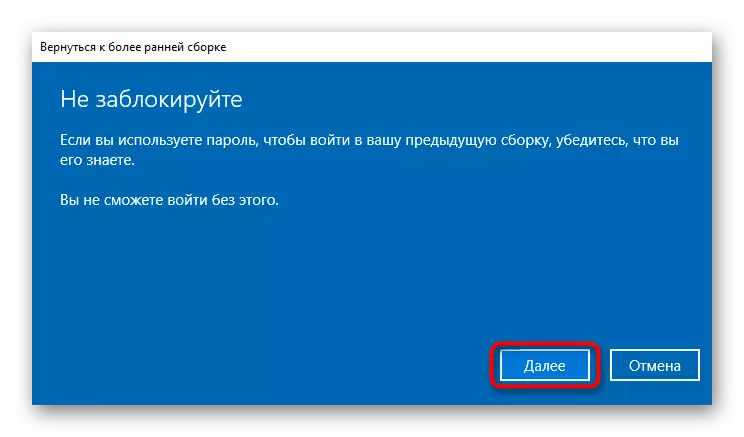
- In a new window, click on "Next" by reading another warning.
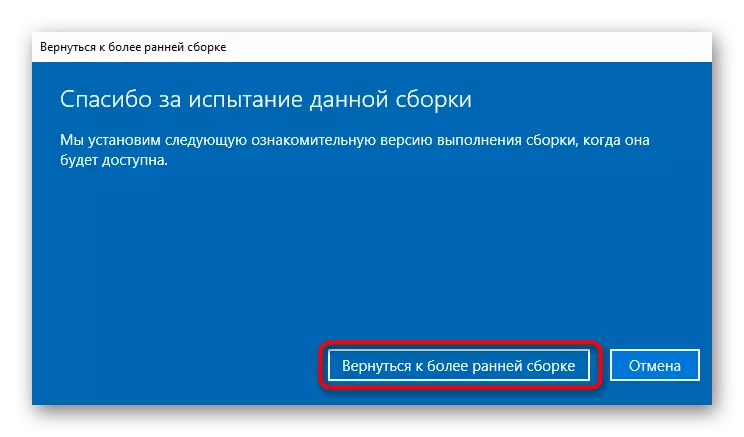
- Now it remains to confirm your desire to restore the corresponding button.
- A return procedure will be started to the previous version of Windows.


We clarify that the whole process can only be a little different - it depends on the "dozens" version.
Delete a small update
Small updates in the same way as large, can affect the performance of the components of the laptop. If in your case a minor update has been installed, better known as KB0000000 (where 0 is a set of numbers to identify the update), remove it.
Of course, only after removal it will become clear 100%, it or not it has adversely affected the computer. Even if the case is not in the update, run the manual search for updates (see the following instruction) and set it again.
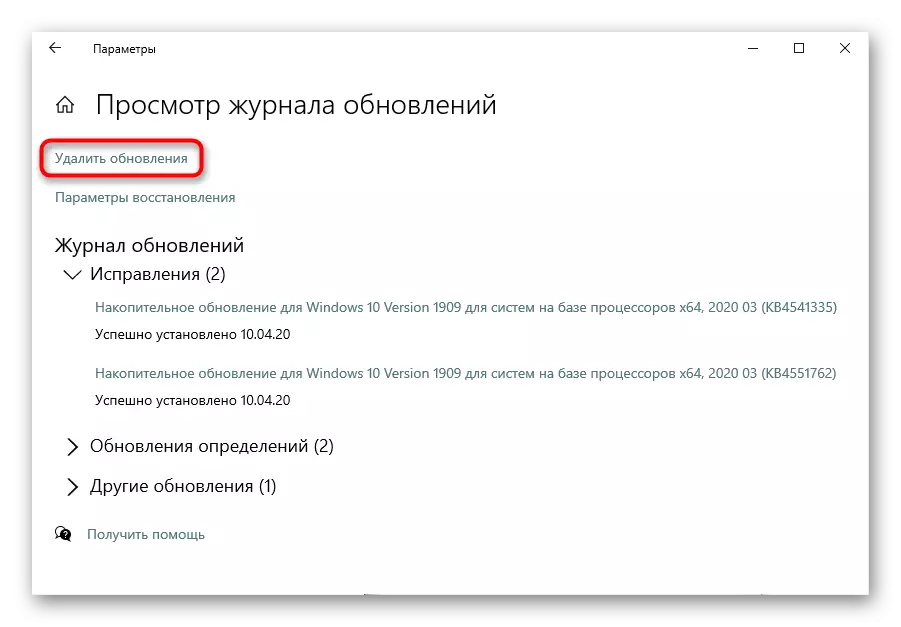
About how to delete a small update manually, you will learn from the method of 1 another of our article on the link below.
Read more: Delete updates in Windows 10
Windows 10 update
As opposed to rollbacks and manual deletions of updates, you can also install newer versions. Of course, almost always in the "dozen" service itself promptly checks the availability of updates, but sometimes it is required to run an independent search.
Usually, the need for such a search is due to the fact that the update search service has not yet approached the time for re-checking, and the developers have already been released by the corrective problem of the patch, or this service has been disabled on the computer or there are any problems with it .
Read more: Installing updates in Windows 10

Method 8: System Restore
A simple, but often efficient, rollback to the recovery point very often helps to correct the situation. Of course, only those users, on which the backup points are included on computers are enabled. If there are no, therefore, it will not roll back to what.
It is best to try to restore the system after the implementation of simple ways and before moving to complex.
Read more: Rollback to recovery point in Windows 10 / Windows 8 / Windows 7

Return to the initial state
There is a chance that no methods will help solve the problem and find its original source will fail. Exclude hardware cause can only help the system to the factory state. This is the most radical option, and it only fits for those users who have no information on a laptop or who is ready to copy them to a physical backup drive into a cloud.
The "dozen" user is allowed to save some personal files and application settings, but most of the information will be deleted. Before you have a rollback, a list of software that will be uninstalled is displayed. It is written about this in the article on the following link.
Read more: We restore Windows 10 to the original state
Part of the settings can be transferred back through synchronization from Microsoft - for this in advance, before recovery, log in in the profile on your computer so that all the basic system settings are copied to the cloud. After returning to the initial state, log in to your profile and wait until the synchronization is completed.
See also: Creating a new account in Windows 10
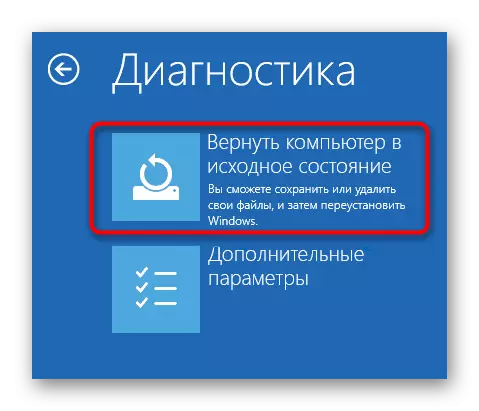
In Windows 7, the mentioned function is absent, so the only thing that can be done is to restore the OS to the original state, like from the store. In Windows 10, this feature is also present and differs from the fact that the system will be practically reinstalled. It is still problematic for users, the most different information retained the laptop for years. Therefore, if you are not ready to part with it and are not sure that the case in a faint software fail, we recommend trying all other options for the article and contact the service center - perhaps a reset will be avoided.
Read more: We restore to the factory settings of Windows 10 / Windows 7
Method 9: Check OS for viruses
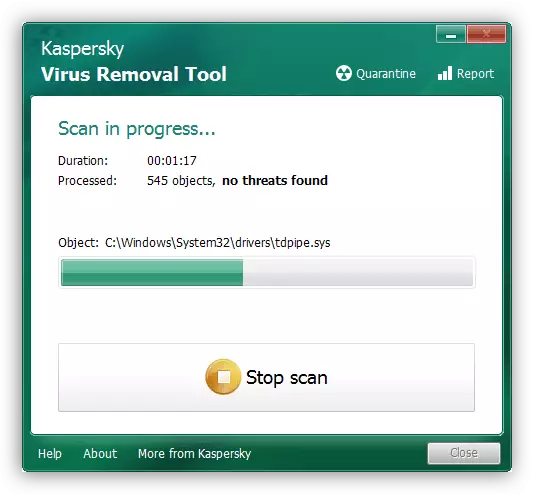
The effects of viruses can also lead to the fact that the keyboard will start working with failures or stop working at all. Corrected such a violation by removing malicious software. If you do not have an installed antivirus that you can scan the entire OS, or it does not find anything, we recommend checking the system to some other effective application that does not require installation. We offer more about such programs in our other article.
Read more: Fighting computer viruses
Method 10: Keyboard Repair
Before that, we talked exclusively about the program methods of solving the problem. However, if nothing brought the result, we can conclude that it's all about the hardware. Unfortunately, only a small percentage of users can independently correct damage to this type. If the old laptops are not so difficult to disassemble, and the keyboard can be bought on Avito sites, then the analysis of a new laptop with a monolithic case - the task is much harder. Especially this should not be done if the device is on warranty service.
What leads to the inoperability of the keyboard? The simplest thing is the loop, along which it is attached to the motherboard, moved, leaned or burned down. He could disconnect after vibrations, shaking, though not immediately. Burnt - if it was incorrectly laid, which most often happens after parsing and reverse laptop assembly. Burnt - for the same reasons, like any other device. In addition to the loop, part of the keyboard, which passes electricity, is usually after spilled on a liquid laptop; Contacts are oxidized and because of too wet indoor air.

If you are not sure what happened or understand what it happened during the wrong operation, but it is not possible to fix it, better contact the service center. Specialists will examine the laptop and prompt that you need to take. Those who still want to try to repair the input device independently, we recommend to read our article about the general laptop parsing rules, as well as find the instruction (best on YouTube) with a sequential analysis of the laptop from the line to which it belongs.
See also: Disassemble the laptop at home
Additional recommendations
In rare cases, something from this may be effective:
- Fully de-energize a laptop for 15-20 minutes. If his body assumes a battery extraction, do it. Disconnect the mouse, headphones and other connected technique. Hold the power button for about 30 seconds to reset the voltage residues in the motherboard condensers. After that, insert the battery back and turn on the laptop.
- Check if the keyboard in the "secure mode" works. Since it is loaded only by the component critical for the system, and all the user and not affecting the laptop work - no, there is a chance to find out if one of the installed programs on the keyboard affects. Provided that in "Safe Mode" all its keys work normally, you have to manually find the software that provokes a nuisance. It can be like a virus and something else - everything is purely individually.
See also: Safe mode in Windows 10 / Windows 8 / Windows 7
- Reset BIOS settings to factory. Of course, if the keyboard works in it.
See also: Resetting BIOS settings