
In this manual, step by step about how to split the computer or laptop disk on C and D using system and third-party software for these purposes. Make it relatively simply and the creation of the disk D will be for even the novice user. It can also be useful: how to increase the disk C due to disk D.
Note: To perform the following actions described, on the C disk (on the system of the hard disk) there should be enough space to highlight it "under the D disk", i.e. Select it more than freely, it will not work.
Creating a Disk D using the Windows Disk Utility
In all the latest versions of Windows, there is a built-in disk management utility, with which, including, you can divide the hard disk to the partitions and create a D disc.
To start the utility, press the Win + R keys (where the WIN - key with the OS emblem), enter the diskmgmt.msc and press ENTER, after a short time "disks" will be loaded. After that, follow these steps.
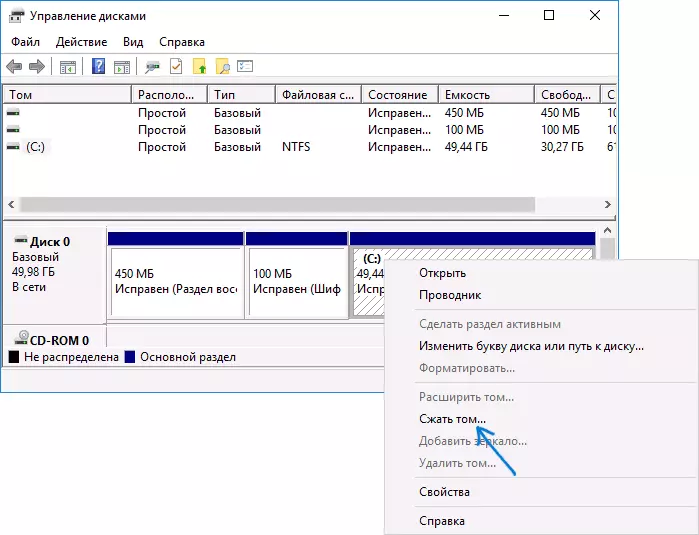
- At the bottom of the window, find the disk section corresponding to the C drive
- Click on it right-click and select "Compress Tom" in the context menu.
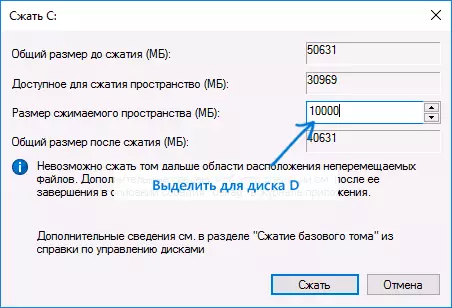
- After searching for the available space on the disk, in the "Size Size" field, specify the size of the D disc in the megabytes created (by default there will be a full size of the free disk space and it is better not to leave it - on the system section there should be enough free space on the system section. Work, otherwise, problems are possible as described in the article why the computer slows down). Click the "Compress" button.
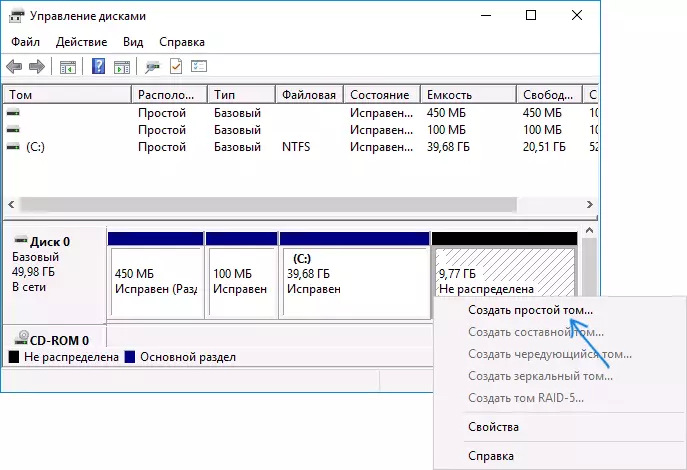
- After completing the compression, you will see the "right" from the disk with a new space, signed "not distributed." Click on it right-click and select "Create a Simple Tom".
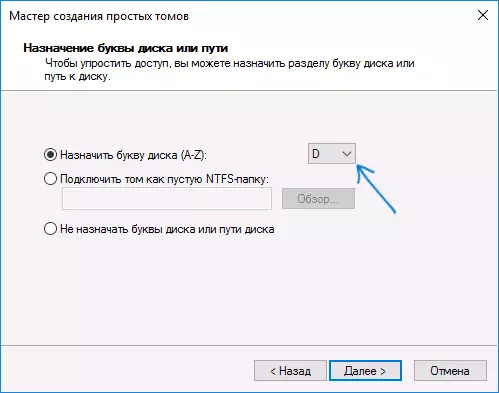
- In the opened wizard of creating simple volumes, it is enough just to press "Next". If the letter D is not occupied by other devices, then in the third step it will be proposed to appoint it for a new disk (otherwise - the following alphabetically).
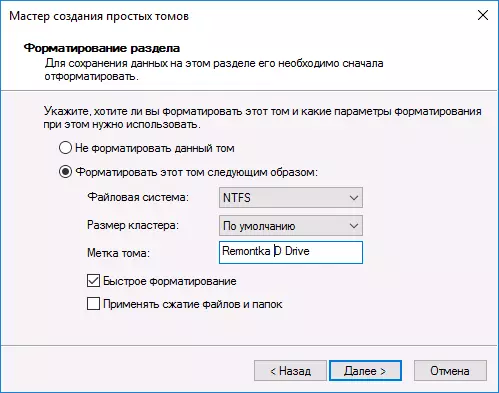
- At the formatting stage, you can set the desired TOM label (signature for disk D). The remaining parameters are usually not required to change. Click "Next" and then - "Finish".
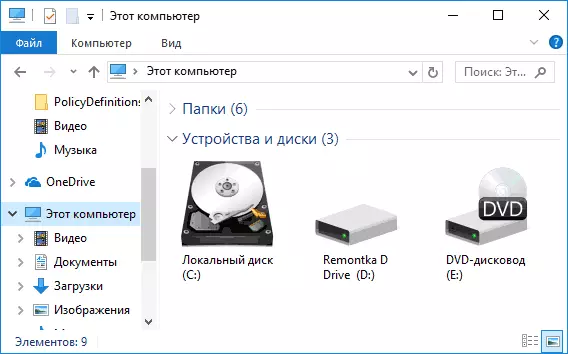
- The D disc will be created, formatted, will appear in "Drive Management" and Windows 10, 8 or Windows Explorer, the disk management utility can be closed.
Note: If at the 3rd step size of the available space is displayed incorrectly, i.e. The available size is much smaller than it is available on the disk, it says that the disparaging disk is interfere with the windy windows. Solution In this case: Temporarily disable the paging file, hibernation and restart the computer. If these steps did not help, then additionally perform disk defragmentation.
How to split the disk on C and D on the command line
All that was described above can be performed not only using the "Windows drive" graphical interface, but also on the command line using the following steps:
- Run the command prompt on the administrator name and use the following commands in order.
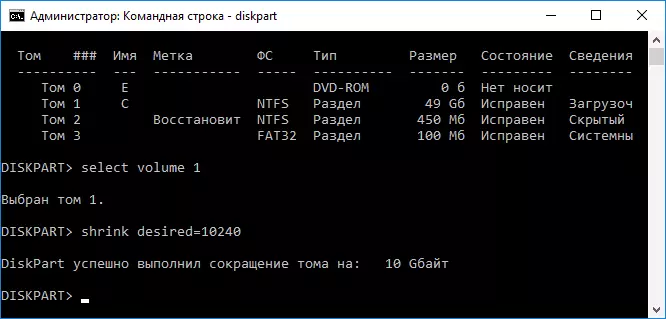
- diskpart.
- List Volume (as a result of the execution of this command, pay attention to the volume number corresponding to your C disc, which will compress. Next - n).
- SELECT VOLUME N.
- SHRINK desired = size (where size is the size of the disc D disc in megabytes. 10240 MB = 10 GB)
- CREATE PARTITION PRIMARY.
- Format FS = NTFS Quick
- Assign Letter = D (here d - the desired letter of the disk, it should be free)
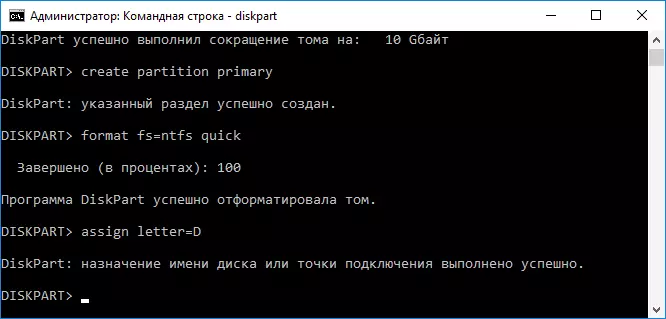
- EXIT.
This will be closed by the command line, and the new Disk D (or under another letter) will appear in Windows Explorer.
Using a free program Aomei Partition Assistant Standard
There are many free programs that allow you to break the hard drive for two (or more). As an example, I will show how to create a D disc in a free program in Russian Aomei Partition Assistant Standard.
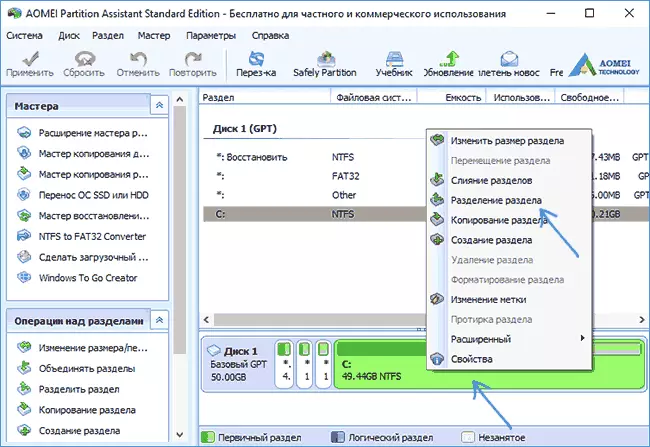
- After starting the program, right-click on the section corresponding to your C drive and select the section "Section Section" menu.
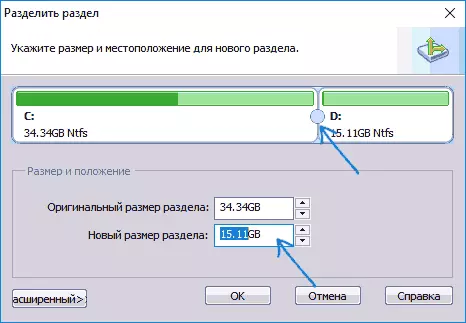
- Specify the sizes for the C disc and disk D and press OK.
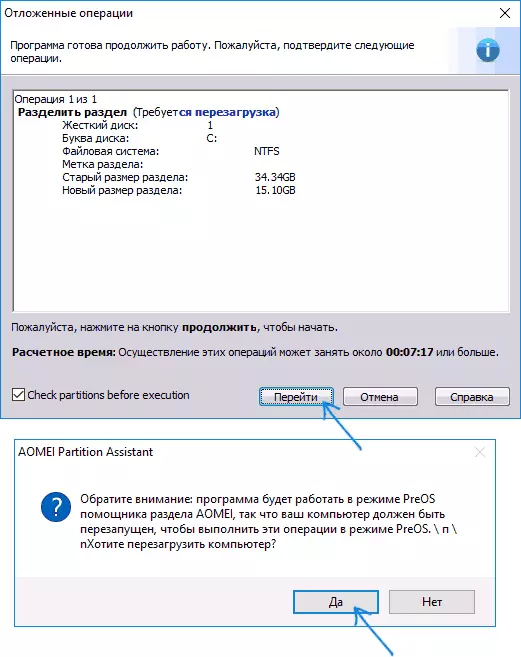
- Click "Apply" to the left at the top of the main program window and "Go" in the next window and confirm the reboot of the computer or laptop to perform the operation.
- After rebooting, which can take more than usual (do not turn off the computer, provide power to the laptop).
- After the disk separation process, Windows will again boot, but the conductor will already have a D disk, in addition to the system partition.
You can download the free Aomei Partition Assistant Standard from the official site http://www.disk-partition.com/free-partition-manager.html (site in English, but there is a Russian interface language in the program, selected when installed).
I complete this. The instruction is designed for those cases when the system is already installed. But you can create a separate disk section and during Windows installation to a computer, see how to split the disk in Windows 10, 8 and Windows 7 (last method).