

This filter ( Liquify ) Contribors to the number of the most frequently used tools in Photoshop software. It makes it possible to change points / pixels of photography without changing the qualitative characteristics of the picture. Many people slightly scares the use of such a filter, the other category of users is working with it. Not as needed.
At the moment you will read the details of the use of this tool and then also be able to use it for its intended purpose.
We deal with the purpose of the plastic filter tool
Plastic - Excellent means and strong tools for all who use the photoshop program, because with it you can make the usual retouching images and even complex work using a large spectrum effects.
The filter can move, make a coup and move, swing and shrink the pixels of absolutely all photos. As part of this lesson, we will get acquainted with the basic principles of the work of this important tool. Type a large number of photos that drag your skills, try to repeat what we have written. Forward!
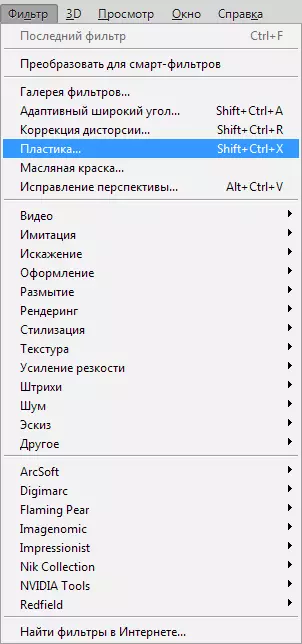
The filter can be used when modified with any layer, however, it will not be applied to our chagrin with the so-called smart objects. Find it very easy to select Filter> Liquify. (Filter plastic ), or climbing SHIFT + CTRL + X on keyboard.
As soon as this filter appeared, you can see the window that includes the following parts:
1. A set of the toolkit that is located on the left side of the monitor. There are main functions there.
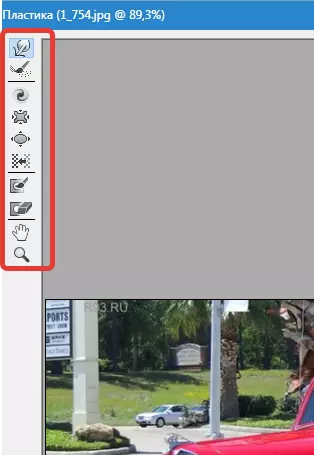
2. The picture that will be subjected to ours with you.

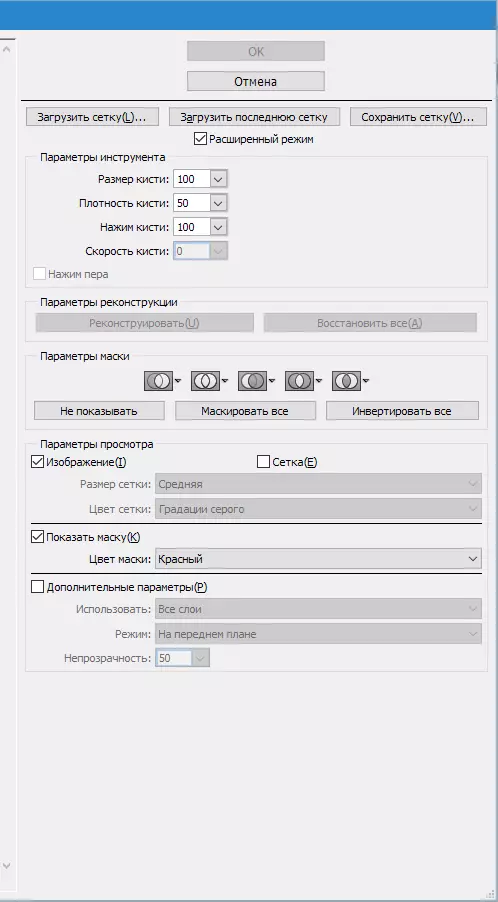
3. Settings where it is possible to change the characteristics of the tassels, apply masks, etc. Each set of such settings allows you to control the functions of the toolkit in the active state. With their characteristics, we will get to know a little later.
Tools
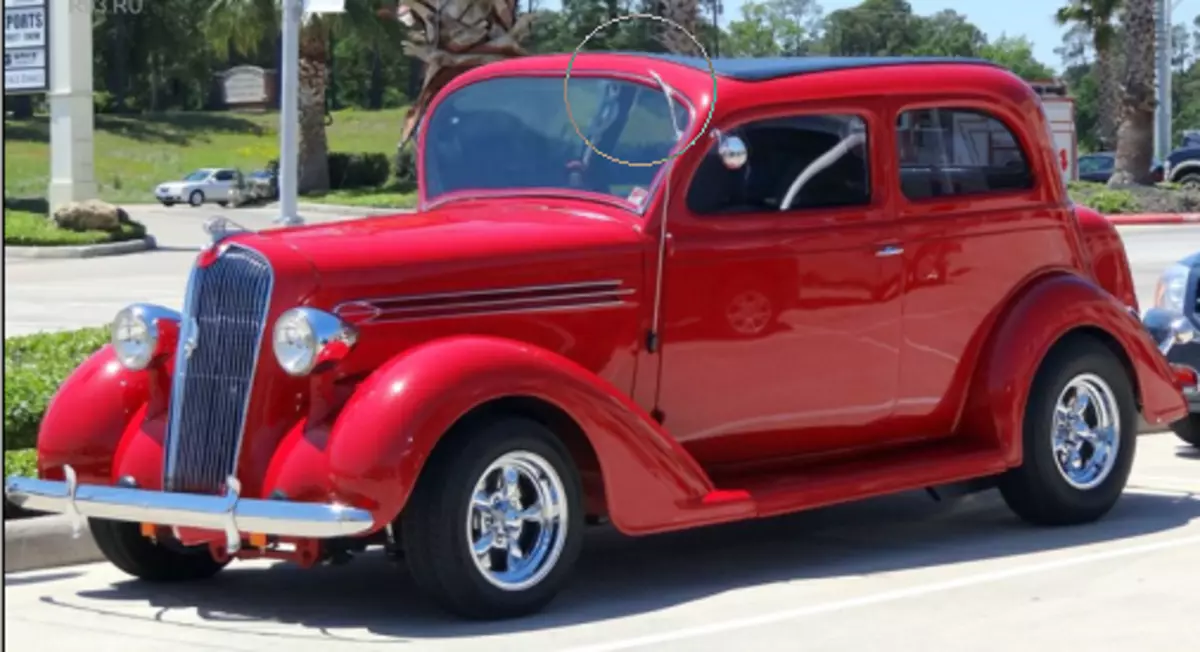
Deformation (Forward Warp Tool (W))

This toolkit refers to the most frequently used filters. The deformation can move the picture points in that direction where you move the tassel. You also have the ability to manage the number of moved pictures of photography, and changing the characteristics.
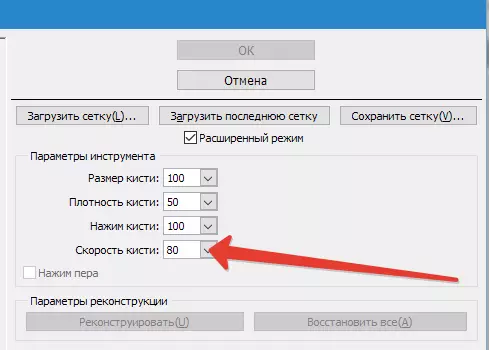
Brush size (Brush Size) In subnabilities of the tassels in the right part of our panel. The more characteristics and thickness of the brush, the larger number of points / pixels of the photo will make it possible.
Brush density (Brush density)
The density level of the brush is monitored by the process of smoothing the effect from the central part to the edges when using this toolkit. According to the original settings, the deformation is usually pronounced in the center of the object and slightly smaller on the reprocess, but you yourself have the ability to change this indicator from zero to one hundred. The level of it is more, it will be a great effect of a tassel on the edges of the image.
Pressure Press (Brush Pressure)
This tool can control the speed, with the help of which it is a deformation, as soon as the brush itself approaches our picture. The indicator can be set from zero to one hundred. If we take a low indicator, the process itself will go to a more slow down pace.

Twirl Tool (C))

This filter makes the rotation of the drawing points clockwise when we press the tassel to the drawing itself or we are changing the location of the brush itself.
In order to take a pixel twisting on the contrary, in another direction, you need to press the button Alt. When using this filter. You can make settings in such a way that ( Brush Rate. ) And the mouse will not participate in these manipulatsi. The higher the level of this indicator, the speed of this effect increases.
Wrinkling Toolkit (Pucker Tool (S)) and Bloat Tool (B))

Filter Swimming Carries out the movement of points to the central part of the image to which we have brought a brush, and the toolkit blink on the contrary from the central part to the edges. They are very necessary for work if you want to resize any objects.

Toolkit Displacement Pixels (Push Tool (O)) vertical
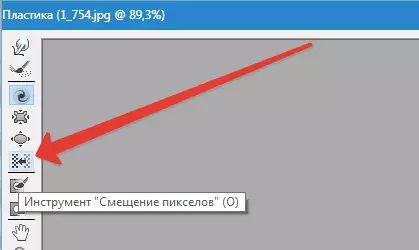
This filter moves the points to the left side when you tie into the upper area and vice versa to the right side, as sending down.
You also have the opportunity to make the taste of the desired picture clockwise clockwise to change and increase its dimensions, and in the other way, if you wish to make a decrease. To send offshift to the other side, just clamp the button Alt. When using this toolkit.
Toolkit Displacement Pixels (Push Tool (O)) horizontally
You can move the point / pixels in the top area of the tassel and starting on the left side moving to the right, as well as in the lower part when moving this brush, on the contrary, on the right side.
Tools to freeze (Freeze Mask) and defrost (Thaw Mask)
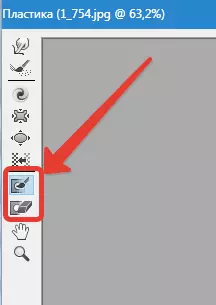
You also have the opportunity to protect some parts of the photo from making adjustments to them when using certain filters. For these purposes it serves Freeze Mask ). Pay attention to this filter and freeze those parts of the figure you want to not be adjusted during the edit process.
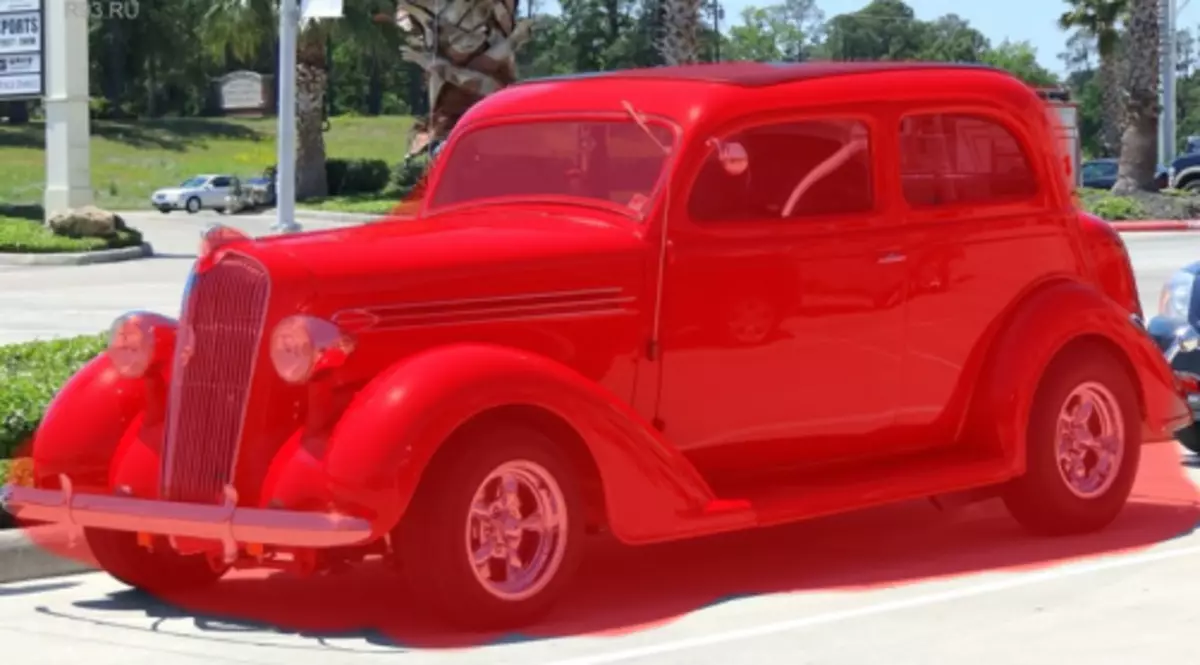
In their work tools Thaw Mask) Looks like an ordinary eraser. He simply removes the frozen parts of the picture. In such tools, since everywhere in Photoshop, you have the right to set up the thickness of the tassel, its density level and the forces of the press. After we have masked the necessary parts of the drawing (they will become red), this part will not be subject to adjustments when using various filters and effects.
Mask Options (Mask Options)
Mask Options (Mask Options) Plastics allows you to select Settings Selection (Transparency), Transparency, Layer Mask (Layer Mask) Layer (Layer Mask). Making a variety of masks in the photo.
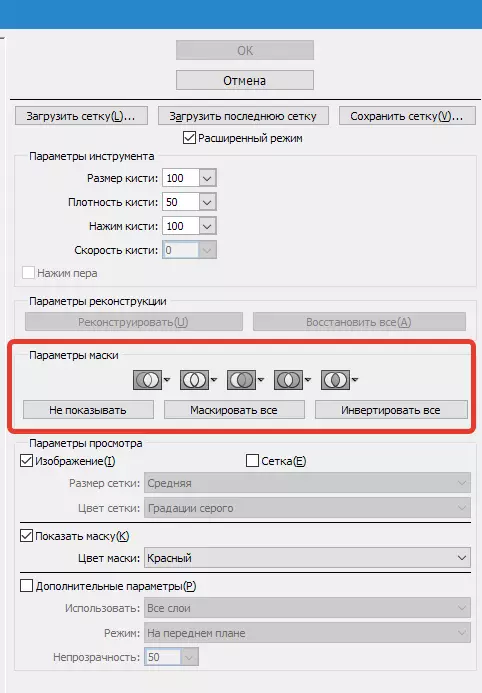
You can also adjust ready-made masks, taking into the settings that regulate their interaction on each other. Look at the screenshots and look at the principle of their work.
We restore the whole picture
After we changed your drawing, we can come in handy to return some parts to the previous level, as it was before adjustment. The easiest method is easy to use a key. Restore all (restore all) which is in part Reconstruction Options (Reconstruct Options).
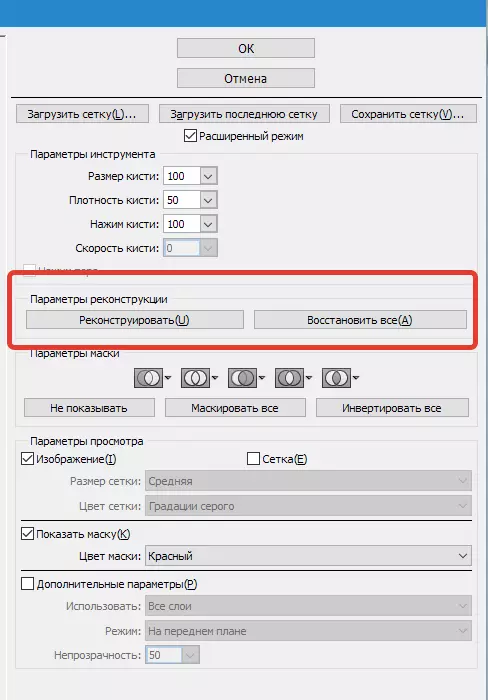
Reconstruct Tool and Reconstruction Options (Reconstruct Options)
Tools Reconstruct Tool) gives us the opportunity to apply a brush to restore the desired parts of our modified pattern.
In the right side of the window Plastics Placed area Reconstruction Options (Reconstruct Options).
It can be noted in it RECONSTRUCT MODE To return to the primordial view of the picture, where the mode is already selected Revert Thus that the image recovery will occur.
There are other ways with their details, how to restore our image, it all depends on the location of the corrected part and the part where the freezing was used. These ways deserve their portion of our attention, but they are already harder to use, so we will make a whole lesson in the future to work with them.
Reconstruct automatically
Into parts Reconstruction Options (Reconstruct Options) There is a key Reconstruct . Just closing it, we have the ability to automatically return the picture to the primordial view, applying any of the ways to recover from the proposed list for such purposes.

Grid and mask
In part View Options There is a setup SHOW MESH) showing or hiding the grid in a two-dimensional image. You also have the right to change the dimensions of this grid, as well as adjust its color gamut.
In the same option there is a function SHOW MESH) With which it is possible to enable or disabling the mask itself or adjusting its color value.
Any picture that has been changed and created using the above toolkit can be left in the form of a mesh. For such purposes, click the key Save Mesh At the top of the screen. As soon as our grid is saved, it will be possible to open it and use again to another figure, for data of manipulations, just clamp the key Load Mesh.

Visibility background
In addition to the layer itself, on which you act as plastic, there is an opportunity to make the visibility of the background mode itself, i.e. other parts of our facility.
In the object where there are a lot of layers, stop your choice on the layer where you want to make your adjustments. In mode View Options Choose Advanced Settings (Show Backdrop) Now we are visible to other parts of the object.

Additional viewing options
You also have the opportunity to choose different parts of the document you wish to see as a background image (apply Use (Use) ). Functions are also on the panel Mode (Mode).

Instead of output
Plastic right - one of the best filtration tools for working in the Photoshop program. This article should be to you as never by the way.