

Signature is something that can provide a unique view of any text document, whether business documentation or artistic story. Among the rich functionality of the Microsoft Word program, the capabilities of the signature is also available, and the latter can be both handwritten and printed.
Lesson: How to change the name of the author of the document
In this article, we will tell about all possible methods to sign signature in Word, as well as how to prepare for it a specially designated place in the document.
Creating a handwritten signature
In order to add a handwritten signature to the document, first it must be created. To do this, you will need a white sheet of paper, handle and scanner connected to a computer and configured.Inserting handwritten signature
1. Take a handle and lay on the paper sheet.
2. Scan the page with your signature using the scanner and save it to a computer in one of the common graphic formats (JPG, BMP, PNG).

Note: If you have difficulty using a scanner, refer to the manual attached to it or visit the manufacturer's website, where you can also find detailed instructions for setting up and using equipment.
- Advice: If you do not have a scanner, the camera of a smartphone or tablet can also be replaced, but in this case, you may have to try to carefully try to make a page with the signature in the photo that has snow-white and not stand out in comparison with the Word electronic document page.
3. Add an image with a document signature. If you do not know how to do this, use our instructions.
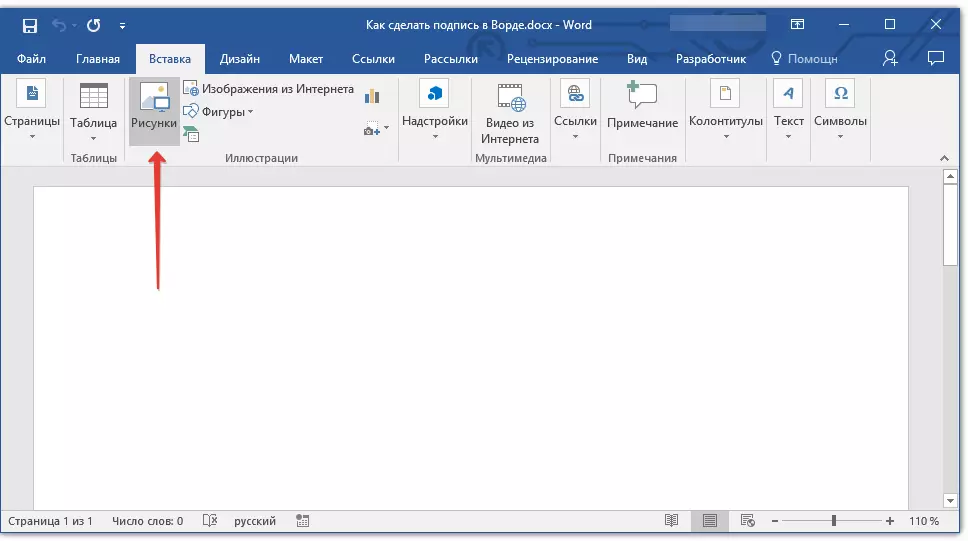
Lesson: Insert images in Word
4. Most likely, the scanned image must be cut, leaving only the area in which the signature is located. Also, you can resize the image. Our instruction will help you with this.
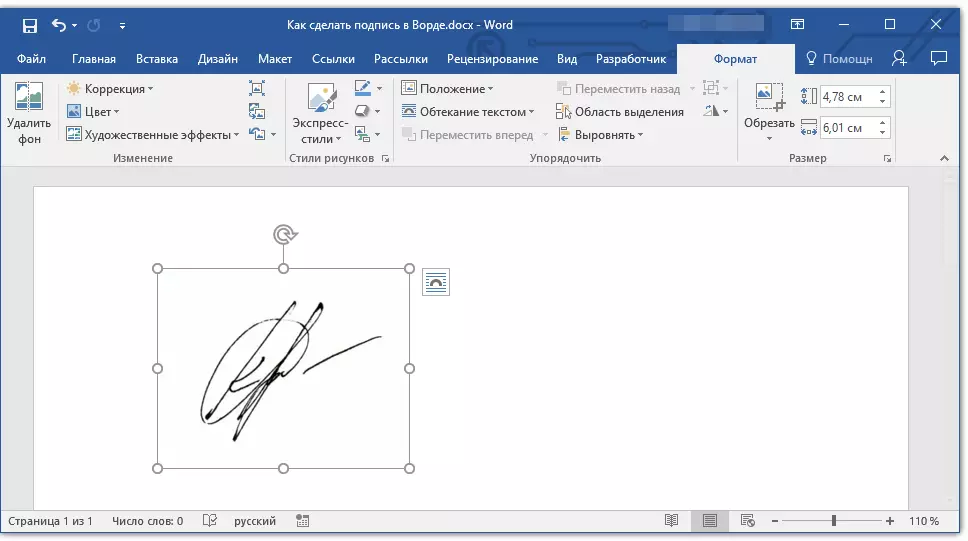
Lesson: How to trim the picture in the word
5. Move the scanned, cropped and the sizes given to the required sizes in the desired place of the document.

If you need to add machine-written text to handwritten signature, read the following section of this article.
Adding text to signature
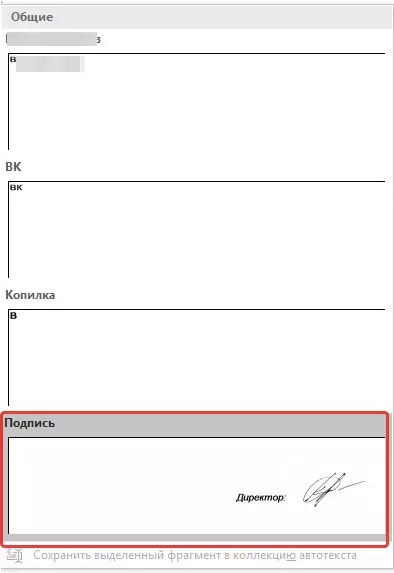
Quite often in the documents in which you need to sign, in addition to the signature itself, you need to specify the position, contact details or other information. To do this, you need to save text information along with a scanned signature as an autothext.
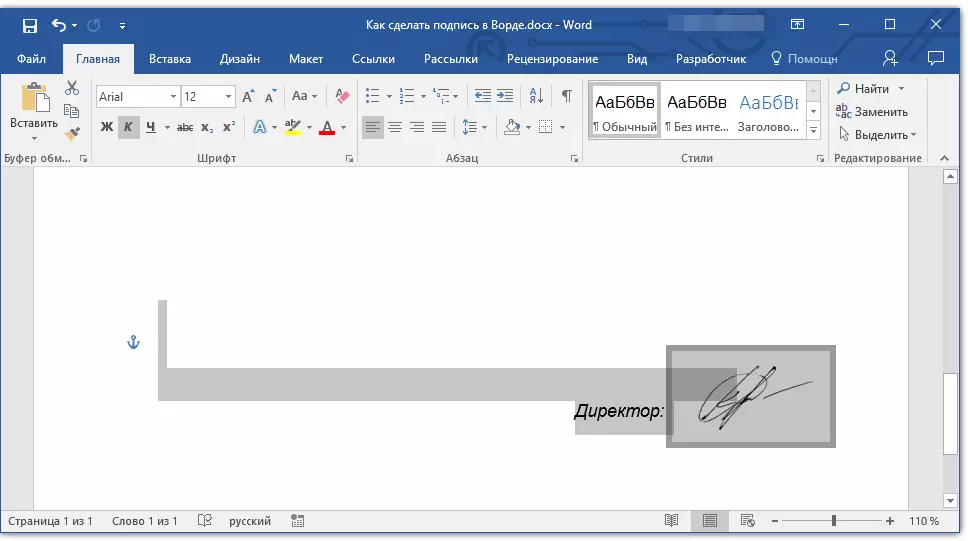
1. Under the inserted image or to the left, enter the desired text.

2. Using the mouse, highlight the text entered together with the image of the signature.
3. Go to the tab "Insert" and click "Express blocks" located in the group "Text".
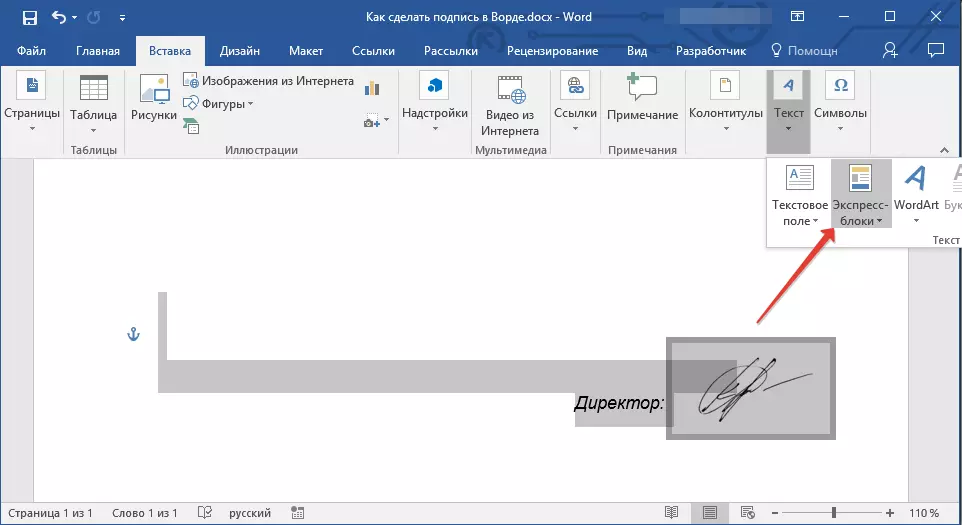
4. In the drop-down menu, select item "Save the selected fragment to the collection of express blocks".
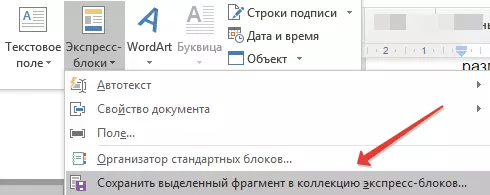
5. In the dialog that opens, enter the necessary information:
- Name;
- Collection - select item "AUTOTEXT".
- Leave the remaining items unchanged.
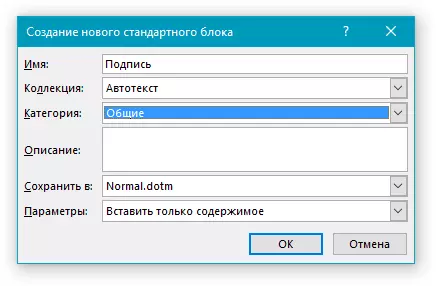
6. Tap "OK" To close the dialog box.
7. The handwritten signature you created with the accompanying text will be saved as an autotex that is ready for further use and insertion into the document.
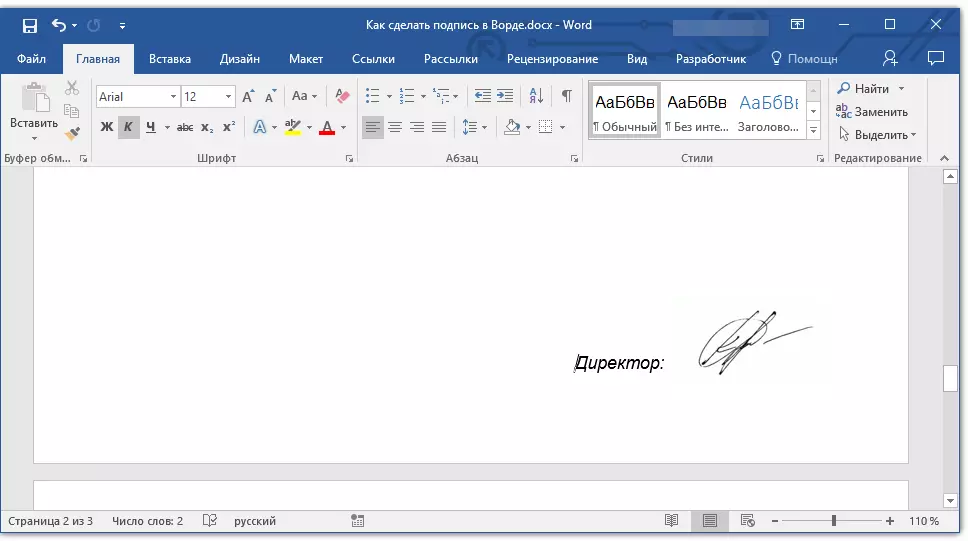
Inserting handwritten signature with typewritten text
To insert the handwritten signature created by you, you must open and add the express block you saved and add to the document. "AUTOTEXT".
1. Click in the place of the document where the signature must be, and go to the tab "Insert".
2. Click the button "Express blocks".
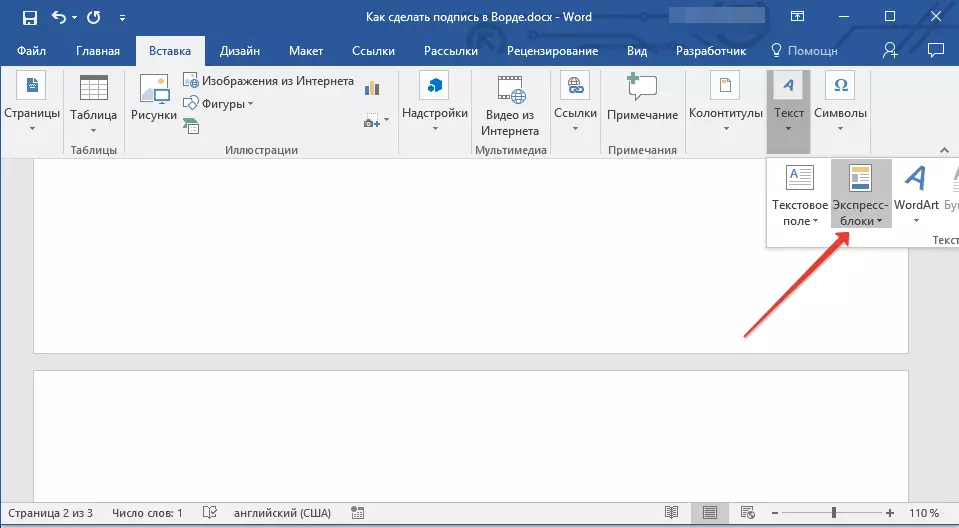
3. In the drop-down menu, select item "AUTOTEXT".
4. Select the desired block in the list that appears and paste it into the document.
5. The handwritten signature with the accompanying text will appear in the document you specified.
Insert rows for signature
In addition to the handwritten signature, the Microsoft Word document also can also add a signature string. The latter can be made in several ways, each of which will be optimal for a specific situation.Note: The creation method for the signature depends also on whether the document will be displayed or not.
Adding a row for signature by underscounter spaces in the usual document
Earlier, we wrote about how in the Worde to emphasize the text and, in addition to the letters and words themselves, the program also allows you to emphasize the gaps between them. Immediately to create a signature line, we will need to emphasize only spaces.
Lesson: How to stress text
To simplify and accelerate the solution, the task instead of spaces it is better to use tabs.
Lesson: Tabulation in Word
1. Click in the place of the document where the row should be for the signature.
2. Press the key "TAB" One or more times, depending on how long the string is needed for the signature.
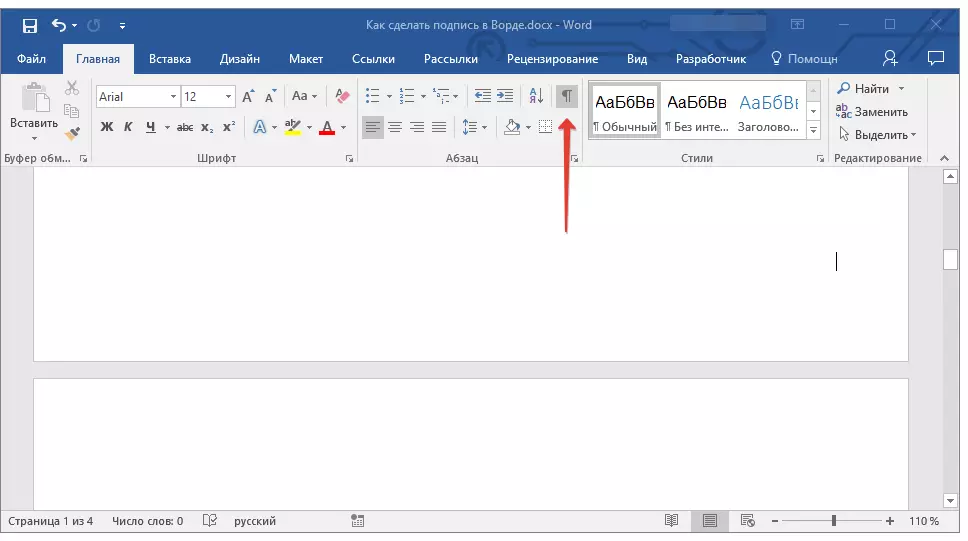
3. Turn on the display mode of non-printable signs by clicking the button with the "PI" sign in the group "Paragraph" Tab "Home".
4. Highlight the sign or to the tabs to emphasize. They will be displayed as small arrows.

5. Perform the necessary action:
- Click "Ctrl + U" or button "U" located in the group "Font" In the tab "Home";
- If the standard underscore type (one line) does not suit you, open the dialog box "Font" by clicking on a small arrow on the right side of the group, and select the appropriate line of line or lines in the section "Underline".
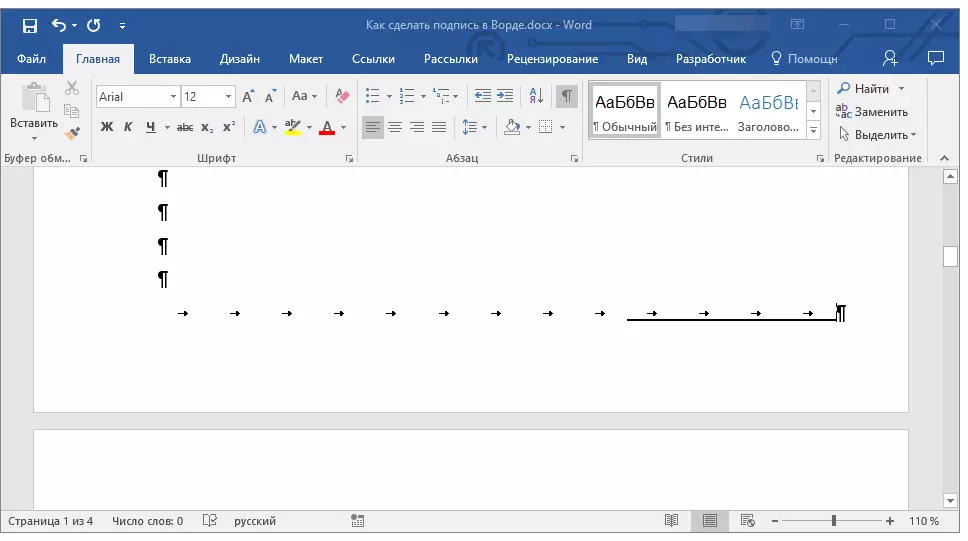

6. The horizontal line will appear on the place of the gaps you installed (tabs) - a string for the signature.
7. Disconnect the display mode of non-selected characters.

Adding a string to sign up by underscounter spaces in a web document
If you need to create a line for a signature by underscores, not in the document preparing for printing, but in a web form or a web document, for this it is necessary to add a cell of the table in which only the bottom limit will be visible. It is she who will act as a string to sign up.Lesson: How to make a table in Word invisible
In this case, when you enter the text to the document added by you, the underlining line will remain in place. Line added in this way may be accompanied by introductory text, for example, "Date", "Signature".
Insert line
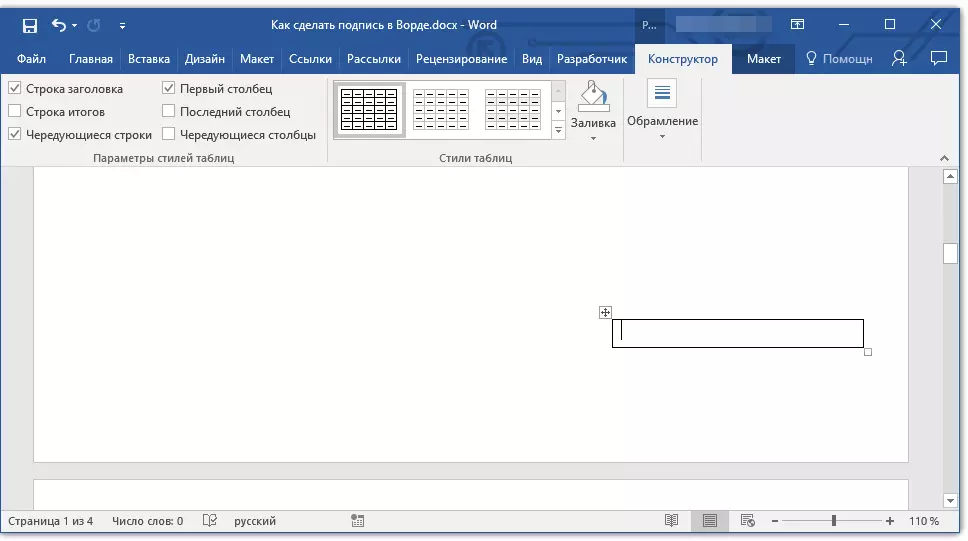
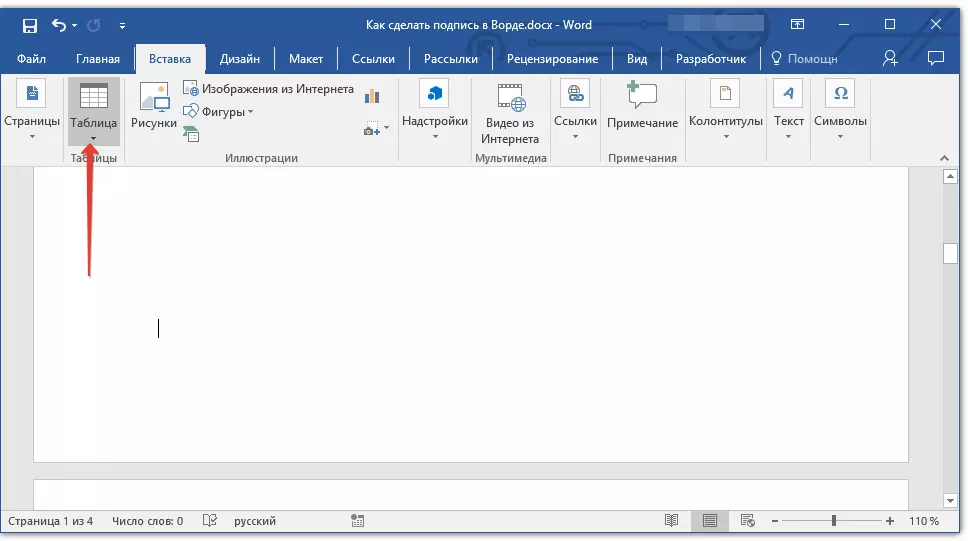
1. Click in the place of the document where you need to add a row to sign up.
2. In the tab "Insert" Press the button "Table".
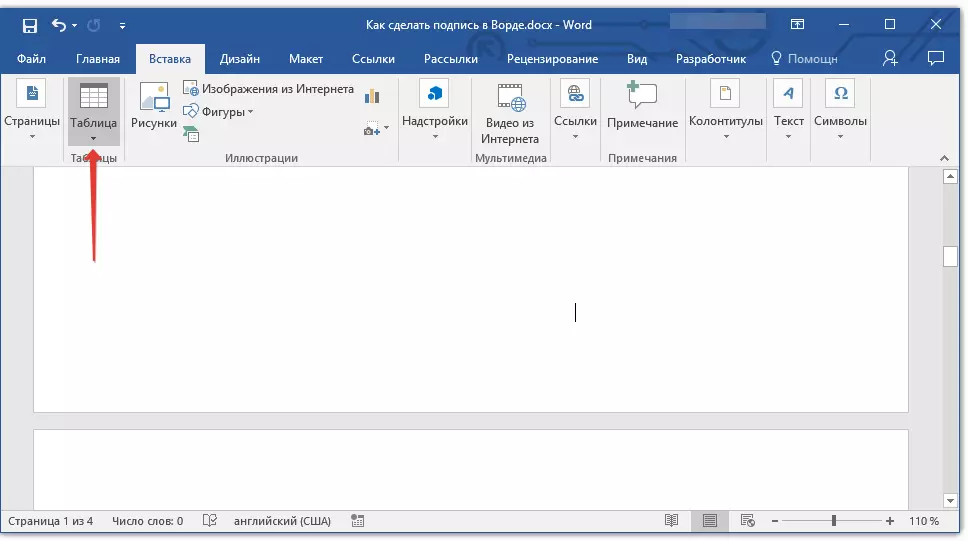
3. Create a table in size in one cell.

Lesson: How to make a table in the Word

4. Move the added cell to the desired document place and change its size in accordance with the desired size of the row created for the signature.
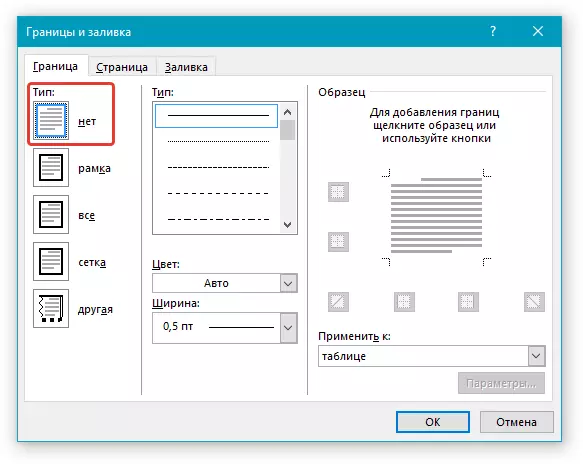
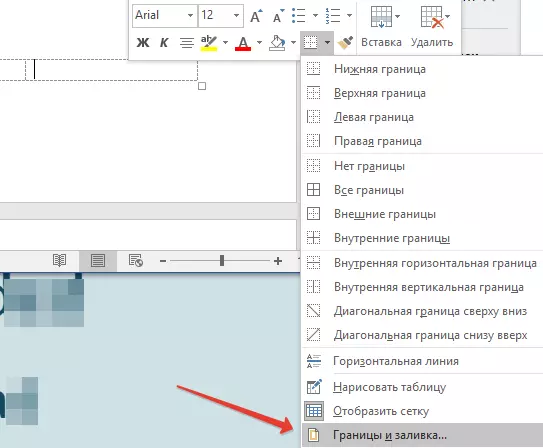
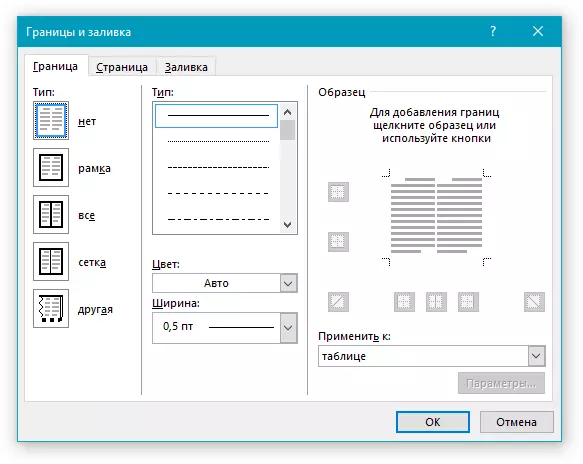
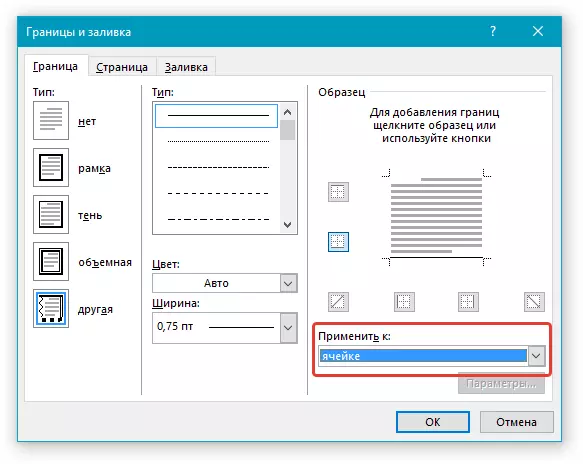
5. Right click on the table and select item. "Borders and Pouring".

6. In the window that opens, go to the tab "The border".

7. In the section "Type of" Select "No".
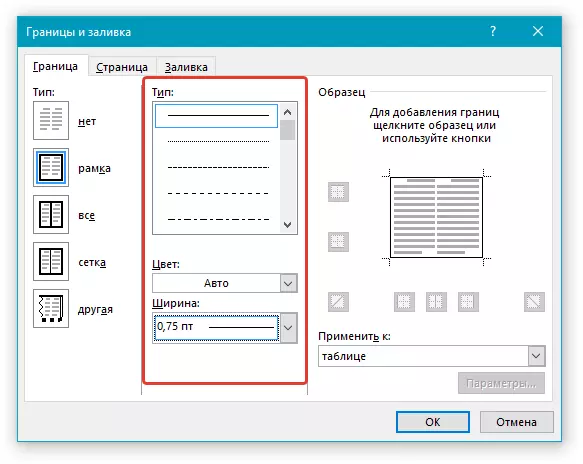
8. In the section "Style" Select the desired color line line for the signature, its type, thickness.
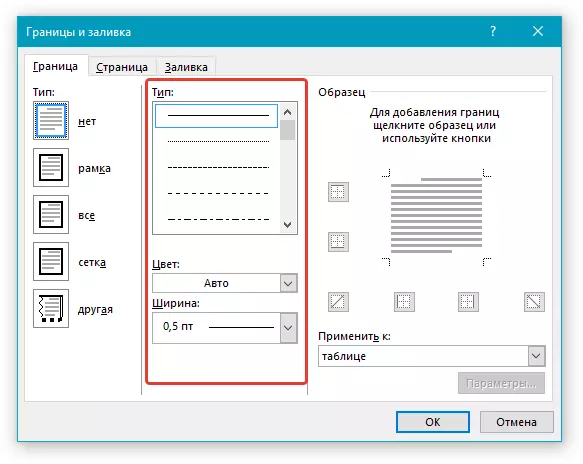
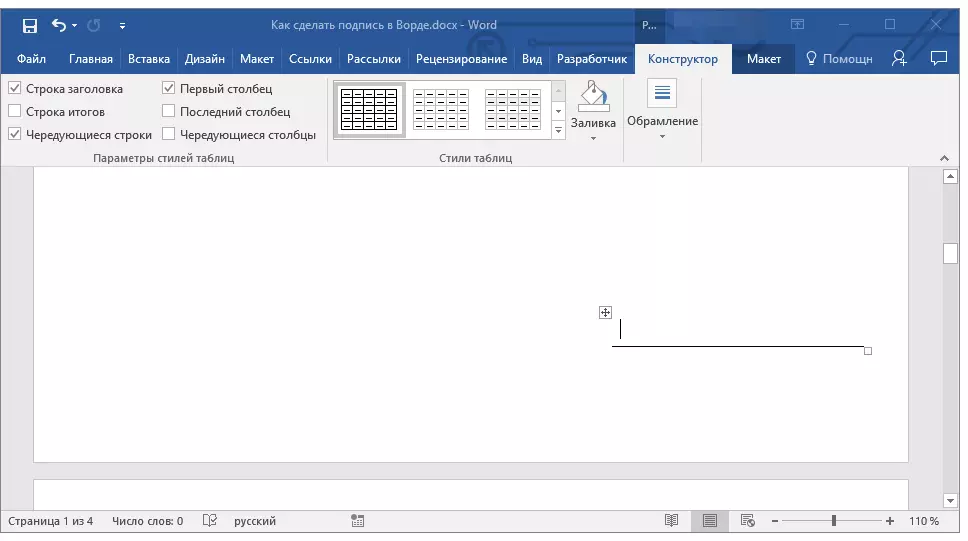
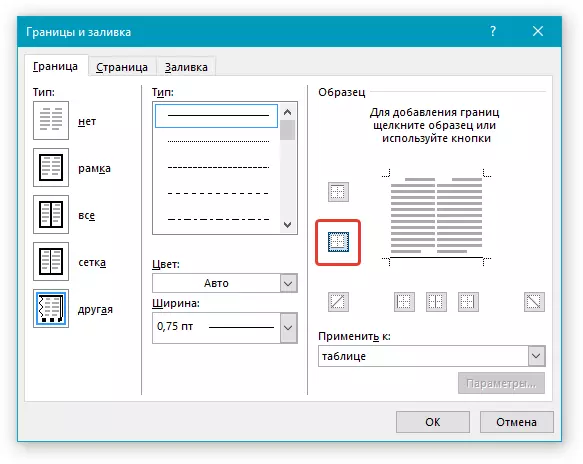
9. In the section "Sample" Click between the lower field display markers on the diagram to display only the bottom limit.

Note: The border type will change to "Other" , instead of the previously selected "No".
10. In the section "Apply to" Select a parameter "Table".
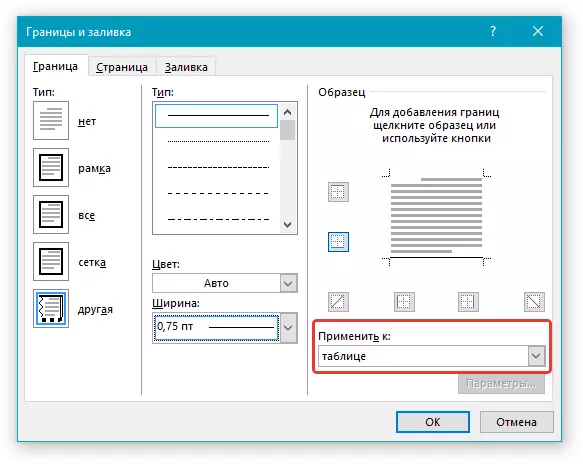
11. Tap "OK" To close the window.
Note: To display a table without gray lines that will not be displayed on paper when printing the document, in the tab "Layout" (chapter "Working with tables" ) Select a parameter "Display the grid" which is located in the section "Table".
Lesson: How to print a document in Word
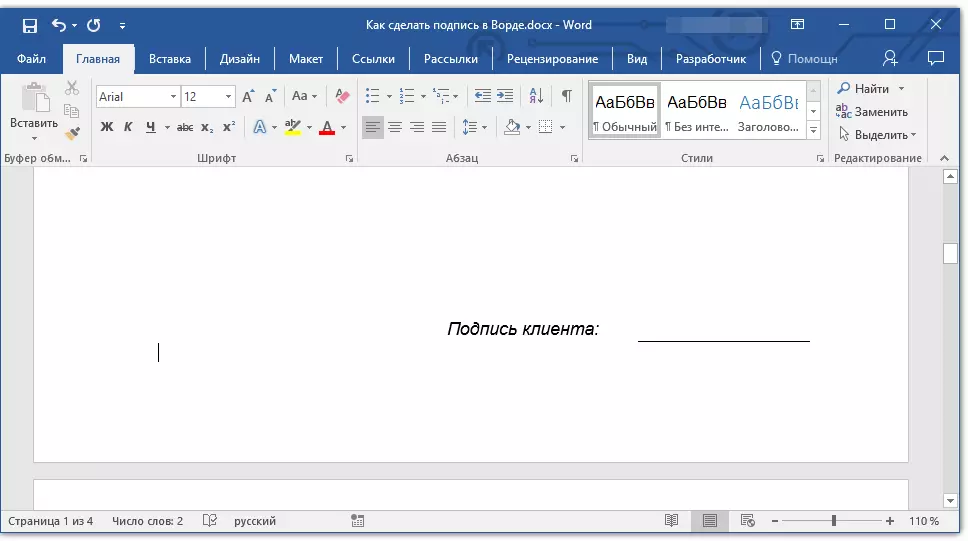
Insert line with accompanying text for signature lines
This method is recommended for those cases when you need not only to add a line for a signature, but also indicate the explanatory text near it. Such text may be the word "signature", "Date", "FULL NAME", held a position and much more. It is important that this text and the signature itself, along with a string for it, were on the same level.
Lesson: Inserting a substitution and fading inscription in the Word
1. Click in the place of the document where the row should be for the signature.
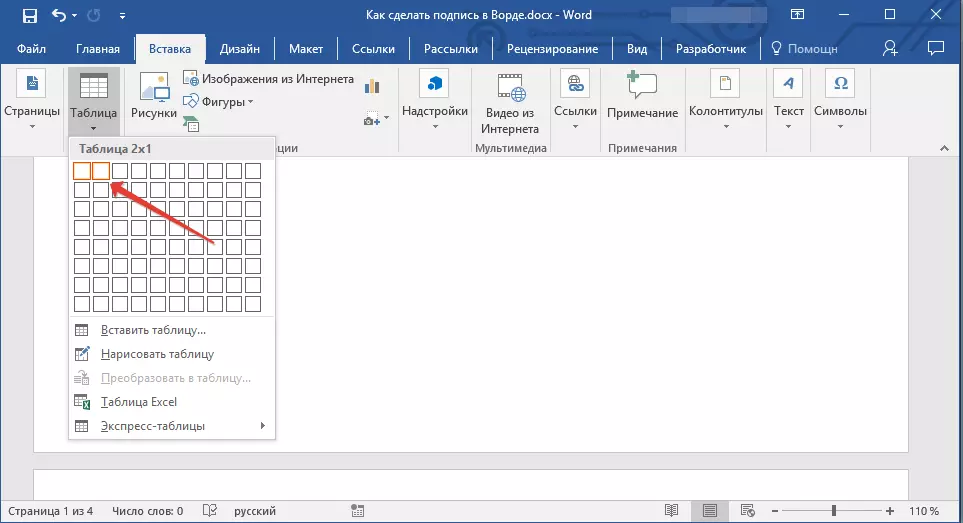
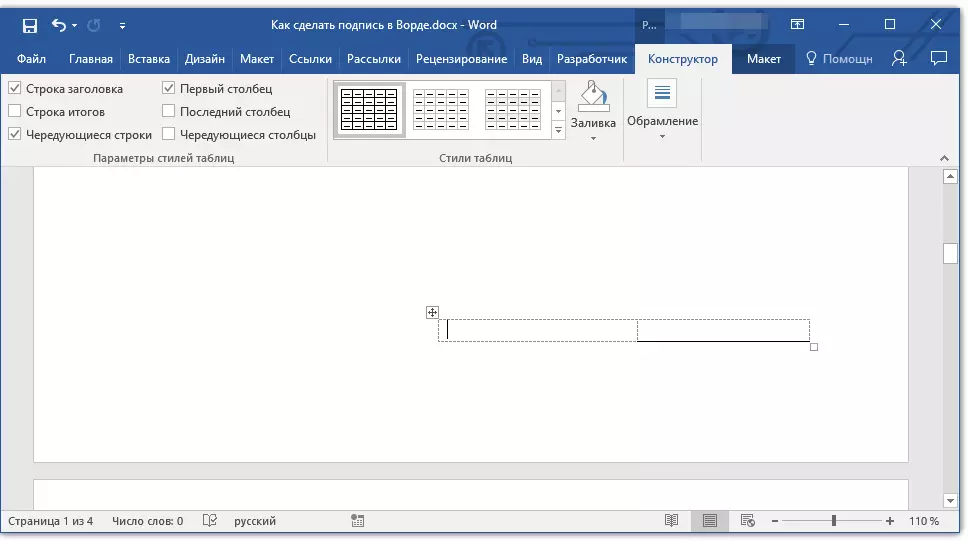
2. In the tab "Insert" Click on the button "Table".
3. Add a table with a size of 2 x 1 (two columns, one line).
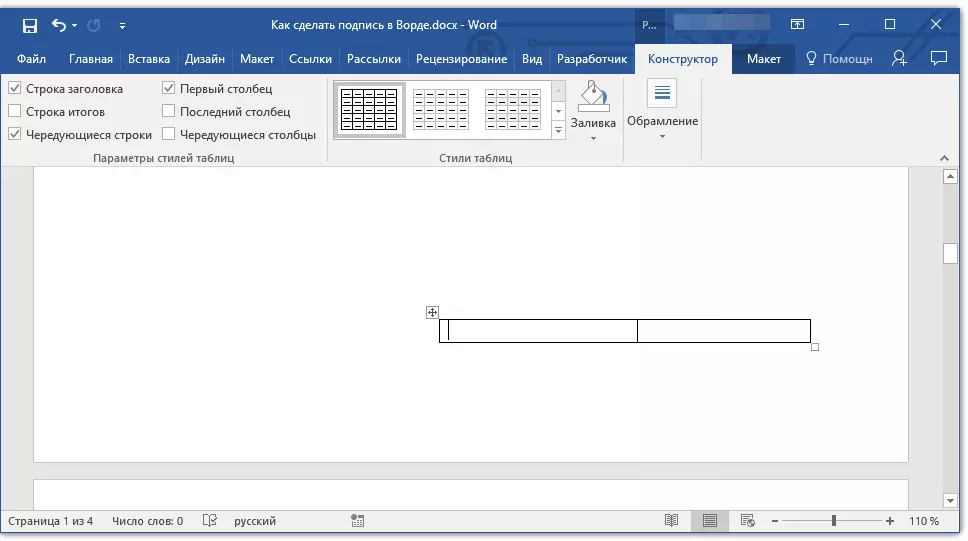
4. Change the location of the table if necessary. Change its size by pulling the marker in the lower right corner. Adjust the size of the first cell (for explanatory text) and the second (signature string).
5. Right click on the table, select the item in the context menu "Borders and Pouring".
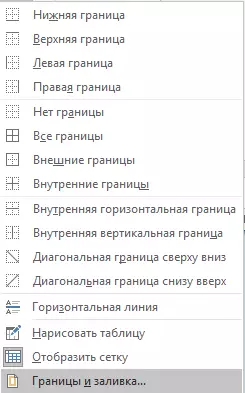
6. In the dialog that opens, go to the tab "The border".

7.In partition "Type of" Select a parameter "No".

8. In the section "Apply to" Choose "Table".
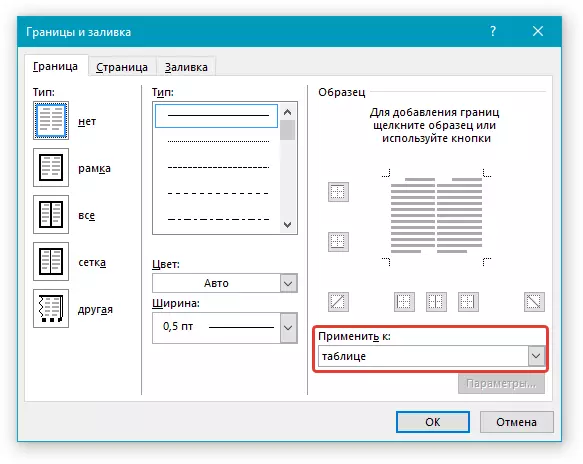
9. Click "OK" To close the dialog box.
10. Right-click at the place of the table where the row should be for the signature, that is, in the second cell, and again select item "Borders and Pouring".
11. Go to the tab "The border".
12. In the section "Style" Select the appropriate line type, color and thickness.
13. In the section "Sample" Click on the marker on which the bottom field is displayed to make the bottom limit of the table visible - it will be a string for the signature.
14. In the section "Apply to" Select a parameter "Cell" . Click "OK" To close the window.
15. Enter the necessary explanatory text in the first cell of the table (its borders, including the bottom line, will not be displayed).
Lesson: How to change the font to the Word
Note: Gray dashed border, framing the cells created by the table, is not displayed on print. To hide her or, on the contrary, display if it is hidden, click on the button. "Borders" located in the group "Paragraph" (tab "Home" ) and select a parameter "Display the grid".
Here, in fact, all, now you know about all possible methods to sign signature in Microsoft Word. It can be both a handwritten signature and a string to add a signature manually on the printed document. In both cases, the signature or a signature place may be accompanied by an explanatory text, about the ways of adding you also told you.