
The creation of the sweep of the inner walls of the premises is a fairly common task for those engaged in interior design and the design of residential buildings. In the architecture of version 19 there is a tool designed for convenient creation of sweeps.
Get acquainted with him closer.
How to create wall scanners in ArchiCAD
Suppose you have a drawn room with windows and several furniture samples. Create orthogonal projections of the walls of this room. Now you make sure how simple it is.
Useful information: Hot keys in ArchiCAD
Being in the room plan window, click on the "Scan" button on the toolbar. In the information panel located above the working field, select "Geometrical Option: Rectangle".
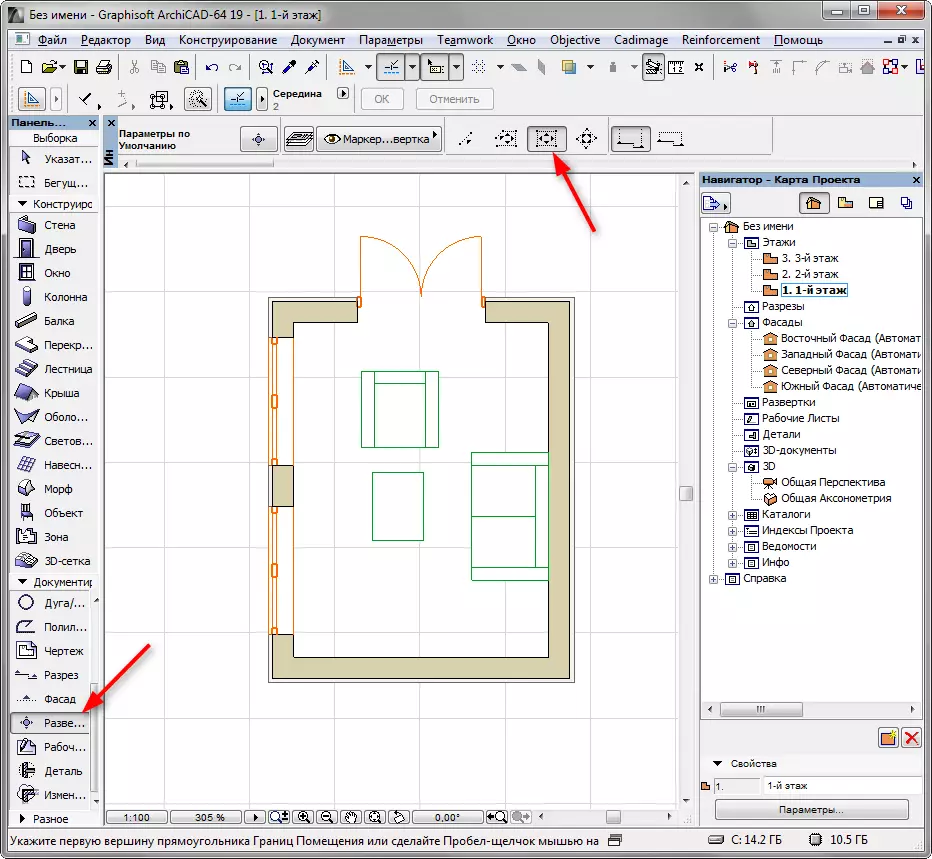
Click in the corner of the room and re-click the rectangular area in the opposite corner. This creates a sweep, which includes all the walls of the room.
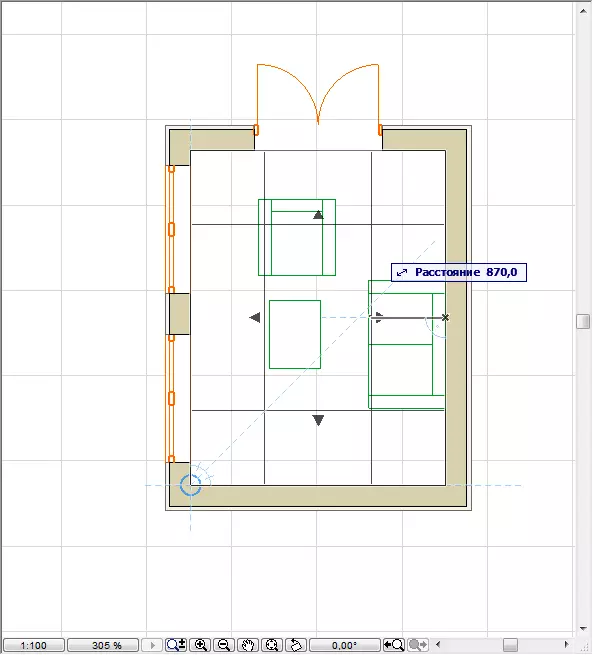
You will see four straight lines that are removed or approaching the walls. These are cross section lines. They determine the area of the room in which objects inside the room will fall. Click in a suitable place for you.
We have got this object of scan with a special marker.
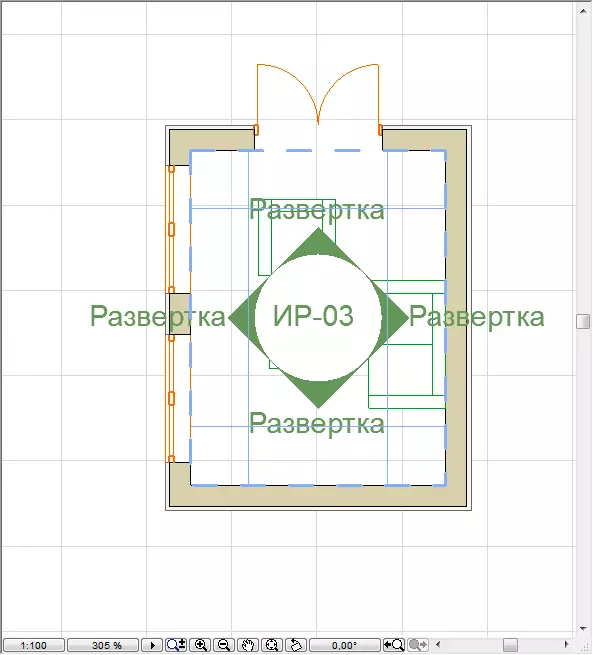
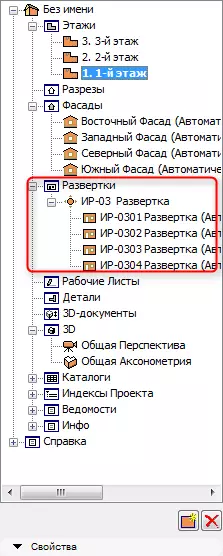
Scan themselves can now be found in the navigator. When you click on them will open windows with sweeps.

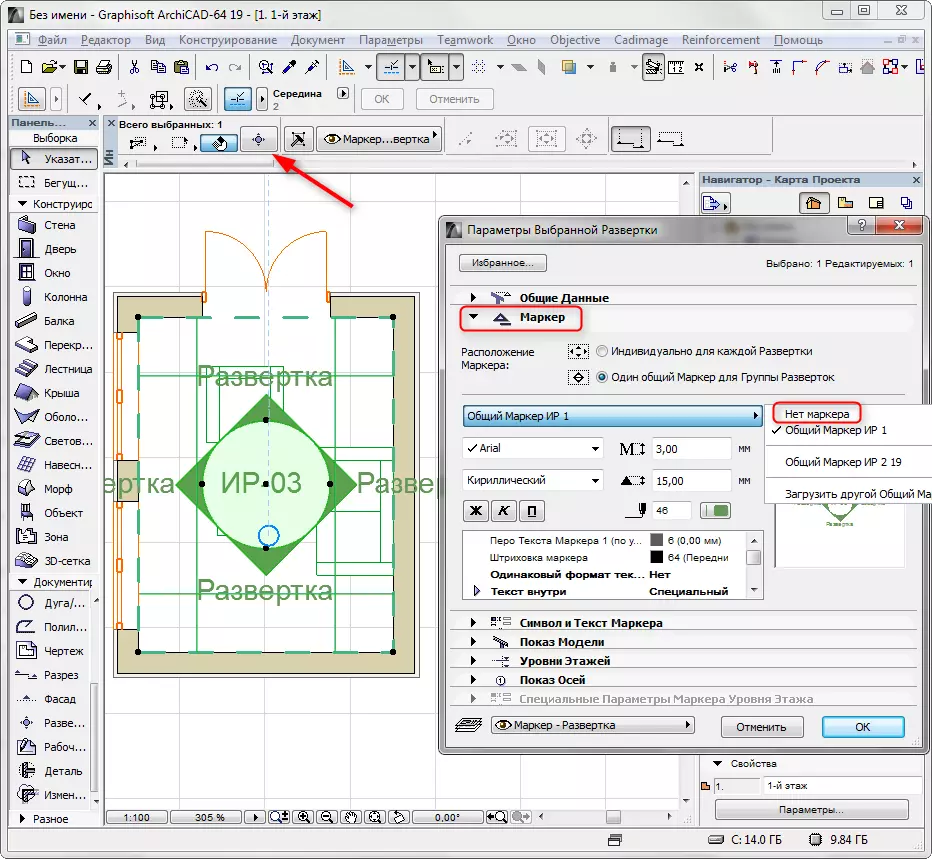
Go to the Floor Plan window and select the scan object. Open the scan settings dialog. Let's remove the marker with the plan. Open the "Marker" scroll and the drop-down list, select "No Marker". Click OK.
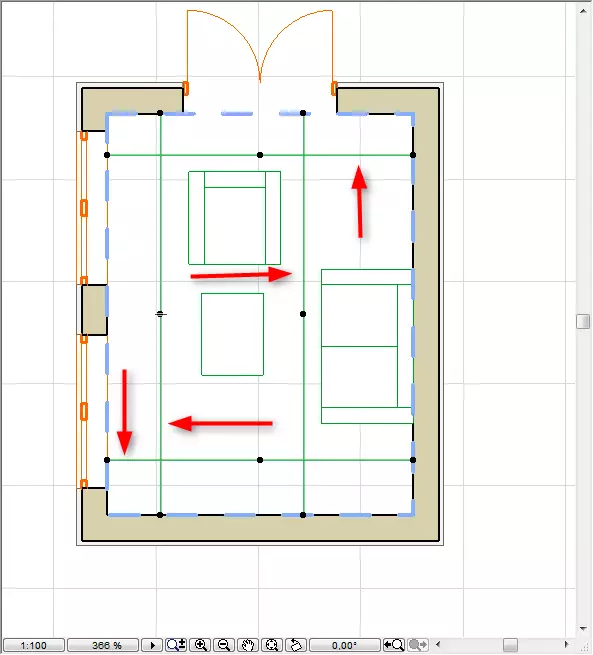
Move the line-projection scan so that they do not cross the furniture, but so that the furniture gets into the scan (it turned out to be between the wall and the projection line).
Lesson: How to independently make a design project apartment
Turn on one of the sweep in the navigator. Right-click on its name and select Scan Settings. Here we may be interested in several parameters.
In the "General data" scroll, we can set the depth borders and the display height. Place the height limit if you work with one of the rooms in a multi-storey building.

Open the "Model Show" scroll. In the group "Elements not in the section", highlight the line "hatching of injective surfaces" and assign "colors of its own coating without shading". Also install a tick opposite the "vector 3D shading" this operation will make your sweep color.

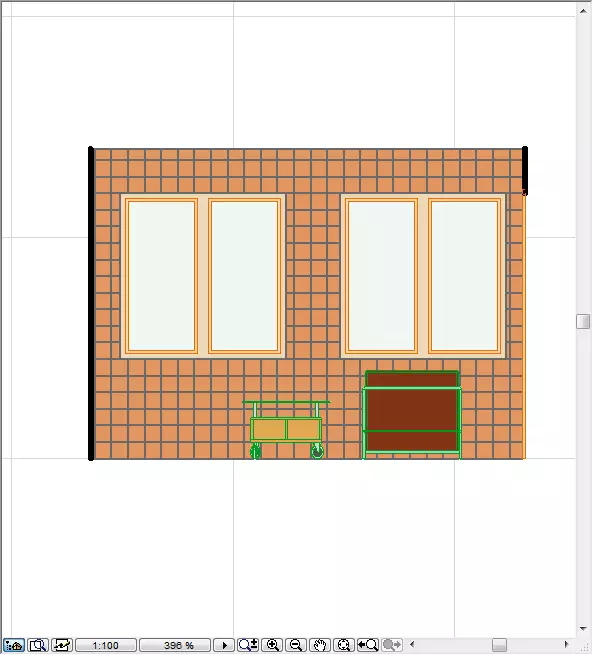
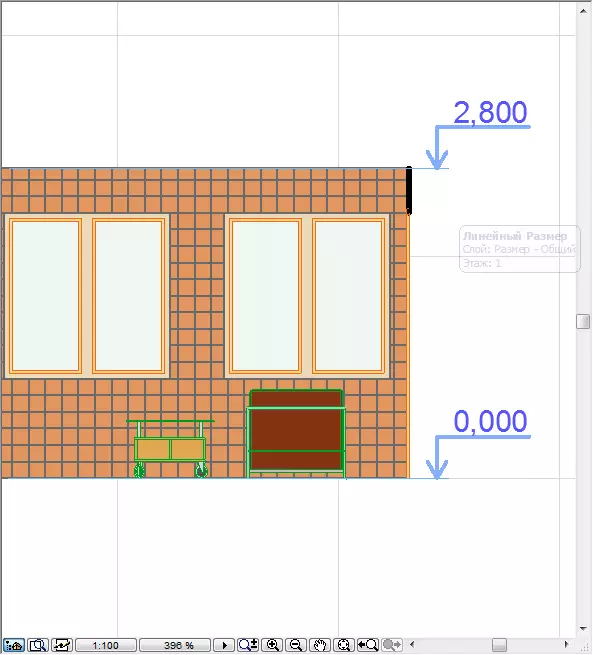
Also, as in the cuts and facades, the size can be applied to the scan.
Read on our website: Best Planning Programs
This is how the process of creating and editing sweeps in the architecture looks. We hope this lesson was useful for you.