

MS Word is approximately equally focused on professional and personal use. At the same time, representatives of both user groups are often faced with certain difficulties in this program. One of these is the need to write on top of the line, without applying the standard text underscore.
Lesson: How to make an underlined text in the Word
Especially actual need to write text above the line for forms and other template documents created or existing. It can be rows for signature, dates, positions, surnames and many other data. At the same time, most of the forms created by the ready-made lines for input are far from always being created correctly, why the line for text can be shifted directly during its fill. In this article we will talk about how in Word it is correct to write above the line.
We have already talked about various ways, with the help of which you can add a string or string to the Word. We strongly recommend familiarizing yourself with our article on a given topic, it is quite possible that it is in it that you will find the solution of your task.

Lesson: How to make a string in word
Note: It is important to understand that the method of creating a line, above or on top of which you can write, depends on what kind of text, in what form and for what purpose you want to place above it. In any case, in this article we will consider all possible methods.
Adding a row for signature
Quite often, the need to write on top of the line occurs when you need to add a signature or a row to the document. We have already considered this topic in detail, so if you are worth it that is this task, you can familiarize yourself with the method of solving it below.

Lesson: How to insert a signature in the Word
Creating a line for forms and other business documents
The need to write on top of the line is most relevant precisely for the forms and other documents of this type. There is at least two methods with which you can add a horizontal line and place the required text directly above it. About each of these methods in order.Application line for paragraph
This method is especially convenient for those cases when you need to add an inscription over a solid line.
1. Install the cursor pointer in the place of the document where you need to add a line.

2. In the tab "The main" in a group "Paragraph" Click on the button "Borders" and choose the parameter in its drop-down menu "Borders and Pouring".

3. In the window that opens in the tab "The border" Select the appropriate line style in the section "Type of".

Note: In chapter "Type of" You can also choose the color and width of the line.
4. In the section "Sample" Select the template on which the lower bound is indicated.

Note: Make sure that in the section "Apply to" Set parameter "To paragraph".
5. Click "OK" The horizontal line will be added to the selected location, on top of which you can write any text.

The lack of this method is that the line will occupy the entire string, from its left to the right edge. If this method is not suitable for you, we turn to the next one.
Application of tables with invisible boundaries
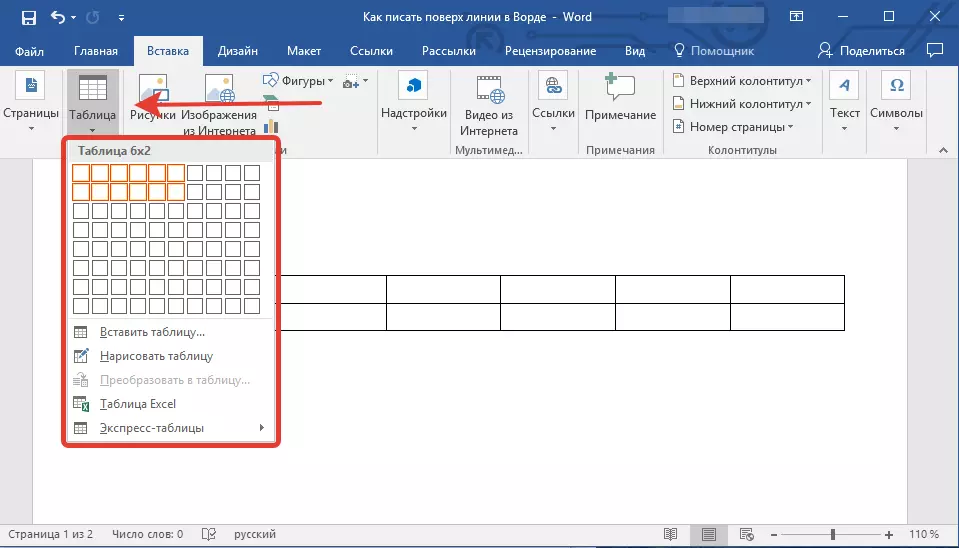
We wrote a lot about working with tables in MS Word, including about hiding / displaying the boundaries of their cells. Actually, it is this skill and will help us create suitable lines for the blanks of any size and quantity, on top of which you can write.
So, we will have to create a simple table with invisible left, right and upper boundaries, but visible lower. At the same time, the lower boundaries will be visible only in those places (cells), where you want to add an inscription over the line. In the same place where the explanatory text will be, the boundaries will not be displayed.
Lesson: How to make a table in the Word
Important: Before creating a table, calculate how many rows and columns should be in it. Our example will help you.
Enter the explanatory text in the desired cells, the same in which you need to write on top of the line, you can leave empty at this stage.

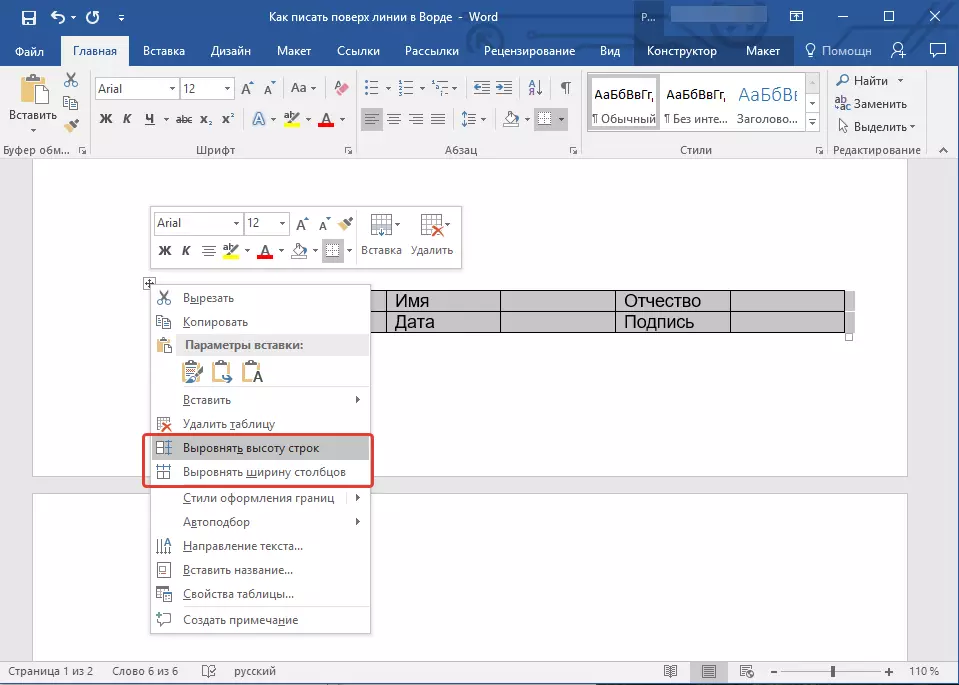
Advice: If the width or height of columns or rows in the table will change in the course of writing text, follow these steps:
- Right-click on the plus, located in the upper left corner of the table;
- Choose "Align the width of columns" or "Align the height of the strings" , depending on what you need.
Now you need to walk alternately on each cell and hide it either all the boundaries (explanatory text) or leave the lower boundary (place for the text "over the line").
Lesson: How to Hide Table Borders in Word
For each individual cell, follow these steps:
1. Select the cell with a mouse by clicking on its left border.

2. Click the button "The border" located in the group "Paragraph" On the shortcut panel.

3. In the drop-down menu of this button, select the appropriate parameter:
- no border;
- Top border (leaves the visible lower).

Note: In the last two cells of the table (extreme right), you need to deactivate the parameter "Right border".
4. As a result, when you run through all cells, you will have a beautiful form for a form that can be saved as a template. When you fill it in person or any other user, the created lines will not shift.

Lesson: How to make a pattern in the Word
For greater use of the use of the form you created with the lines, you can enable the display of the grid:
- Click the "Border" button;
- Select the "Display Mesh" option.

Note: This grid is not displayed.

Drawing lines
There is another method with which you can add a horizontal line to the text document and write on top of it. To do this, use the tools from the "Insert" tab, namely the "Figures" button, in the menu of which you can select the appropriate line. In more detail about how to do this, you can learn from our article.

Lesson: How to draw a line in Word
- Advice: To draw a horizontally level line while holding it down the key SHIFT.
The advantage of this method is that with its help you can spend a line over the already existing text, in any arbitrary place of the document, setting any dimensions and appearance. The lack of a hand drawn line is that it is not always possible to enter it harmoniously into the document.
Removing line
If for some reason you need to remove the line in the document, make it will help you our instructions.
Lesson: How to remove the line in the Word
This can be safely finished, because in this article we looked at all methods with which in MS Word can be written on top of the line or create an area in the document to fill with the horizontal line, on top of which the text will be added, but in the future.