
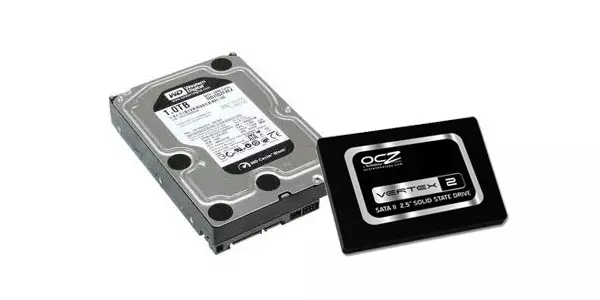
Replacing a conventional hard disk on SSD may noticeably increase the comfort of work and ensure reliable data storage. That is why many users try to replace HDD to a solid state drive. However, replacing the drive, it is necessary to somehow transfer its operating system together with the programs installed.
On the one hand, you can still set again and then there will be no problems with the transition to a new disk. But what if there is about a dozen programs on the old age, and the OS itself is already configured for comfortable work? It is for this question that we will reply in our article.
Operating System Transfer Methods with HDD on SDD
So, you purchased a new SCD and now you need to somehow move the OS itself with all the settings and the installed programs. Fortunately, we will not have to invent anything. Software developers (however, both the developers of the Windows operating system) have already taken care of everything.Thus, we have two ways, or use a third-party utility or regular means of windows.
Before moving on to the instructions, we want to draw your attention to the fact that the disk to which you will transfer your operating system should be no less than that it is installed.
Method 1: Transfer OS on SSD using Aomei Partition Assistant Standart Edition
To begin with, consider in detail the method of transferring the operating system using a third-party utility. Currently, there are many different utilities that allow you to implement an easy way to transfer OS. For example, we took the Aomei Partition Assistant application. This tool is free and has a Russian interface.
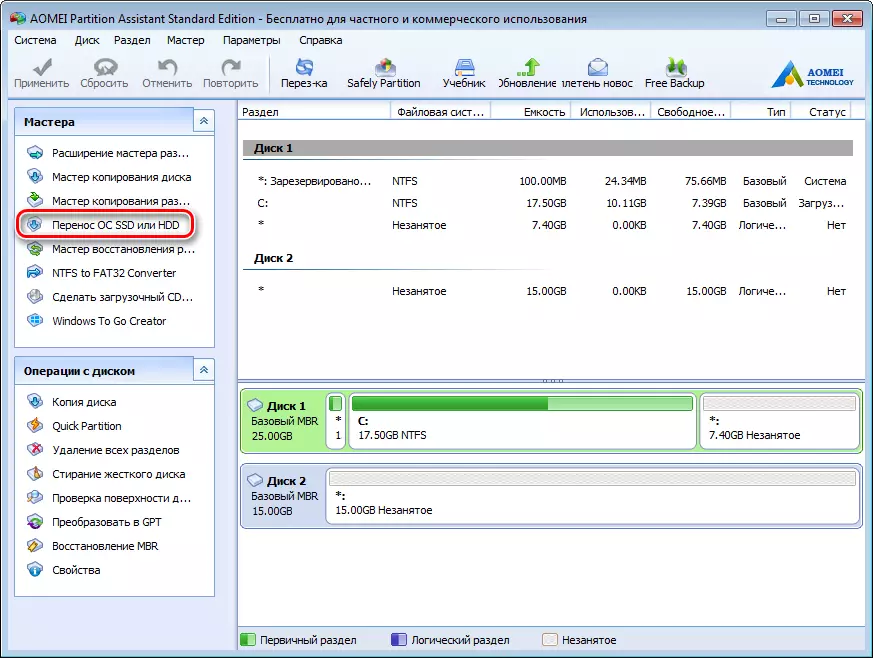
- Among the large number of functions, the appendix has a very convenient and simple master of the operating system transfer to another disk, we will use it in our example. The master you need is on the left pane in the "Wizards" section, to call it click on the command "Transfer of SSD or HDD" command.
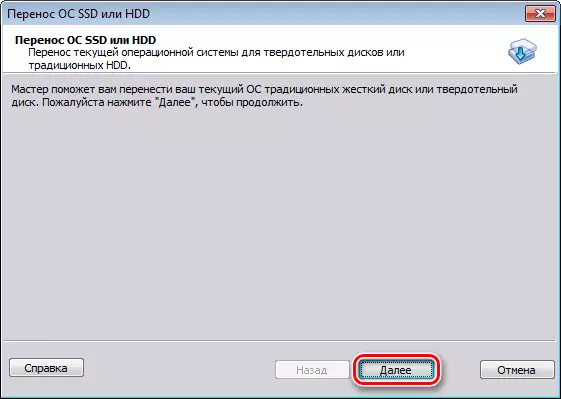
- A window with a small description appeared before us, having read the click of the click "Next" button and go to the next step.
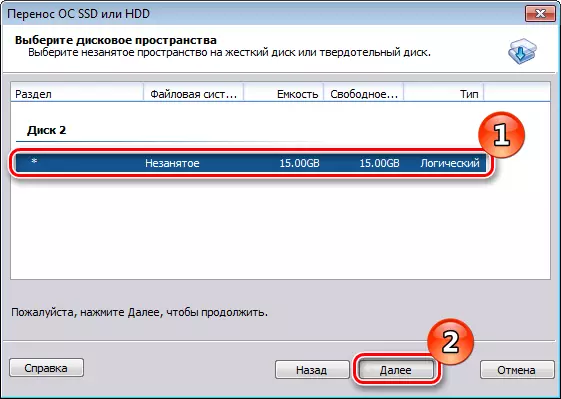
- Here the master proposes to choose a disk where the OS will be transferred. Please note that the drive should not be posted, that is, it should not contain partitions and file system, otherwise at this step you will get an empty list.
So, as soon as the target disk was chosen, press the "Next" button and proceed on.
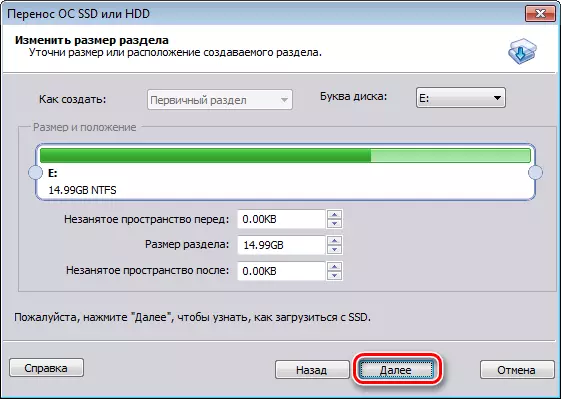
- The next step is the markup of the drive to which the operating system is transferred. Here you can change the size of the section if necessary, however, do not forget that the section should be at least on which the OS is. Also, if necessary, you can set the letter to the new section.
Once installed all the parameters, go to the next step by clicking the "Next" button.
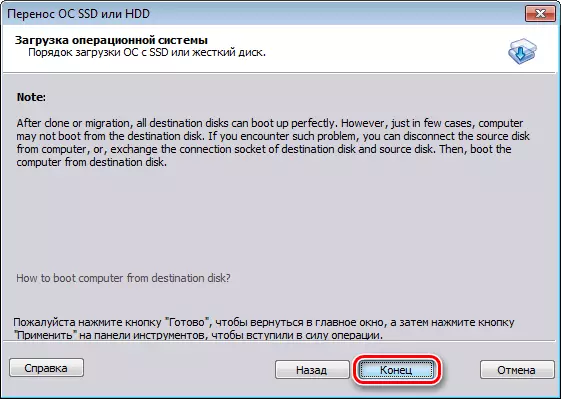
- Here the master offers us to complete the configuration of the Aomei Partition Assistant application to migrate the SSD system. But before this can be familiar with a slight warning. The speech in it is that after the reboot in some cases, the OS may not be loaded. And if you encountered a similar problem, then you need to turn off the old disk or connect the new one to the place of the old, and the old one is in place new. To confirm all actions, click the "End" button and complete the work of the wizard.
- Further, so that the migration process begins, you must click the "Apply" button.
- The partish assistant will display a window with a list of deferred operations, where we can press the "Go button".
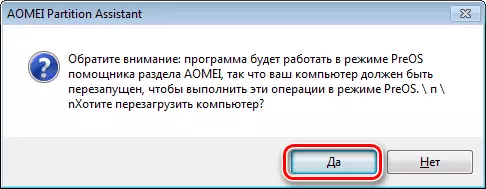
- Next will follow another warning, where by clicking the "Yes" button, we confirm all your actions. After that, the computer will restart and the process of transferring the operating system to the solid state drive will begin. The duration of this process will depend on a number of factors, among which the amount of portable data, the HDD speed and the power of the computer.


After migration, the computer will reboot again and will now only format the HDD to remove the OS and the old bootloader.
Method 2: Transfer OS on SSD using standard Windows tools
Another way to go to a new disk is the use of standard operating system tools. However, you can use it if Windows 7 and higher installed on your computer. Otherwise, you will have to use third-party utilities.
Consider this method in more detail on the example of Windows 7.
In principle, the process of transferring the OS standard means is not complicated and passes into three stages:
- creating a system image;
- Creating a boot drive;
- Unpacking the image to a new disk.
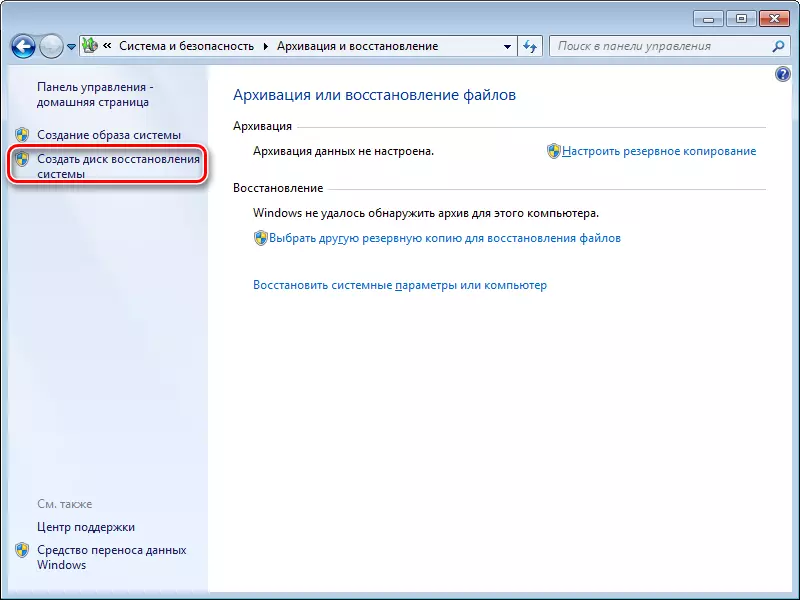
- So, proceed. In order to create an OS image, you must use the Windows Archiving Tool. To do this, go to the "Start" menu and open the control panel.
- Next, you must click on the "Computer Data Archiving" link and you can switch to the backup of Windows. In the "Archiving or Recovery File" window, there are two commands we need, now it will be used by creating an image of the system, for this, click on the relevant link.
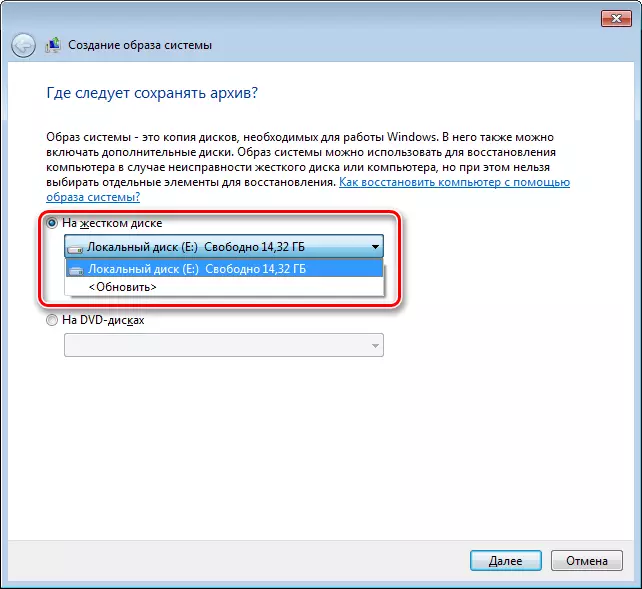
- Here we need to choose the drive to which the image of the OS will be recorded. This can be like a disc partition and DVD. However, it is worth remembering that Windows 7, even without installed programs, is quite a lot of space. Therefore, if you decide to record a copy of the DVD system, then you may need not one disk.
- By choosing a place where you want to save the image, click "Next" and go to the next step.
Now the master invites us to choose the sections you want to enable in archiving. Since we only transfer OS, you do not need to choose anything, the system for us has already included all the necessary discs. Therefore, click "Next" and go to the final step.
- Now you need to confirm the selected archiving parameters. To do this, click "Archive" and wait for the end of the process.
- After a copy of the OS is created by Windows, prompted to create a boot drive.
- You can also create a drive and using the Create System Recovery Disk command in the Archiving or Recovery window.
- In the first step, the boot disk creation wizard will offer to choose a drive in which a clean drive must be installed.
- In case the drive is in the drive, the system will propose to clean it. If you are using DVD-RW to record, it can be cleaned, otherwise you need to insert clean.
- To do this, go to "My Computer" and click right-click on the drive. Now choose the item "Erase this disk".
- Now we return to the creation of a recovery drive, select the desired drive, click on the "Create Disk" button and wait for the end of the process. Upon completion, we will see such a window:
- Restart your computer and go to the selection menu of the boot device.
- Next will be downloaded by the OS Recovery Wednesday. At the first stage, for convenience, select the Russian language and press the "Next" button.
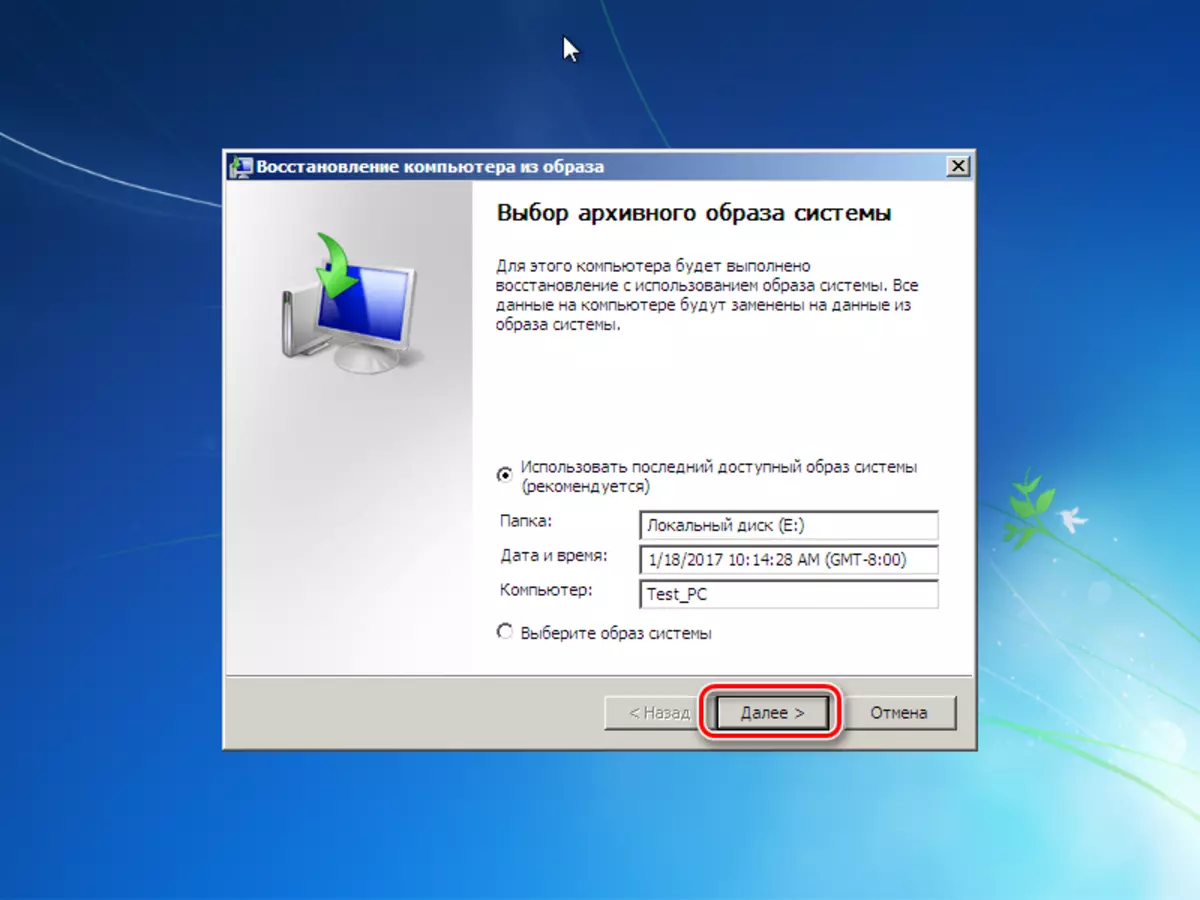
- Since we restore the OS from a pre-prepared image, we translate the switch to the second position and click "Next".
- At this stage, the system itself will offer us a suitable image for recovery, therefore, without changing anything, click "Next".
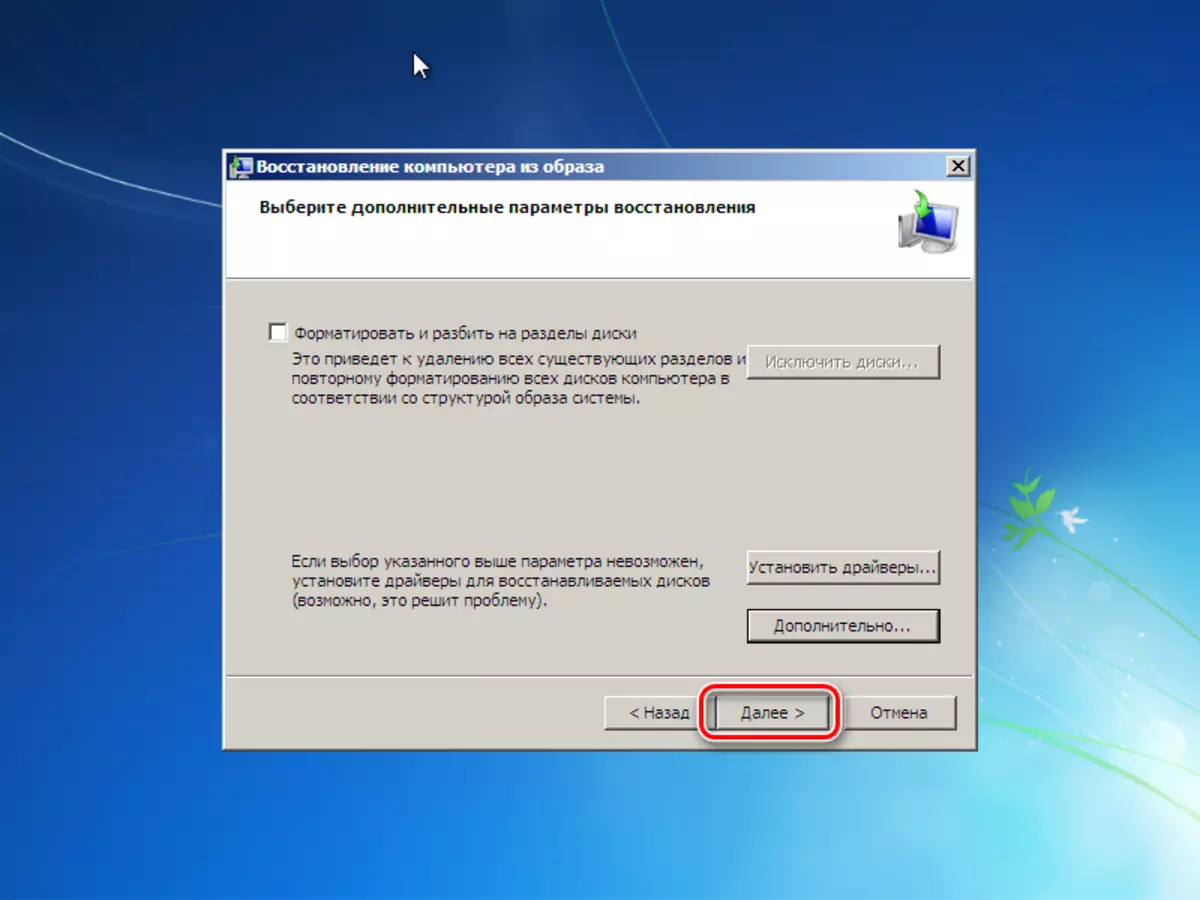
- Now you can set additional parameters if necessary. To go to last action, press the "Next" button.
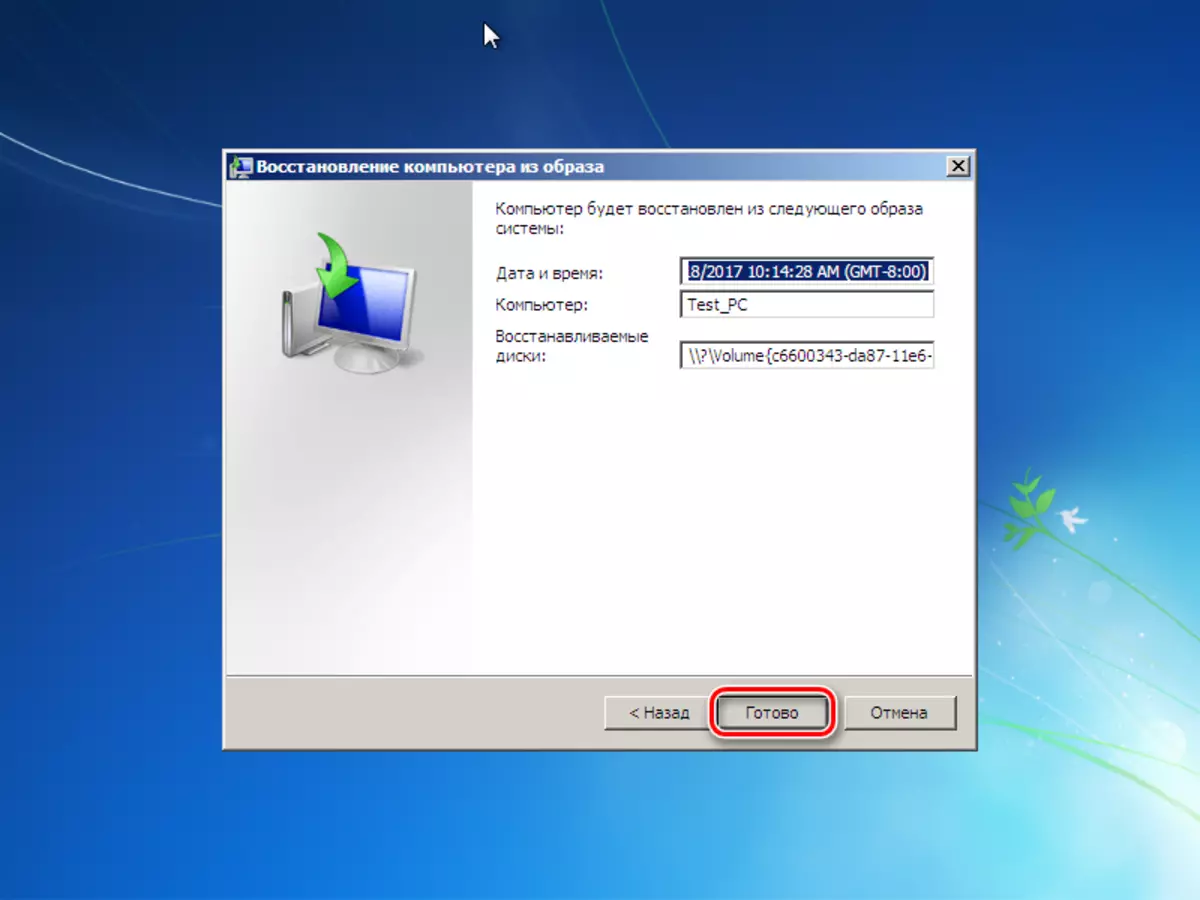
- At the last stage, we will display brief information about the image. Now you can proceed directly to unpacking to the disk, for this press the "Next" button and wait for the end of the process.


Attention! If there are no writing drives in your work machine, then you will not be able to record an optical recovery drive.


This suggests that the disk is successfully created.
So let's sum up a small result. By this time, we already have an image with an operating system and a bootable drive for recovery, which means you can move to the third, final step.
This usually can be done by pressing the F11 key, however, there may be other options. Typically, the function keys are painted on the BIOS start screen (or UEFI), which is displayed when the computer is turned on.


After that, the installed systems will be searched.


Upon completion of the process, the system will automatically restart and on this Windows transfer process on CDM can be considered over.
Today we looked at two ways to cross the HDD on SSD, each of which is good in its own way. When you familiarize yourself with both, you can now choose more acceptable for yourself to move quickly and without losing data to transfer OS to a new disk.