

Hamachi is a special software that allows you to build your own protected networks via the Internet. Many gamers download the program for playing Minecraft, Counter Strike, etc. Despite the simplicity of settings, sometimes the application has a connection with a network adapter, which is quite quickly corrected, but requires certain actions from the user. Consider how it is done.
Why the problem of connecting to the network adapter occurs
Now we will go to the network settings and bring some adjustments in them. Check whether the problem remained if yes, then I will update the hamachi to the latest version.Network Connection Settings on Computer
1. Go to the "Control Panel" - "Network and the Internet" - "Center for network management and shared access".

2. On the left side of the window, select from the "Changing Adapter Settings" list.

3. Press the "Advanced" tab and proceed to "Advanced Parameters".
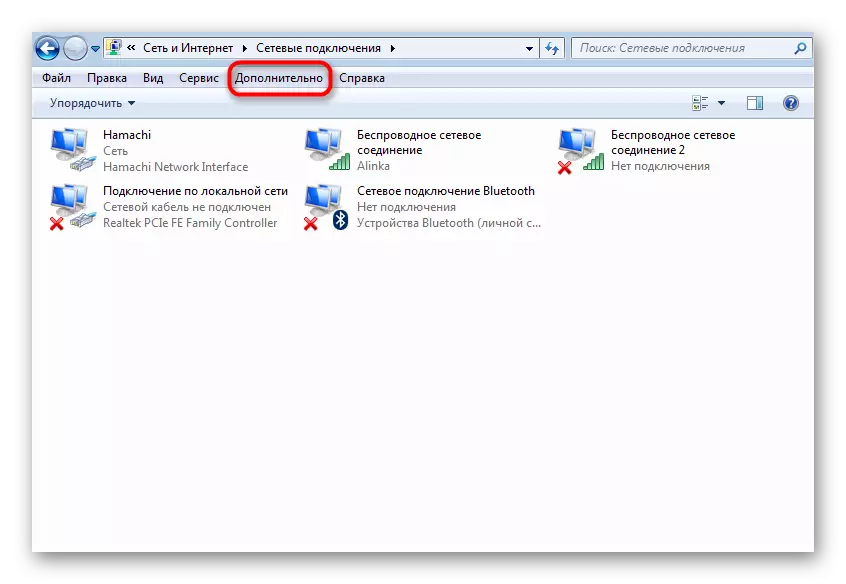
If you do not have the "Optional" tab, go to "Sort" - "view" and click on the "menu line".
4. We are interested in "adapters and binding". At the top of the window, we see a list of network connections, there are Hamachi among them. We move it to the top of the list using the special arrows and click "OK".

5. Restart the program.
As a rule, at this stage most users, the problem disappears. In the opposite case, go to the next method.
Problem with update
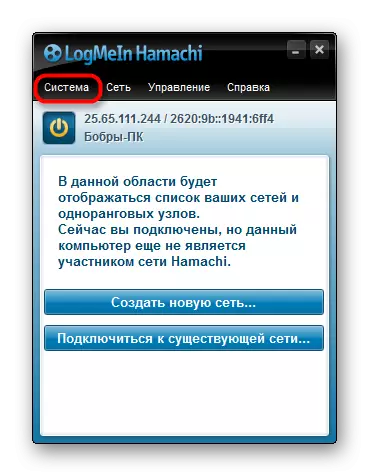
1. Hamachi provides automatic update mode. Very often, the connection problems occur due to the wrong settings in this part of the program. In order to fix, find the "System" tab in the main window - "Parameters".
2. In the window that opens, in its left part, we also go to "Parameters" - "Advanced Settings".

3. And then in "Basic Settings".
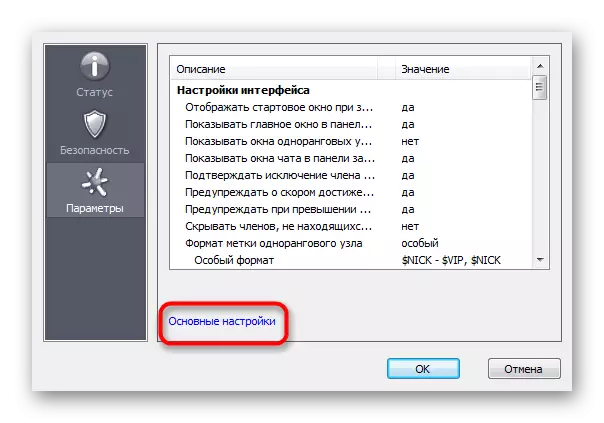
4. Here it is necessary to set a tick opposite the "automatic update". Restart the computer. Make sure the Internet is connected and running. After launching, Hamachi must determine the availability of updates and install them.

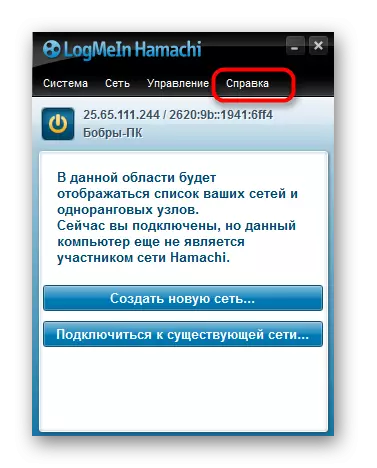
5. If the checkbox is present, and the new version has not been loaded, go to the main window into the "Help" tab - "Check availability of updates". If updates are available, updated manually.
If it did not help, then, most likely, the problem is in the program itself. In this case, it makes sense to delete it and download the latest version from the official site.
6. Please note that the standard removal through the "Control Panel" is not enough. Such uninstallation leaves after a different "tailings", which can interfere with the installation and use of anenially installed hamachi. You must use third-party software, to completely delete programs, such as Revo Uninstaller.
7. Open it and choose our program, then click "Delete".

8. First, the standard uninstall wizard will start, after which the program will propose scanning to the remaining files in the system. You need to select the user, in this case it is "moderate", and click "Scan"

After that, Hamachi will be completely removed from the computer. Now you can start installing the current version.
Often, after the proceeds done, the connection does without problems, and no longer worries the user. If "WHO and now there", you can write a letter to the support service or reinstall the operating system.