

Signing a photo or "stamp" is used by the masters of photoshop to protect their work from theft and illegal use. Another appointment of signature is to make a job recognizable.
This article will tell you how to create your stamp and how to save it for further use. At the end of the lesson in your Arsenal Photoshop will appear a very convenient, universal tool for use as a watermark and other types of signatures.
Creating a signature for a photo
The easiest and fastest way to create stamps is a definition of a brush from any image or text. In this way, we use how the most acceptable.Creating text
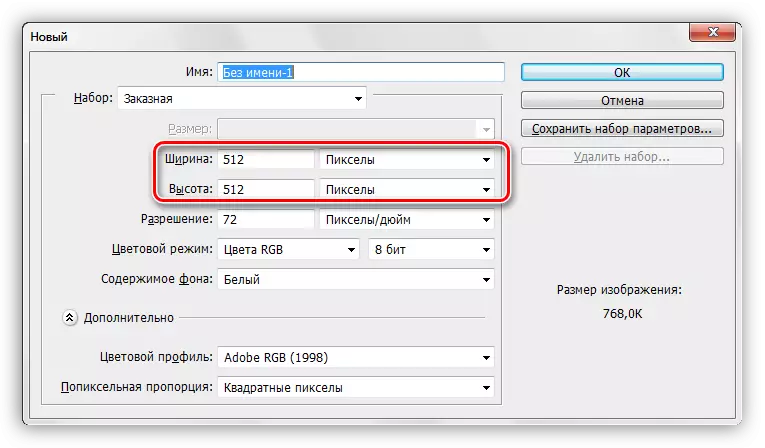
- Create a new document. The size of the document should be so to accommodate the stamp of the original size. If you plan to create a big stamp, then the document will be great.
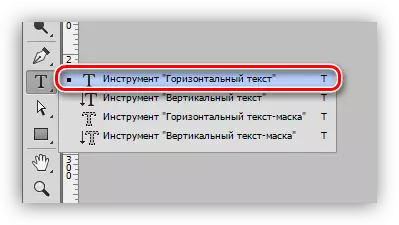
- Create a signature from the text. To do this, select the appropriate tool on the left pane.
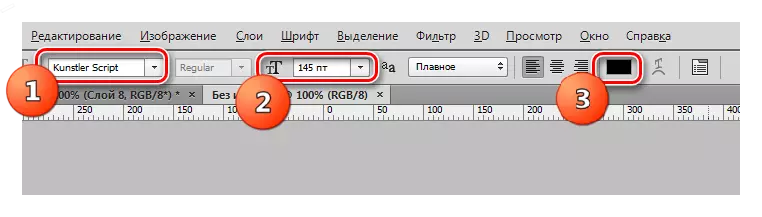
- On the top panel will configure the font, its size and color. However, the color is not important, the main thing is that it would differ from the color of the background, for the convenience of work.
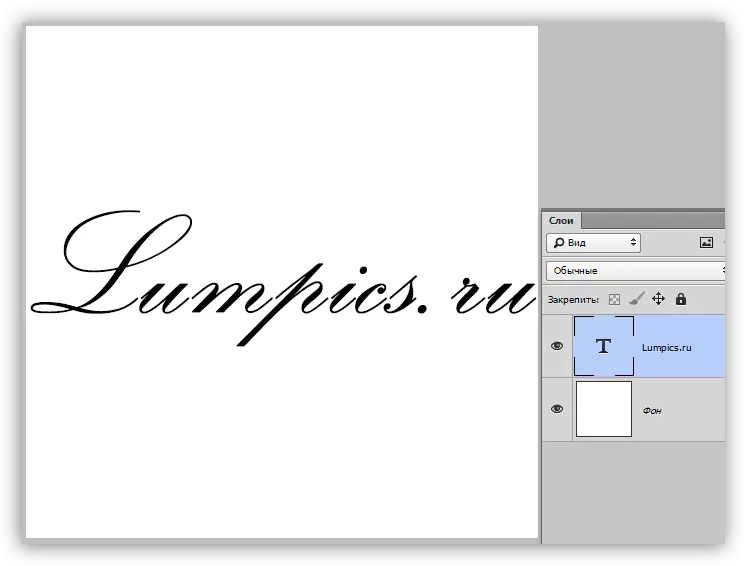
- We write text. In this case, it will be the name of our site.
Brush definition
The inscription is ready, now you need to create a brush. Why exactly a brush? Because with a brush easier and faster work. Brushes You can give any color and size, you can apply any styles to it (set the shadow, remove the fill), besides, this tool is always at hand.
Lesson: Tool Brush in Photoshop
So, with the benefits of the brush, we figured out, continue.
1. Go to the "Editing - Define Brush" menu.
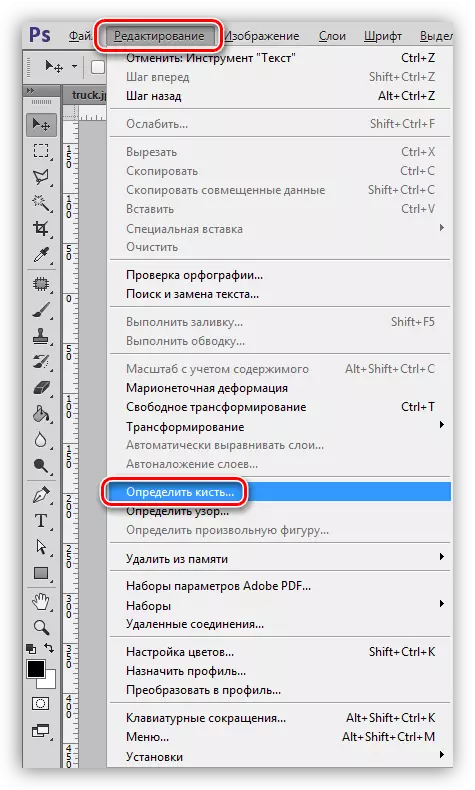
2. In the dialogue opened dialog box, give the name of the new tassel and click OK.

This creates a brush is completed. Let's look at an example of its use.
The use of brush mark
A new brush automatically falls into a valid set of brushes.
Lesson: We work with sets of brushes in Photoshop
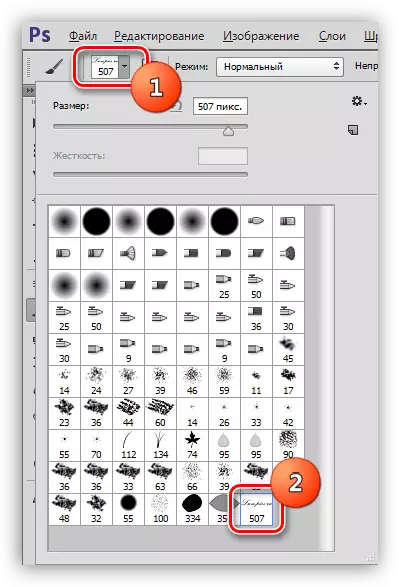
Apply the stigma to some photo. I will open it in Photoshop, create a new layer for the signature, and take our new brush. The size is selected by square brackets on the keyboard.
- Put the stigma. In this case, it does not matter what color it will be, the color we will subsequently edit (completely remove).
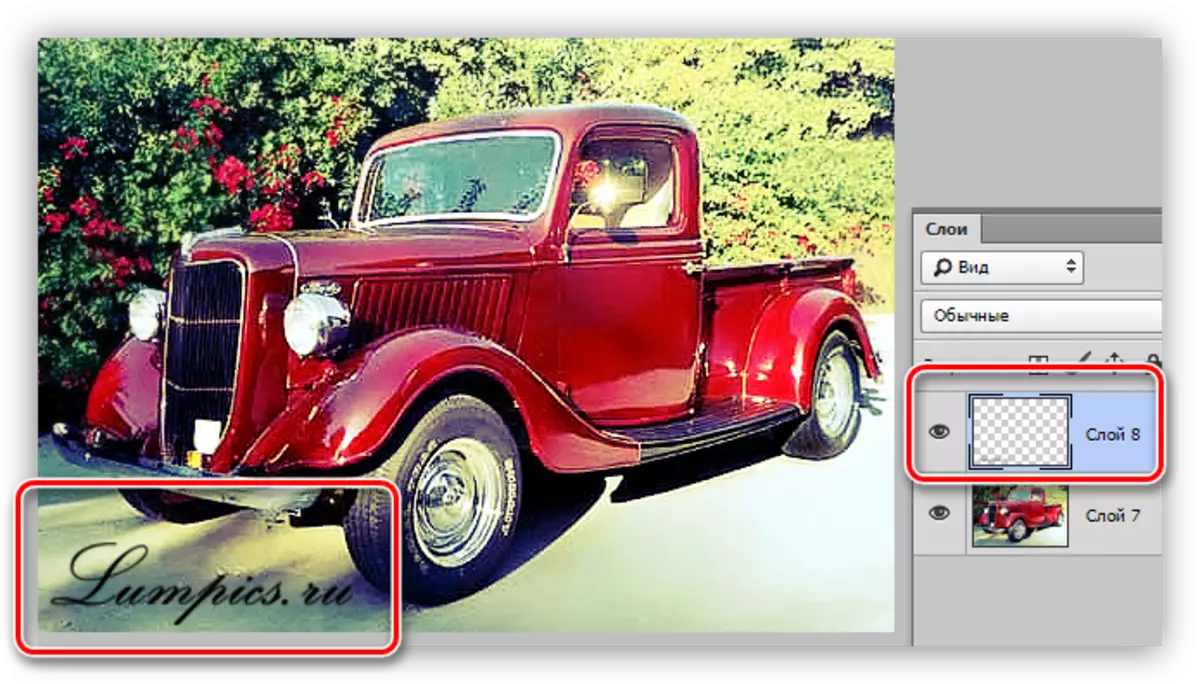
To enhance the contrast of the signature, you can click twice.
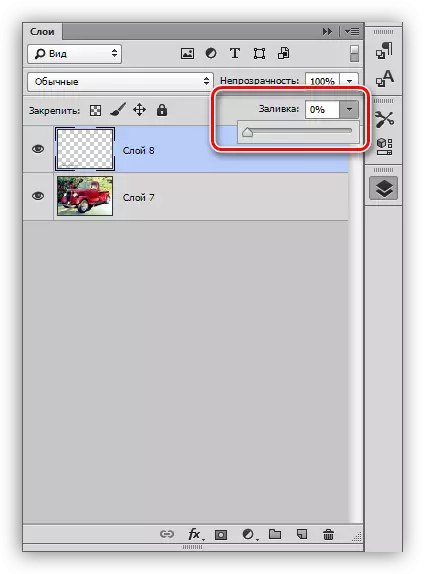
- To make stimples of the type of watermark, reduce the opacity of the fill to zero. This will completely remove the inscription from appearance.
- We call styles with a double click on a layer with a signature, and set the necessary shadow parameters (offset and size).

This is just one example of applying such a brush. You yourself can experiment with the styles to achieve the desired result. You have a universal tool with flexible settings, be sure to use it, it is very convenient.