
This instruction step-by-step describes how to create a loading flash drive MacOS Sierra both on Mac and Windows. Important: Methods allow you to make the installation USB MacOS Sierra drive, which will be used on Mac computers, and not on other PCs and laptops. See also: The loading flash drive Mac OS Mojave.
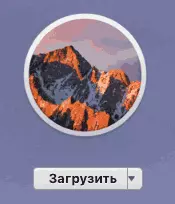
Before you start creating a boot drive, download MacOS Sierra installation files to your Mac or PC. To make it on Mac, go to the App Store, find the desired "application" (at the time of writing it is in the list immediately under the "fast links" on the App Store selection page and click "Download". Or immediately go to the application page: https://itunes.apple.com/ru/app/macos-sierra/id1127487414
Immediately after the download is complete, the window will open with the start of the Sierra installation to the computer. Close this window (Command + Q or through the main menu) The files need to be necessary for our task on your MAC.
If you need to download MacOS Sierra files on a PC to write a flash drive in Windows, the official ways do not have it, but you can use torrent trackers and load the desired image image (in .dmg format).
Creating a loading flash drive MacOS Sierra in the terminal
The first and, possibly, the easiest way to record the MacOS Sierra boot flash drive is to use a terminal on Mac, but before formatting a USB drive (reported that a flash drive is required of at least 16 GB, although, by fact, the image "weighs" less).
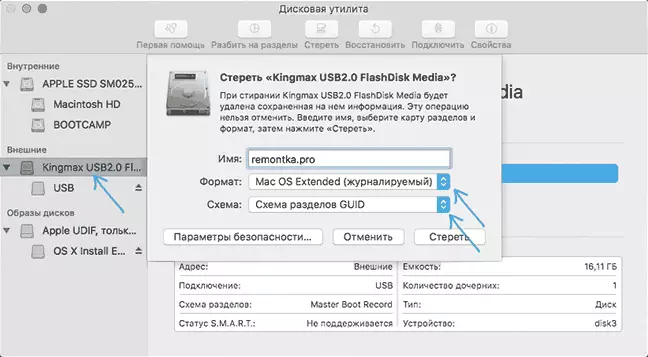
For formatting, use the "disk utility" (can be found through the search for Spotlight or in Finder - programs - utilities).
- In the disk utility, on the left, choose your flash drive (not partition on it, and the USB drive itself).
- Click "Erase" in the top menu.
- Specify any disk name (Remember it, do not use spaces), format - Mac OS Extended (journaling), GUID section scheme. Click "Erase" (all data from the flash drives will be deleted).
- Wait for the process to complete and exit the disk utility.
Now that the drive is formatted, open the Mac terminal (just as the previous utility - via Spotlight or in the "Utilities" folder).
In the terminal, enter one simple command that will record all the necessary Mac OS Sierra files on the USB flash drive and make it boot. In this command, replace the remontka.pro in the name of the flash drive, which you specified in paragraph 3 earlier.
Sudo / Applications / Install \ MacOS \ sierra.app/contents/resources/createInstallmedia --volume /volumes/remontka.pro --ApplicationPath / Applications / Install \ MacOS \ Sierra.App --NointeractionAfter entering (or by copying the command), click Return (ENTER), then enter your MacOS Password (In this case, the entered characters will not be displayed even in the form of "stars", but they are entered) and press RETURN again.
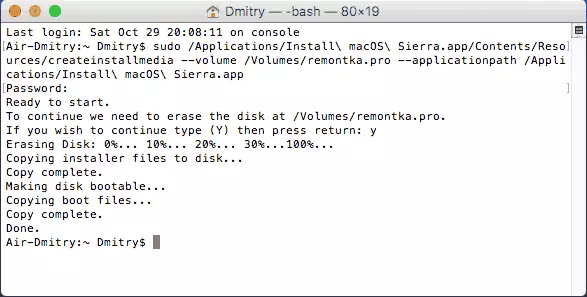
It will only be left to wait for the end of copying files upon completion of which you will see the text "Done" And invitation to the new command input in the terminal, which can now be closed.
On this loading flash drive MacOS Sierra is ready for use: To download your Mac from it, while restarting, hold the Option (ALT) key, and when you appear the storage drives to download, select your USB flash drive.
MacOS Drive Installation USB Recording Programs
Instead of a terminal, on Mac, you can use simple free programs that will do everything automatically (except for downloading Sierra from the App Store, that you will still need to be done manually).
The two most popular programs of this kind - Macdaddy Install Disk Creator and Diskmaker X (both free).
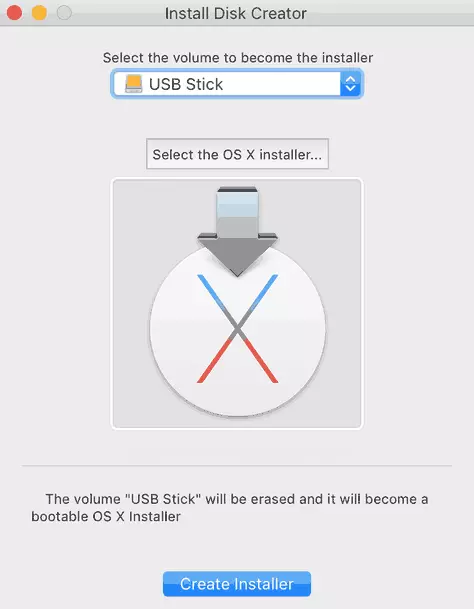
In the first of them, it is enough to choose a flash drive that needs to be done, and then specify the MacOS Sierra installer by pressing "Select The OS X Installer". Last action - click "Create Installer" and wait when the drive is ready.
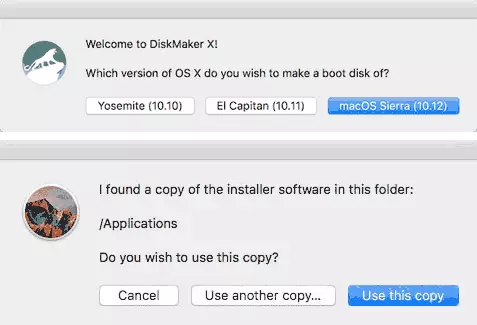
In Diskmaker X, everything is just as simple:
- Select MacOS Sierra.
- The program itself will offer you a copy of the system that will detect on your computer or laptop.
- Specify the USB drive, select "Erase the Create A Disk" (data from the flash drives will be deleted). Click Continue and enter your user's password when you need.
After a while (depending on the rate of data exchange with the drive), your flash drive will be ready for use.
Official programs:
- Install Disk Creator - http://macdaddy.io/install-disk-creator/
- Diskmakerx - http://diskmakerx.com.
How to write Macos Sierra on a USB flash drive in Windows 10, 8 and Windows 7
The MacOS Sierra boot flash can be created in Windows. As mentioned above, you will need an image of an installer in the .dmg format, and the created USB will only work on Mac.
To record the DMG image on a USB flash drive, you will need a third-party transmac program (which is paid, but the first 15 days work for free).
The process of creating an installation drive consists of the following steps (all the data will be deleted from the flash drive, which you will be warned several times):
- Run TRANSMAC on behalf of the administrator (you have to wait 10 seconds to press the Run button to start the program if you use a trial period).
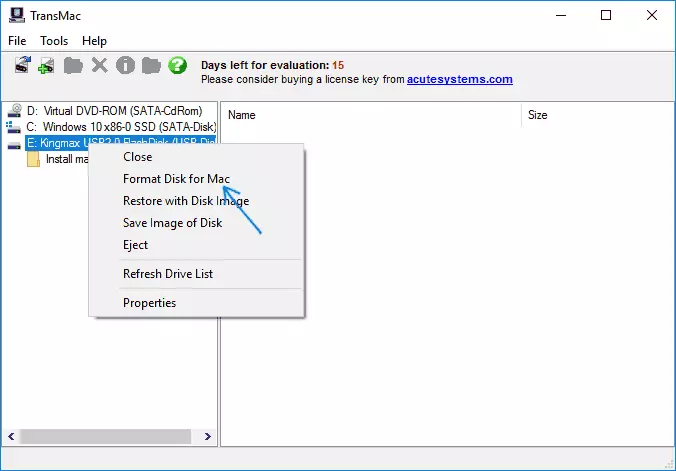
- In the left pane, select a flash drive from which you need to make a bootable with MacOS, click on it right-click and select "Format Disk for Mac", agree with the data removal (Yes button) and set any disk name (for example, Sierra).
- Upon completion of formatting, click on the flash drive in the list on the left right mouse button and select the Restore Wither Disk Image context menu.
- Agree with data loss warnings, and then specify the path to the MacOS Sierra image file in the DMG format.
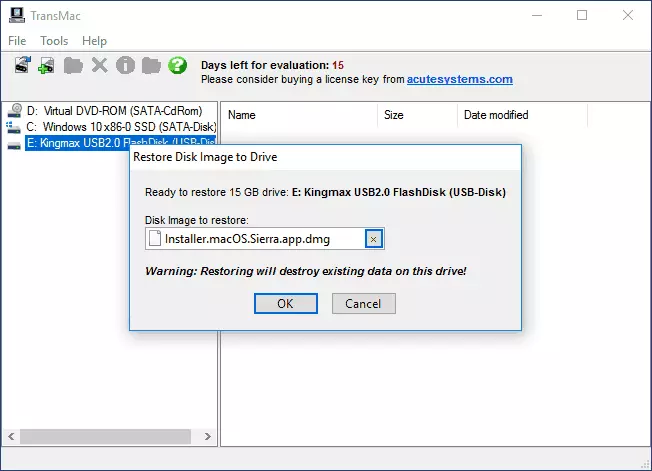
- Click OK, confirm again that you are warned about the loss of data from USB and wait for the file recording process.
As a result, the MacOS Sierra boot flash driver, created in Windows ready for use, but, I repeat, use it on simple PCs and laptops will not work: installation of the system from it is possible only on Apple computers. You can download TRANSMAC from the developer's official website: http://www.acutesystems.com