
Photoshop is a raster editor of images, but its functionality also includes the possibility of creating vector figures. Vector figures consist of primitives (points and segments) and fill. In fact, this is a vector circuit, flooded by any color.
Saving such images is possible only in raster formats, but if required, the work document can be exported to the vector editor, for example, Illustrator.
Creating figures
The toolkit for creating vector figures is located in the same place where all other fixtures are on the toolbar. If there is a desire to become a real professional, then the hot key of the call of any of these tools is U.

This includes a rectangle "," Rectangle with rounded corners "," Ellipse "," Polygon "," Arbitrary Figure "and" Line ". All of these tools perform one function: create a working outline consisting of reference points, and poured its main color.
As you can see, there are quite a few tools. Let's talk about all briefly.
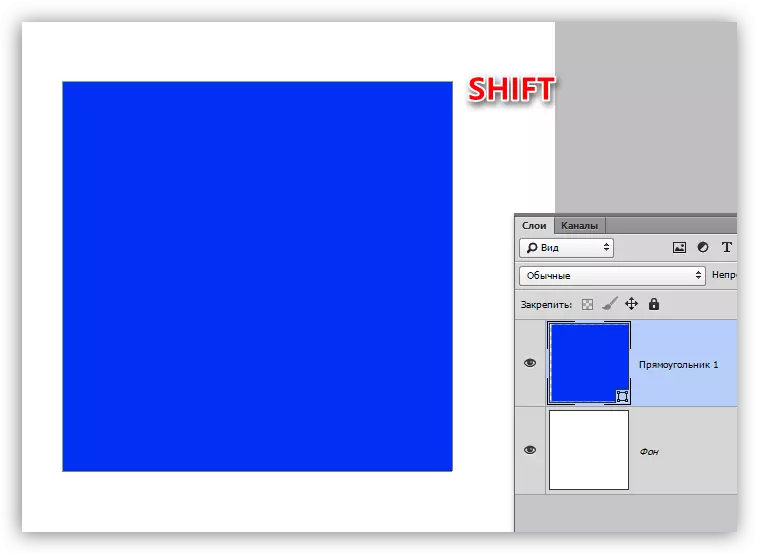
- Rectangle.
With the help of this tool, we can draw a rectangle or square (with the SHIFT clamped key).
Lesson: Draw rectangles in Photoshop
- Rectangle with rounded corners.
This tool, as follows from the title, helps to portray the same figure, but with rounded corners.
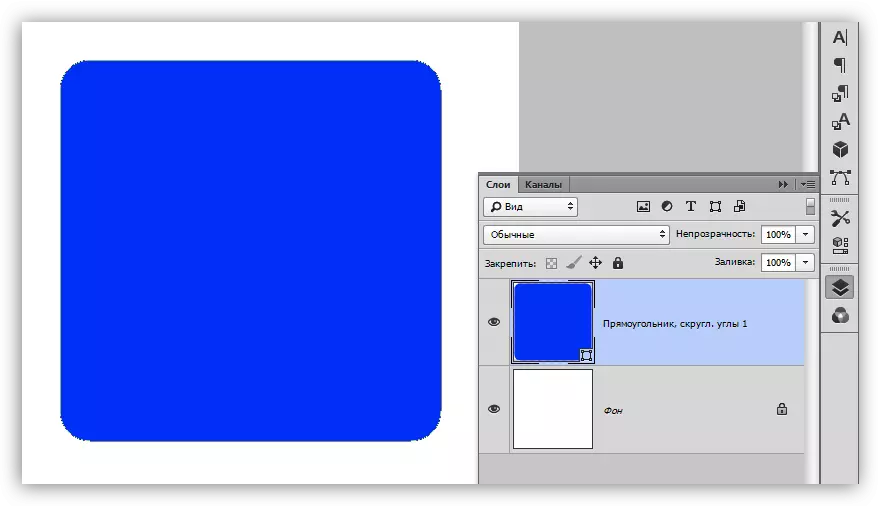
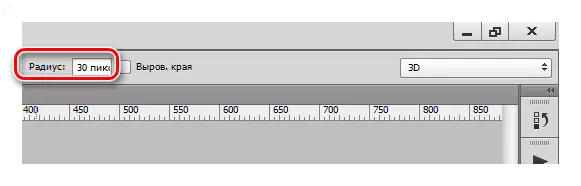
Radius of roundings is preloaded on the parameter panel.
- Ellipse.
With the help of the "Ellipse" tool, circles and ovals are created.
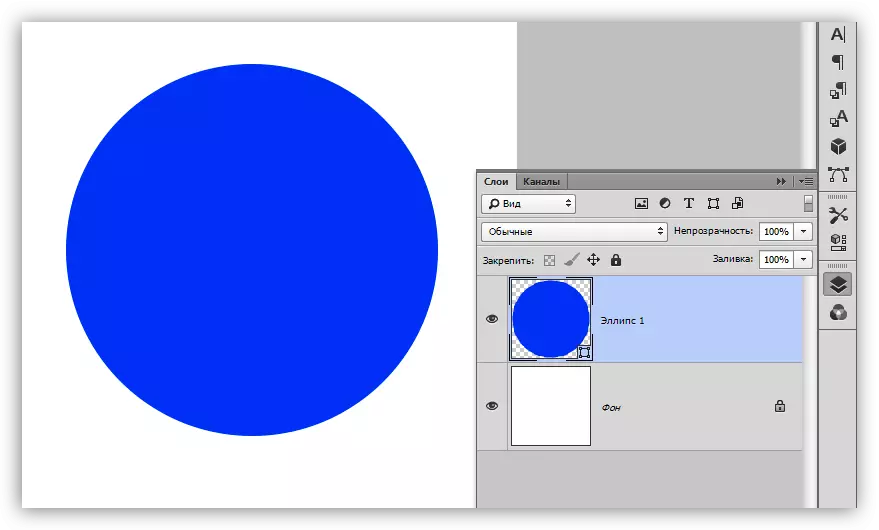
Lesson: How to draw a circle in photoshop
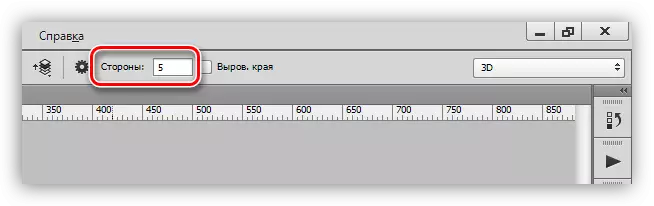
- Polygon.
The "Polygon" tool allows us to draw polygons with a given number of corners.

The number of angles is also configured on the parameter panel. Please note that the "Side" parameter is specified in the setting. Let this fact mislead you.
Lesson: Draw a triangle in Photoshop
- Line.
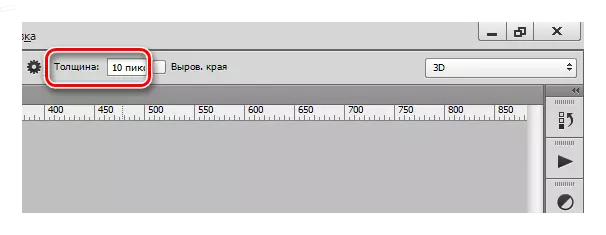
With this tool, we can spend a straight line in any direction. The SHIFT key in this case allows lines under 90 or 45 degrees relative to the canvas.
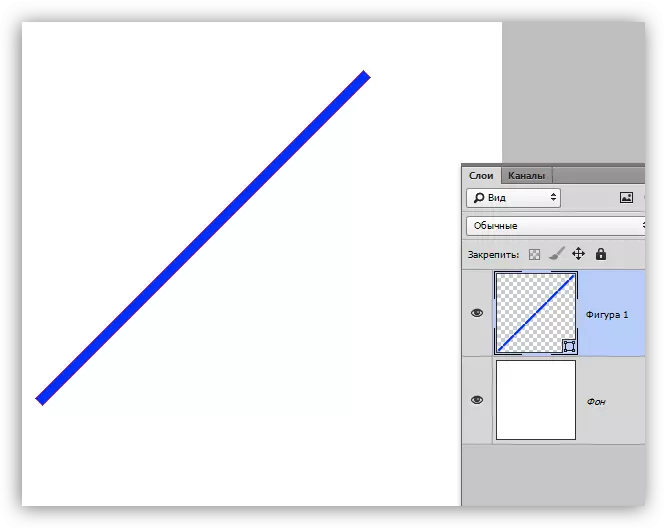
The thickness of the line is configured everything there - on the parameter panel.
Lesson: Draw a straight line in Photoshop
- Arbitrary figure.
The "Arbitrary Figure" instrument gives us the opportunity to create an arbitrary form figures contained in the set of figures.
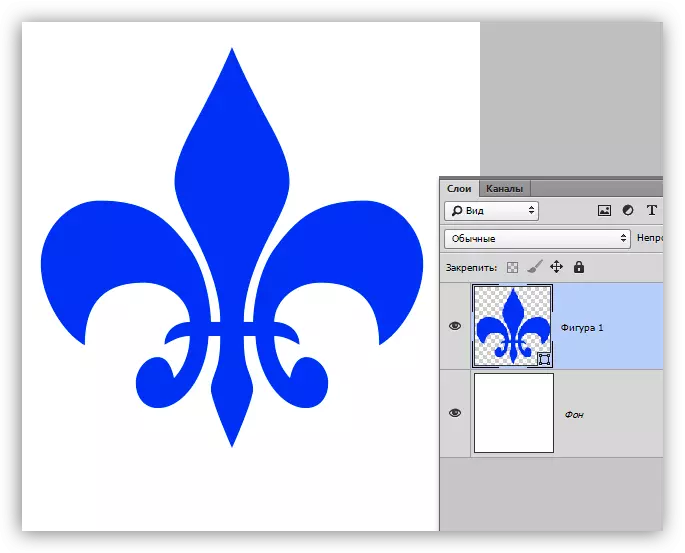
Standard photoshop set containing arbitrary shapes can also be found on the top of the tool settings panel.
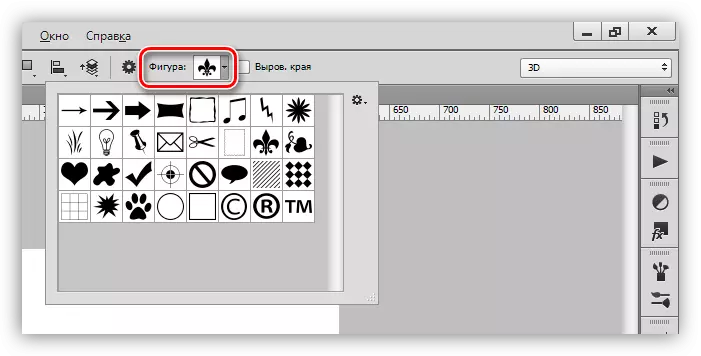
In this set, you can add figures downloaded from the Internet.
General tool settings
As we already know, most of the settings of the figures are on the top panel of the parameters. The settings below are equally applied to all group tools.
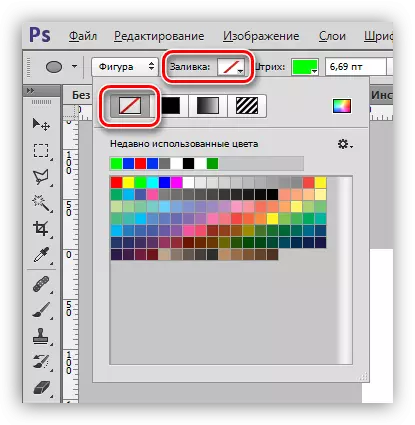
- The very first drop-down list allows us to portray either directly figure the whole, or its outline or fill separately. Fill in this case will not be a vector element.

- Filling color shapes. This parameter works only if the tool is activated from the "Figure" group, and we are on the layer with the figure created. Here (from left to right) we can: turn off the fill completely; pour the figure with a continuous color; pour the gradient; Short pattern.
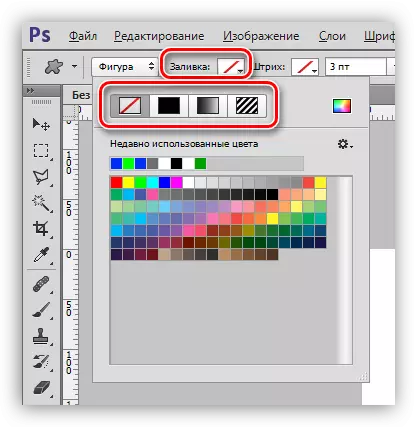
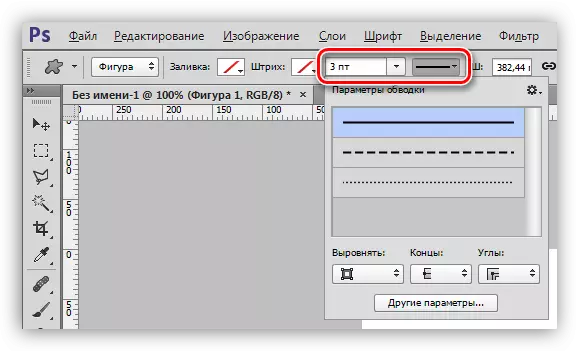
- The following in the list of settings is "bar". Here refers to the stroke of the contour of the figure. For the stroke, you can configure the color (or disable), and setting the fill type,

And his thickness.
- Then follow the "width" and "height". This setting allows us to create figures with arbitrary sizes. To do this, you need to make data into the appropriate fields and click anywhere in the canvas. If the figure is already created, then its linear dimensions will change.

The following settings allow you to produce with different figures, rather complex, manipulations, so let's talk about them in more detail.
Manipulations with figures
These manipulations are possible only if at least one figure is already present on the canvas (layer). Below it will be clear why this happens.
- New layer.
When this setting is set, the new figure is created in the usual mode on the new layer.

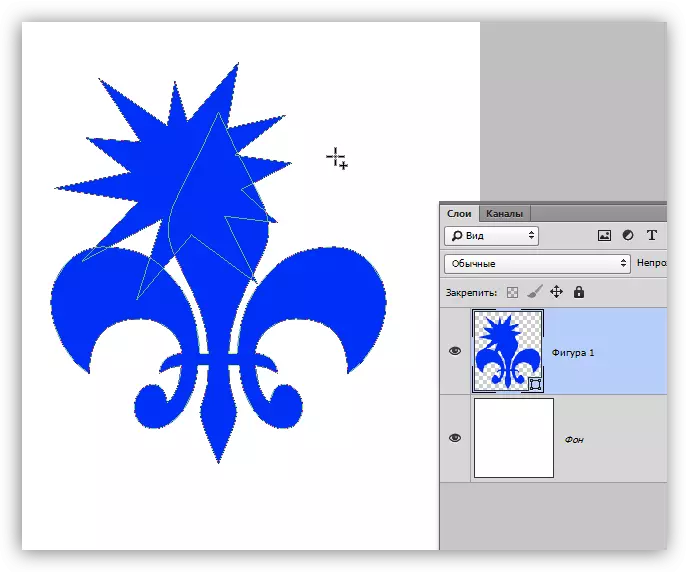
- Combining figures.
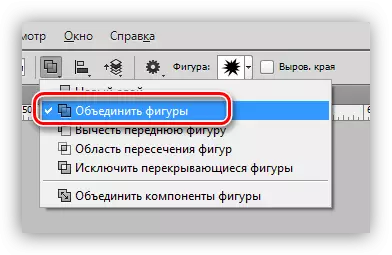
In this case, the figure being created at the moment will be fully combined with the figure located on the active layer.
- Subtraction of figures.

When the configuration is enabled, the created figure will be "deducted" from the currently located layer. The action resembles the selection of the object and press the DEL key.

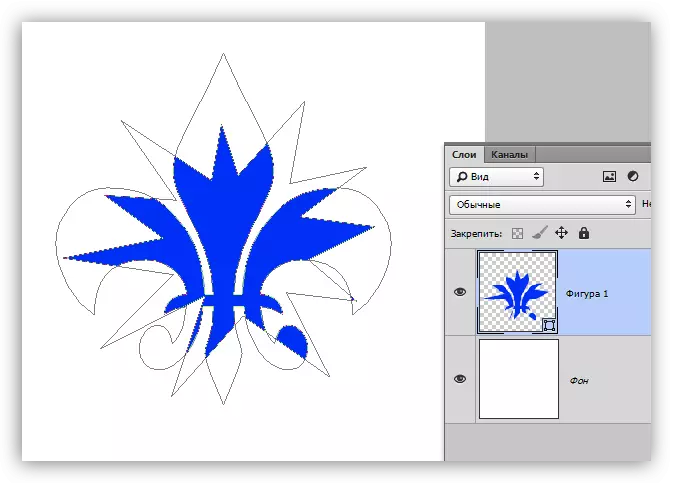
- Crossing figures.

In this case, when creating a new figure, there will be visible only those areas where the figures are superimposed by one to another.
- Exclusion of figures.
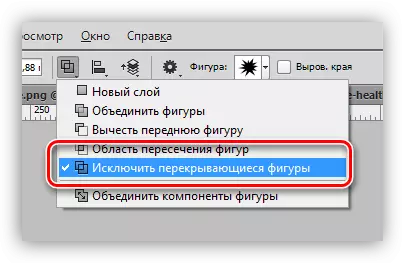
This setting allows you to remove those areas where the figures intersect. Other areas will remain intact.
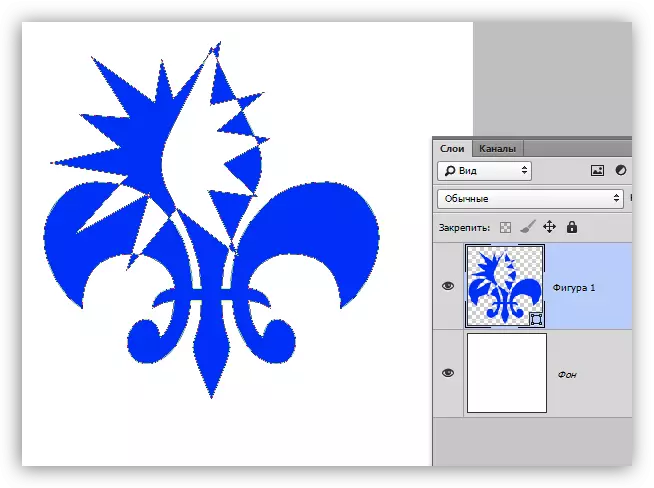
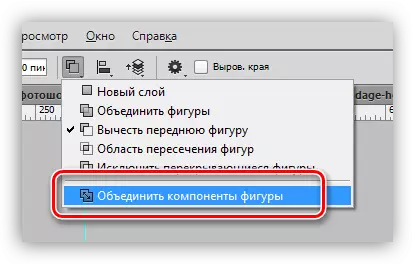
- Combining components of figures.
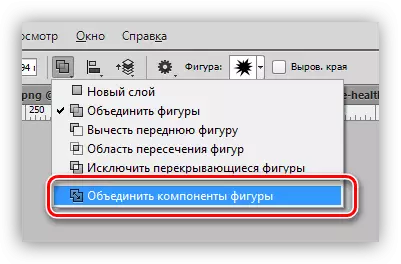
This item allows, after committing one or more of previous operations, combine all contours into one solid figure.
Practice
The practical part of today's lesson will be a set of messy actions directed only to see the operation of the tool settings. This will already be enough to understand the principles of working with figures.
So, practice.
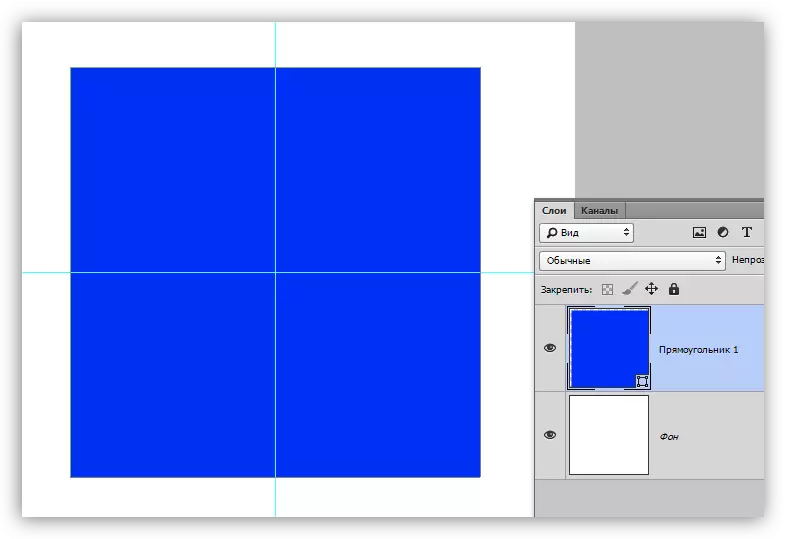
1. To begin with, creating a normal square. To do this, choose the "Rectangle" tool, climb the Shift key and pull from the center of the canvas. You can use guides for convenience.
2. Then choose the "Ellipse" tool and the "Substitutional Figure" settings. Now we will cut a circle in our square.
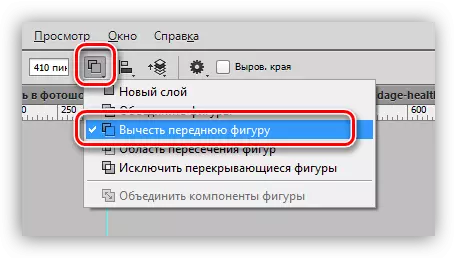
3. Click once at any place on the canvas and, in the dialogue opened, weeping the sizes of the future "hole", as well as put a tank opposite the point "from the center". The circle will be created precisely in the center of the canvas.
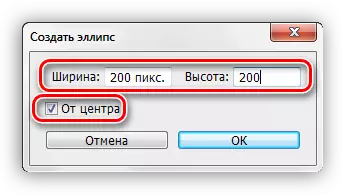
4. Click OK and see the following:
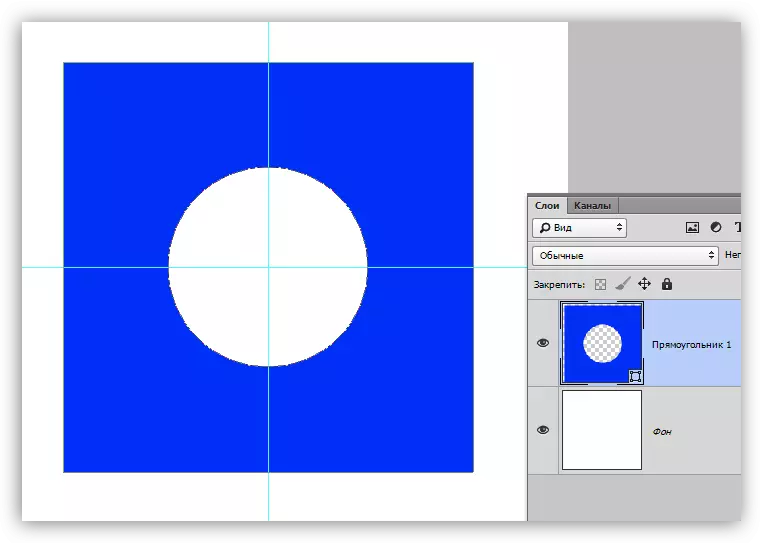
Hole is ready.
5. Next, we need to combine all the components by creating a solid figure. To do this, select the appropriate item in the settings. In this case, it is not necessary to do this, but if the circle went beyond the borders of the square, our figure consisted of two working circuits.
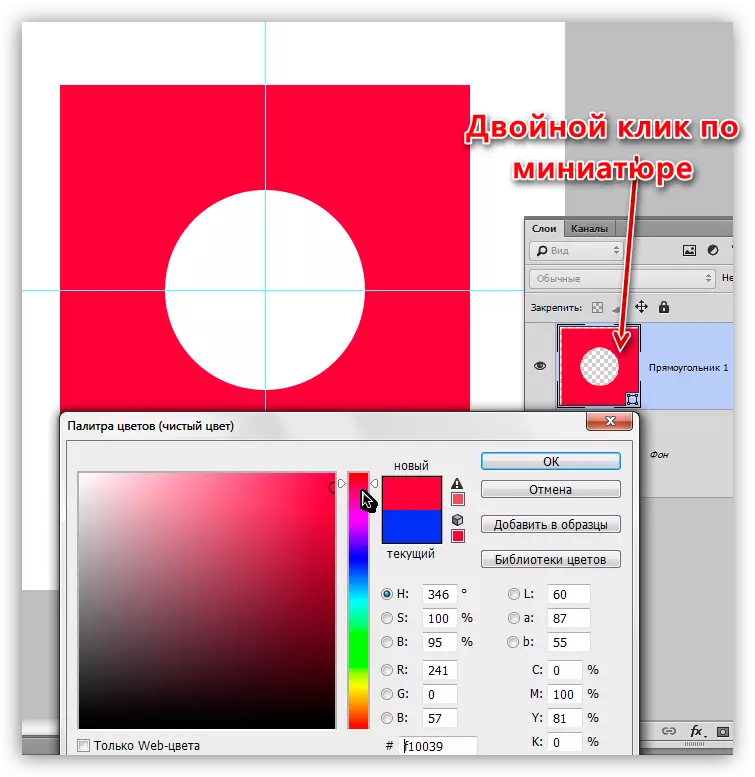
6. Change the color of the shape. From the lesson we know which setting is responsible for the fill. There is another, faster and practical way of changing color. You must click on the miniature of the layer with the figure and, in the color settings window, select the desired shade. In this way, you can pour the figure to any solid color.
Accordingly, if a gradient fill or pattern is required, we use the parameter panel.
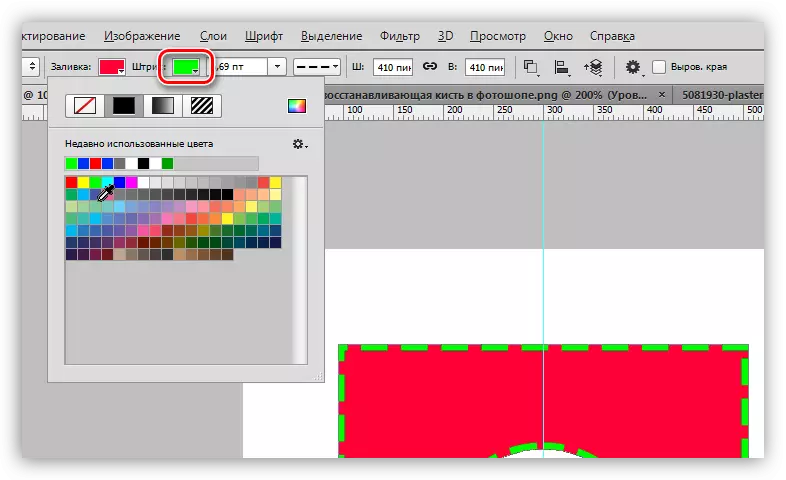
7. Let us set the stroke. To do this, take a look at the "Bar" block on the parameter panel. Here, choose the type of stroke "dotted" and the slider will change its size.
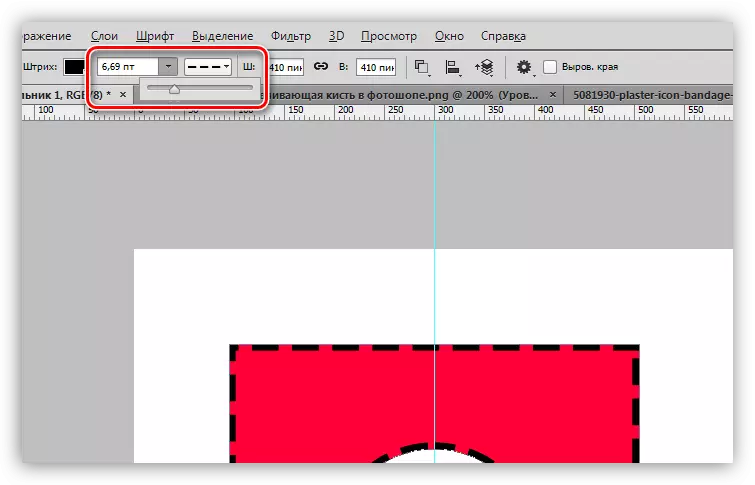
8. The color of the dotted is set by clicking on the adjacent color window.
9. Now, if you completely disable the fill of the shape,
You can see the following picture:

Thus, we ran almost on all the tools settings from the "Figure" group. Be sure to practice, simulating various situations in order to understand how raster objects in Photoshop are obeyed.
The figures are notable for, unlike their raster fellow, they do not lose quality and do not acquire torn edges when scaling. At the same time, they possess the same properties and are treated. Figures can be used styles, pour by any means, by combining and subtracting to create new forms.
Skills of working with figures are indispensable when creating logos, various elements for sites and printing. Using tools data, you can transfer raster elements into vector with subsequent export to the appropriate editor.
Figures can be downloaded from the Internet, as well as create their own. With the help of the figures, you can draw huge posters and signs. In general, the usefulness of these tools is very difficult to overestimate, so pay special attention to the study of this photoshop functional, and the lessons on our site will help you with this.