Very often the end of the work on the Excel document is to withdraw it to print. If you want to display the printer all the contents of the file, then make it quite simple. But if only part of the document remains to be printed, problems with the configuration of this procedure begins. Let's find out the main nuances of this process.
Printing pages
When printing a document pages, you can configure the print area each time, and you can do this once and save in the document parameters. In the second case, the user will always offer to print exactly the fragment that he indicated earlier. Consider both of these options on Excel 2010 Example. Although this algorithm can be applied for later versions of this program.Method 1: Disposable Setup
If you plan to display a definite area of the document only once, it makes no sense to install a constant print area in it. It will be enough to apply a one-time setting that the program will not be memorized.
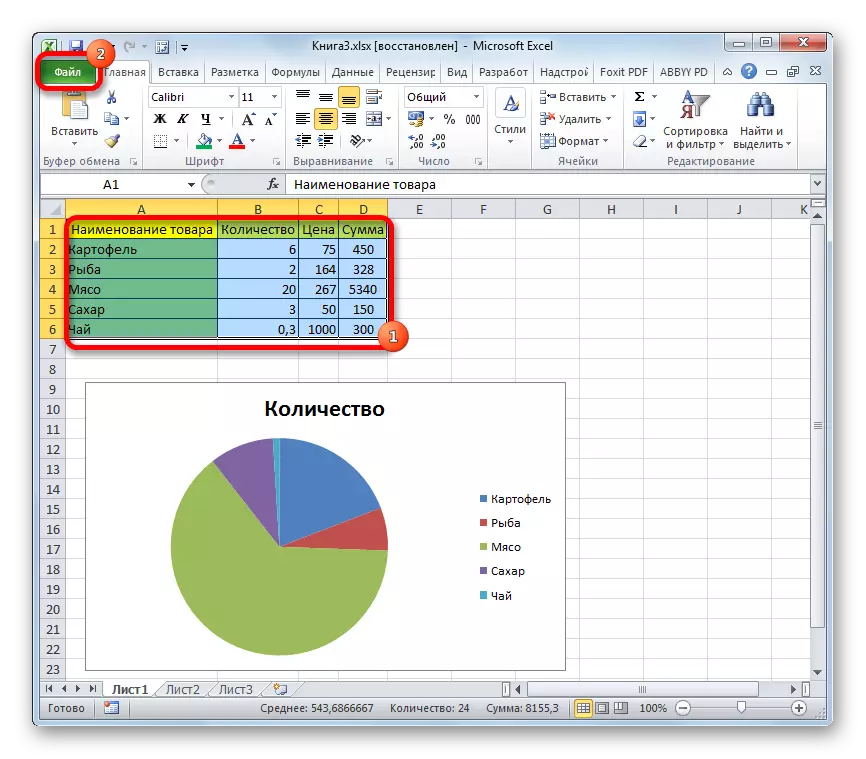
- We highlight the area with a sandwicted area on the sheet to be printed. After that, go to the "File" tab.
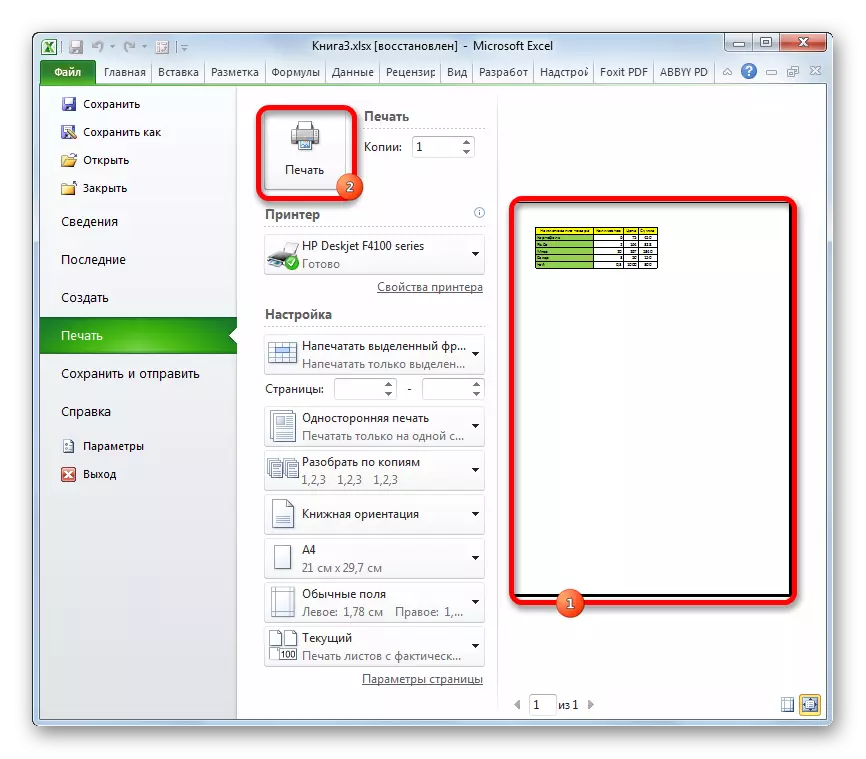
- On the left side of the window that opened the window is moving on the "Print". Click on the field, which is located immediately under the word "setting". The list of options for selecting parameters opens:
- Print active sheets;
- Print all books;
- Print a selected fragment.
We choose the last option, as it is just suitable for our case.
- After that, there will be no entire page in the preview area, but only a selected fragment. Then, to conduct a direct printer procedure, press the "Print" button.

After that, the printer will be printed exactly the fragment of the document you allocated.
Method 2: Installing Permanent Settings
But if you plan to periodically print the same fragment of the document, that is, it makes sense to set it as a permanent print area.
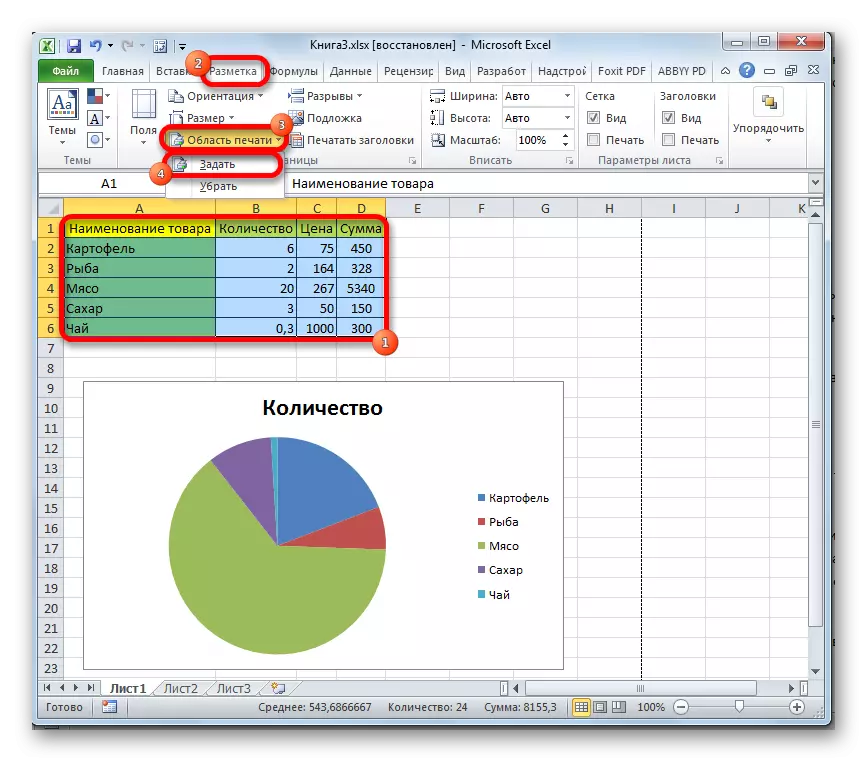
- We highlight the range on a sheet that are going to make a print area. Go to the tab "Page Markup". Click on the "Print region" button, which is located on the tape in the page of the "Page Parameters" toolbar. In a small menu that appears, consisting of two items, choose the name "Set".
- After that, the constant settings are specified. To make sure this, go back to the "File" tab, and then move to the "Print" section. As you can see, in the preview window it is clear that the area we asked.
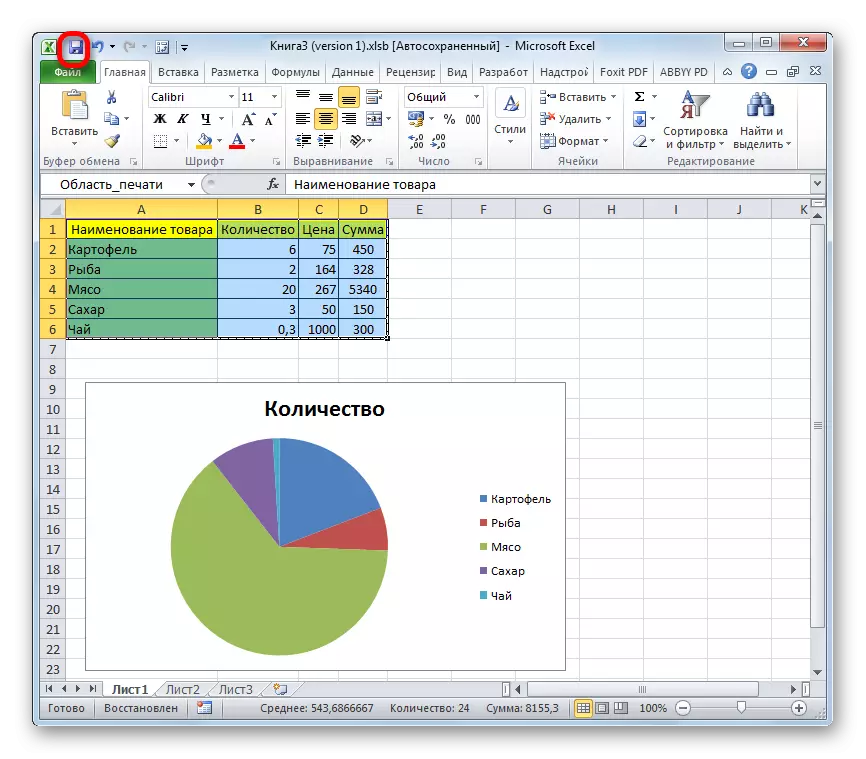
- To be able to print the default file by default, we return this fragment, we return to the "Home" tab. To save changes to click on the button in the form of a floppy disk in the upper left corner of the window.
- If you ever need to print the entire sheet or another fragment, then in this case you will need to remove the fixed print area. Being in the "Page Markup" tab, click on the tape on the "Print region" button. In the list that opens, click on the "Remove" item. After these actions, the print area in this document will be disabled, that is, the settings are returned to the default state, as if the user did not change anything.


As you can see, set a specific fragment to output to the printer in the Excel document is not as hard as it may seem to someone at first glance. In addition, you can install a permanent print area that the program will offer for printing material. All settings are made literally a few clicks.
