

In order for the solid-state drive to work in full force, it must be configured. In addition, the correct settings will not only provide a quick and stable disk operation, but also will extend its service life. And today we will talk about how and what it is necessary to make settings for SSD.
Ways to configure SSD to work in Windows
We will consider SSD optimization in detail on the example of the Windows 7 operating system. Before switching to the settings, say a few words about what methods have. Actually, you will have to choose here between automatic (using special utilities) and manual.Method 1: Using SSD MINI TWEAKER
Using the SSD Mini Tweaker utility, the SSD optimization passes almost completely in automatic mode, with the exception of special actions. This setting method will allow not only to save time, but also more securely perform all the necessary actions.
Download SSD MINI TWEAKER program
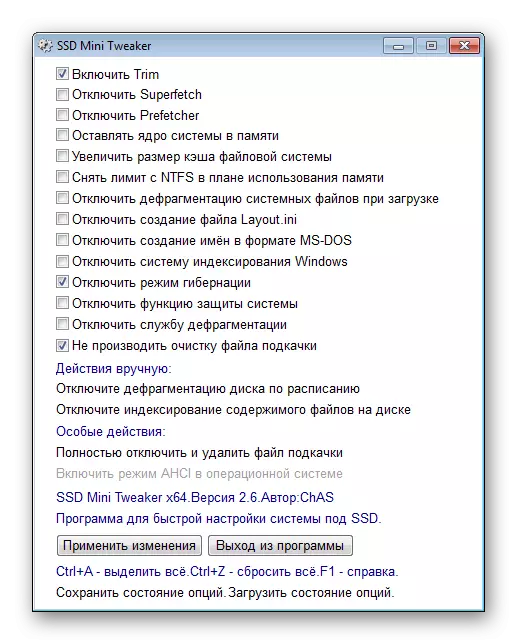
So, to optimize using SSD Mini Tweaker, you must run the program and mark the necessary actions with flags. In order to understand what actions must be performed, let's go through each item.
- Enable trim
- Disable Superfetch
- Disable Prefetcher.
- Leave the kernel of the system in memory
- Enlarge File System Cache
- Remove the limit with NTFS in terms of use of memory
- Disable system file defragmentation when loading
- Disable Layout.ini file creation
- Disable name creation in MS-DOS format
- Disable Windows Indexing System
- Disable hibernation mode
- Disable system protection function
- Disable defragmentation service
- Do not clean the paging file

Trim is a command of the operating system that allows you to clean the disc cell from physically remote data, thus significantly increases its performance. Since this command is very important for SSD, then it is necessarily turned on.
Superfetch is a service that allows you to speed up the system, by collecting information about frequently used programs and in advance locating the necessary modules in RAM. However, when using solid-state drives, the need for this service disappears, since the speed of data reading increases in tens of times, which means the system will be able to quickly read and run the required module.
PREFETCHER is another service that allows you to increase the speed of the operating system. The principle of its work is similar to the previous service, so it can be safely disabled for SSD.
If 4 and more gigabytes of RAM installed on your computer, then you can safely check the box opposite this option. Moreover, the location of the kernel in RAM, you will extend the service life of the drive and can increase the speed of the operating system.

This option will reduce the amount of access to the disk, and, therefore, will prolong its service life. The most frequently used disk area will be stored in RAM in the form of a cache, which will reduce the number of references directly to the file system. However, there is also a reverse side - this is an increase in the amount of memory used. Therefore, if less than 2 gigabytes of RAM installed in your computer, then this option is better not to mark.
When this option is enabled, you will more cache read / write operations, which will require an additional amount of RAM. As a rule, this option can be included if you use 2 or more gigabytes.
Since SSD has a different data recording principle compared to magnetic drives, which makes the need for defragmentation of files absolutely not necessary, it can be disabled.
During system downtime, a special Layout.ini file is created in the Prefetch folder, which stores the list of directories and files that are used when the operating system is loaded. This list is used by the defragmentation service. However, it is absolutely no need for SSD, so we note this option.

This option will disable the creation of names in the format "8.3" (8 characters for the file name and 3 to expand). By and large, it is necessary for the correct operation of 16-bit applications created to work in the MS-DOS operating system. If you do not use this software, it is better to turn off this option.
The indexing system is designed to quickly find the necessary files and folders. However, if you do not use the standard search, it can be turned off. In addition, if the operating system is installed on SSD, this will reduce the number of appeals to the disk and release an additional place.
Hibernation mode is usually used to quickly launch the system. In this case, the system file, which is usually equal to the RAM, is saved by the current state of the system. This allows in a matter of seconds to load the operating system. However, this mode is relevant if you use a magnetic drive. In the case of SSD, the load itself occurs in a matter of seconds, so this mode can be turned off. In addition, it will allow you to save several gigabytes of the place and extend the service life.

Disconnecting the system protection function, you will not just save space, but also significantly extend the disk service life. The fact is that the protection of the system is to create checkpoints, the volume of which can be up to 15% of the total disk. It will also reduce the number of read / write operations. Therefore, for SSD, it is better to disable this feature.
As mentioned above, the solid-state drives in view of the storage features do not need defragmentation, so this service can be turned off.
If you use the paging file, you can "say" the system that you do not need to clean it every time when the computer is turned off. This will reduce the number of operations with SSD and extend the service life.
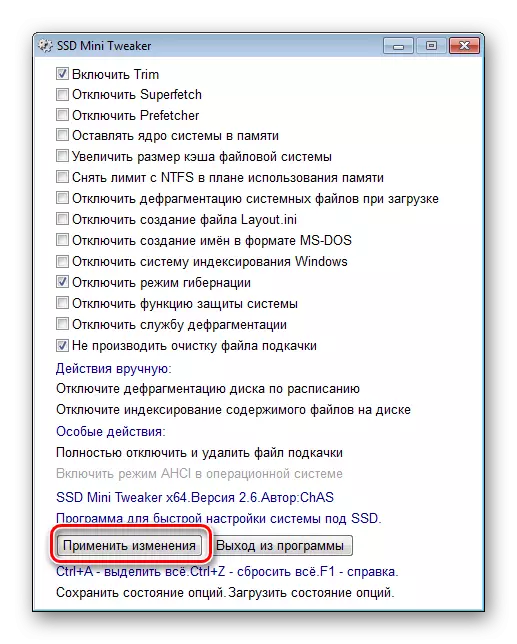
Now, when they put all the required checkboxes, press the "Apply Change" button and reboot the computer. On this, the SSD configuration using the SSD Mini Tweaker application is complete.
Method 2: With SSD Tweaker
SSD Tweaker is another assistant in the correct setup of the SSD. In contrast to the first program, which is completely free, this has both paid and free versions. These versions are distinguished, first of all, set of settings.
Download SSD TWEAKER program
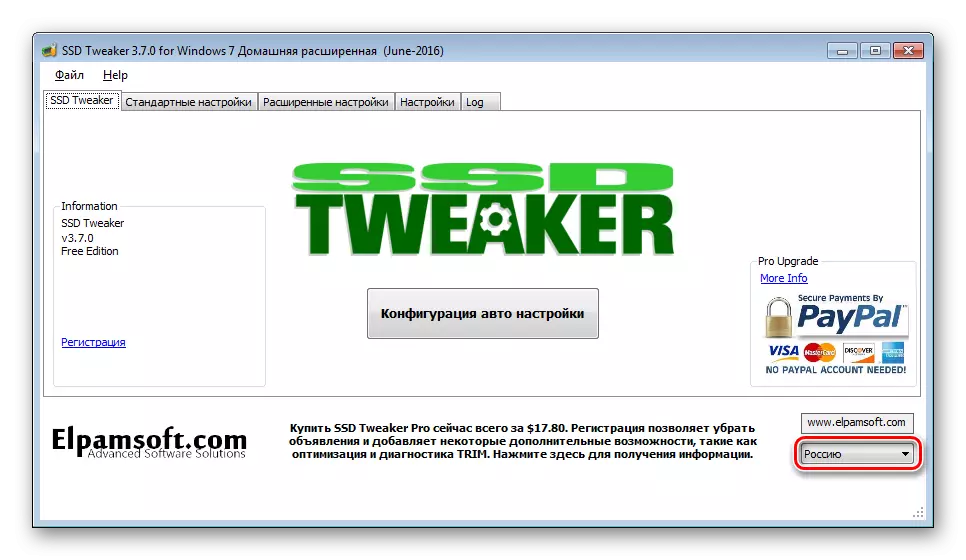
If you run the utility for the first time, the English-speaking interface will be met by default. Therefore, in the lower right of the corner, we choose Russian. Unfortunately, some elements will still remain in English, but still most of the text will be translated into Russian.
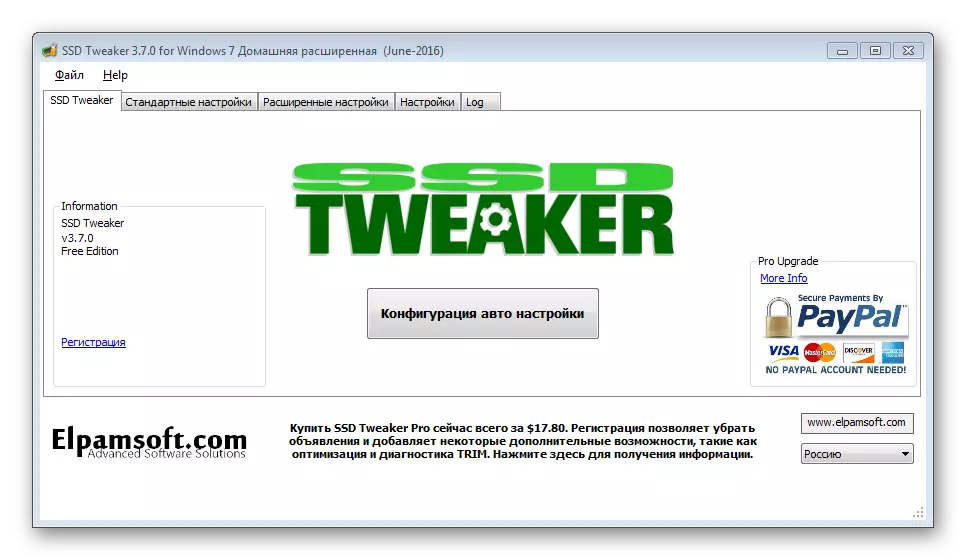
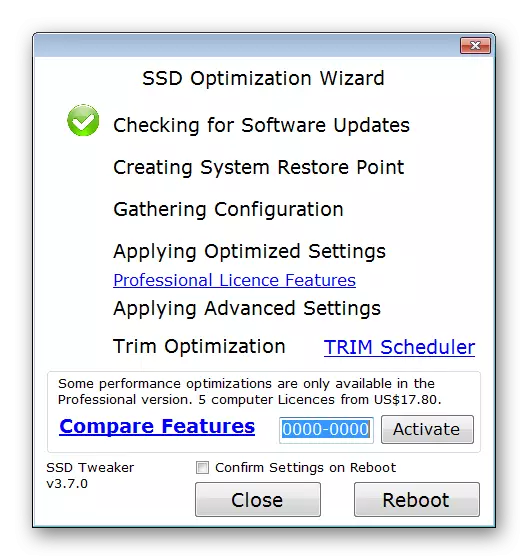
Now go back to the first SSD Tweaker tab. Here, in the center of the window, a button is available that allows you to choose the disk settings automatically.
However, there is one "but" here - some settings will be available in the paid version. At the end of the procedure, the program will offer to restart the computer.
If you are not satisfied with the automatic disk setup, you can go to manual. For this, users of the SSD Tweaker application are available two tabs "Standard Settings" and "Advanced Settings". The latter contains those options that will be available after buying a license.
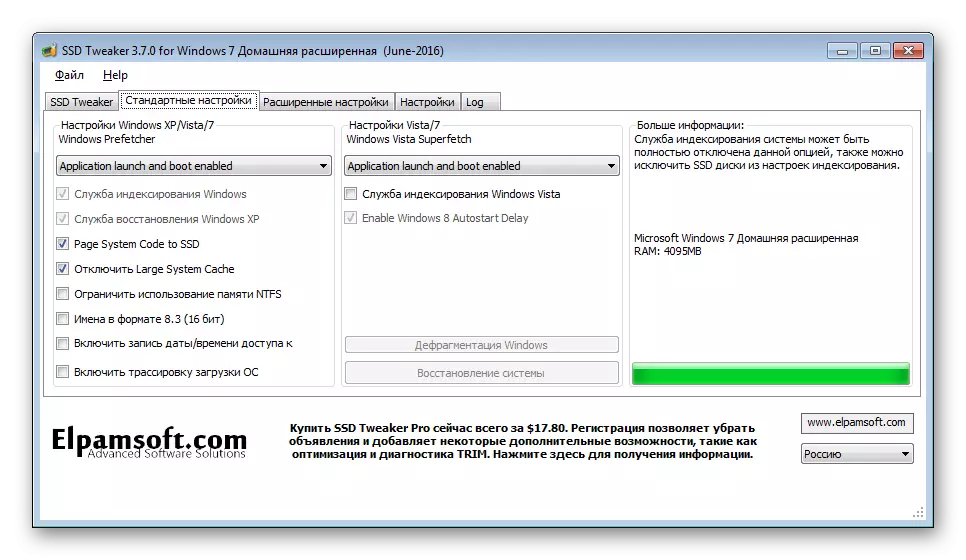
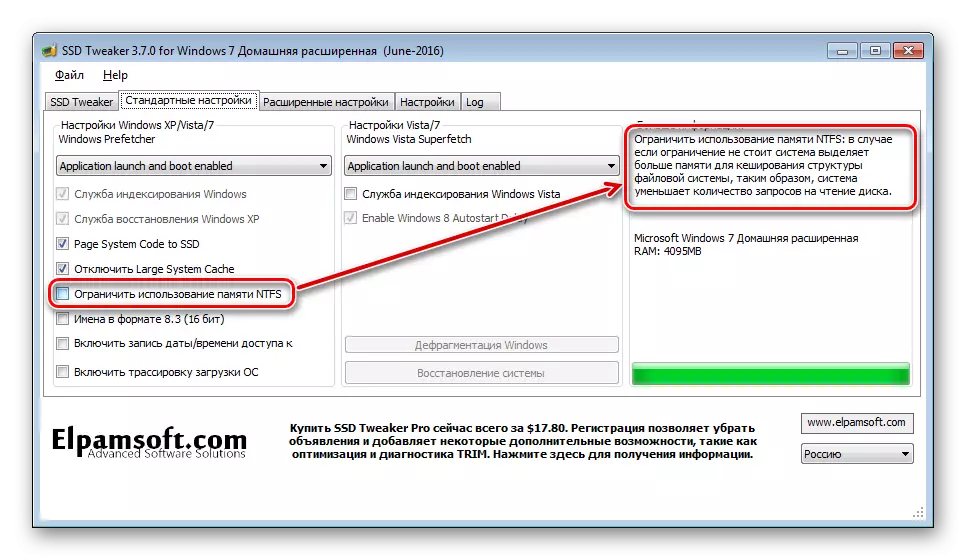
On the Standard Settings tab, you can enable or disable Prefetcher and Superfetch. These services are used to speed up the operation of the operating system, however, using SSD, they lose meaning, so it is better to disable them. Other parameters that were described in the first method of setting up the drive are also available here. Therefore, we will not stop in detail. If you have any questions about the options, you can enjoy the cursor on the desired line you can get a detailed prompt.
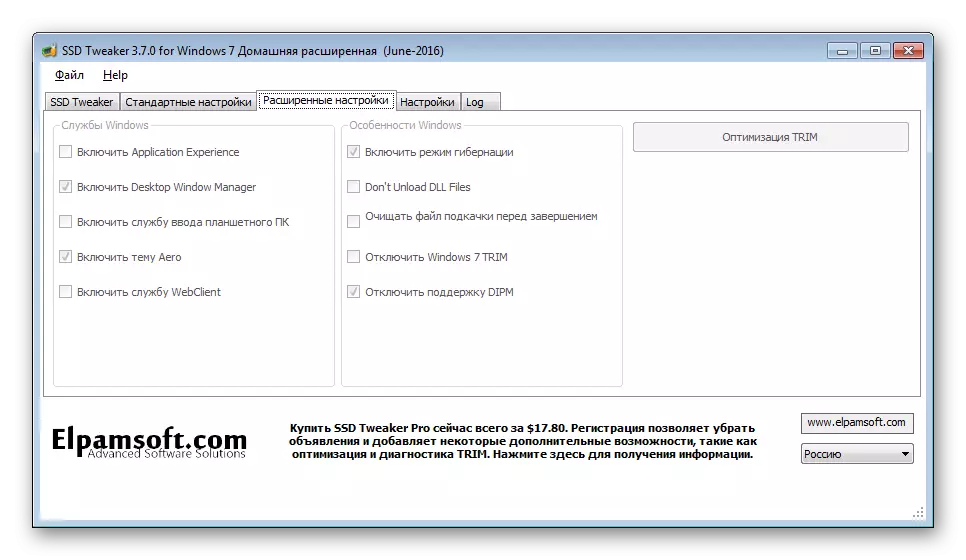
The Advanced Settings tab contains additional options that allow you to manage some services, as well as use some features of Windows operating systems. Some of the settings (for example, such as "Enable Tablet PC Input Service" and "Enable Aero Topic") more affect the speed of the system and do not affect the operation of solid-state drives.
Method 3. Setting up SSD manually
In addition to using special utilities, you can configure SSD yourself. However, in this case there is a risk of doing something wrong, especially if you are not an experienced user. Therefore, before proceeding with actions, make a recovery point.
See also: How to create a recovery point in Windows 7
For most settings, we use the standard registry editor. To open it, you must press the "Win + R" keys and enter the "Regedit" command in the "Run".

- Turn on the Trim command.
- Disable data indexing.
- Turn off the paging file.
- Turn off the hibernation mode.
- Disable the prefetch function.
- Turning off SuperFetch.
- Shutting off the Windows cache cleaning.
The first thing to turn on the TRIM command, which will ensure the fast operation of the solid-state drive. To do this, in the registry editor, go on the next way:
HKEY_LOCAL_MACHINE \ SYSTEM \ CURRENTCONTROLSET \ SERVICES \ MSAHCI
Here we find the parameter "ErrorControl" and change its meaning to "0". Next, in the "Start" parameter, also set the value "0". Now it remains to restart the computer.
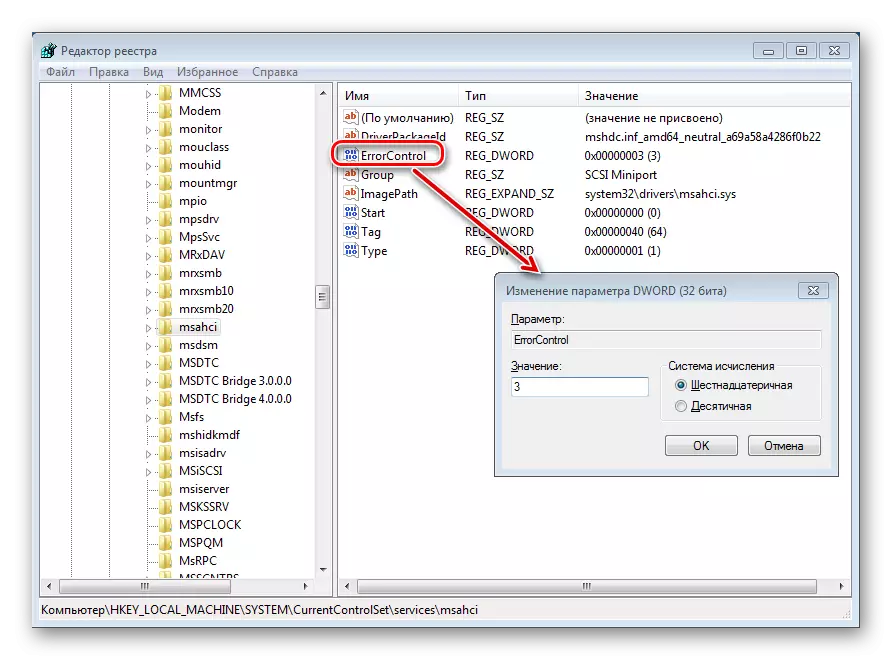
Important! Before changing the registry, you need to install the AHCI controller mode in the BIOS instead of SATA.
In order to check, the change has entered into force or not, you need to open the device manager and in the IDEATA branch to see if AHCI is there. If it is worth - it means the change has entered into force.
In order to disable the data indexing, go to the system disk properties and remove the "Allow index the contents of files on this disk in addition to the file properties."
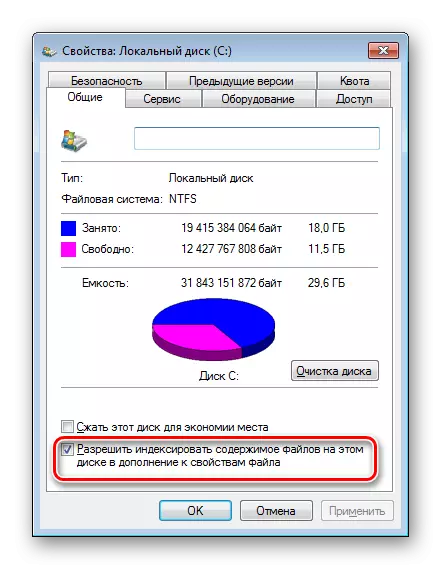
If in the process of disabling data indexing the system will report an error, then it is most likely due to the paging file. In this case, you must reboot and repeat the action again.
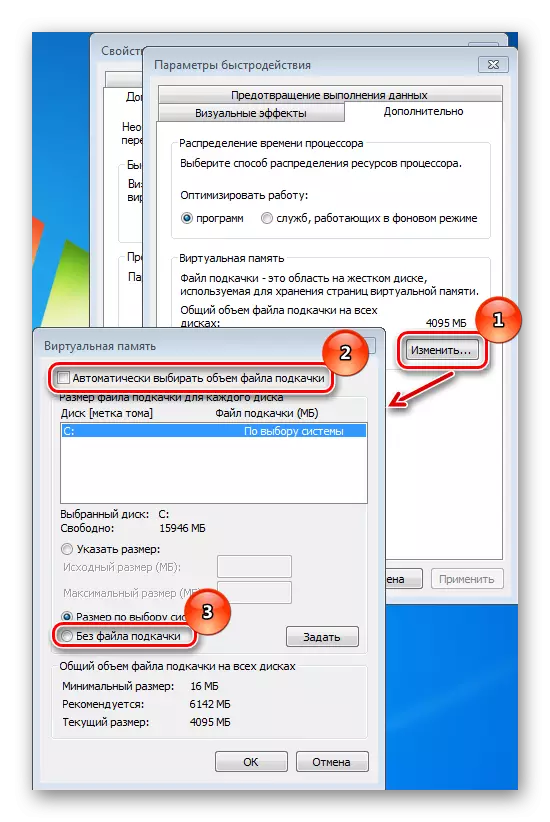
If less than 4 gigabytes of RAM is installed on your computer, then this item can be skipped.
In order to disable the paging file, you need to go to the system speed settings and in the additional parameters it is necessary to remove the check mark and turn on the "without paging file".
See also: Do you need a paging file on SSD
To reduce the load on the SSD, you can turn off the hibernation mode. To do this, run the command prompt on behalf of the administrator. We go to the "Start" menu, then go to "All Programs -> Standard" and here click right-click on the "Command Line" item. Next, select the "Run from the administrator" mode. Now enter the "PowerCFG -H OFF" command and restart the computer.

If you need to enable hibernation mode, then you should use the PowerCFG -H ON command.
Disable the Prefetch function is made through the registry settings, therefore, we launch the registry editor and go to the branch:
HKEY_LOCAL_MACHINE / SYSTEM / CURRENTCONTROLSET / CONTROL / SESSIONMANAGER / MEMORYMANAGEMENT / PREFETCHPARAMETERS
Then, for the EnablePrefetcher parameter, set the value 0. Click "OK" and reboot the computer.

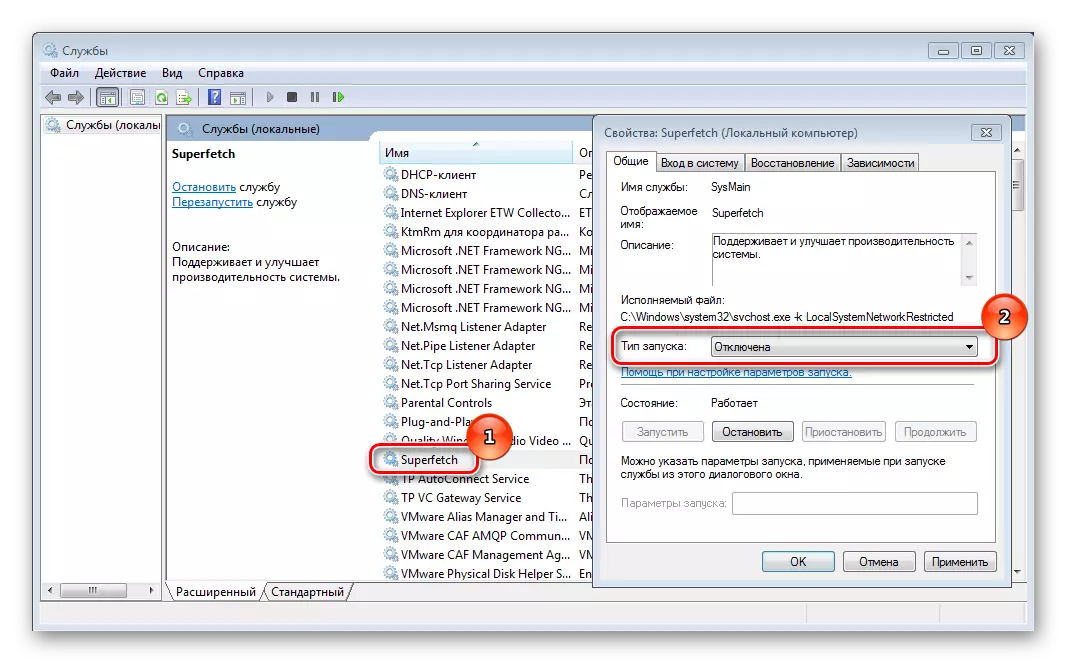
Superfetch is a service that accelerates the operation of the system, however, when using SSD, it disappears. Therefore, it can be safely disabled. To do this, over the "Start" menu, open the "Control Panel". Next, go to "Administration" and here we open the "services".
This window displays a complete list of services available in the operating system. We need to find Superfetch, click on it two times with the left mouse button and install the "Start Type" to the "Disabled" status. Next reboot the computer.
Before disconnecting the cache cleaning function, it is worth it to bear in mind that this setting may adversely affect the performance of the drive. For example, Intel does not recommend turning off cache cleaning for its disks. But if you still decided to disable it, then you must perform the following actions:
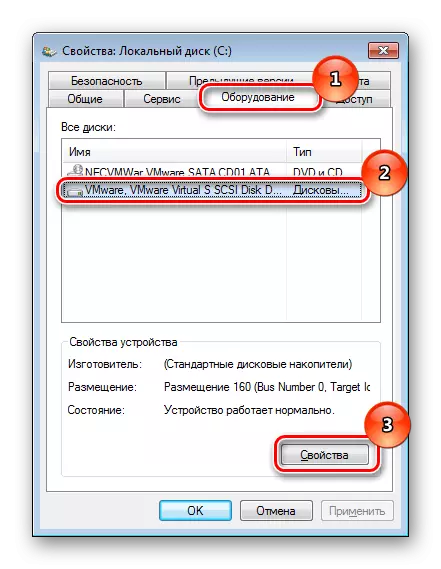
- Go to the properties of the system disk;
- Go to the "Equipment" tab;
- Select the desired CDD and press the "Properties" button;
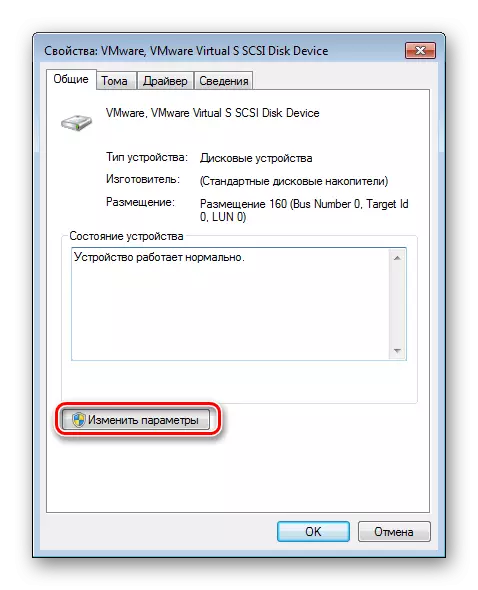
- On the General tab, click the "Change Parameters" button;
- Go to the "Politics" tab and set a tick on the "Disable Cash Buffer Cleaning" options;
- Reboot your computer.
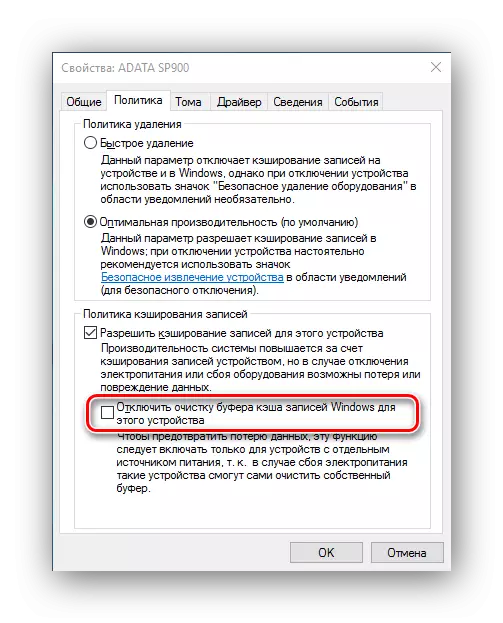
If you notice that the performance of the disk dropped sharply, then you must remove the "Disable Casha buffer cleaner".
Conclusion
From the ways considered here, the SSD optimization methods are the most secure is the first - with the help of special utilities. However, there are often cases when all actions must be performed manually. The main thing, do not forget before making any changes to create a system recovery point, in case of any failure, it will help to return the operability of the OS.