
Probably everyone who at least once reinstalled the operating system, a popular question arose: how to find out which drivers need to be installed on a computer for its stable operation? It is for this question that we will try to answer this article. Let's deal with more.
What software is needed for computer
In theory, on a computer or laptop you need to install software for all devices that require this. Over time, the developers of operating systems are constantly expanding the Microsoft driver database. And if during Windows XP had to be installed manually almost all drivers, then in the case of newer OS, many drivers are installed automatically. Nevertheless, devices remain, the software for which you have to be installed manually. We bring to your attention a number of ways to help you solve this issue.Method 1: Official Manufacturers Sites
In order to install all the necessary drivers, you need to put software for all boards in your computer. Meaning motherboard, video card and external boards (network adapters, sound cards, and so on). At the same time, in the Device Manager, it may not be indicated that the drivers are needed for the equipment. When installing the operating system, the standard software for the device was simply used. Nevertheless, the software for such devices must be installed original. Most of the entire installed software fall on the motherboard and the chips integrated into it. Therefore, at first we will look for all the drivers for the motherboard, and then for the video card.
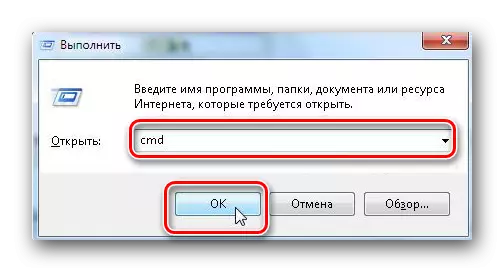
- We learn the manufacturer and model of the motherboard. To do this, press the "Win + R" keys on the keyboard and in the window that opens, enter the "CMD" command to open the command line.
- In the command prompt, you must enter alternately commands:
WMic Baseboard Get Manufacturer
WMic Baseboard Get Product
Do not forget to press "ENTER" after entering each command. As a result, you will see on the screen of the manufacturer and the model of your motherboard.
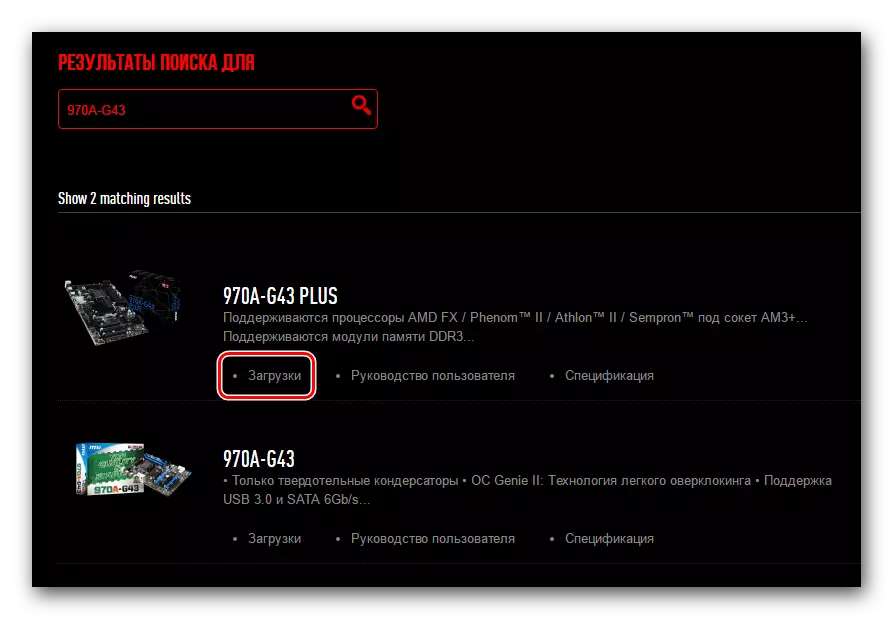
- Now we are looking for the manufacturer's website on the Internet and go to it. In our case, this is the site of MSI.
- On the site, search for a search box or the corresponding button in the form of a magnifying glass. As a rule, by clicking on this button you will see the search field. In such a field, you must enter the motherboard model and press "ENTER".
- On the next page you will see the search result. You must select your motherboard from the list. Usually, under the name of the board model there are several subsections. If there is a section "Drivers" or "Downloads", click on the name of such a section and go to it.
- In some cases, the following page can be divided into subsections with software. If so, we are looking for and choosing the "Drivers" subsection.
- The next step will be the choice of the operating system and the discharge from the drop-down list. Please note that in some cases the drivers may be distinguished when choosing different OS. Therefore, look at the wrong system that is installed with you, but also below.
- After selecting OS, you will see a list of just software that your motherboard needs to interact with other components of the computer. You need to download them all and install. Downloading occurs automatically after clicking on the "Download" button, "download" or the corresponding icon. If you downloaded the archive with the drivers, then before installation, be sure to remove all its contents into one separate folder. After that, install the software.
- After you install the entire software for your motherboard, go to the video card.
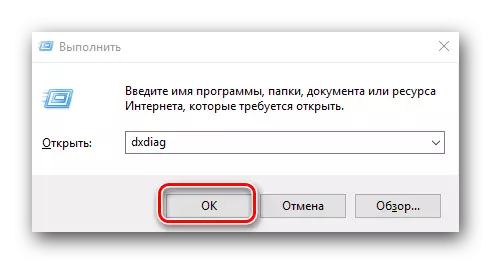
- We press the "Win + R" key again and in the window that appears, enter the "dxdiag" command. To continue click "Enter" or the "OK" button in the same window.
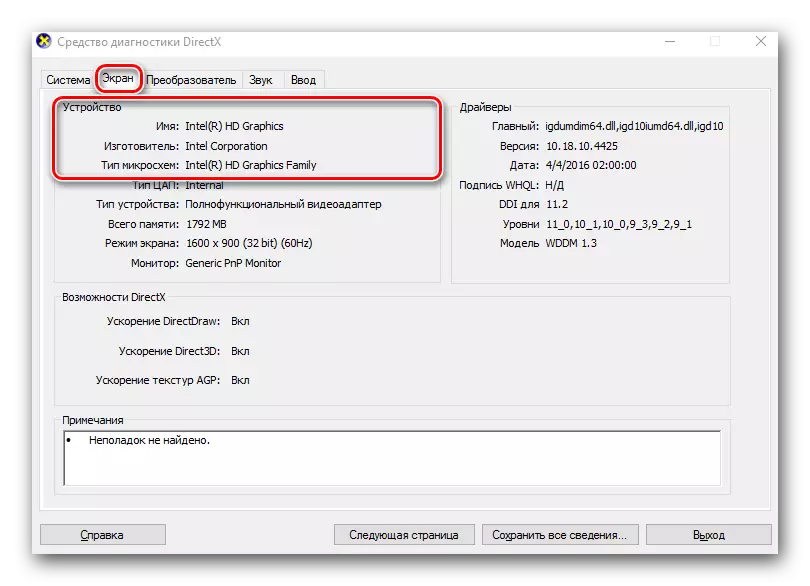
- In the Diagnostic Tools window that opens, go to the "Screen" tab. Here you can find out the manufacturer and the model of your graphics adapter.
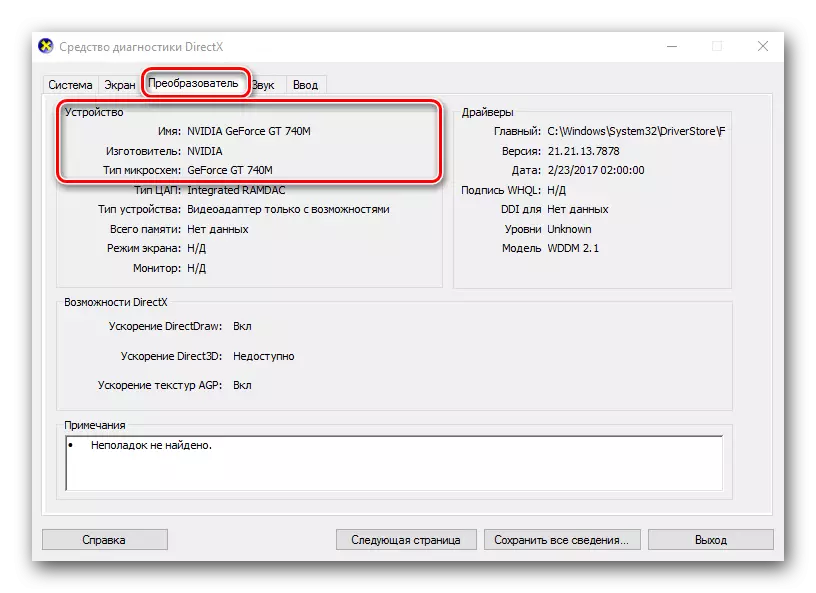
- If you have a laptop, you must also go to the "Converter" tab. Here you can see information about the second discrete video card.
- After you learned the manufacturer and the model of your video card, you need to go to the company's official website. Here is a list of downloads of the largest graphic adapter manufacturers.
- You need to specify the model of your video card and the operating system with the discharge on these pages. After that you can download software and install it. Please note that it is preferable to install software for a graphics adapter from the official site. Only in this case special components will be installed, which will increase the performance of the video card and allow it to make it detailed setting.
- When you set software for a graphics adapter and motherboard, you need to check the result. To do this, open the "Device Manager". Press the combination of the "Win" and "R" buttons on the keyboard, and in the window that opens, write the devmgmt.msc command. After that, press "ENTER".
- As a result, you will see the Device Manager window. It should not have unidentified devices and equipment, next to the title of which there are question or exclamation marks. If all that is the case, then you installed all the necessary drivers. And if such components are present, we recommend using one of the following methods.


NVIDIA video card download page
Boot page for AMD video cards
Boot page for Intel video cards
Method 2: Utilities for automatic update by
If you are too lazy to search and install the entire software manually, then you should look at the programs that are designed to facilitate this task. Overview of the most popular programs for automatic search and software updates, we were conducted in a separate article.
Lesson: The best programs for installing drivers
You can use any of the described utilities. But we recommend using Driverpack Solution or Driver Genius. These are programs with the greatest database of drivers and supported equipment. We have already told you about how to use Driverpack Solution.
Lesson: How to update drivers on a computer using DriverPack Solution
So let's tell you how to find and install all the drivers using the Driver Genius program. So, let's begin.
- Run the program.
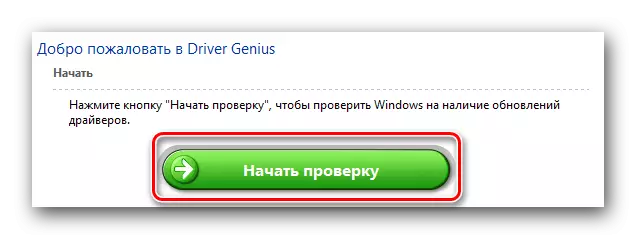
- You will immediately find yourself on its main page. Here in the middle there is a green button "Start checking". Press boldly on it.
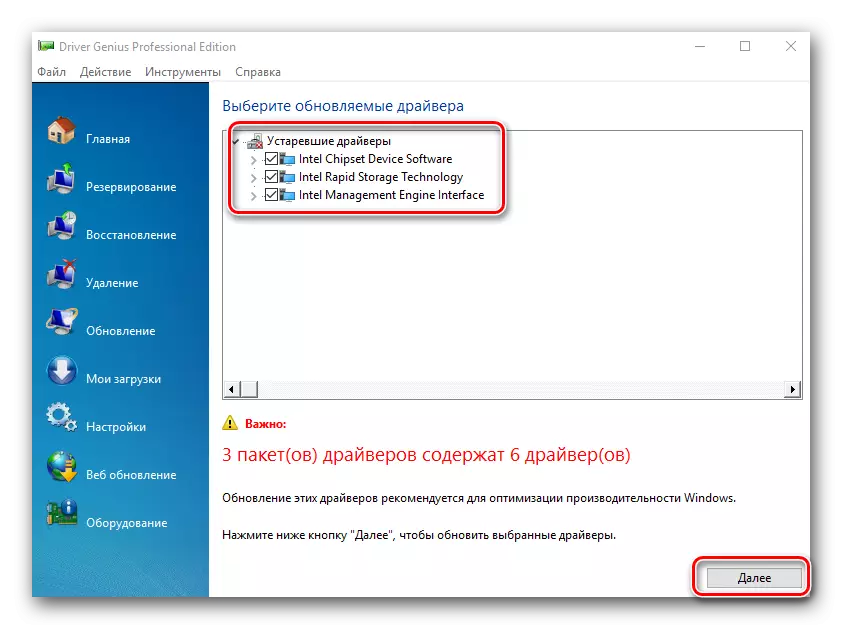
- The process of scanning your computer or laptop will start. A few minutes later you will see a list of all devices for which you want to download and install software. Since we are not looking for a specific driver, we celebrate all available items. After that, click the "Next" button in the bottom area of the program window.
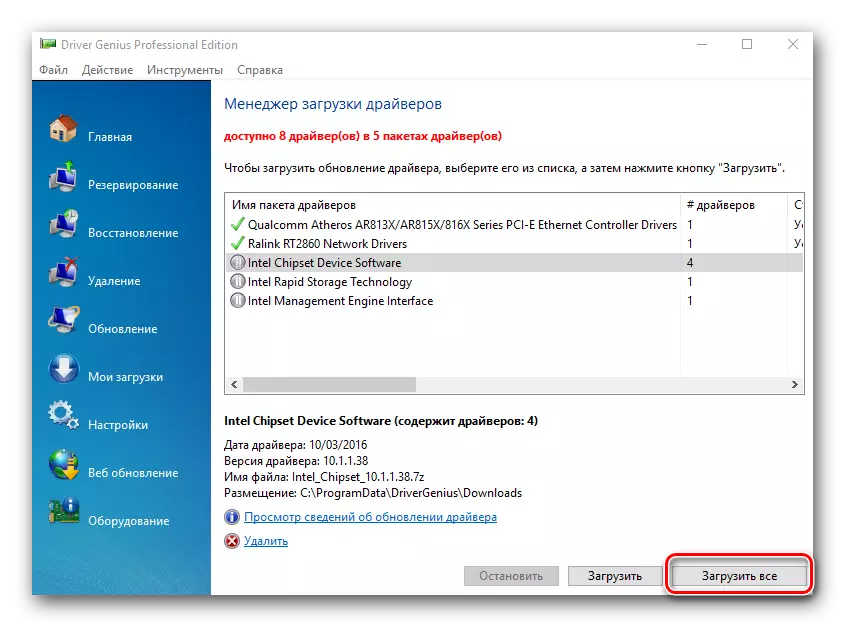
- In the next window, you will see a list of devices for which the drivers have already been updated using this utility, and those devices for which you still need to download and install. The last type of devices is marked with a gray circle next to the title. For reliability, press the "Download All" button.
- After that, the program will try to connect to servers to download the necessary files. If everything goes well, you will return to the previous window where you can track the progress of loading software in the appropriate line.
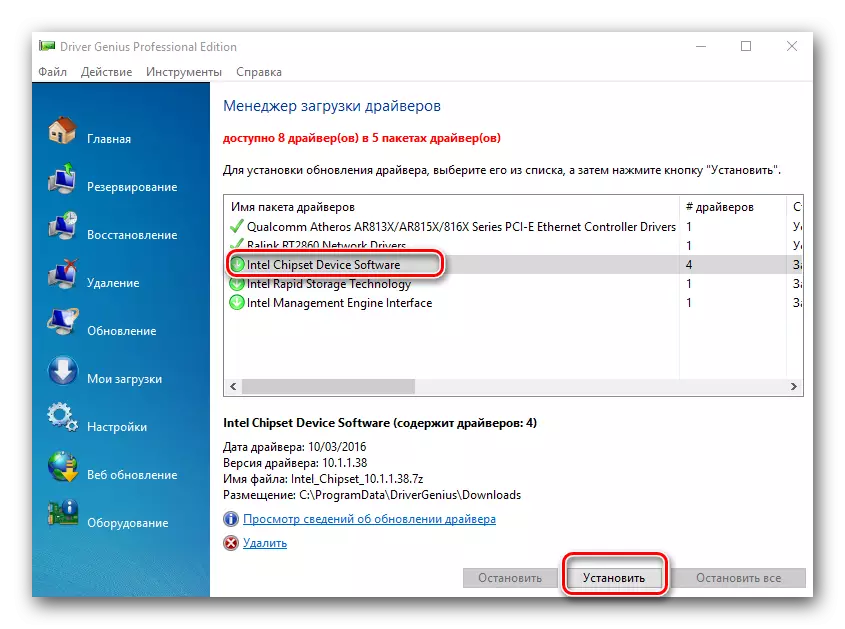
- When all the components are downloaded, the icon next to the device name will be green with directional down arrow. Unfortunately, install everything on one button will not work. Therefore, we highlight the row with the required device and click the "Install" button.
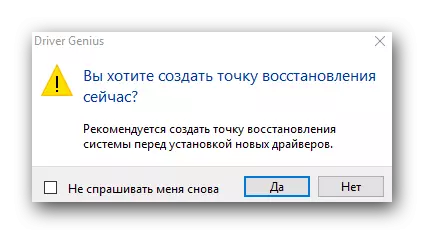
- Optionally, create a recovery point. This will be offered in the next dialog box. Choose a response that matches your decision.
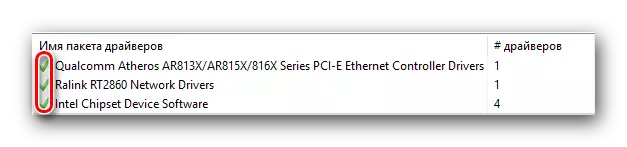
- After that, the process of installing the driver for the selected device will begin, during which standard dialog boxes may occur. They need to simply read license agreements and press the "Next" buttons. There should be no problems at this stage. After installing one or another, you may offer to restart the system. If such a message is recommended to do it. When the driver is successfully installed, in the Driver Genius program opposite the row with the equipment there will be a green tick.
- Thus, you need to install the software for all equipment from the list.
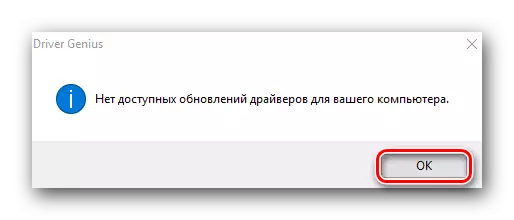
- At the end, you can make a computer scan again for persuasive. If you installed all the drivers, you will see a similar message.
- In addition, you can check whether all software is set using the Device Manager as described at the end of the first method.
- If there are still unidentified devices, try the following way.

Method 3: Online Services
If the previous ways did not help you, it remains to be hoped for this option. Its meaning is that we will search for us in the manual on the unique identifier of the device. In order not to duplicate information, we recommend you to familiarize yourself with our lesson.Lesson: Search for Drivers by Equipment ID
In it, you will find detailed information on how to find id and what to do with it. As well as guide to the use of the two largest online drivers for the search for drivers.
Method 4: Manual Driver Update
This method is the most inefficient of all above. However, in very rare cases to help install the software can be. That's what it is necessary.
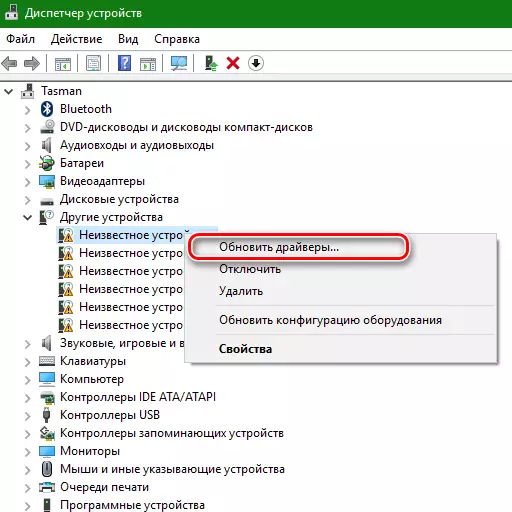
- Open the Device Manager. How to do this, indicated at the end of the first way.
- In the "Dispatcher" we are looking for an unidentified device or equipment, next to the title of which is a questionnaire / exclamation mark. Usually branches with such devices are immediately open and not to search for them. Click on such a device with the right mouse button and select the "Update Drivers" string.
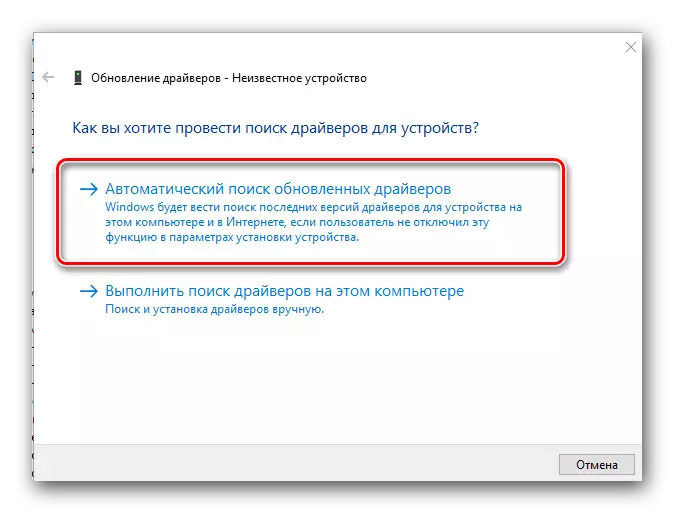
- In the next window, select the search method for: automatic or manual. In the latter case, you will need to manually specify the path to the place where the drivers are stored for the selected device. Therefore, we recommend using an automatic search. To do this, click on the appropriate string.
- As a result, the search for on your computer will begin. If the necessary components are found, the system itself will install them. At the end you will see a message about whether the drivers were installed or found them failed.
These are the most effective ways to identify devices for which you want to install software. We hope one of the proposed options will help you in solving this issue. Do not forget to update software on time for your devices. If you have difficulty finding or installing drivers, write in the comments. Together we will fix everything.