
Modern laptops one after another get rid of CD / DVD drives, becoming thinner and easier. Together with this, users have a new need - the ability to install an OS with a flash drive. However, even if there is a bootable flash drive, not everything can go so smoothly as I would like. Microsoft experts have always loved throwing curious tasks for their users. One of them - BIOS can simply not see the carrier. The problem can be solved by several consecutive actions that we now and describe.
Bios does not see the loading flash drive: how to fix
In general, there is nothing better to install the OS on your computer than the personally made loading flash drive. In it you will be 100% sure. In some cases it turns out that the carrier itself is incorrect. Therefore, we will consider several ways to make it for the most popular versions of Windows.In addition, you need to set the correct parameters in the BIOS itself. Sometimes the reason for the lack of drive in the list of disks may be in this. Therefore, after you figure it out with the creation of a flash drive, we will look at three more ways to configure the most common versions of the BIOS.
Method 1. Flash drive with installer Windows 7
In this case, we will use Windows USB / DVD Download Tool.
- First of all, go to the Microsoft website and download the utility from there to create a bootable flash drive.
- Install it and proceed to the manufacture of a flash drive.
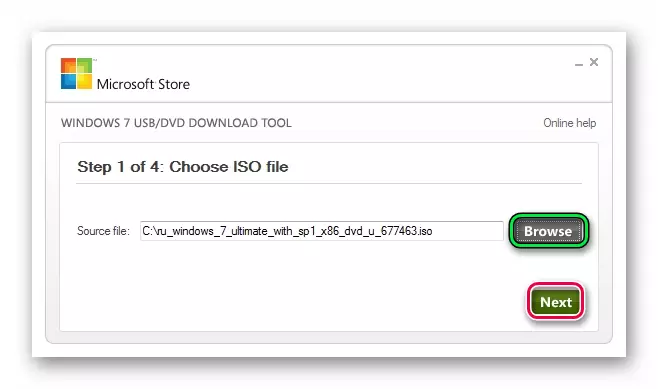
- Using the "Browse" button, which will open the conductor, specify the place where the ISO image is located. Click on "Next" and go to the next action.
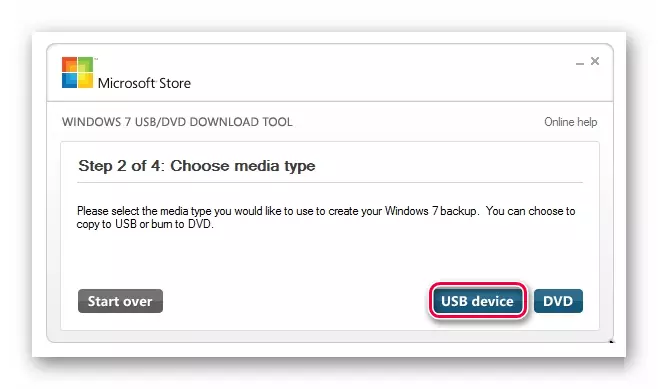
- In the window with a choice of installation media type, specify "USB Device".
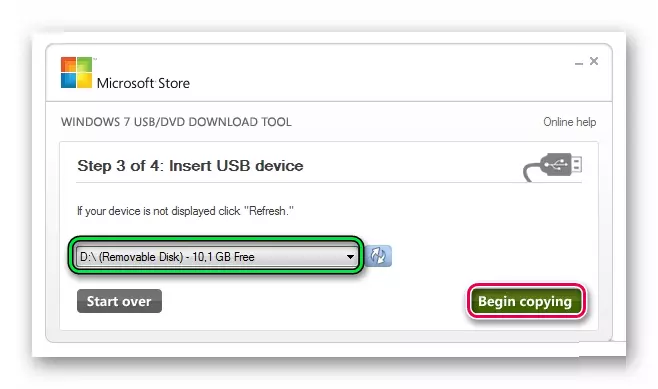
- Check that the path to the flash drive is correct and run it by pressing "Begin Copying".
- Next will begin, in fact, the process of creating a drive.
- Close the window in the usual way and proceed to install the system with just created media.
- Try to use the boot drive.

This method is suitable for windows 7 and older. To burn images of other systems, use our instructions for creating bootable flash drives.
Lesson: How to create a bootable flash drive
In the following instructions, you can see ways to create the same drive, but not with Windows, but with other operating systems.
Lesson: How to create a bootable USB flash drive with Ubuntu
Lesson: How to create a bootable USB flash drive with DOS
Lesson: How to create a bootable USB flash drive with Mac OS
Method 2: Setting up AWARD BIOS
To go to Award BIOS, press F8 while booting the operating system. This is the most common option. There are also the following combinations for entry:
- Ctrl + Alt + ESC;
- Ctrl + Alt + Del;
- F1;
- F2;
- F10;
- Delete;
- Reset (for Dell computers);
- Ctrl + Alt + F11;
- INSERT.
And now let's talk about how to configure BIOS correctly. In most cases, the problem is precisely in this. If you have Award BIOS, do this:
- Go to bios.
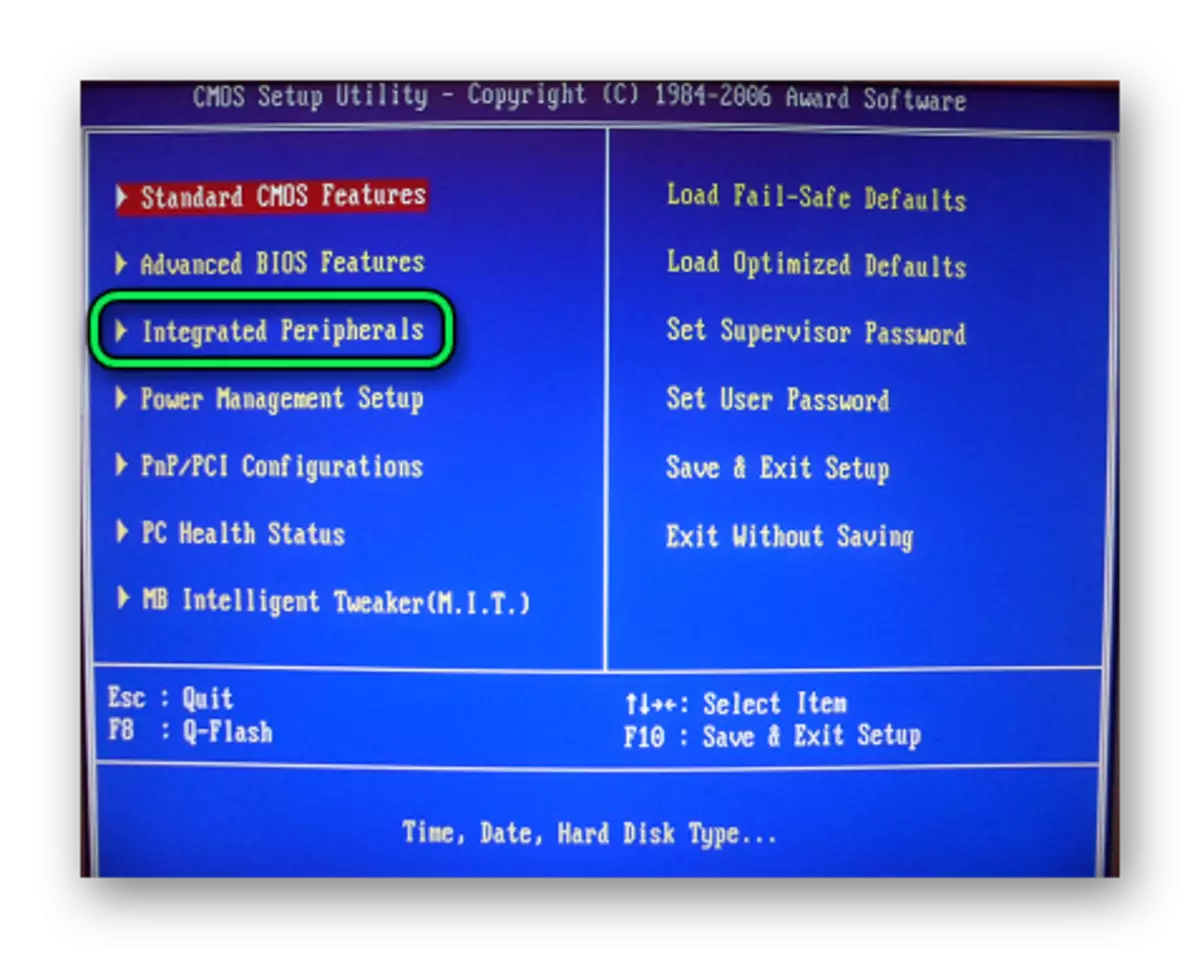
- From the main menu, go using the arrows on the keyboard, in the "Integrated Peripherals" section.
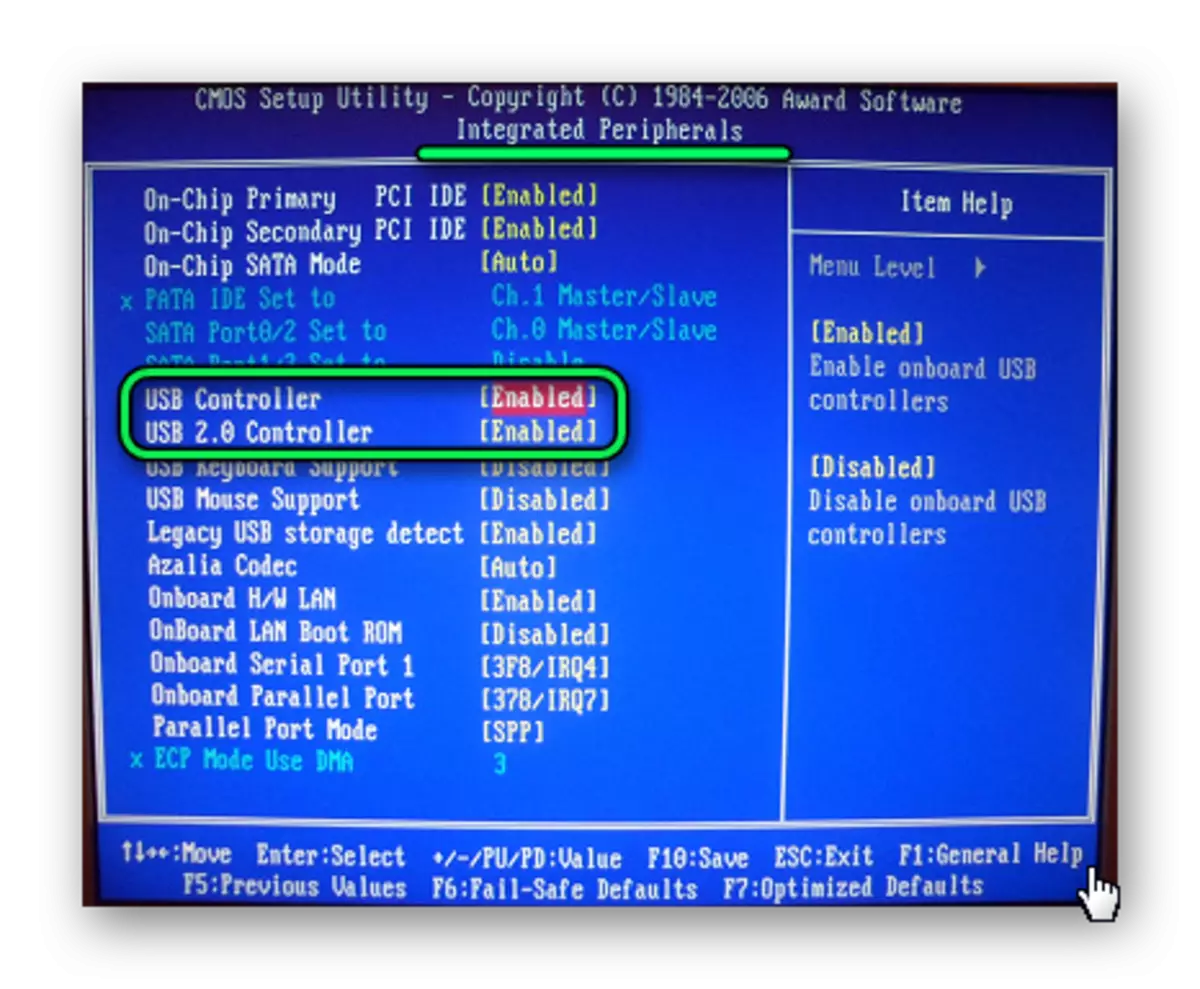
- Check that the USB controller switches stood in the "Enabled" position, if necessary, switch yourself.
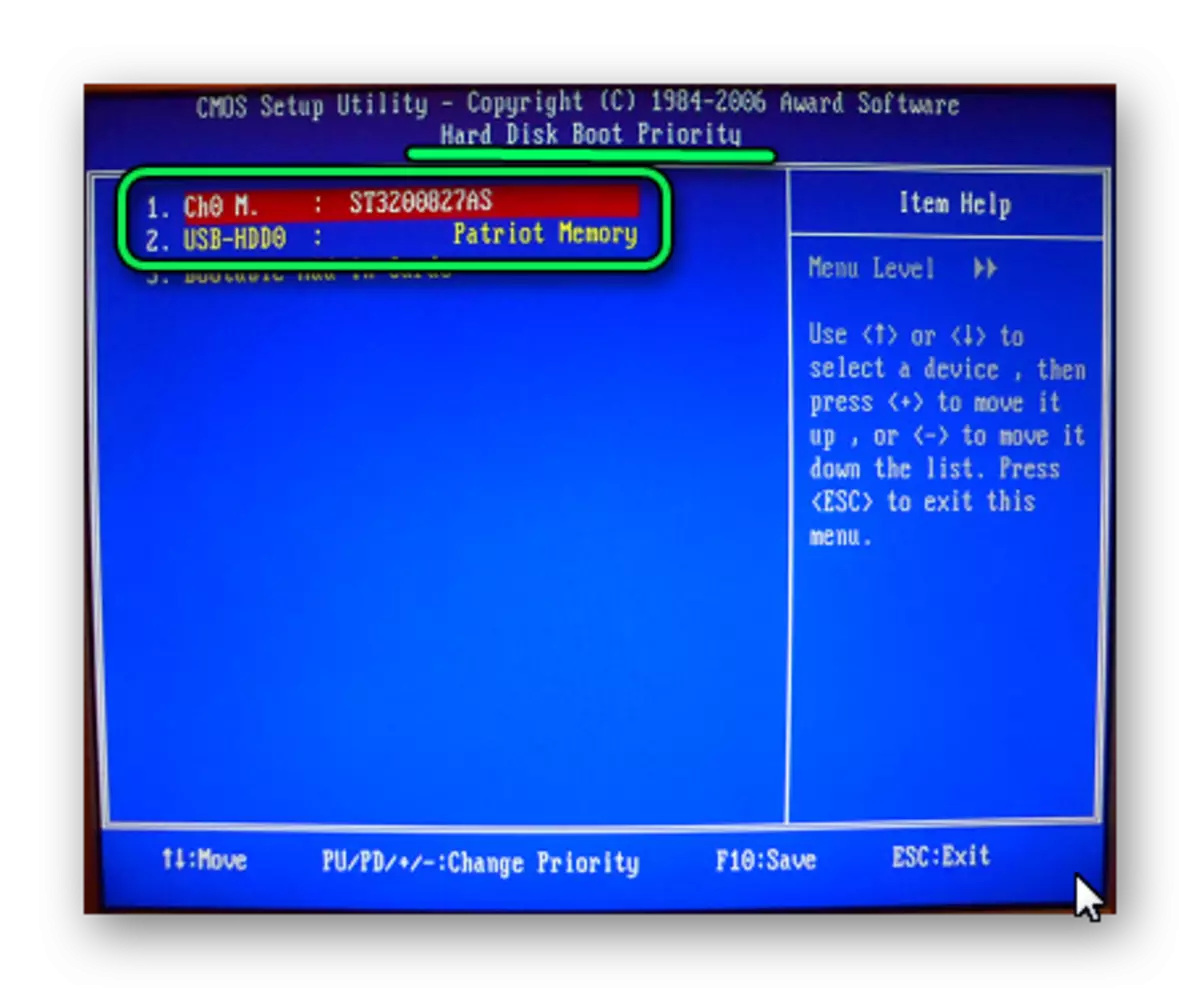
- Go to the Advanced section from the main page and find the "Hard Disk Boot Priority" item. It looks like shown in the photo below. Pressing "+" on the keyboard, move to the top of the "USB-HDD".
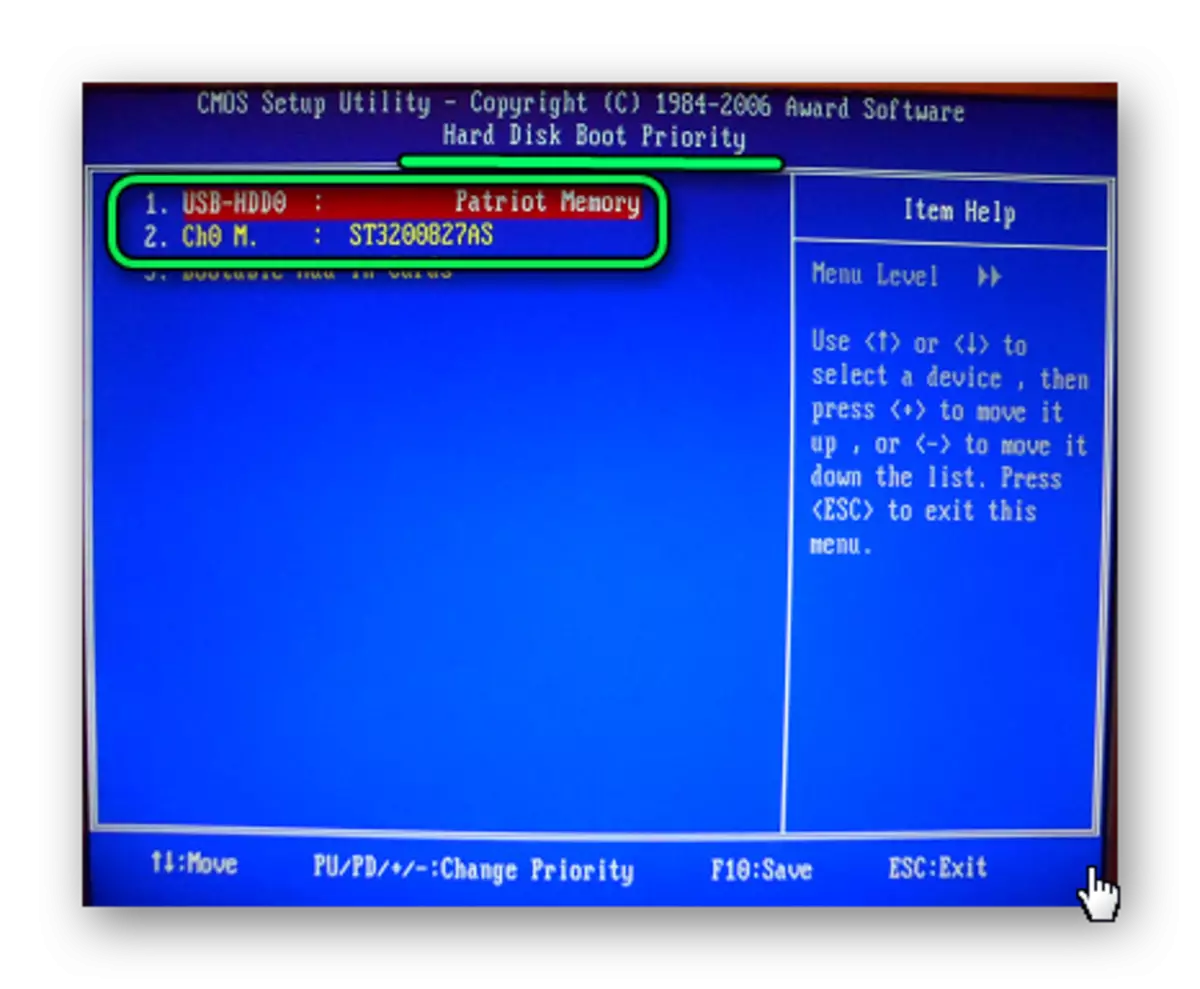
- As a result, everything should look like shown in the photo below.
- Switch again to the main window of the Advanced section and set the "FIRST BOOT Device" switch to "USB-HDD".
- Return to the main window of the settings of your bios and click "F10". Confirm the selection by the "Y" key on the keyboard.
- Now after rebooting your computer will start the installation from the flash drive.


See also: Manual in case the computer does not see a flash drive
Method 3: AMI BIOS Setup
The key combinations for the entrance to AMI BIOS are the same as for Award BIOS.
If you have AMI BIOS, perform such simple actions:
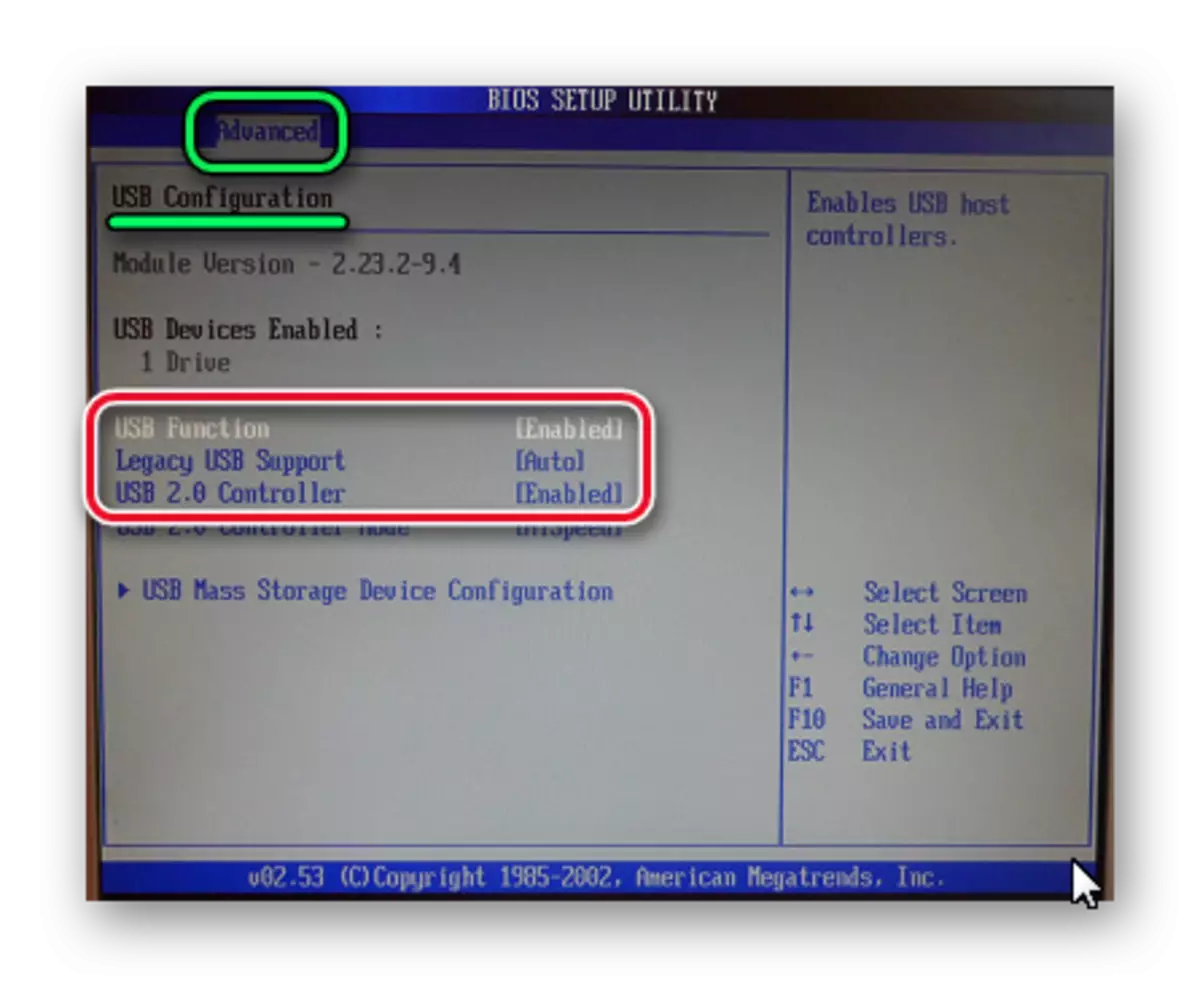
- Go to the BIOS and find the Advanced sector.
- Switch to it. Select the "USB Configuration" section.
- Exhibit "USB FUNCTION" and "USB 2.0 CONTROLLER" switches to "Enabled" ("Enabled".
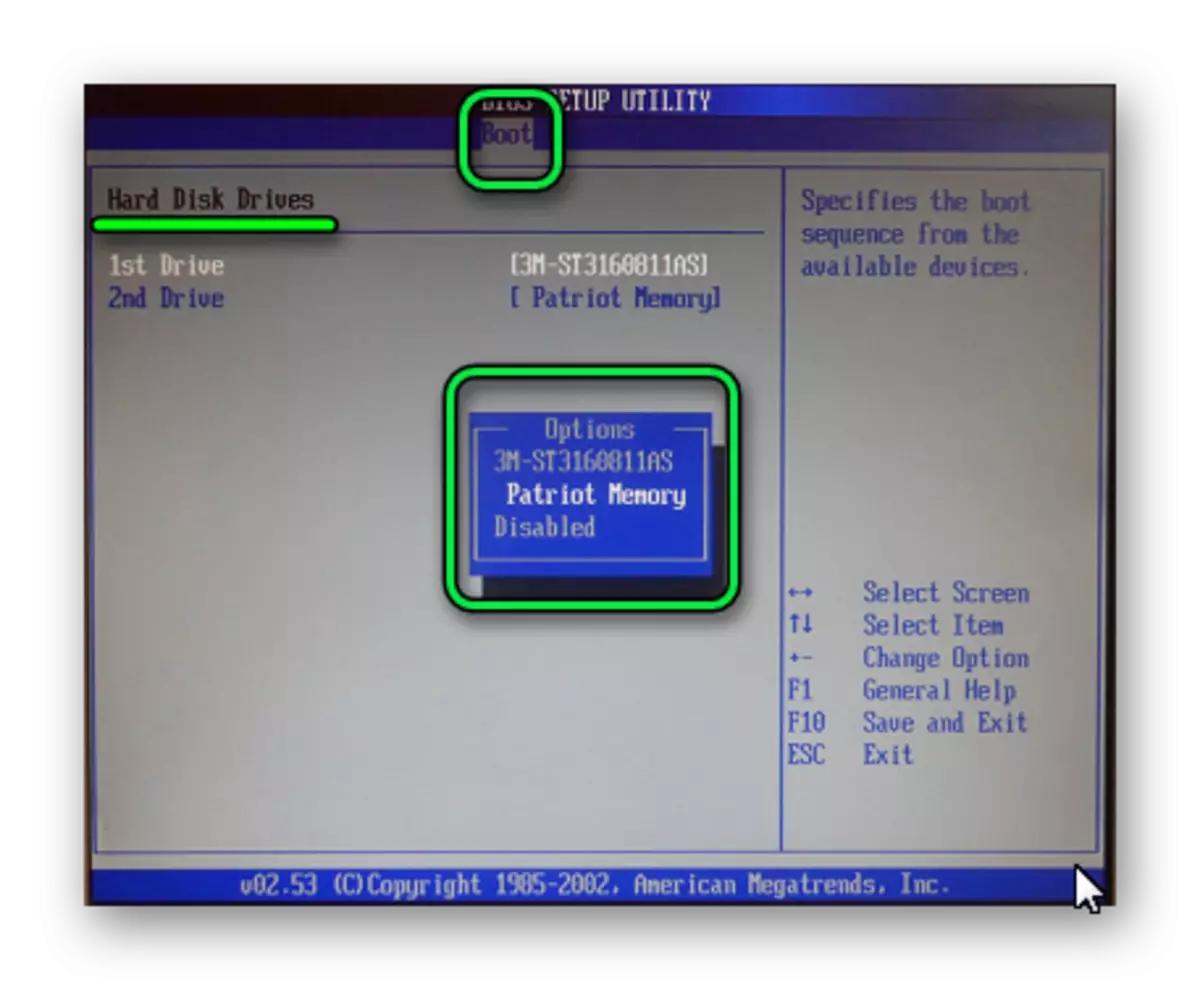
- Click the "Boot" tab and select the "Hard Disk Drives" section.
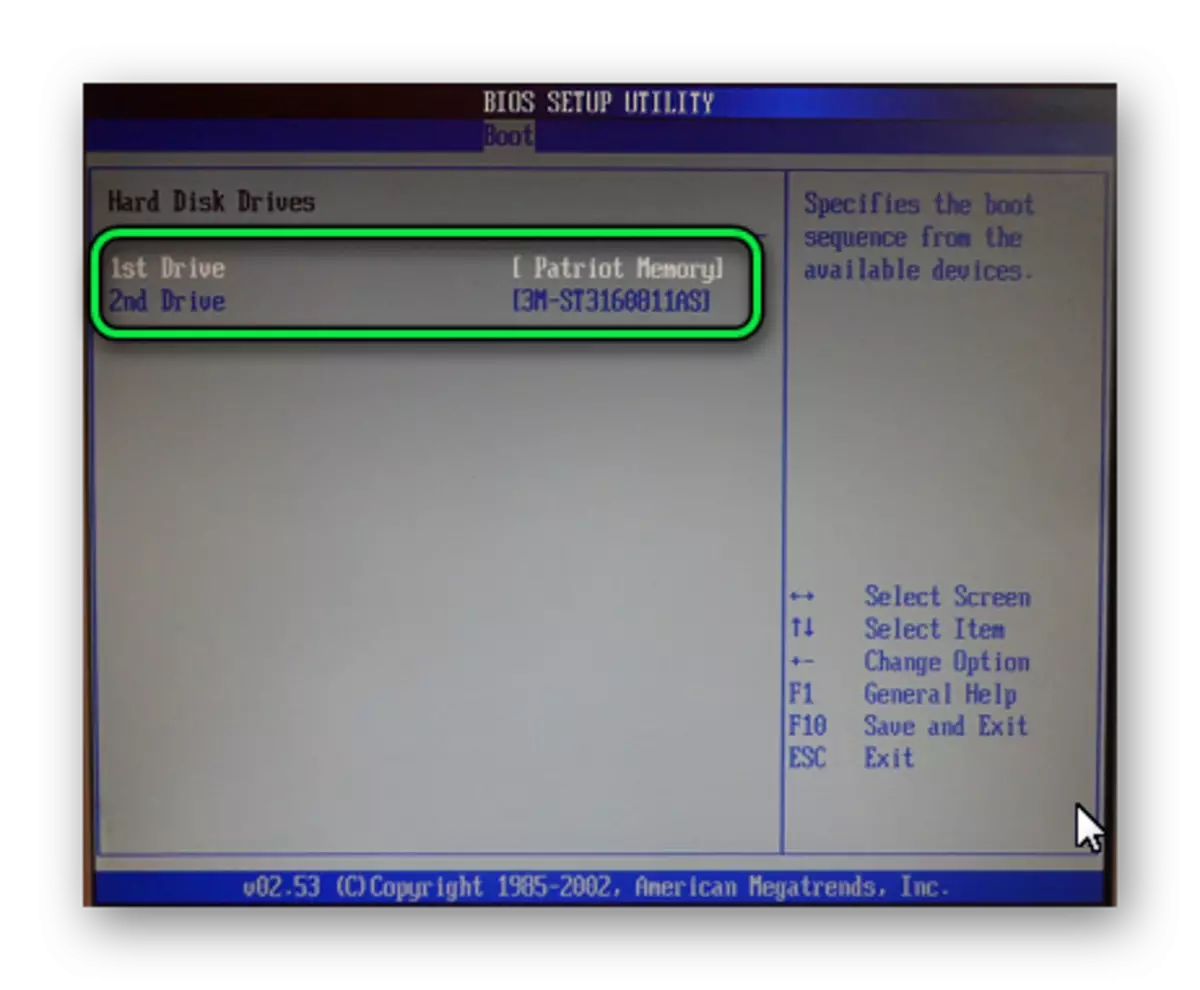
- Move the Patriot Memory point in place (1st drive).
- The result of your actions in this section should look like this.
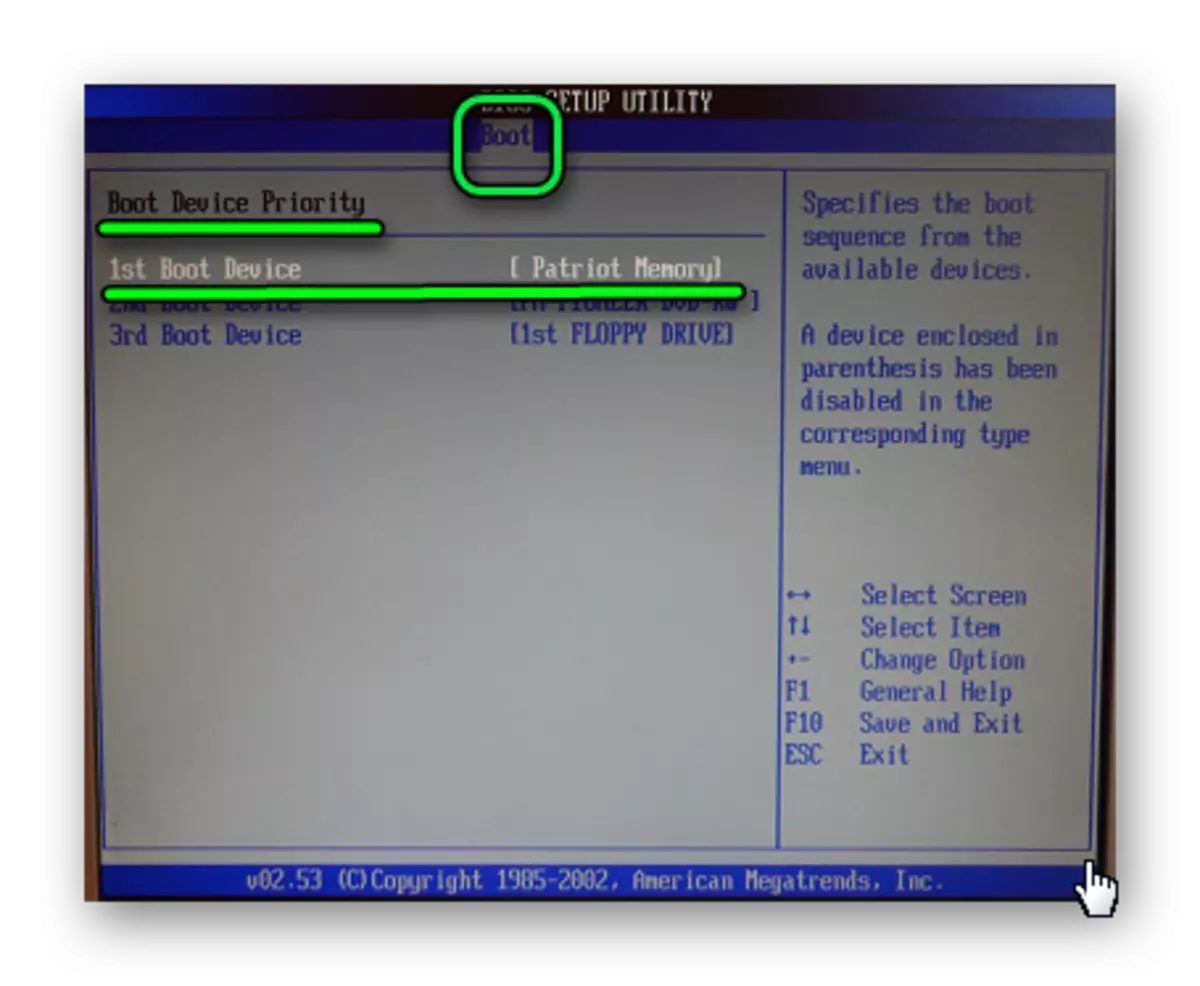
- In the "BOOT" section, go to "Boot Device Priority" and check - "1st boot device" must accurately coincide with the result that is obtained in the previous step.
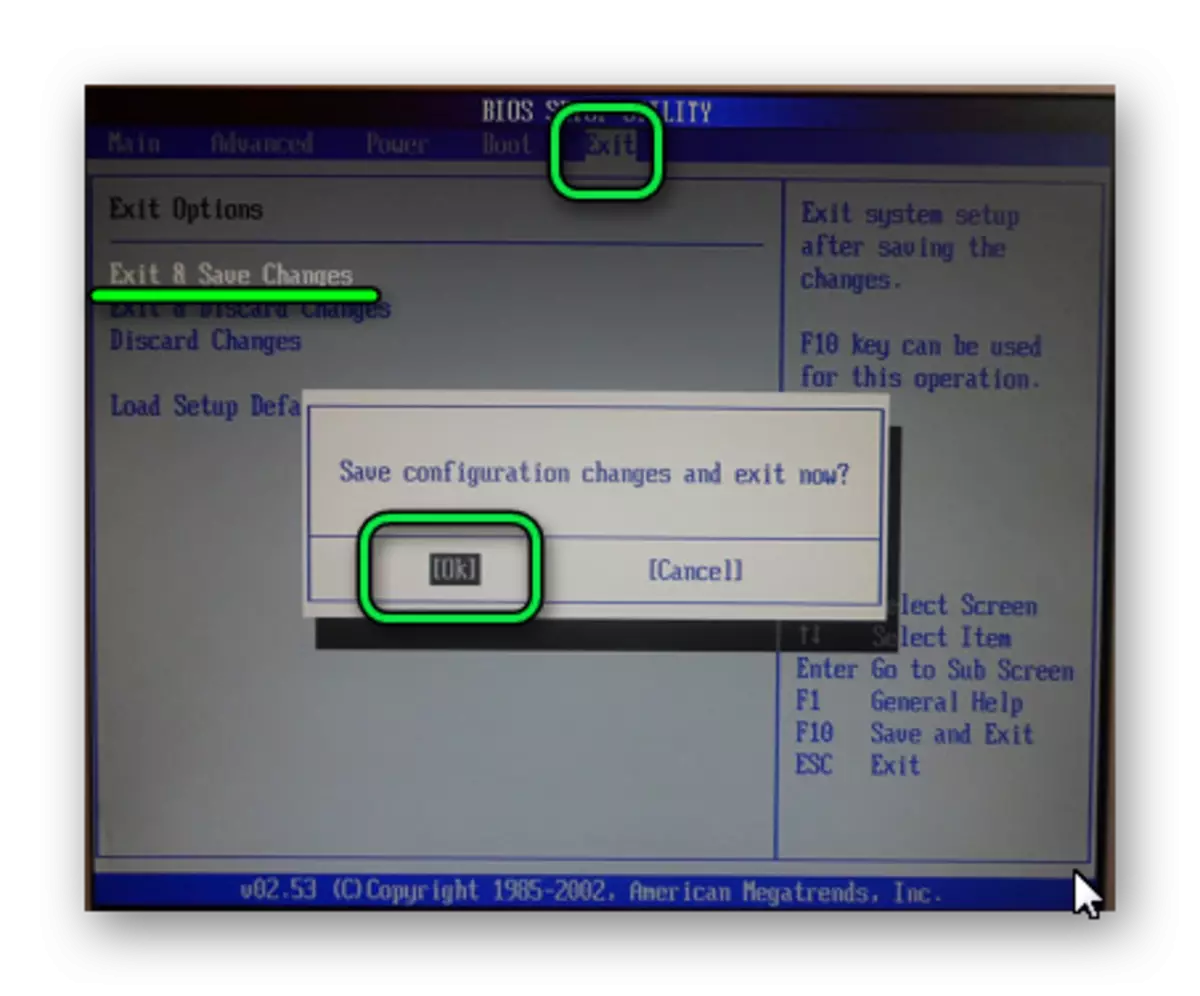
- If everything is done correctly, go to the "EXIT" tab. Press "F10" and in the appeared window - the input key.
- The computer will go to the reboot and starts a new work session from your flash drive.


See also: How to restore the A-Data USB
Method 4: UEFI Setup
The entrance to the UEFI is carried out in the same way as in the BIOS.
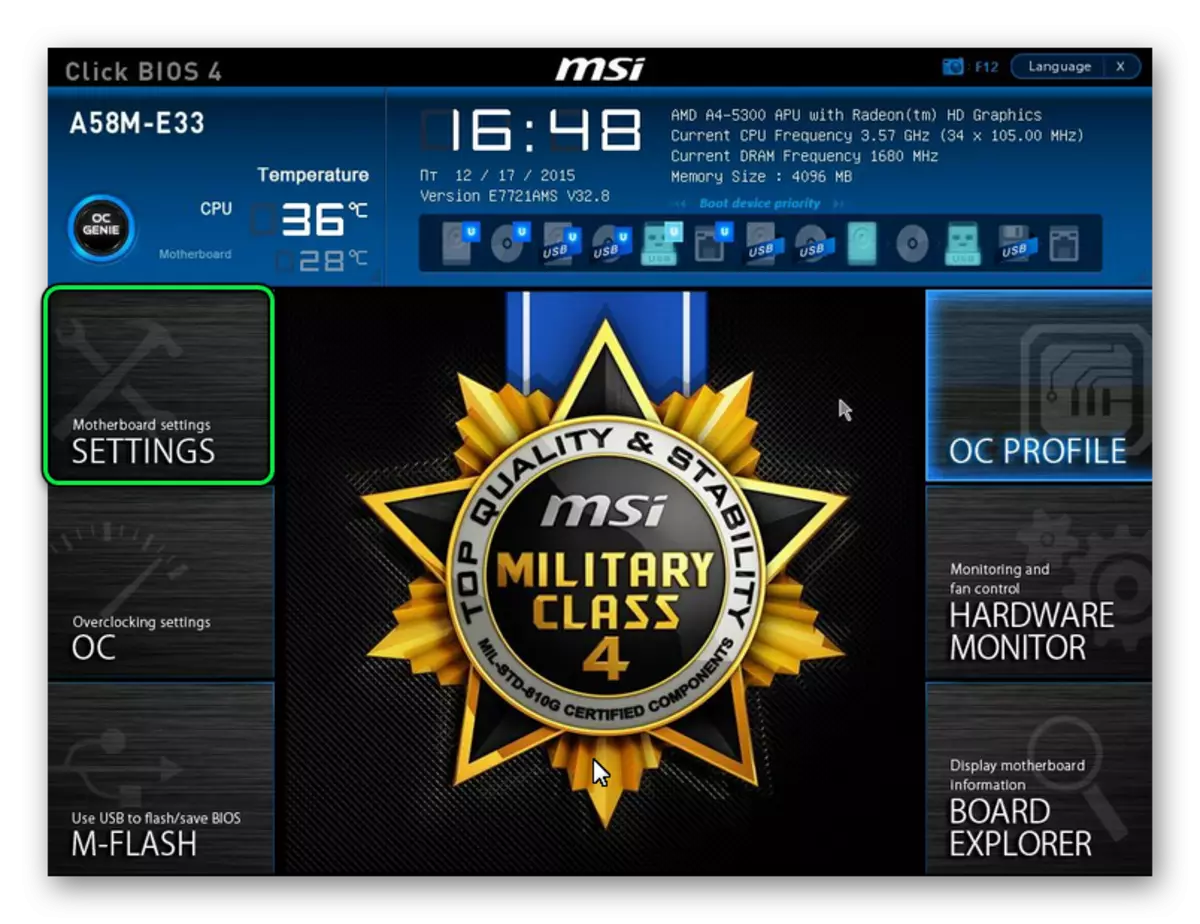
This advanced version of the bios has a graphical interface and can be used in it using a mouse. To set up a download from removable media there, perform a number of simple actions, and specifically:
- On the main window immediately select the "Settings" section.
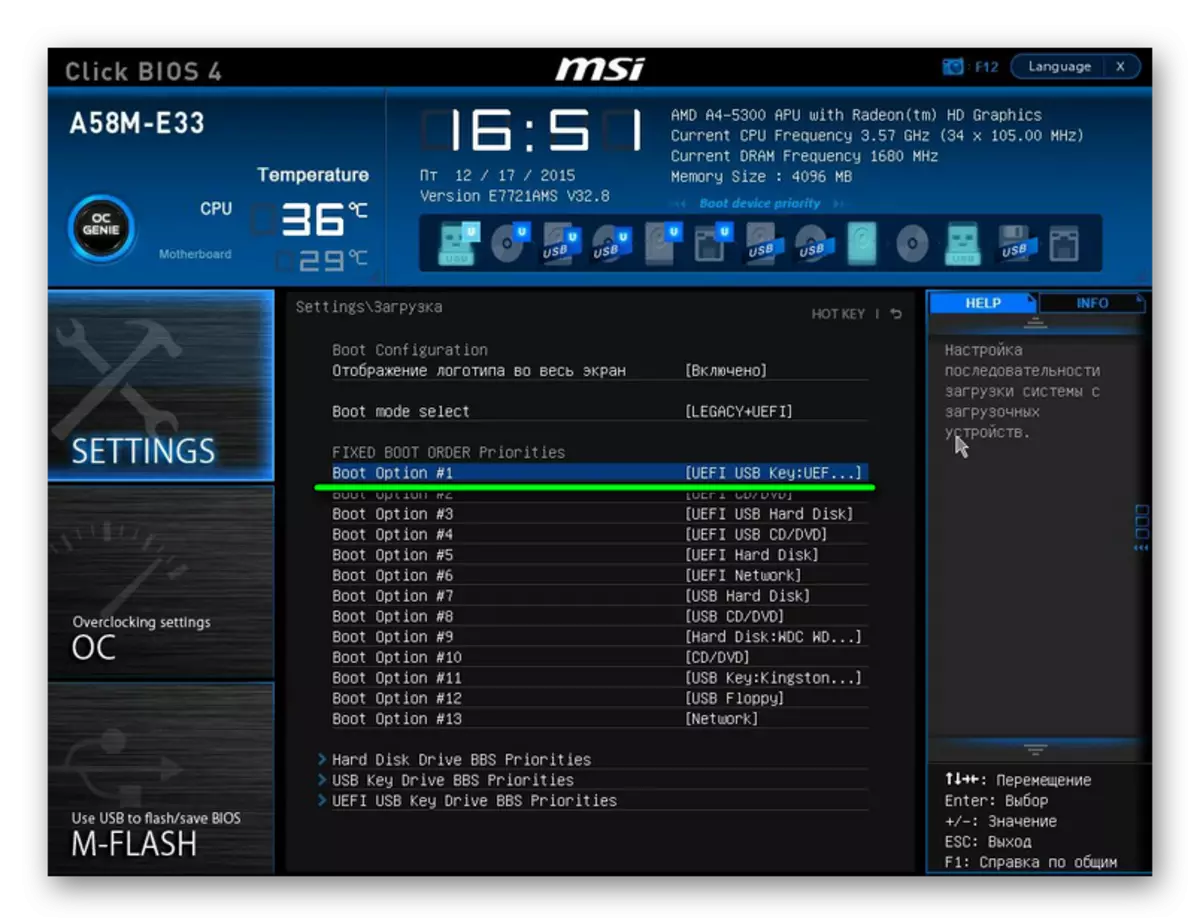
- In the selected section of the mouse, set the "Boot Option # 1" parameter so that it shown the USB flash drive.
- Go out, spend a reboot and install the OS you like.
Now, armed properly made bootable flash drive and knowledge of BIOS settings, you can avoid unnecessary excitement when installing a new operating system.
See also: 6 tested methods for recovering flash drive transcend