

Comics at all times were very popular genre. On them films are removed, based on them create games. Many would like to learn how to make comics, but not everyone is given. Not everyone, except for Masters Photoshop. This editor allows you to create pictures of almost any genres without the ability to draw.
In this lesson, we transform the usual photo in the comic using photoshop filters. We'll have to work a little tassel and eraser, but it is not at all difficult in this case.
Comic creation
Our work will be divided into two large stages - preparation and directly drawing. In addition, today you will learn how to use the capabilities that the program provides us.Preparation
The first step of preparation for the creation of a comic will be the search for a suitable shot. It is difficult to determine in advance which image is perfect for this. The only advice that can be given in this case - the photo should have a minimum of areas with loss of details in the shadows. The background is not important, extra details and noises. We will relieve the lesson.
In the lesson we will work with such a picture:

As you can see, there are too shaded areas in the photo. This is done intentionally to show what it is fraught.
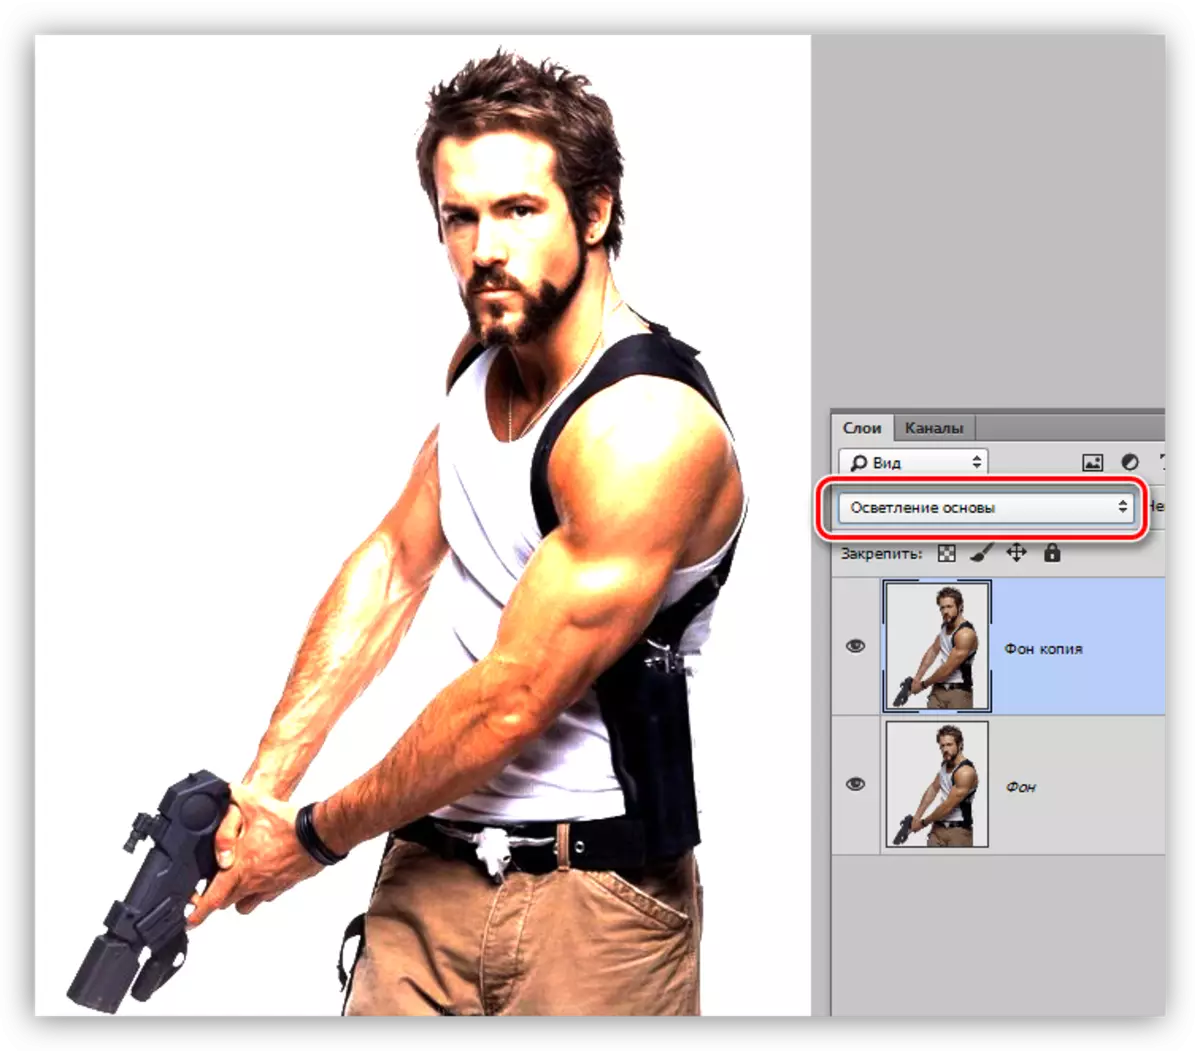
- We make a copy of the source picture using the hot keys Ctrl + J.

- Change the overlay mode for a copy to the "Lightening of the Foundation".
- Now it is necessary to invert colors on this layer. This is done by the hot keys Ctrl + I.
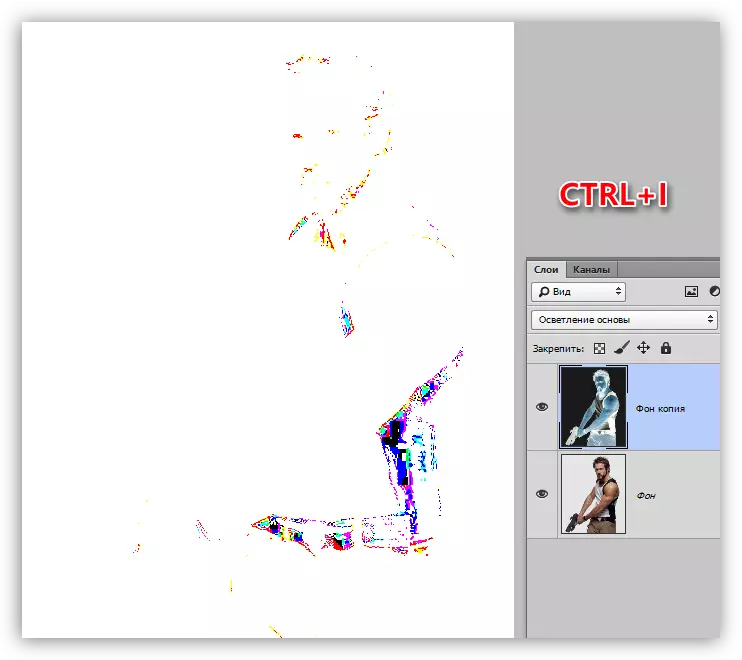
It is at this stage that there are deficiencies. Those areas that remained visible are our shadows. There are no details in these places, and subsequently it will be "porridge" on our comic. This we will see a little later.
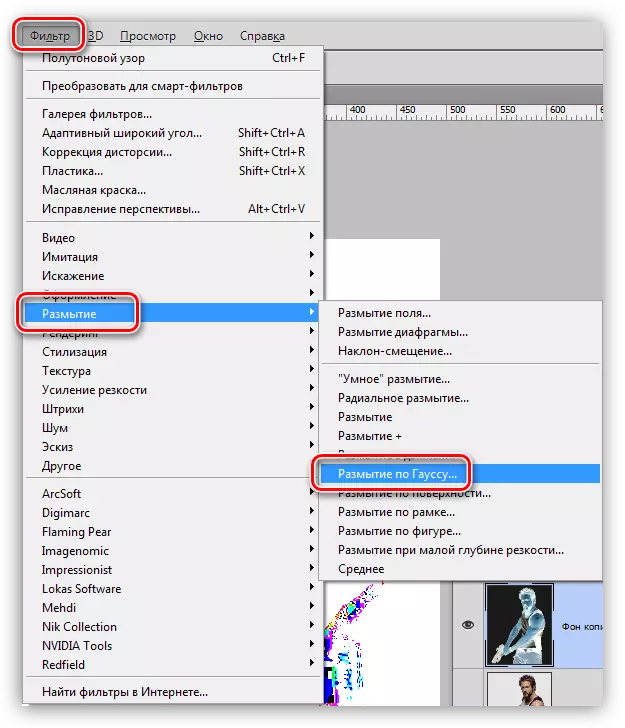
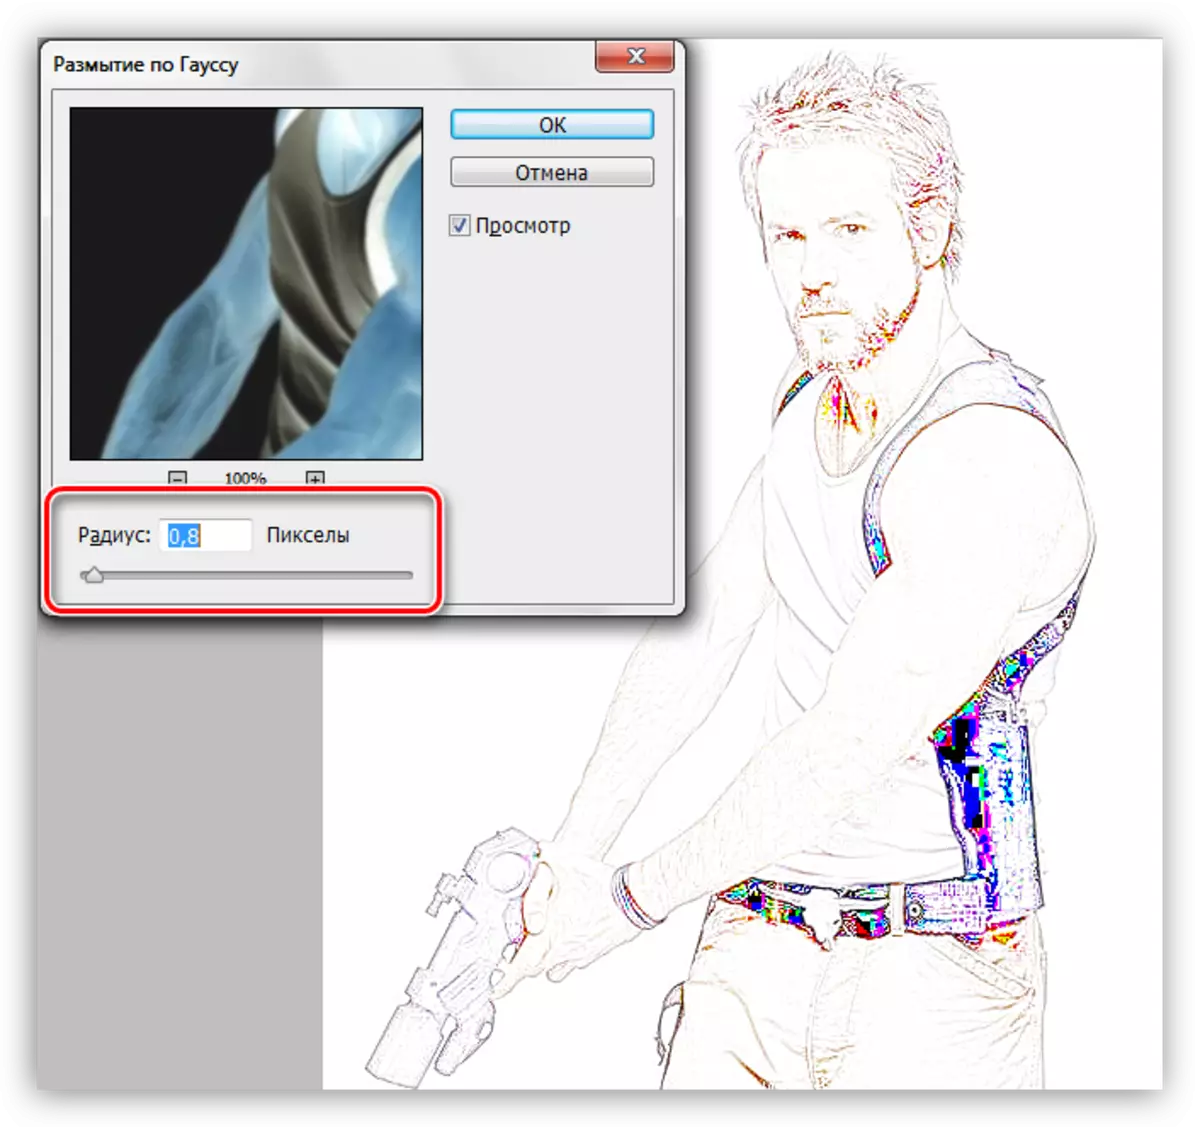
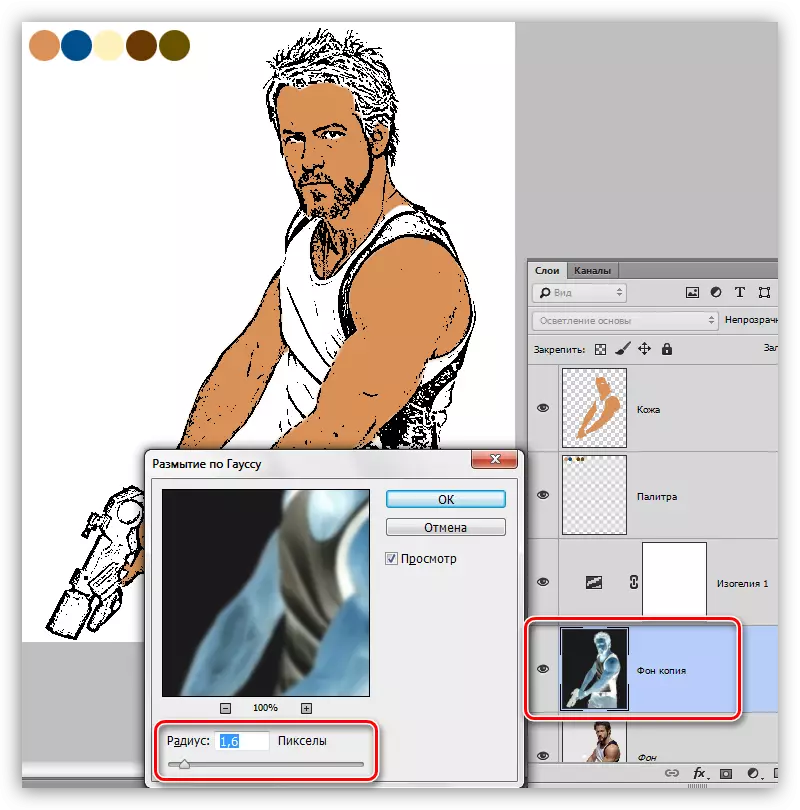
- The resulting inverted layer must be blurred in Gauss.
The filter must be configured in such a way that only contours remain clear, and the colors remained as muffled as possible.
- We use a correction layer called "Isaohelia".

In the layer settings window, using the slider, as soon as possible, the contours of the comic character, while avoiding the appearance of unwanted noise. For the standard you can take a face. If you do not have a background background, I do not pay attention to it (background).

- Noise that appears can be deleted. This is done by the usual eraser at the lowest, source layer.
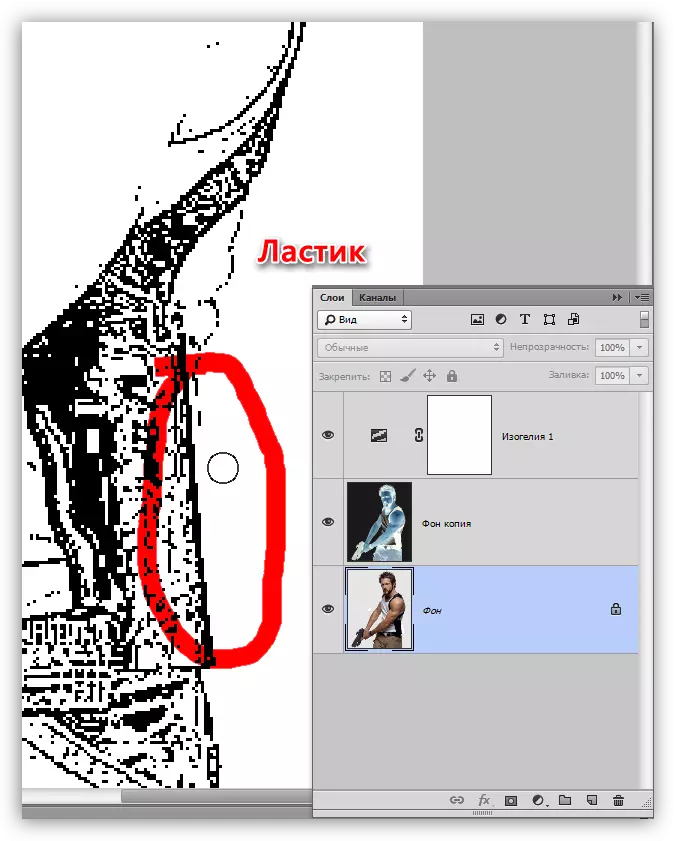
In the same way, the background objects can be deleted.
This preparatory stage completed, followed by the most time-consuming and long-term process - painting.
Palette
Before starting coloring our comic, you need to decide on the palette of colors and create samples. To do this, you need to analyze the picture and break it on the zones.
In our case, this is:
- Leather;
- Jeans;
- Mike;
- Hair;
- Ammunition, belt, weapon.
Eyes in this case do not take into account, as they are not very pronounced. The belt buckle is also not interested in us.

For each zone, we determine your color. In the lesson we will use such:
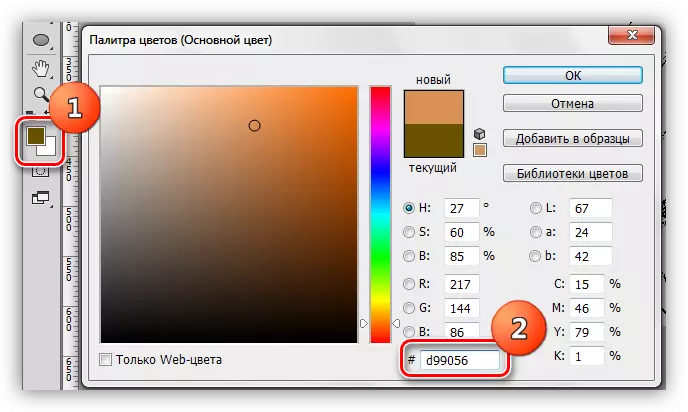
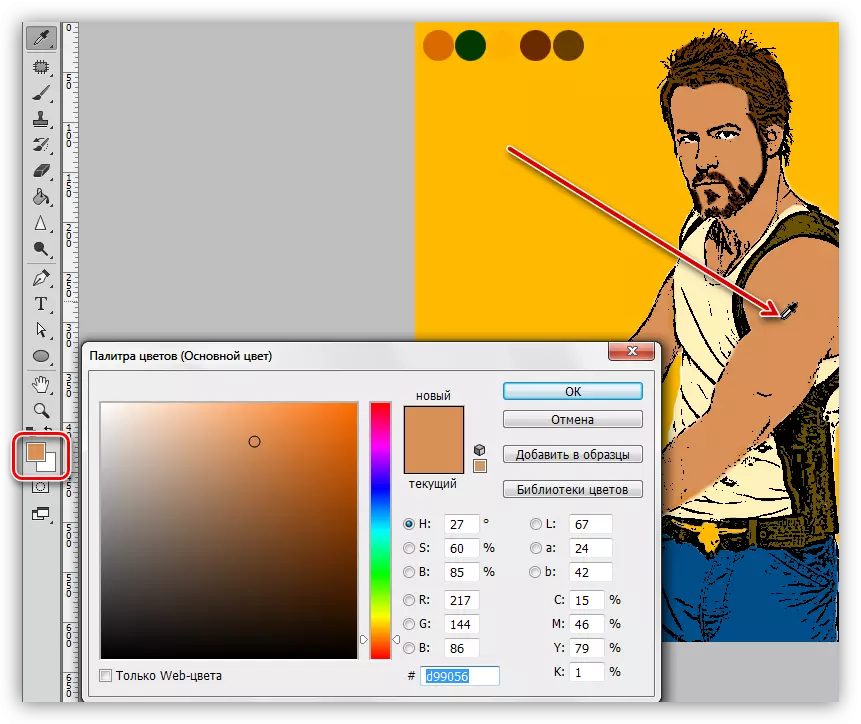
- Leather - D99056;
- Jeans - 004F8B;
- T-shirt - FEF0BA;
- Hair - 693900;
- Ammunition, belt, weapons - 695200. Please note that this color is not black, this is a feature of the method that we are now studying.
Colors It is advisable to choose as saturated as possible - after processing, they will significantly sweat.
Preparing samples. This step is not mandatory (for amateur), but such training will further facilitate work. To the question "How?" Reply just below.
- Create a new layer.

- We take the oval area tool.

- With the SHIFT clamping key, create such a round selection:
- Take the tool "Pouring".
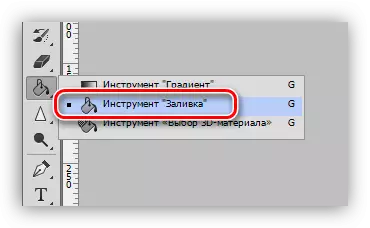
- Choose the first color (D99056).
- Click inside the selection, poured it with the selected color.
- Again, take into hand tool selection, bring the cursor to the center of the mug and move the dedicated area.
- This isolation fill in the next color. In the same way, create the remaining samples. When you finish, do not forget to remove the Ctrl + D keystroke.

It's time to tell what we created this palette. During operation, it is necessary to often change the color of the brush (or other tool). Samples eliminate us from the need to look for the desired shade every time, we simply clamp alt and click on the desired mug. Color automatically switches.
Designers often enjoy such palettes to save the color scheme of the project.
Setting up tools
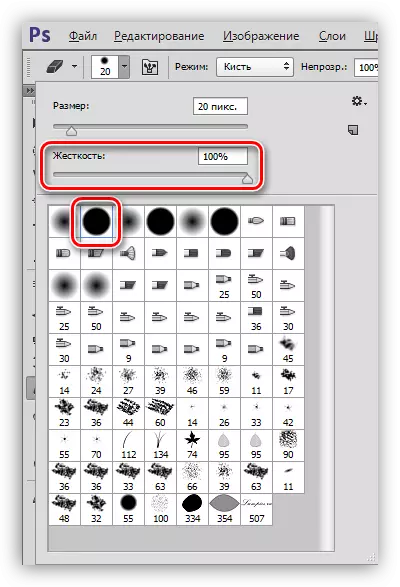
When creating our comic, we will use only two devices: brush and eraser.
- Brush.

In the settings, choose a rigid round brush and reduce the rigidity of the edges to 80 - 90%.

- Eraser.
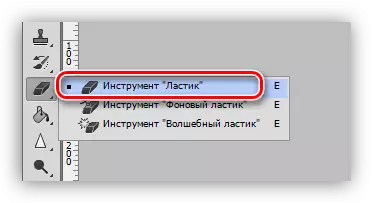
Elastic shape - round, hard (100%).
- Colour.
As we have already spoken, the main color will be determined by the palette created. The background should always be white, and no other.
Collecting comic
So, we completed all the preparatory work on creating a comics in Photoshop, now it's time to finally paint it. This work is extremely interesting and fascinating.
- Create a blank layer and change the imposition mode for it to multiply. For convenience, and not to get confused, let's call it "leather" (double click on the title). Take yourself a rule when working on complex projects, give the layers of names, such an approach distinguishes professionals from lovers. In addition, it will facilitate the life of the master who will work with the file after you.

- Next, we work with a tassel over the skin of the comic character, the color we prescribed in the palette.

Tip: Change the size of the brush with square brackets on the keyboard, it is very convenient: one hand can be painted, and the other adjust the diameter.
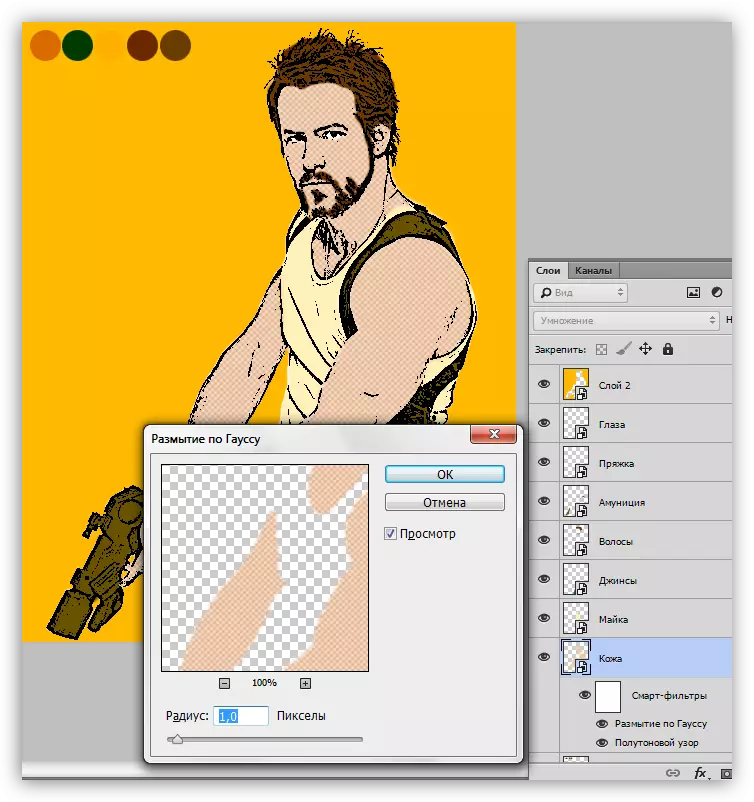
- At this stage it becomes clear that the contours of the character are not strong enough, so we blur the inverted layer in Gauss once again. Perhaps you have to raise a slight radius.
Extra noises are erased by the eraser on the original, the lowest layer.
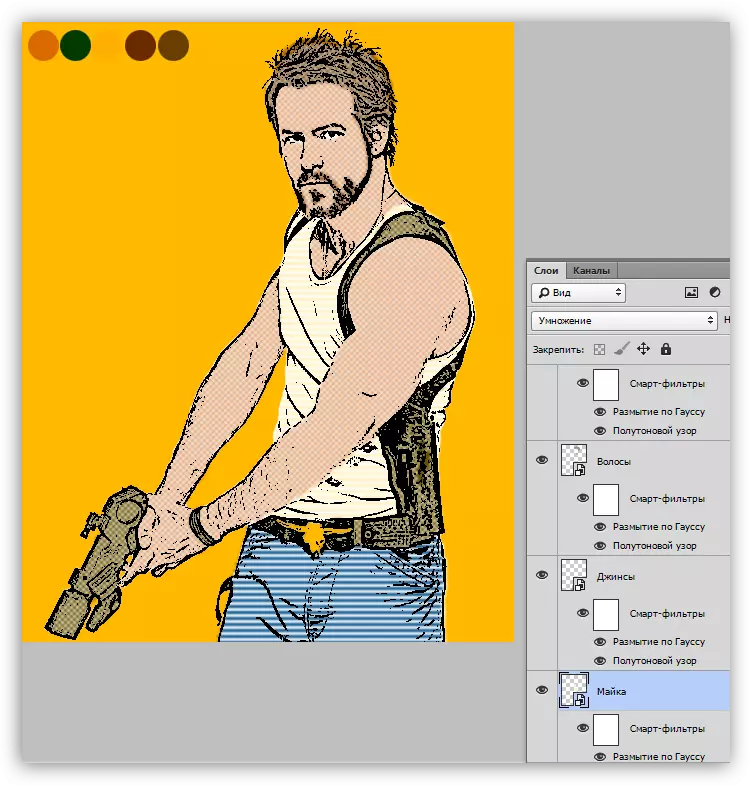
- Using the palette, brush and eraser, paint the entire comic. Each element should be located on a separate layer.

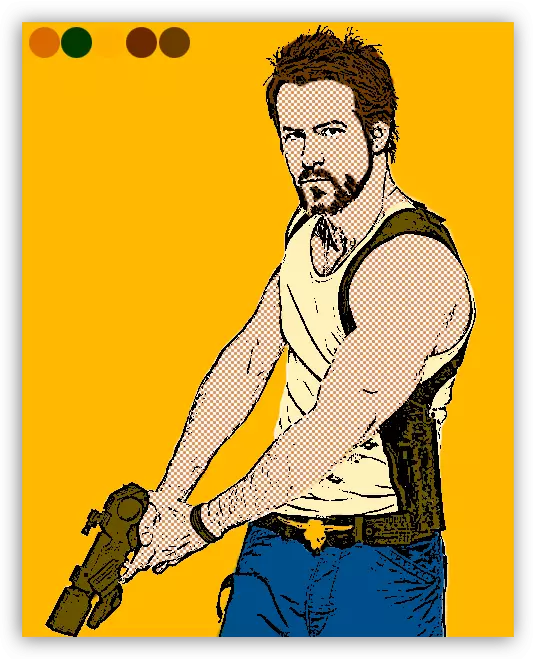
- Create a background. For this, the best color is best, for example, such:

Please note that the background does not fill, but it is painted, like other sites. The character (or under it) should not be background.
Effects
With the color design of our image, we figured out, then a step should be made to give it the very effect of the comic, for which everything was stood. This is achieved by applying filters to each layer with color.
To begin with, we transform all layers into smart objects so that if you wish, you can change the effect, or change its settings.
1. Click right-click on the layer and select the "Convert to Smart-Object" item.

Make the same actions with all the layers.

2. Select the layer with the skin and set up the main color that should be the same as on the layer.
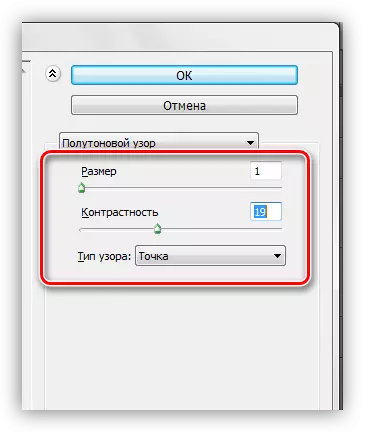
3. We go to the photosop menu "Filter - Sketch" and we are looking for a "halftone pattern" there.
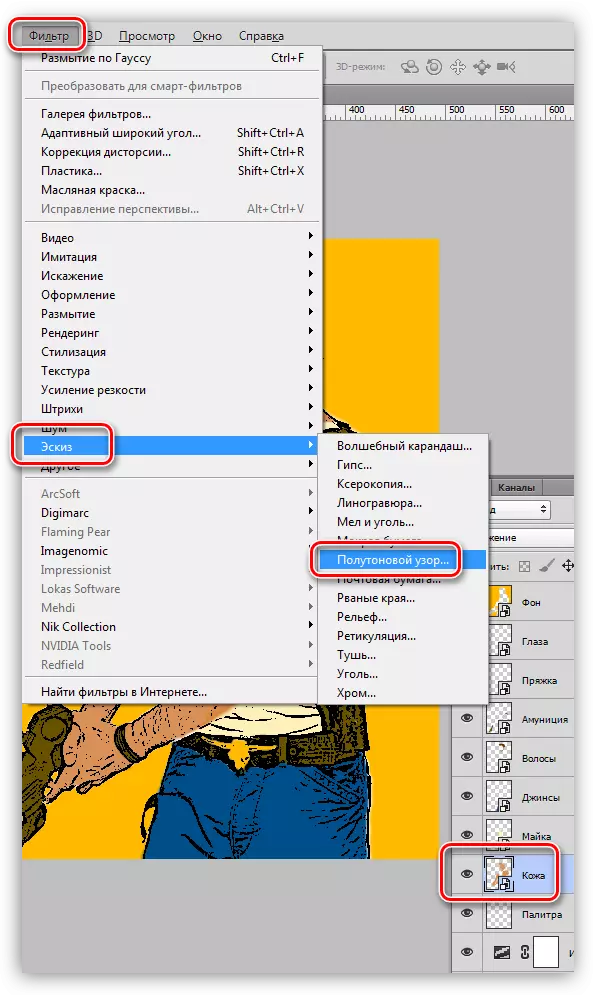
4. In the settings, select the type of dot pattern, the size is set to the minimum, the contrast raise up to about 20.
The result of such settings:
5. The effect created by the filter must be softened. To do this, we will warm up a smart object according to Gauss.
6. Repeat the effect on the ammunition. Do not forget about the setting of the primary color.

7. To effectively use filters on the hair, it is necessary to reduce the contrast value to 1.

8. Go to comic character. Filters apply the same, but the pattern of the pattern is chosen "line". Pick contrast individually.
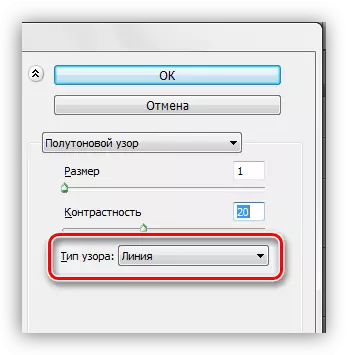
We impose the effect on the shirt and jeans.
9. Go to the comic background. With the help of the entire filter "halftone pattern" and blur in Gauss, we make such an effect (pattern type - circle):

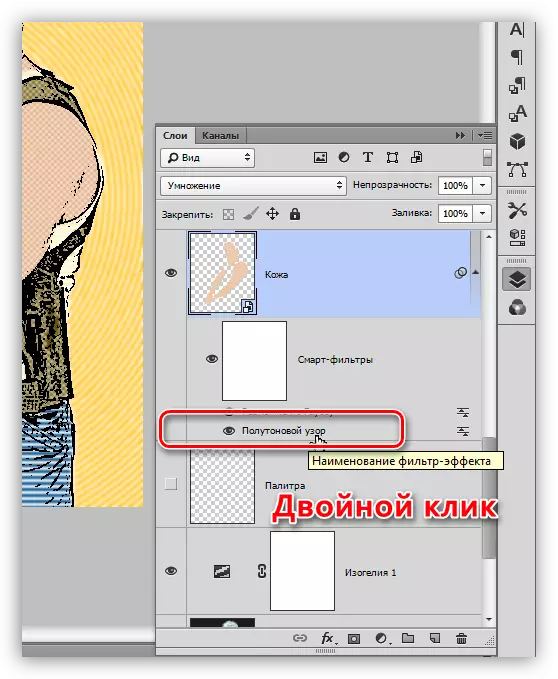
On this coloring of the comic, we completed. Since we have all layers are converted into smart objects, you can experiment with different filters. This is done like this: twice click on the filter in the layers palette and change the settings of the acting or choose another.
Photoshop features are truly limitless. Even such a task as the creation of a comics from the photograph to him. We just have to help him, using their talent and fantasy.