

The Skype application serves not only to communicate in the usual sense of the word. Using it, you can send files, broadcast video and music, which once again emphasizes the advantages of this program before counterparts. Let's figure out how to broadcast music using Skype.
Broadcast musical compositions through Skype
Unfortunately, Skype does not have built-in tools to broadcast music from the file, or from the network. Of course, you can move your speakers closer to the microphone and thus carry out broadcast. But, hardly the sound quality will satisfy those who will listen. In addition, they will hear third-party noise and conversations that occur in your room. Fortunately, there are ways to solve the problem through third-party applications.Method 1: Installing Virtual Audio Cable
A small Virtual Audio Cable will help to solve the problem with high-quality music broadcast in Skype. This is a kind of virtual cable or virtual microphone. Find this program on the Internet is quite simple, but the optimal solution will be visited by the official site.
Download Virtual Audio Cable
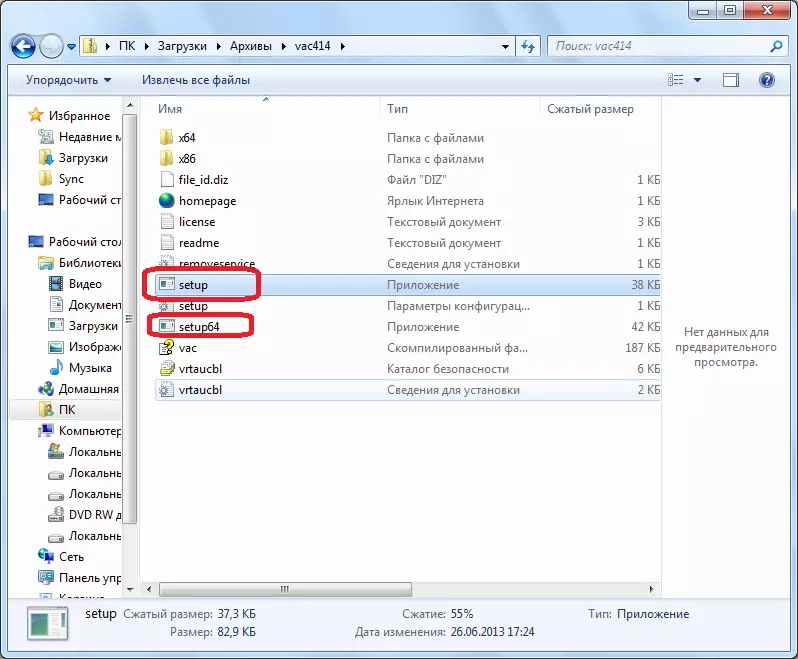
- After we downloaded the program files, as a rule, they are located in the archive, open this archive. Depending on the bittenness of your system (32 or 64 bits), we start the Setup or Setup64 file.
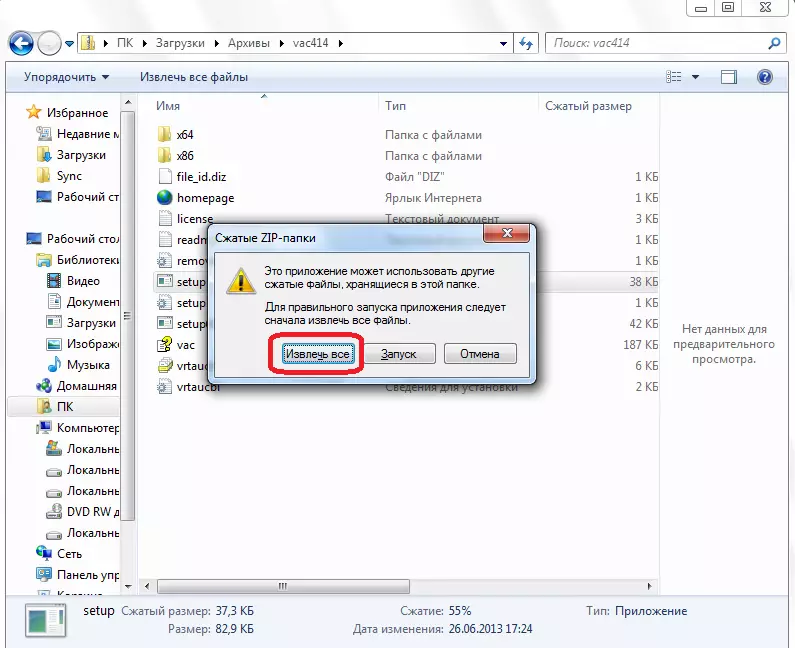
- A dialog box appears, which offers to extract files from the archive. Click on the "Earn All" button.
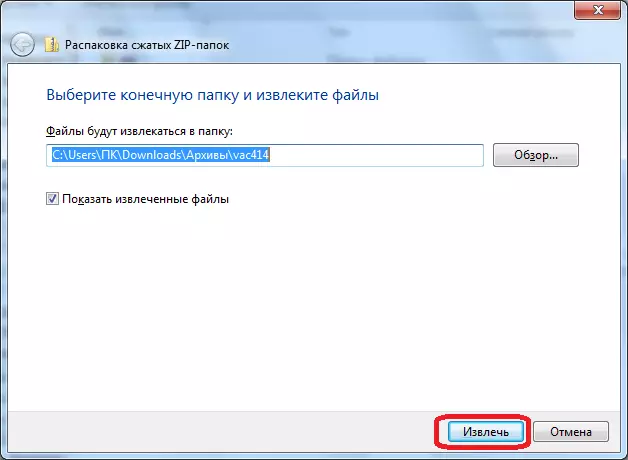
- Next, we are invited to choose the directory of file extraction. You can leave it by default. Click on the "Extract" button.
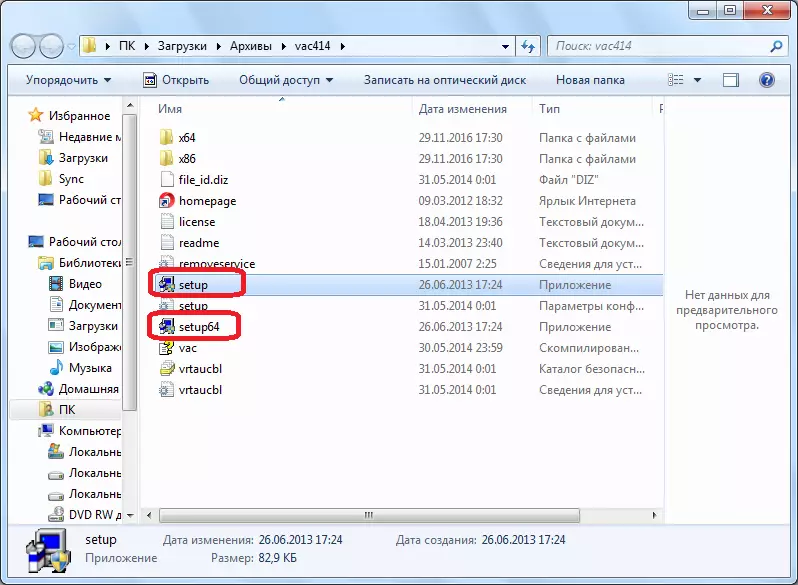
- Already in the folder extracted folder, you start the Setup or Setup64 file, depending on the configuration of your system.
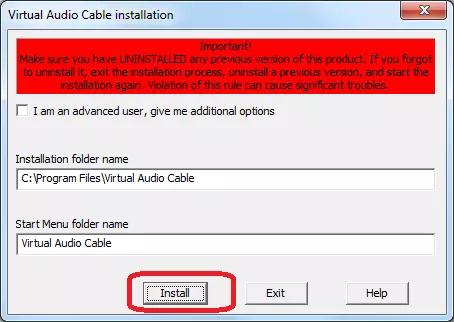
- In the process of installing the application, a window opens where we will need to agree with licenses by clicking on the "I Accept" button.
- In order to directly start installing the application, in the window that opens, click on the "Install" button.
- After that, the installation of the application begins, as well as install the appropriate drivers in the operating system.
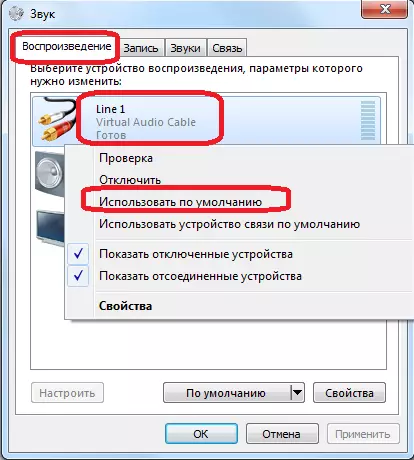
After the installation of the Virtual Audio Cable, click right-click on the speaker icon in the PC notification area. In the context menu, select the "Playback Device" item.
- A window opens with a list of playback devices. As you can see, in the "Playback" tab, "Line 1 (Virtual Audio Cable)" has already appeared. I click on it right mouse button and set the "Use by default" value.
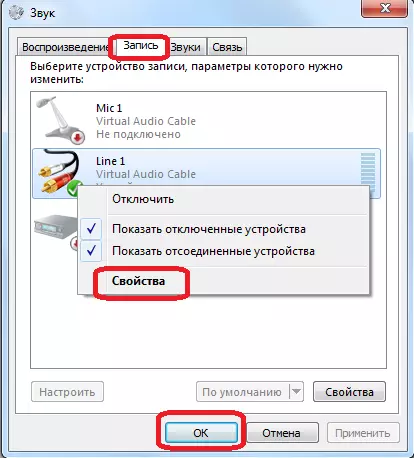
- After that, go to the "Record" tab. Here, similarly, calling the menu, also set the value opposite the name of Line 1 "Use by default" if it is no longer appointed. After that, again, click on the name of the Line 1 virtual device and select the item "Properties" in the context menu.
- In the window that opens, in the column "Play from this device", select the Line 1. After that, after this click on the "OK" button.
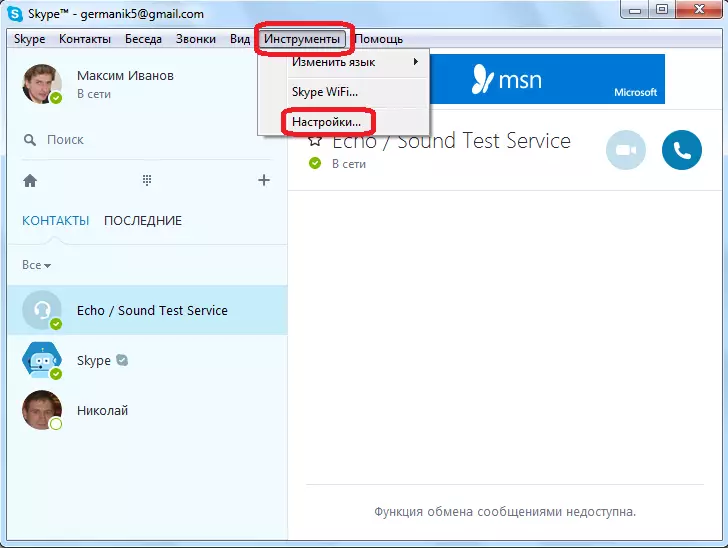
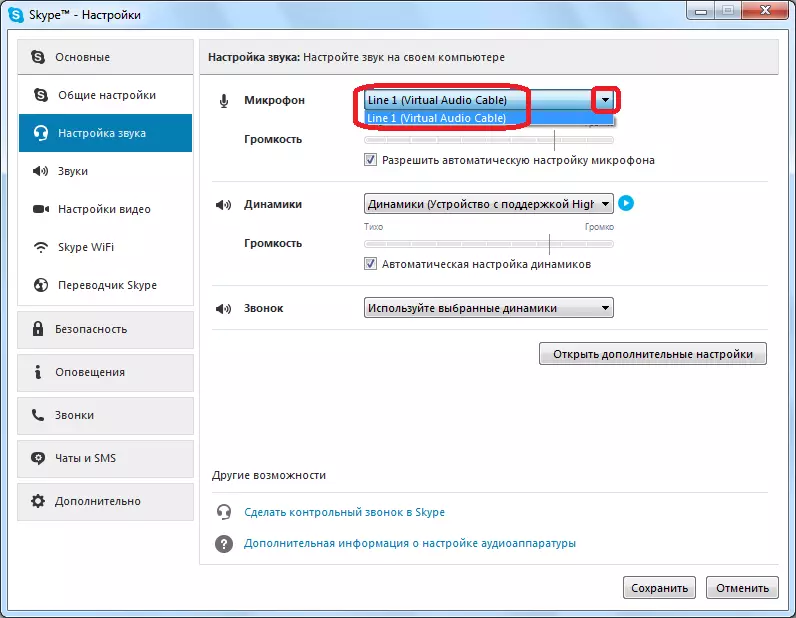
- Next, go directly to the Skype program. Open the "Tools" menu section, and click on "Settings ...".
- Then, go to the "Sound Settings" subsection.
- In the Microphone settings block, in the selection of the recording device from the drop-down list, select "Line 1 (Virtual Audio Cable)".


Now your interlocutor will hear the same thing that would have published your speakers, but only, so to speak directly. You can enable music on any, installed on your computer audio player and, contacting the interlocutor or a group of interlocutors, start musical broadcast.
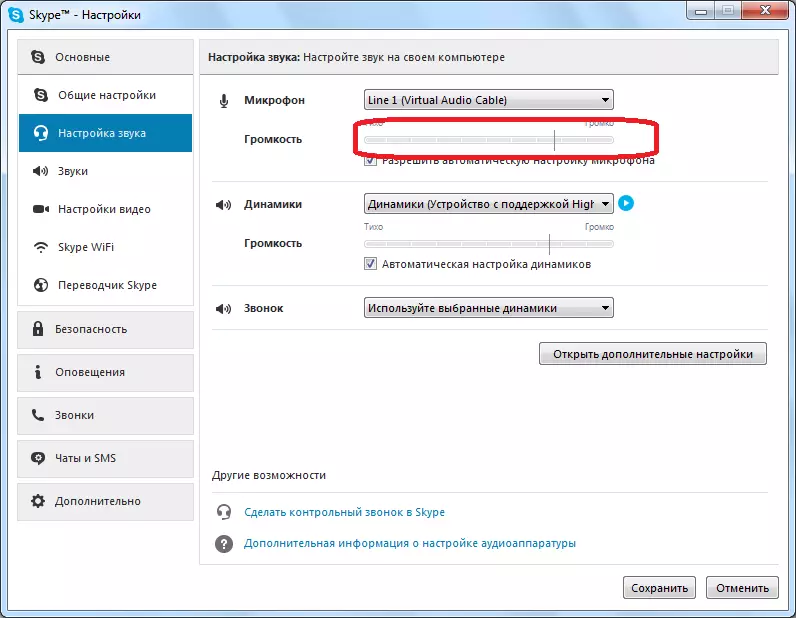
In addition, removing the checkbox from the "Allow automatic microphone setting" item manually adjust the volume of the transmitted music.
But, unfortunately, this method has shortcomings. First of all, this is what the interlocutors will not be able to communicate with each other, since the receiving party will hear only music from the file, and in the transmission side, in general, the sound output devices (speakers or headphones) will be actually disconnected during the transmission period.
Method 2: Using Pamela for Skype
Partially solve the above problem can be by installing additional software. We are talking about the Pamela for Skype program, which is a comprehensive application designed to expand Skype functionality at once in several directions. But us now she will be interested only in terms of the possibility of organizing the broadcast of music.
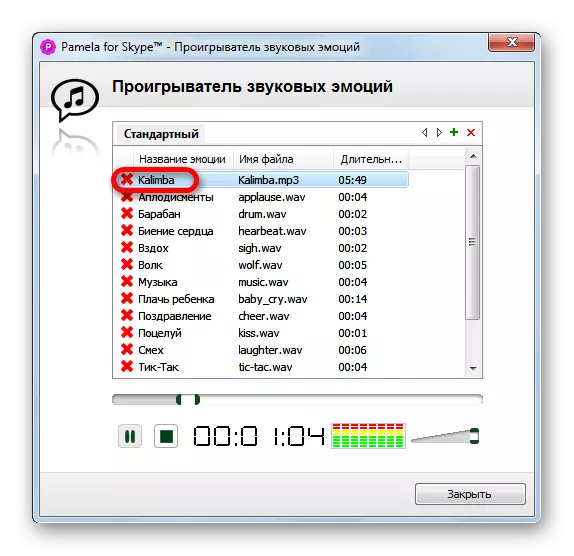
You can organize the broadcast of musical compositions in Pamela for Skype through a special tool - "sound emotion player". The main task of this tool is the transfer of emotions by setting sound files (applause, sigh, drum, etc.) in WAV format. But through the player of sound emotions, you can also add conventional music files in MP3, WMA and OGG format, which we need.
Download Pamela for Skype program
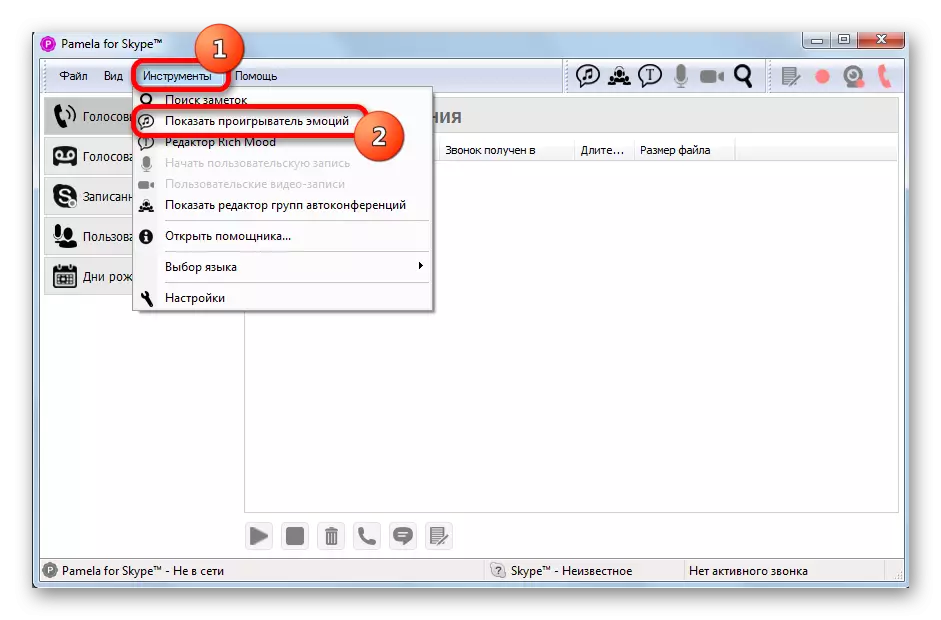
- Run Skype and Pamela for Skype. In the main menu of Pamela for Skype, click on the "Tools". In the discontinued list, select the position "Show emotion player".
- The sound emotion player window is launched. Before us opens a list of preset audio files. Scroll it to the Niza himself. At the very end of this list there is a "Add" button in the form of a green cross. Click on it. A context menu is opened, consisting of two items: "Add emotion" and "Add folder with emotions". If you are going to add a separate music file, choose the first option if you already have a separate folder with a predetermined composition set, then stop at the second point.
- The conductor window opens. It needs to go to the directory where a music file or a music folder is stored. Select the object and click on the "Open" button.
- As you can see, after these actions, the name of the selected file will be displayed in the audio emotion player window. In order to lose it, click the double click of the left mouse button by name.


After that, playing a music file will begin, and the sound will be heard to both interlocutors.
In the same way, other musical compositions can be added. But this method has its drawbacks. First of all, this is the lack of the possibility of creating playlists. Thus, each file will have to run manually. In addition, the free version of the Pamela for Skype (BASIC) provides only 15 minutes of broadcast time over a single communication session. If the user wants to remove this restriction, he will have to purchase a paid version of Professional.
As you can see, despite the fact that the standard Skype tools do not provide for broadcast to interlocutors of music from the Internet and from files located on a computer, if desired, such a broadcast can be arranged.