

Sometimes the USB flash drive is not only a portable information storage device, but also an important tool for working with a computer. For example, to debug certain problems or to reinstall the operating system. These functions are possible thanks to the Ultraiso program, which can make a similar tool from the flash drive. However, the program does not always displays a flash drive. In this article we will deal, why it happens and how to fix it.
Ultraiso is a very useful utility to work with images, virtual drives and discs. It can make a bootable flash drive for the operating system so that then you can reinstall the OS from the flash drive, as well as many more interesting things. However, the program is not ideal, and there are often mistakes and bugs in which the developers are not always to blame. Just one of the similar cases is that the flash drive is not displayed in the program. Let's try to fix it below.
Causes of the problem
Below we will look at the main reasons that may cause this problem.- The reasons for several and most common of them are the error of the user itself. There were cases when the user read somewhere that you can do, for example, the bootable USB flash drive in Ultraiso and knew how to use the program, so I missed the article by the ears and decided to try it myself. But, when trying to do it, I came across just with the problem of "invisibility" of the flash drive.
- Another reason is the error of the flash drive itself. Most likely, there was some faction when working with a flash drive, and she stopped responding to any actions. In most cases, the flash drive will not see the conductor, but it also happens that the flash drive will be displayed normally in the explorer, but in third-party programs, such as Ultraiso, it will not be seen.
Ways to solve the problem
Further ways to solve the problem can be used only if your flash drive is perfectly displayed in the conductor, but the Ultraiso does not find it.
Method 1: Select the desired partition to work with a flash drive
If the flash drive is not displayed in Ultraiso by the fault of the user, then, most likely, it will be displayed in the conductor. Therefore, see if the operating system sees your USB flash drive, and if so, then, most likely, the case is in your inattention.
Ultraiso has several separate tools for working with different media. For example, there is a tool for working with virtual drives, there is a tool for working with drives, and there is to work with flash drives.
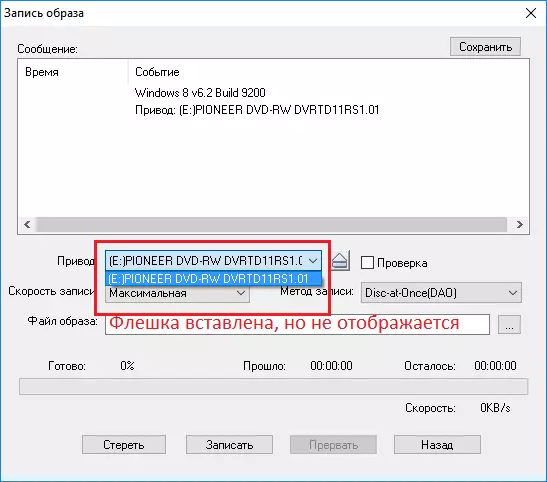
Most likely, you just try to "cut" the disk image on the USB flash drive in the usual way, and it turns out that nothing will happen to you because the program simply does not see the drive.
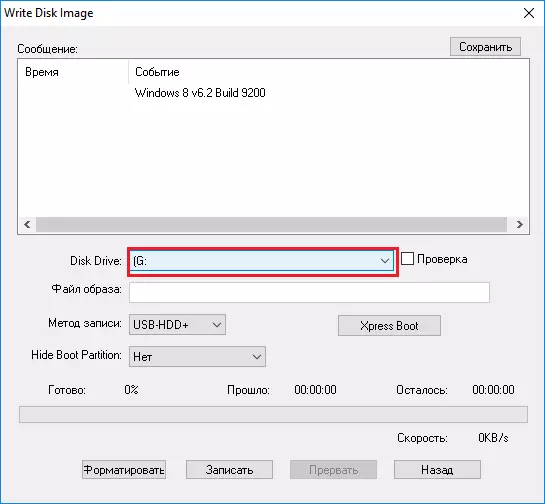
To work with removable drives, you should select a tool to work with the HDD, which is in subparagraph "Self-loading" menu.
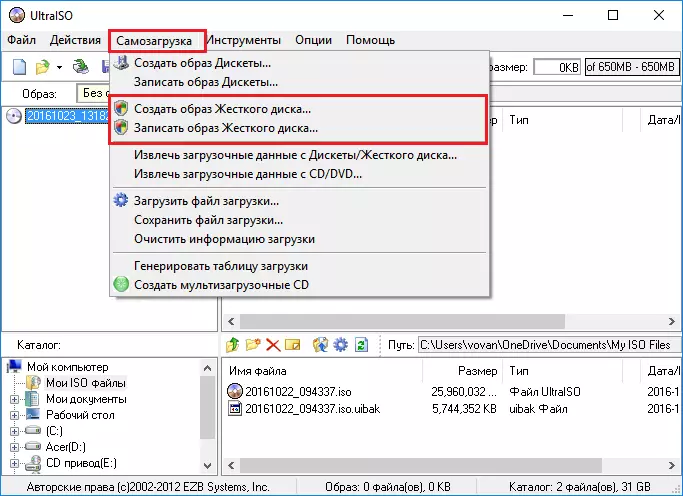
If you select "Write a hard disk image" instead of "burn the CD image", then notice that the flash drive is displayed normally.
Method 2: Formatting in FAT32
If the first method did not help solve the problem, then, most likely, the case is in the storage device. In order to correct this problem, you must format the drive, and in the correct file system, namely in FAT32.
If the drive is displayed in the explorer, and it has important files, then copy them to your HDD to avoid data loss.
In order to format the drive, you must open the "My Computer" and click on the disk right-click, and then select "Format".
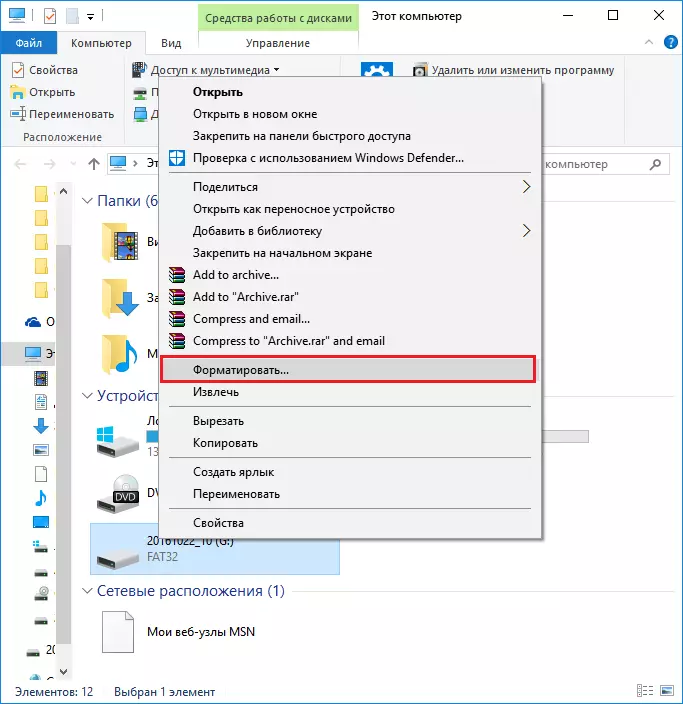
Now you need to specify the FAT32 file system in the window that appears, if it is different, and remove the checkbox with "Fast (Cleaning Table and Points)" to make a complete formatting of the drive. After that, click "Start".
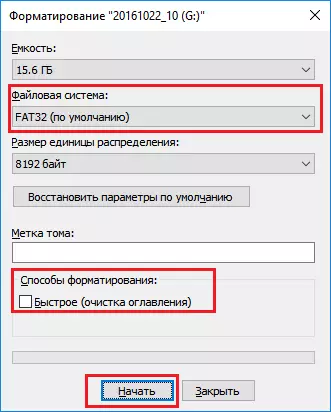
Now it remains only to wait until formatting is completed. The duration of complete formatting is usually more quickly and depends on the filing of the drive and when the last time you performed complete formatting.
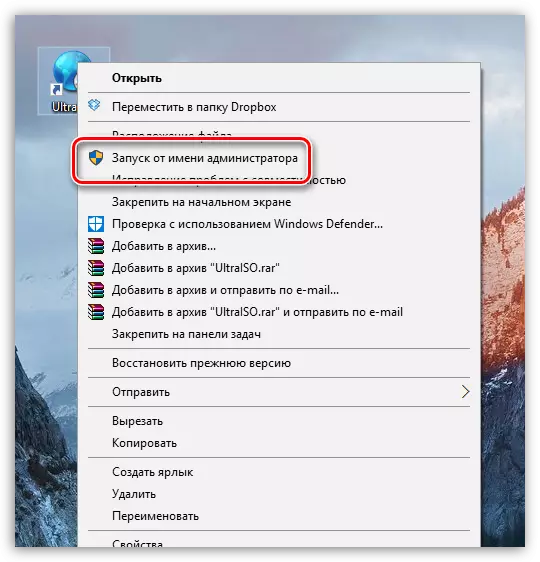
Method 3: Run on behalf of the administrator
For some tasks in Ultraiso, executed with a USB drive, require administrator rights. We will try to launch the program with these methods with their participation.
- To do this, click on the Ultraiso label with the right mouse button and in the pop-up context menu, select "Run from the administrator".
- If you are currently using an account with administrator rights, you just have to answer "Yes." In the event that you do not have them, Windows will offer to enter the administrator password. By specifying it correctly, the next moment the program will be launched.
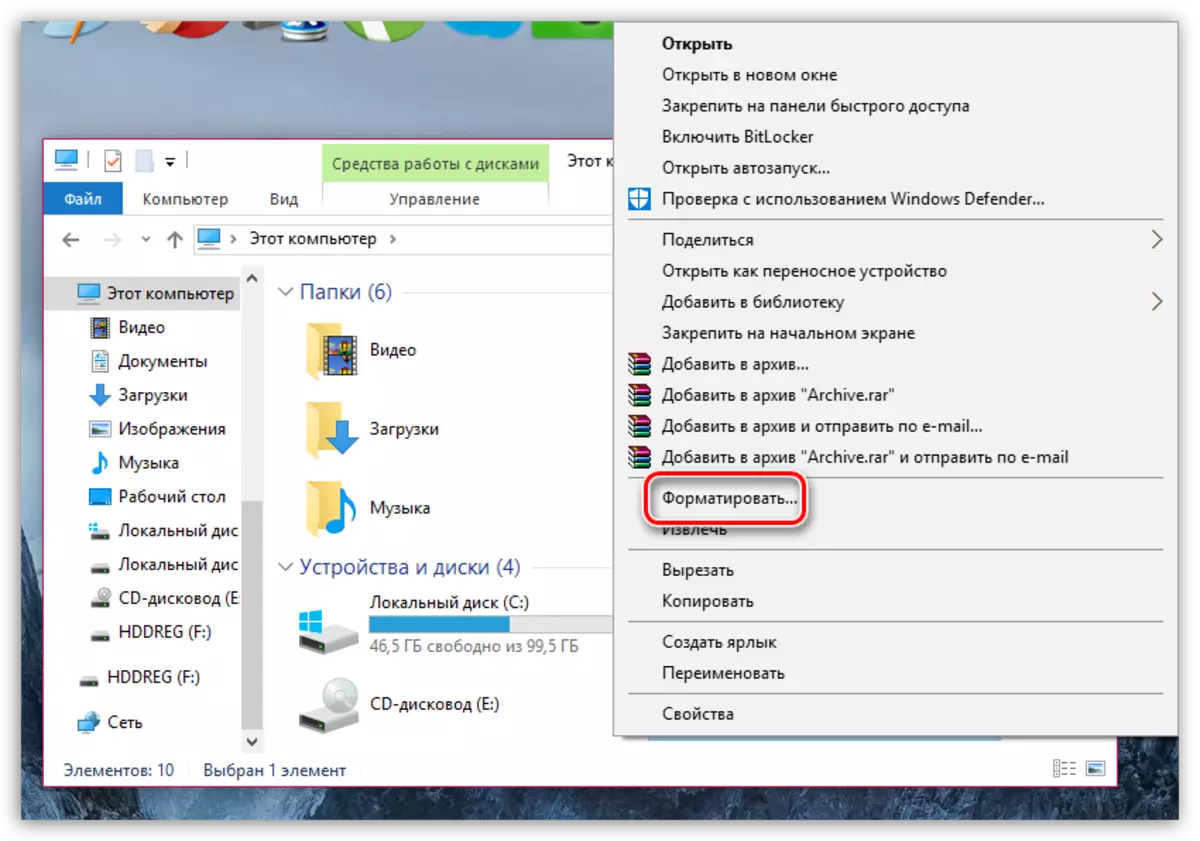
Method 4: Formatting in NTFS
NTFS is a popular file system for storing large amounts of data, which today is considered the most used for accumulation devices. As an option - we will try to format a USB drive in NTFS.
- To do this, open the Windows Explorer in the "This Computer" section, and then right-click on your drive and in the displayed context menu, select "Format".
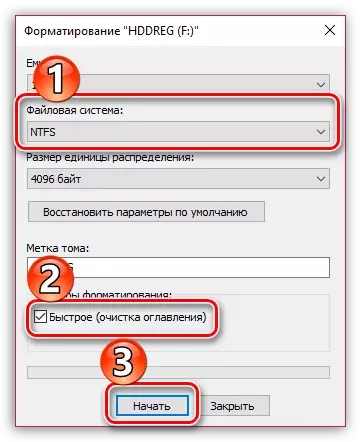
- In the "File System" block, select "NTFS" and make sure that you have been removed the checkbox near the "Fast Formatting" item. Run the process by clicking the "Start" button.
Method 5: Reinstall Ultraiso
If you are watching the problem in Ultraiso, although everywhere drive is displayed correctly, you might think about the work of the program. So, now we will try to reinstall it.
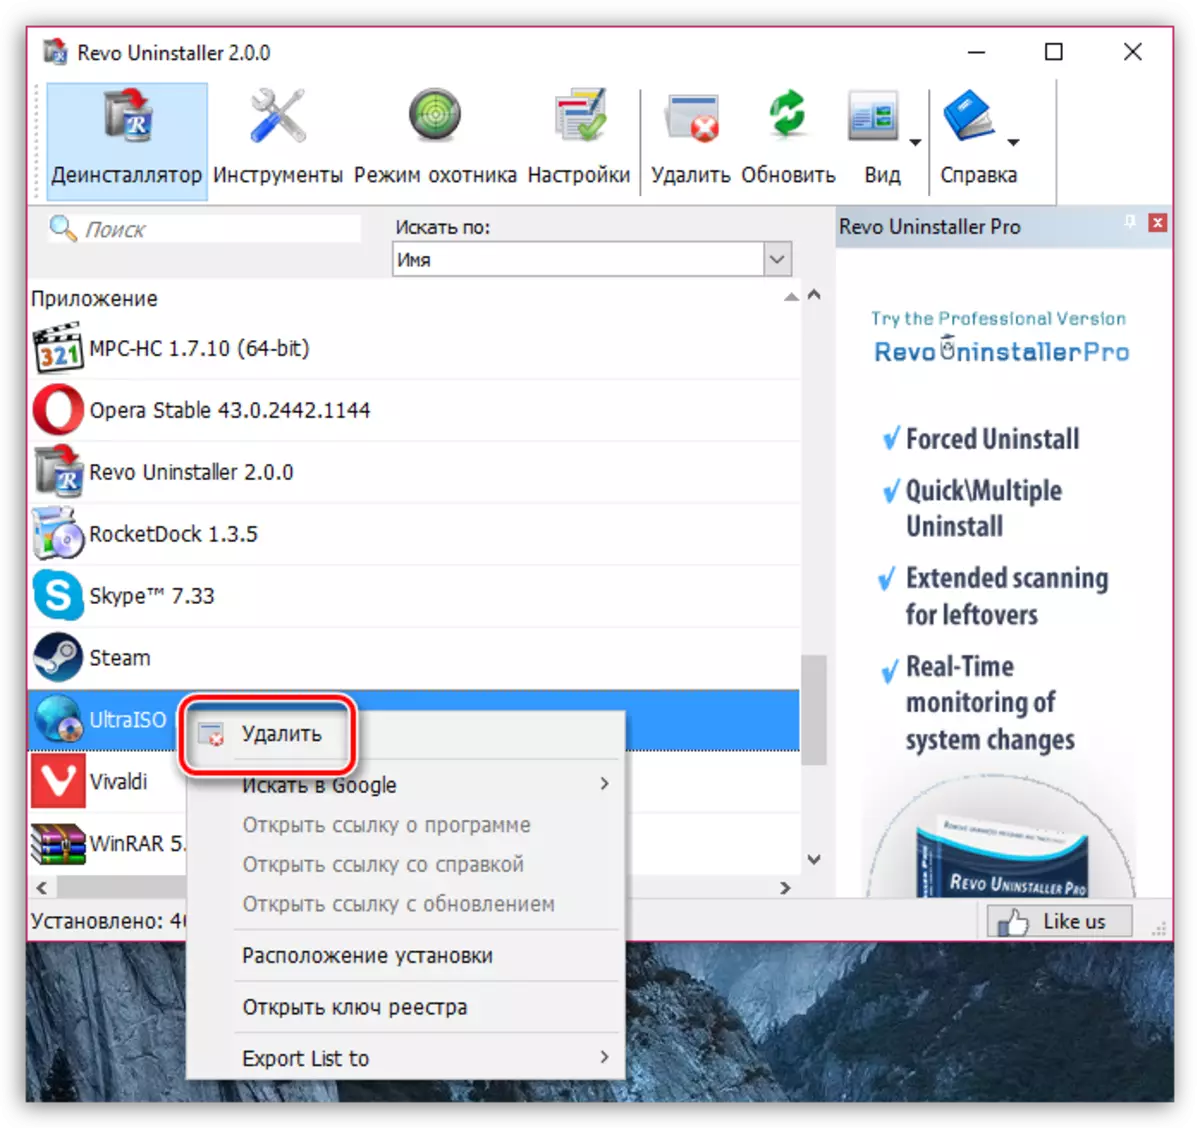
To begin with, you will need to delete the program from the computer, and this must be done completely. Our task is perfect for Revo Uninstaller.
- Run the Revo Uninstaller program. Note that the administrator's rights are required for its launch. The screen will load a list of programs installed on your computer. Find Ultraiso among them, right-click it and select Delete.
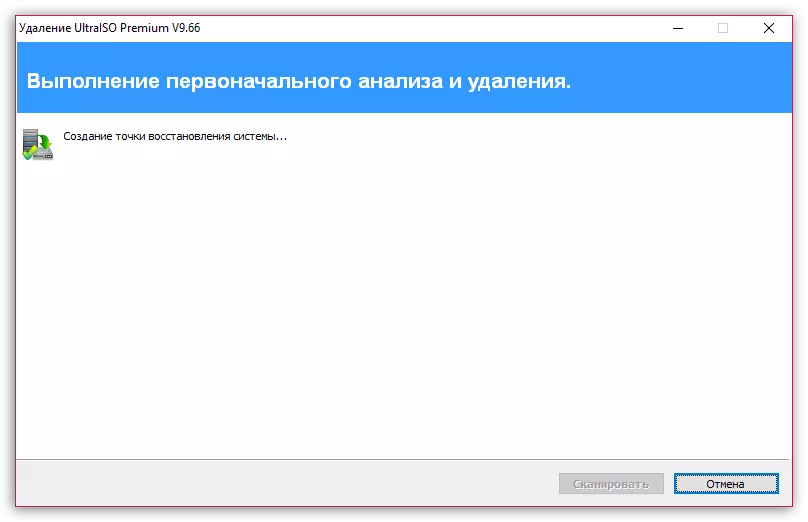
- Initially, the program will begin to create a recovery point in case, if, as a result of uninstalling, you will have problems in the operation of the system, and the uninstallator will start the uninstaller built into the Ultraiso program. Complete the removal by your usual method.
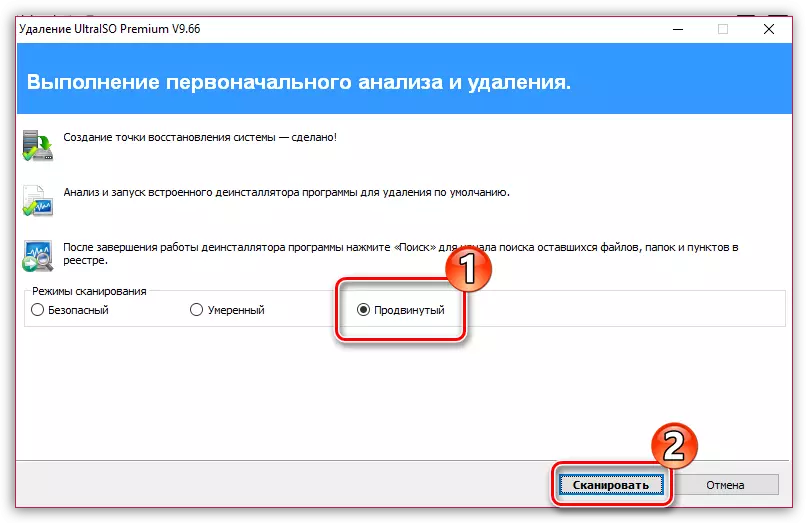
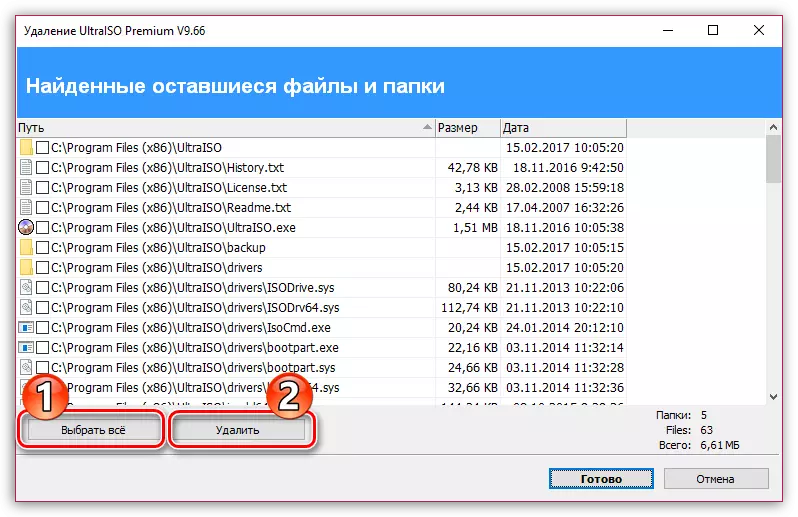
- Once the deletion is completed, Revo Uninstaller will offer you to scan to find the remaining files related to Ultraiso. Check the "Advanced" parameter (preferably), and then click on the "Scan" button.
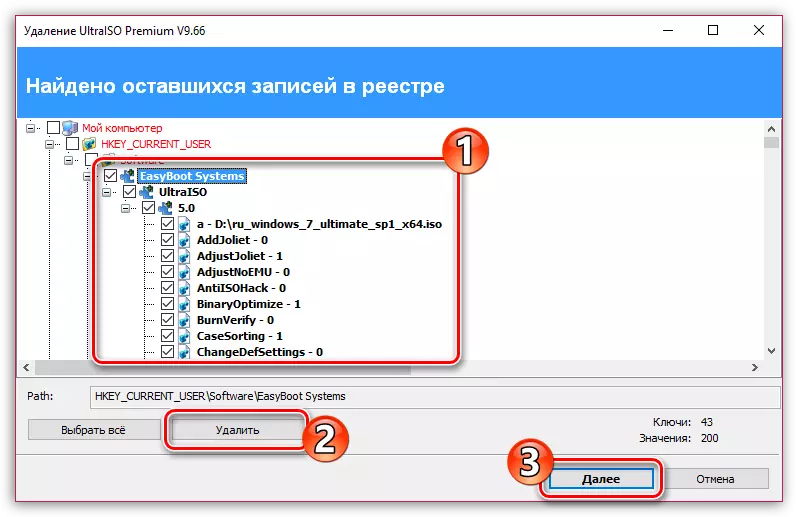
- As soon as Revo Uninstaller finishes scanning, it will display the results. First of all, it will be the search results for the registry. In this case, the bold program will highlight those keys that relate to Ultraiso. Put the ticks near the keys labeled in bold (this is important), and then click on the Delete button. Go further.
- Following Revo Uninstaller displays all folders and files left by the program. It is not necessary to especially follow what you delete, you do not need, so right press the "Select All" button, and then "Delete".
- Close Revo Uninstaller. To the system finally accepted the changes made, restart the computer. After that, you can proceed to download the new Ultraiso distribution.
- By downloading the installation file, set the program to the computer, and then check its performance with your drive.
Method 6: Change Letters
It is far from the fact that this method will help you, but still try good luck. The method is that you change the drive letter to any other.
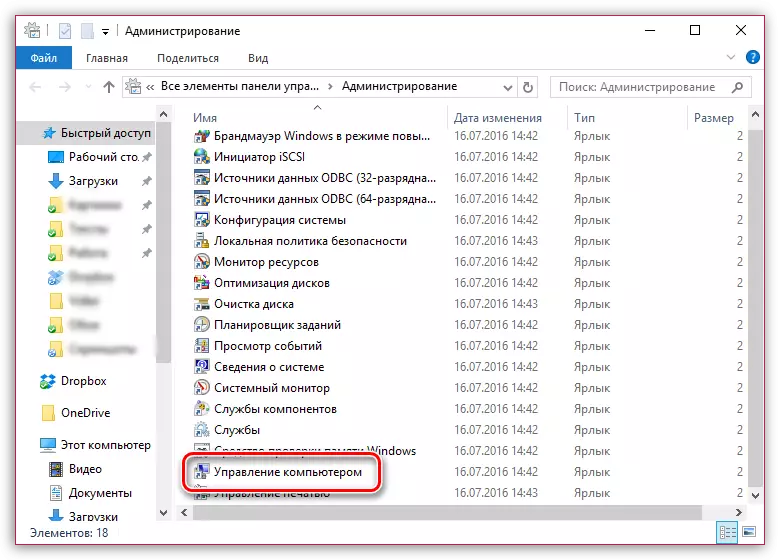
- To do this, open the Control Panel menu, and then go to the "Administration" section.
- Double click on the "Computer Management" label.
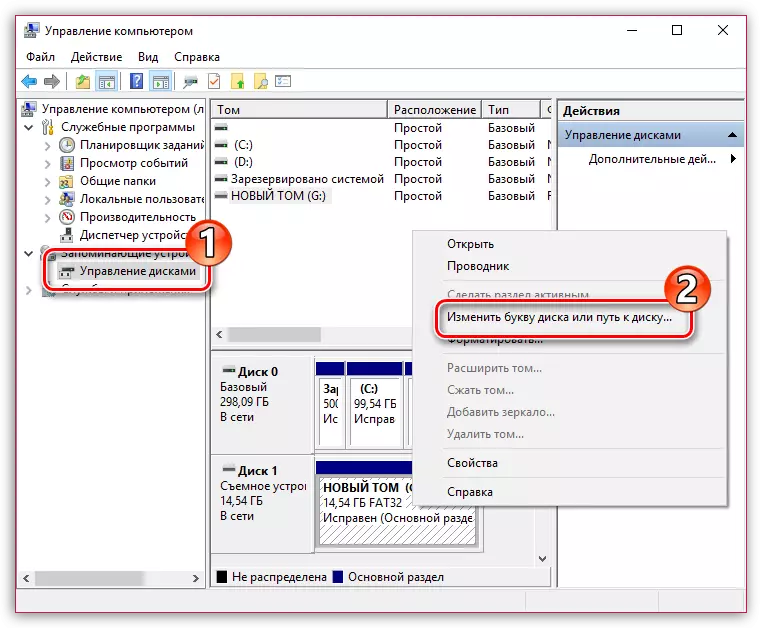
- In the left area of the window, select the section "Disk Management". Find your USB drive at the bottom window, right-click on it and go to "Change the drive letter or path to the disk."
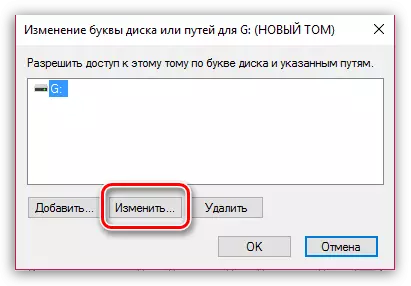
- In a new window, click on the Edit button.
- In the right window of the window, expand the list and select a suitable free letter, for example, in our case the current letter of the disk "G", but we will replace it with "k".
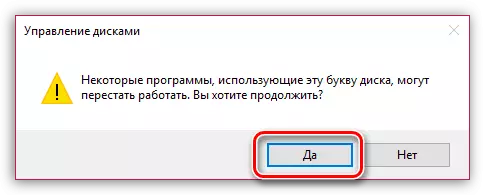
- A warning will be displayed on the screen. Agree with him.
- Close the disk management window, and then run Ultraiso and check the presence of a storage device.


Method 7: Cleaning the drive
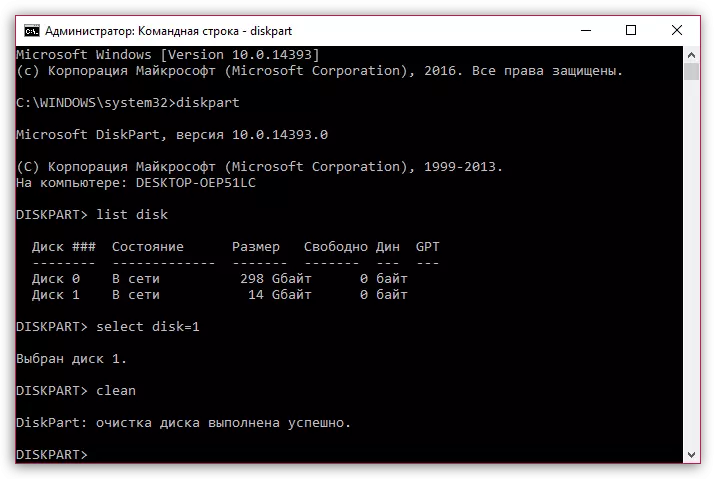
We will try to clean the drive using the DiskPart utility, and then format it in one of the methods described above.
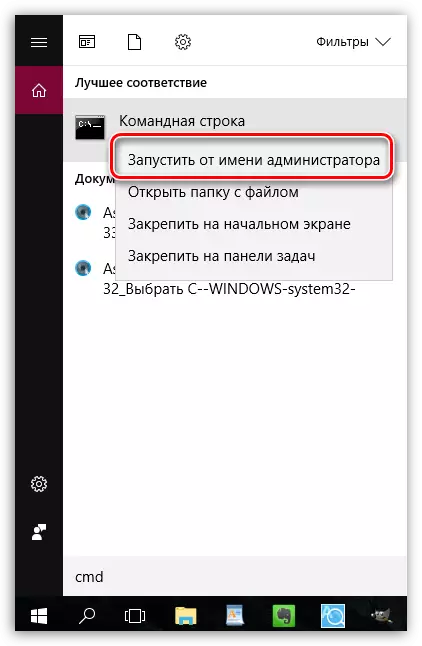
- You will need to run the command prompt on behalf of the administrator. To do this, open the search string and write a CMD query in it.
Click the Right-click Result and in the context menu, select "Run on behalf of the administrator".
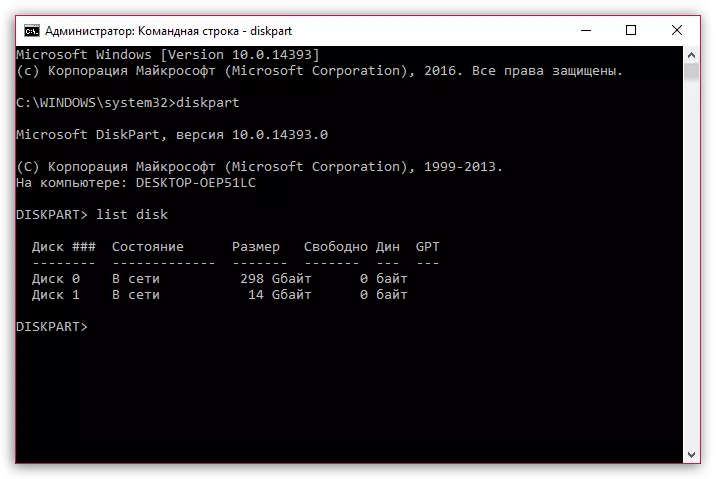
- In the displayed window, run the diskpart utility by the command:
- Following, we will need to display a list of disks, including removable. You can make it a team:
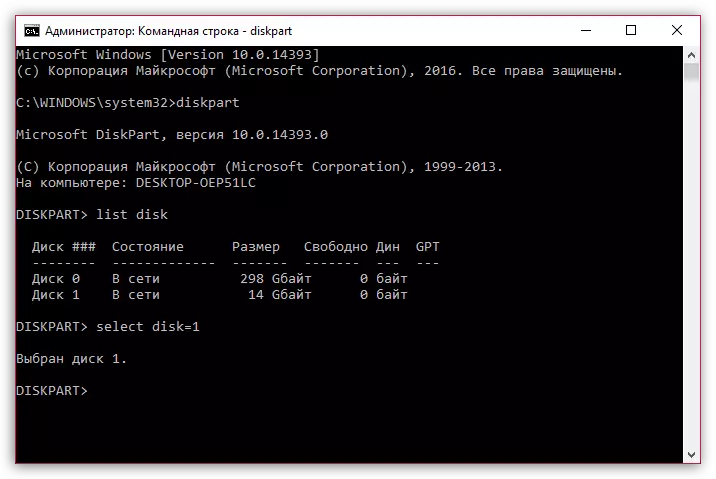
- You will need to determine which of the presented storage devices is your flash drive. The easiest way can this be done based on its size. For example, our drive has a size of 16 GB, and on the command line the disk is visible with an affordable place in the amount of 14 GB, it means that it is. Select it with a team:
- Clean the selected storage device with the command:
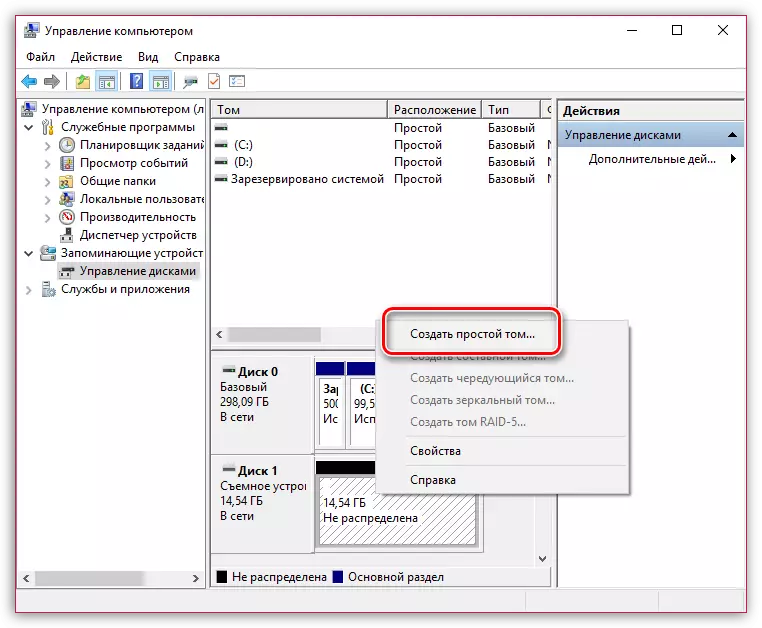
- Now the command line window can be closed. The next step that we need to do is formatting. To do this, run the "Disk Management" window (how to do it, described above), click at the bottom of the window on your flash drive, and then select "Create a Simple Tom".
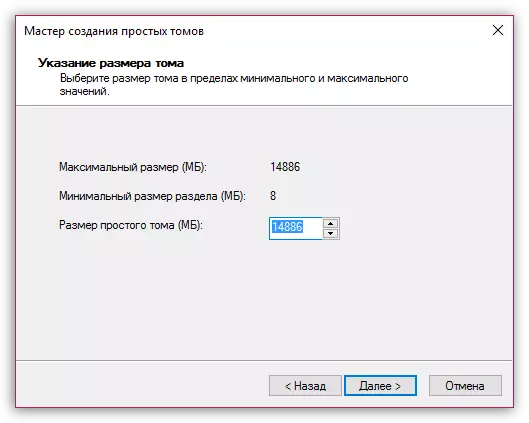
- You will welcome the "Tom Creation Wizard", after which you will be asked to specify the size of the volume. Leave this value by default, and then go to the next.
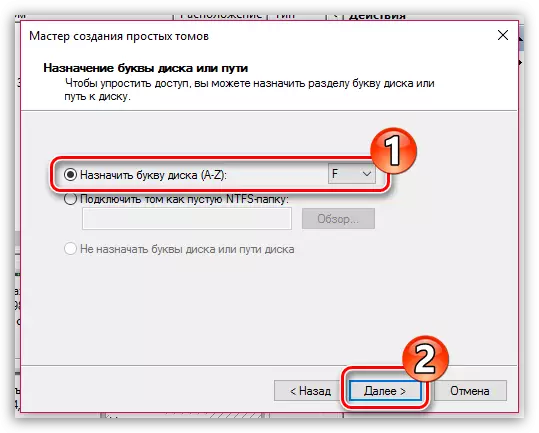
- If necessary, assign another letter for the storage device, and then click the "Next" button.
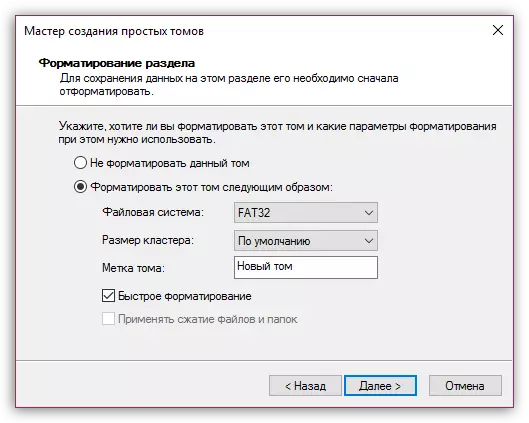
- Perform the formatting of the drive by leaving the initial indicators.
- If necessary, the device can be translated into NTFS, as described in the fourth method.
diskpart.

LIST DISK.
SELECT DISK = [_disc_name], where [_disk] is the number specified near the drive.
For example, in our case, the command will look like this:
SELECT DISK = 1
Clean.
And finally
This is the maximum number of recommendations that can help eliminate the problem under consideration. Unfortunately, how users say, the problem may be caused by the operating system itself, therefore, if any method does not help you from the article, in the most extreme case you can try to reinstall Windows.
See also: Step by step guide to install Windows from a flash drive
That's all today.