
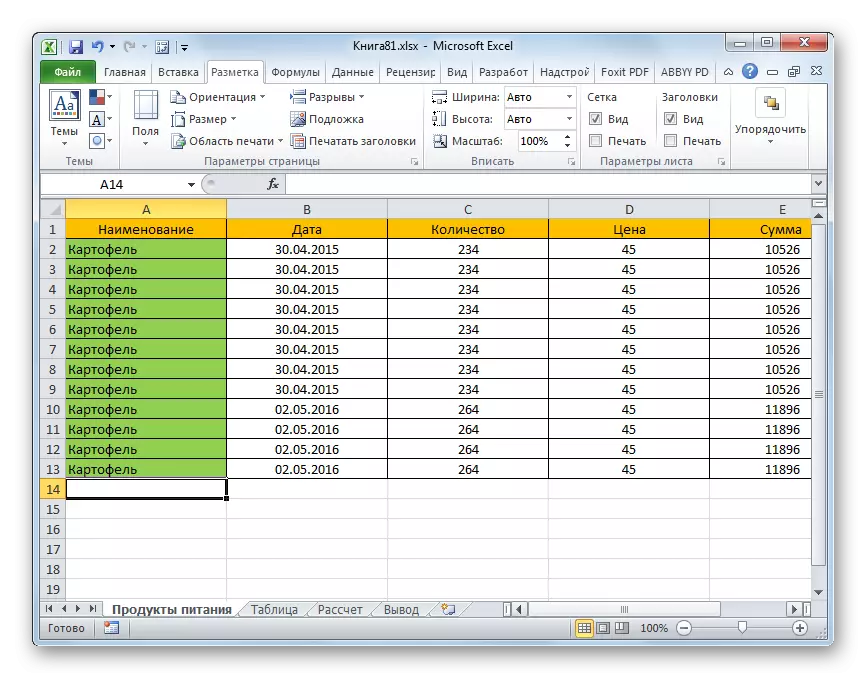
When printing tables and other data, the Excel document is often case when the data goes beyond the borders of the sheet. It is especially unpleasant if the table does not fit horizontally. Indeed, in this case, the names of the strings will be on one part of the printed document, and separate columns on the other. Even more disappointment, if a little bit did not have enough space to completely place the table on the page. But exit from this position exists. Let's figure out how to print data on one sheet in various ways.
Print on one sheet
Before switching to solving the question of how to put the data on one sheet, you should decide whether to do it at all. It should be understood that most of those methods of which will be discussed below, suggest a decrease in the scale in order to fit them on one printed element. If the leaf limit is relatively small in size, it is quite acceptable. But if a significant amount of information does not fit, then an attempt to place all the data on one sheet can lead to the fact that they will be reduced so much that they will become unreadable. In this case, in this case, the best output will print the page on a larger format paper, glue sheets or find another way out.So the user must determine if it is worth trying to accommodate data or not. We will proceed to the description of specific ways.
Method 1: Change orientation
This method is one of the options described here, in which you do not have to resort to a reduction in the scale. But it is suitable only if the document has a small number of lines, or for the user is not so important that it fit into one page in length, and it will be enough that the data will be located on the sheet area in width.
- First of all, you need to check whether the table is placed in the boundaries of the printed sheet. To do this, switch to the "Page Markup" mode. In order to make a clickey on the icon with the same name, which is located on the status bar.
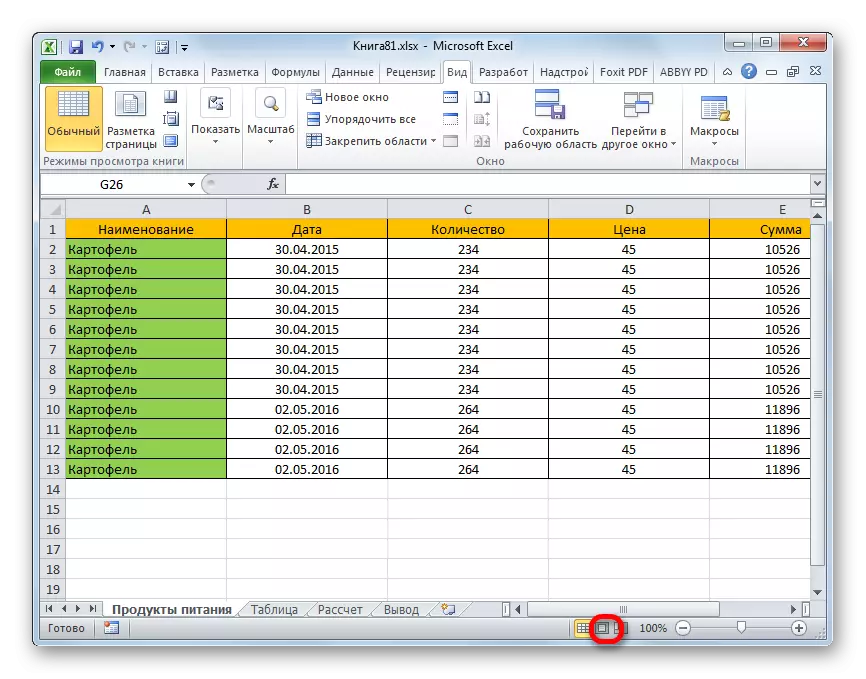
You can also go to the "View" tab and click on the button on the page Markup ", which is located on the tape in the" Book View Modes "toolbar.
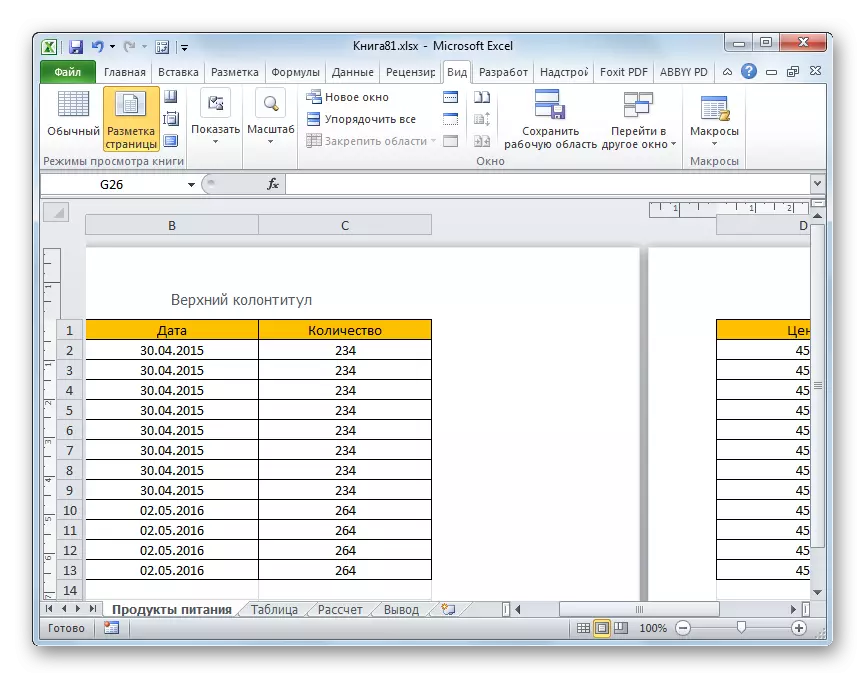
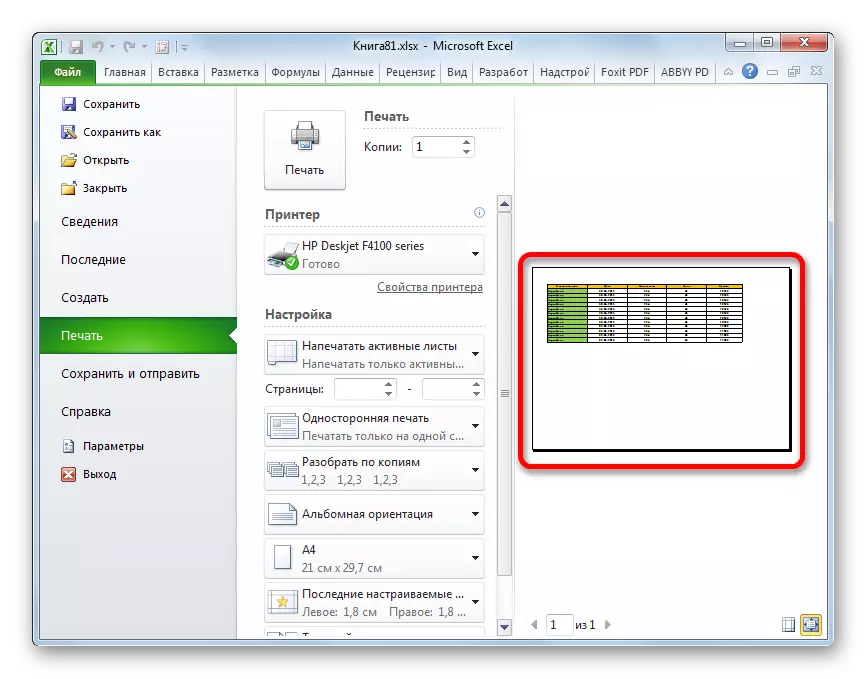
- In any of these options, the program enters the page markup mode. In this case, the boundaries of each printed element are visible. As we see, in our case, the table turns horizontally to two separate sheets, which cannot be acceptable.
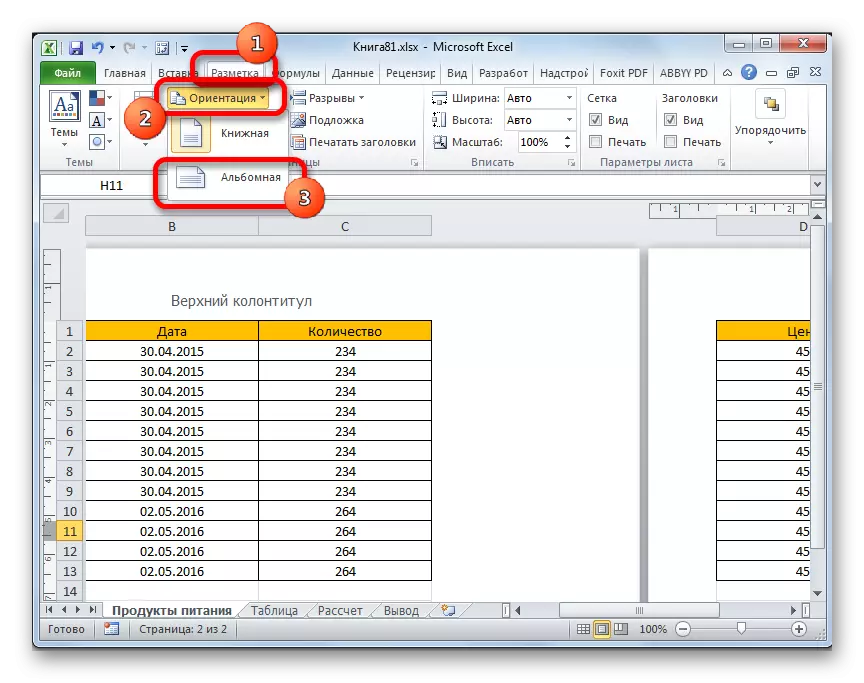
- In order to correct the situation, go to the "Page Markup" tab. We click the "Orientation" button, which is located on the tape in the "Page Parameters" toolbar and from the small list that appears, select the "album" item.
- After the above actions, the table fully fit on the sheet, but his orientation was changed from the book on the landscape.

There is also an alternative version of the change of leaf orientation.
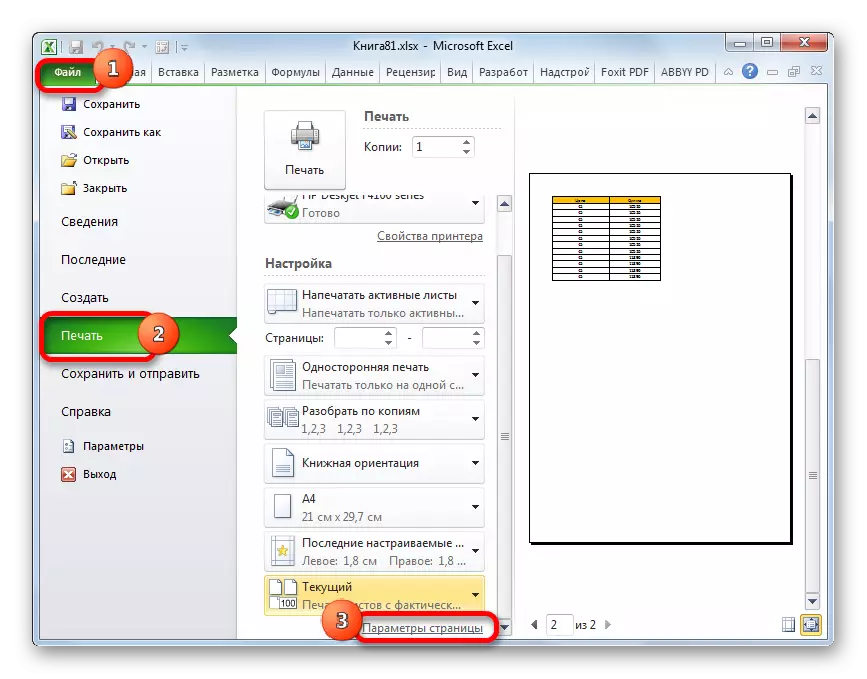
- Go to the "File" tab. Next, move to the "Print" section. In the central part of the window that opened the window is a print settings block. Click on the name "Book orientation". After that, a list with the ability to select another option. Choose the name "Loading Orientation".
- As we see, in the preparation area, after the above actions, the sheet changed the orientation on the landscape and now all data is fully included in the print area of one element.

In addition, you can change the orientation through the parameter window.
- Being in the "File" tab, in the "Print" section by clicking on the inscription "Page Settings", which is located at the bottom of the settings. In the window window, you can also get through other options, but we will talk in detail about the description of the method 4 in detail.
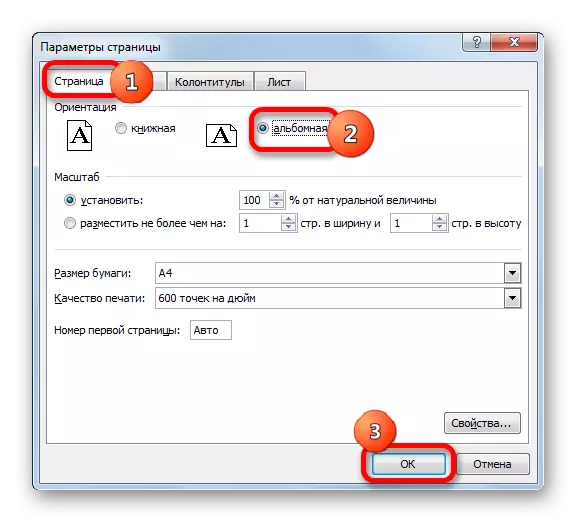
- The parameter window starts. Go to his tab called "Page". In the "Orientation" settings block, we rearrange the switch from the "Book" position to the "landscape" position. Then click on the "OK" button at the bottom of the window.
The orientation of the document will be changed, and, therefore, the area of the printed element is expanded.
Lesson: How to make a landscape sheet in exale
Method 2: Shift of the boundaries of the cells
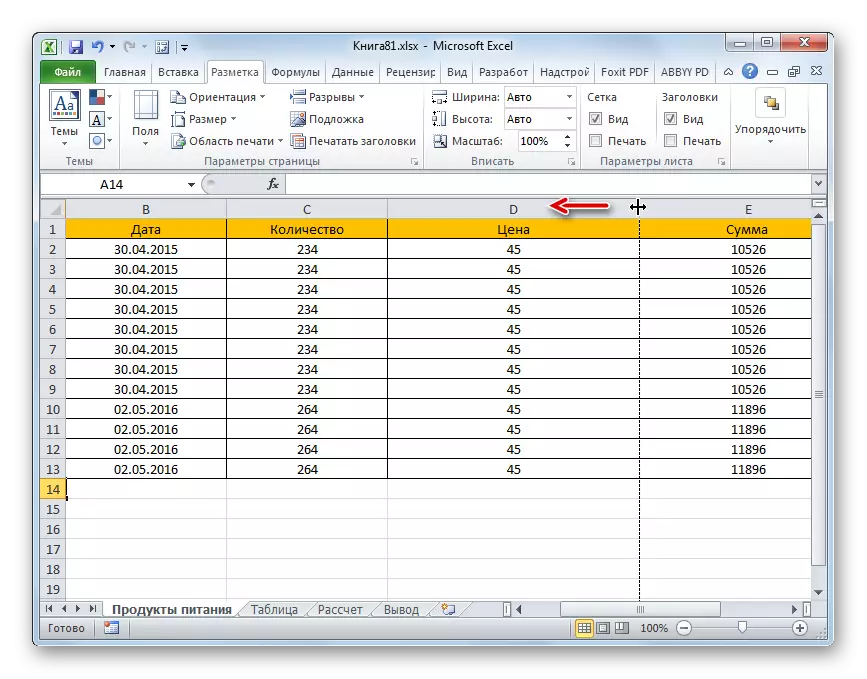
Sometimes it happens that the sheet space is used inefficient. That is, in some columns there is an empty place. This increases the size of the page in the width, and therefore displays it beyond the limits of one printed sheet. In this case, it makes sense to reduce the size of the cells.
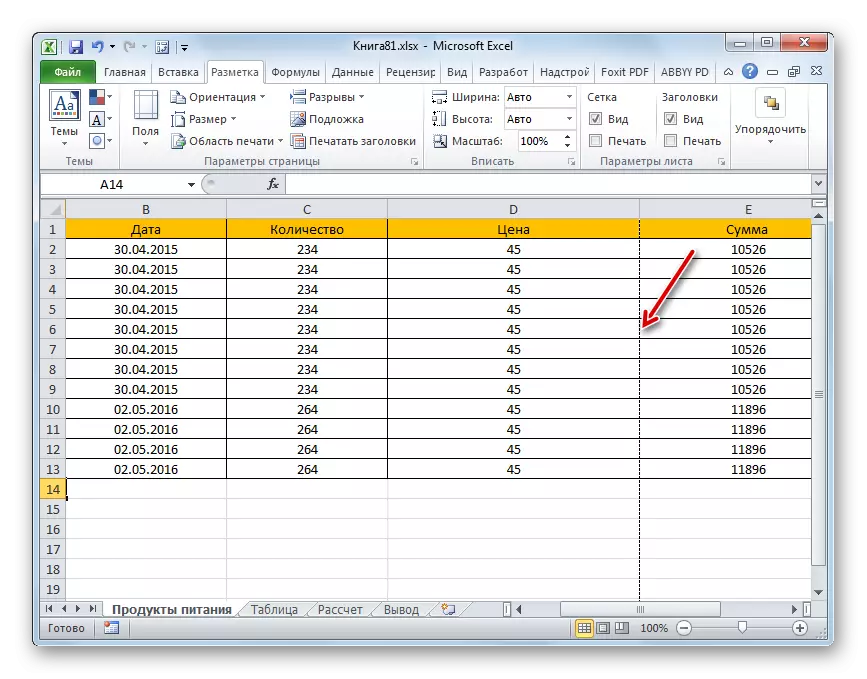
- We establish the cursor on the coordinate panel on the border of the columns to the right of that column that you consider it possible to reduce. In this case, the cursor should turn into a cross with arrows directed into two sides. Close the left mouse button and move the border to the left. This movement is continuing until the border reaches the data of the cell of the column, which is filled out more than others.
- Such an operation is done with the rest of the columns. After that, it is significantly increasing the likelihood that all data of the tables will fit on one printed element, since the table itself becomes much more compact.

If necessary, such an operation can be done with lines.
The disadvantage of this method is that it is not always applicable, but only in cases where Excel's working sheet space was used inefficient. If the data is located as compact as possible, but still not placed on the printed element, then in such cases you need to use other options that we will talk about.
Method 3: Print Settings
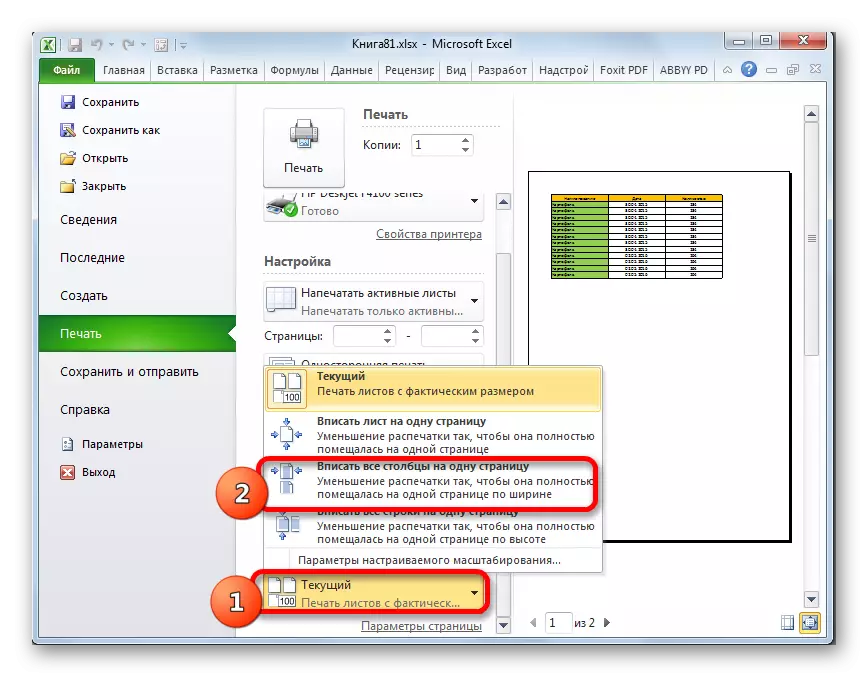
It is possible to make all the data when printing on one item, you can also in the print settings by scaling. But in this case, it is necessary to consider that the data themselves will be reduced.
- Go to the "File" tab. Next, move to the "Print" section.
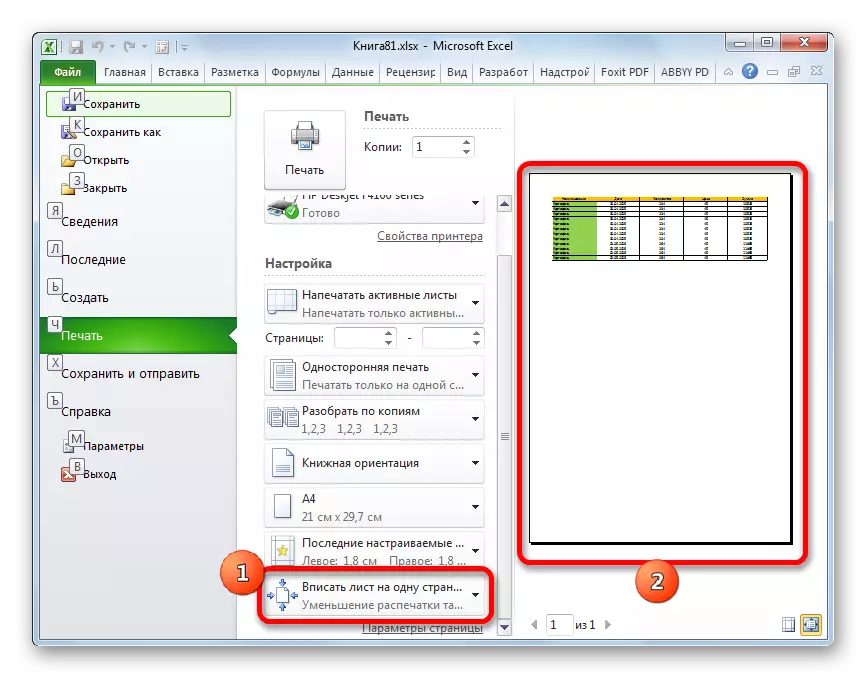
- Then again pay attention to the print settings block in the central part of the window. At the bottom there is a scaling settings field. By default, there must be the "Current" parameter. Click on the specified field. The list opens. Choose in it the position "Enter a sheet for one page."
- After that, by reducing the scale, all data in the current document will be placed on one printed element, which can be observed in the preview window.

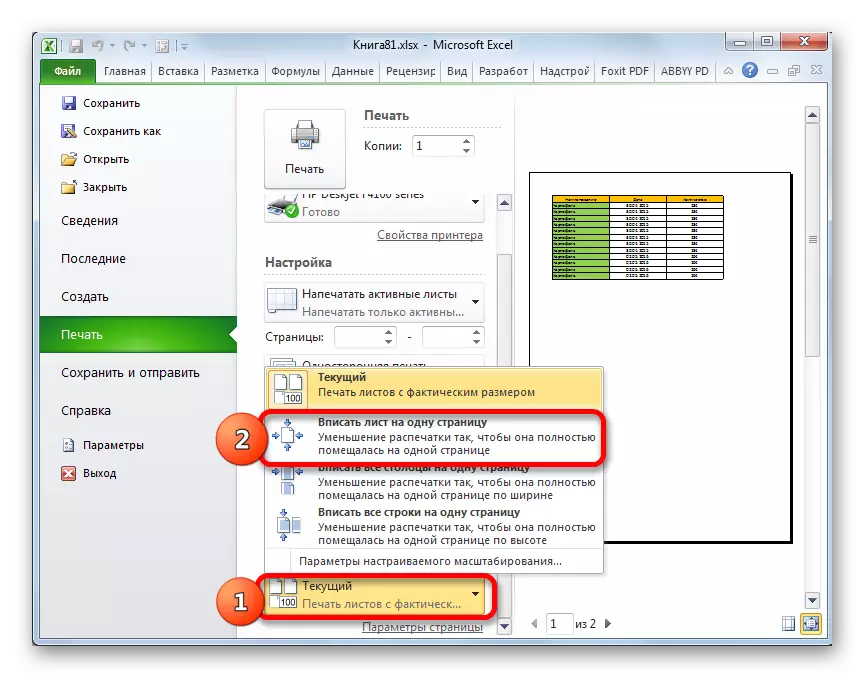
Also, if there is no mandatory need to reduce all rows on one sheet, you can select the "Enter columns per page" in the scaling parameters. In this case, the table data will be horizontally focused on one printed element, but in the vertical direction there will be no such restriction.
Method 4: Page Settings Window
Position the data on one printed element can also be using the window that is called "Page Settings".
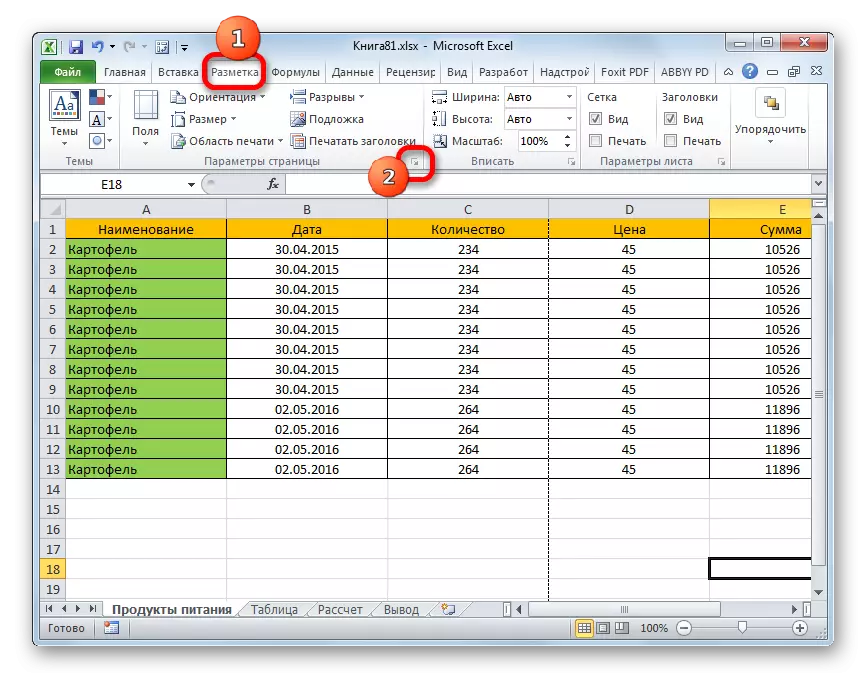
- There are several ways to start the page settings window. The first of them is to switch to the "Page Markup" tab. Next, you need to click on the icon in the form of an inclined arrow, which is placed in the lower right corner of the "Page Settings" tool block.
A similar effect with the transition to the window you need will be when clicking on the same pictogram itself in the lower right corner of the "Fit" tool group on the tape.

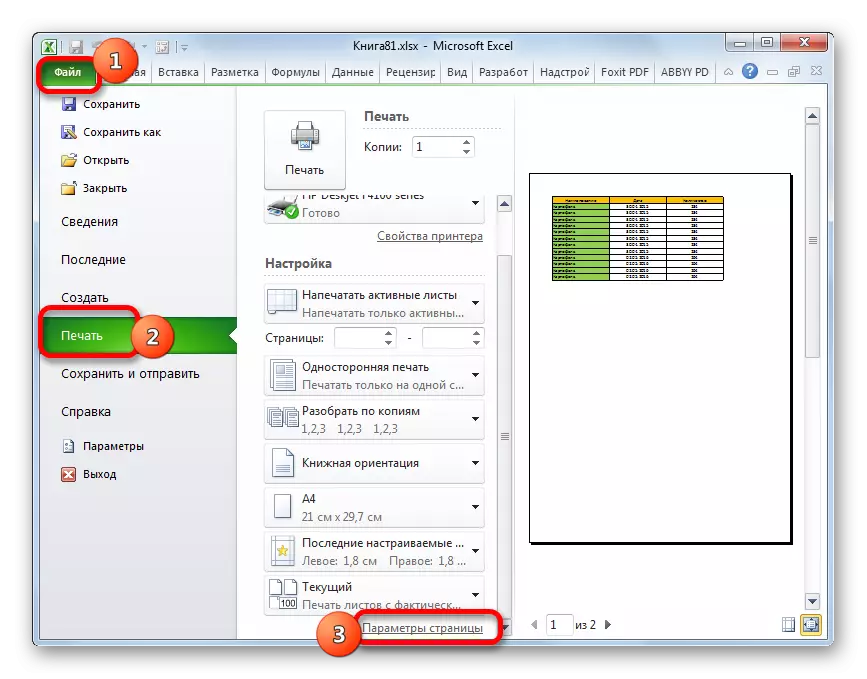
There is also an option to get into this window through the print settings. Go to the "File" tab. Next, click on the name "Print" in the left menu of the opened window. In the settings block, which is located in the center of the window, click on the inscription "Page Parameters", located at the bottom.
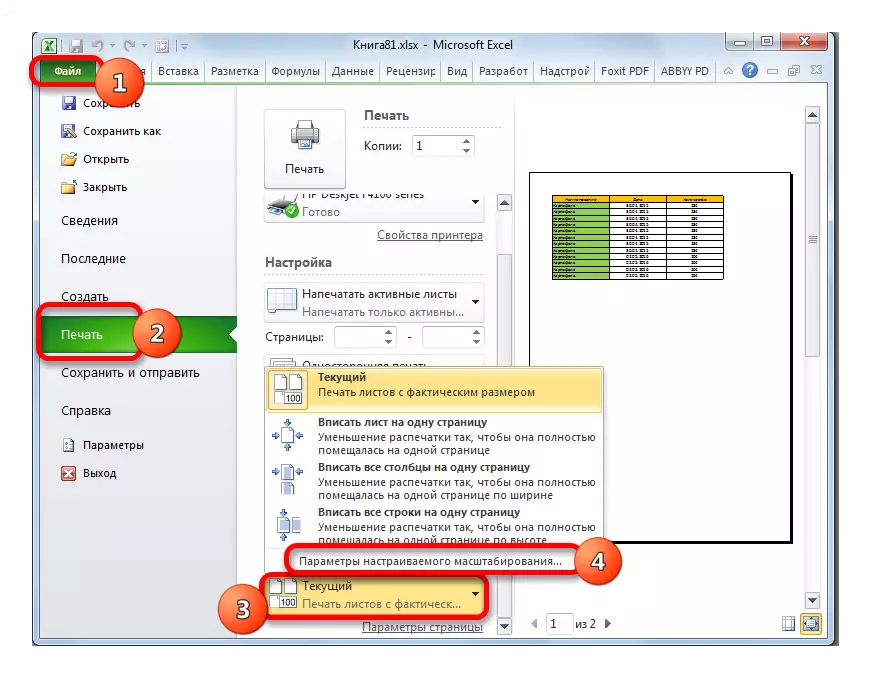
There is another way to start the parameter window. Move into the "Print" section of the File tab. Next, click on the scaling settings field. By default, the "Current" parameter is specified. In the list that opens, select the item "Settings of the Custom Scaling ...".
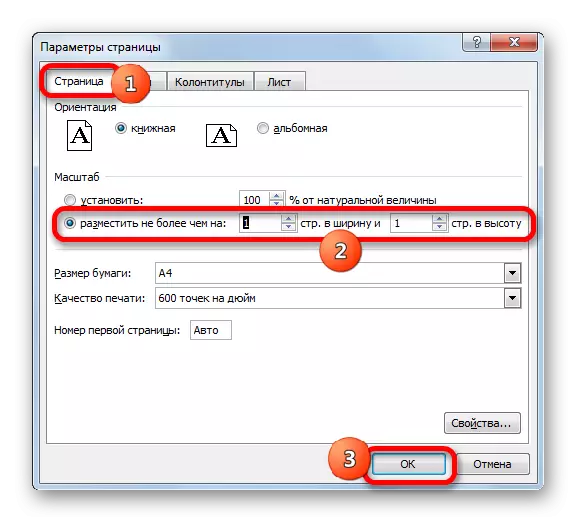
- Which of the actions described above, you would not have chosen, the "Page Settings" window will open before you. We move to the "Page" tab if the window was open in another tab. In the "Scale" settings block, we set the switch to the "place no more than on" position. In the fields "Page In width "and" p. High "should be installed" 1 "numbers. If this is not the case, you should set the data of the number in the corresponding fields. After that, so that the settings were taken by the program to execute, click on the "OK" button, which is located at the bottom of the window.
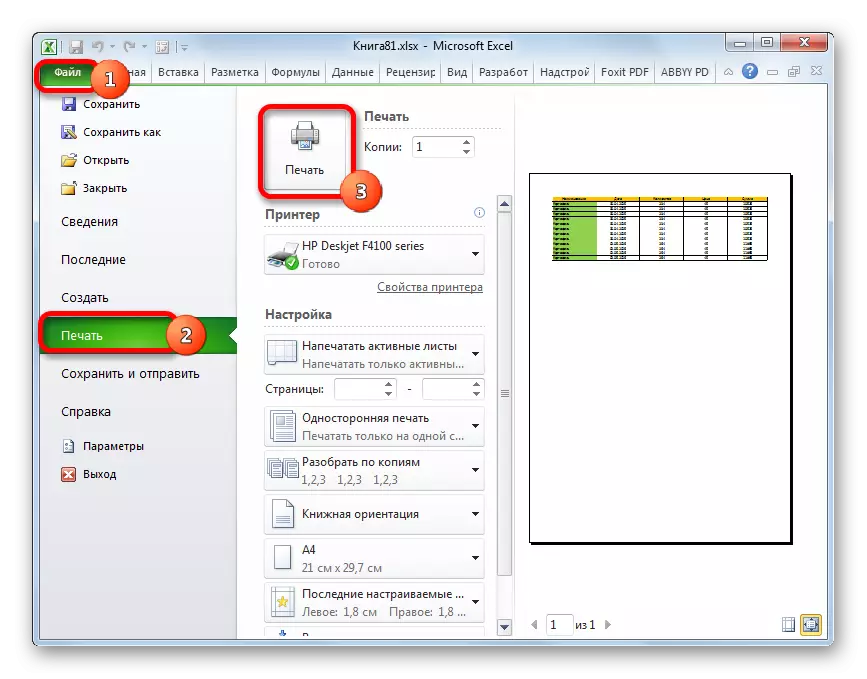
- After performing this action, all the contents of the book will be prepared for printing on one sheet. Now go to the "Print" section of the "File" tab and click on the large button called "Print". After that, the material is printed on the printer on one sheet of paper.
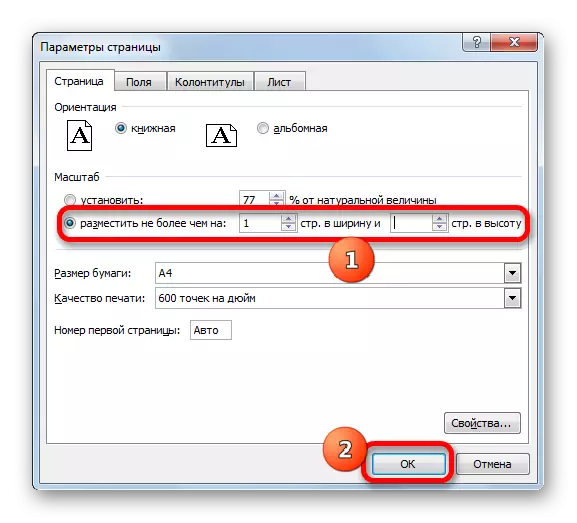
As in the previous method, in the parameter window, you can make settings in which the data will be placed on the sheet only in the horizontal direction, and in the vertical limit will not be. For these purposes, it is required to rearrange the switch to the position "Post no more than on" in the "Page field" In width "set the value" 1 ", and the field" Page Height "leave empty.
Lesson: How to print a page in exile
As you can see, there is a fairly large number of ways to accommodate all data for printing on one page. Moreover, the described options are essentially very different. The relevance of the use of each method should be dictated by concrete circumstances. For example, if you leave too much empty space in columns, then the most optimal option will simply move their borders. Also, if the problem is not to put the table on one printed element in length, but only in width, then it may make sense to think about changing the orientation to the landscape. If these options are not suitable, you can apply the methods associated with a decrease in scaling, but in this case the data size will also be reduced.