

Image deformation is a fairly common technique of work in Photoshop. The functionality of the program includes many options for distorting objects - from simple "flattening" before making a picture of the water surface or smoke.
It is important to understand that when deformed can significantly deteriorate the image quality, so it is worth using similar tools with caution.
In this lesson, we will analyze several methods of deformation.
Deformation image
For deformation of objects in Photoshop use several methods. We list the main.
- Additional feature of "free transformation" called "Deformation";
- Puppet deformation. Pretty specific tool, but, at the same time, quite interesting;
- Filters from the block "distortion" of the corresponding menu;
- Plastic plugin.
Lesson: Function Free Transformation in Photoshop
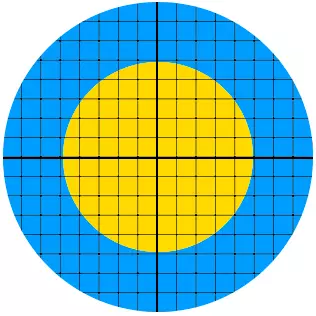
Mock in the lesson, we will be over the pre-prepared, image:
Method 1: Deformation
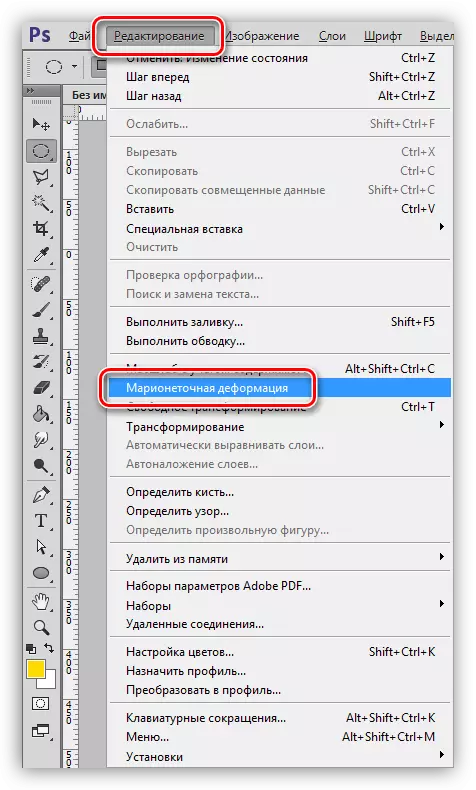
As mentioned above, "deformation" is an addition to "free transforming", which is caused by the combination of hot keys Ctrl + T, or from the Editing menu.
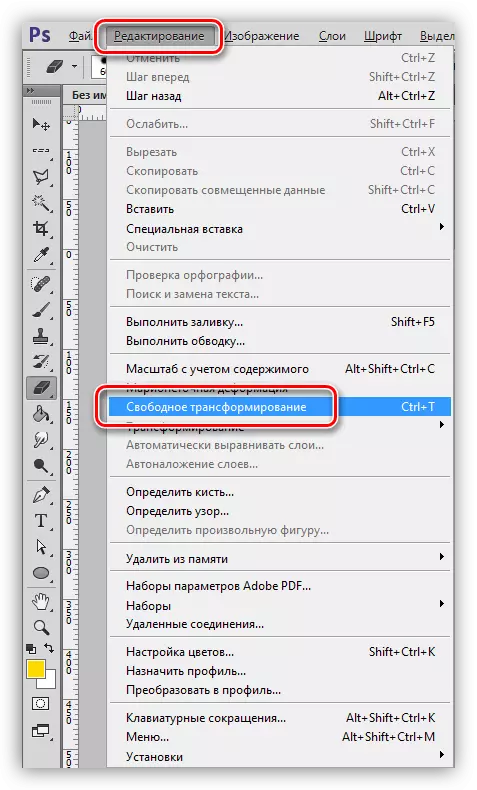
The function you need is located in the context menu that opens after pressing the right mouse button with the "free transformation" activated.

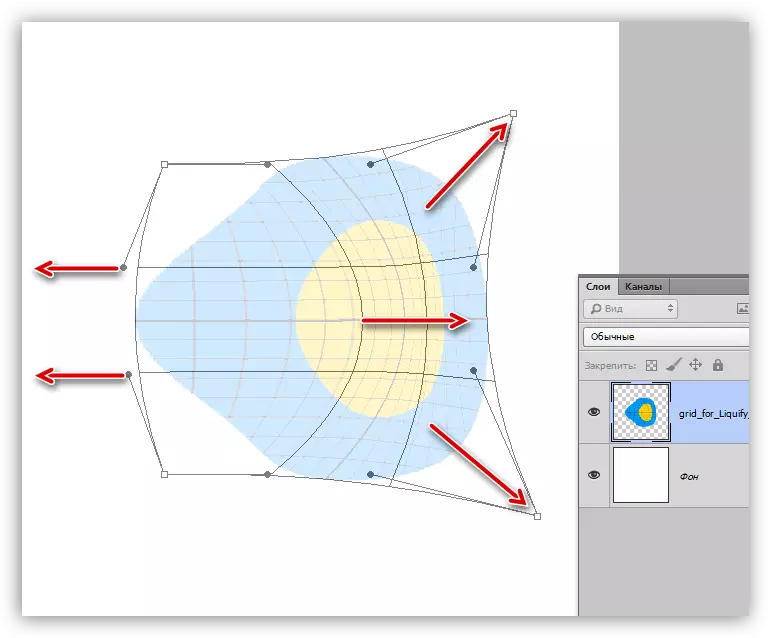
"Deformation" imposes a grid with special properties to the object.

On the grid, we see several markers, affecting which, you can distort a picture. In addition, all mesh nodes are also functional, including segments limited to lines. From this it follows that it is possible to deform the image by pulling in any point that are inside the frame.
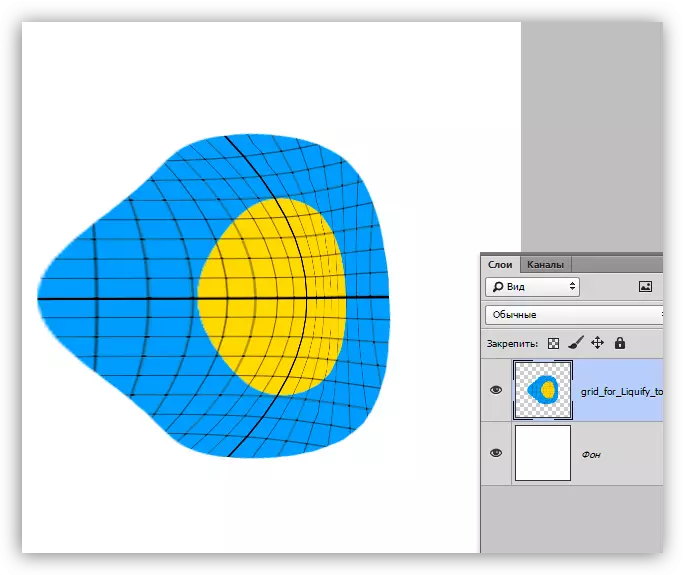
The use of parameters is carried out in the usual way - by pressing the Enter key.
Method 2: Puppet deformation
There is a "puppet deformation" in the same place where all transform tools are in the Editing menu.
The principle of operation consists in fixing certain points of the image with special "pins", with one of which is deformed. The remaining points remain motionless.
Pins can be put in any place, guided by the needs.
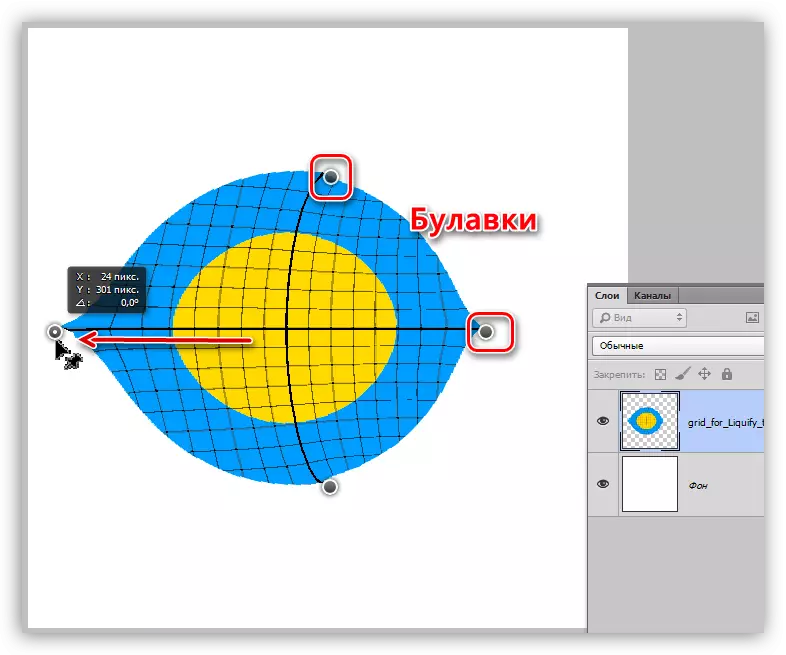
The tool is interesting because it is possible to distort objects with maximum control over the process.
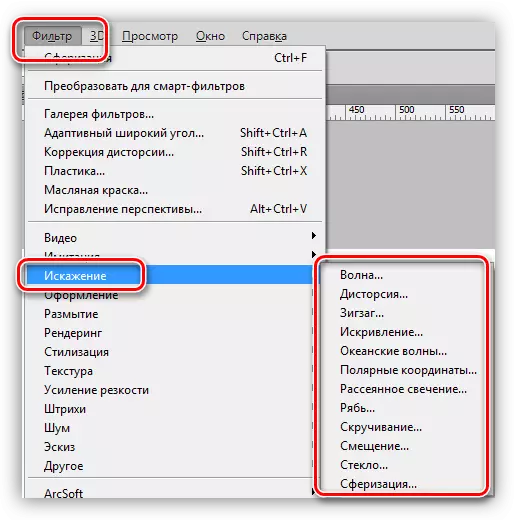
Method 3: Distortion Filters
Filters that are in this block are designed to deform pictures in various ways.
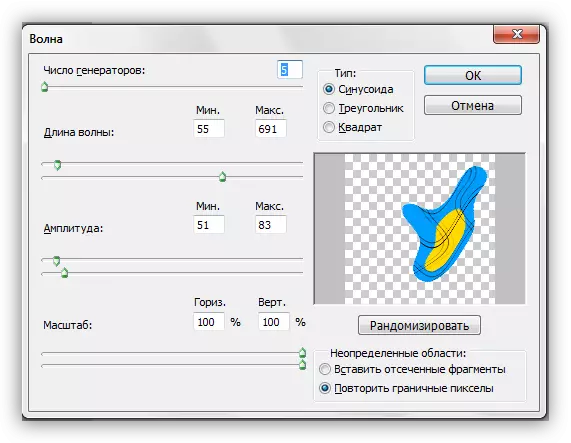
- Wave.
This plugin allows you to distort the object either manually or randomly. It is difficult to advise something here, since images of different shapes behave differently. Great for creating smoke and other similar effects.
Lesson: How to make smoke in photoshop
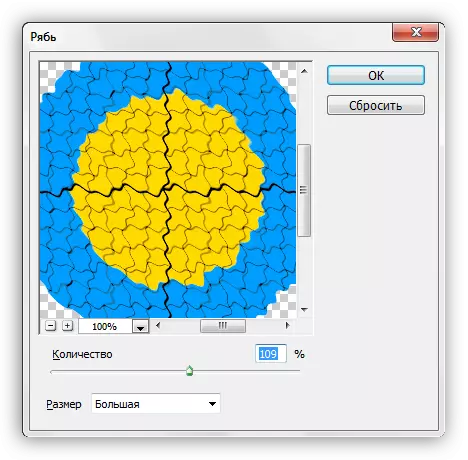
- Distsiscy.
The filter allows you to imitate convexity or concave planes. In some cases, it can help eliminate the distortion of the camera lenses.

- Zigzag.
Zigzag creates the effect of intersecting waves. In rectilinear elements, he fully justifies its name.

- Curvature.
Very similar to "deformation" tool, with the only difference that he has much less degrees of freedom. With it, you can quickly create arcs from straight lines.
Lesson: Draw arcs in photoshop

- Ripple
It is clear from the name that the plugin creates imitation of water ripples. There are settings for the wave and frequency.
Lesson: We simulate the reflection in the water in Photoshop
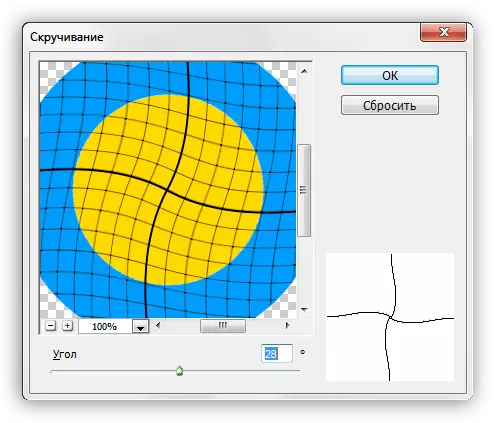
- Twisting.
This tool distort the object by rotating pixels around its center. In combination with the "Radial blur" filter, you can simulate the rotation, for example, wheels.
Lesson: Basic methods of blur in Photoshop - theory and practice
- Spherimization.
Plugin with action, reverse action filter "Distortion".

Method 4: Plastic
This plugin is a universal "deformer" of any objects. Its possibilities are endless. With the help of "plastics" you can produce almost all the actions described above. Read more about the filter in the lesson.
Lesson: Filter "Plastic" in Photoshop
These are such ways to deform images in Photoshop. Most often use the first "deformation" function, but, at the same time, other options can help in any specific situation.
Repeat into the use of all kinds of distortions to improve your work skills in our favorite program.