

In this very short instruction - how to delete this item from the context menu of images in Windows 10, if it is not required or the 3D Builder application has been removed.
We remove 3D printing in 3D Builder using the registry editor

The first and, probably, the preferred way to remove the specified context menu item is to use the Windows 10 registry editor.
- Run the registry editor (Win + R keys, enter the REGEDIT or enter the same in the Windows 10 search)
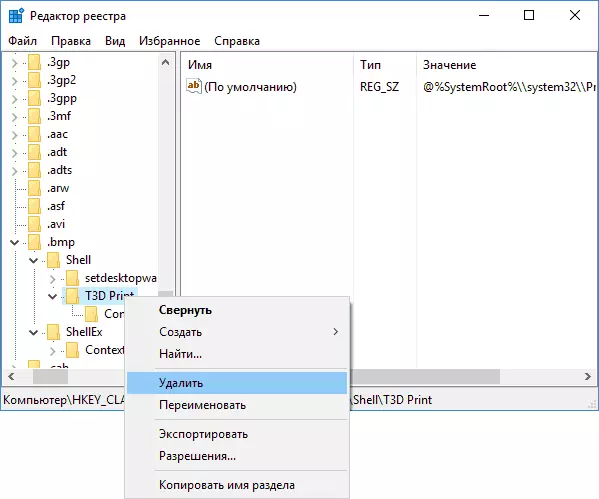
- Go to the Registry (folders on the left) HKEY_CLASSES_ROOT \ SystemFileAssociations \ .bmp \ Shell \ T3D Print
- Right-click on the T3D PRINT section and delete it.
- Repeat the same for the .jpg and .png extensions (that is, go to the appropriate subsections in the systemFileAssociation registry).
After that restart the conductor (or restart the computer), and the 3D printing item with 3D Bulider will disappear from the context menu of the images.
How to remove the 3D Bulider application
If you also need to delete the 3D Builder application itself from Windows 10, it is easier to do it easier (almost just like any other applications): Just find it in the Start menu application list, right-click and select "Delete".

Agree with deletion, after which the 3D Builder will be deleted. Also on this topic can be useful: how to delete embedded Windows 10 applications.