
Memory card is a universal drive that works great on a variety of devices. But users may encounter situations when the computer, smartphone or other devices do not perceive the memory card. There may also be cases when you need to quickly delete all data from the card. Then you can solve the problem by formatting the memory card.
Such measures will eliminate damage to the file system and erase all the information from the disk. Some smartphones and cameras have a built-in formatting function. You can use it or carry out a procedure by connecting a card to a PC through the card reader. But sometimes it happens that the gadget gives an error "Memory Card is faulty" when you try to reformatting. And an error message appears on the PC: "Windows cannot complete formatting."
Memory card is not formatted: causes and solution
We have already written about how to solve the problem with the above-mentioned Error windows. But in this manual, we will look at what to do when other messages occur when working with MicroSD / SD.Lesson: What to do if the flash drive is not formatted
Most often, the problem with the memory card begins if when using flash drives there were malfunctions. It is also possible that programs for working with partitions of disks was incorrectly used. In addition, there could be a sudden disconnection of the drive when working with it.
The cause of errors can be the fact that the record is enabled on the card itself. In order to remove it, you must switches the mechanical switch to the "Unlock" position. Viruses can also affect the performance of the memory card. So it's better just in case to scan microSD / SD antivirus if there are malfunctions.
If formatting is clearly necessary, it is worth remembering that with this procedure all information from the media will be automatically deleted! Therefore, it is necessary to make a copy of important data stored on a removable drive. To format a MicroSD / SD, you can use both the built-in Windows tools and third-party software.
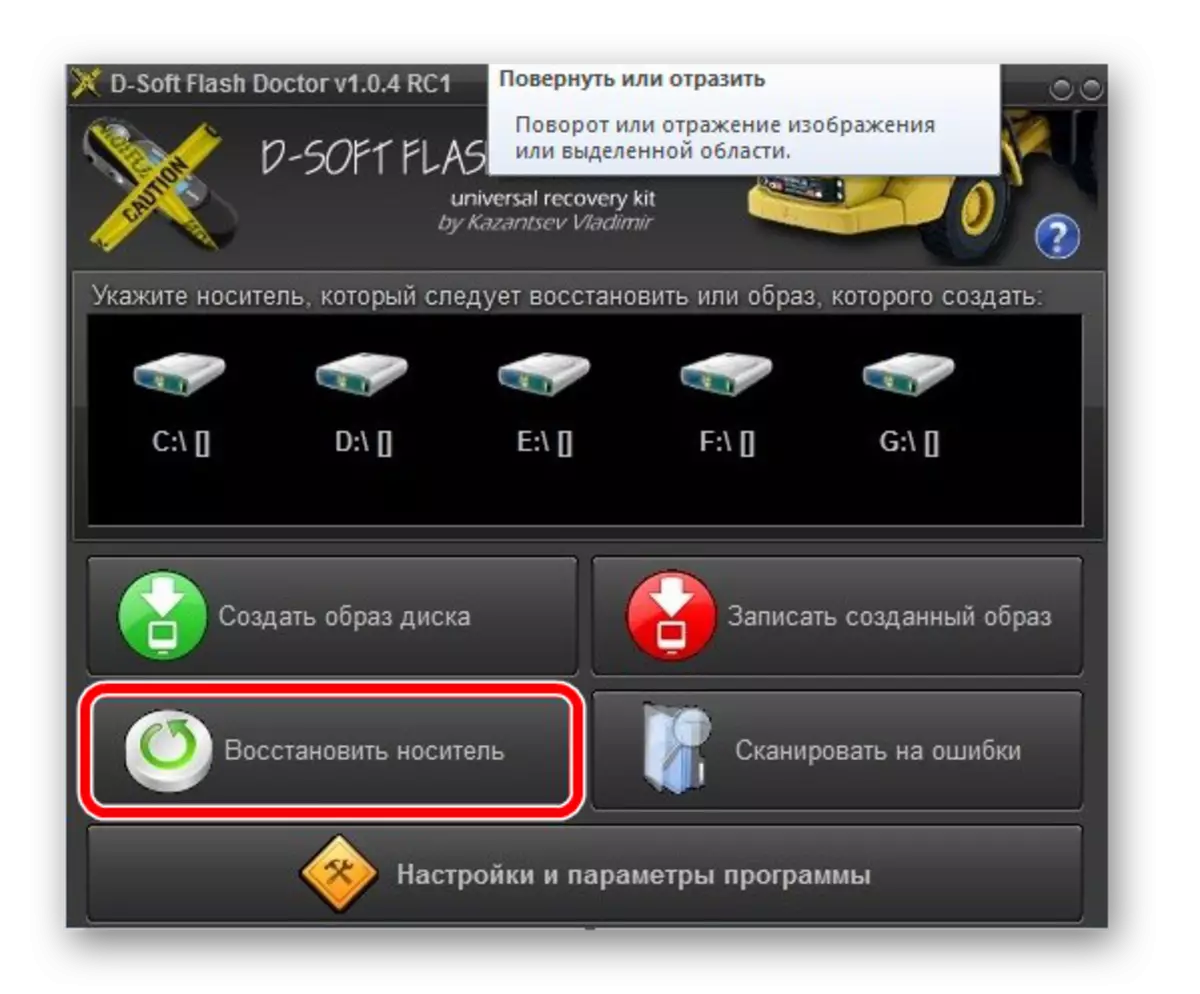
Method 1: D-Soft Flash Doctor
The program has a simple interface in which it is easy to figure out. Its functionality includes the ability to create a disk image, scan the disk on errors and restore the carrier. To work with it, this is what:
- Download and install D-Soft Flash Doctor on your computer.
- Run it and click the Restore Media button.
- When everything is finished, just click "Finish."
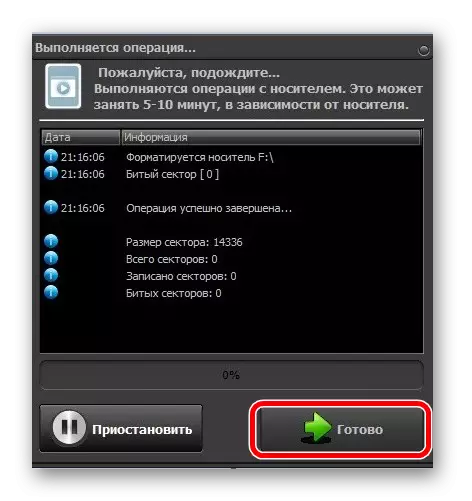
After that, the program will very quickly break the media memory according to the configuration.
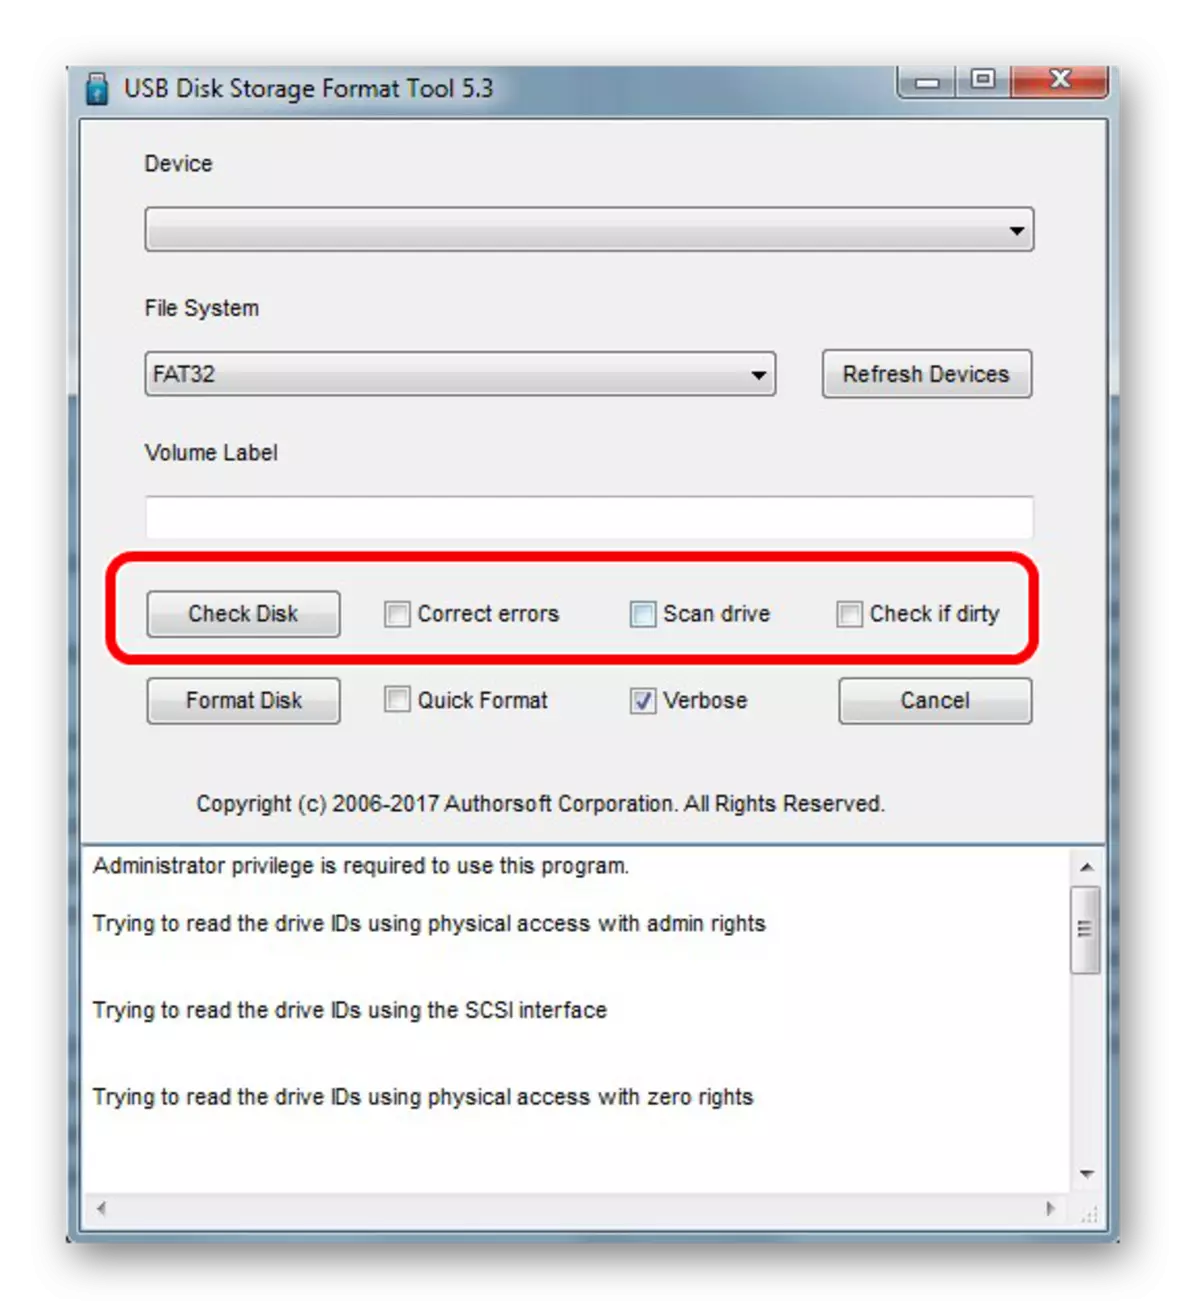
Method 2: HP USB Disk Storage Format Tool
Using this proven program, you can enforce flash memory formatting, create a boot drive or check the disk on errors.
For compulsory formatting, do the following:
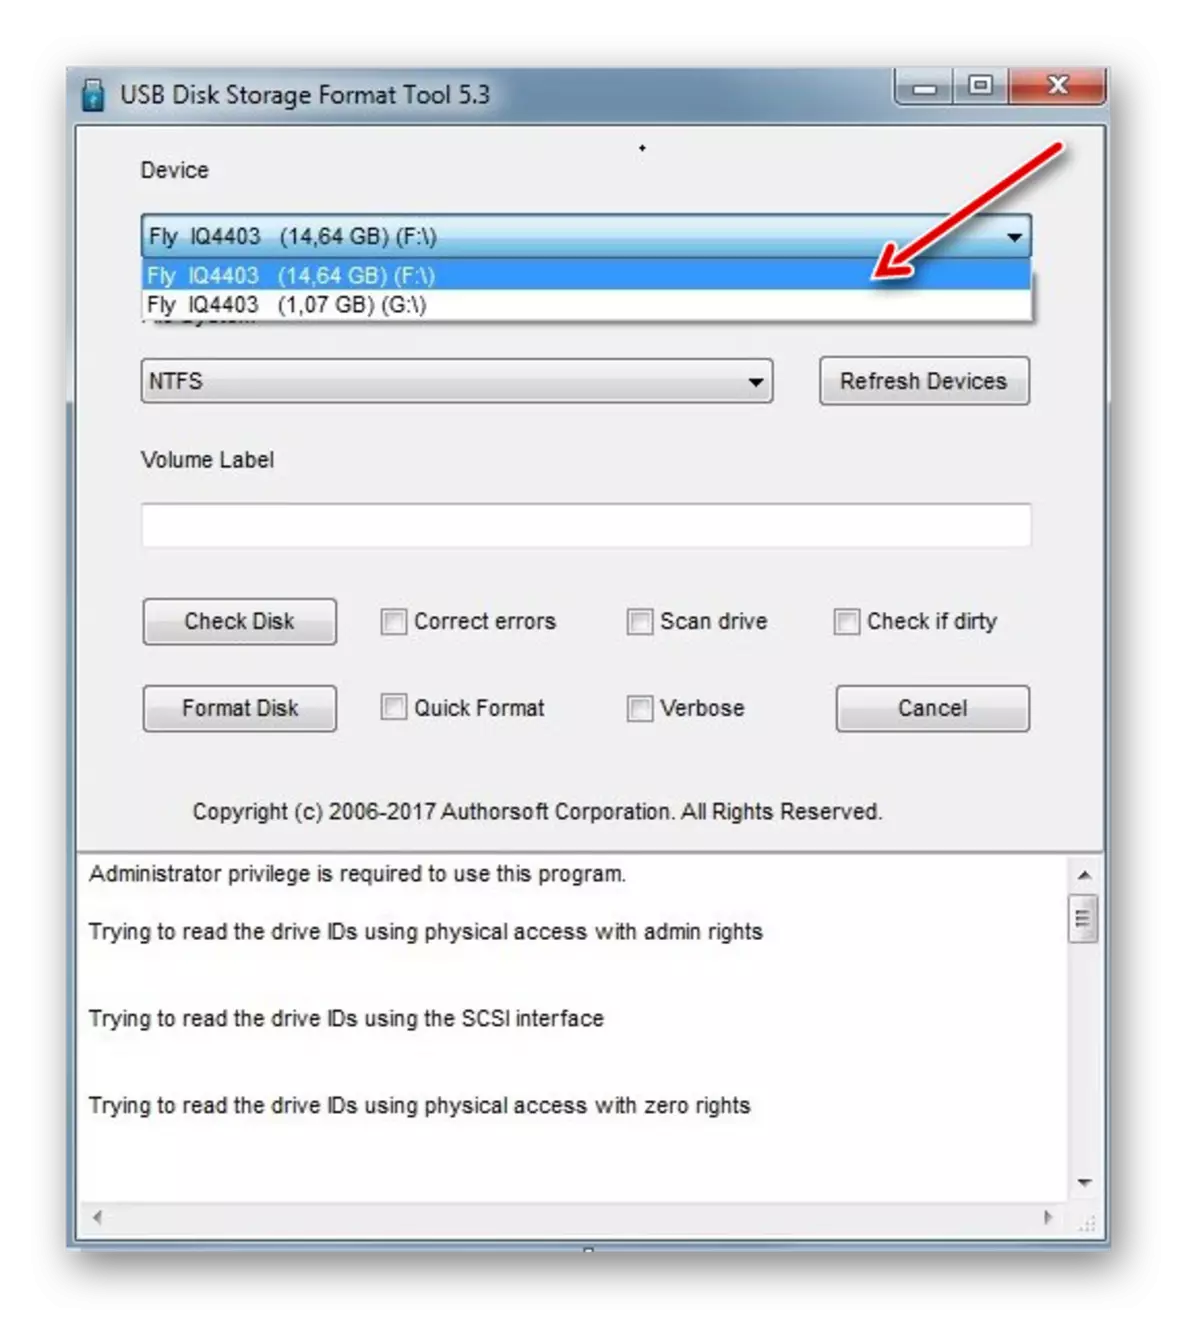
- Download, Install and run HP USB Disk Storage Format Tool on PC.
- Select your device in the top view.
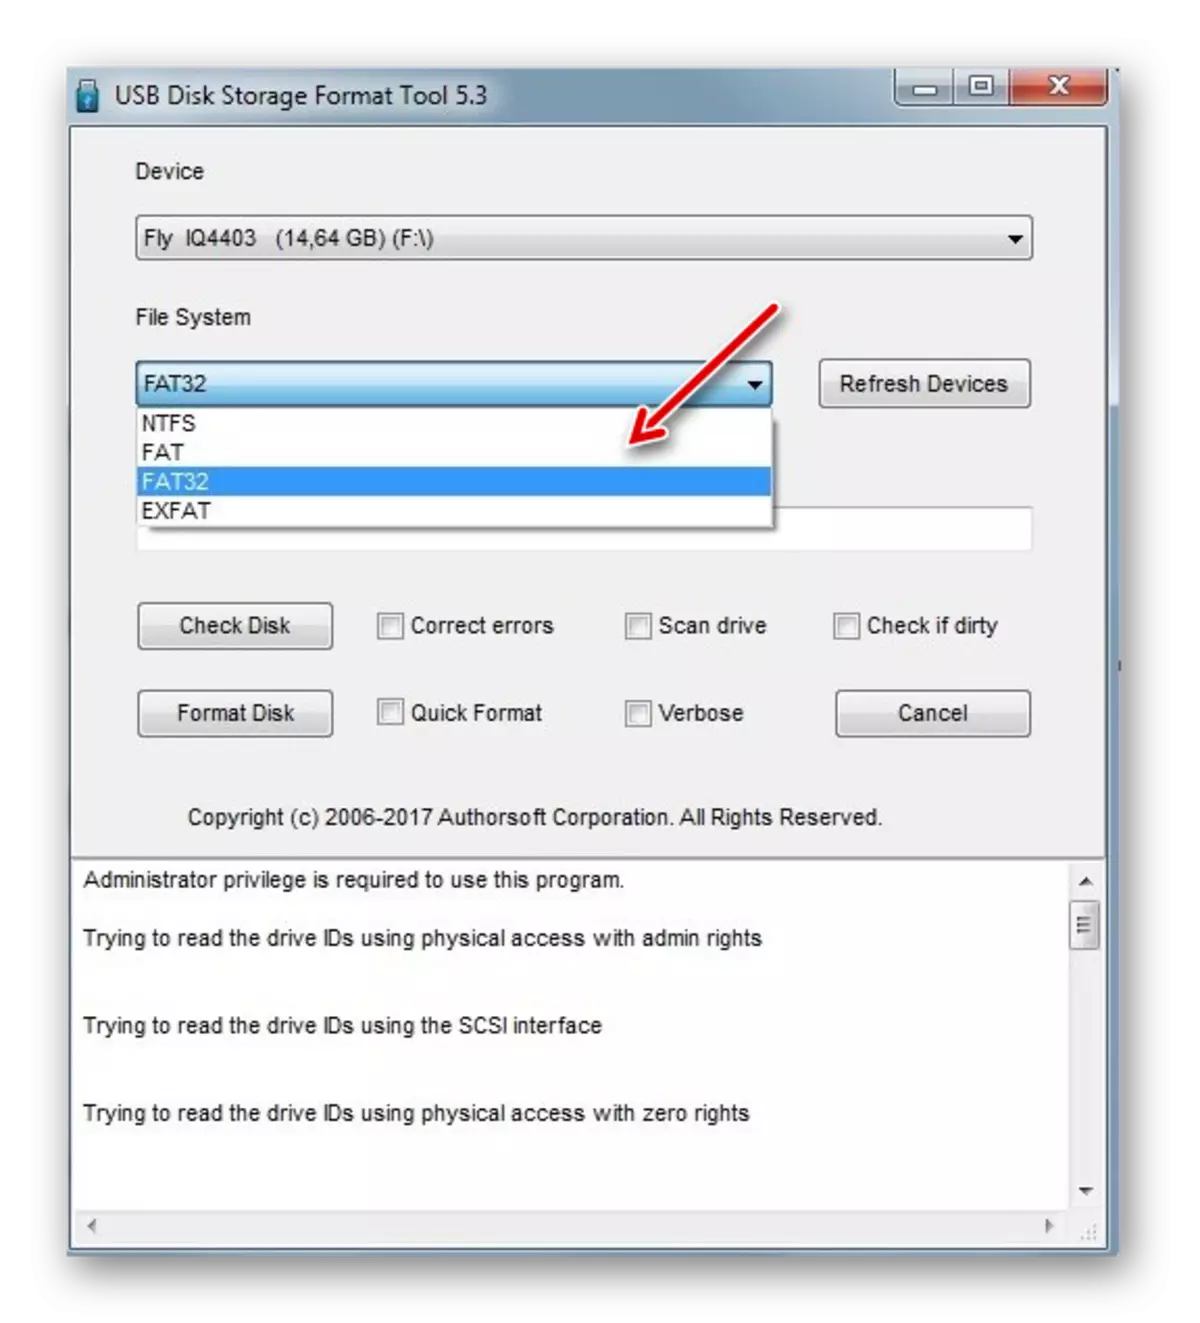
- Specify the file system with which you plan to work further ("FAT", "FAT32", "EXFAT" or "NTFS").
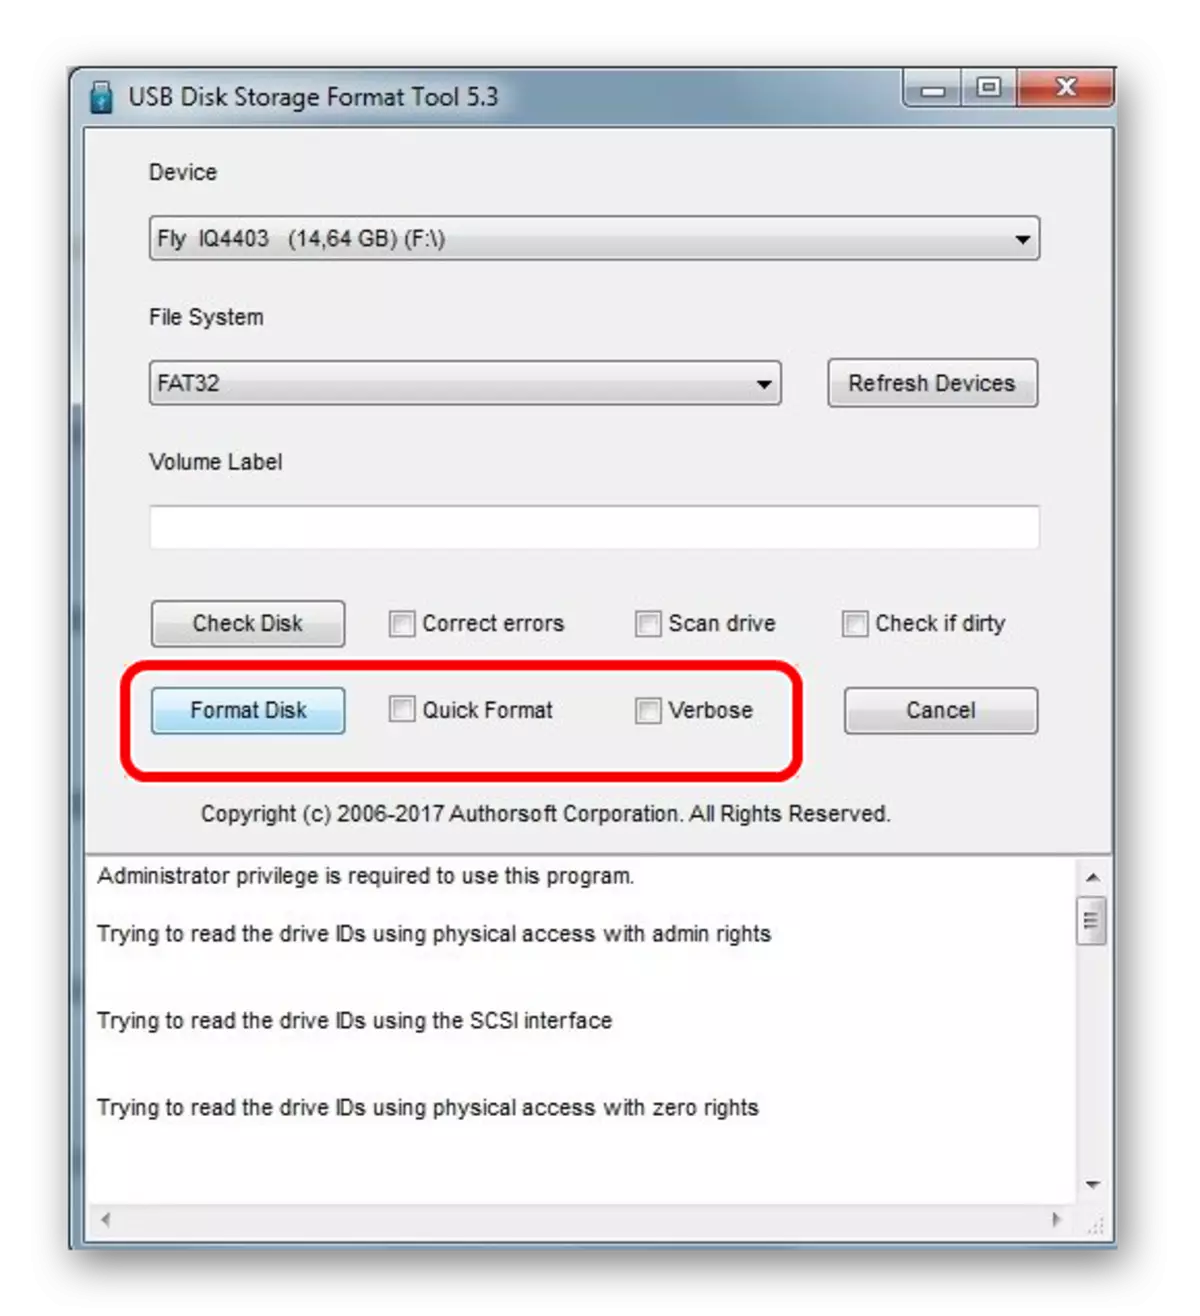
- You can quickly format ("Quick Format"). It will save time, but does not guarantee complete cleaning.
- There is also a "multi-frequency formatting" function (Verbose), which guarantees the absolute and irrevocable deletion of all data.
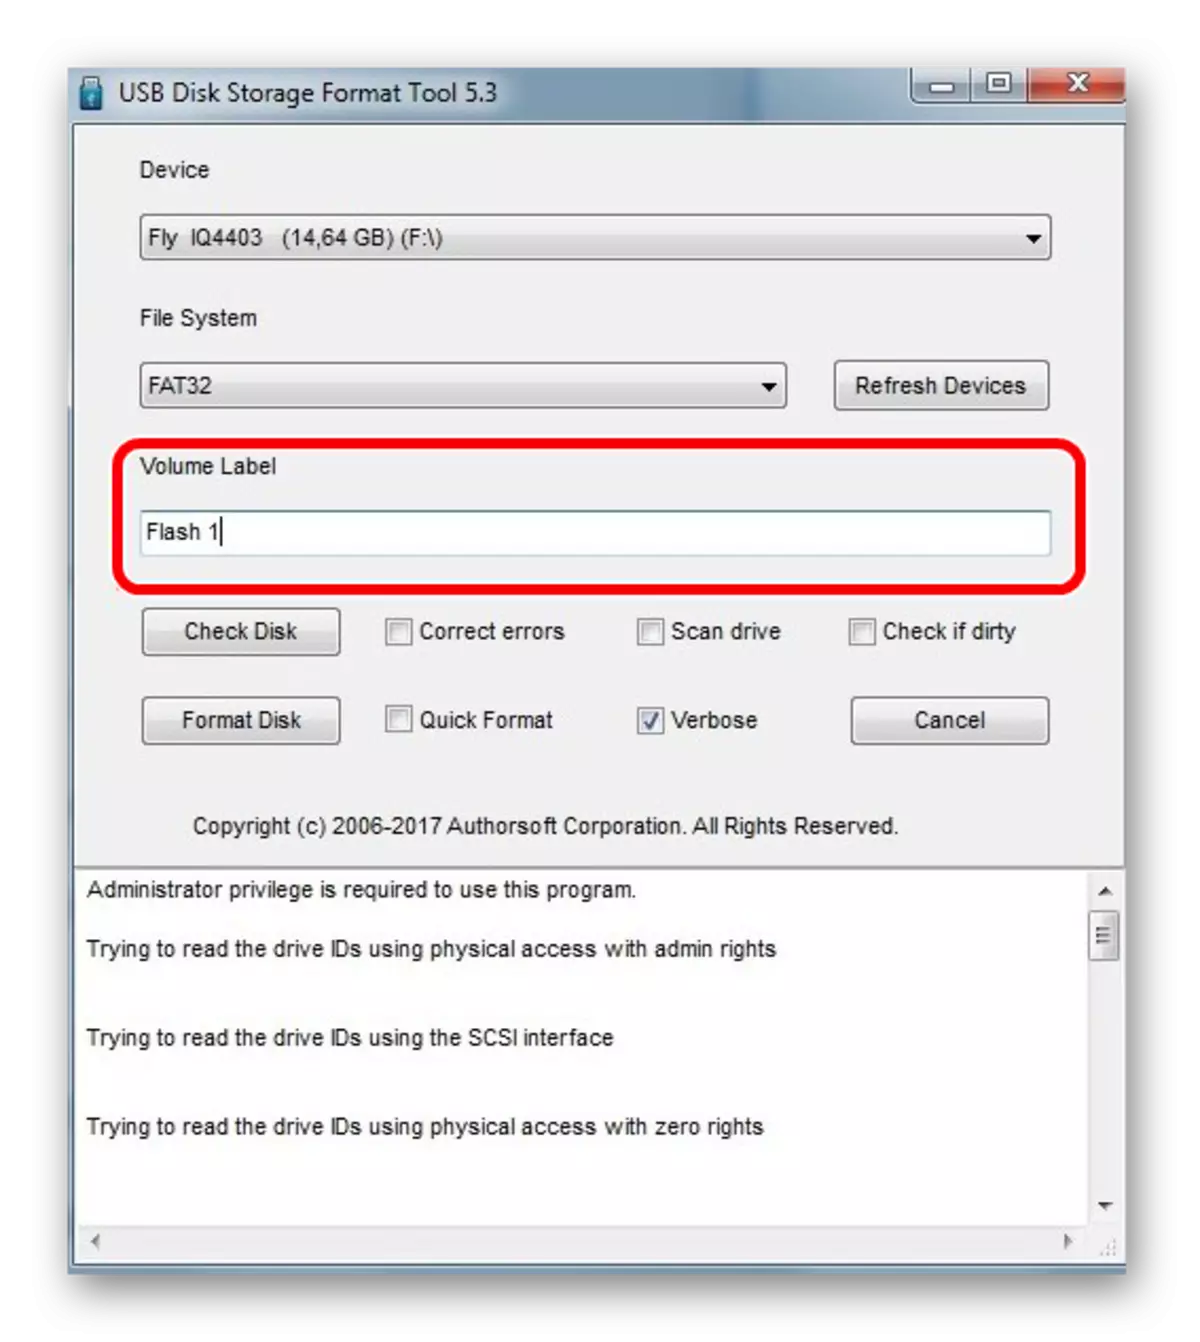
- Another advantage of the program is the ability to rename a memory card by scoring a new name in the Volume Label field.
- After selecting the necessary configurations, click on the "Format Disk" button.
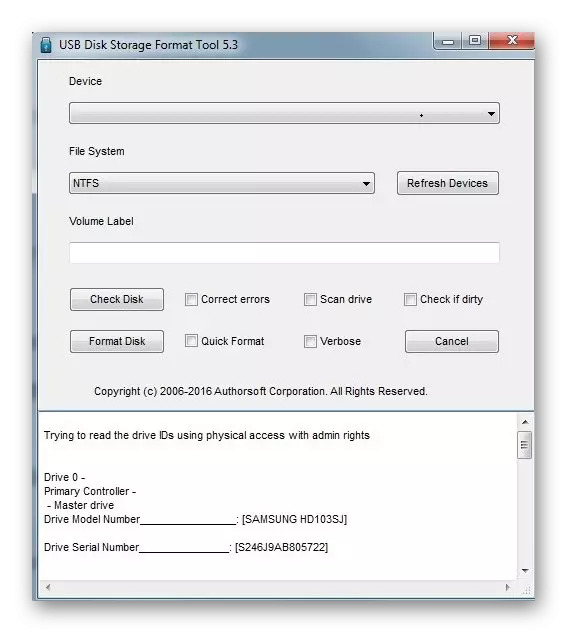
In order to check the disk on errors (it will also be useful after compulsory formatting):
- Check the box next to the "Correct Errors". So you can fix the file system errors that will detect the program.
- For more careful media scan, select "Scan Drive".
- If the media is not displayed on the PC, then you can use the Check If Dirty item. This will return MicroSD / SD "Visibility".
- After that, click "Check Disk".
If you do not have to use this program, you may help our instructions for its use.
Lesson: How to restore a flash drive with HP USB Disk Storage Format Tool
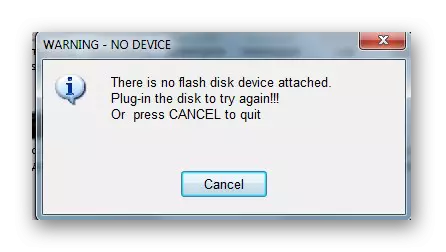
Method 3: Ezrecover
EzRecover is a simple utility created to format flash drives. It automatically defines removable media, so you do not need to specify the path to it. Working with this program is very easy.
- First install and run it.
- Then there is such an informational message as shown below.
- Now reconnect the media to the computer.
- If the value is not specified in the Disk Size field, then enter the same disk volume.
- Press the "Recover" button.

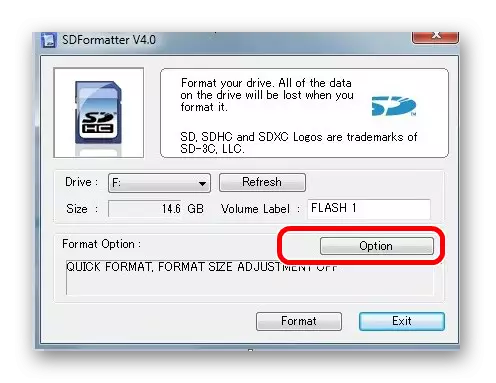
Method 4: SDFormatter
- Install and run SDFormatter.
- In the DRIVE section, specify the carrier that is not yet formatted. If you launched the program before you connected the media, use the Refresh feature. Now all sections will be visible in the drop-down menu.
- In the settings of the "Option" program, you can change the type of formatting and turn on the change in the size of the storage cluster.
- The following parameters will be available in the following window:
- "Quick" - high-speed formatting;
- "FULL (ERASE)" - removes not only the former file table, but also all stored data;
- "FULL (Overwrite) - guarantees full rewriting of the disk;
- "Format Size Adjustment" - will help change the size of the cluster if it was specified in the previous time.
- After installing the required settings, click the "Format" button.

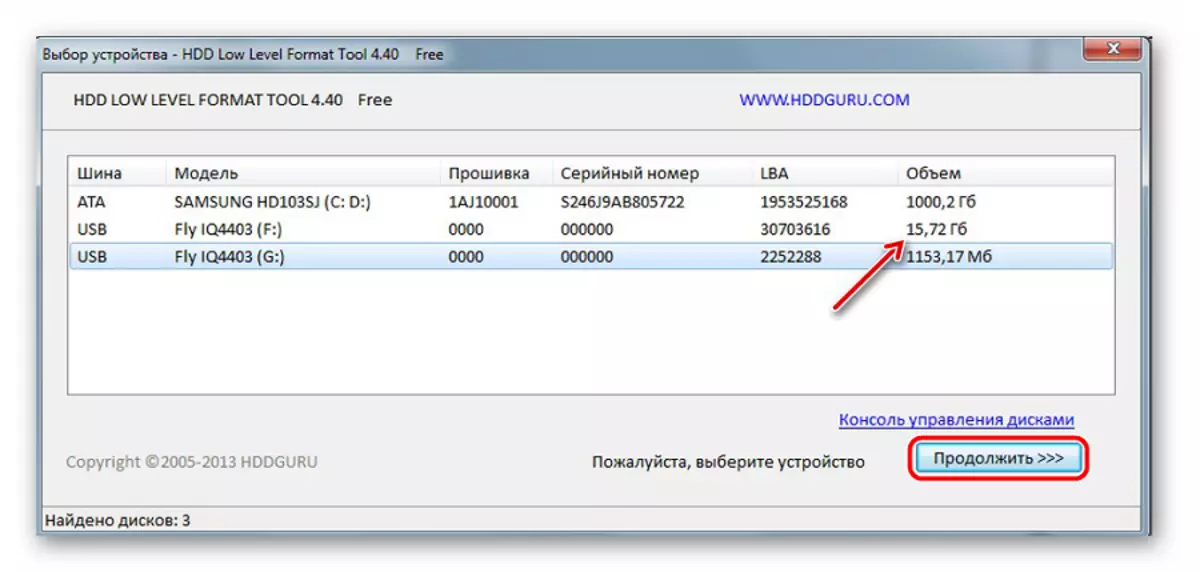
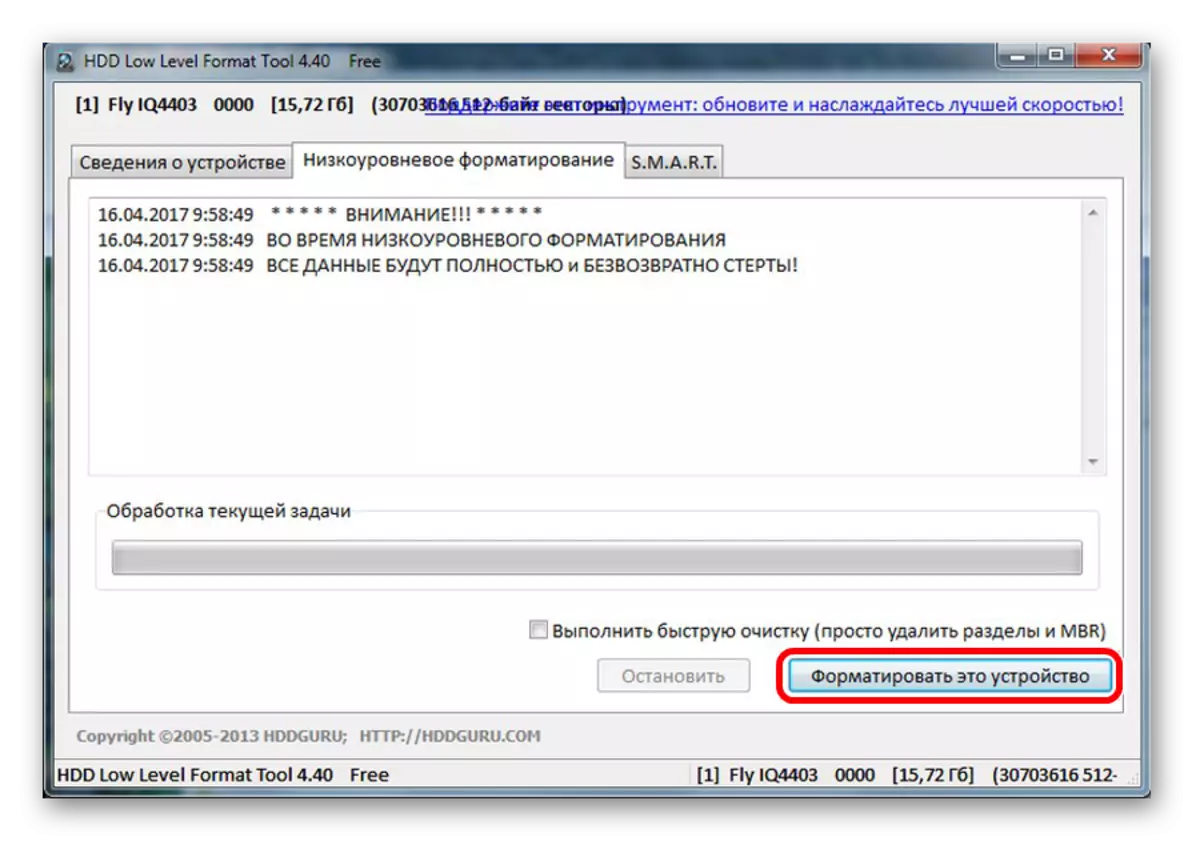
Method 5: HDD Low Level Format Tool
HDD Low Level Format Tool - Low-level formatting program. This method can be returned to the carrier even after serious failures and errors. But it is important to remember that low-level formatting completely erased all the data and fill the space zeros. The subsequent data recovery in this case cannot go and speech. Such serious measures should be taken only if none of the above problem solutions gave results.
- Install the program and run it, select "Continue for FREE".
- In the list of connected media, select a memory card, click "Continue".
- Click the Low-Level Format ("Low-Level Format" tab.
- Next, click "Format this device" ("Format This Device"). After that, the process will begin and the operations will be displayed below.
This program also helps very well with low-level formatting of removable drives, which can be found in our lesson.
Lesson: How to perform low-level formatting flash drive
Method 6: Windows tools
Insert the memory card into the card reader and connect it to the computer. If you do not have a cartrider, you can connect the phone via USB to PC in data transmission mode (USB drive). Then Windows can recognize the memory card. To take advantage of Windows, do this:
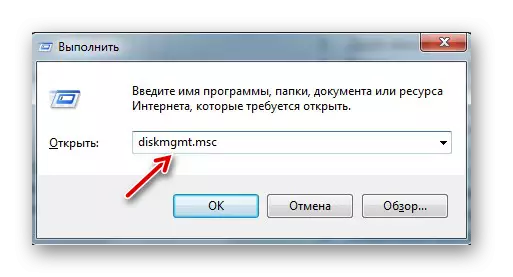
- In the Row "Run" (called the Win + R keys) simply write the DiskMGMT.msc command, and then click "OK" or ENTER on the keyboard.
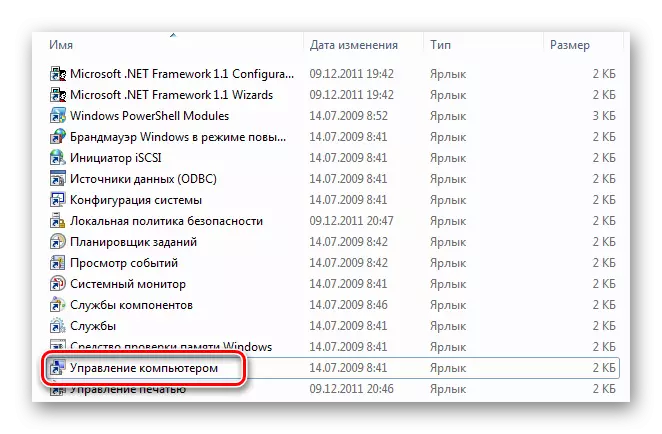
Or go to the "Control Panel", set the viewing parameter - "Minor Icons". In the "Administration" section, select Computer Management, and then "Disk Management".
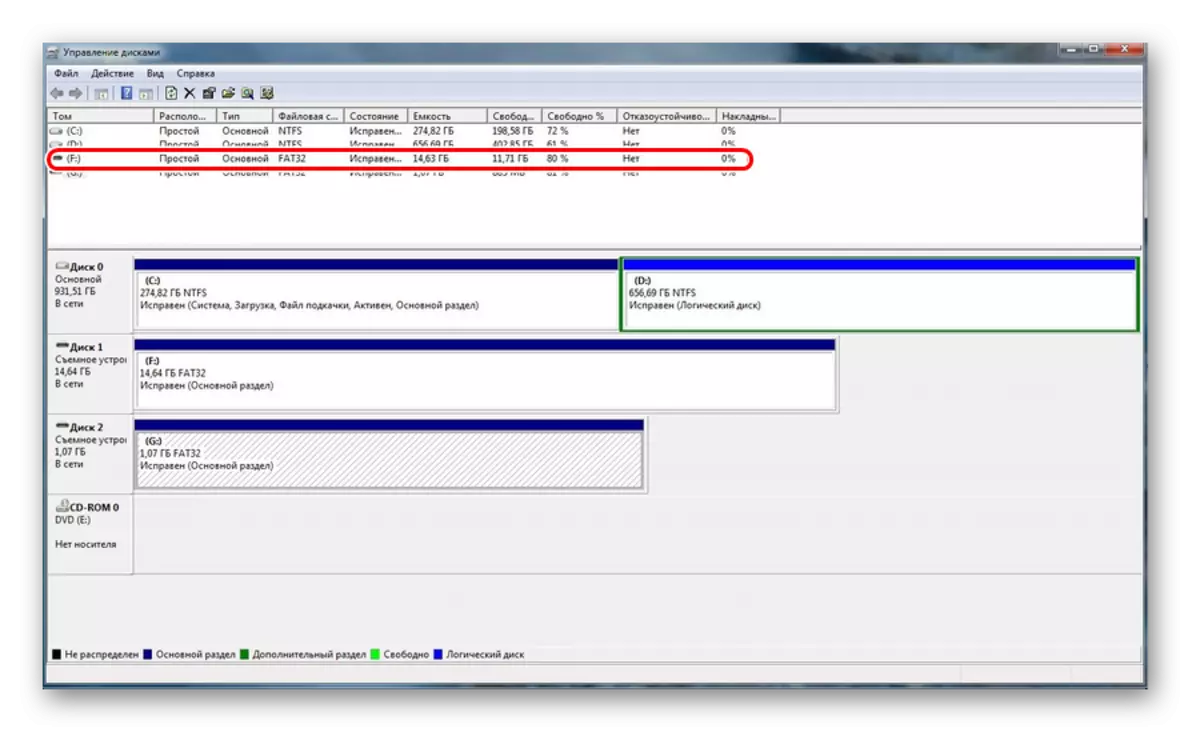
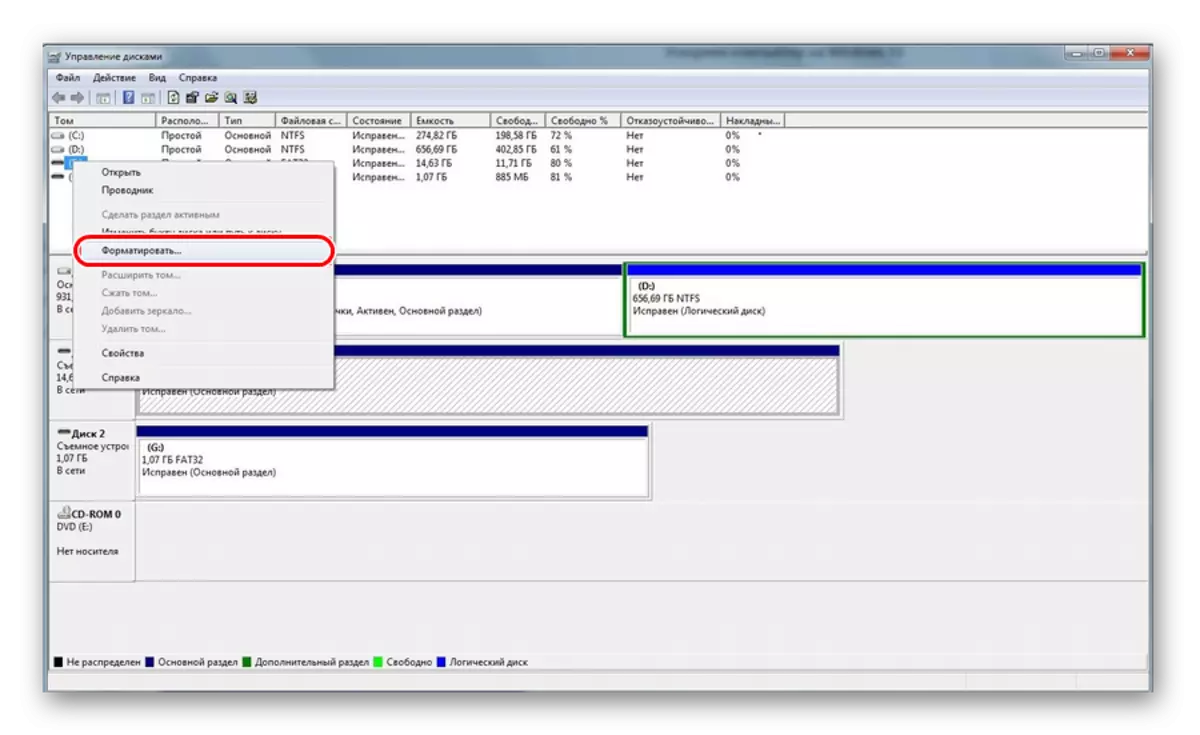
- Among the connected disks, find the memory card.
- If the "Status" line is "FIXED", right-click on the desired section. In the menu, select "Format".
- For the status "not distributed", select "Create a simple volume".
Visual video by solving the problem
If the deletion still occurs with an error, then it may be some kind of Windows process that uses the drive and therefore it is impossible to access the file system and it will not be formatted. In this case, a method associated with the use of special programs can help.
Method 7: Windows Command String
This method involves the following actions:
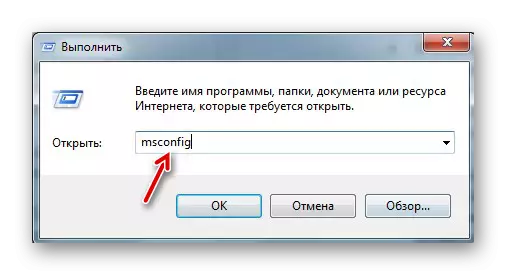
- Restart the computer in safe mode. To do this, in the "Run" window, enter the msconfig command and press ENTER or OK.
- Next, in the "Load" tab, check the "Safe Mode" daw and restart the system.
- Run the command prompt and write the Format N command (N-letter memory card). Now the process must pass without errors.

Or use the command line to clear the disk. In this case, do this:
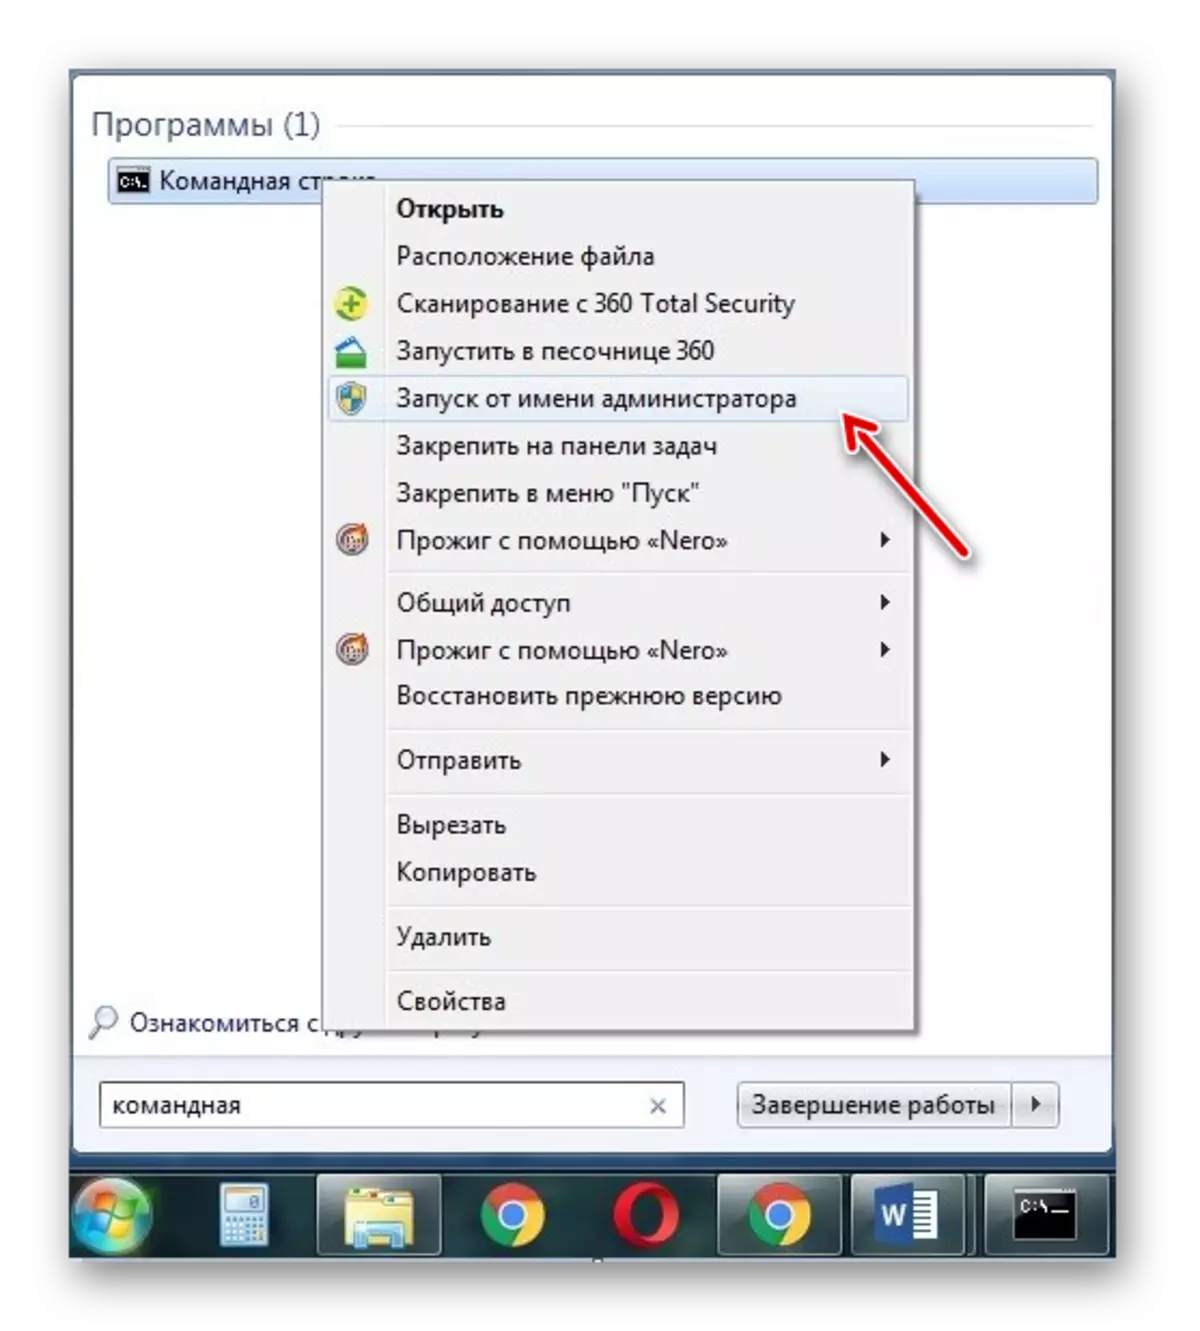
- Run the command line under the admin name.
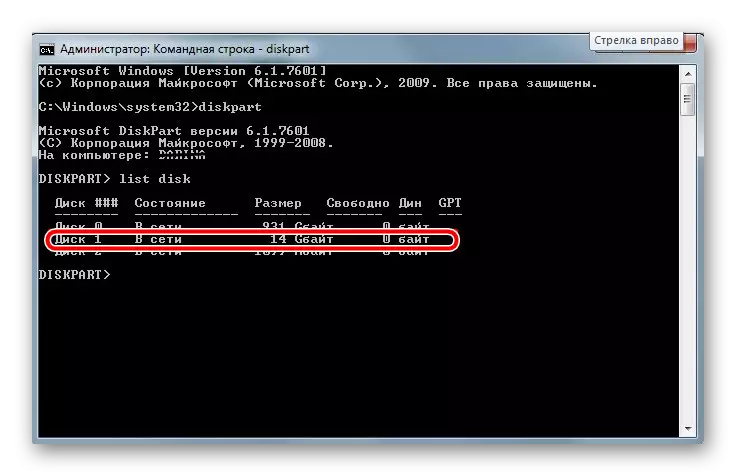
- Write diskpart.
- Next, enter List DISK.
- In the disk list that appears, find the memory card (by volume) and remember the disk number. It will come in handy for us for the next team. At this stage, you need to be very careful not to confuse the sections and do not erase all the information on the computer's system disk.
- By defining the disk number, you can perform the following Select Disk N command (n you need to replace the disk number in your case). By this command, we will choose the required disk, all subsequent commands will be implemented in this section.
- The next step will be the complete cleaning of the selected disk. It can be done with the Clean command.


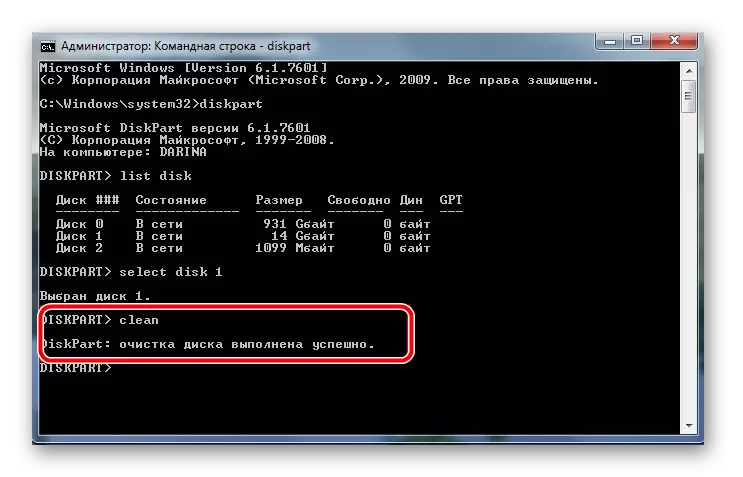
If you successfully execute this command, a message will appear: "Clearing the disk is successful." Now the memory must be available for correction. Next, act as it was intended initially.
If the DiskPart command does not find a disk, then most likely, the memory card has mechanical damage and is not subject to recovery. In most cases, this command works fine.
If none of the options proposed by us helped cope with the problem, then the case, again, in mechanical damage, so it is already impossible to restore the drive. The last option is to ask for help in a service center. You can also write about your problem in the comments below. We will try to help you or advise other ways to correct errors.