

Not every presentation is able to do without a table. Especially if it is an information demonstration that shows various statistics or indicators in certain industries. PowerPoint supports several ways to create these elements.
The method is quite simple and universal. Another problem is that after manipulations with the area for text, the icons may be lost and no longer return. Also, it is impossible not to say that this approach removes the area for the text, and will have to create it in other ways.

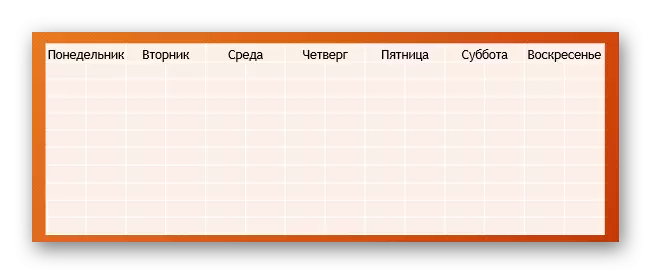
Method 2: Visual Creation
There is a simplified way to create tables, implying that the user will make small signs with a maximum size of 10 to 8.
- To do this, go to the "Insert" tab in the program header. Here on the left there is a "Table" button. Clicking on it will open a special menu with possible ways to create.
- Most importantly, what can be seen is a field of cells 10 to 8. Here the user can choose the future sign. When you hover will be painted cells from the upper left corner. Thus, the user needs to choose the size of the object that he wants to create - for example, 3 squares on 4 will create a matrix of the corresponding sizes.
- After clicking on this field, when the desired size is selected, the required component of the corresponding view will be created. If necessary, columns or strings can be easily expanded or narrowed.


The option is extremely simple and good, but is only suitable for creating small table arrays.
Method 3: Classic Method
A classic method that goes from one version of PowerPoint to another over the years.
- Everything is there in the "Insert" tab, you need to select "Table". Here you must click on the "Insert Table" option.
- A standard window will open, where you need to specify the number of rows and columns in the future component of the table.
- After pressing the "OK" button, an object will be created with the specified parameters.

The best option, if you need to create an ordinary table of any size. This does not suffer from the objects of the Slide itself.
Method 4: Insert from Excel
If there is an already created table in Microsoft Excel, it can also be transferred to the presentation slide.
- To do this, it will be necessary to select the desired element in Excel and copy. Next, just insert into the desired slide presentation. You can do this as a combination of "Ctrl" + "V" and through the right button.
- But it is worth noting that in the second case, the user will not see the standard option "Paste" in the pop-up menu. In the new versions there is a choice of several inserts options, not all of which will be useful. We need only three options.

- "Use a finite fragment styles" is the first icon on the left. It will insert a table by optimizing the PowerPoint, but retaining the general initial formatting. Roughly speaking, by type, this inset will be as close as possible to the initial form.
- "Implement" - the third left version. This method will place the source code here, while retaining only the size of the cells and text in them. The style of borders and the background will be reset (the background will be transparent). In this embodiment, it will be easy to reconfigure the table as needed. Also, this method allows to avoid negative variants of format distortions.
- "Figure" - the fourth version of the left. Inserts a table like the last option, but already in the figure format. This method is not amenable to further formatting and changing the appearance, but the initial version is easier to change in size and embed into the slide among other elements.

Also, nothing prevents inserting a table using the Microsoft Excel editor.
The path is the old - the "Insert" tab, then "Table". Here the last item will be required - "Excel Table".

After selecting this option, the standard Excel 2 matrix is added to 2. It can be expanded, modified in size and so on. When the process editing and internal format processes are completed, the Excel editor closes and the object will take the appearance specified by the formatting of the style of this presentation. Only text, size and other functions will remain. This method is useful to those who are more used to creating tables in Excel.

It is important to note that in the last method, the system can issue an error if the user tries to create a table when Excel is open. If this happened, you just need to close the program that interferes and try again.
Method 5: Manual creation
You can not always do with standard creating tools. Complex types of tables may be required. Such can only draw yourself.
- You will need to open the "Table" button in the "Insert" tab and choose the option "Draw a table" here.
- After that, the user will be offered a tool for drawing on the slide of the rectangular area. After the required object size is drawn, the extreme boundaries of the frame will be created. From this point on, you can draw anything, using the appropriate functions.
- As a rule, in this case the "constructor" opens. It will be described in more detail below. Using this section and the desired object will be created.


This method is quite complicated, because it is not always quickly able to draw the desired table. However, with the desired level of snorkeling and experience, manual creation allows you to create absolutely any species and formats.
Designer tables
Basic hidden tab of the caps, which appears when choosing a table of any type - at least standard, even manual.
Here you can highlight the following important areas and elements.

- "Table Style Parameters" allow you to mark specific sections, such as the string of the results, headlines, and so on. It allows you to assign a unique visual style to specific departments.
- "Table styles" have two sections. The first offers a choice of several basic laid designs for these elements. The choice is quite large here, rarely when you have to invent something new.
- The second part is the area of manual formatting, allowing you to independently adjust additional external effects, as well as the color fill with cells.
- Wordart Styles allow you to add special inscriptions in image format with a unique design and appearance. It is almost not used in professional tables.
- "Draw the borders" - a separate editor, allowing you to manually add new cells, expand borders and so on.
Layout
All of the above provides a wide functionality for adjusting the appearance. As for the content specifically, here you need to go to the next tab - "Layout".
- The first three areas can be constructed together, as they are generally designed to expand the size of the component, creating new lines, columns and so on. Here you can work with cells and tables in general.
- The next section is the "cell size" - allows you to format the dimensions of each individual cell, creating additional elements of the desired dimensions.
- "Alignment" and "Size of the Table" offers optimization capabilities - for example, here you can compare all the cells for the external borders of the cell, align the edges, set some parameters for text inside, and so on. "Ordering" also gives the possibility of rearrangement of certain elements of the table relative to other components of the slide. For example, this component can be moved to the front edge.


As a result, using all these functions, the user is able to create a table of absolutely any degree of difficulty for a variety of purposes.
Tips for work
- It is worth knowing that it is not recommended to apply animations to tables in PowerPoint. It can distort them, and simply look not very beautiful. An exception can be done only for the use of simple input, output or selection effects.
- It is also not recommended to make bulky tables with a huge amount of data. Of course, except when it is necessary. It must be remembered that for the most part presentation is not a carrier of information, but only designed to demonstrate something over the speech of the speaker.
- As in other cases, the basic rules for design also apply here. There should be no "rainbow" in the design - the colors of different cells, rows and columns should be perfectly combined with each other, do not cut eyes. It is best to use the specified design styles.
Summing up, it is worth saying that in Microsoft Office there is always a complete arsenal of various functions for anything. The same applies to the tables in PowerPoint. Although in most cases and fairly standard varieties with adjustment of the width of rows and columns, it is often necessary to resort to the creation of complex objects. And here it can be done without any problems.