

Despite the high level of reliability of Android devices production of one of the leaders of the global market for smartphones and tablet computers - Samsung - users are quite often prescribed by the possibility or necessity of the device firmware. For Android devices for the production of Samsung, the best solution for manipulating with software and recovery is the ODIN program.
No matter what purpose is the procedure for firmware Android-devices Samsung. After resorting to the use of powerful and functional ODIN, it turns out that work with a smartphone or tablet is not so difficult, as it may seem at first glance. We will understand step by step with the procedure for installing various types of firmware and their components.
Important! The ODIN application with incorrect user actions may damage the device! All actions in the program user performs at its own risk. The site administration and the author of the article for the possible negative consequences of the implementation of the following instructions are not responsible!
Step 1: Loading and installing device drivers
To ensure the interaction of ODIN and devices, you will need to install drivers. Fortunately, Samsung took care of its users and the installation process usually does not cause any problems. The only inconvenience is the fact that the drivers are included in the SAMSUNG brand name for servicing mobile devices - Kies (for old models) or Smart Switch (for new models). It should be noted that when firmware via ODIN with simultaneously installed in the KIES system, various failures and critical errors may occur. Therefore, after installing KIES drivers, you must delete.
- Download the application from the download of the official Samsung website and install it.
- If the KIES installation is not included in the plans, you can use the driver of the drivers. You can download Samsung USB Driver by reference:
Download driver for Android devices samsung
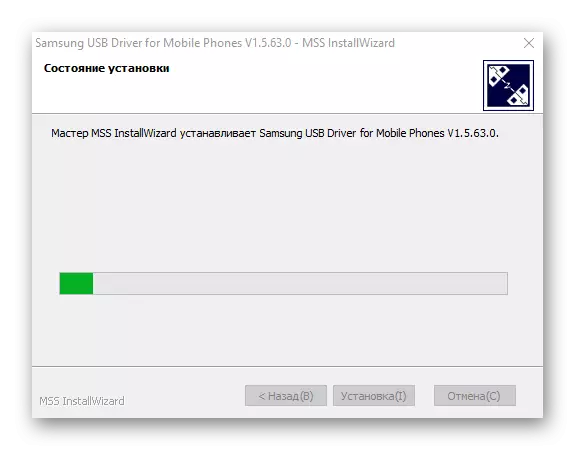
- Installing drivers using auto installer is a completely standard procedure.

Run the file received and follow the instructions of the installer.
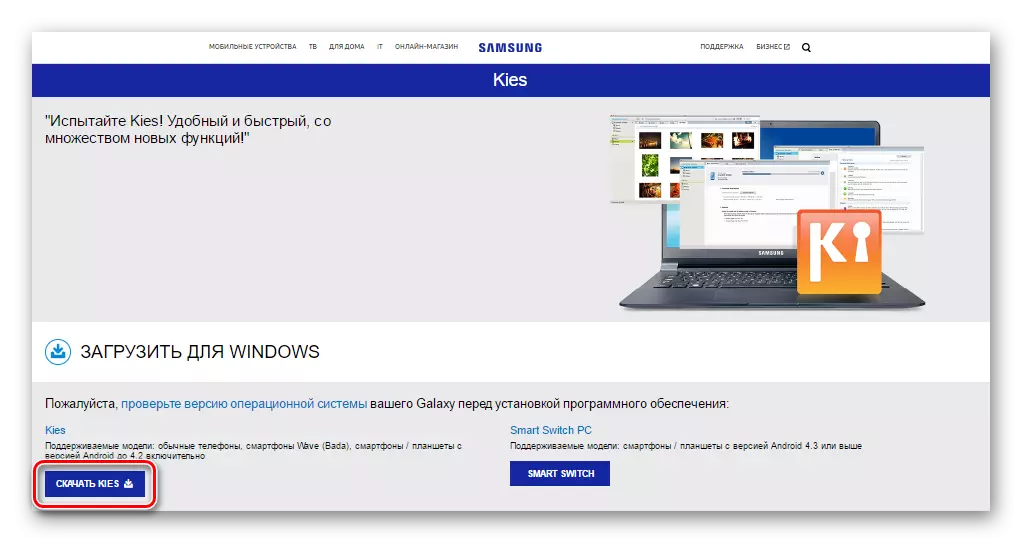
Download Samsung Kies from the official site

Step 3: Firmware
Using the ODIN program, installing single and multifile firmware (service), as well as individual software components.Installing single-file firmware
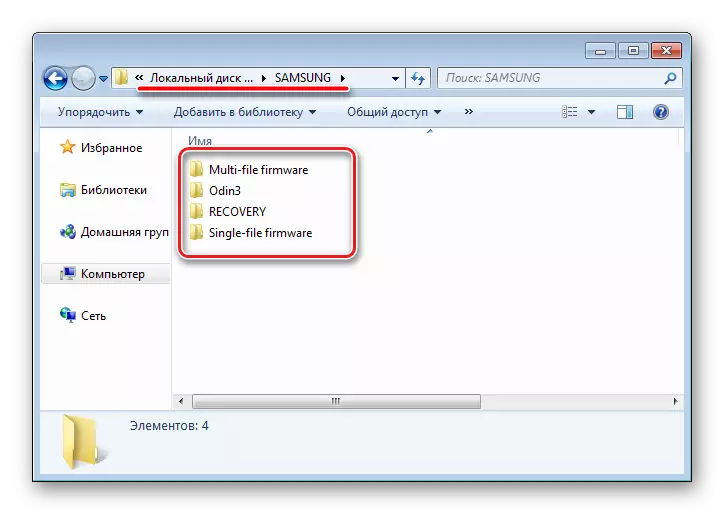
- Download ODIN and firmware. Unpack everything into a separate folder on the S. disk
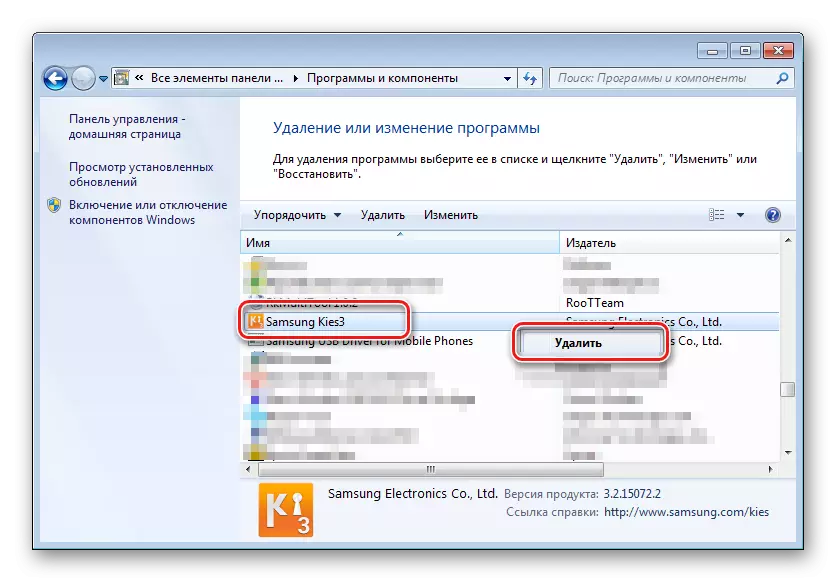
Necessarily! If installed, delete samsung kies! Go along the path: "Control Panel" - "Programs and Components" - "Delete".
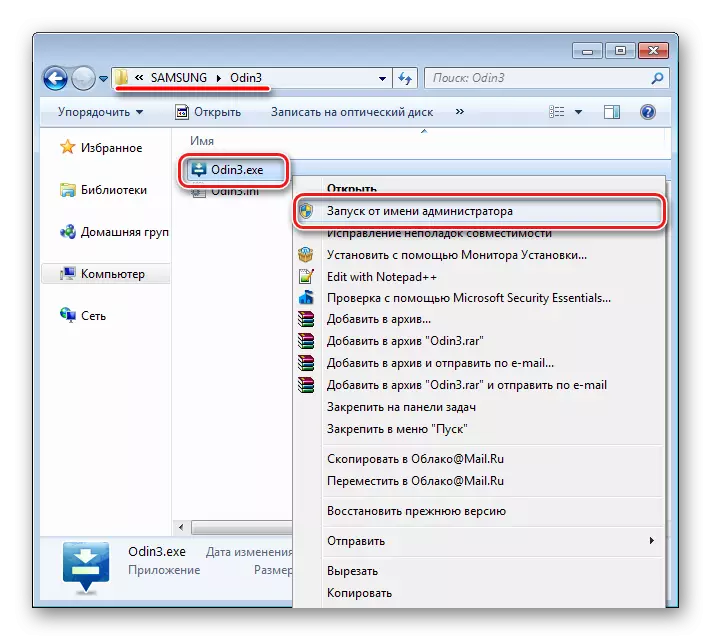
- Run Odin on behalf of the administrator. The program does not require installation, so it is necessary for its startup to run the right mouse click on the file Odin3.exe. In a folder containing the application. Then in the Open menu, select the "Start from the administrator" item.
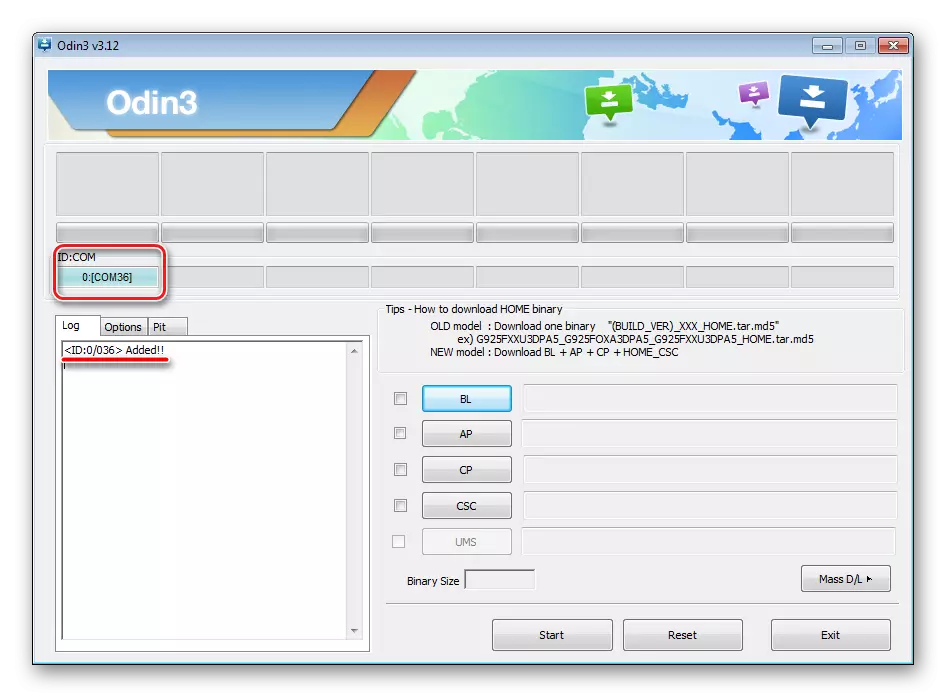
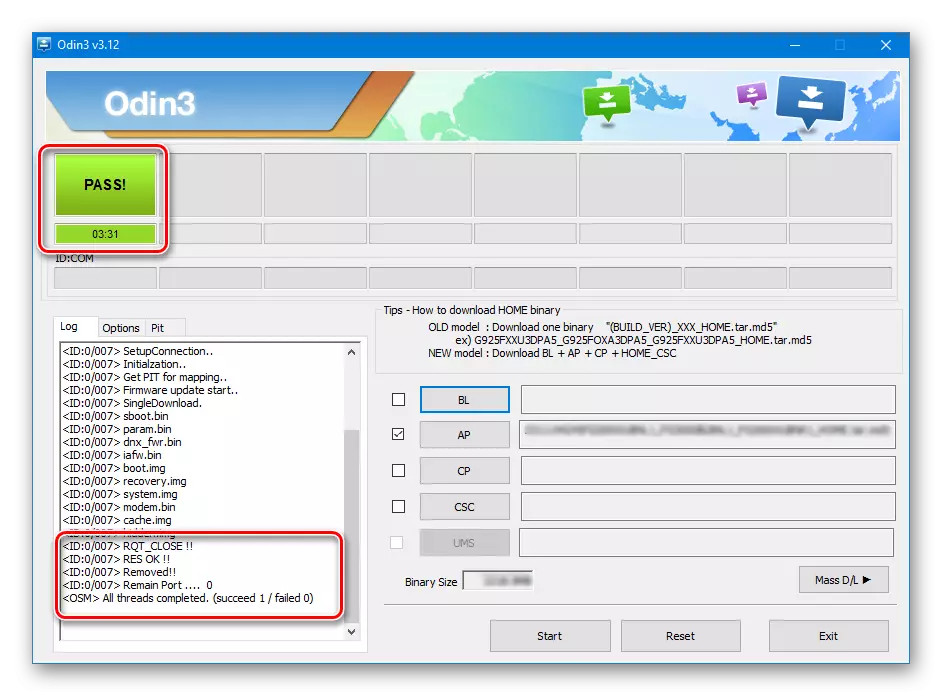
- We charge the battery device at least 60%, we translate it into the "Download" mode and connect to the USB port located on the rear panel of the PC, i.e. directly to the motherboard. When the ODIN is connected, it must define the device, as evidenced by the filling of the Blue field "ID: COM", displaying the port number in the same field, as well as the inscription "Added !!" In the Log field (Log tab).
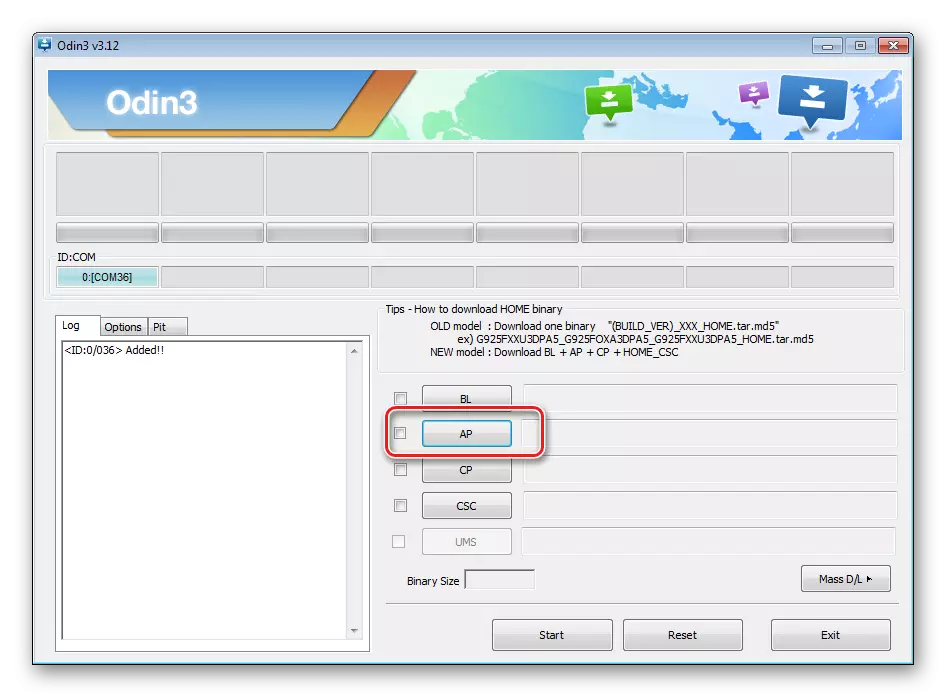
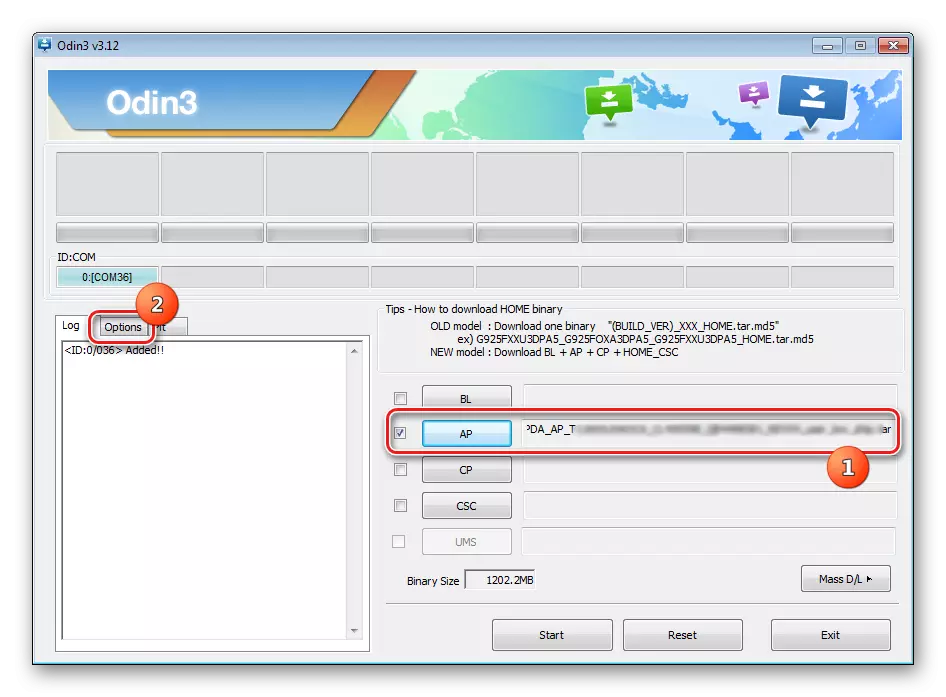
- To add an image of a single-file firmware in ODIN, press the "AP" button (in versions one to 3.09 - the PDA button)
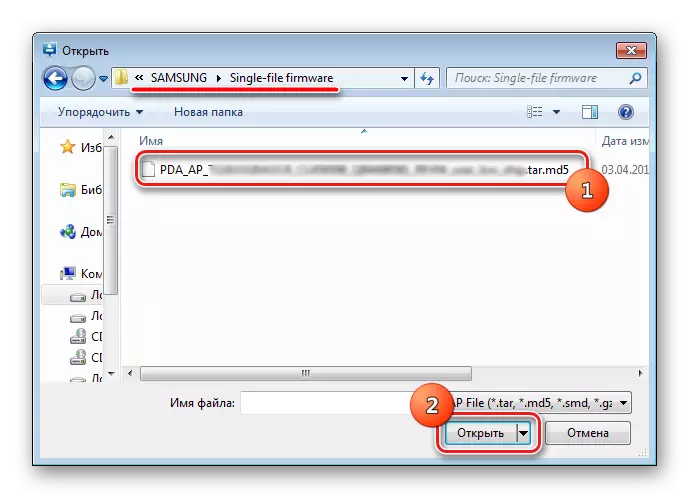
- Specify the program path to the file.
- After pressing the "Open" button in the ODIN Explorer window, the MD5 sums of the proposed file will be reconciled. Upon completion of the hash-sum check, the name file name is displayed in the "AP (PDA) field. Go to the Options tab.
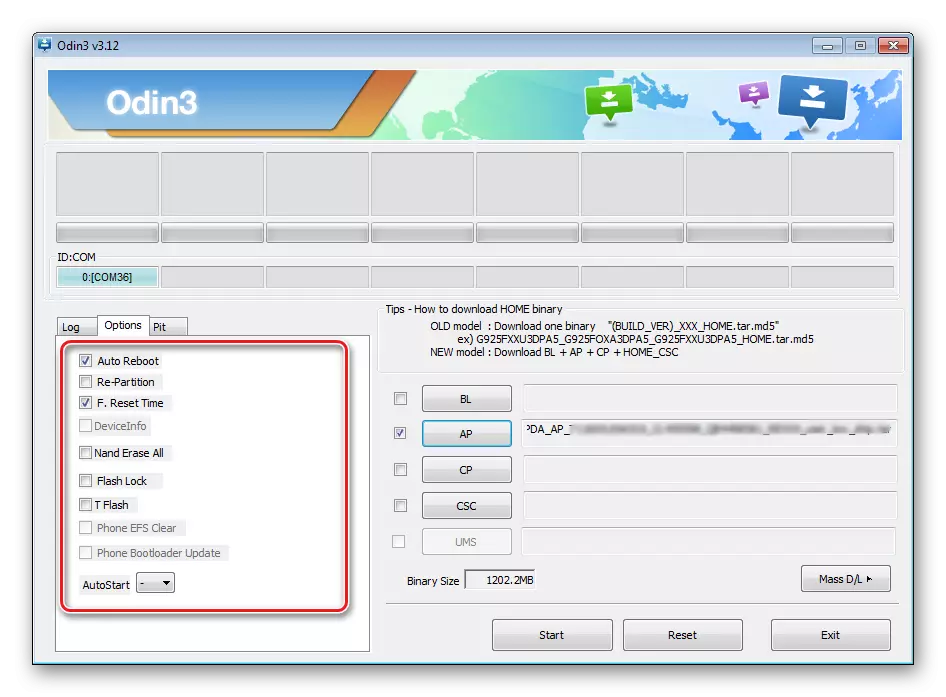
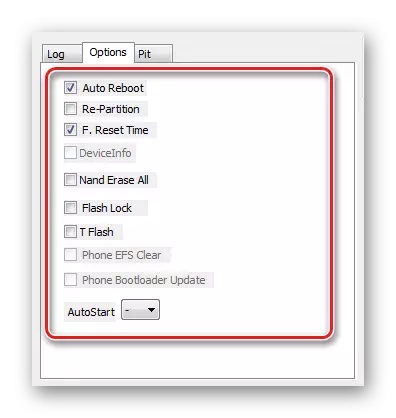
- When using a single-focal firmware in the Options tab, all ticks should be removed except "F. RESET TIME "and" AUTO REBOOT ".
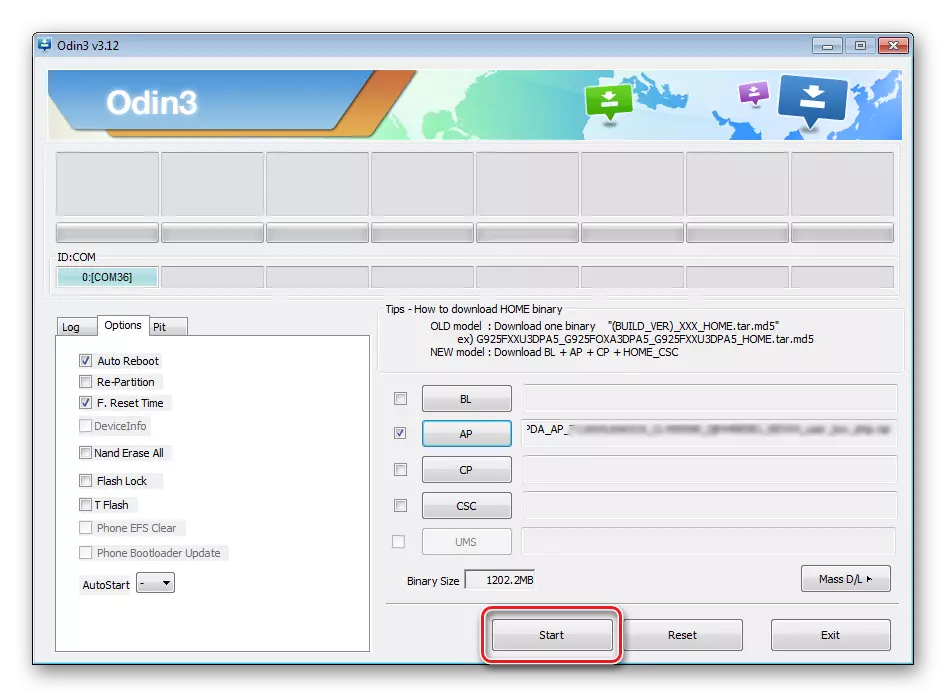
- By defining the necessary parameters, click the "Start" button.
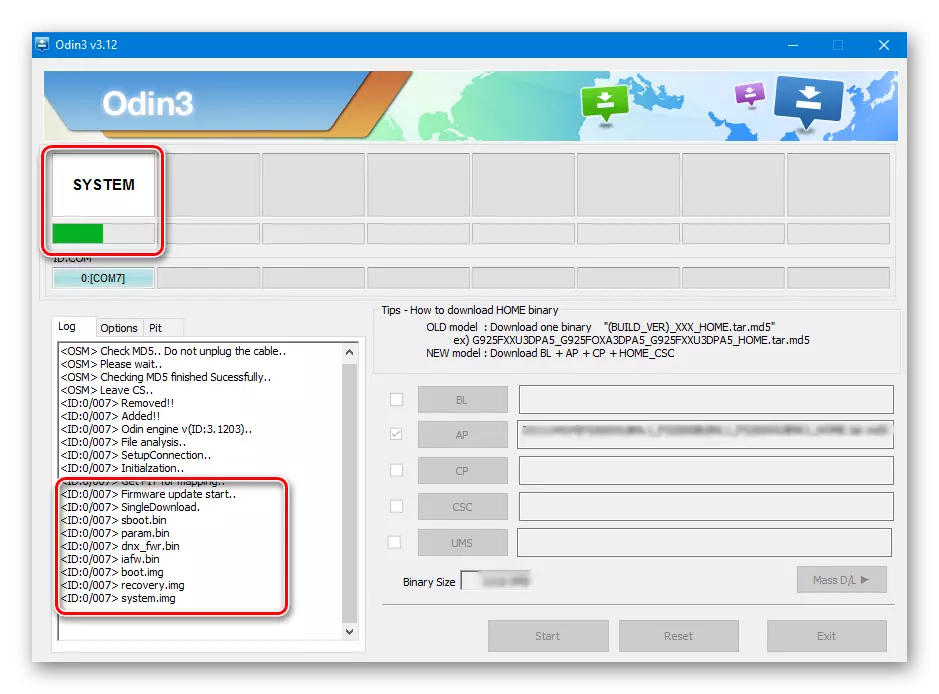
- The process of recording information in the memory sections of the device will begin, accompanied by displaying the names of the recorded sections of the device in the upper right corner of the window and fill the execution indicator located above the "ID: COM" fields. Also in the process, the log field is filling out inscriptions about the procedures.
- Upon completion of the process in a square in the upper left corner of the program on a green background, "PASS" is displayed. This speaks about the successful completion of the firmware. You can turn off the device from the computer's USB port and start it with a long press on the power button. When installing a single-focus firmware user data, if it is clearly not specified in the ODIN settings, in most cases are not affected.
Installing Multifile (Service) Firmware
When restoring the Samsung device after serious failures, the installation of modified software and in some other cases will require the so-called multi-failed firmware. In fact, this is a service solution, but the described method is widely used and ordinary users.
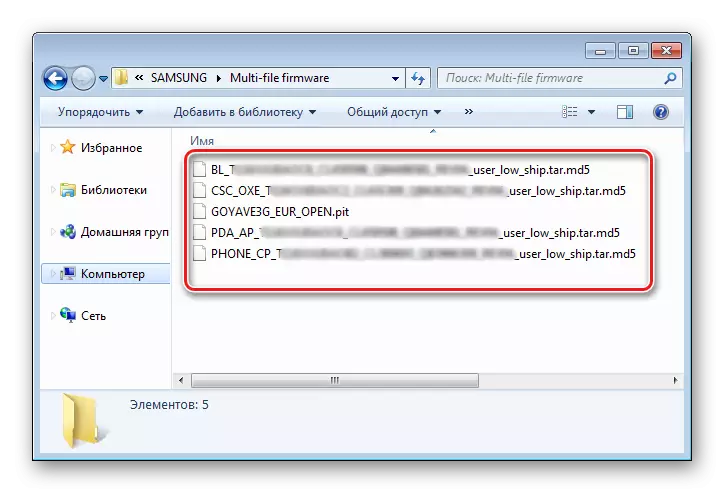
Multifile firmware is called because it is a combination of multiple image files, and, in some cases, the PIT file.
- In general, the procedure for recording partitions by data obtained from a multifile firmware is identical to the process described in the method 1. Repeat steps 1-4 of the above method.
- A distinctive feature of the procedure is a method of loading the necessary images into the program. In the general case, the unpacked archive of the Multifile firmware in the explorer looks like this:
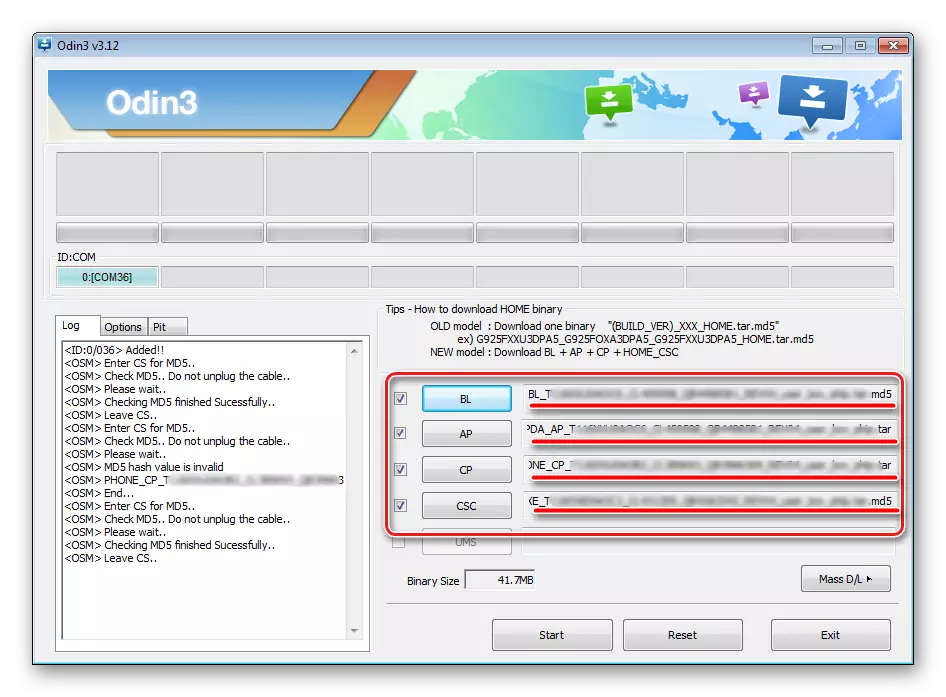
- To add each component of the software, you must first press the load button of the individual component, and then select the appropriate file.
- After all files are added to the program, go to the Options tab. As in the case of a single-fuel firmware, all checkboxes with the exception of "F. should be removed in the" Options "tab RESET TIME "and" AUTO REBOOT ".
- By defining the necessary parameters, press the "Start" button, observe the progress and wait for the appearance of the "PASS" inscription in the upper right corner of the window.
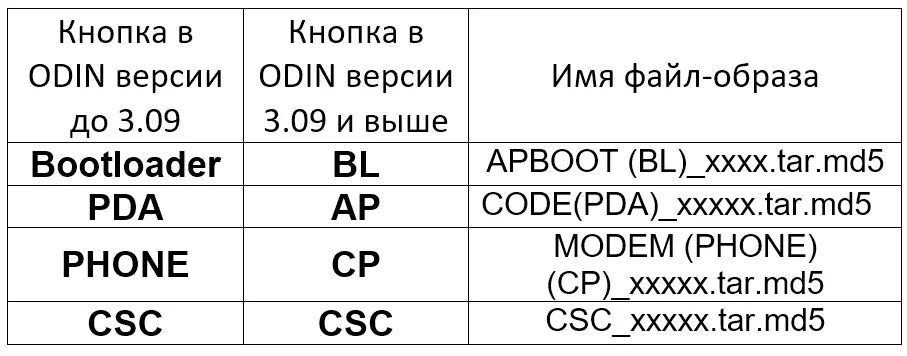
It should be noted that the name of each file contains the name of the memory of the device to write to which it (file-image) is intended.
Some difficulties in many users cause the fact that, starting with version 3.09, the names of buttons intended to select one or another image were changed in ODIN. For ease of determining which download button in the program, the file image matches, you can use a table:
Firmware with pit-file
PIT file and adding it to ODIN are tools used to overspend the memory of the device to sections. This method of carrying out the process of recovery of the device can be used together with both single-file and multifile firmware.
Using the PIT file when firmware is permissible only in extreme cases, for example, in the presence of serious problems with the efficiency of the device.
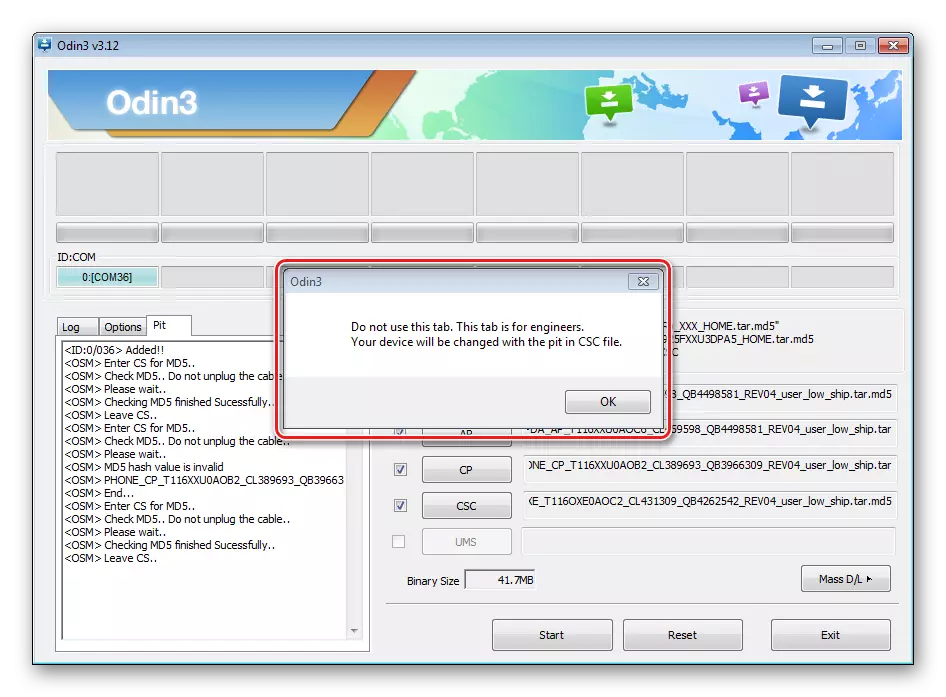
- We perform the steps necessary to load the image (s) of the firmware from the above methods. To work with the PIT file, use a separate tab in ODIN - "PIT". When switching to it, a warning from developers about the danger of further action is displayed. If the risk of procedure is conscious and appropriate, press the "OK" button.
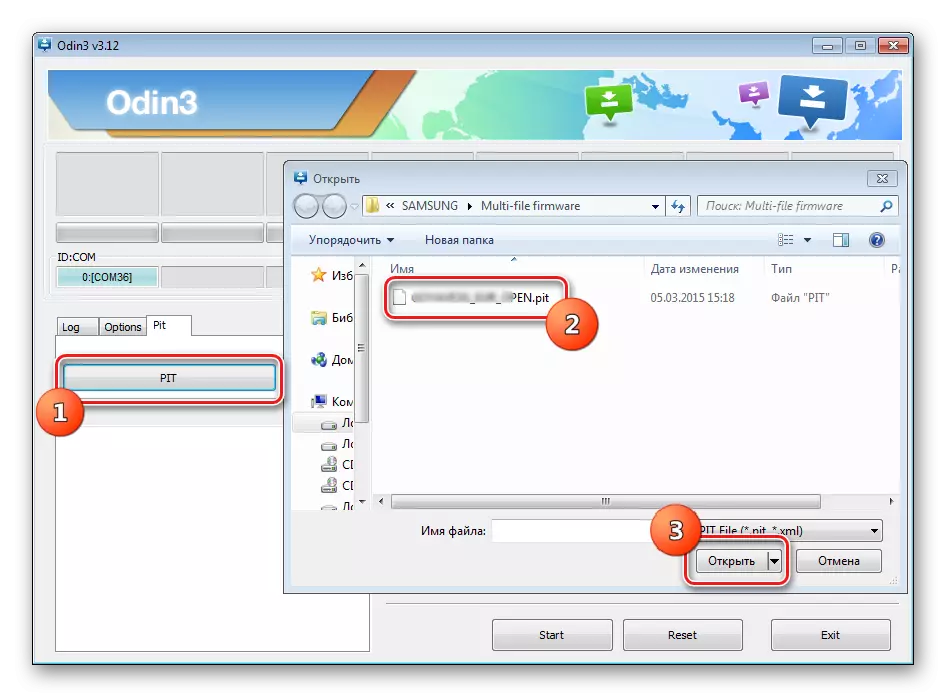
- To specify the path to the PIT file, press the button of the same name.
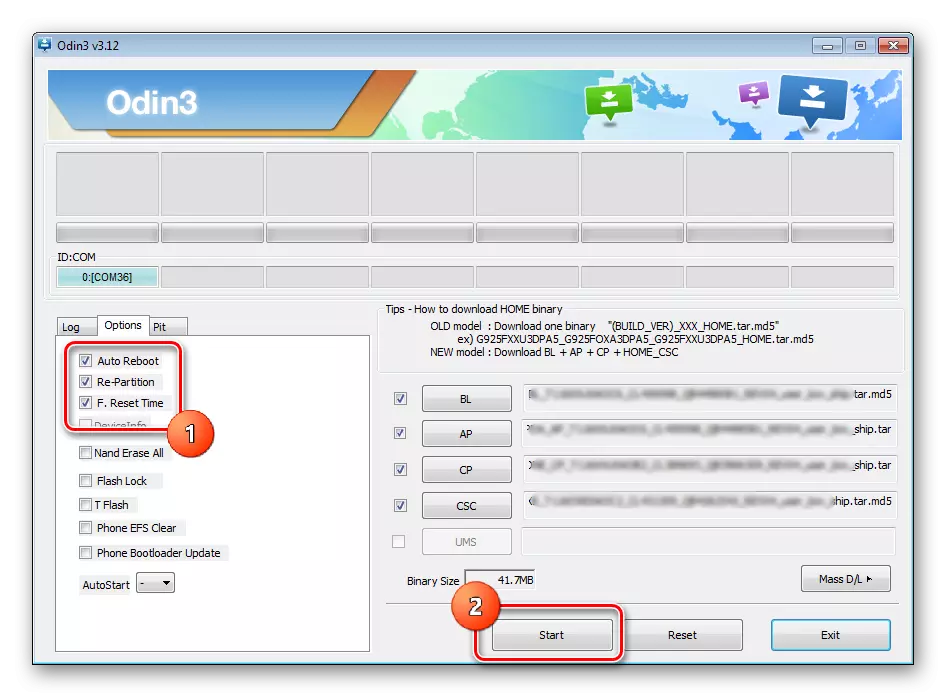
- After adding a PIT file, go to the "Options" tab and check the AUTO Reboot, Re-Partition and F. RESET TIME. " The remaining items must remain unmarked. After selecting options, you can switch to the recording procedure by pressing the "Start" button.
Installing individual components by
In addition to installing the firmware, ODIN makes it possible to record separate components of the software platform - kernel, modem, recovery, etc. into the device.
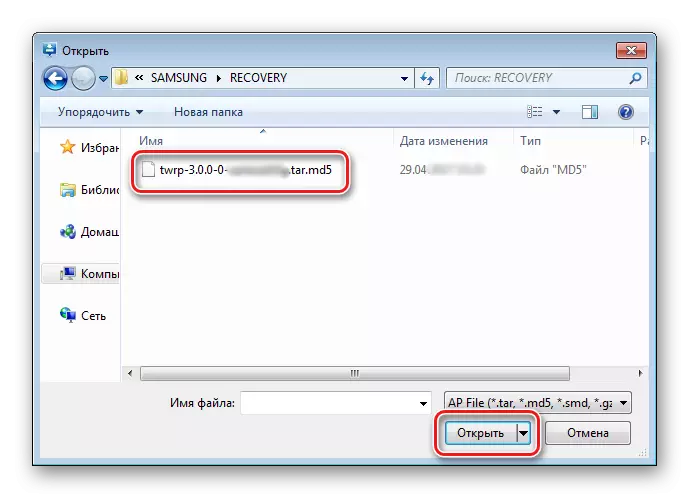
For example, consider the installation of custom TWRP recovery through ODIN.
- We download the desired image, run the program and connect the set in "Download" to the USB port.
- Press the "AP" button and select the file from the recovery in the Explorer window.
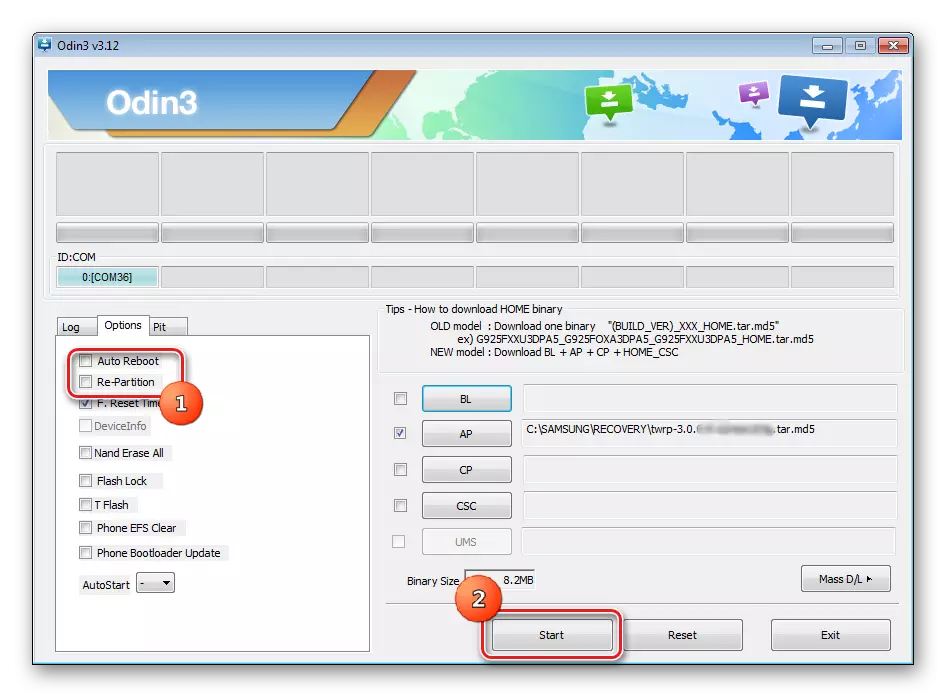
- Go to the Options tab and remove the mark from the AUTO Reboot item.
- Press the "Start" button. Recording recovery occurs almost instantly.
- After the "PASS" inscription appears in the upper right corner of the ODIN window, disconnect the device from the USB port, turn it off by a long pressing of the "Power" button.
- The first launch after the procedure described above should be carried out in TWRP Recovery, otherwise the system will restart the recovery environment to the factory. We enter the custom recovery by holding the "Volume +" and "Home" keys on the disabled, then holding them down, the power button.

It should be noted that the described methods of working with ODIN are applicable to most Samsung devices. At the same time, they cannot claim for absolutely universal instructions in view of the availability of a wide variety of firmware, a large model range of devices and small differences in the list of used options in specific applications.