
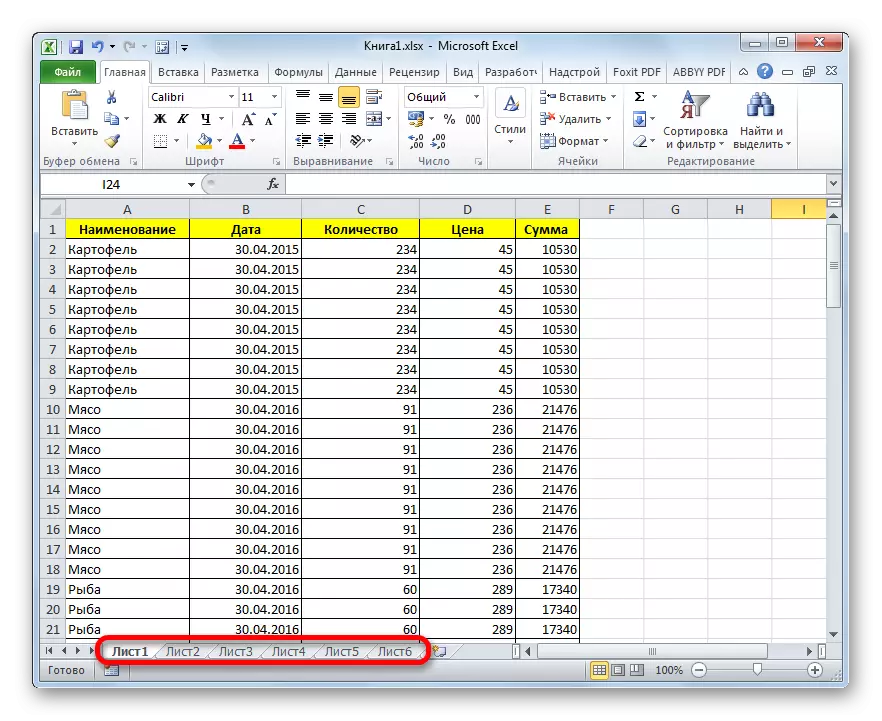
The ability to create individual sheets in one book in one book allows, in fact, to form multiple documents in one file and, if necessary, bind them with references or formulas. Of course, this significantly improves the functionality of the program and allows you to expand the horizons of the tasks. But sometimes it happens that some sheets you create disappear or completely disappear all their shortcuts in the status bar. Let's find out how you can return them back.
Restoration of sheets
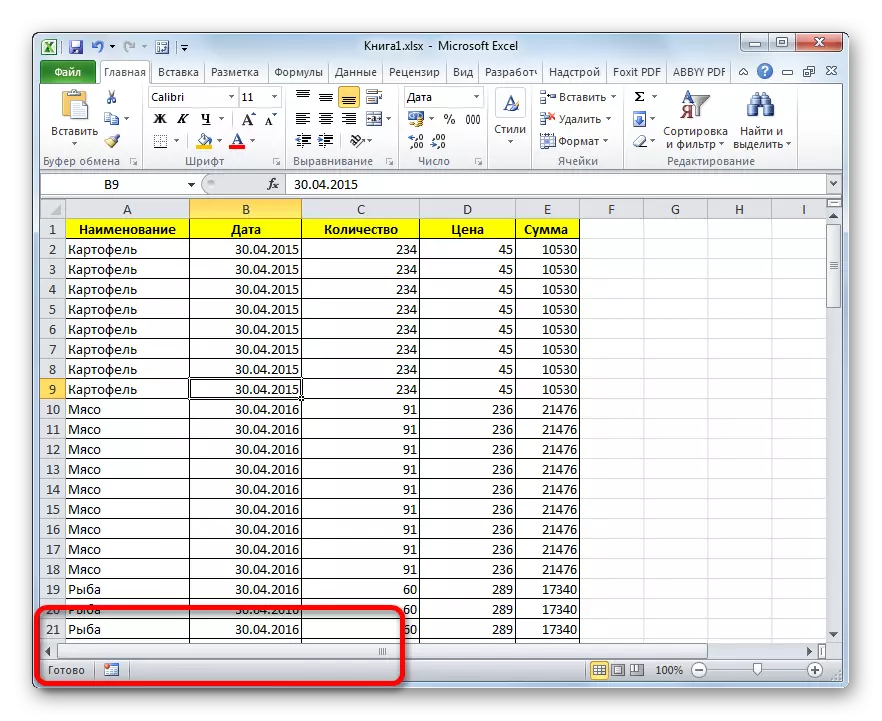
The navigation between the sheets of the book allows you to carry out shortcuts that are located on the left side of the window above the status bar. The question of their recovery in case of disappearance we will be considered.
Before proceeding with the study of the recovery algorithm, let's figure it out why they may generally. There are four main reasons why it can happen:
- Disable panel of shortcuts;
- Objects were hidden behind the horizontal scroll bar;
- Separate shortcuts were translated into the state of hidden or superblit;
- Removal.
Naturally, each of these causes causes a problem that has its own solution algorithm.
Method 1: Turning on the label panel
If there are no shortcuts in the status string in general, including the label of the active element, this means that their show simply was disconnected in the settings. This can only be done for the current book. That is, if you open another Excel file to the same program, and the default settings will not be changed, the label panel will be displayed. Throw out how you can enable visibility again if the panel is turned off in the settings.
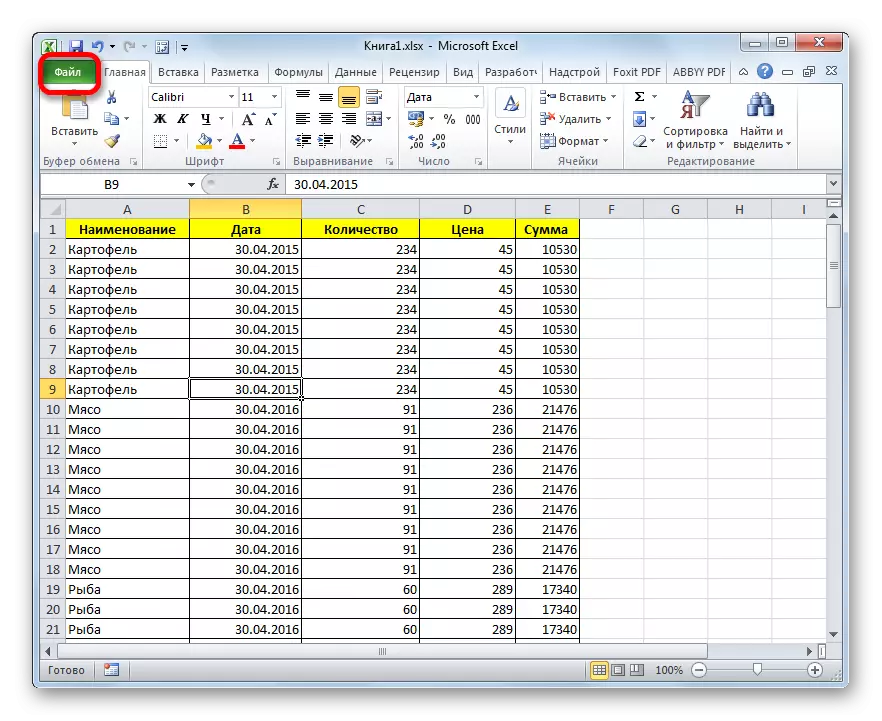
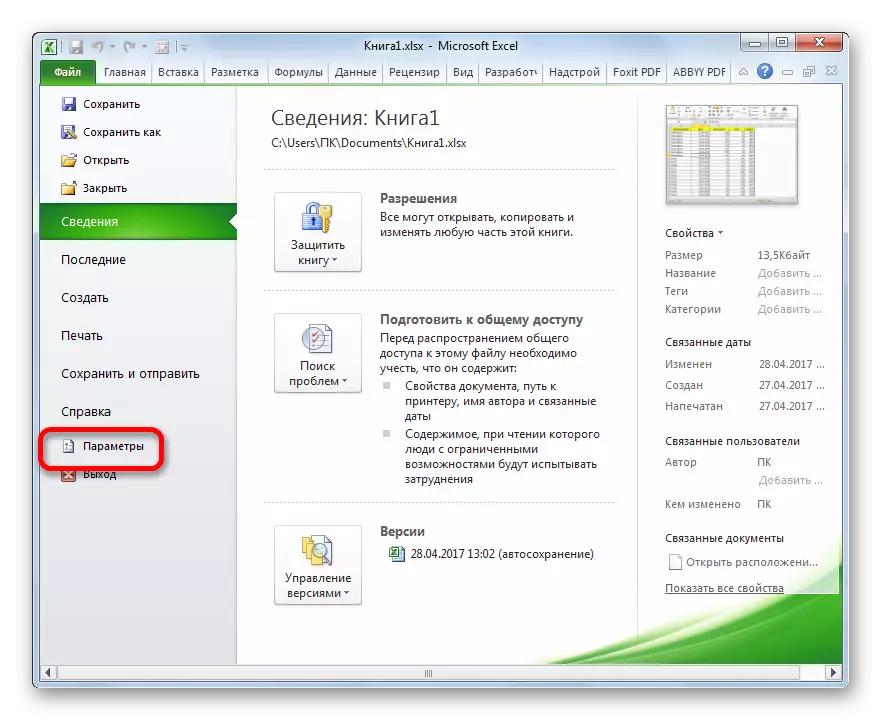
- Go to the "File" tab.
- Next, we make moving to the "Parameters" section.
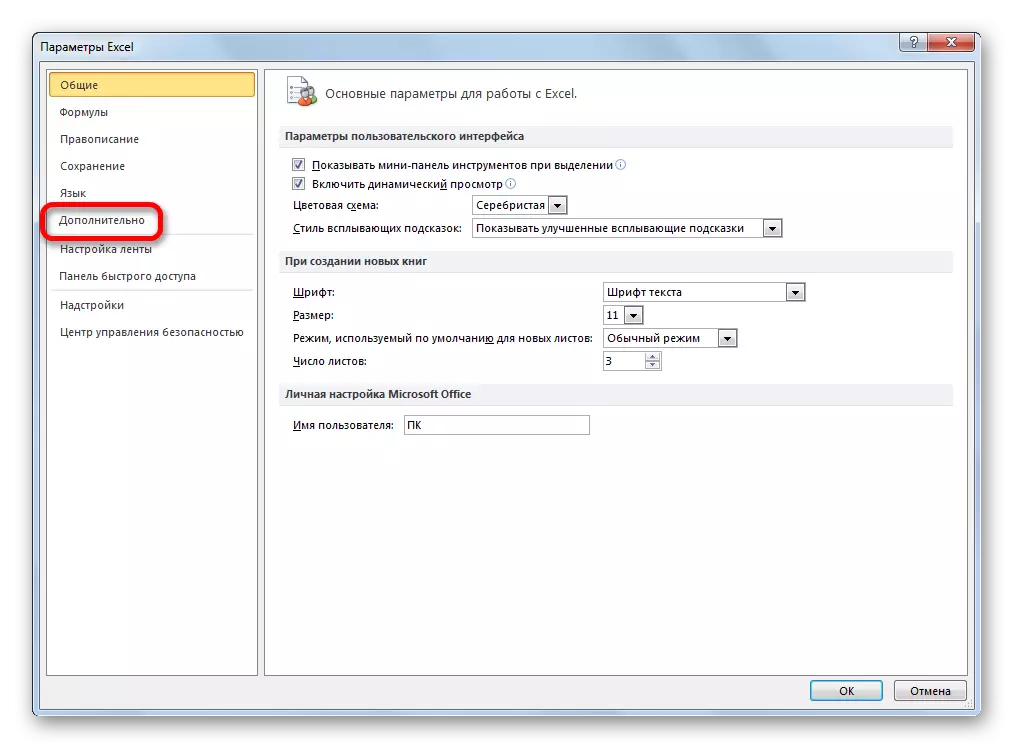
- In the Excel parameter window that opens, perform the transition to the "Advanced" tab.
- On the right side of the window that opened various Excel settings are located. We need to find the settings block "Show parameters for the next book". In this block there is a "Show sheet labels" parameter. If there is no check mark in front of it, then it should be installed. Next, click on the "OK" button at the bottom of the window.
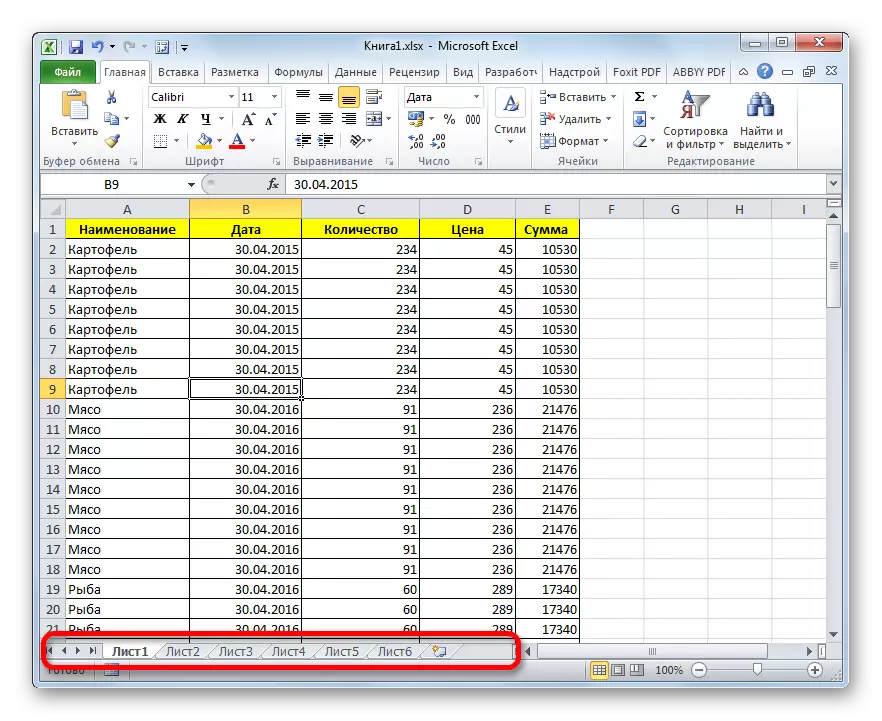
- As you can see, after performing the above, the label panel is again displayed in the current Excel book.

Method 2: Move the scroll bar
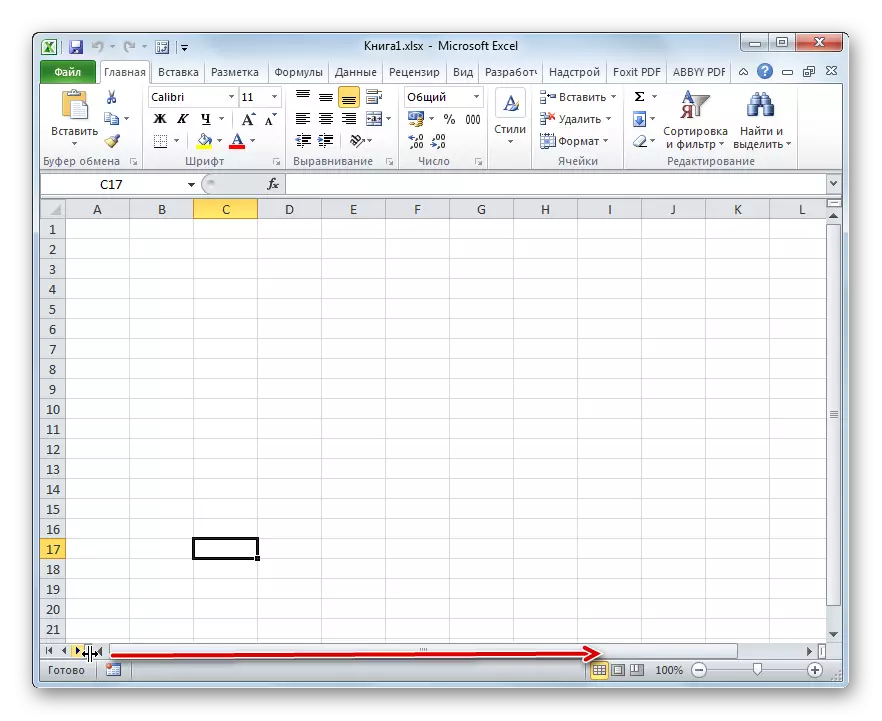
Sometimes there are cases when the user accidentally pulled the horizontal scroll bar on top of the label panel. Thus, he actually hid them, after which, when this fact is found, a feverish search begins the cause of the laborers.
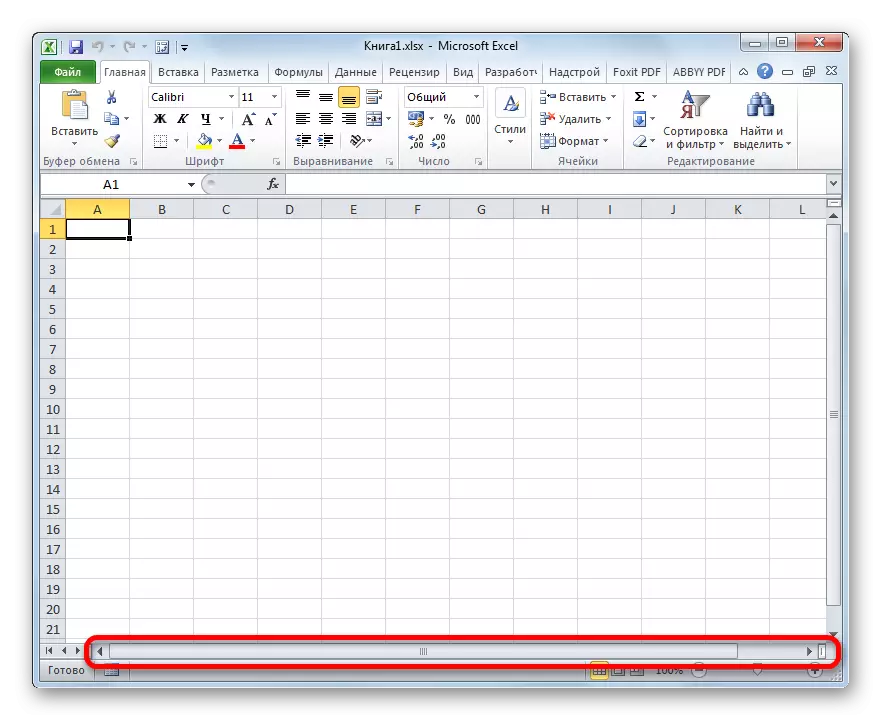
- Solve this problem is very simple. Install the cursor to the left of the horizontal scroll bar. It must be transformed into a bidirectional arrow. Click the left mouse button and the taking cursor to the right until all objects on the panel are displayed. Here, too, it is not important not to overdo it and do not make the scroll bar too small, because it is also needed to navigate the document. Therefore, you should stop dragging the strip as soon as the entire panel will be open.
- As you can see, the panel is displayed again on the screen.

Method 3: Enabling Hidden Labels
Also, individual sheets can be hidden. At the same time, the panel itself and other shortcuts on it will be displayed. The difference in hidden objects from remote is that if you wish, you can always display. In addition, if on one sheet there are values that are tightened through the formulas located on the other, then in the case of deleting the object, these formulas will start withdrawing an error. If the item is simply hidden, then no changes in the formula function will occur, just labels for the transition will be absent. Speaking with simple words, the object will actually remain in the same form as it was, but the navigation tools for switching to it will disappear.
The procedure is pretty simple to hide. You need to right-click on the corresponding shortcut and in the Select "Hide" item appears.

As you can see, after this action, the dedicated element will be hidden.
Now let's figure out how to display hidden labels again. It is not much more complicated than hiding them and also intuitively understandable.
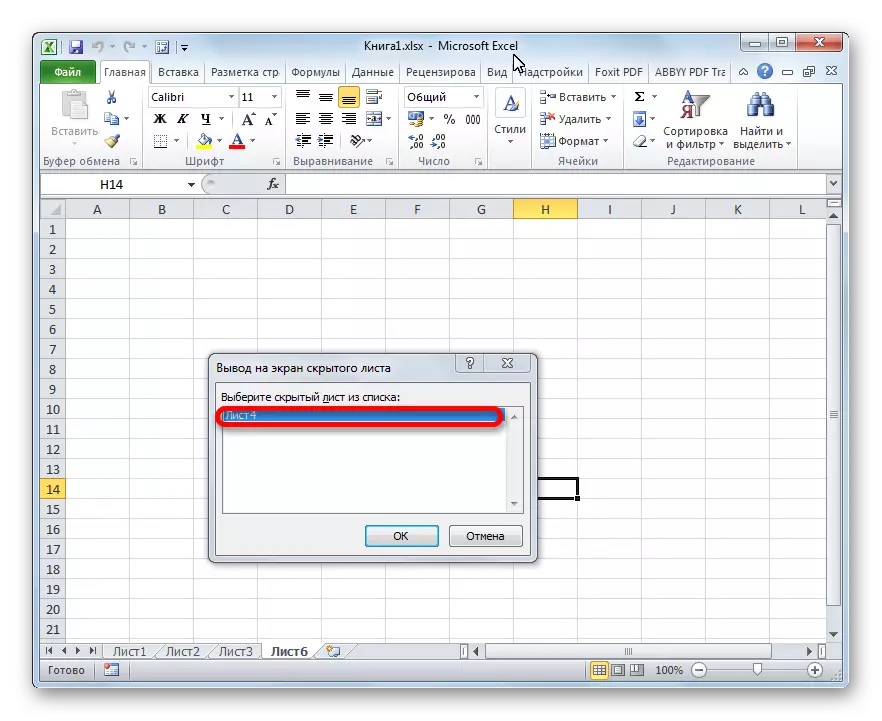
- Right-click on any label. The context menu opens. If there are hidden elements in the current book, then in this menu it becomes an active item "show ...". Click on it with the left mouse button.
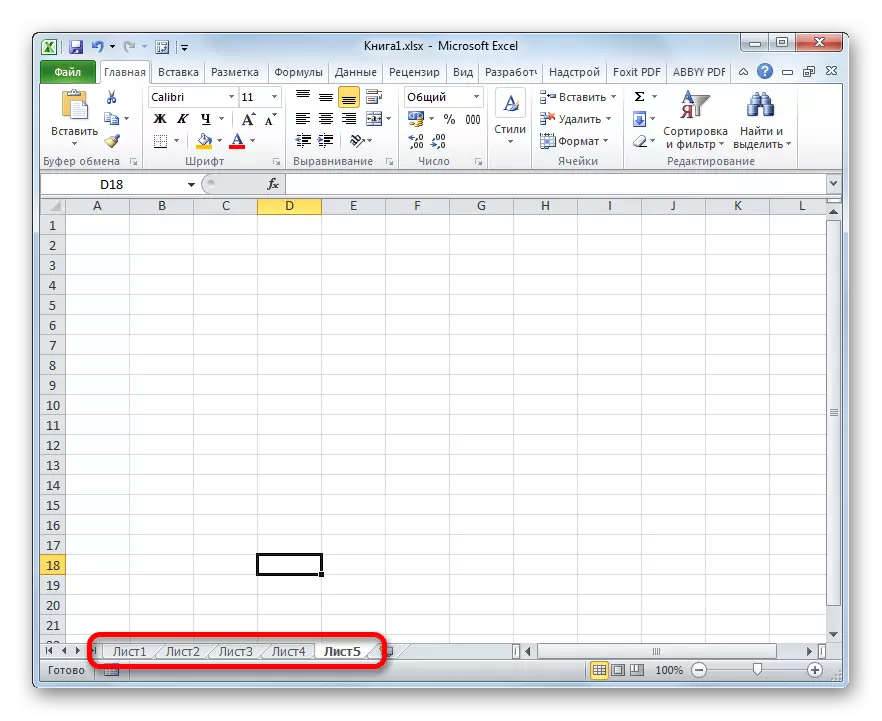
- After clicking, the discovery of a small window is opening, in which there is a list of hidden sheets in this book. Select that object that you want to display again on the panel. After that, click on the "OK" button at the bottom of the window.
- As you can see, the label of the selected object is again displayed on the panel.


Method 4: Display of supercad sheets
In addition to hidden sheets, there are still super-free. From the first they differ in that you will not find them in the usual output list on the latent item screen. Even if we are confident that this object has accurately existed and no one has deleted it.
Elements can disappear in this way can only if someone is purposefully hidden through the VBA macro editor. But finding them and restore the display on the panel will not be difficult if the user knows the algorithm of the actions we will talk about below.
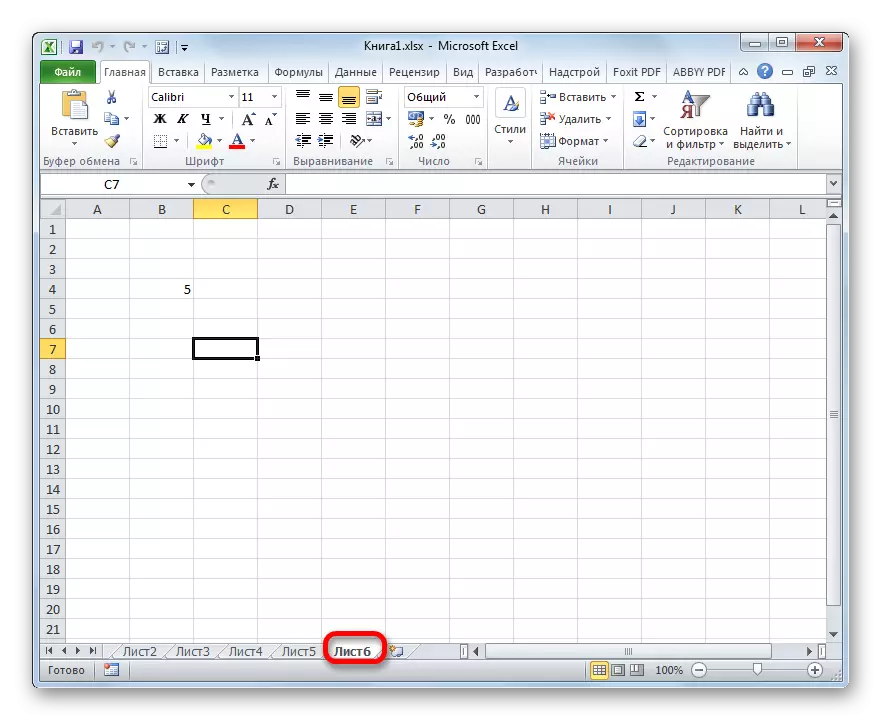
In our case, as we see, there are no labels of the fourth and fifth sheets.
Going to the output window on the screen of hidden elements, the way we spoke about in the previous way, we see that only the name of the fourth sheet is displayed. Therefore, it is quite obvious to assume that if the fifth sheet is not deleted, it is hidden using the VBA editor tools.
- First of all, you need to enable macros mode and activate the Developer tab, which are disabled by default. Although, if in this book, some elements were assigned the status of supercaded, it is possible that the indicated procedures in the program have already been carried out. But, again, there is no guarantee that after performing the hides of the elements, the user who has done it, again did not disable the necessary tools to turn on the display of super-free sheets. In addition, it is possible that the inclusion of the display of shortcuts is performed at all on the computer on which they were hidden.
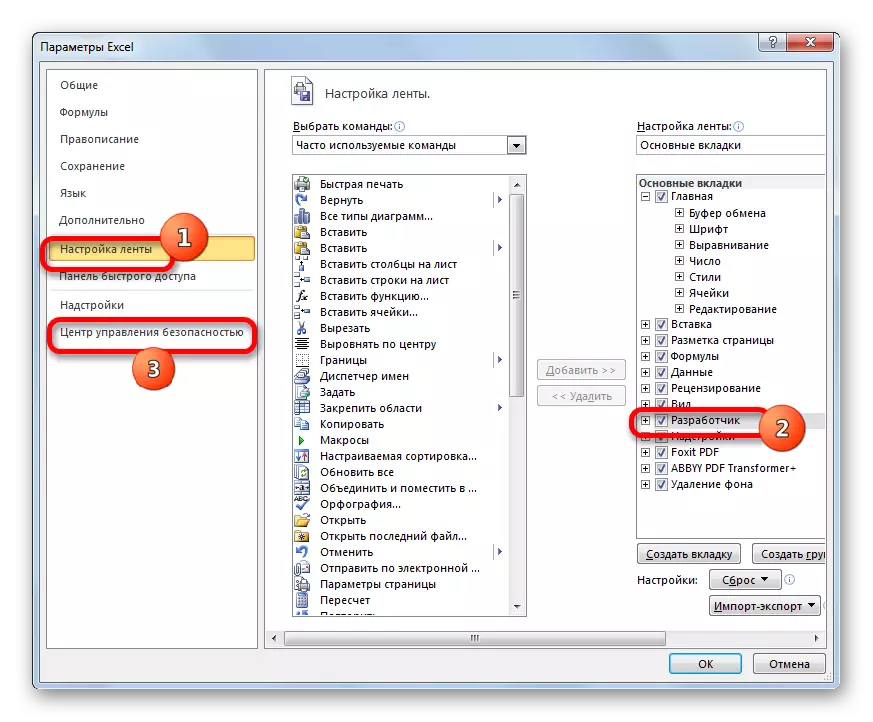
Go to the "File" tab. Next, click on the "Parameters" item in the vertical menu located on the left side of the window.
- In the Excel parameter window that opens, click on the Ribbon Setup item. In the "Basic tabs" block, which is located on the right side of the window that opened, set the tick if it is not, near the "Developer" parameter. After that, we move to the Security Management Center section using the vertical menu on the left side of the window.
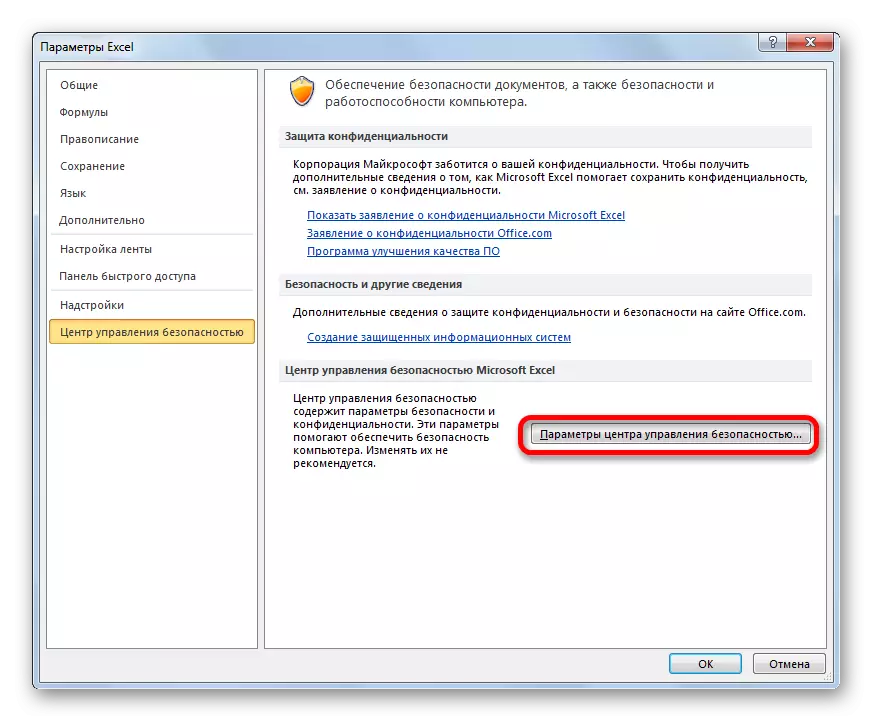
- In the running window, click on the button "Parameters of the Security Management Center ...".
- The Security Management Center window is launched. Go to the "Macro Settings" section by means of a vertical menu. In the "Macro Settings" toolbar, you set the switch to the "Enable all macros" position. In the "Macro Settings for Developer" block, we set a tick about the item "Trust access to the object model of VBA projects". After working with macros is activated, click on the "OK" button at the bottom of the window.
- Returning to the Excel parameters so that all changes to the settings entered into force, also press the "OK" button. After this, the developer tab and work with macros will be activated.
- Now, to open the macro editor, we move to the "Developer" tab, which we have just activated. After that, on the tape in the "Code" tool block, click on the large "Visual Basic" icon.
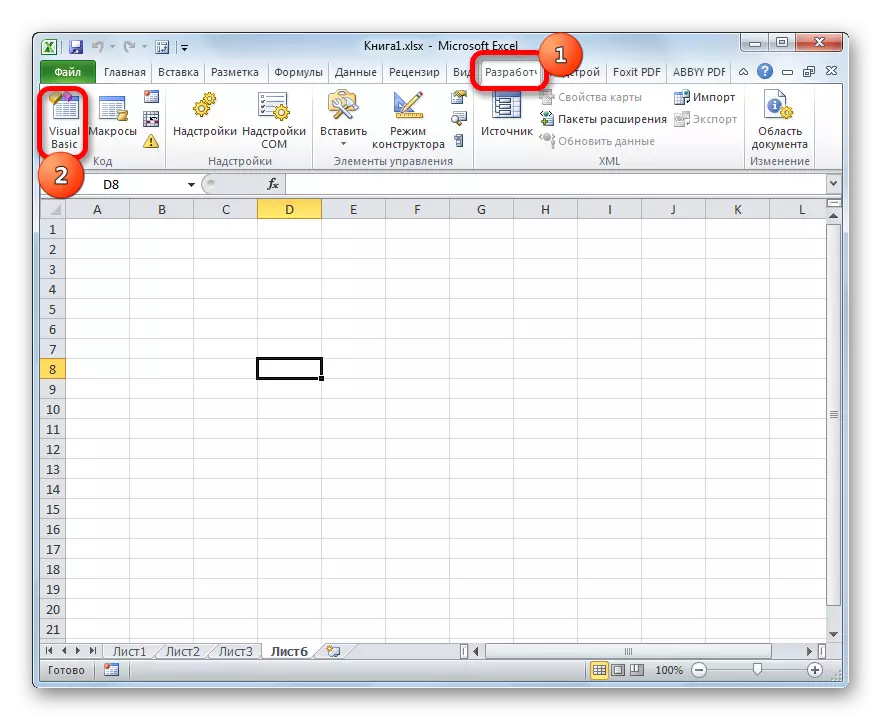
Macro editor can also be launched by typing the Alt + F11 keyboard keyboard.
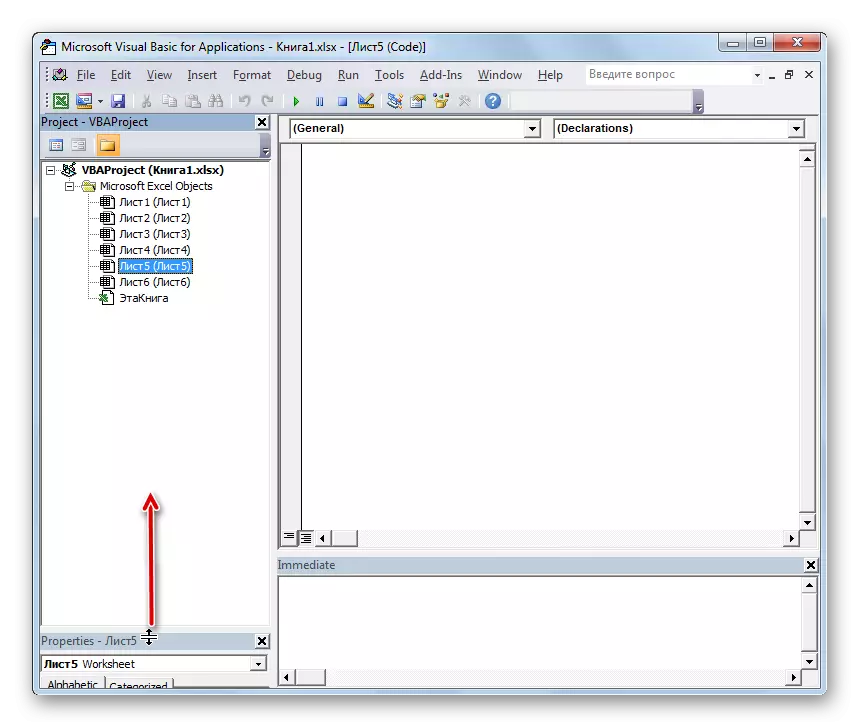
- You will then see the macro editor window, in the left part of which are the project "Project" and "Properties".

But it is possible that these areas will not be in the window that opens.
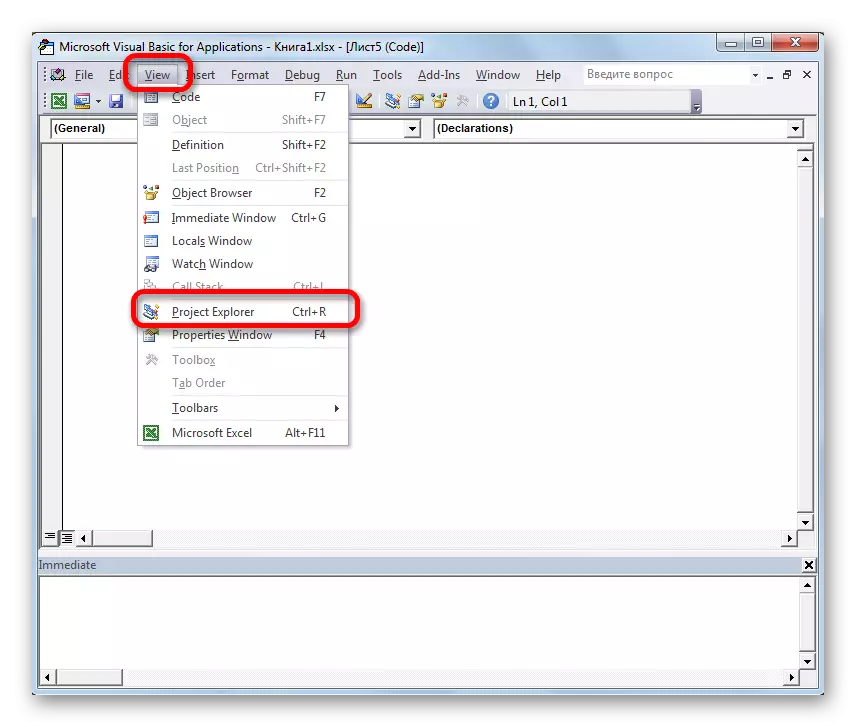
- To enable the display of the "Project" area, click on the View Horizontal menu item. In the list that opens, select the "Project Explorer" position. Or you can make the combination of hot keys Ctrl + R.
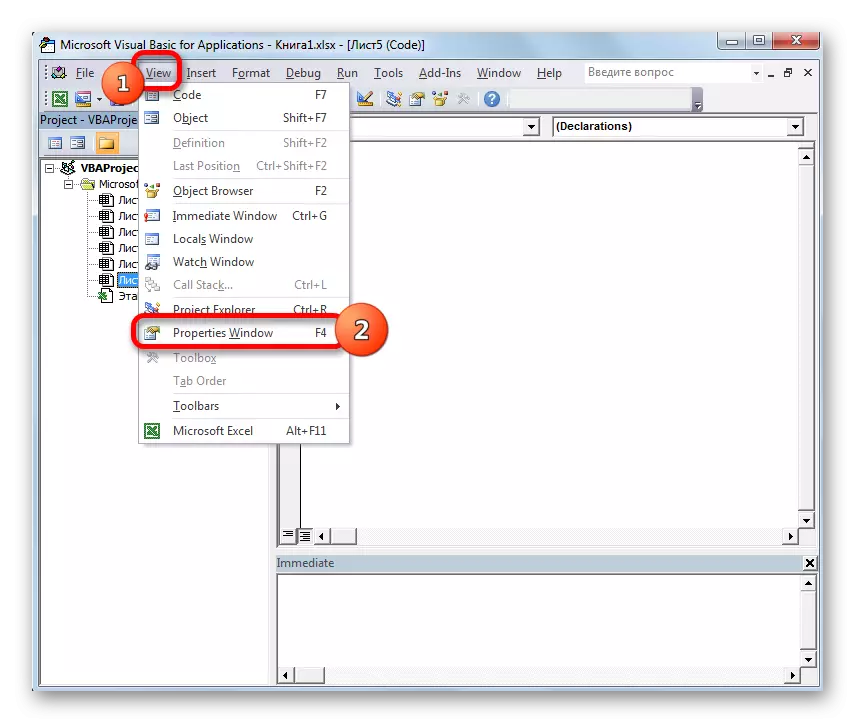
- To display the "Properties" area, again, click on the View menu item, but this time the "Properties Window" position is selected in the list. Or, as an alternative, you can simply press the F4 function key.
- If one area overlaps another, as presented in the image below, then you need to install the cursor on the boundary of the areas. At the same time, it should be converted to a bidirectional arrow. Then clamp the left mouse button and drag the border so that both areas are fully displayed in the macro editor window.
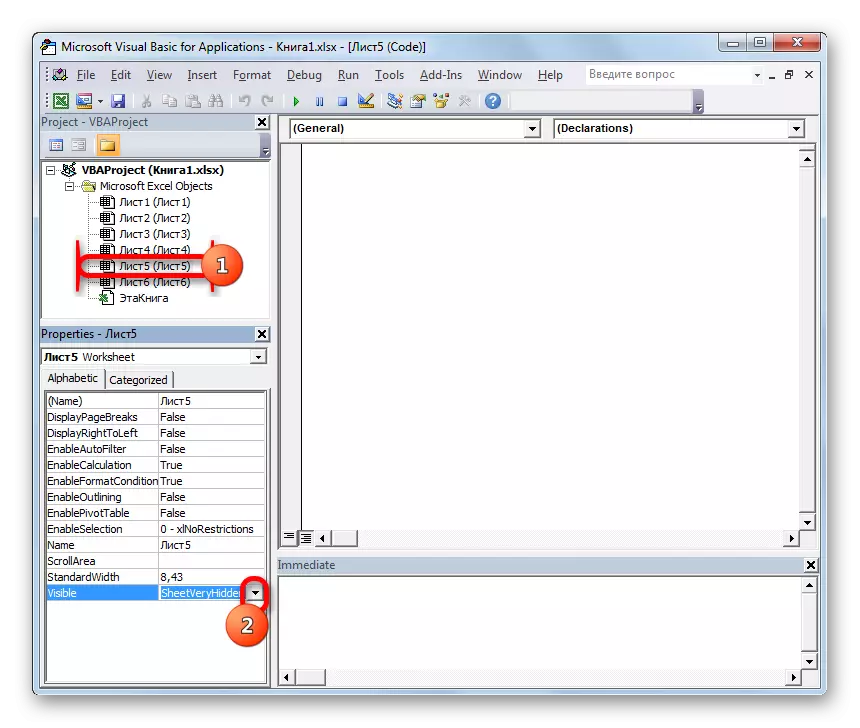
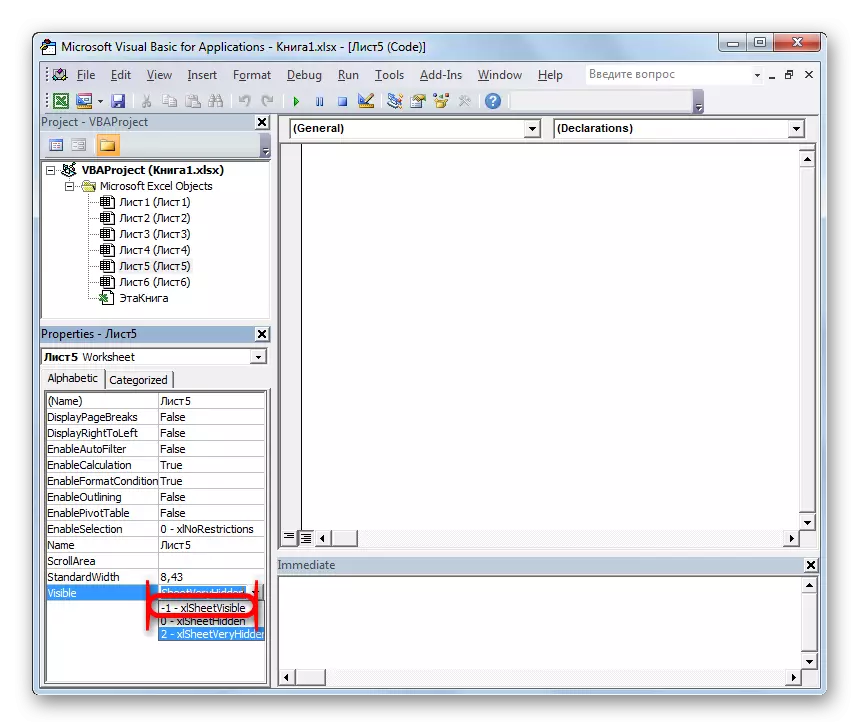
- After that, in the "Project" area, we allocate the name of the supervised element, which we could not find it in the panel or in the list of hidden labels. In this case, this is "Sheet 5". In this case, in the "Properties" area, the settings of this object are shown. We will specifically be interested in the item "Visible" ("Visibility"). Currently, in front of it, the "2 - XLSheetVeryHidden" parameter is set. Translated into Russian, "Very Hidden" means "very hidden", or as we previously expressed "supercurrent". To change this parameter and return the visibility of the label, click on the triangle to the right of it.
- After that, a list of three sheets of sheets appears:
- "-1 - xlsheetvisible" (visible);
- "0 - XLSheethidden" (hidden);
- "2 - XLSheetVeryHidden" (superb).
In order for the label to be displayed again on the panel, select the "-1 - xlsheetvisible" position.
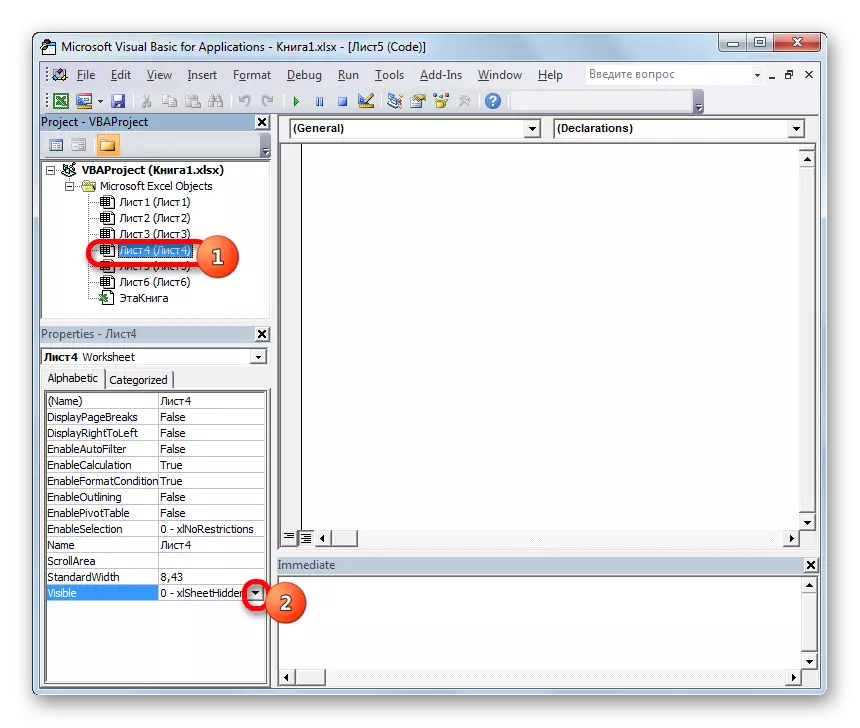
- But, as we remember, there is still a hidden "Sheet 4". Of course, it is not supercount and therefore it can be installed using the method 3. So even it will be easier and more convenient. But, if we started a conversation about the possibility of incorporating shortcuts through the macro editor, let's see how with it you can restore the usual hidden elements.
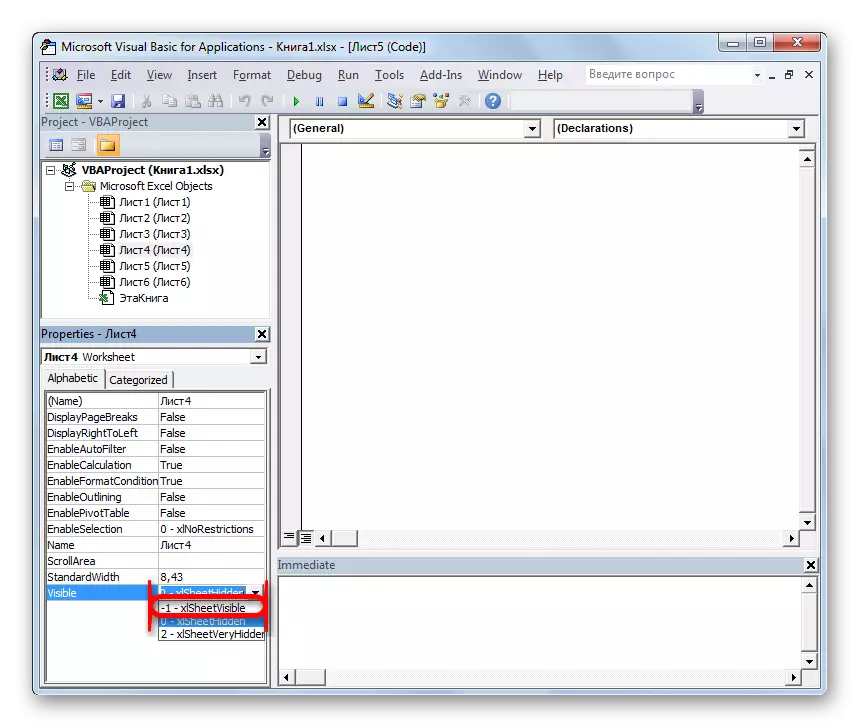
In the "Project" block, we allocate the name "List 4". As we can see, in the "Properties" area, in front of the "Visible" item, the "0 - XLSheethidden" parameter, which corresponds to the usual hidden element. Click on the triangle to the left of this parameter to change it.
- In the list of parameters that opens, select "-1 - xlsheetvisible".
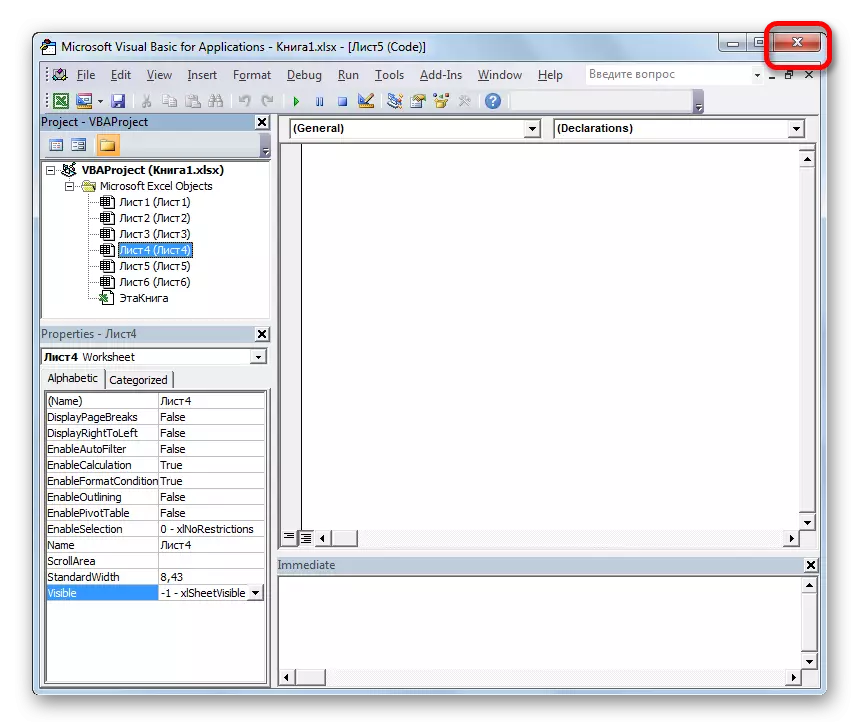
- After we configured the display of all hidden objects on the panel, you can close the macro editor. To do this, click on the standard closing button as a cross in the upper right corner of the window.
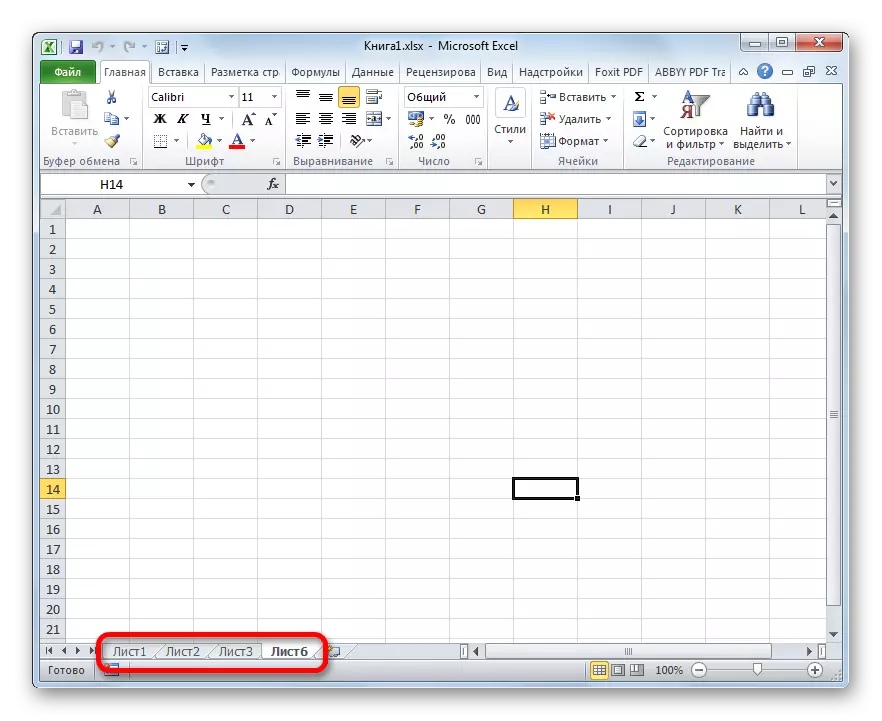
- As you can see, now all the labels are displayed on the Excel panel.


Lesson: How to enable or disable macros in Excel
Method 5: Restoration of remote sheets
But often it happens that the labels disappeared from the panel simply because they were removed. This is the most difficult option. If in previous cases, with the correct algorithm of actions, the probability of restoring the display of shortcuts is 100%, then if they are removed, no one can give such a guarantee of a positive result.
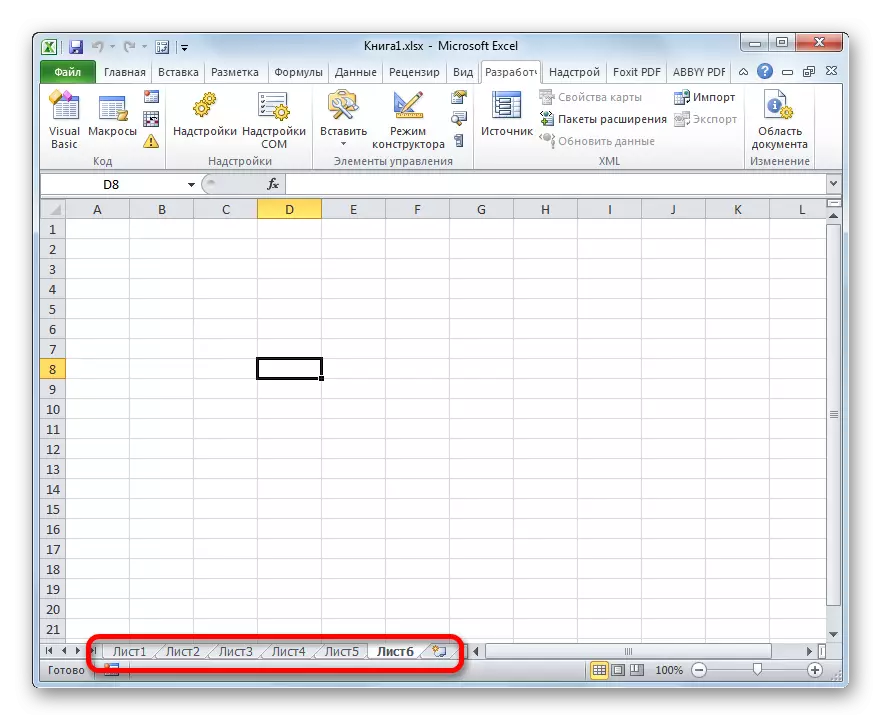
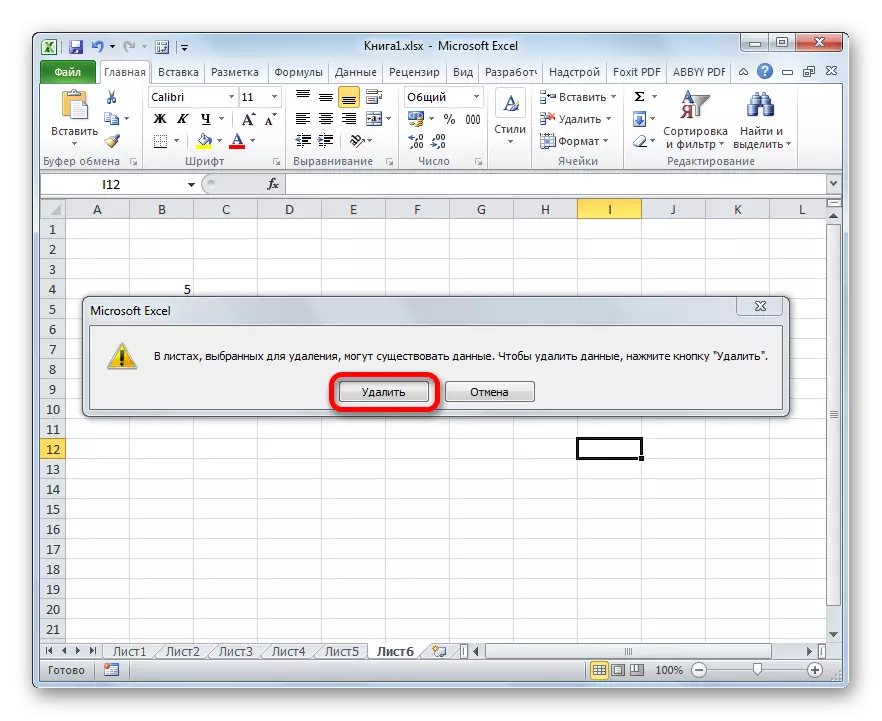
Remove the label is quite simple and intuitive. Just click on it with right mouse button and in the menu that appears select the "Delete" option.

After that, a deletion warning appears as a dialog box. To complete the procedure, it is enough to click on the "Delete" button.
Restore the remote object is much more difficult.
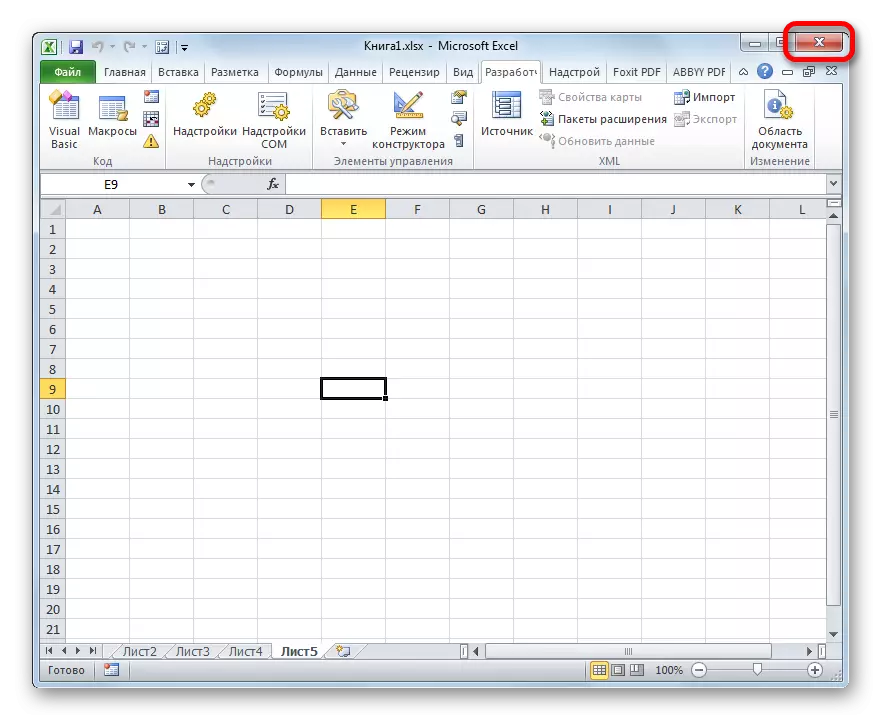
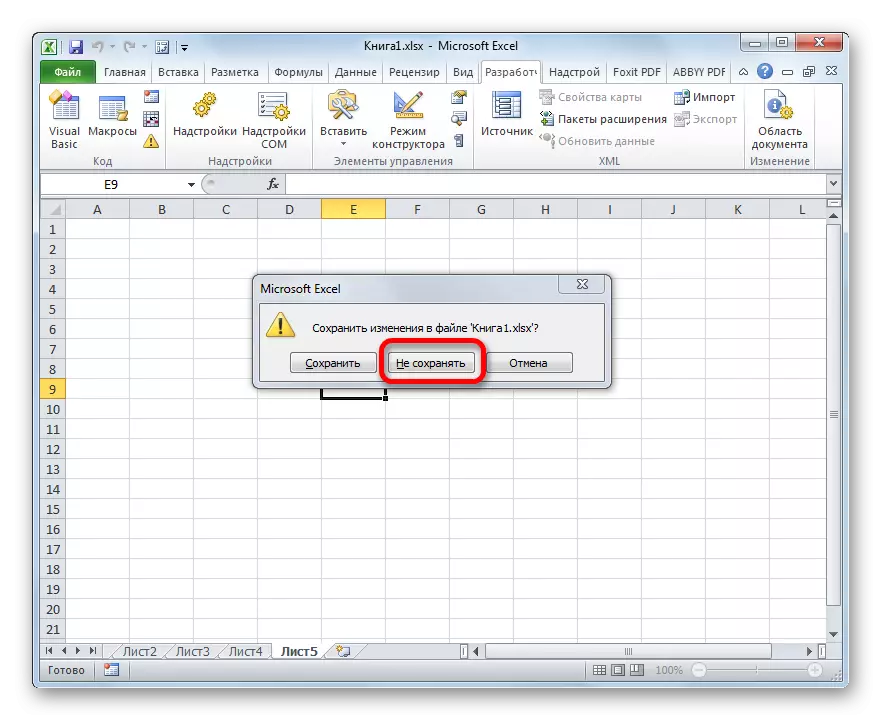
- If you have given a label, but they realized that it was done in vain even before saving the file, then you need to simply close it by clicking on the standard button closing the document in the upper right corner of the window in the form of a white cross in a red square.
- In the dialog box that opens after that, you should click on the button "Do not save".
- After you open this file again, the remote object will be in place.
But it should be paid to the fact that restoring the sheet in this way, you will lose all the data made to the document, starting with its last preservation. That is, in fact, the user will have to choose between the fact that for him a priority: a remote object or data that he managed to make after the last preservation.
But, as already mentioned above, this recovery option will only be suitable if the user did not have time to save data after deletion. What should I do if the user has retained a document or generally out of it with preservation?
If, after removing the label, you have already saved the book, but did not have time to close it, that is, it makes sense to dig in the file versions.
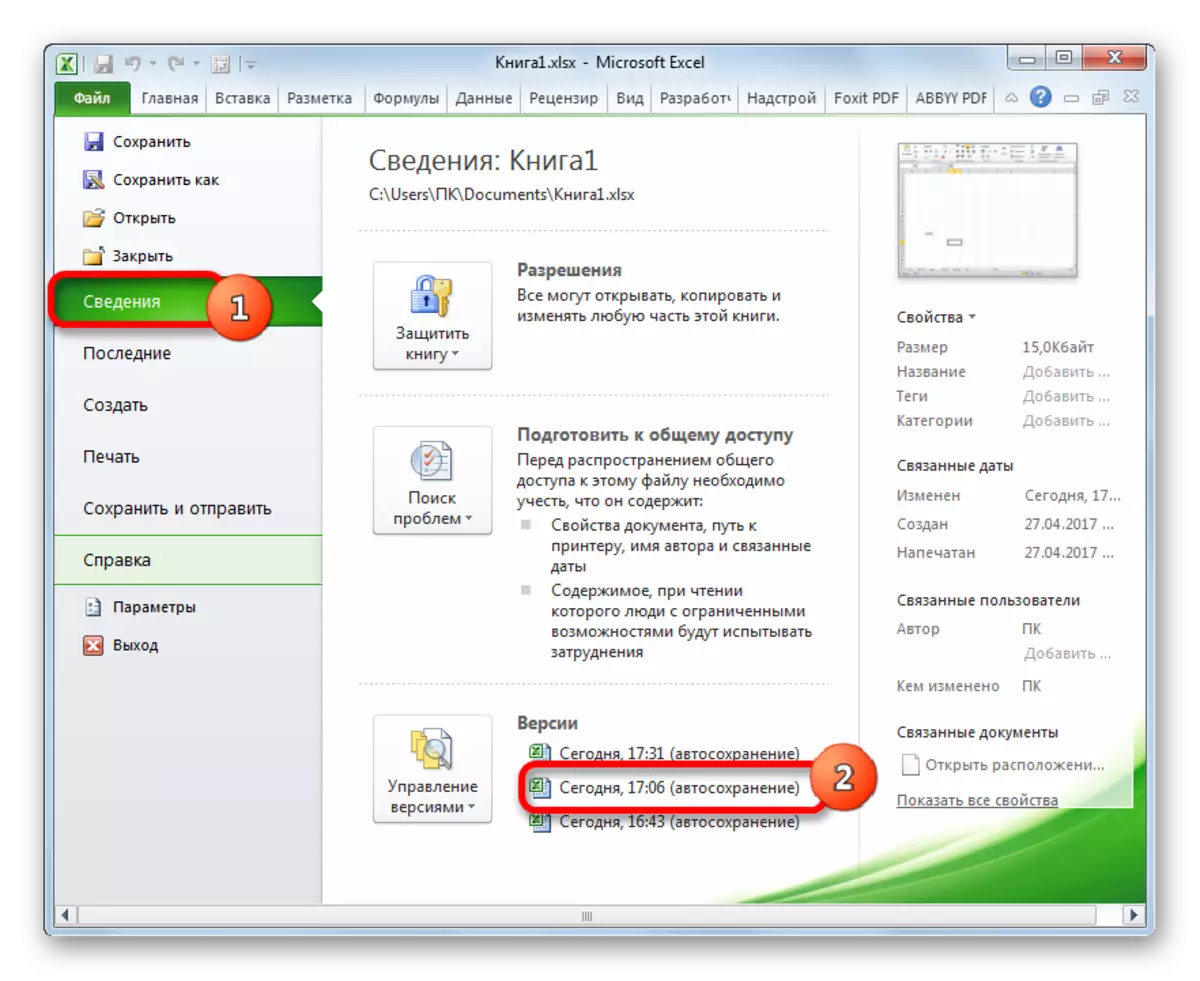
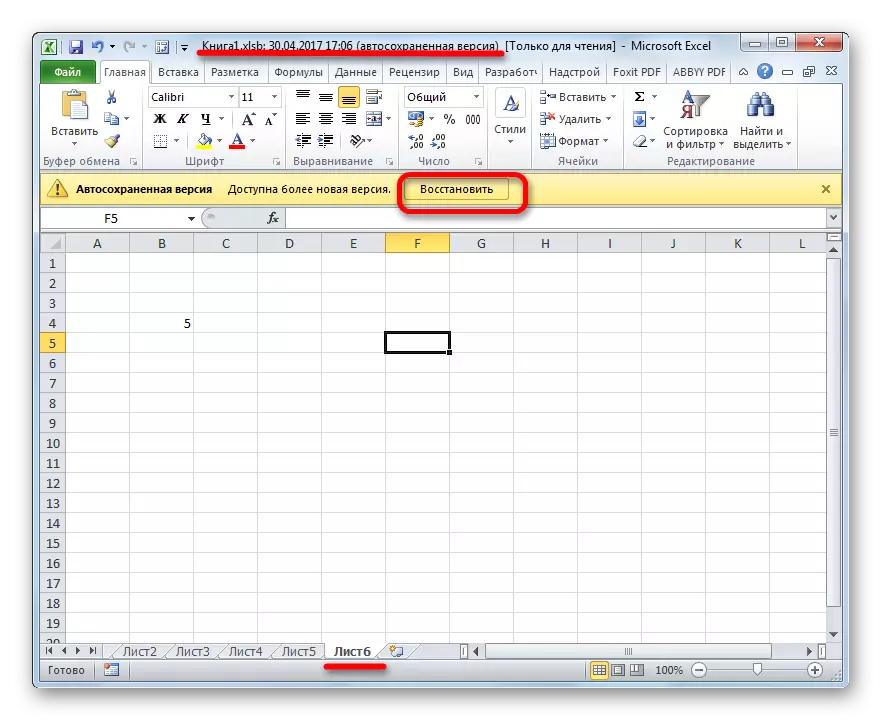
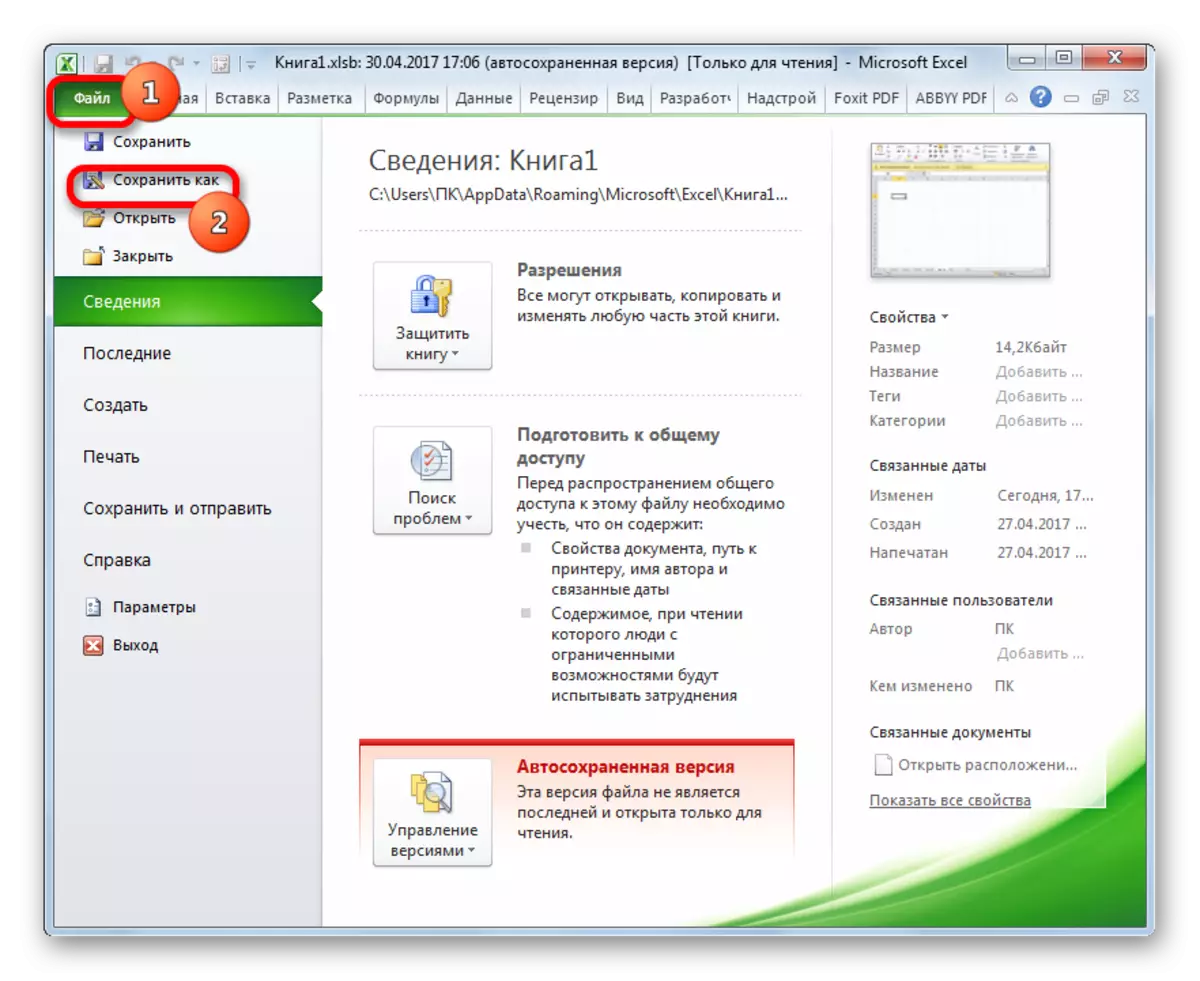
- To go to view versions, move to the "File" tab.
- After that, go to the "Details" section, which is displayed in the vertical menu. In the central part of the window that opened the window is located. It contains a list of all versions of this file stored using Excel's auto storage tool. This tool is enabled by default and saves the document every 10 minutes if you do not do it yourself. But if you have made manual adjustments in the Excel settings, turning off the auto storage, you will not be able to restore remote items. It should also be said that after closing the file, this list is erased. Therefore, it is important to notice the loss of the object and decide on the need to restore it before you closed the book.
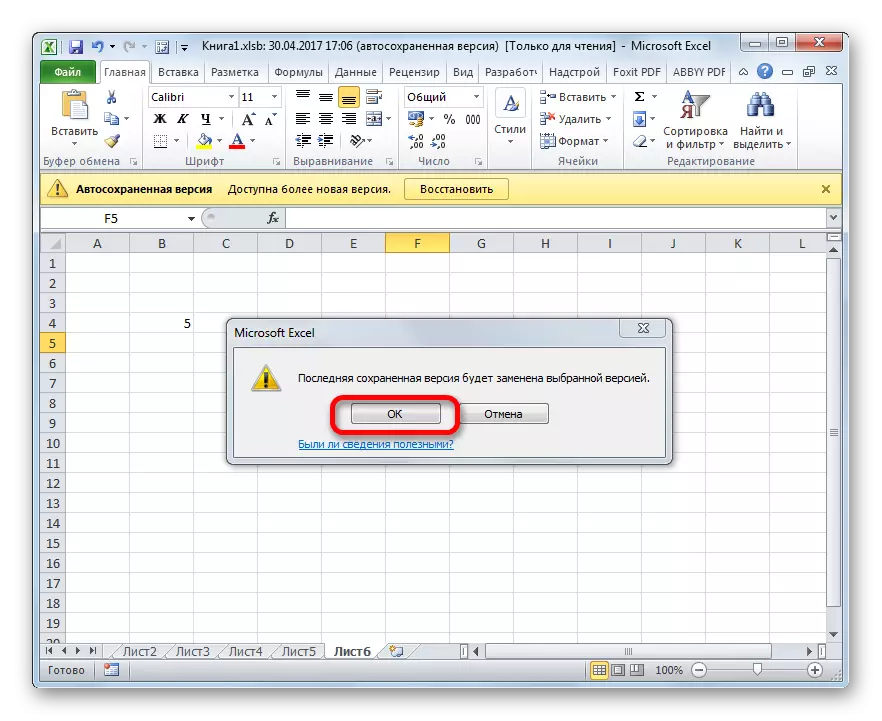
So, in the list of autosocated versions, we are looking for the latest conservation option, which was carried out until the removal. Click on this item in the specified list.
- After that, a new window will be opened in a new window. As you can see, it has a previously remote object. In order to complete the file recovery, you need to click on the Restore button at the top of the window.
- After that, a dialog box will open, which will be offered to replace the latest saved version of the book by this version. If it is suitable for you, click on the "OK" button.
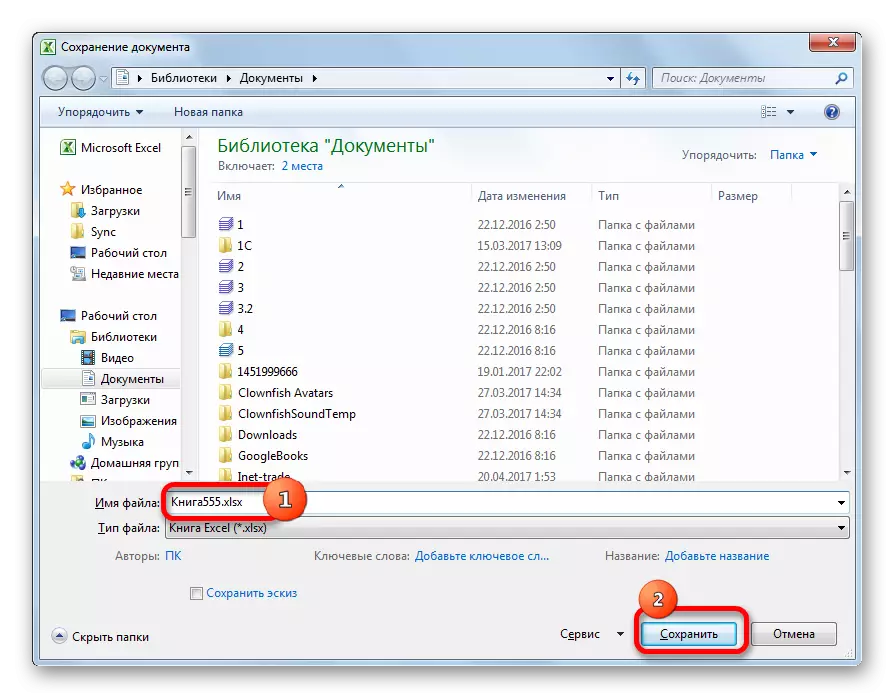
If you want to leave both versions of the file (with a valid sheet and with information added to the book after deleting), then go to the "File" tab and click on "Save As ...".
- Start the save window. In it, it will be necessary to rename the recovered book, then click on the "Save" button.
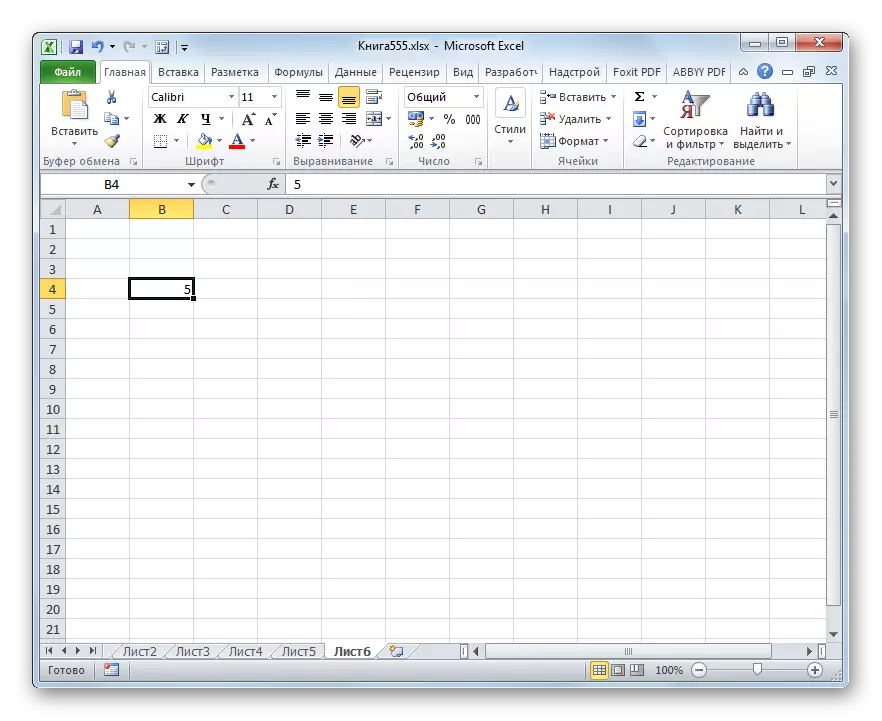
- After that you will receive both versions of the file.
But if you have saved and closed the file, and the next time you saw it, you saw that one of the shortcuts is deleted, then it will not be possible to restore it with a similar way, since the list of file versions will be cleaned. But you can try to recover through version control, although the likelihood of success in this case is significantly lower than when using previous options.
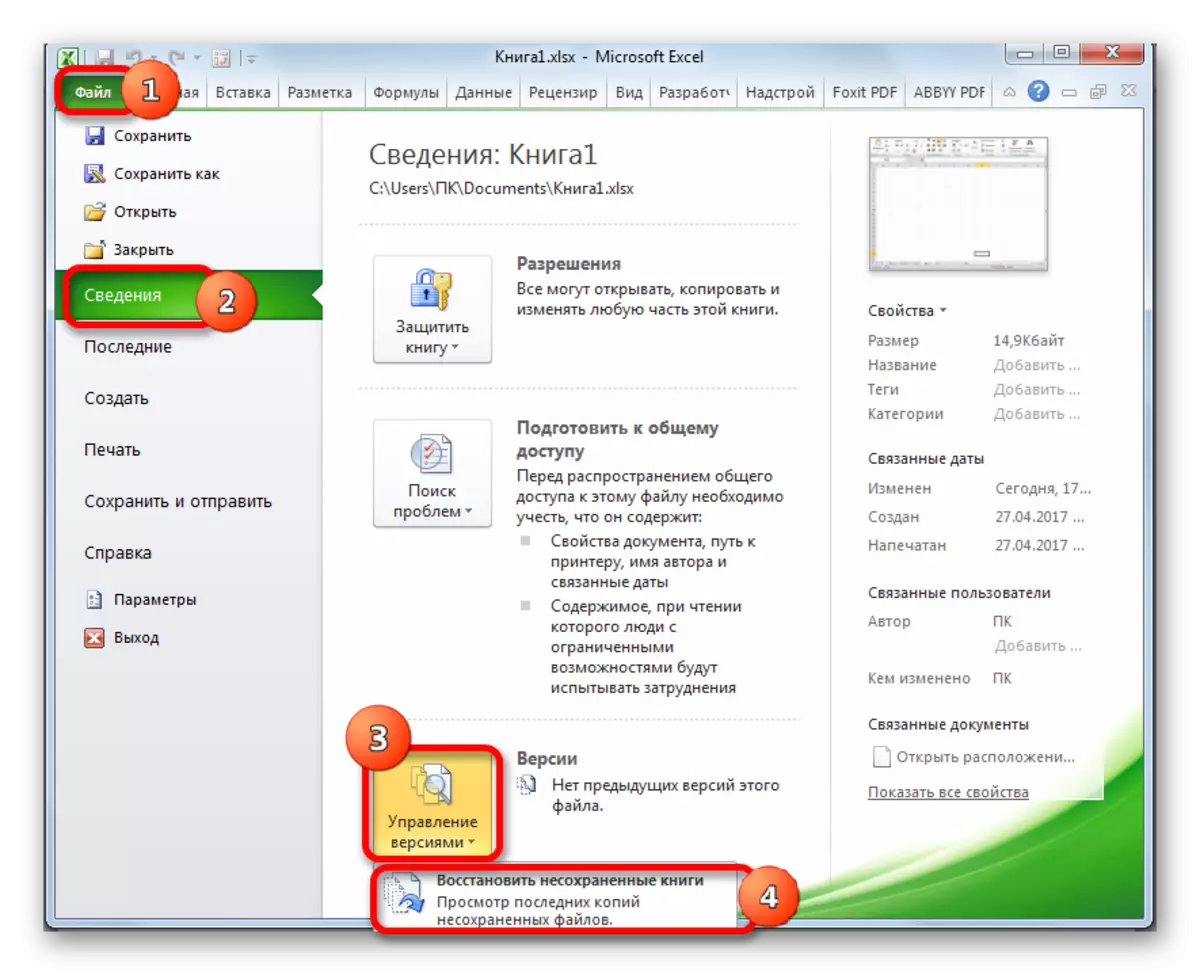
- Go to the "File" tab and in the "Properties" section click on the "Version Management" button. After that, a small menu appears, consisting of just one point - "Restore the unshakable books". Click on it.
- A window opening window in the directory where there are unaccompanied books in the XLSB binary format. Alternately choose the names and click on the "Open" button at the bottom of the window. Perhaps one of these files will be the book containing a remote object you need.
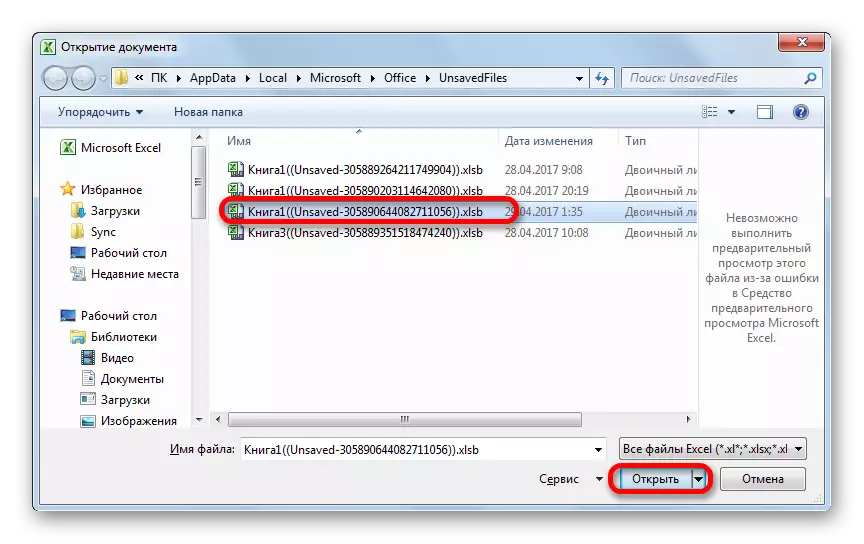
Just still the probability of finding the right book is small. In addition, even if it is present in this list and contain a remote element, it is likely that it will be relatively old and not contain many changes that have been made later.
Lesson: Restoration of the Saved Book Excel
As we can see, the disappearance of labels in the panel can be caused by a number of reasons, but they can all be divided into two large groups: the sheets were hidden or removed. In the first case, the sheets continue to remain part of the document, only access to them is difficult. But if desired, by defining the way, the labels were hidden, adhering to the algorithm of actions, to restore their mapping in the book will not be difficult. Another thing, if objects have been deleted. In this case, they were completely extracted from the document, and their recovery is not always possible. However, even in this case, it is sometimes possible to restore the data.