
In Windows XP, such a problem appears quite often as the disappearance of the language panel. This panel displays the user the current language and, it would seem, there is nothing terrible. However, for those users who often work with the test, the lack of a language panel is a real catastrophe. Each time a text set has to be checked, what language is now turned on by pressing any key with the letter. Of course, this is very uncomfortable and in this article we will look at the action options that will help return the language panel to the previous place if it constantly disappears.
Restore language panel in Windows XP
Before proceeding to recovery methods, let's go deep into the Windows device and try to find out what exactly the display of the language panel ensures. So, among all system applications in XP there is also such that provides its display - ctfmon.exe. It is it that shows us what language is now and layout are used in the system. Accordingly, a certain registry key that contains the necessary parameters corresponds to the start of the application.Now, when we know "where the legs are growing," we can proceed to eliminate the problem. To do this, we will look at three ways - from the simplest to more complex.
Method 1: Starting a system application
As mentioned above, the ctfmon.exe system application is responsible for displaying the language panel. Accordingly, if it is not displayed, then you need to run the program.
- To do this, click right-click on the taskbar and in the context menu that appears, select "Task Manager".
- Next, go to the main menu "File" and select the "New Task" command.
- Now enter ctfmon.exe and click Enter.


If, for example, as a result of viruses, the ctfmon.exe file is missing, it must be restored. To do this, you need to perform only a few steps:
- Insert the installation disk with Windows XP;
- Open the command prompt (Start / All Programs / Standard / Command Line);
- We enter the command
- Press ENTER and wait for the end of the scan.
SCF / SCANNOW.

This method will allow you to restore deleted system files, including CTFMON.EXE.
If for any reason you have no Windows XP installation disk, then the language panel file can be downloaded from the Internet or from another computer with the same operating system.
Often, this is enough to return the language panel to your place. However, if it did not help, then go to the next method.
Method 2: Check Settings
If the system application is running, and the panels are still not, then you should see the settings.
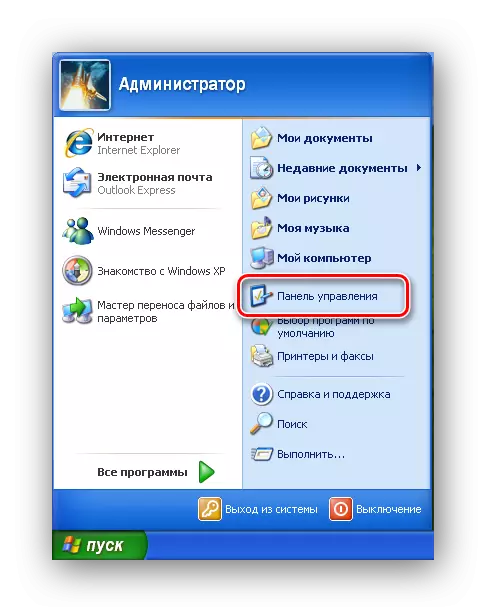
- We go to the "Start" menu and click on the "Control Panel" row.
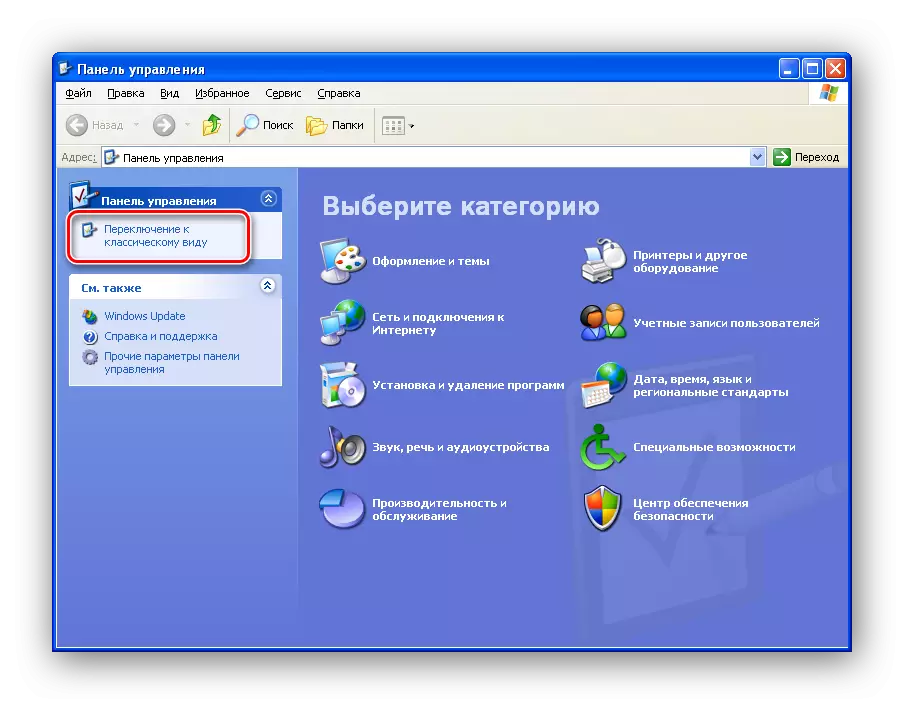
- For convenience, we turn to the classic mode for convenience, for this, click on the link to the left "Switching to the classical form".
- We find the icon "Language and regional standards" and click on it a couple of times with the left mouse button.
- Open the "Languages" tab and click on the "Read more ..." button.
- Now on the "Parameters" tab, we check that we have at least two languages, since this is a prerequisite for displaying the languages panel. If you have one language, then go to step 6, otherwise you can skip this step.
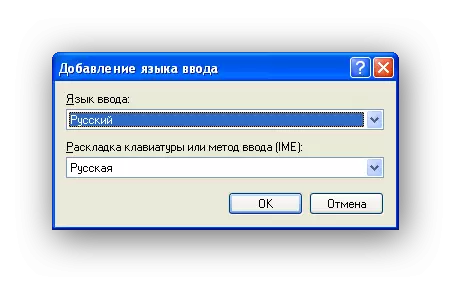
- Add another language. To do this, click the Add button

In the "Input Language" list, select the language you need, and in the list "Laying of the keyboard or input method (IME)" - the corresponding layout and press the "OK" button.
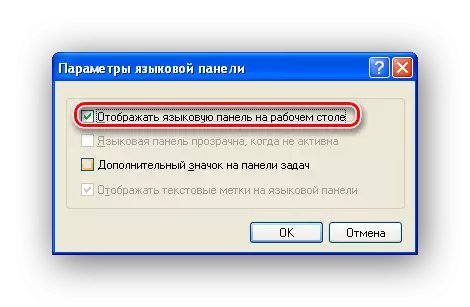
- Press the button "Language panel ..."

And check if the "Display Language Panel on the Desktop" checkbox is noted. If not, we note and click "OK".


On this, everything is now the panel of the languages should appear.
But there are such cases when interference requires a system registry. If all of the above methods did not give results, then go to the next option to solve the problem.
Method 3: Corrections of the parameter in the system registry
To work with the system registry, there is a special utility that will allow not only to view the records, but also to make the necessary adjustments.
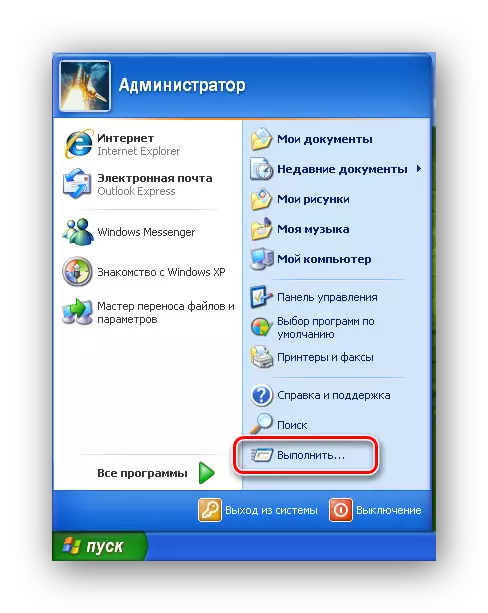
- Open the "Start" menu and click on the "Run" command.
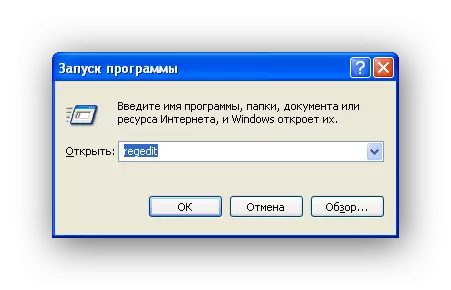
- In the window that appears, enter the following command:
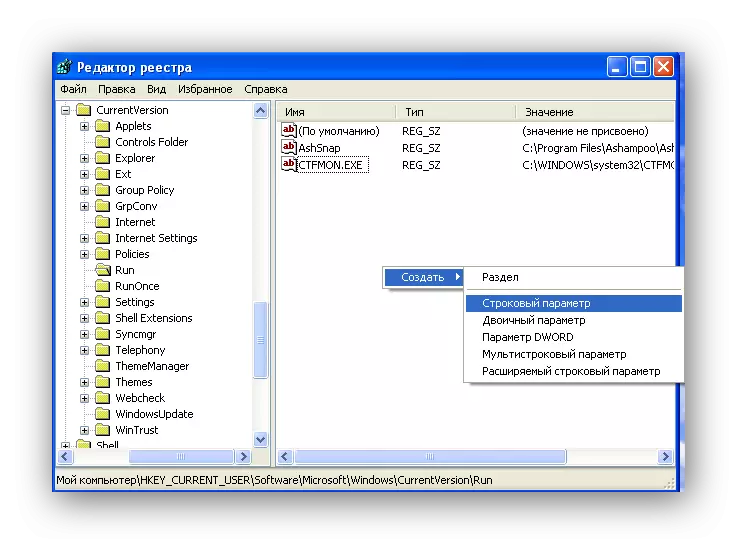
- Now, in the registry editing window, we reveal the branches in the following order:
- Now check if there is a "ctfmon.exe" parameter with a string value of C: \ Windows \ System32 \ ctfmon.exe. If there is no such, then it must be created.
- On a free space by clicking the right mouse button and select the "String parameter" command in the context menu of the "Create" list.
- We specify the name "ctfmon.exe" and the value C: \ Windows \ System32 \ Ctfmon.exe.
- Reboot your computer.
Regedit.
HKEY_CURRENT_USER / Software / Microsoft / WindWS / CURRETVERSION / RUN


In most cases, the actions described enough to return the language panel to its former place.
Conclusion
So, we looked at several ways, how to return the panel of languages in your place. However, still, there are exceptions and the panel is still missing. In such cases, you can use third-party programs that displays the current language, such as the Punto Switcher keypad layout, or reinstall the operating system.
READ ALSO: Windows XP installation instructions from a flash drive
