

Another interesting opportunity, in addition to downloading the Convenience Rollup, after installing Windows 7, is its integration to the ISO installation image to automatically install the updates on the installation or reinstall system. On how to do it - step by step in this instruction.
In order to start you need:
- The ISO image of any version of Windows 7 SP1, see how to download ISO Windows 7, 8 and Windows 10 from Microsoft. You can also use the available disk with Windows 7 SP1.
- Uploaded service stack update from April 2015 and Windows 7 Convenience Rollup itself in the desired bit (x86 or x64). About how to download them in detail in the original article about Convenience Rollup.
- Windows automatic installation package (AIK) for Windows 7 (even if you use Windows 10 and 8 for the steps described). You can download from the official site Microsoft here: https://www.microsoft.com/ru-ru/download/details.aspx?id=5753. After downloading (this is an ISO file), mount the image in the system or unpack it and install the AIK to the computer. Use the StartCd.exe file from image or waikamdmsi and waikx86.msi to install in 64-bit and 32-bit systems, respectively.
Convenience Rollup update integration into Windows 7 image
And now go directly to the steps to add updates to the installation image. First, follow these steps.
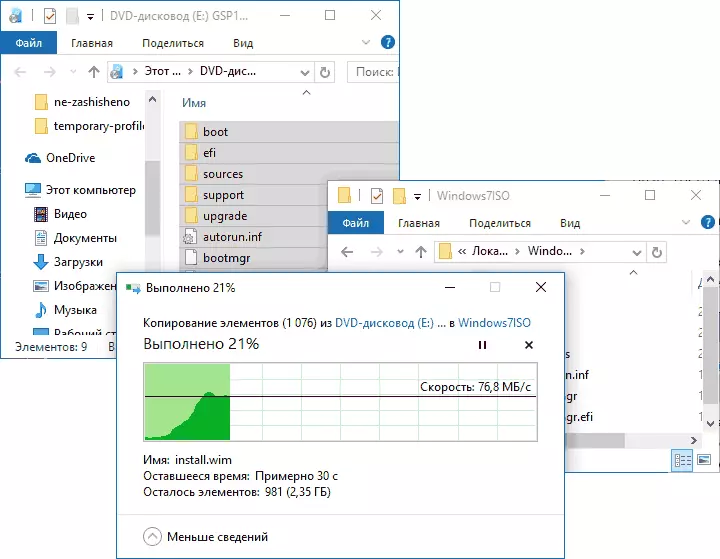
- Mock the image of Windows 7 (or insert the disc) and copy its contents to any folder on the computer (better not on the desktop, it will be more convenient to have a short path to the folder). Or unpack the image into the folder using the archiver. In my example, it will be a folder C: \ windows7iso \
- In the C: \ Windows7iso \ folder (or the other you created for the contents of the image in the previous step), create another folder to unpack the image of install.wim under the subsequent steps, for example, C: \ Windows7iso \ Wim \
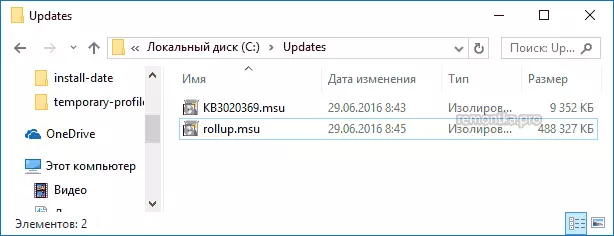
- Also save downloaded updates to any folder on your computer, for example, C: \ Updates \. You can also rename update files into something short (since we will use the command prompt and the original file names are inconvenient to enter or copy-insert. I renamed respectively in MSU and Rollup.msu
Everything is ready to proceed. Run the command prompt on behalf of the administrator in which all subsequent steps will be performed.
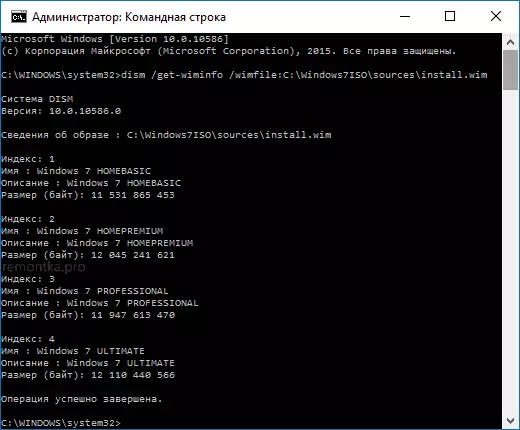
In the command prompt, enter (if you used paths are different from those in my example, use your option).
DISM / Get-Wiminfo /WimFile :C :\Windows7iso\Sources\Install.wimAs a result of the execution of the command, pay attention to the index of the version of Windows 7, which is installed from this image and for which we will integrate the update.
Unpack files from the image WIM to follow the work with them using the command (specify the Index parameter you learned earlier)
DISM / MOUNT-WIM /WIMFILE :C: MOULINDOWS7ISO / INDEX: 1 / Mountdir: C: \ Windows7iso \ Wim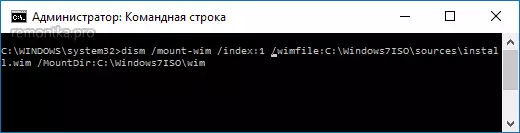
In order, add the update KB3020369 and ROLLUP UPDATE using commands (the second of them can take a long time and "hang", just wait for its execution).
DISM / Image: C: \ Windows7iso \ WIM / Add-Package /PackagePath :C:\upDates\kb3020369.msu DISM / Image: C: \ Windows7iso \ Wim / Add-Package /PackagePath :C:\Updates /rollup.msu
Confirm the change made in the WIM image and disconnect it using the command.
DISM / UNMOUNT-WIM / MOUNTDIR: C: \ Windows7iso \ WIM / COMMIT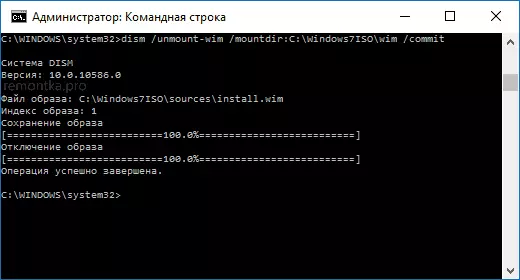
Finish, now the WIM file contains Windows 7 Convenience Rollup Update updates, it remains to turn files in the Windows7iso folder to a new OS image.
Creating an image of ISO Windows 7 from the folder
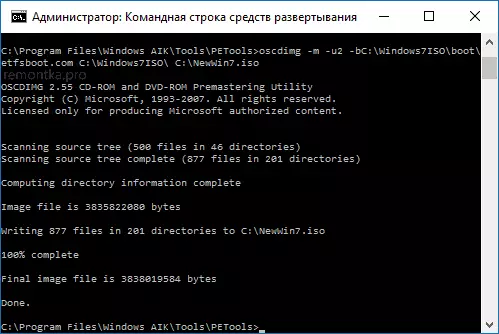
To create a new ISO image with integrated updates, find the Microsoft Windows AIK folder in the Start menu list in the list of the Microsoft Windows AIK menu, "Deployment Tools Command Prompt)", click on it right-click and run on behalf of the administrator.
After that, use the command (where newwin7.iso is the name of the future image file with Windows 7)
OSCDIMG -M -U2 -BC: \ Windows7iso \ Boot \ ETFSBOOT.com C: \ Windows7iso \ C: \ Newwin7.isoWhen you complete the execution of the command, you will receive a ready image that can be recorded on the disk or make the Windows 7 bootable USB flash drive for the subsequent installation on the computer.
Note: If you, as well as I have, in one ISO image, several editions of Windows 7 under different indexes, updates are added only to the edition that you have chosen. That is, to integrate them in all editions, you have to repeat the commands from the mount-WIM to UNMOUNT-WIM for each of the indices.