
Not in all cases of the Presentation Presentation - Slides - in its base form a user arrange. The reasons may be a hundred. And in the name of creating a high-quality demonstration, it is impossible to put up with something that does not fit into general requirements and rules. So you need to go edit the slide.
Editing features
PowerPoint presentations have a wide selection of tools that will allow qualitatively to change many standard aspects.In this case, this program is difficult to name a truly universal platform. If you familiarize yourself with the PowerPoint analogs, you can see how many functions are still lacking in this application. However, at a minimum, you can edit slides.
Change of visual design
The design of slides for the presentation plays a crucial role, setting the general nature and tone to the entire document. Therefore, it is important to configure it true.
The required tools are in the Design tab in the application header.
- The first area is called "Topics". Here you can choose the pre-installed standard design options. They include a wide list of changes - background, additional decorative elements, text parameters in areas (color, font, size, location) and so on. At least to try each to rate how it will look like this. When you click on each separate topic, it automatically applies to the entire presentation.

The user can also click on a special button to deploy a complete list of available styles.
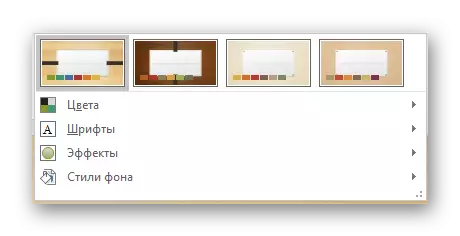
- The "Options" area offers 4 options for the selected theme.

Here you can click on a special button to open the optional window to set up the option. Here you can make deeper and accurate style settings, if something does not suit it.
- The "Configure" area is used to resize and enter the more accurate mode of the appearance.

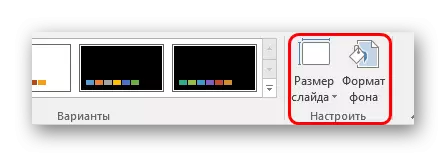
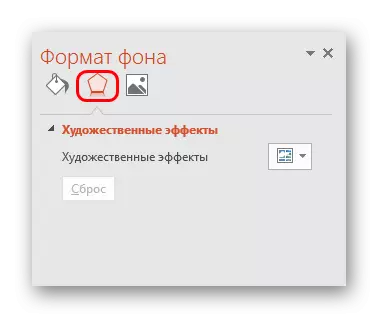
About the latter is worth talking separately. The "background format" contains a large number of various settings. Basically they are divided into 3 tabs.
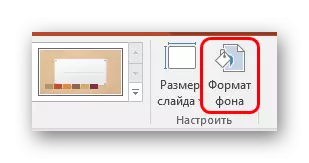
- The first is "fill". Here you can make a choice of a common background for slides using fill, patterned filling, images, and so on.
- Second - "Effects". There is an adjustment of additional elements of decoration.
- The third is called "Figure" and allows you to set up the image set as the background.


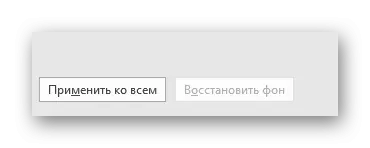
Any changes here are applied automatically. It is worth noting that the setting of this method works only on a specific slide that was selected by the user before it. To spread the result on the entire presentation, the button "Apply to all slides" is provided below.
If the preset design type was not previously selected, then there will be only one tab - "Fill".
It is important to remember that the visual style also requires the accuracy of this artist for correct implementation. So it is not worth a hurry - it is better to take away several options than to present the audience to the public.
You can also add your own static elements. To do this, insert a special element or pattern into the presentation, click on it with the right mouse button and select the option "to the back" in the pop-up menu. Now it will turn on the background and does not interfere with any content.

However, this will have to use patterns to each manual slide. So it will be best to add such decorative elements into a template, but the next item is about it.
Layout setting and templates
The second thing is critical for the slide is its contents. The user can freely configure a wide range of parameters relating to the distribution of areas to make this or that information.
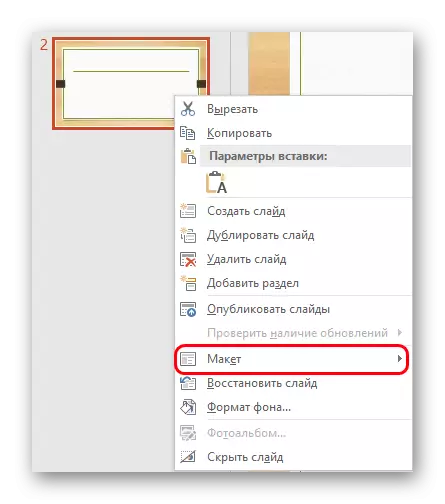
- Layouts serve for this purpose. To apply one of them to the slide, you need to right-click on the slide in the list on the left and select the "layout" in the pop-up menu.
- A separate section will appear where all available options will be presented. The program developers provide templates practically for any case.
- When you click on your favorite version, the selected layout automatically applies for a specific slide.
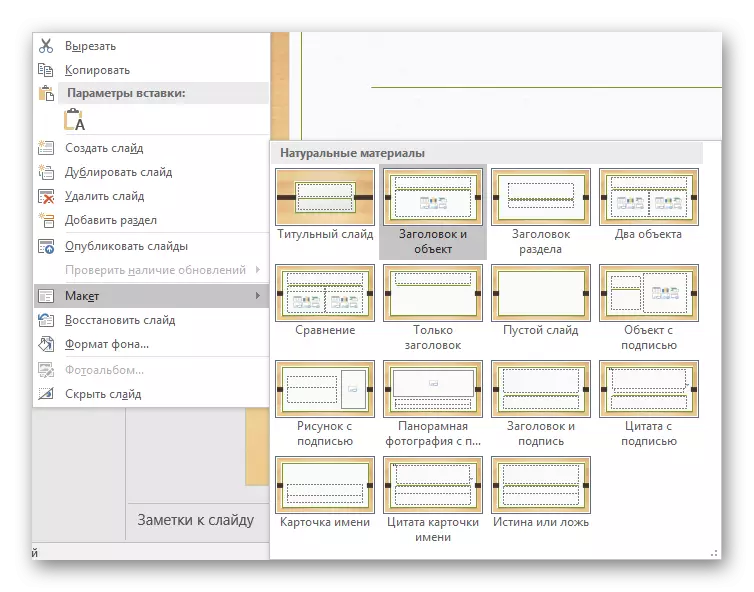
It is worth noting that all new pages that will be created after it will also use this type of information layout.
However, not always available standard templates can satisfy the user needs. So it may be needed to make your own option with all the necessary options.
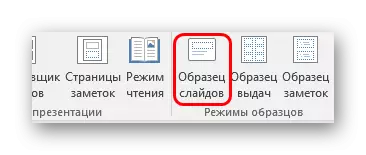
- To do this, you need to enter the "View" tab.
- Here we are interested in the "Slide Sample" button.
- After pressing it, the program will switch to a special mode to work with templates. Here you can create your own, using the "Paste layout" button ...
- ... so edit any of the available by choosing from the side list.
- Here the user can perform absolutely any installations for the type of slides, which will later be widely used in the presentation. Basic tools in the Slide Sample tab allow you to add new areas for contents and headlines, adjust the visual style, resize. All this makes it possible to create a really unique template for the slide.

The remaining tabs ("Home", "Insert", "Animation", etc.) allow you to adjust the slide in the same way as in the main presentation, for example, you can install fonts and color for text.
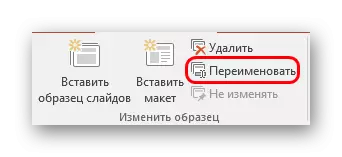
- After the preparation of its template is completed, it is necessary to give him a unique name to distinguish among others. This is done using the Rename button.
- It remains only to exit the mode of working with templates by clicking on the "Close Sample Mode" button.


Now the above method can be applied to your layout for any slide and enjoy further.
Change of size
The user can also flexibly configure the dimensions of the pages in the presentation. You can customize, unfortunately, only the entire document, individually, to assign your size to each slide.Lesson: how to change the size of the slide
Adding transitions
The last aspect that concerns the slides is to configure transitions. This feature allows you to determine the effect or animation of how one frame will be replaced by another. This allows you to achieve the smoothing of the transition between pages, and in general it looks very pleasant.
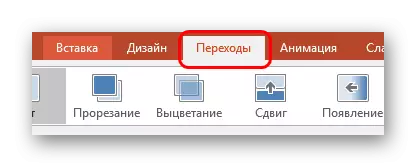
- Settings for this feature are located in the tab of the program in the header of the program - "Transitions".
- The first area called "Go to this Slide" allows you to choose the effect with which one slide will be replaced by another.
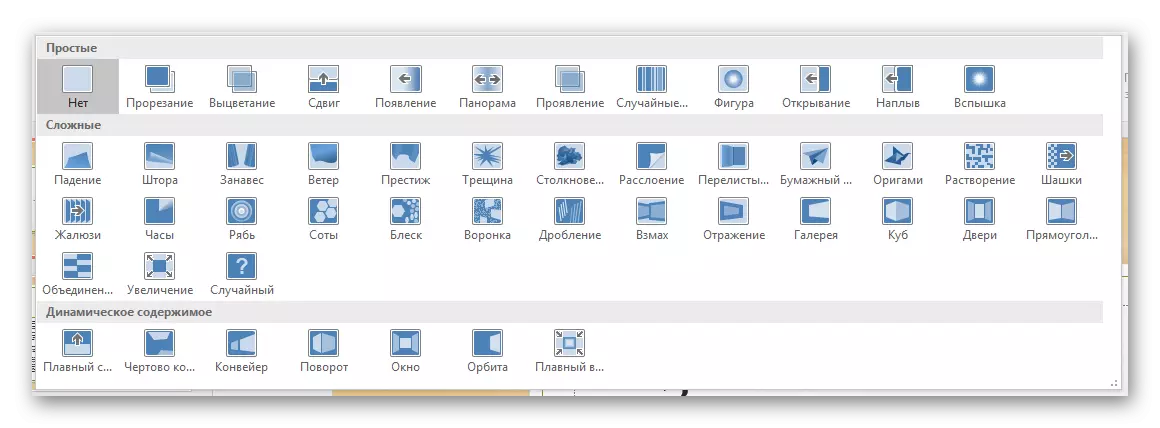
- When you click on the appropriate button, the complete list of all available effects is deployed.
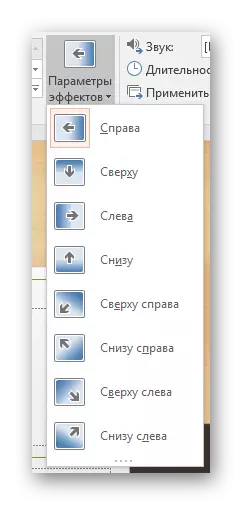
- For additional animation settings, click on the "Effect Settings" button.
- The second area is "Slide Display Time" - opens up the ability to edit the duration of the automatic display, the type of switching type, sound when switching and so on.
- To apply the effects obtained for all slides, you need to click on the button "Apply to all".


With these settings, the presentation looks better during viewing. But it is also worth noting that a large number of slides with such transitions can significantly increase the time of the demonstration due to the fact that it will be taken out of transition costs. So it is best to make such effects for small documents.
Conclusion
This set of options will not make the presentation of the vertex of skill, however, will really achieve high results from the slide both in the visual part and in terms of functionality. So it is not always possible to afford to make a document on the standard page.